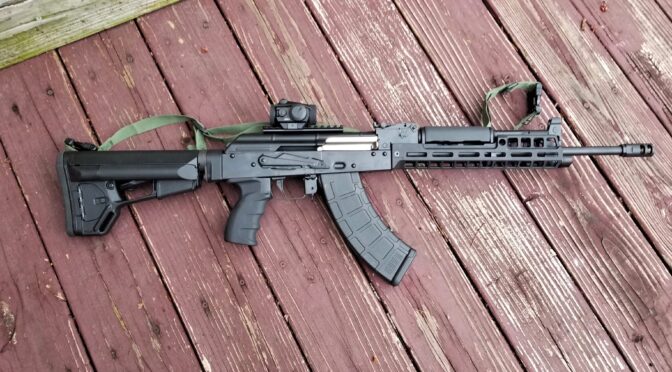
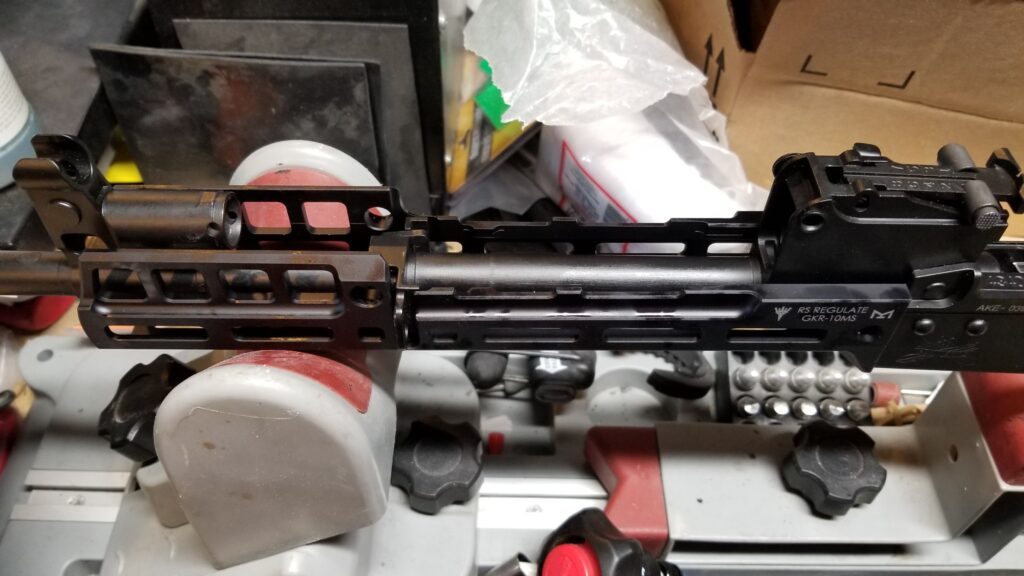
In place of the handguards, I planned to install one of the RS!Regulate GKR-10MS aluminum rails. It’s 10″ long, is ready for MLOK attachments and looked wicked. Furthermore, you do not need to remove the sling loop on the lower handguard retainer. Scot Hoskisson is the owner and I’ve used his scope mounts on a number of rifles plus one of his handguards on my IWI Galil Ace pistol and really liked it.
I thought this would be easy but that turned out not to be the case due to a seemingly small change PSA made that I’ll cover in a moment. Basically the rail system has three parts – The F1 front piece, the middle rail section and a rear end cap. Scot provides good instructions so follow them to the letter.
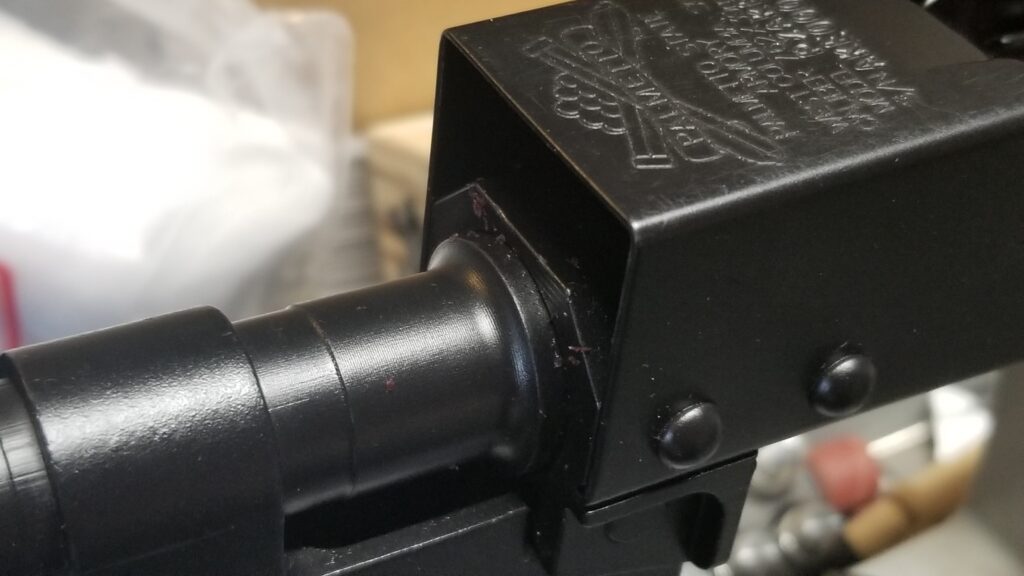
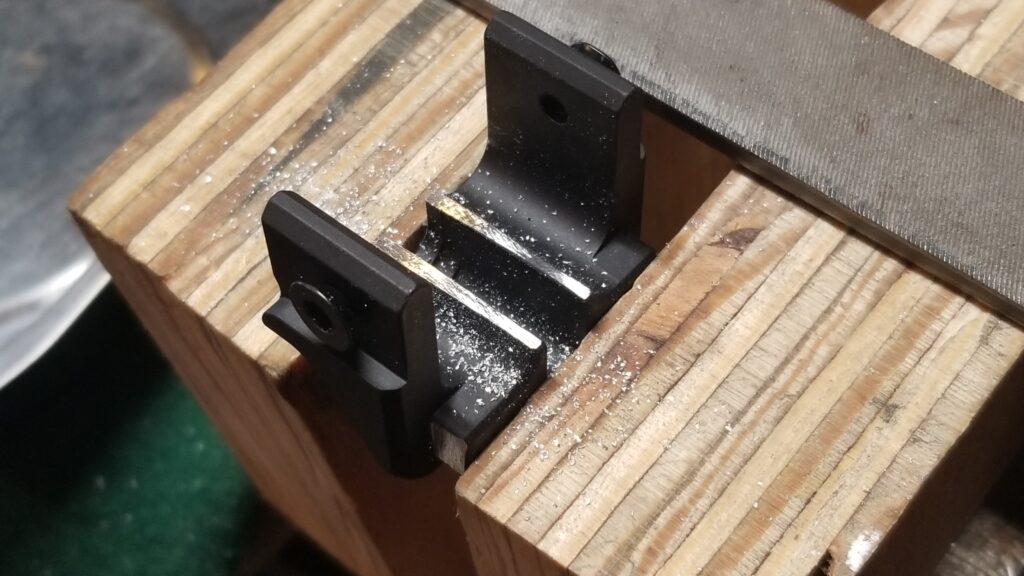
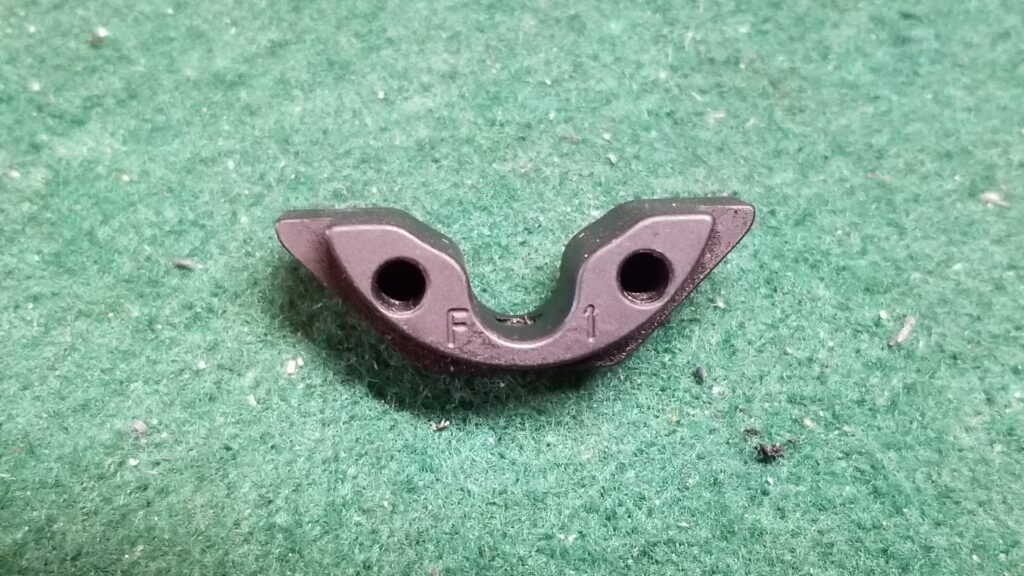
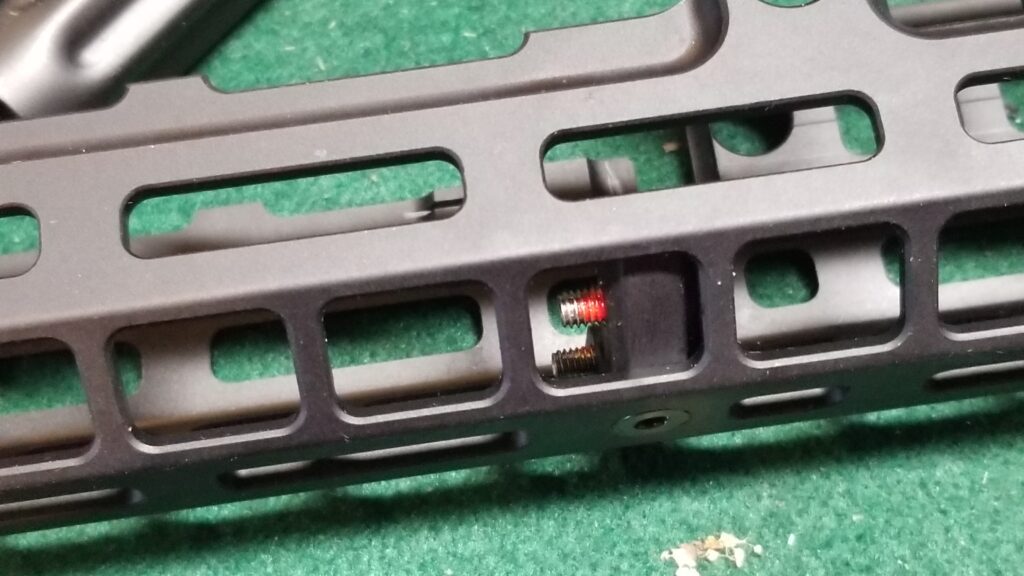
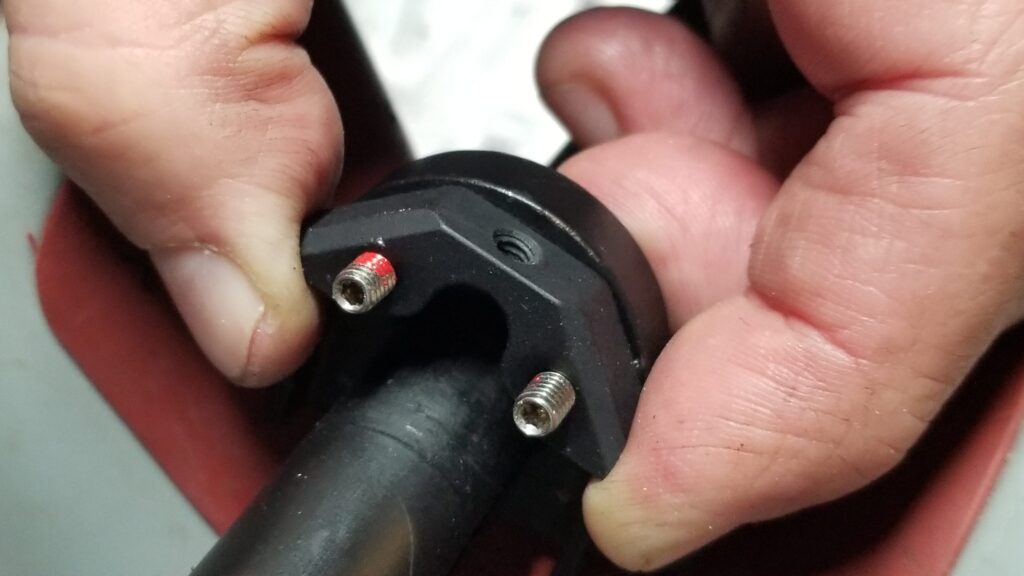
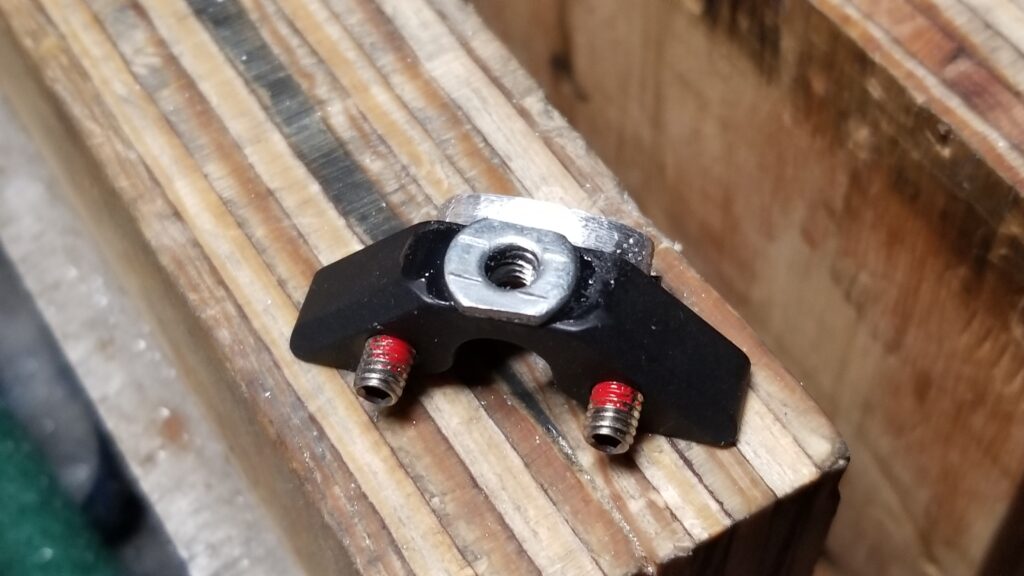
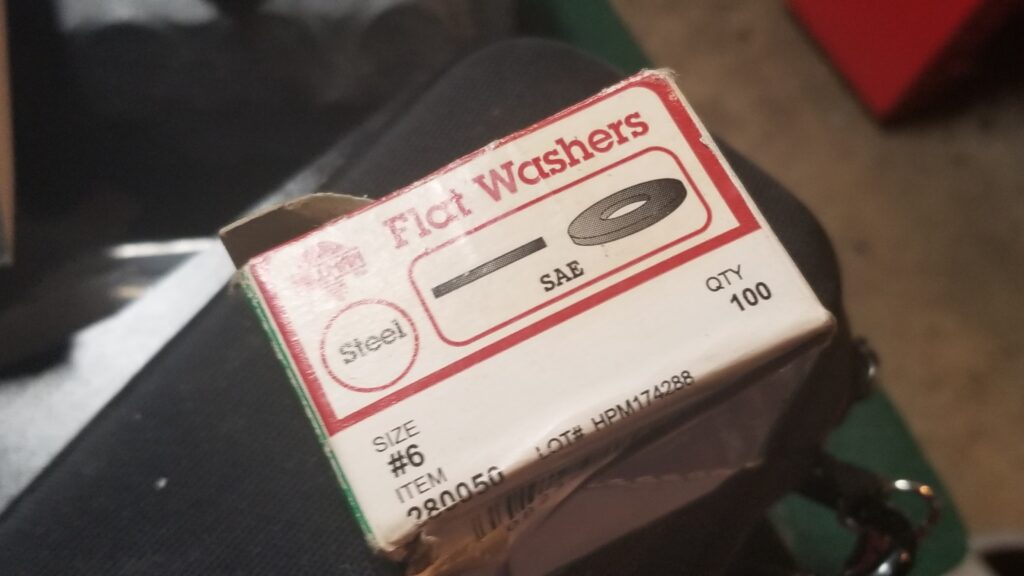
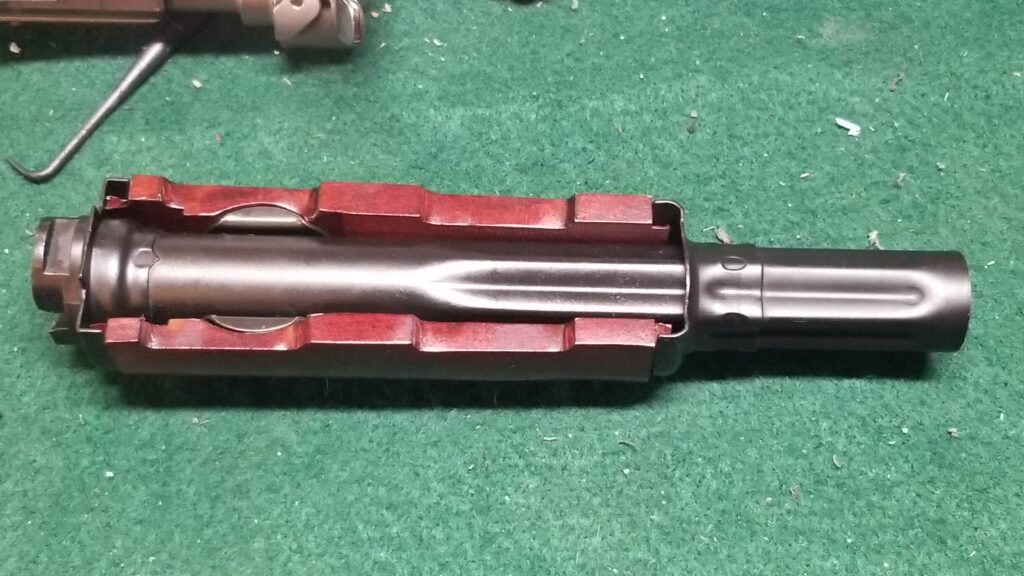
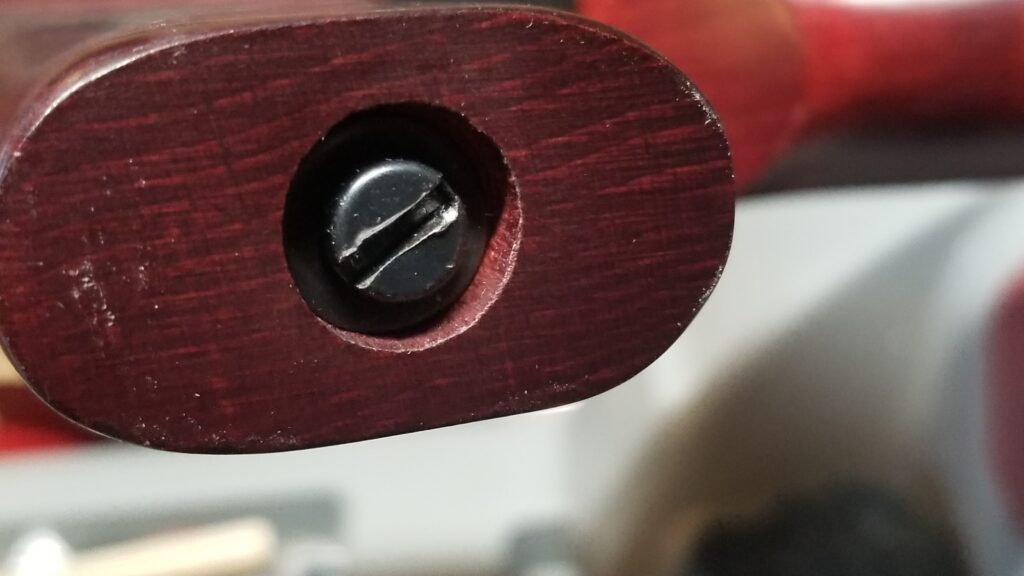
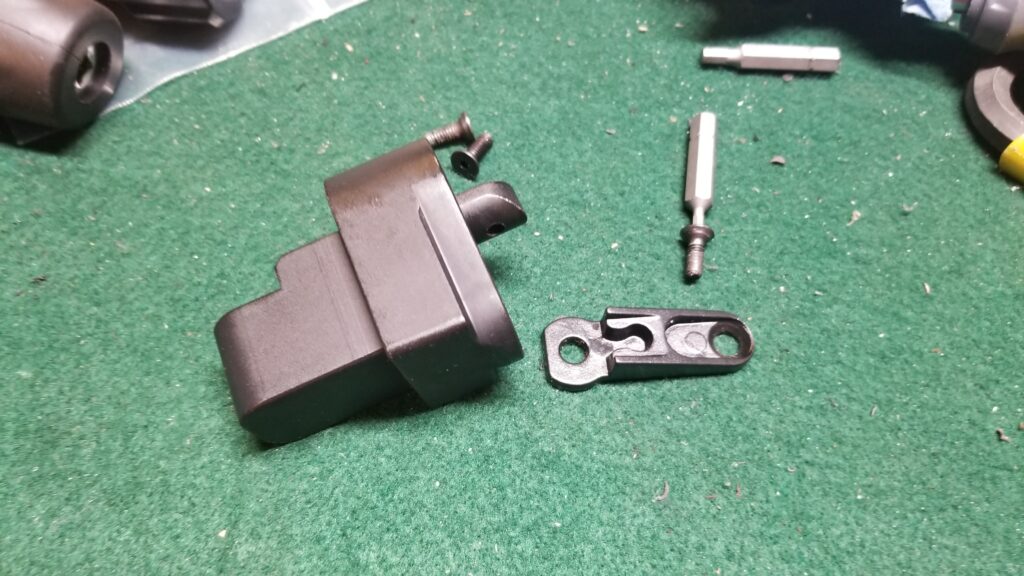
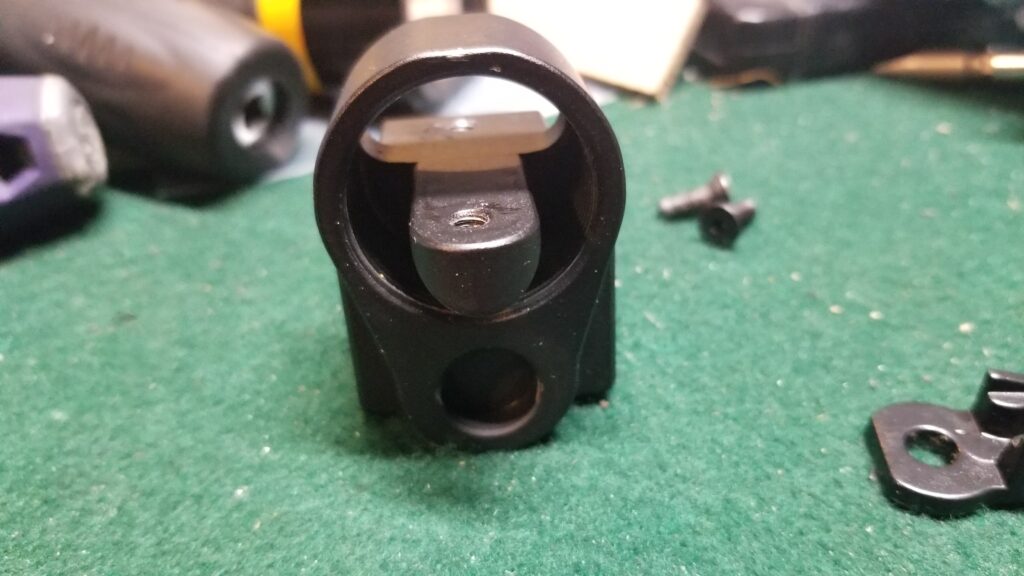
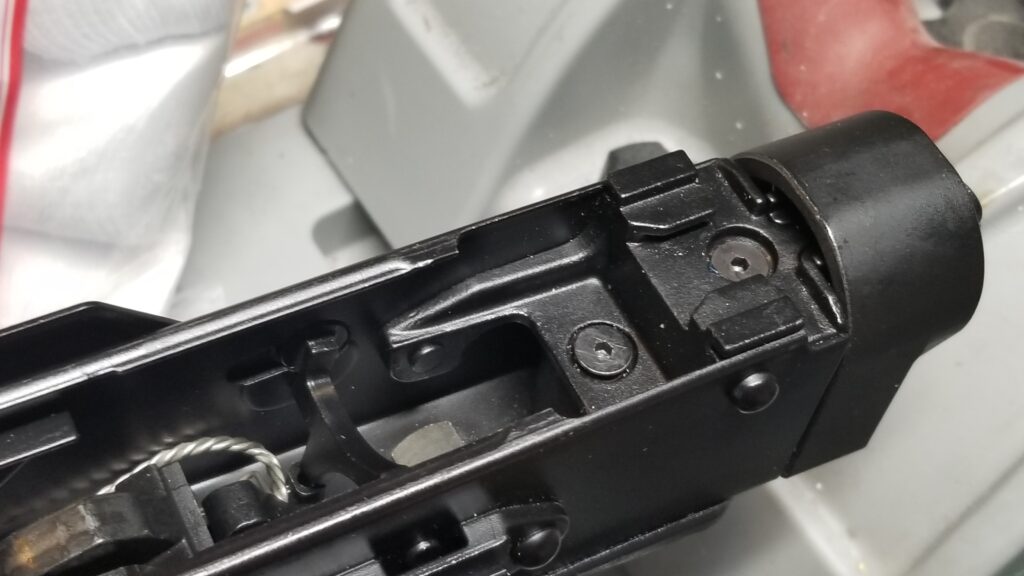
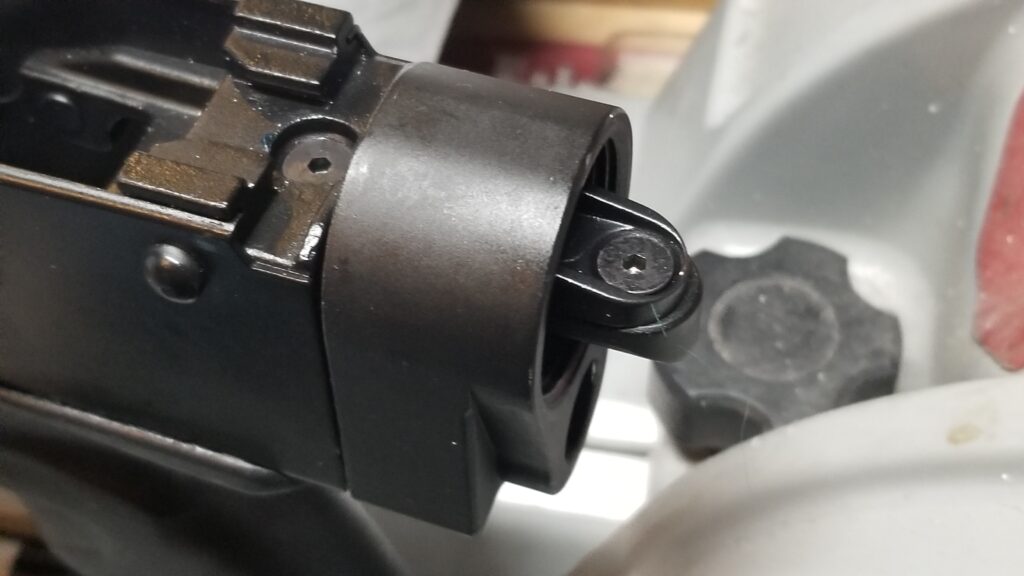
Like other AK rifles, there is a space between the front trunnion and the receiver to allow the tab of the handguard to press into. The flakes you see in the photo are presumably from the finish of the red handguard, just FYI.The block is designed to be filed to fit. You can see where it will go but you will need to take your time and file it to fit. The elevated sides of the U in the middle need to be filed to fit and you might need to take some off the sides as well.So take your time, remove a little and test fit over and over. A trick I learned that I applied is to file the protrusions at a very slight angle so that as the handguard is pressed further in, the tighter the fit becomes.It was coming together nicely. Notice the rail is secured to the end cap and is clearing the handguard retainer nicely in terms of the slot.Next, this F1 nosepiece has to slide back inside the handguard, get screwed in place and then set screws on the opposite side are tightened thus locking everything in place This is where things go sour.Every time I tightened down the bottom screw, the F1 piece would cam backwards vs. sitting properly. I tried a few times and could not get it to sit. I have both carpal tunnel and a tremor so this is very tedious for me to try and do. I reached out to Scot and he told me a compatability issue had come up with the PSA handguard retainer.Due to ever so slight dimension differences, the F1 piece does not sit flush or even lower than the retainer so when the bottom screw is tightened down it cams the F1 backwards. Argh!I spent almost an hour of careful filing and test fitting and finally decided to super glue a trimmed #6 washer to the bottom of the F1 unit to address the issue. I think this would have worked from the start. Note, Scot tells me that he plans to make a PSA specific unit. It’s totally do-able as-is once you realize you need to add a spacer to the unit. It was rock solid after I made that change and tightened down the set screws. I also had to use a longer 8-32 screw vs. the supplied unit due to the spacer.Folks, this is the type of washer I used – literally it came out of this box. I ground two flat sides so it wouldn’t stick out past the front or back of the F1 part. Your goal is for the washer to make contact with the handuard before the retainer does. If the retainer hits first, it will want to make the F1 part cant as you tighten it.Look closely at the F1 fitting in front of the handguard retainer inside the rail – you can see the shiny #6 washer doing its job.
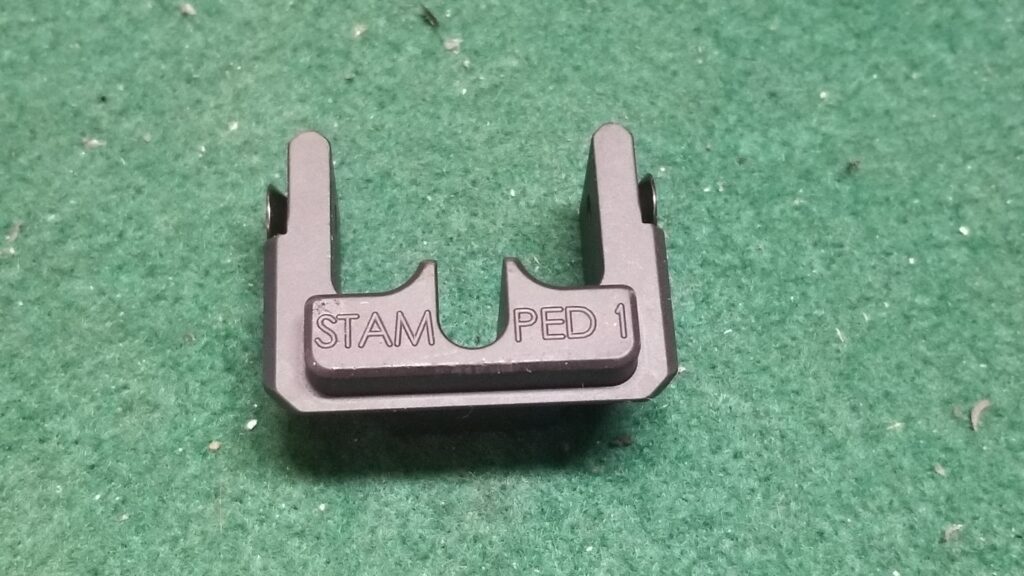
One Of Our Gas Tube Covers
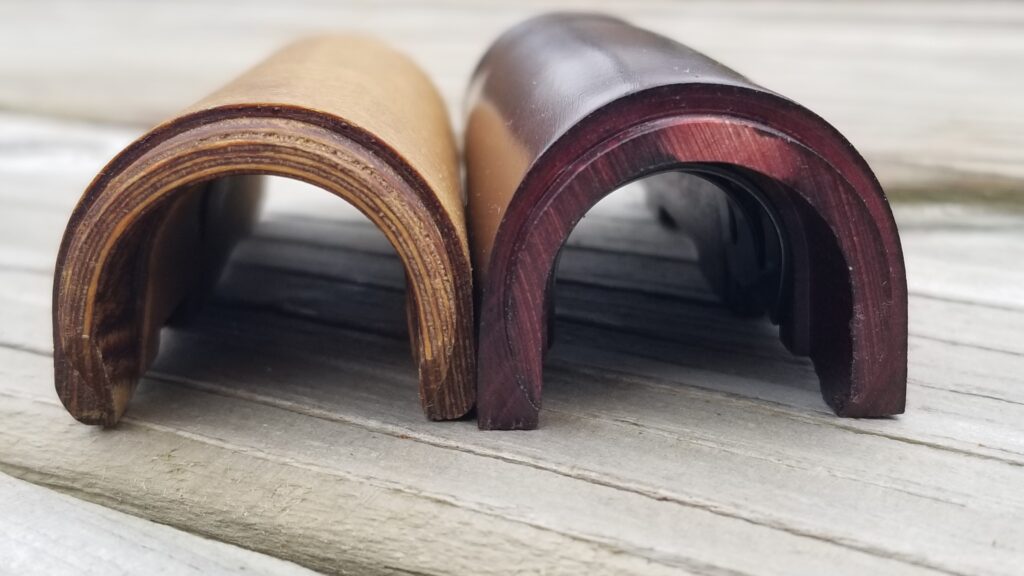
I made a bunch of new molds to make AKM gas tube covers and they are all based on Polish AKM units. In other words, the masters were real Polish covers that I then used to make the molds. It turns out that the PSA gas tube cover is just a tad taller and uses a different spring clip than the Polish units. Our new covers work just fine – the difference surprised me though.
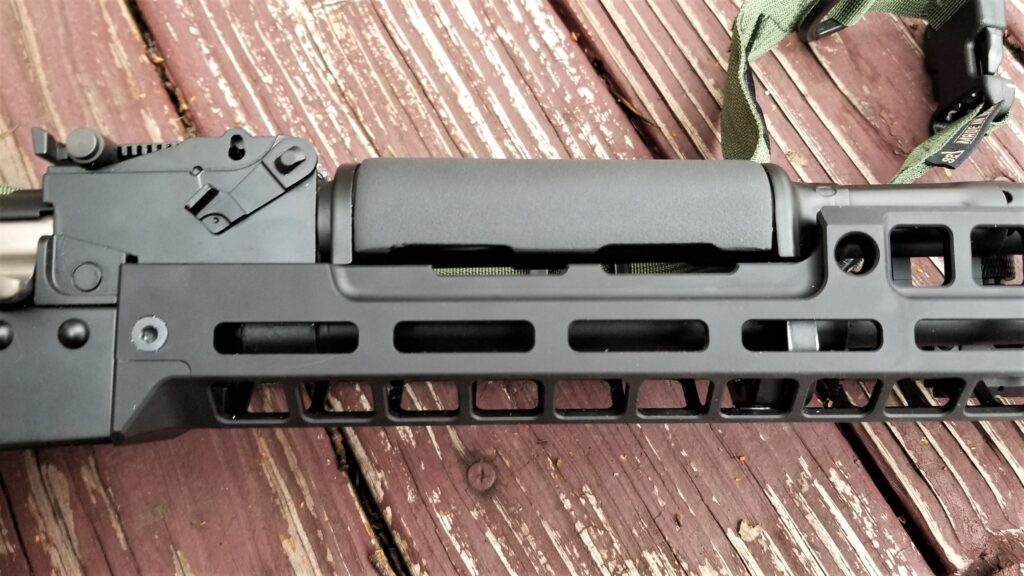
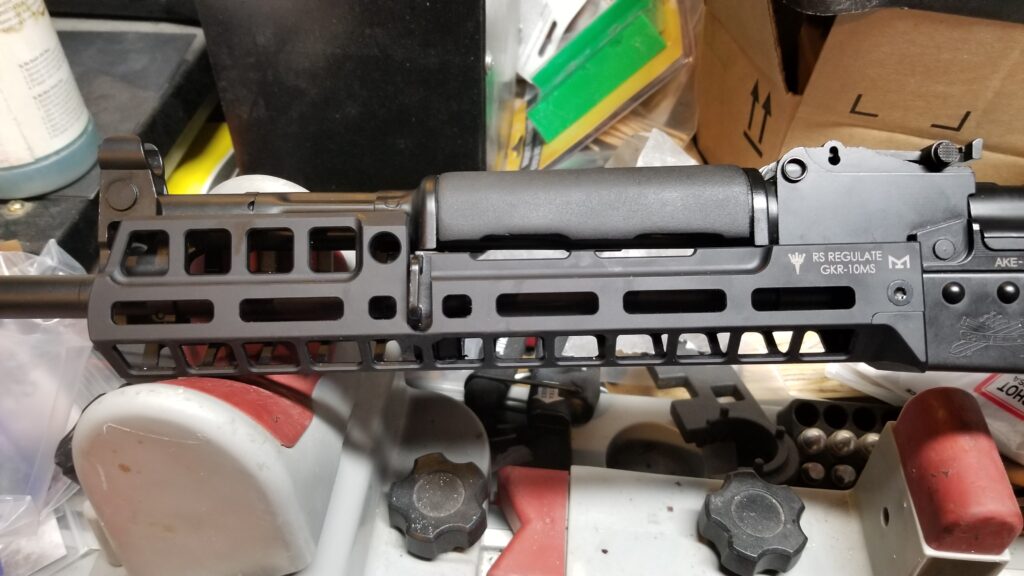
Here’s an original wood Polish AKM gas tube cover on the left and the PSA model on the right. Note the PSA unit is just a tad taller.To remove the PSA cover, you just rotate it on the tube 180 degrees and pull them off. Because the rifle is brand new, this is very easy to do. On surplus rifles you can have a real fight on your hands trying to get them off sometimes.Here’s a photo of the installed GKR-10MS rail and our gas tube cover.
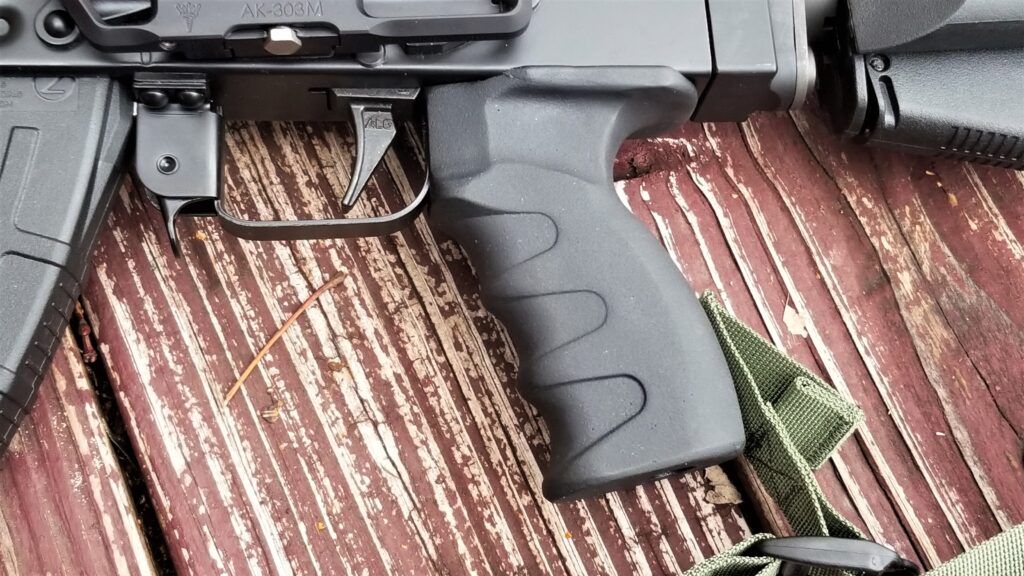
One Of Our Russian AK-12 Grips
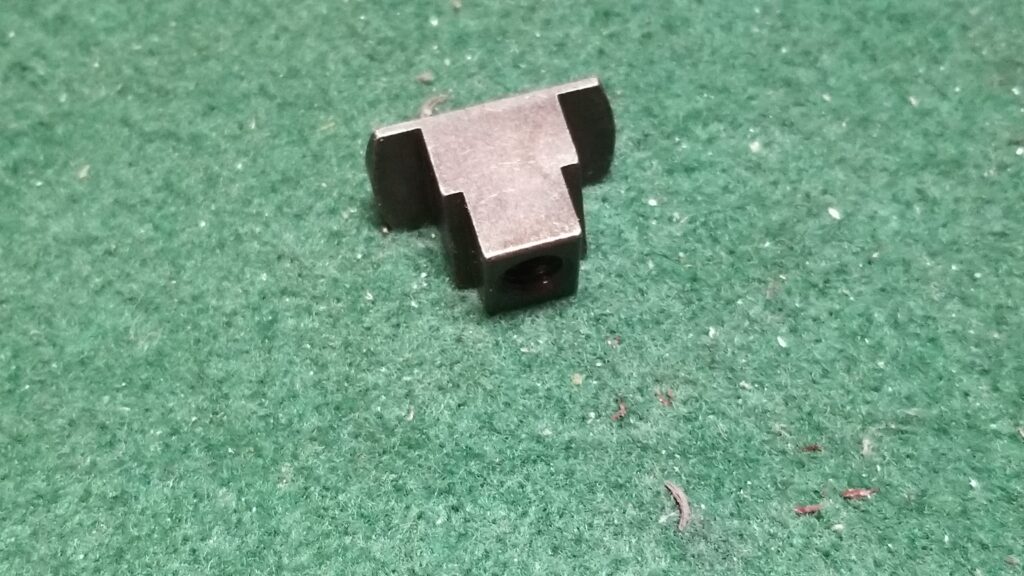
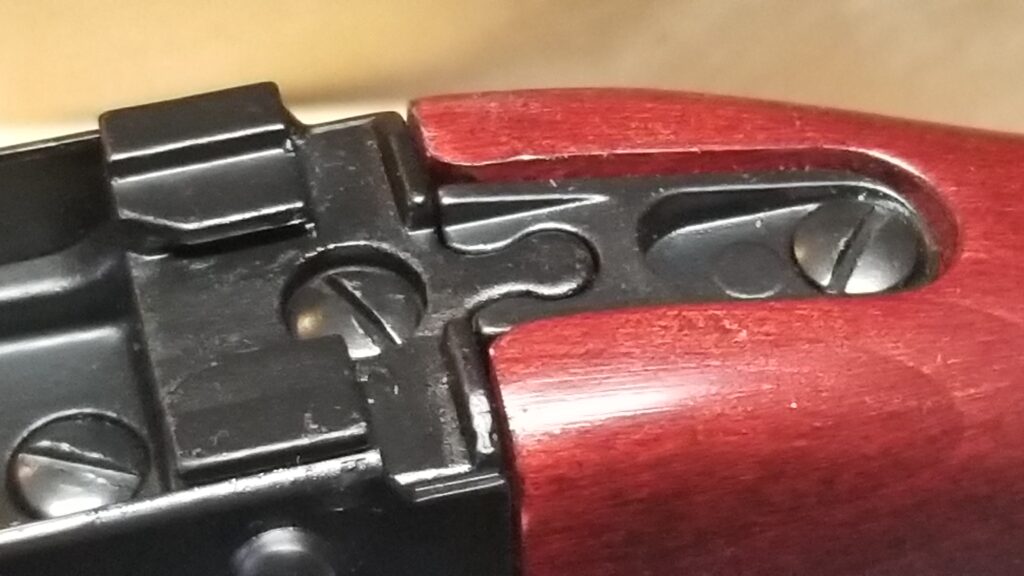
To change the pistol grip, you remove this bolt and then the T-nut inside will flop around.This is the loose T-nut that sticks through the receiver. When you install the new grip, use one finger to keep this in place while you are getting the bolt started.This is our custom US-made AK-12 grip.
M4 Adapter and a Magpul ACS Stock
Next up was the stock. I really prefer the M4-style adjustable stocks and the Magpul ACS is really my go-to unit for most of my builds. It’s solid and has a locking clamp so there is no wiggle.
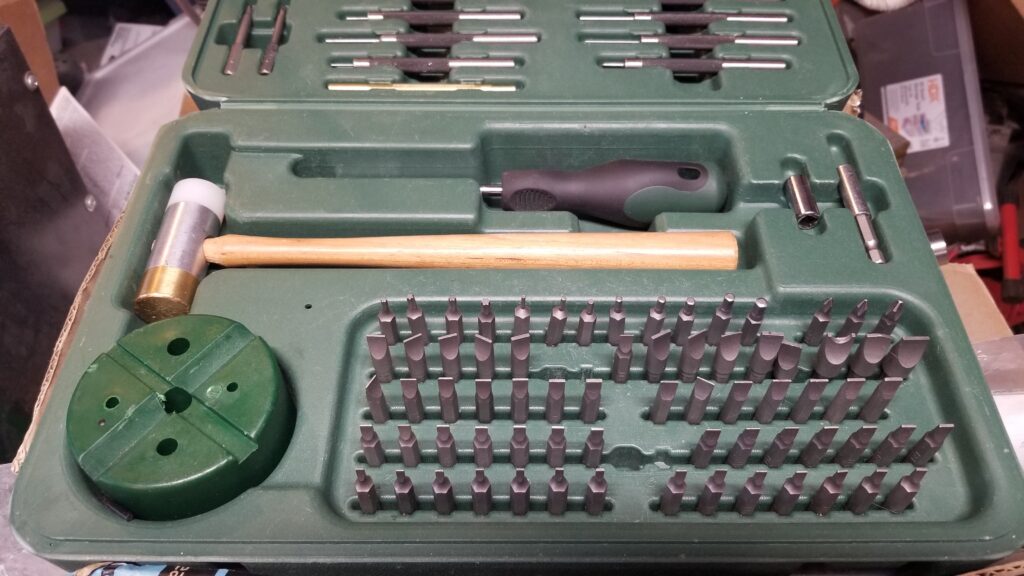
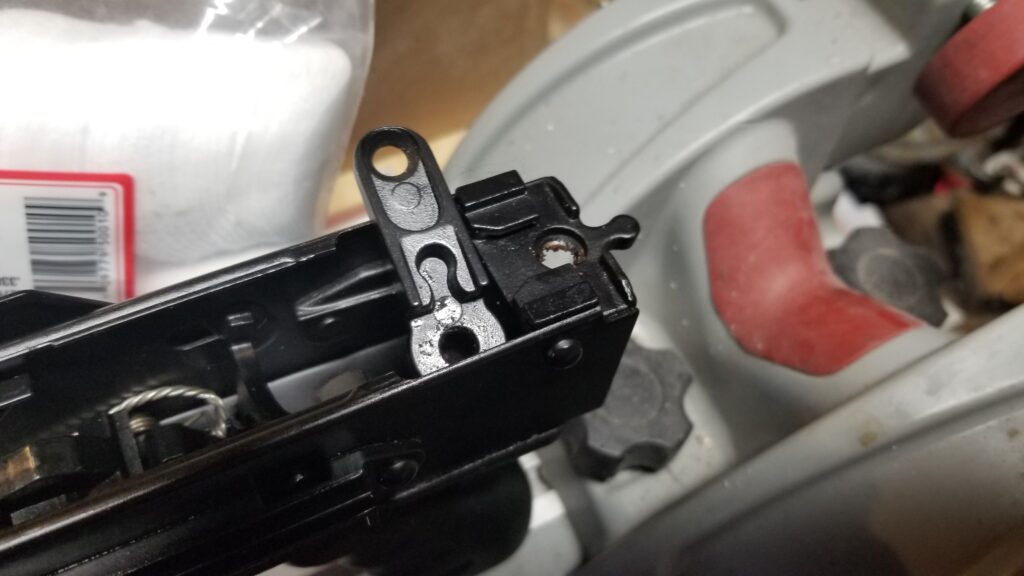
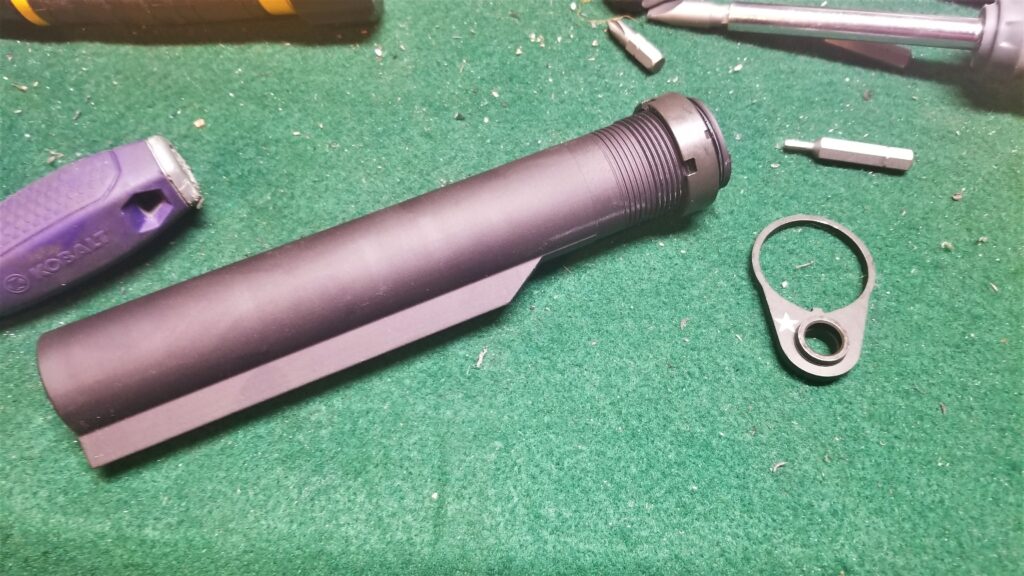
To remove the stock, first take out these three blade screws. Now, to avoid chewing them up, use a screwdriver blade bit that completely fills the slot from top to bottom and left to right. Using a screw driver that is too small will cause the metal to deform around the screw heads and make a mess. Furthermore, screw driver bits are hollow ground so their end is not tapered unlike a normal screwdriver is.One of the reasons I keep this Weaver tool set handy is the bit collection. Note how there are a variety of sizes of blade bits. This is my go-to for removing stocks for that very reason.The stock is press fit into the receiver. It should either just pull out or you may need to use a mallet and wood dowel to tap it out. Surplus AK buttstocks can be a bear to remove but since the AK-E is brand new, you will probably find it fairly easy. In this photo, you can see what some call the “puzzle piece” or “jigsaw puzzle piece” that is unique to PSA. This lets them have one rear trunnion and if the application does not warrant the tang, then it is not installed. Historically, we would have needed to cut that off depending on what type of buttstock system we planned on using. In this build, I am going to use an M4 adapter and I do need the tang so I was careful not to lose it.
If you are now thinking, “crap, I lost the puzzle piece/rear tang” then you are in luck. PSA sells just that part. Click here to go to the product page.
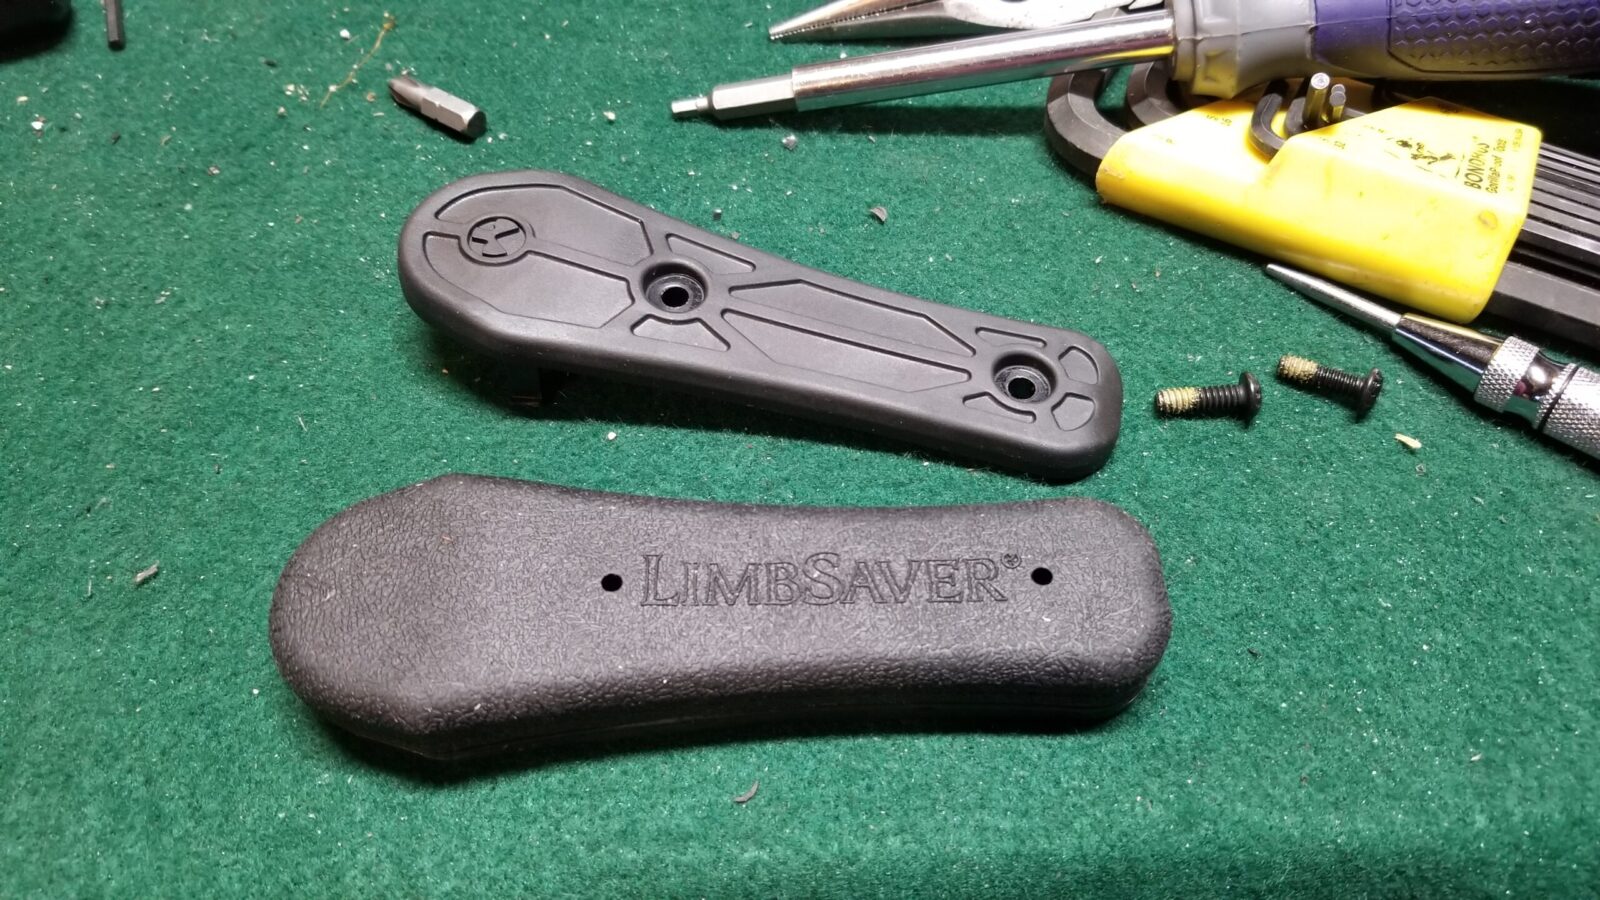
This M4 adapter was on my AK-V. It is either made for PSA by Rifle Dynamics (RD) or it looks just like RD’s design. Basically it slides in place of the stock and the tang of the stock passes through the M4 buffer tube’s mouth. This was an ingenious move and created a short solid adapter. PSA does sell this – click here for the product listing. Unfortunately it is out of stock a lot probably due to the popularity of their rifles and pistols that use it. I’ve used the RD adapter and it is rock solid so I definitely recommend getting that one if you can – check out Brownells or RD directly.Here’s a view of the adapter from the rear. You can see the tang passes through the threaded circle where the buffer tube will screw in.The adapter goes where the stock was at using the supplied machine screws. Apply blue loctite so they don’t vibrate loose.You can see the puzzle piece / modular rear tang is installed and is protruding through the threaded attachment for the buffer tube. Be sure to apply blue loctite to this screw also. When I need AR parts in a rush, Primary Arms is one of the vendors I check first. They ship fast – often the same day if not the next. This is an Expo Arms 6 position Mil-Spec buffer tube, an Expo Arms castle nut and a BCM Gunfighter QD End Plate (meaning it is an M4 receiver end plate but it has the attachment point for a QD swivel.On an AR, I worry about torque specs for the castle nut. On an AKM with a sheet metal receiver, you will see it start to twist as you apply more more torque so my recommendation is *not* to treat it like an AR because I don’t want to bend the receiver. I tighten the castle nut down farmer firm (meaning snug and then some) and then stake the nut to the end plate to keep it from moving.These are my three key tools for installing a Magpul ACS buttstock as well as the tube and cast nut. The above is an automatic center punch. It’s be Neiko and I also have one from General Tools. I use them for staking the castle nut by striking the surface 3-4 times. With my tremor I have a hard time with a hammer and center punch, which is what most folks use. To tighten the castle nut, I use a Magpul wrench. The way it engages the castle nut is very well thought out and reduces the odds of the tool slipping and marring the finish. The bottom is a simple tool I make and sell to grab the friction locking mechanism of the ACS stock and lift it high enough so the stock can slide into place. Yes, there are other ways of doing it but the tool makes it super simple.Here’s the installed ACS stockWhile the AK doesn’t have much of a recoil, it can be softened further by adding a Limbsaver recoil pad that simply replaces the OEM Magpul pad that is a fairly hard plastic. You just use a drive to remove the two screws, pull the old pate off, push the screws into the new Limbsaver pad, line the pad up with the stock and drive them into place.Here’s the installed Limbsaver recoil pad. It fits very nicely as you can see.
RS!Regulate Optics Mount and Vortex Crossfire Red Dot
This is the AK-303M lower. The clamp is adjusted by compressing the clamping bar and turning that silver shiny screw that is then exposed. Clockwise tightens it and counter-clockwise loosens the clamp. I had to dial it in a bit for the PSA clamp and you probably will for just about any rifle. It’s nice and snug now. Here’s another view of the AK-303M. The top AKR will mount onto the lower and be screwed into place. When everything is dialed in, the rail can be drilled and a roll pin installed to permanently marry the upper and lower if you so choose. Yes, that is a picatinny rail. The upper mounts to it by have the inverse of the rail that then marries together.Here are the two halves mated together with a Vortex Crossfire Red Dot. The Crossfire red dot is my go-to when I need a good basic red dot optic. I may change it out for a 1-6 or 1-8 scope but time will tell.
Streamlight 88058 Protac Rail Mount 1
The last tweak I did was to add a short piece of aluminum Magpul rail and a Streamlight 88058 Protac Mount 1 light. I have found Streamlights to be very reliable and I use them on a variety of weapons. This model is dedicated for a rail and comes with a pigtail and pressure switch if you want to mount the switch remote from the light. I am right handed, not a huge fan of vertical grips and find it very easy to reach up with my left thumb and turn the light on or off.
The 88061 is a 350 lumen LED light that can use either a AA battery or a CR123A – I prefer the CR123A batteries – it is brighter and lasts longer than if you use the AA battery. Regardless it is cool to know that you have an option in case you are out of your preferred battery but have the other.
By the way, you can see the quick disconnect (QD) sling swivel in the background. This is an example of a part where you do not want to go cheap. The unit seen above is Midwest Industries. Go with a name brand and not some cheap knock-off.
Note, I have to buy all of my parts – nothing here was paid for by sponsors, etc. I do make a small amount if you click on an ad and buy something but that is it. You’re getting my real opinion on stuff.
Interested in an American made AK? Consider Palmetto State Armory (PSA) as a source. Click on the following links for the associated webstore categories for AK-related rifles, pistols and parts at PSA: