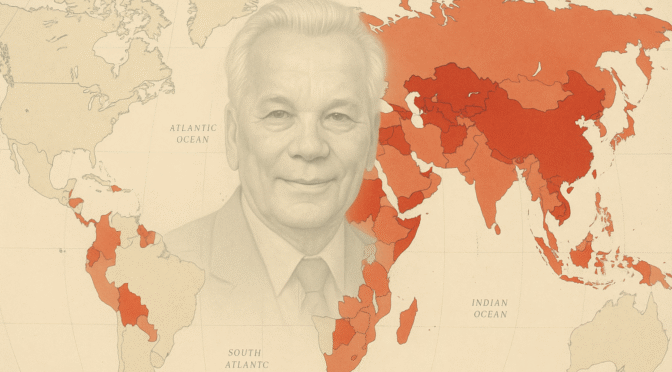
Growing up in the 70s and 80s, I was patriotic and was mainly interested in American firearms. In 2006, I read an article about building your own AK by the late great Steven Matthews and I changed course dramatically. I’ve always liked history, machines and firearms and started reading books about Mikhail Kalashnikov and his AK designs. My business, Ronin’s Grips, was born along the way.
I though it might be interesting to share how the Kalashnikov design has proliferated around the world with everyone. Thus, I did some digging to create this.
1. Introduction
The Kalashnikov assault rifle, first introduced in the Soviet Union shortly after World War II, represents one of the most influential and widely proliferated firearm designs in history.1 Its simple design, rugged reliability, and ease of mass production contributed to its adoption by numerous armed forces globally and its appearance in countless conflicts.1 The original AK-47 and its subsequent iterations, including the AKM, AK-74, the AK-100 series, and the modern AK-12, have not only served as the standard armament for many nations but have also inspired a vast array of locally produced variants and derivatives worldwide.2
This report documents the countries that have manufactured Kalashnikov-inspired rifle designs. It aims to provide a comprehensive overview of the specific models produced, their calibers, approximate dates of production, and, where available, estimated production numbers. The scope encompasses rifles directly based on the Soviet/Russian lineage—AK-47, AKM, AK-74, AK-100 series, and AK-12—as well as notable derivatives that share the core Kalashnikov operating principle.
While extensive research has been conducted, it is important to acknowledge that precise production figures for many Kalashnikov-type rifles, particularly those from less transparent or state-controlled manufacturing environments, are often estimates or remain unavailable in publicly accessible records. Nevertheless, this report endeavors to present the most accurate and detailed information possible based on the available data.
2. The Soviet/Russian Kalashnikov Lineage: The Foundation for Global Variants
The evolution of the Kalashnikov rifle series within the Soviet Union and subsequently the Russian Federation laid the groundwork for its global adoption and adaptation. Each major iteration introduced refinements in design, manufacturing, or caliber, reflecting changing military doctrines and technological advancements. Understanding this original lineage is crucial for contextualizing the myriad of international variants.
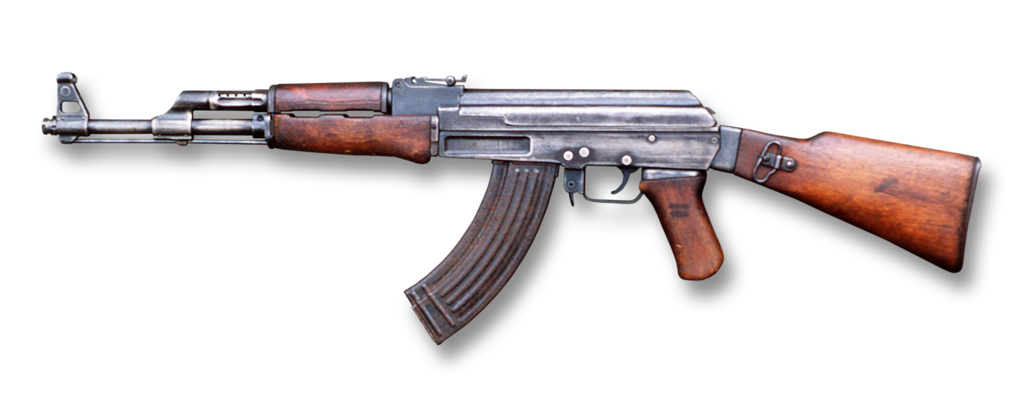
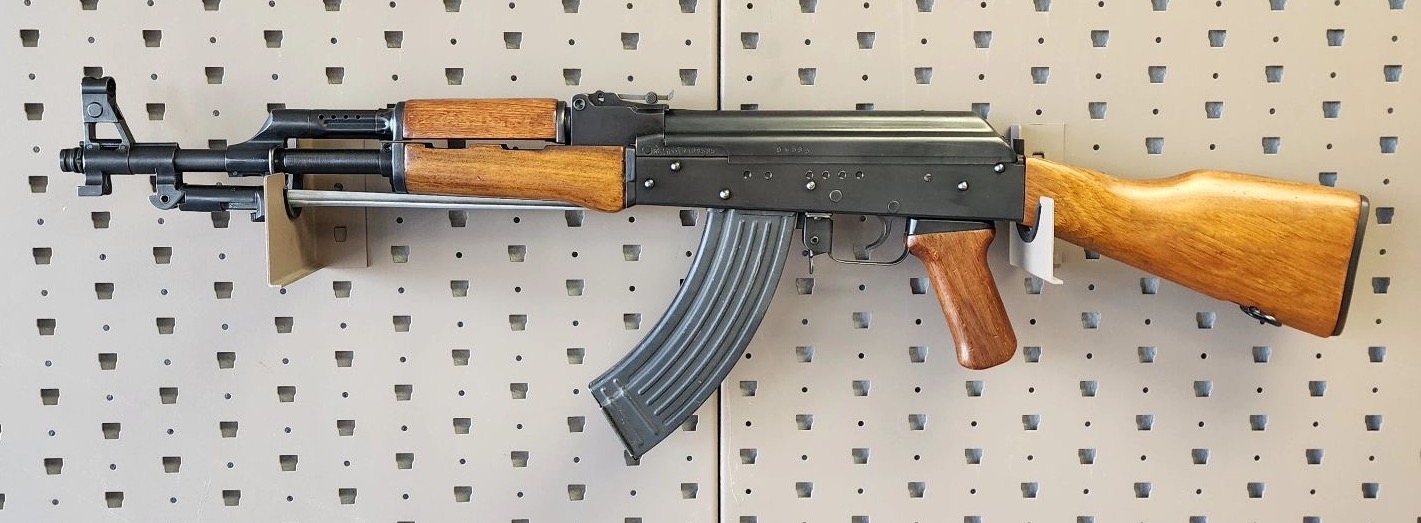
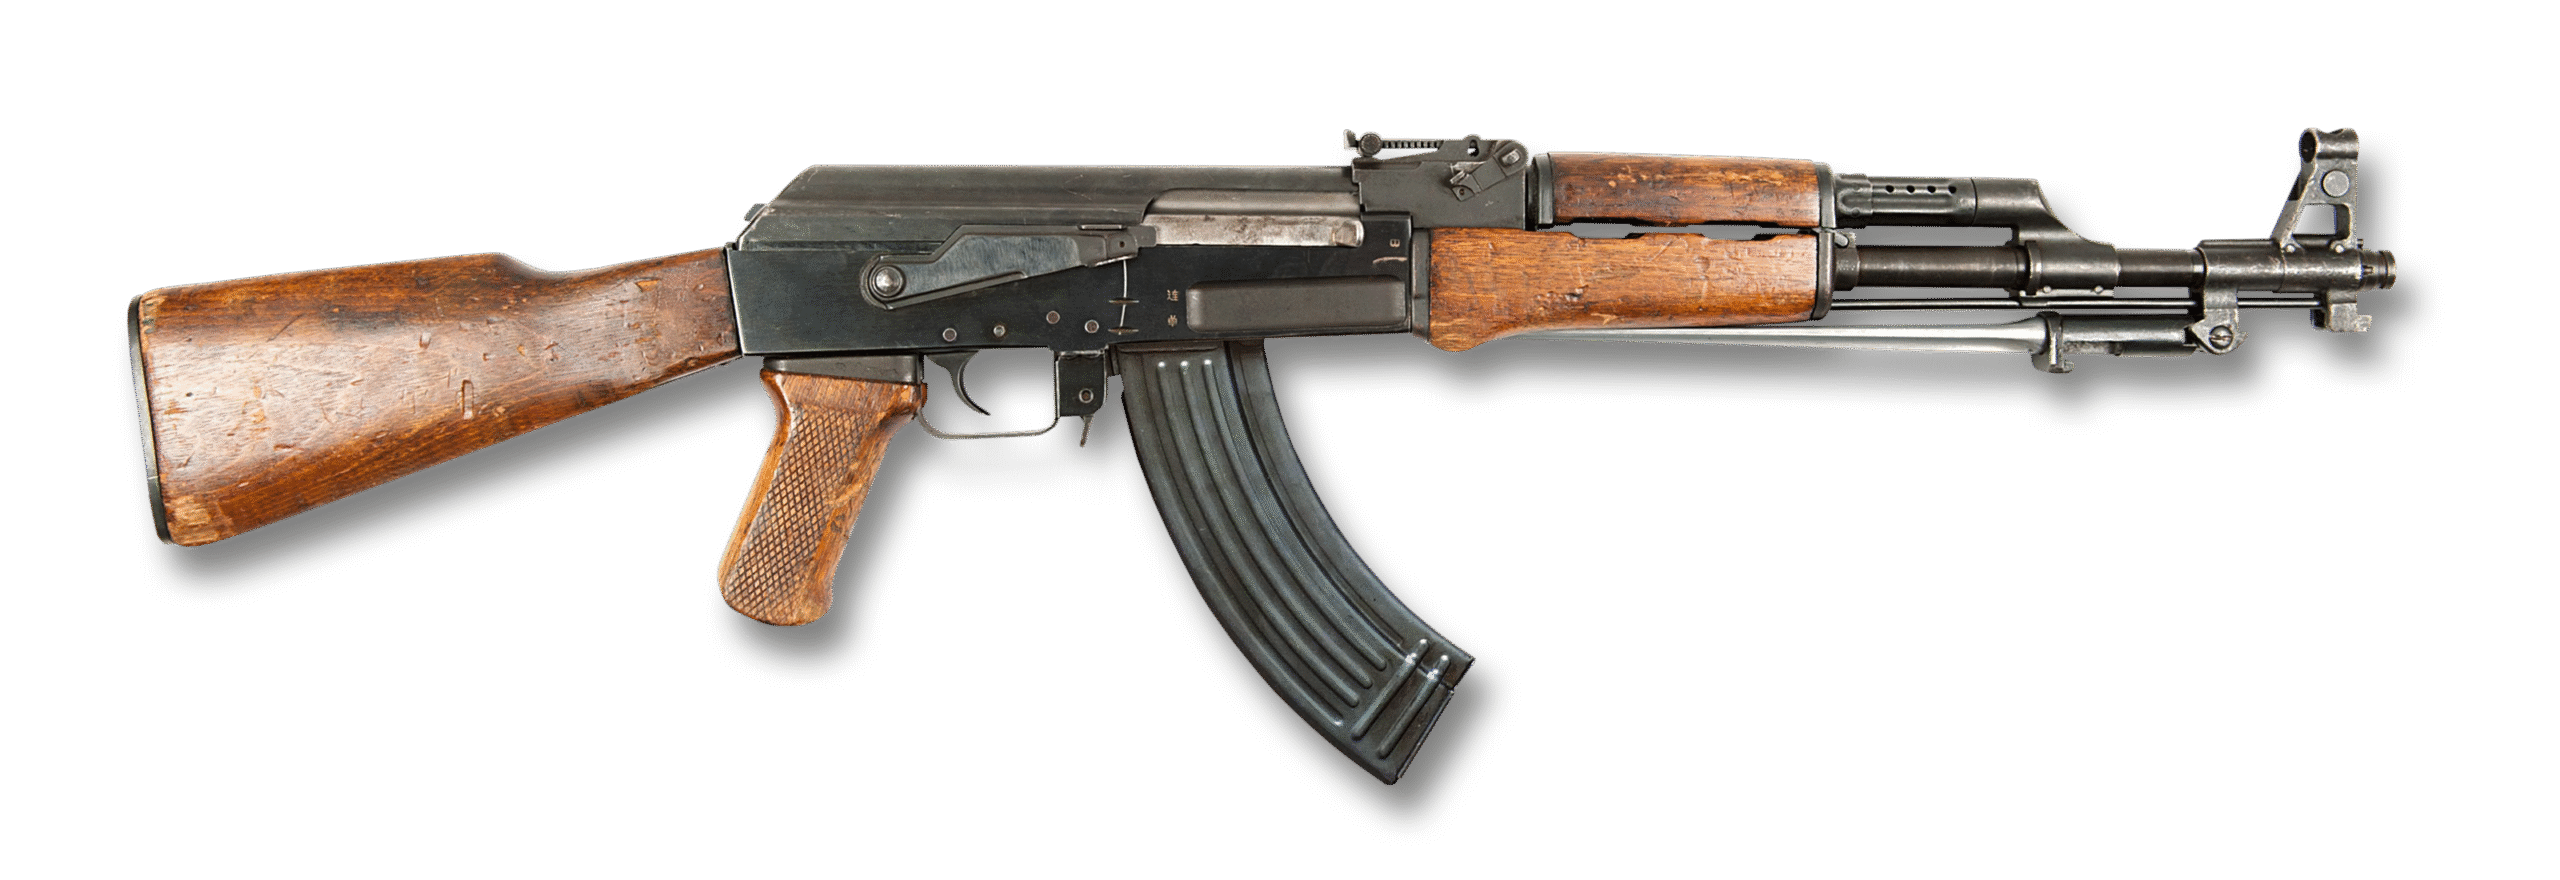
2.1. AK-47 (Avtomat Kalashnikova obraztsa 1947 goda)
The AK-47, designed by Mikhail Kalashnikov, was officially adopted by the Soviet military in 1949, though its design work began earlier, around 1947.1 Initial production started in 1948.3 The rifle was chambered for the intermediate 7.62x39mm M43 cartridge, a defining feature that offered a balance between the power of full-sized rifle cartridges and the controllability of submachine gun rounds.3 Early models featured milled receivers (Type 1, Type 2, Type 3), which contributed to their durability.3 The AK-47 was designed for simplicity, reliability in adverse conditions, and ease of mass production using methods available in the post-war Soviet Union.3 Its long-stroke gas piston system became a hallmark of the Kalashnikov design.3 Approximately 75 million AK-47s are estimated to have been built, with the broader Kalashnikov family reaching around 100 million units.3 Key manufacturers included the Izhevsk Machine-Building Plant (Izhmash), now Kalashnikov Concern.3
2.2. AKM (Avtomat Kalashnikova Modernizirovannyj)
Introduced in 1959, the AKM was a modernized version of the AK-47, also designed by Mikhail Kalashnikov’s team.1 A pivotal change was the introduction of a stamped sheet-metal receiver, which significantly reduced manufacturing costs, lightened the rifle, and simplified mass production compared to the milled receiver of the AK-47.1 The AKM retained the 7.62x39mm caliber and the long-stroke gas piston system.4 Other improvements included a new muzzle brake (slant compensator) to reduce muzzle climb during automatic fire, an improved bayonet, and often, laminated wood furniture.6 Production of the AKM in the Soviet Union ran from 1959 to 1977, with an estimated 10,278,300 units built by Izhmash and the Tula Arms Plant.6 The AKM became the most prevalent variant of the Kalashnikov series globally, largely due to its widespread production and export by the Soviet Union and its allies.7

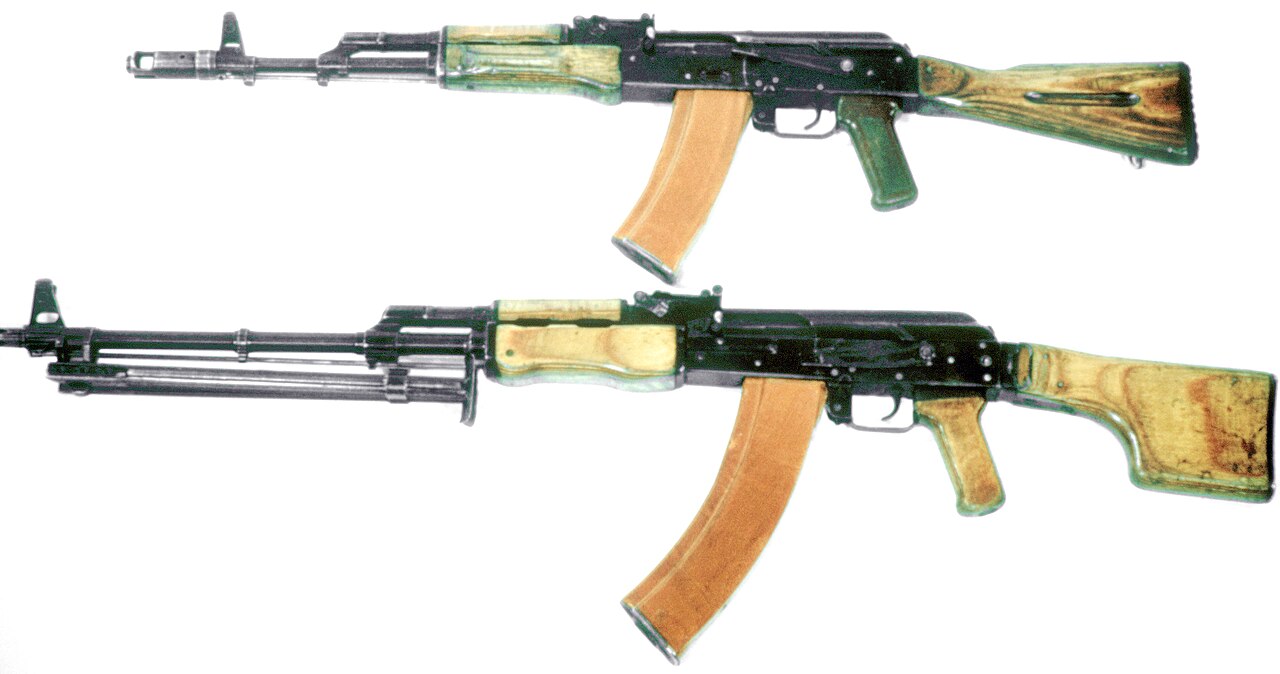
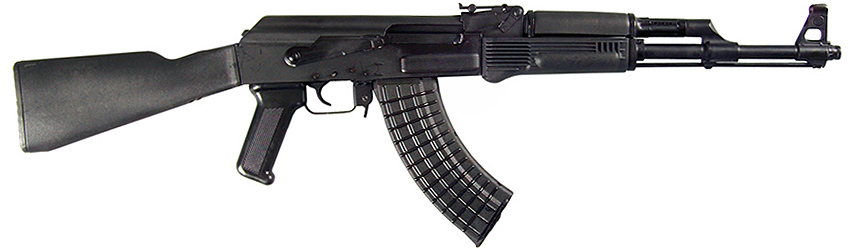
2.3. AK-74 (Avtomat Kalashnikova obraztsa 1974 goda)
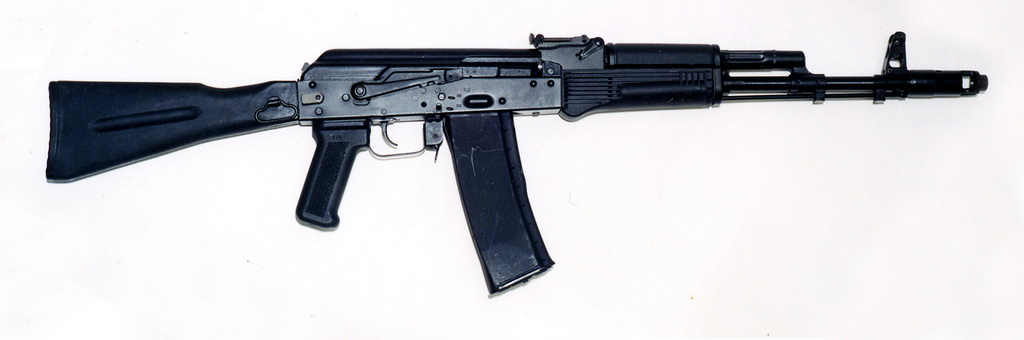
The AK-74 was developed in the early 1970s and officially adopted in 1974 as a successor to the AKM.10 The most significant change was the adoption of a new, smaller caliber, high-velocity cartridge, the 5.45x39mm M74.4 This shift mirrored developments in NATO countries towards smaller caliber service rifles, aiming for lighter ammunition, flatter trajectory, and reduced recoil, thereby improving hit probability.10 The AK-74 retained the basic Kalashnikov long-stroke gas piston operating system and many AKM components, with some early models reportedly being re-barreled AKMs.10 It featured a distinctive, prominent muzzle brake to further mitigate recoil and muzzle rise.10 Manufactured by Izhmash (now Kalashnikov Concern) and Tula Arms Plant, production of the original AK-74 ran from 1974 to 1991, with over 5 million units built.10 The modernized AK-74M, featuring a side-folding polymer stock and a universal scope rail, entered full-scale production in 1991 and continues to be produced.4
2.4. AK-100 Series (Export-Oriented Evolution)
Introduced in 1994, the AK-100 series, developed by Izhmash (now Kalashnikov Concern), is based on the AK-74M design but was primarily intended for export markets.13 This family of rifles is characterized by black polymer furniture, side-folding polymer stocks, and the use of AK-74M internal systems, ensuring a high degree of parts interchangeability.13 A key strategic development with the AK-100 series was the offering of multiple calibers to appeal to a wider international customer base. This demonstrated a shift from primarily arming domestic and allied forces with a standardized caliber to a more market-driven approach in the post-Cold War era. The availability of rifles chambered in NATO standard ammunition alongside traditional Soviet calibers was a significant step in maintaining the Kalashnikov’s global relevance. Production numbers for the entire series are substantial, with Deagel.com indicating over 30,000 produced (though this seems low for the entire series and may refer to a specific timeframe or subset) 14, while other sources suggest much larger overall Kalashnikov production from Izhevsk which would include these models.15 The AK-100M/200 series, introduced around 2017, represents further modernization with enhanced ergonomics and Picatinny rails for accessory mounting.13
- AK-101: An export version of the AK-74M chambered in the NATO standard 5.56x45mm cartridge.4 Production began around 1995.16 Over 270,500+ have been built (this number likely includes other AK-100 variants or is a broader production figure).16
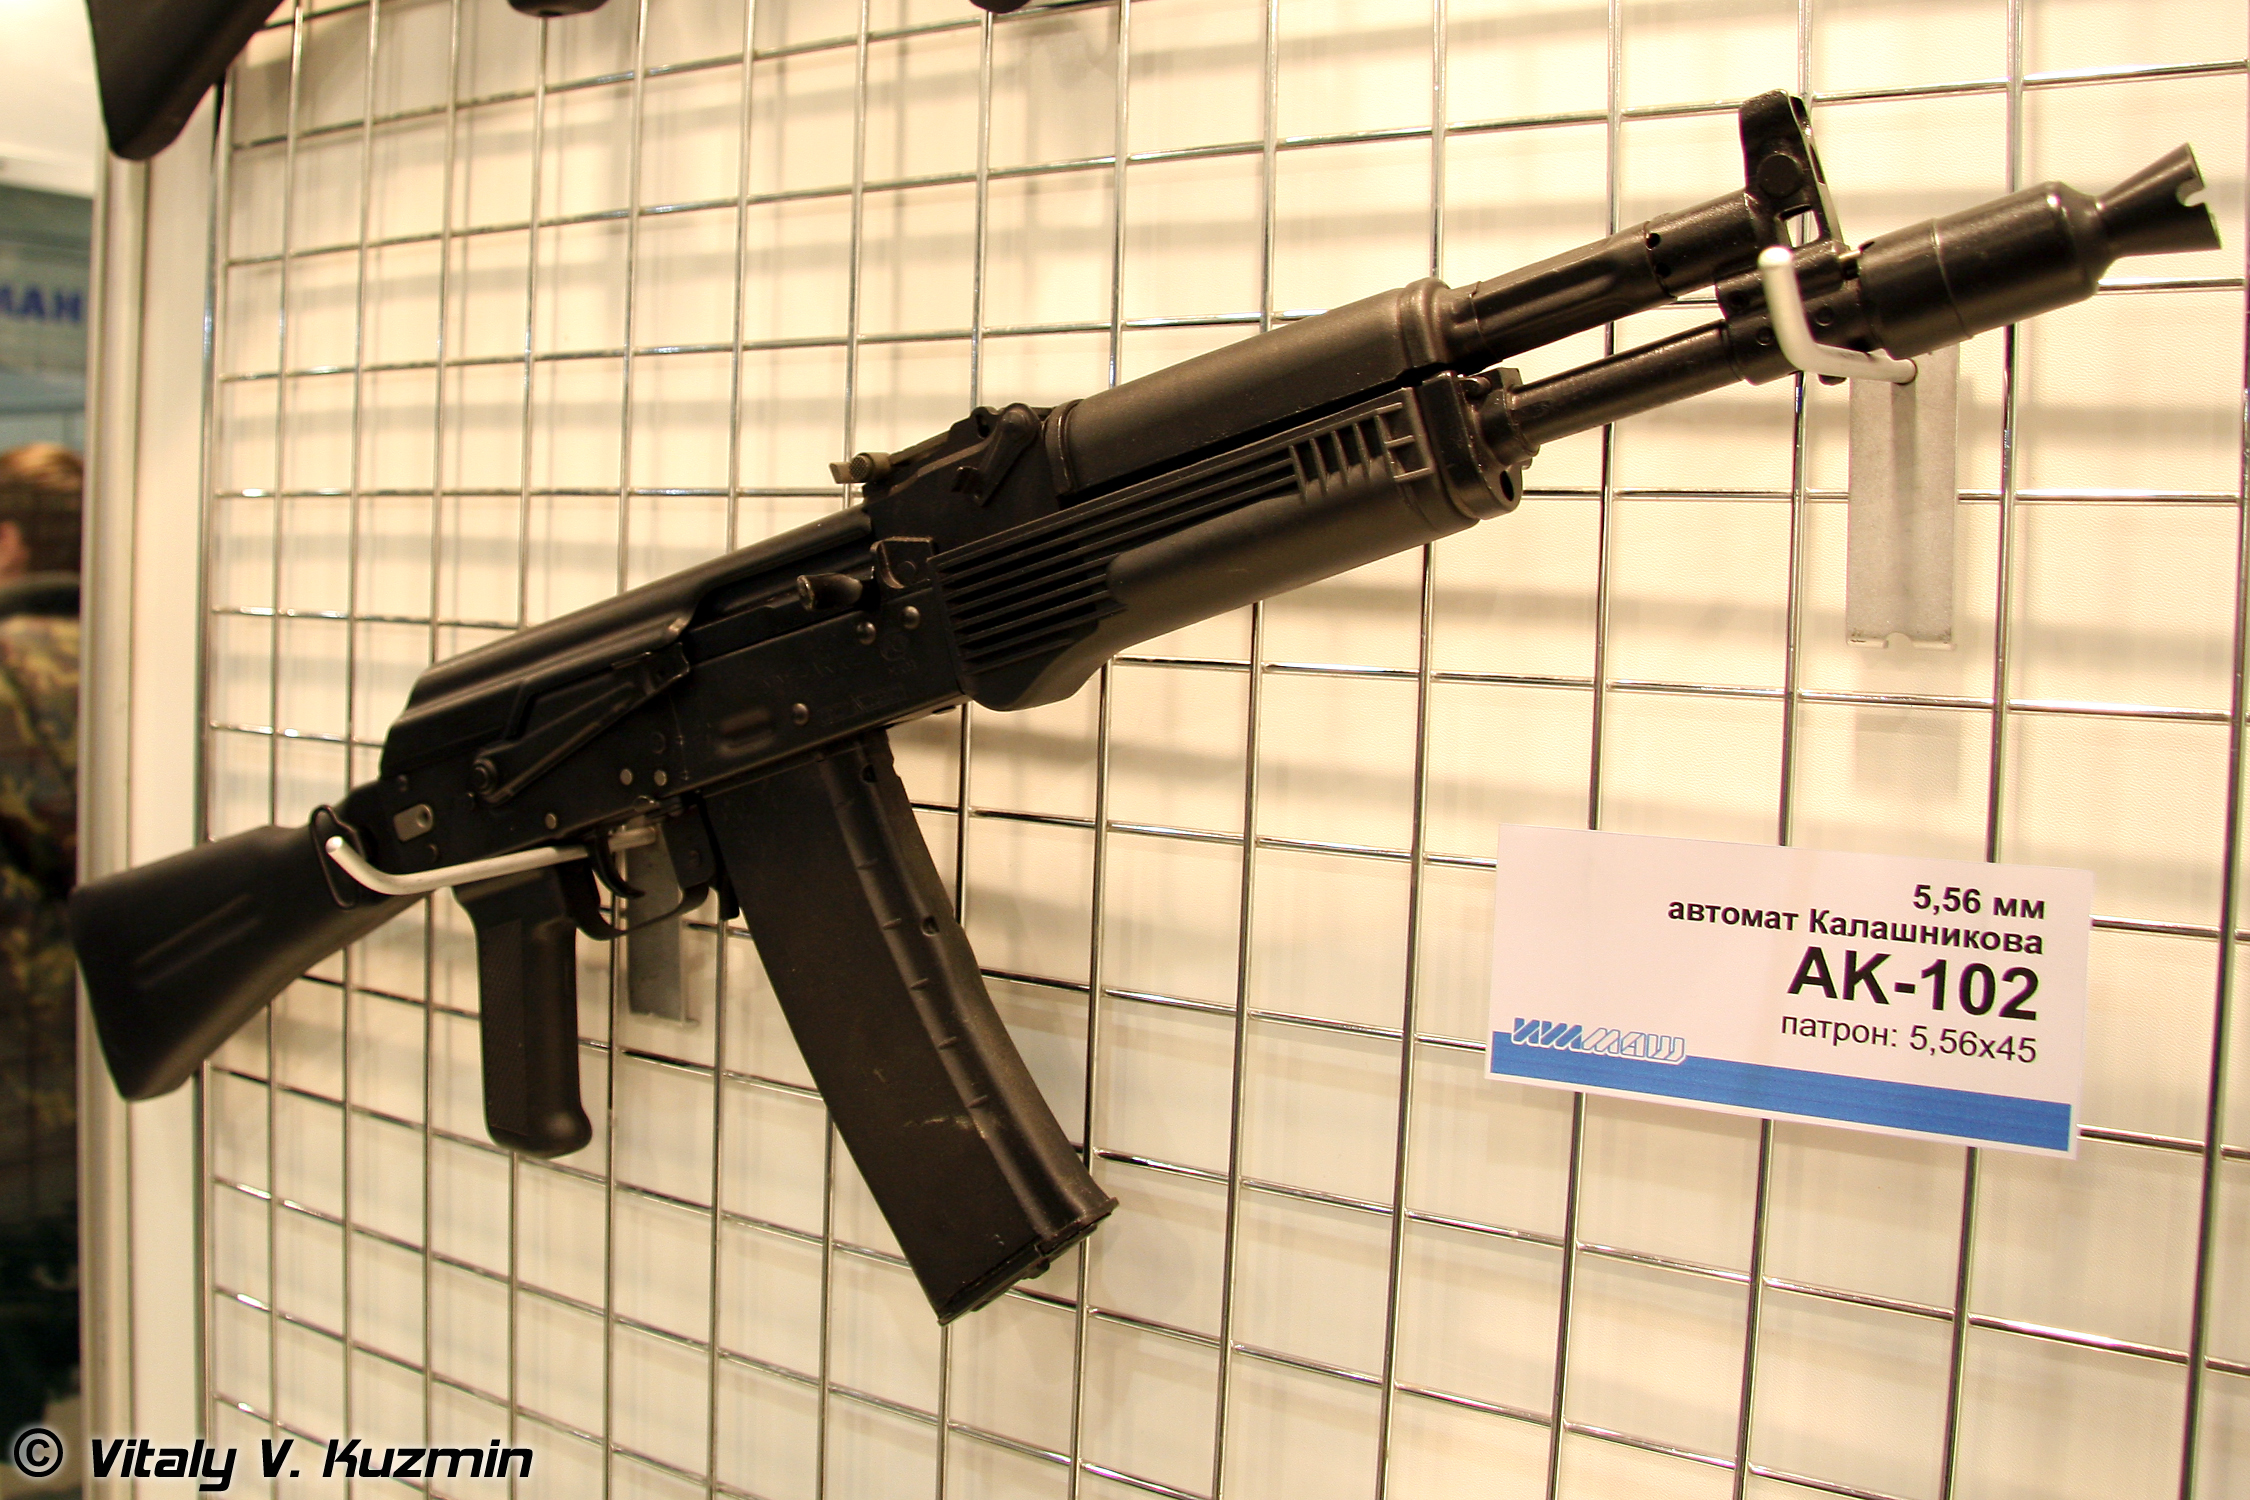
- AK-102: A compact carbine version of the AK-101, also chambered in 5.56x45mm NATO, with a shorter 314mm barrel.4 Production: 2000-present.17 Indonesia reportedly acquired 5,000 AK-101 and AK-102 rifles.17
- AK-103: A modernized AKM chambered in 7.62x39mm M43, incorporating AK-74M features like polymer furniture and a side-folding stock.4 Production: 1994-present, with over 250,000+ built.18 It has seen significant export success, including licensed production in Venezuela and Ethiopia.4

- AK-104: A compact carbine version of the AK-103, chambered in 7.62x39mm M43, with a 314mm barrel.4 Production began in 1994.20

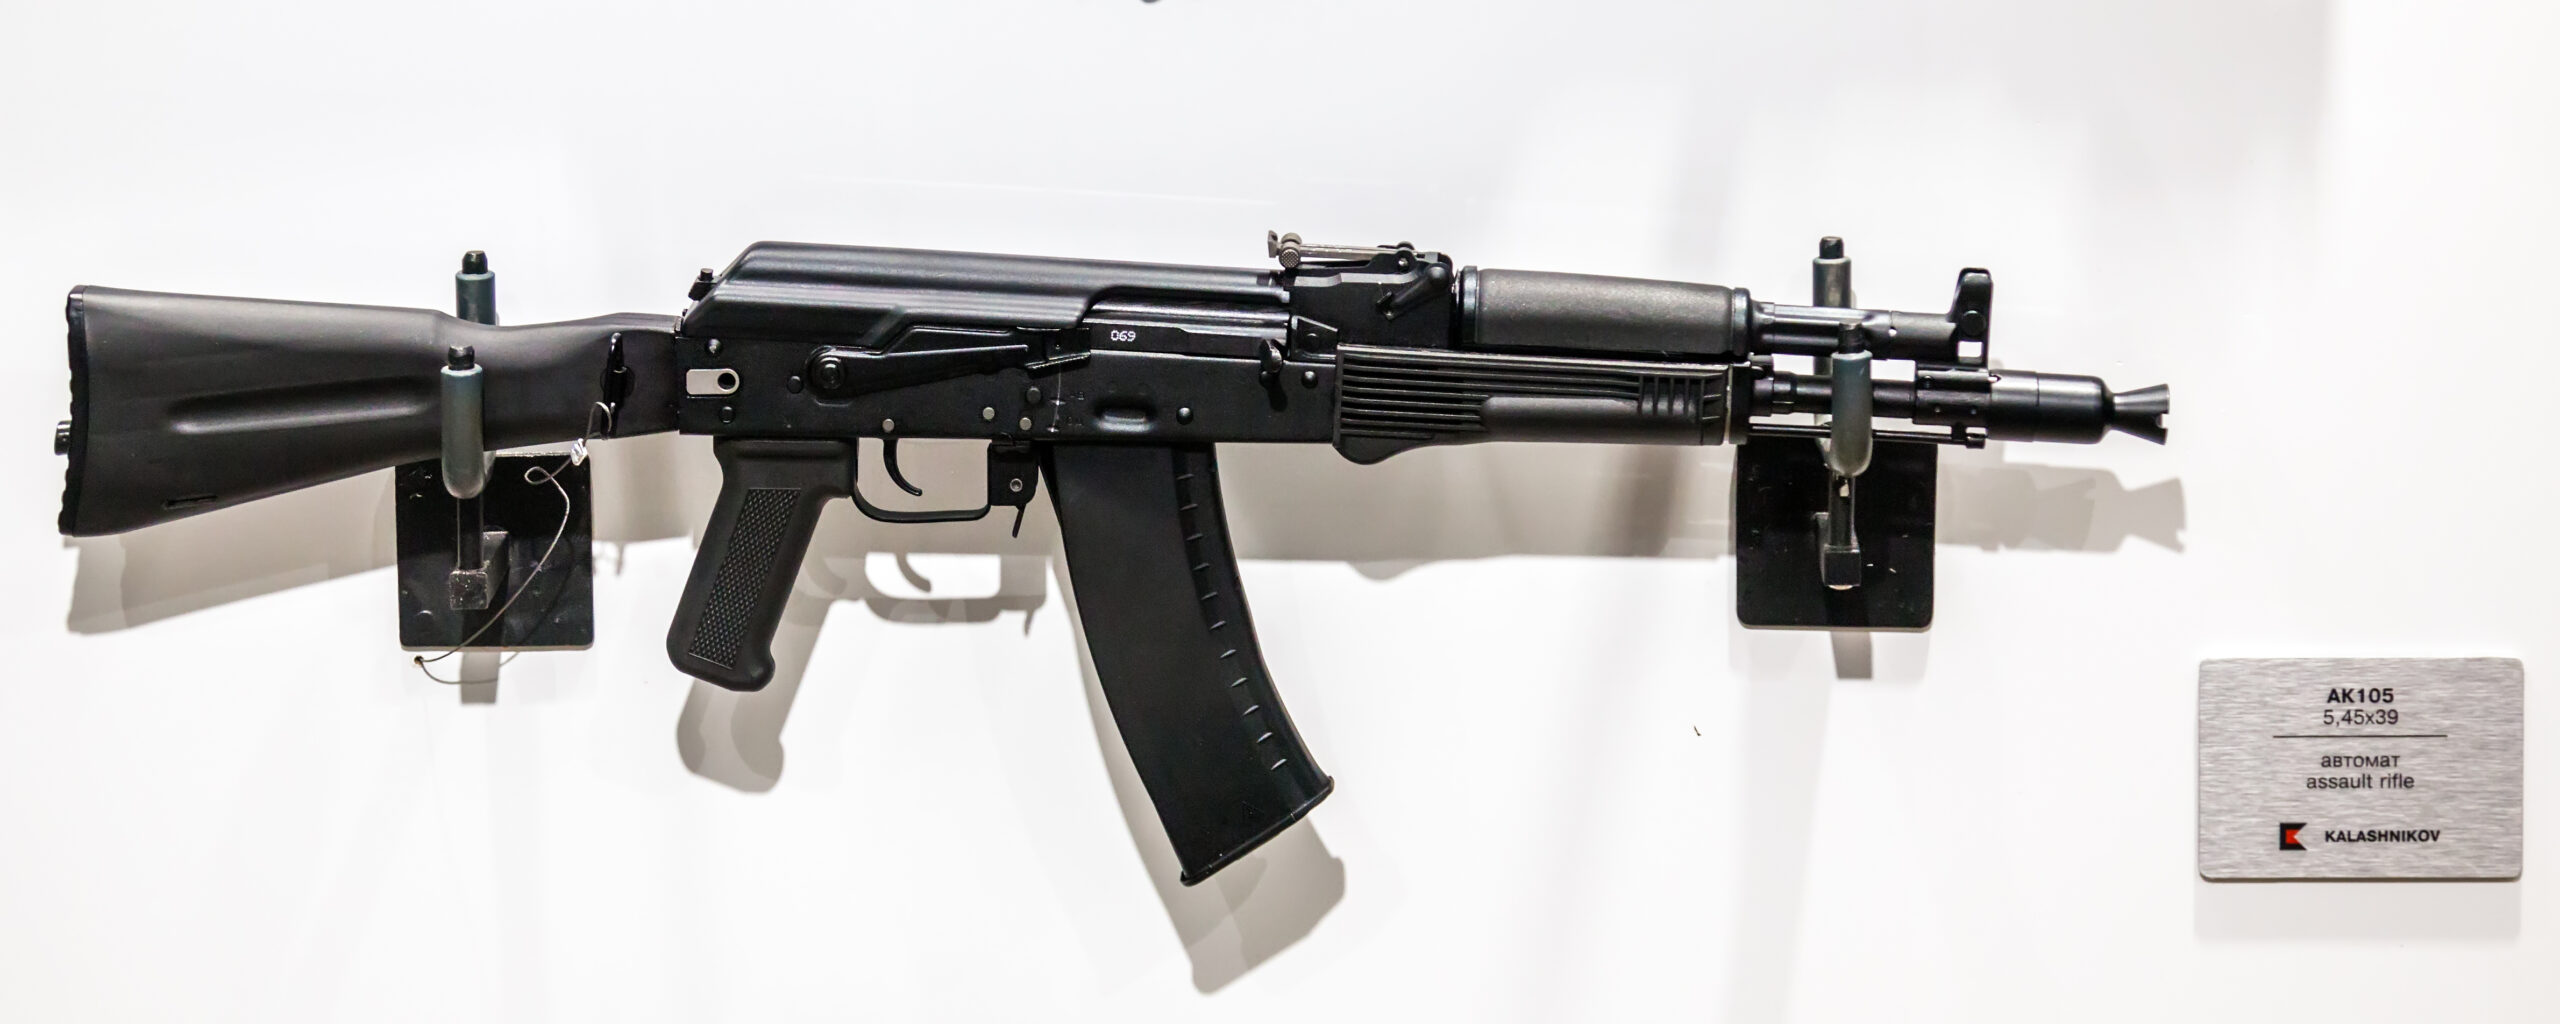
- AK-105: A compact carbine version of the AK-74M, chambered in 5.45x39mm M74, with a 314mm barrel. It is used domestically by Russian forces as a shorter alternative to the full-sized AK-74M, filling a role similar to the older AKS-74U but with improved ballistics due to a slightly longer barrel and more modern features.4 Production began in 1994.23
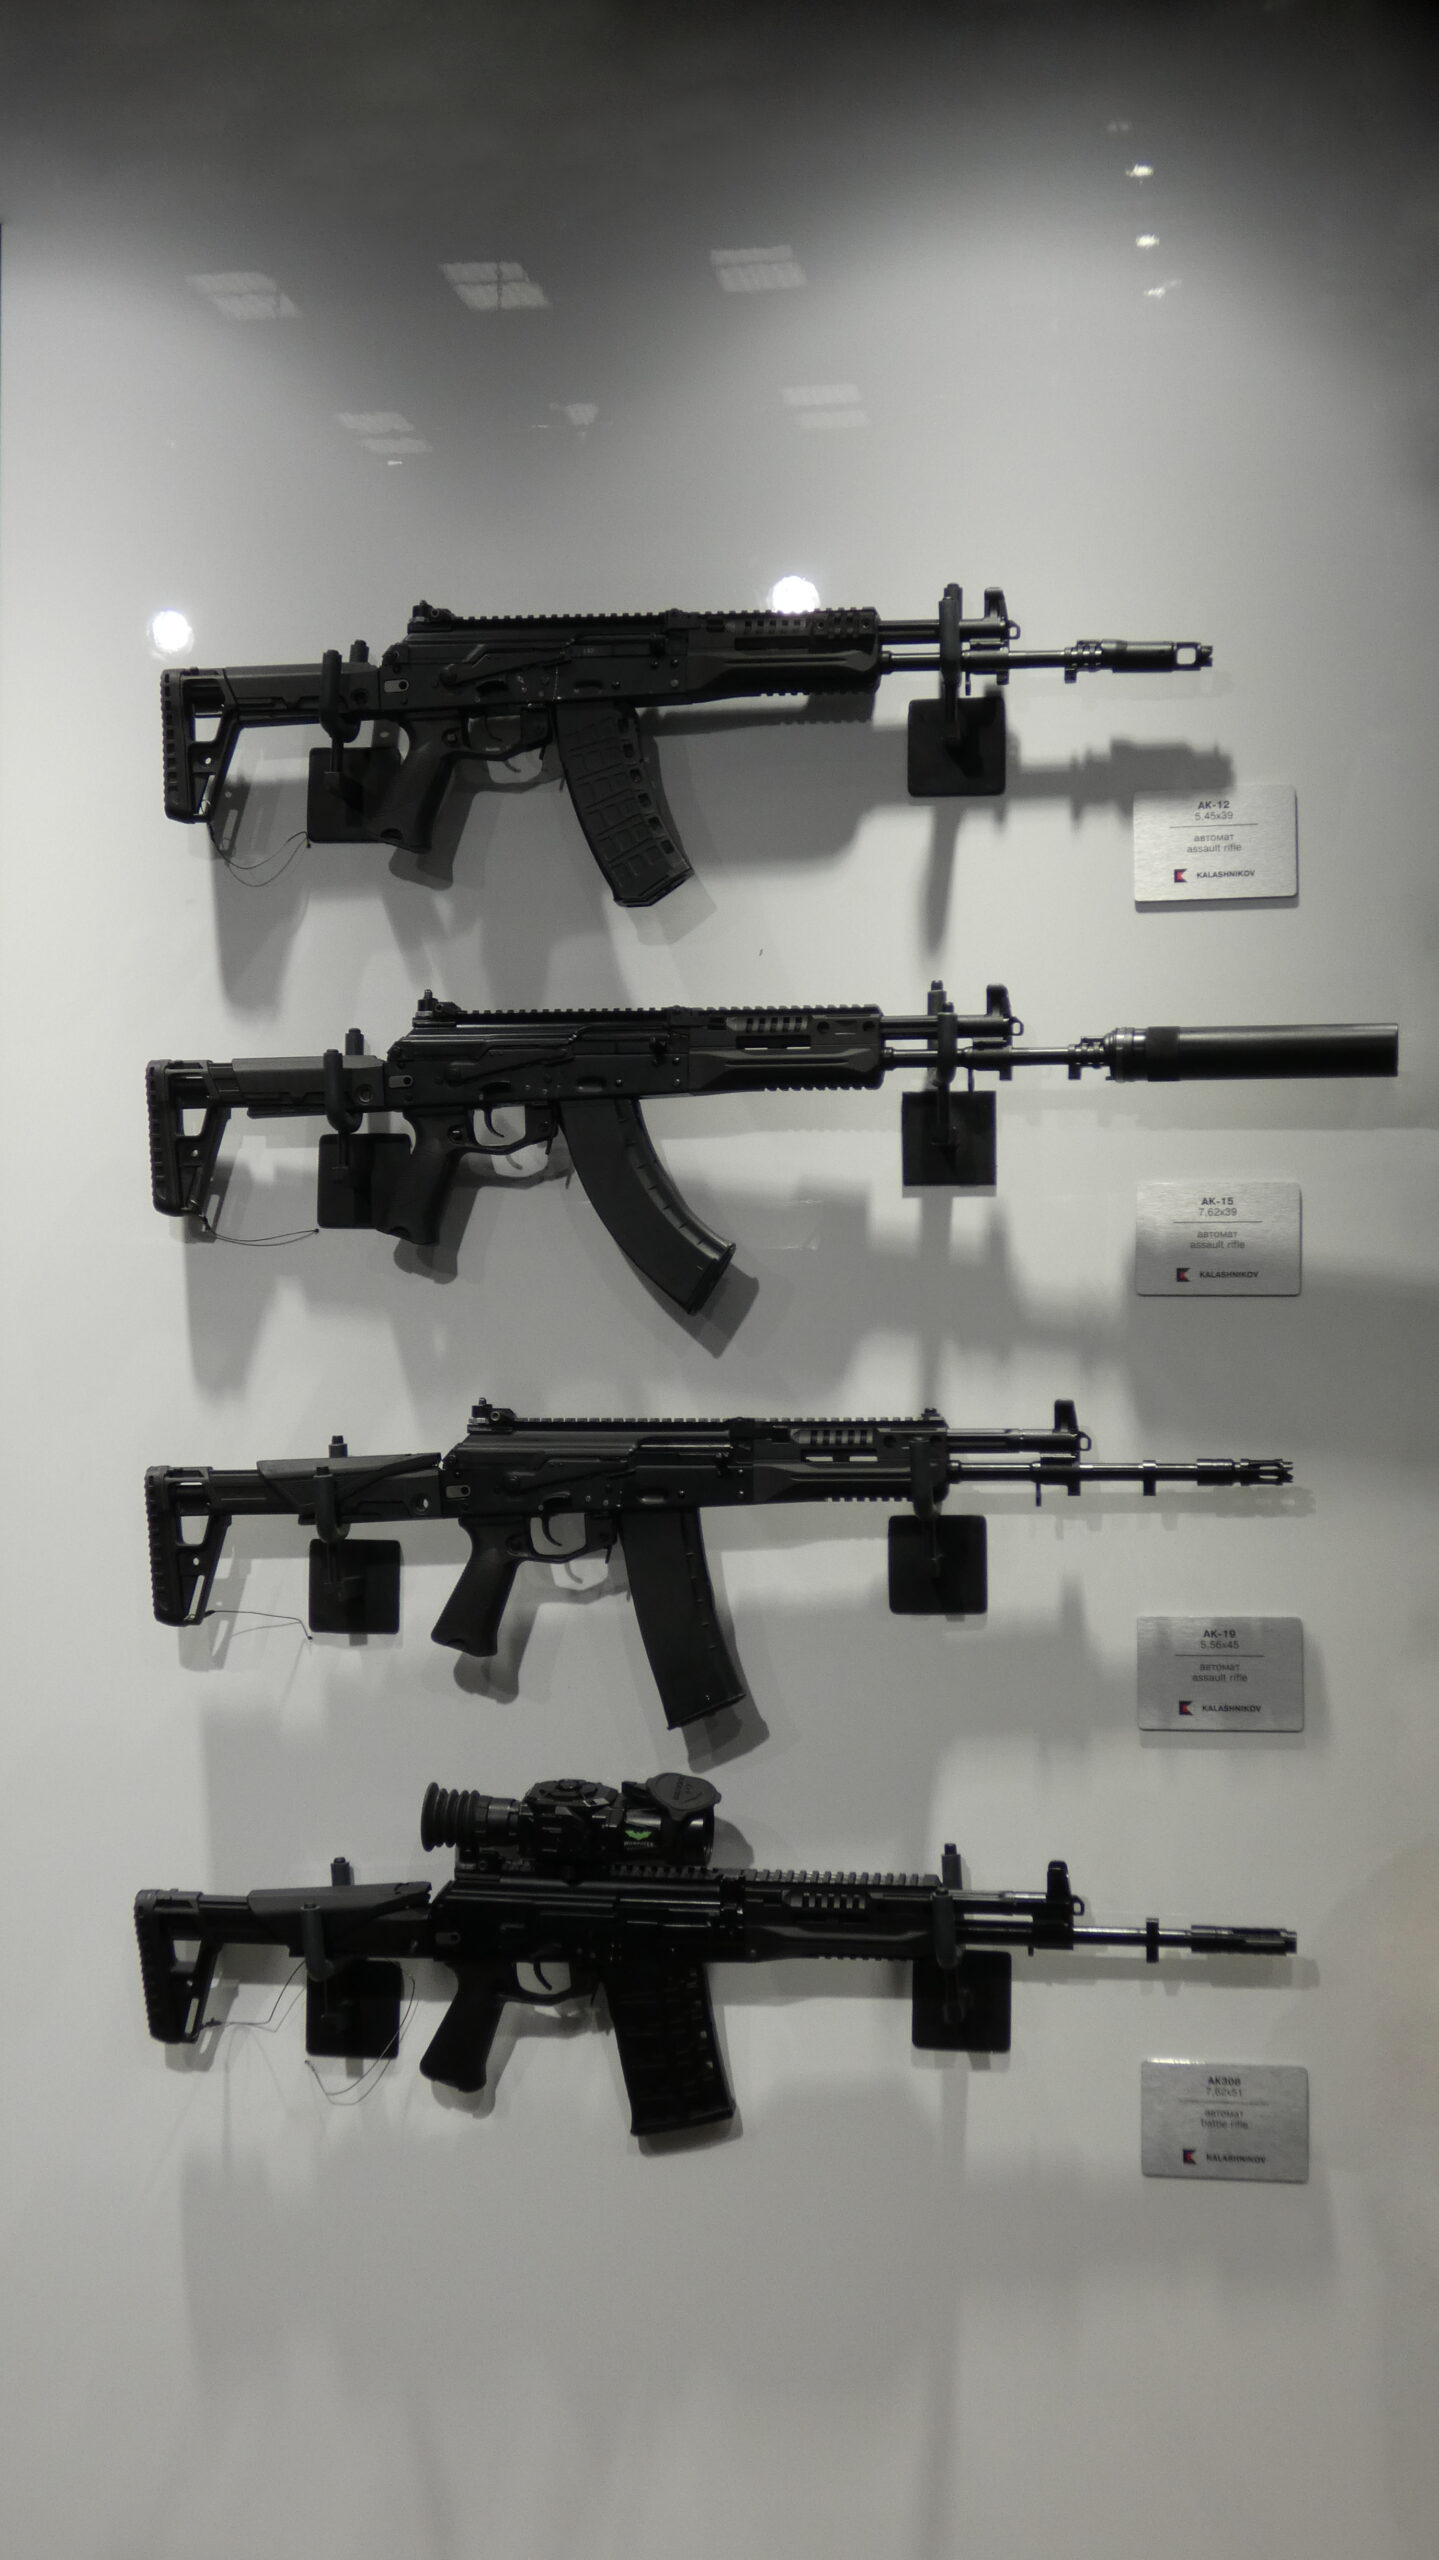
2.5. AK-12 Series (Fifth Generation)
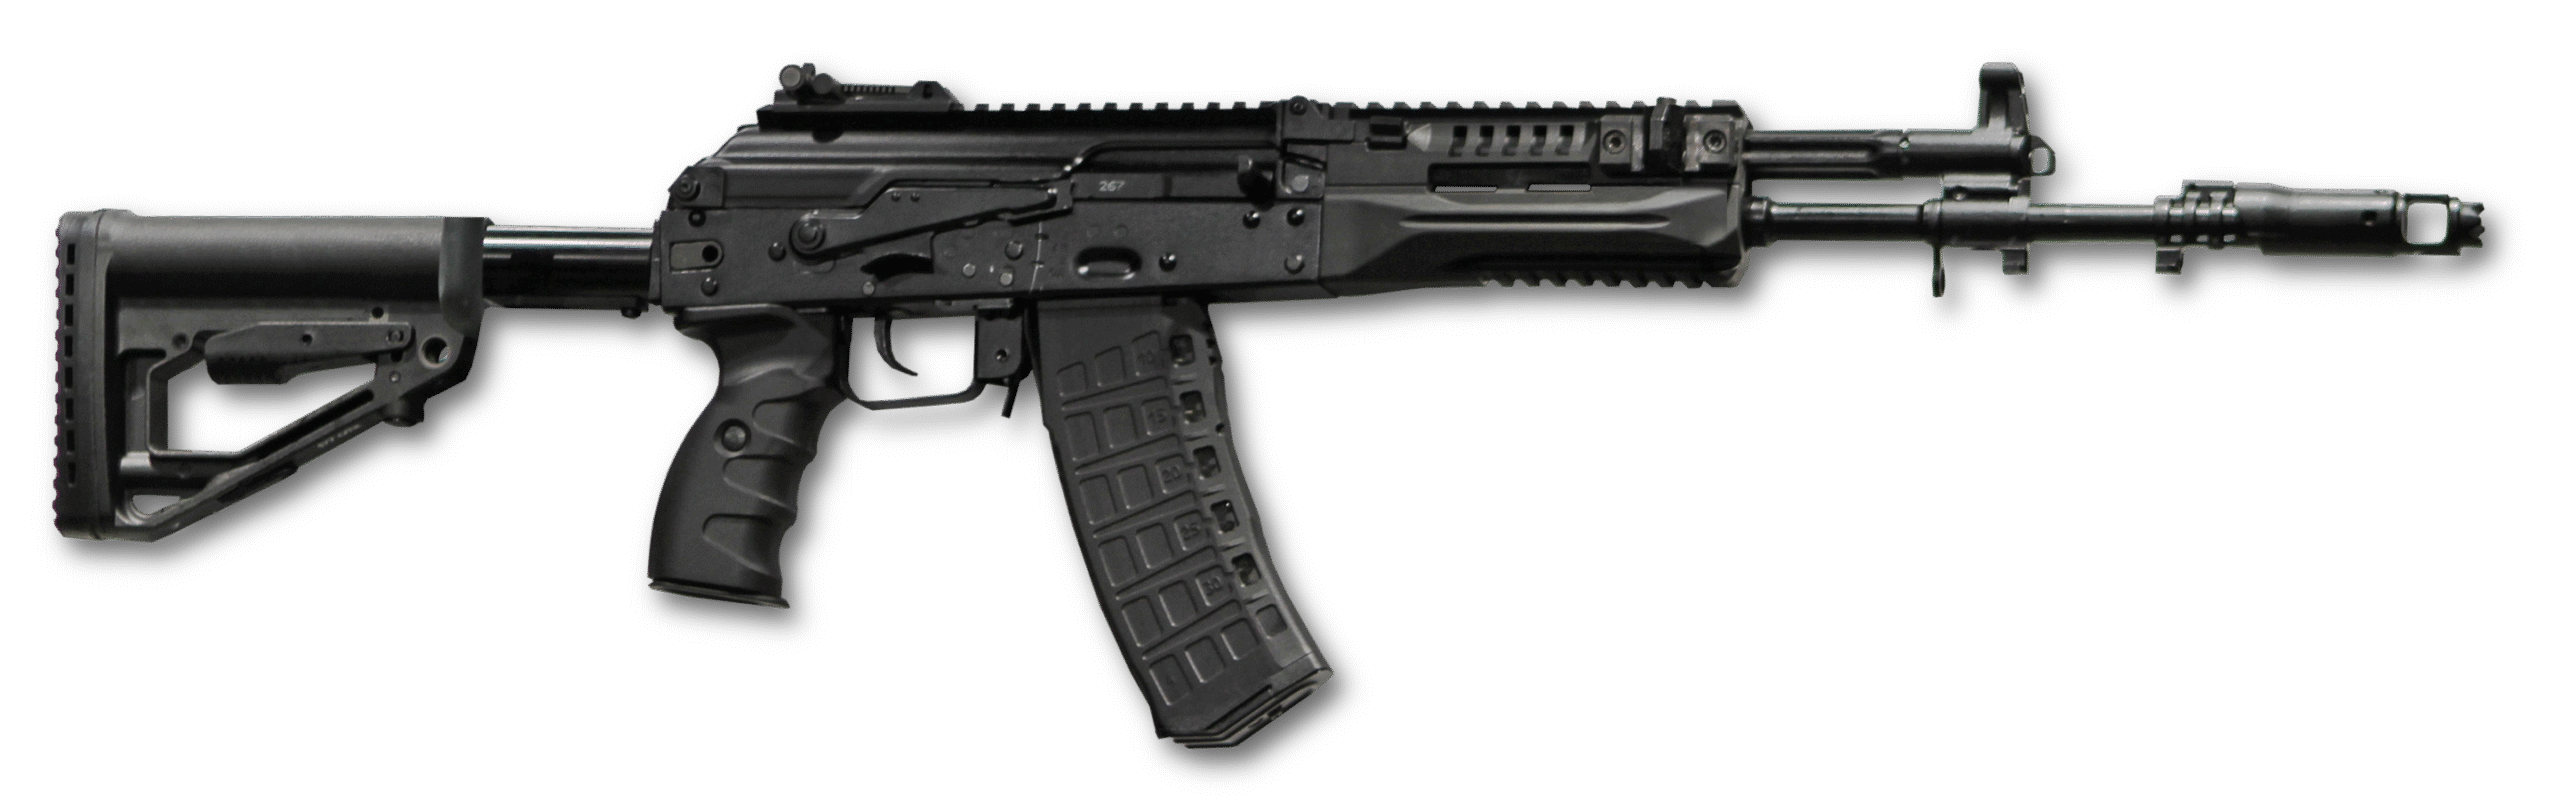
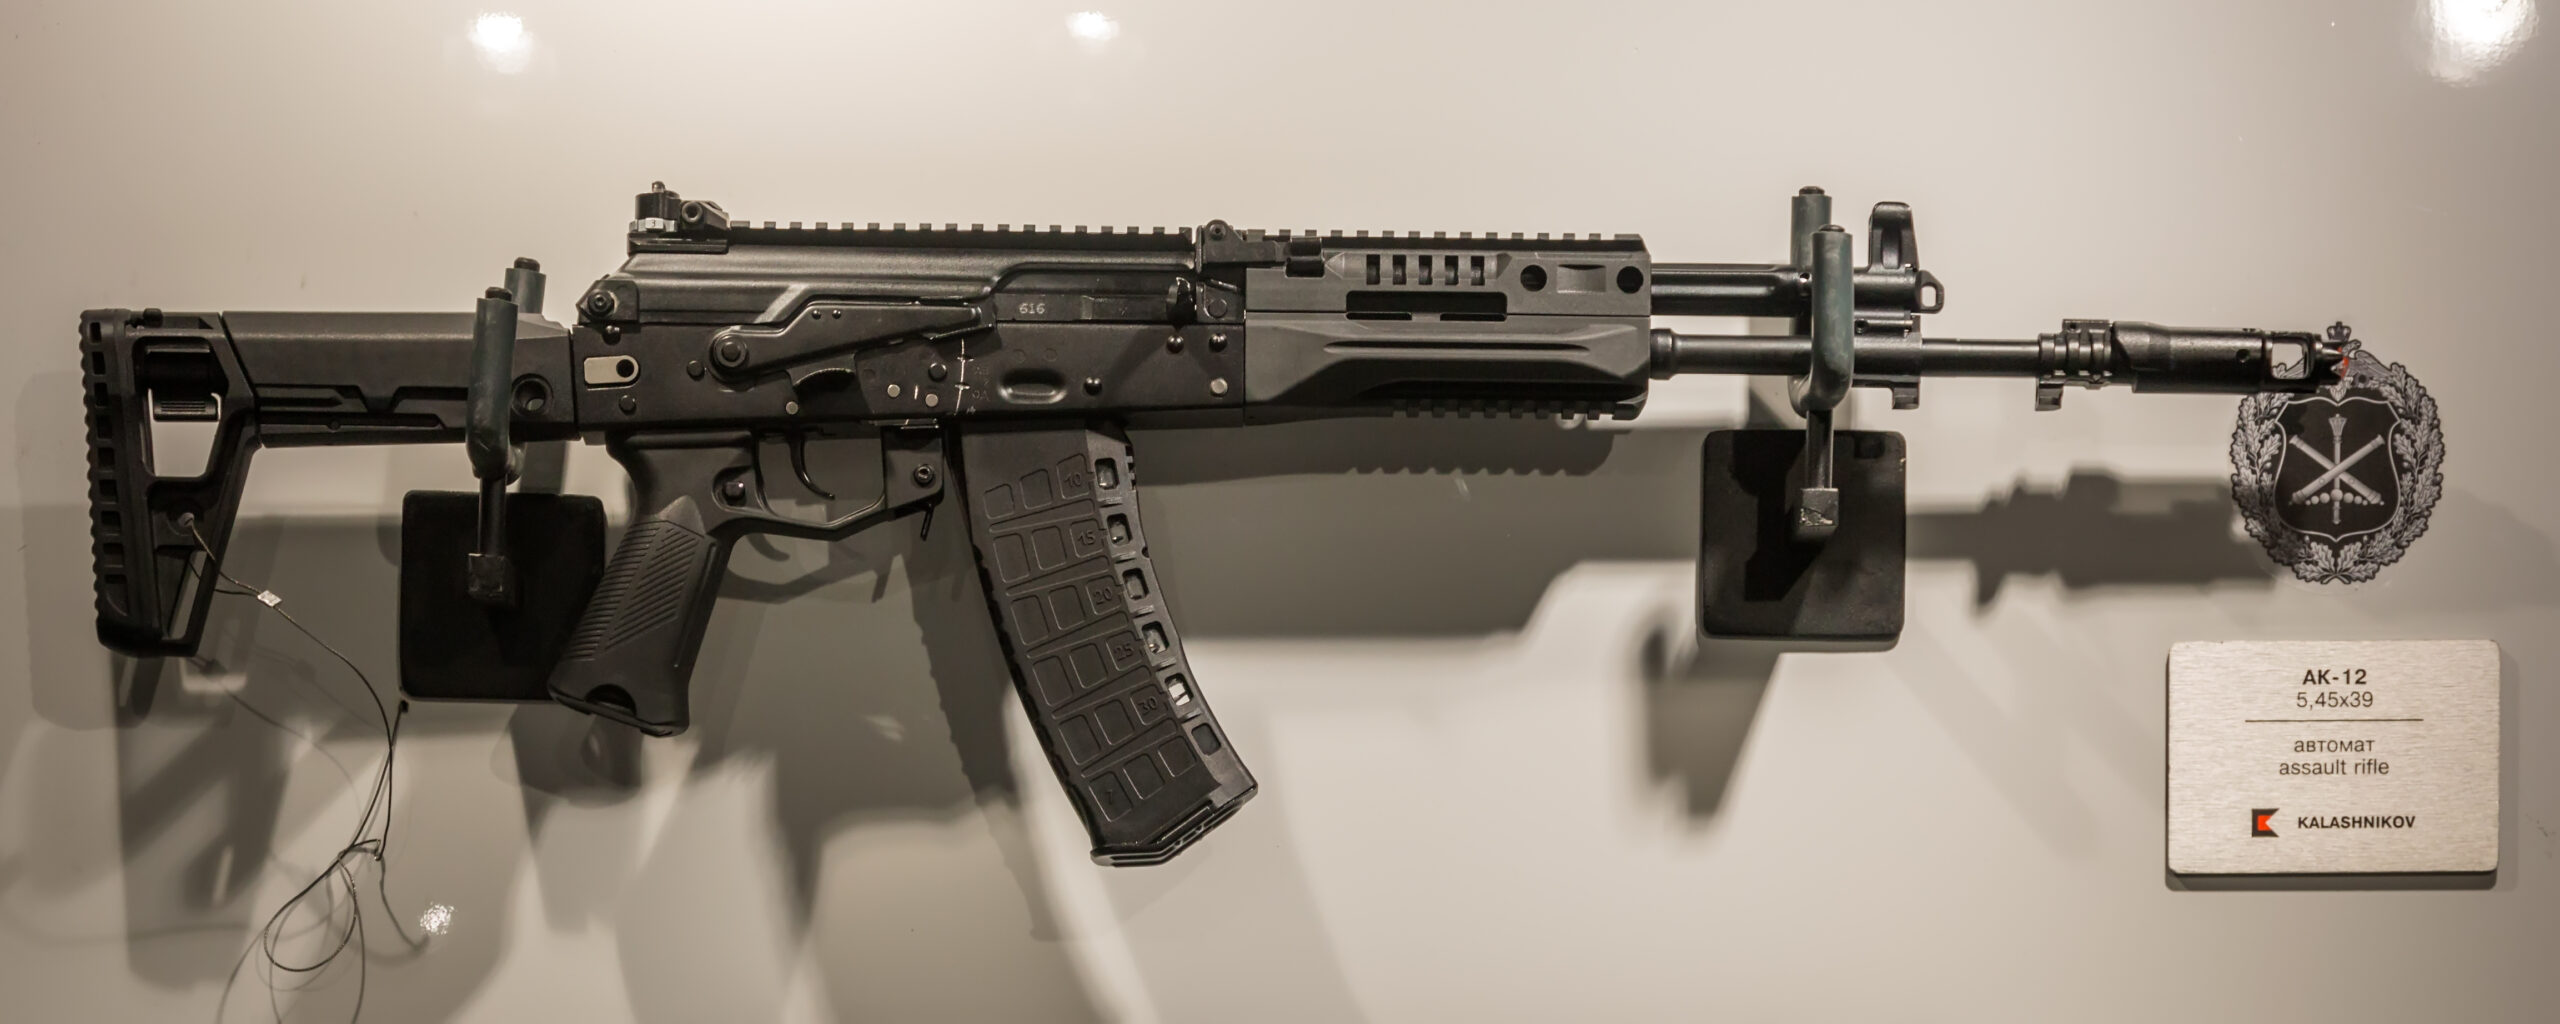
The AK-12 represents the latest generation of Kalashnikov rifles, designed by a team including Vladimir Zlobin and Sergey Urzhumcev under the Kalashnikov Concern (formerly Izhmash).24 The project began in 2011, with serial production commencing in 2018 after undergoing trials and refinements.24 Over 150,000 units have been built, with a significant contract for 150,000 AK-12 and AK-15 rifles for the Russian Ministry of Defence between 2019 and 2021.24
The AK-12 series incorporates significant ergonomic and tactical improvements over previous generations. These include an integrated Picatinny rail on the receiver cover and handguard for mounting optics and accessories, a redesigned adjustable and side-folding telescoping stock, an improved pistol grip, and a new rotary diopter rear sight.24 Early versions featured a two-round burst mode, which was later omitted in the 2023 upgrade based on operational feedback.24 This iterative development, even post-introduction, underscores a responsiveness to user needs and battlefield experiences, a characteristic of successful military firearm evolution. The multi-caliber approach initiated with the AK-100 series continues, broadening the family’s potential applications and export appeal.
- Models & Calibers:
- AK-12 (6P70): Chambered in 5.45x39mm.4
- AK-15 (6P71): Chambered in 7.62x39mm.4
- AK-19: Chambered in 5.56x45mm NATO.4
- AK-308: A battle rifle variant chambered in 7.62x51mm NATO.4
- Carbine versions include the AK-12K and AK-15K.24
The Soviet/Russian Kalashnikov lineage showcases a remarkable evolution. The initial AK-47 prioritized ruggedness and mass producibility with its milled receiver. The AKM’s transition to a stamped receiver was a critical development, drastically reducing production costs and time, which was instrumental in its massive global proliferation.1 This ability to simplify for mass production without sacrificing core reliability is a key factor in the Kalashnikov’s enduring presence. The AK-74’s adoption of the 5.45x39mm cartridge reflected a broader military trend towards smaller, higher-velocity rounds, aiming for improved soldier loadout and hit probability.10 The AK-100 series marked a strategic pivot towards export markets, offering NATO calibers alongside traditional Soviet ones, demonstrating adaptability to global demands.13 Finally, the AK-12 series integrates modern modularity (Picatinny rails, adjustable furniture) while retaining the fundamental Kalashnikov operating system, indicating an effort to keep the platform competitive in the 21st century.24 The production numbers themselves tell a story: massive outputs of AK-47s and AKMs during the Cold War underscored Soviet military doctrine and global influence, while the export focus of the AK-100 series and the recent ramp-up of AK-12 production reflect current geopolitical realities and domestic military requirements.3 Throughout this evolution, a degree of parts and magazine compatibility (within calibers) has often been maintained, simplifying logistics for users of multiple Kalashnikov generations.18
3. Global Production of Kalashnikov-Inspired Rifles: A Country-by-Country Breakdown
The simplicity, reliability, and Soviet policy of sharing technical data packages with allied nations led to the widespread licensed and unlicensed production of Kalashnikov-type rifles across the globe. Many countries adapted the design to their specific manufacturing capabilities and operational requirements, resulting in a diverse array of variants.
3.1. Albania
- Manufacturer(s): KM Poliçan & Gramësh factories; State Arsenal.27
- Models & Details:
- Automatiku Shqiptar 1978 model 56 (ASH-78 Tip-1): A copy of the Chinese Type 56 (itself an AK-47 derivative), chambered in 7.62x39mm. It often lacks magazine well dimples and features unique selector markings “A” (automatic) and “1” (semi-automatic).4 Production ran from 1978 to 1993, with over 100,000 estimated to have been made.27
- ASH-78 Tip-2: A heavy-barreled version, analogous to the RPK.4
- ASH-78 Tip-3: Equipped with grenade launching capability.4
- Tipi 1982 (ASH-82): Generally a copy of the AKS-47 (underfolding stock).4 However, some rifles designated ASH-82 and dated 1981 are fixed-stock Type 56 copies with extended barrels and grenade spigots, while others dated 1986 are Type 56 copies with underfolding bayonets.31 Caliber: 7.62x39mm.
- Various other AKMS-pattern rifles, some with short barrels similar to the Soviet AKS-74U, were also produced.4
- Notes: Albanian Kalashnikov variants were developed during a period of national isolation and were heavily influenced by Chinese designs due to close ties after Albania’s split from the Soviet sphere.27 Albania notably supplied 30,000 ASH-78 rifles to the Afghan National Army.27
3.2. Argentina
- Manufacturer(s): FMAP-DM (Dirección General de Fabricaciones Militares).33
- Model: FARA 83 (Fusil Automático República Argentina), also known as FAA 81.
- Caliber: 5.56x45mm NATO.33
- Production Dates: Designed in 1981, initial production ran from 1984 to 1990, with a brief resumption in 1990 before cancellation due to economic difficulties.33
- Estimated Numbers Produced: 1,193 in the initial run; total production numbers are unknown but limited.33 Some sources suggest “a little over 1000” were made in total.34
- Notes: The FARA 83 was primarily inspired by the Italian Beretta AR70/223, particularly in its magazine and some design features.33 It utilizes a gas-operated reloading system.33 While listed as a “similar rifle” to Kalashnikovs in some sources due to design influences from the Galil and Valmet Rk 62 4, its arguably more of an influenced design rather than a direct derivative. It features a folding buttstock and tritium night sights.33
3.3. Armenia
- Manufacturer(s): Not specified, but likely domestic state facilities.
- Model: K-3
- Caliber: 5.45x39mm.4
- Production Dates: First displayed in 1996, suggesting production around that period.4
- Estimated Numbers Produced: Not specified.
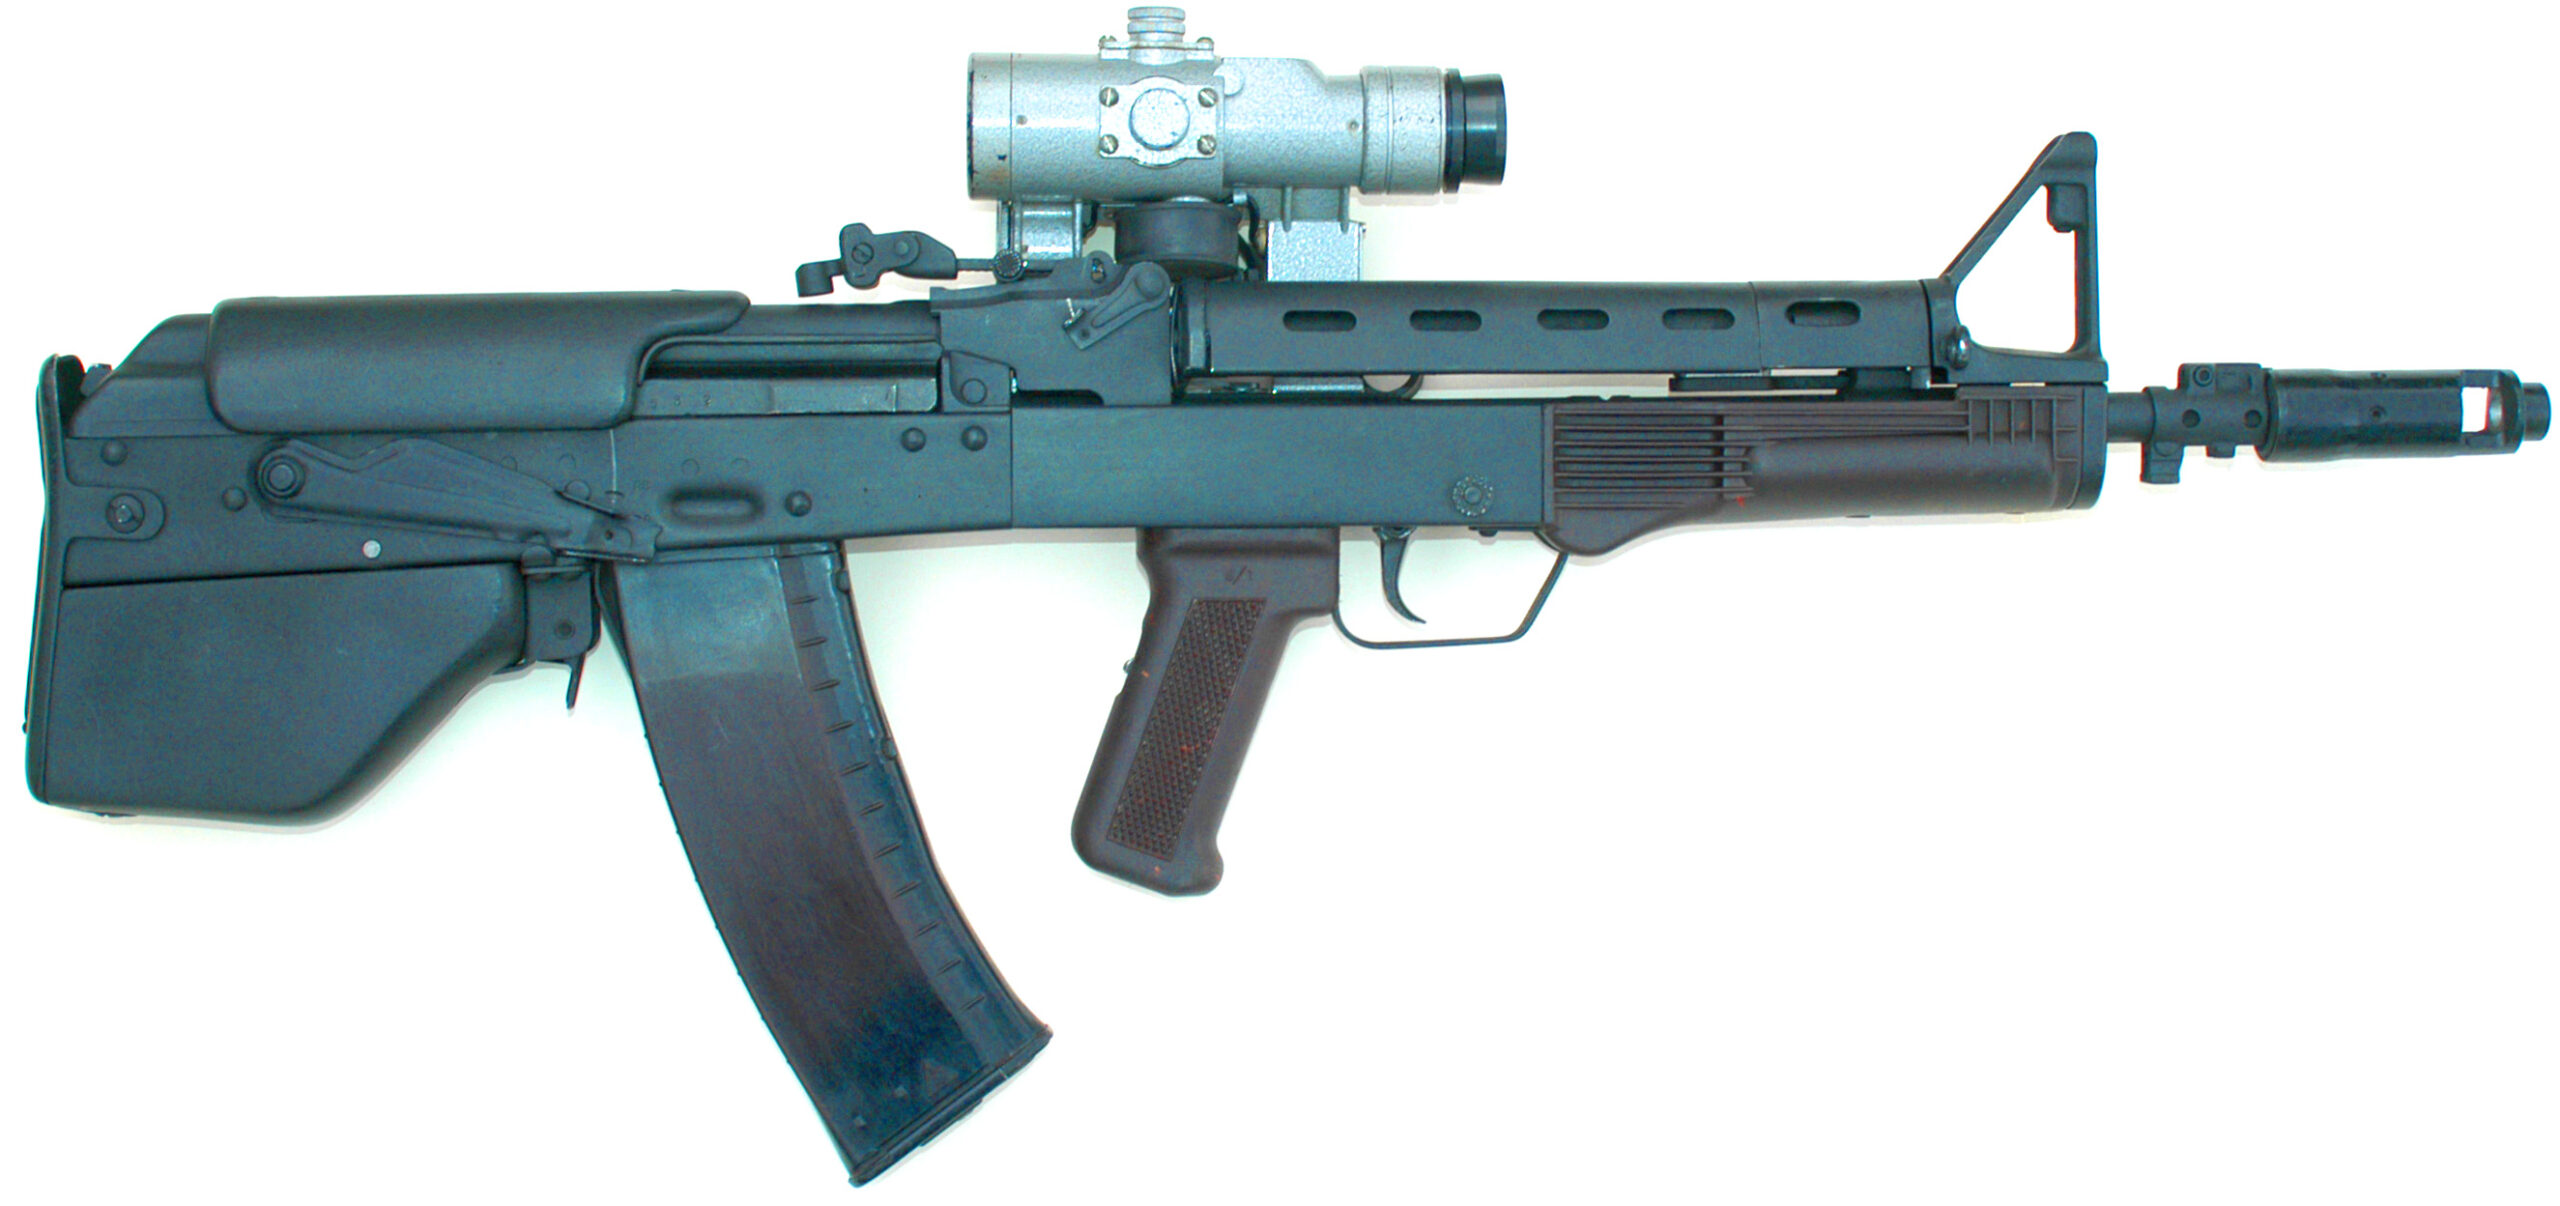
- Notes: The K-3 is a bullpup rifle based on the AKS-74U, designed for compactness.4
- Wikimedia Photo Link: (A specific Wikimedia Commons link for the Armenian K-3 was not found in the provided snippets; image search required for report inclusion if available.)
3.4. Azerbaijan
- Manufacturer(s): Ministry of Defence Industry of Azerbaijan (MODIAR).37
- Models & Details:
- Khazri: A licensed copy of the Russian AK-74M assault rifle. Caliber: 5.45x39mm. Production commenced in 2011 under a 10-year renewable license from Rosoboronexport, with a potential total production volume of up to 120,000 units for domestic use.4
- Wikimedia Photo Link: 39 A representative image of an AK-74M could be used if a specific Khazri image is unavailable.
- EM-14: An AK-101 clone. Caliber: 5.56x45mm NATO.37
- AZ-7.62: An AK-103 clone. Caliber: 7.62x39mm.37
- Notes: Azerbaijan’s production focuses on modern Kalashnikov variants for its armed forces.37
3.5. Bangladesh
- Manufacturer(s): Bangladesh Ordnance Factories (BOF).4
- Models & Details:
- Chinese Type 56: Utilized by Bangladeshi forces, likely imported or assembled locally. Caliber: 7.62x39mm.4
- BD-08: Listed as a “Similar rifle”.4 This is likely a locally produced version or derivative of the Chinese Type 81 assault rifle, as BOF manufactures the Type 81 under license.40 Caliber: 7.62x39mm.
- Production Dates/Numbers: Specific dates and numbers for local Type 56 usage or BD-08/Type 81 production are not detailed in the provided sources.
- Notes: The Type 81, while visually similar to AKs and sharing the same caliber, employs a distinct short-stroke gas piston system.41
- Wikimedia Photo Link: (For BD-08, a specific image search is required. For Type 56, see China section.)
3.6. Bulgaria
- Manufacturer(s): Arsenal AD (Kazanlak, formerly State Factory 10).4
- Models & Details (Examples):
- AKK / AKKS: Copies of the Soviet Type 3 AK-47 (milled receiver) and AKS (folding stock). Caliber: 7.62x39mm. Assembly from Soviet parts began in the early 1960s, with full licensed domestic production by the mid-1960s.4
- AK-47M1: A Type 3 AK-47 variant with black polymer furniture.4
- AR-M1 Series: A modernized derivative of the milled receiver AKK/AK-47, incorporating features from the AK-74 such as a flash suppressor and polymer stock. It is offered in both 5.56x45mm NATO and 7.62x39mm calibers. Production: 1998-present.4
- Various AKS-74U pattern carbines, such as the AKS-74UF and the AR-SF (chambered in 5.56x45mm NATO).4
- Licensed production of the AK-105 is also noted.22
- Estimated Numbers Produced: Arsenal (Factory 10) is estimated to have produced over 1,000,000 Kalashnikov-type rifles in total.15 A specific model, the SA M-7 Classic (a clone of the AK-47 Type 3 by Arsenal), had a limited run of only 243 units.28
- Notes: Bulgaria is a significant and highly regarded producer and exporter of Kalashnikov rifles. Mikhail Kalashnikov himself reportedly stated that the finest AKs were made in Bulgaria.45 The AR-M1 series is notable for retaining the durable milled receiver design.44
3.7. Cambodia
- Manufacturer(s): Not specified; likely imported rather than locally manufactured in significant numbers.4
- Models Used: Chinese Type 56, Soviet AK-47, and AKM.4
- Caliber: Primarily 7.62x39mm.
- Production Dates/Numbers: Not applicable for local production based on available information.
- Notes: Cambodia has historically relied on external sources for its Kalashnikov-pattern rifles.
- Wikimedia Photo Link: (Refer to links for Type 56 from China, AK-47 and AKM from Soviet Union/Russia sections.)
3.8. China
- Manufacturer(s): State Factory 66, Norinco (China North Industries Group Corporation), PolyTech Industries.15
- Models & Details:
- Type 56 Assault Rifle: A licensed copy of the Soviet AK-47. Early versions (from 1956) featured a milled receiver (based on AK-47 Type 3), while mid-1960s production shifted to a stamped receiver, similar to the AKM.47 Chambered in 7.62x39mm. Many Type 56 rifles are distinguished by an integral folding spike bayonet (often called a “pig sticker”).48
- Variants: Type 56-1 (copy of AKS with underfolding stock), Type 56-2 (side-folding stock), QBZ-56C (short-barreled carbine version).48
- Estimated Numbers Produced: Over 10,000,000 units.48

- Type 81 Assault Rifle: While visually resembling the AK series and chambered in 7.62x39mm, the Type 81 utilizes a distinct short-stroke gas piston operating system (similar to the SKS) and is not a direct Kalashnikov derivative.4 Production: 1983-present. Numbers: Approximately 400,000 of the basic Type 81 rifle.40 This rifle is noted as distinct due to its operating system.

- Type 84S: An AK variant chambered in 5.56x45mm NATO, visually similar to the AK-74.11
- Norinco AK-2000: A copy of the Russian AK-101.16
- CS/LR11, SDM AK-103: Clones of the Russian AK-103.18
- Notes: China has been one of the largest producers and exporters of Kalashnikov-type rifles globally, with its Type 56 being particularly widespread.
3.9. Croatia
- Manufacturer(s): Končar-Arma d.o.o (a subsidiary of ARMA-GRUPA Corporation).4
- Model: APS-95
- Caliber: 5.56x45mm NATO.51
- Production Dates: Designed in 1993, produced from 1993/1995 until at least 2007.4
- Estimated Numbers Produced: Produced in small quantities; large-scale procurement was halted due to budgetary constraints.51 One source mentions “a little over 1000” for a different rifle (Argentine FARA 83) in a similar limited production context, but this is not a direct figure for the APS-95.34
- Notes: The APS-95 was developed based on the South African Vektor R4 (itself a Galil derivative, thus tracing lineage to the Kalashnikov via the Finnish RK 62). It features a stamped receiver (unlike the milled receiver Galil/R4), an integrated 1.5x optical sight in the carrying handle, and a distinctive handguard and front sight assembly.51
3.10. Cuba
- Manufacturer(s): Unión de Industrias Militares (UIM) is the state entity responsible for military production.4
- Model(s): Copies or derivatives of the AKM.4 Specific Cuban model designations are not widely publicized.
- Caliber: Primarily 7.62x39mm.
- Production Dates/Numbers: Details regarding the start dates, production volume, or specific factories involved in Cuban AKM production are not specified in the provided materials.53 Cuba was a known recipient of Soviet arms and also played a role in the supply chain for other groups in Latin America.54
- Notes: Cuba has a long history of utilizing Kalashnikov-pattern rifles.
- Wikimedia Photo Link: (Specific images of Cuban-manufactured AKM variants are not readily available in the snippets; a general AKM image may be used as a placeholder if necessary, noting the Cuban context.)
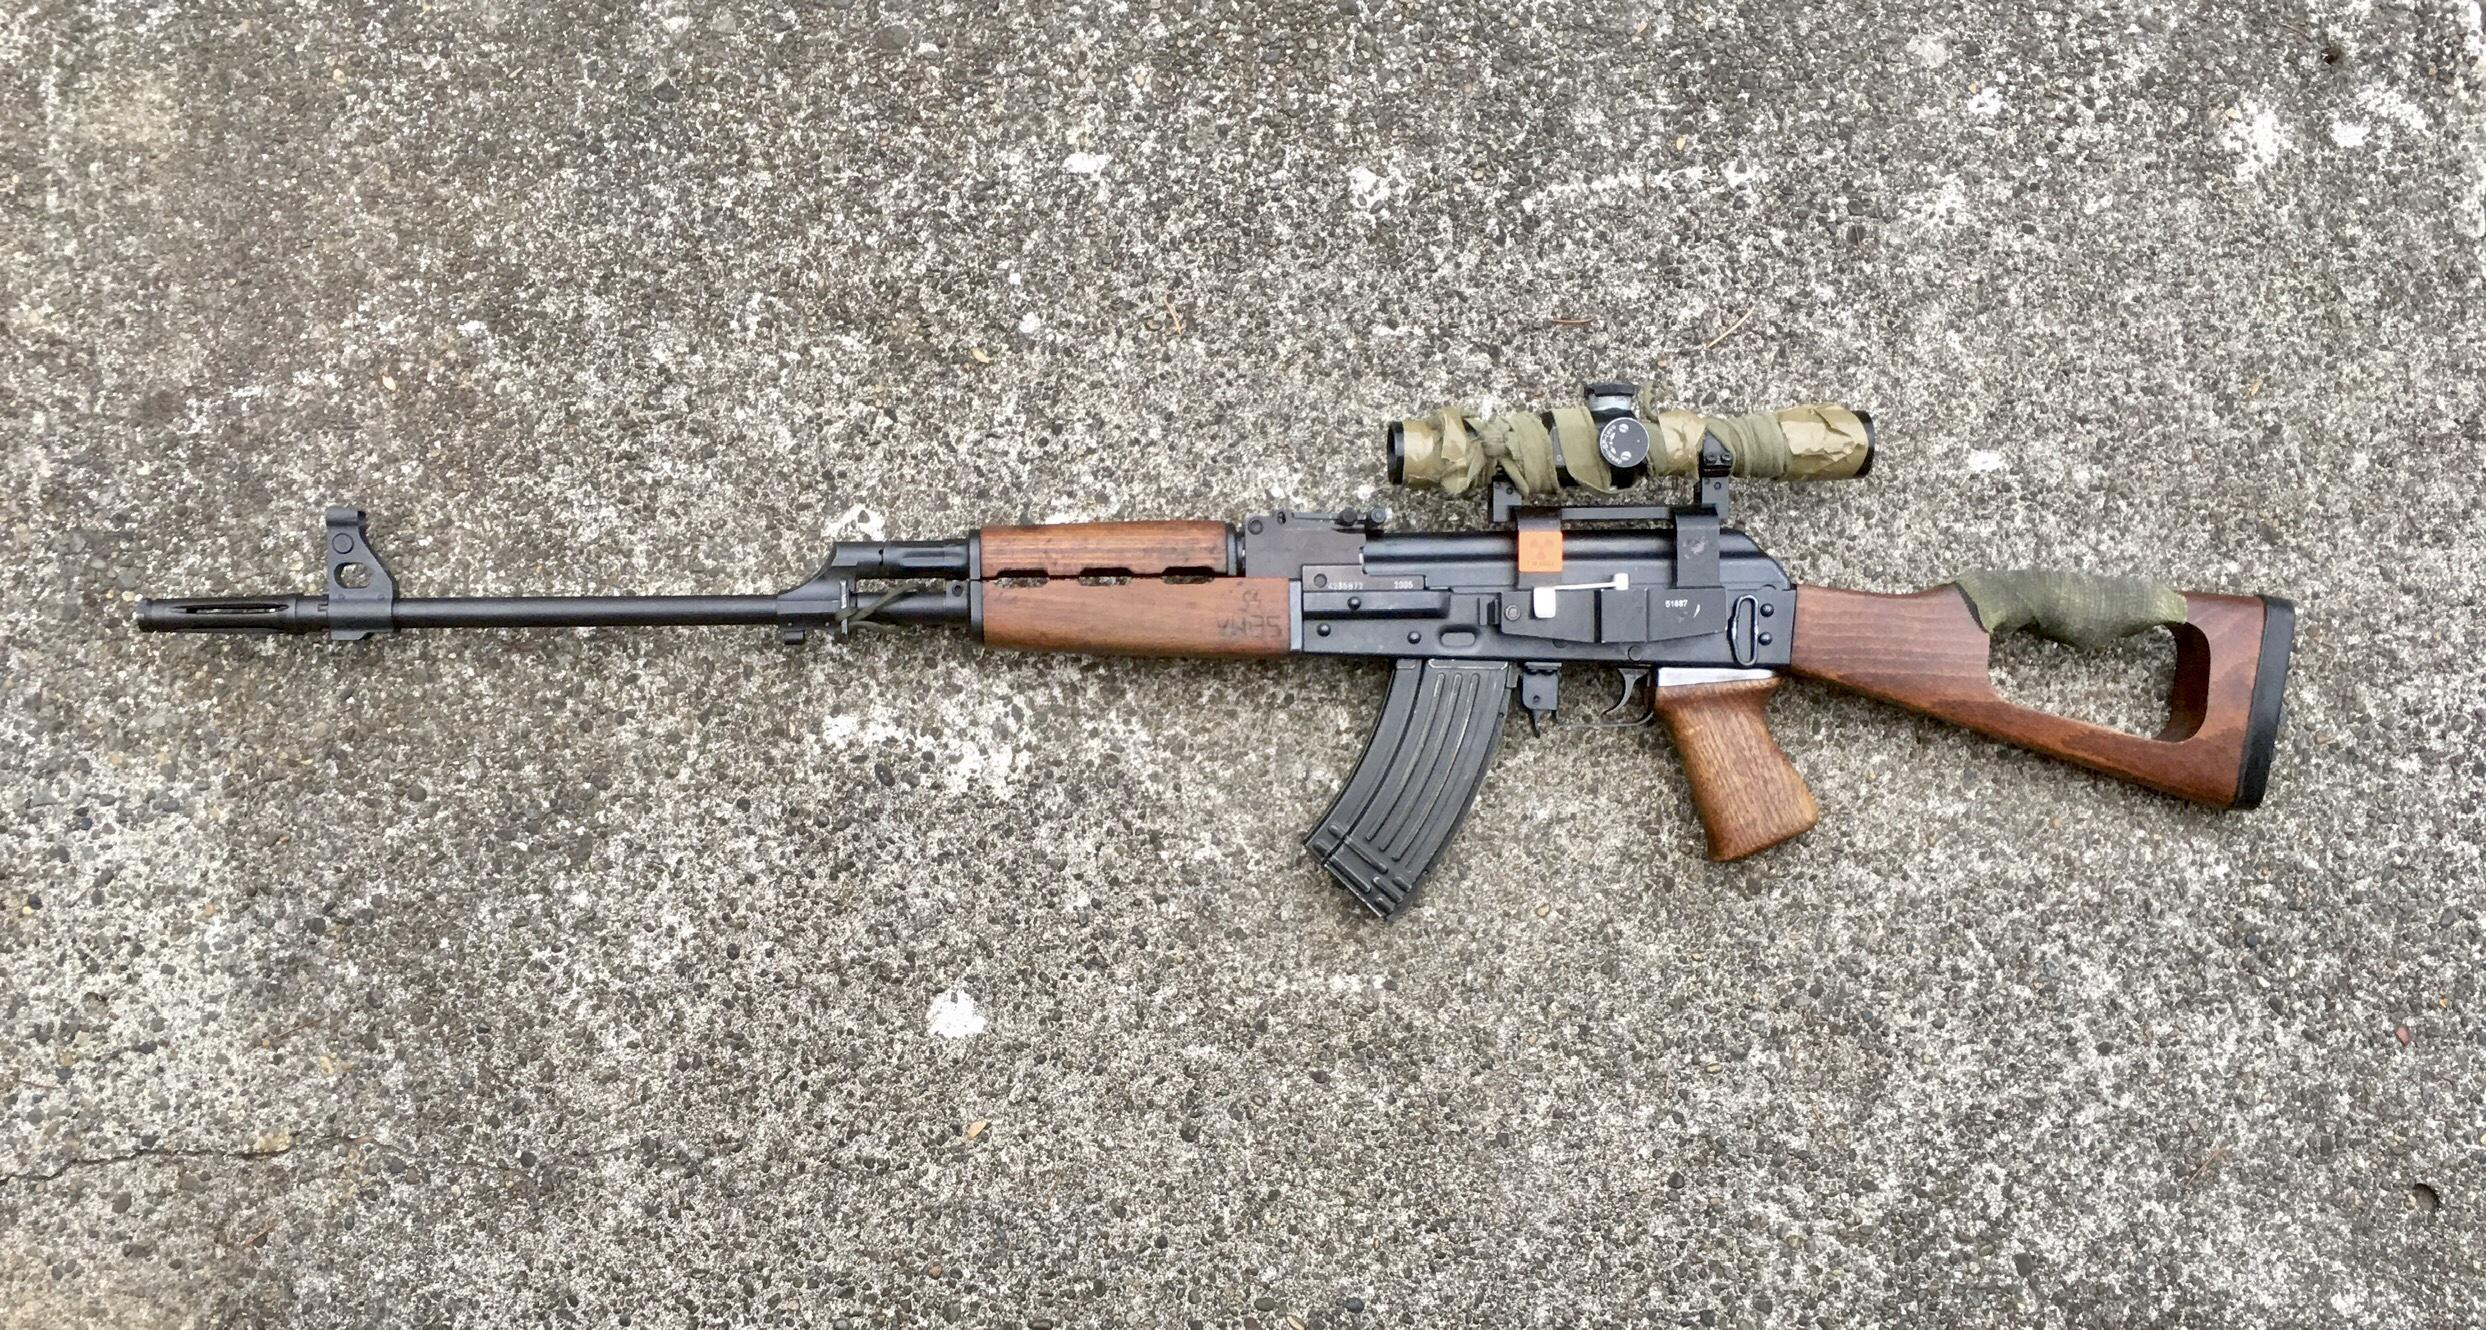
3.11. Czechoslovakia (Now Czech Republic & Slovakia)
- Model: Vz. 58 (Samopal vzor 58)
- Caliber: 7.62x39mm.4
- Notes: The Vz. 58 is often mistaken for a Kalashnikov variant due to its external resemblance and shared cartridge. However, it employs a significantly different operating mechanism: a short-stroke gas piston and a striker-fired mechanism, as opposed to the Kalashnikov’s long-stroke piston and rotating hammer.4 Its parts are not interchangeable with AK-pattern rifles.56 Therefore, it is not a Kalashnikov-inspired design in terms of its core operating system and will be noted as such in the summary table.

3.12. East Germany (German Democratic Republic)
- Manufacturer(s): VEB Geräte- und Sonderwerkzeugbau Wiesa (GSW); Volkseigener Betrieb Fahrzeug- und Jagdwaffenfabrik “Ernst Thälmann” Suhl.15
- Models & Details:
- MPi-K / MPi-KS: Licensed copies of the Soviet AK-47 and AKS (folding stock), respectively. Caliber: 7.62x39mm. Production began around 1957-1959 and continued into the mid-1960s.4
- MPi-KM: A licensed copy of the Soviet AKM, featuring a stamped receiver and often distinctive plastic furniture (buttstock, pistol grip, handguards) with a “pebble” or “dimpled” texture. Caliber: 7.62x39mm. Production: Circa 1966 into the 1980s.4
- MPi-KMS-72: A version of the MPi-KM with a side-folding wire stock.4
- MPi-AK-74N: A licensed copy of the Soviet AK-74. Caliber: 5.45x39mm. Production: 1983-1990.4
- MPi-AKS-74N: Side-folding stock version of the MPi-AK-74N.4
- MPi-AKS-74NK: Carbine version of the MPi-AKS-74N.4
- Estimated Numbers Produced: Nearly 4 million MPi series rifles in total were produced by East Germany.60 Other estimates suggest 2 million from the Wiesa factory alone 15, or 3-4 million MPi-K/MPi-KM rifles.58 Initial production was slow; the 1958 target of 30,000 rifles took nearly three years to achieve.60
- Notes: East Germany was a significant producer and exporter of Kalashnikov rifles. Production ceased with the reunification of Germany in 1990.60
3.13. Egypt
- Manufacturer(s): Maadi Company for Engineering Industries (Factory 54).2
- Models & Details:
- AK-47 copies: Egypt began producing AK-47 pattern rifles from 1958 onwards.4
- Misr: An AKM copy. Caliber: 7.62x39mm.4
- Maadi ARM: An AKM copy, often seen with a distinctive laminated wood stock and pistol grip. Caliber: 7.62x39mm.
- Other Maadi variants include rifles resembling the RPK (long barrel).
- Production Dates: AK-47/AKM type production commenced in 1958.15 Semi-automatic “MISR S/A” rifles imported into the US bear manufacture dates from the late 1990s (e.g., 1997-1999).65
- Estimated Numbers Produced: Not specified in the provided sources. The Maadi factory also produced around 70,000 Hakim rifles (a different Swedish-designed system) in the 1950s-60s.64
- Notes: Egyptian Maadi rifles are well-known among collectors, particularly in the United States.
3.14. Ethiopia
- Manufacturer(s): Gafat Armament Engineering Complex (GAEC), part of the Metals and Engineering Corporation (METEC).4
- Models & Details:
- AK-47 copies: GAEC initially produced AK-47 automatic rifles after its establishment in January 1986.67 Caliber: 7.62x39mm.
- Et-97/1: This is the local designation for the AK-103 assault rifle, produced under license. Caliber: 7.62x39mm.4
- Production Dates: GAEC began AK-47 production in 1986.67 Licensed production of the AK-103 is ongoing.14
- Estimated Numbers Produced: Not specified.
- Notes: There are reports suggesting North Korean advisors assisted Ethiopia with establishing its small arms manufacturing capabilities.67
3.15. Finland
- Manufacturer(s): Valmet; SAKO.2
- Models & Details:
- RK 60 (Rynnäkkökivääri 60): The initial version of the Finnish Kalashnikov derivative, produced in 1960. It was internally almost a copy of the AK-47 but featured a metallic buttstock, plastic handguard and pistol grip, and notably lacked a trigger guard for easier use with winter mittens.68 Caliber: 7.62x39mm.
- RK 62 (Valmet M62): The main production model, designed between 1957-1962 and produced from 1965 to 1994. It is a highly regarded AK-47 derivative known for its quality and accuracy, featuring a milled receiver, distinctive tubular stock on early models (later polymer), unique front sight/gas block combination, and aperture rear sight on the receiver cover.2 Caliber: 7.62x39mm.
- Estimated Numbers Produced: Over 350,000 units of the M62 (RK 62) were jointly manufactured by Valmet and Sako.68
- Valmet M76 (RK 62 76): A version of the RK 62 with a stamped receiver, produced in both 7.62x39mm and 5.56x45mm NATO calibers.4
- Valmet M78: A light machine gun variant based on the RK 62 design.4
- RK 95 TP (Sako M95): A further modernized version of the RK 62, featuring a side-folding stock and other improvements. Caliber: 7.62x39mm. Approximately 20,000 were made.4
- Notes: Finnish Kalashnikov derivatives are renowned for their high manufacturing quality and design improvements over the basic Soviet models. The RK 62 notably served as the design basis for the Israeli Galil assault rifle.69
3.16. Hungary
- Manufacturer(s): Fegyver- és Gépgyár (FÉG).4
- Models & Details:
- AK-55: A domestic copy of the Soviet 2nd Model AK-47 (milled receiver). Caliber: 7.62x39mm. Production started around 1956.4
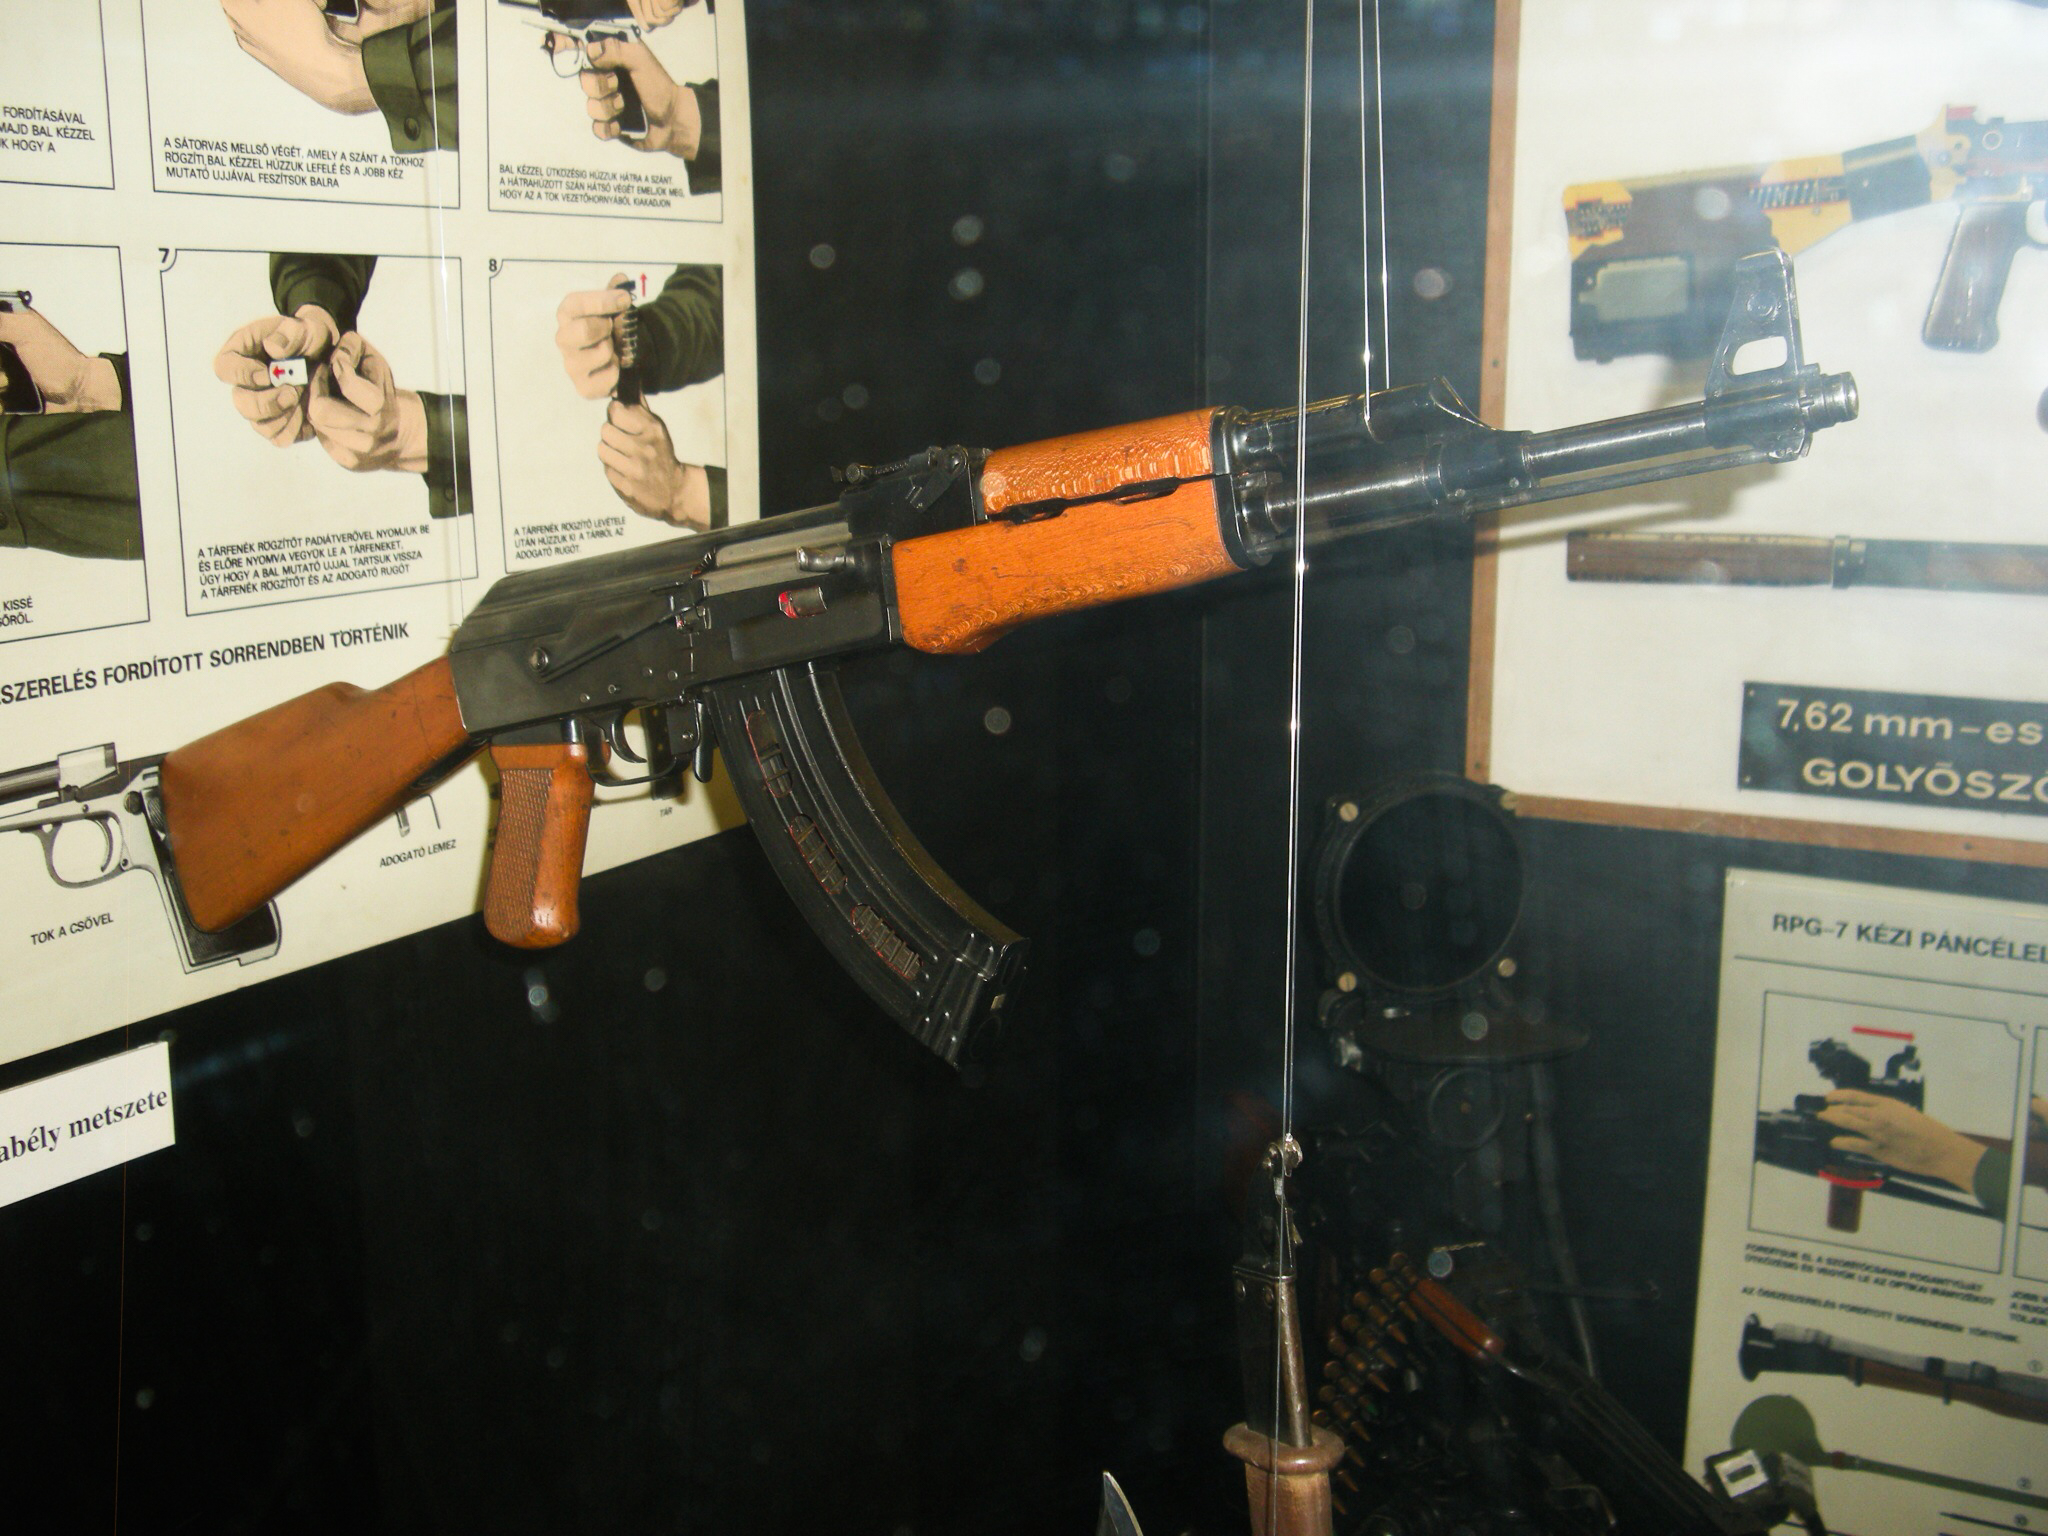
- AKM-63 (AMD-63 in the US market): A modernized version of the AK-55, featuring a distinctive sheet metal handguard with an integrated forward pistol grip, and a fixed wooden stock. Caliber: 7.62x39mm. Production estimated from circa 1963 to 2000.4
- AMD-65M (Automata Módosított Deszantfegyver): A shorter-barreled version of the AKM-63 designed for paratroopers and armored vehicle crews, featuring a side-folding single-strut stock and often a shorter 20-round magazine. Caliber: 7.62x39mm. Production: 1965-1980.4 “Tens of thousands” were produced.73

- AK-63F / AK-63D (Military designations AMM / AMMSz): These models are closer copies of the Soviet AKM and AKMS (stamped receiver), featuring traditional wooden or later polymer furniture, but often retaining the straight pistol grip of the AKM-63. Caliber: 7.62x39mm. Production: 1977–2001.4 Approximately 7,700 AK-63s were modernized to the AK-63MF standard for the Hungarian Armed Forces.72 Around 7,000 semi-automatic SA-85M versions were imported into the US before the 1989 import ban.72
- NGM-81: An export version chambered in 5.56x45mm NATO.4
- Estimated Numbers Produced: Specific overall numbers for FÉG’s AK production are not available in 15 (“N/A”). However, “tens of thousands” of AMD-65s were made 73, and around 11,000 AK-63s were reportedly exported to Central America during the 1980s.72
- Notes: Hungarian Kalashnikovs often feature unique ergonomic (or not so ergonomic_ and design choices, particularly the early models like the AKM-63 and AMD-65.
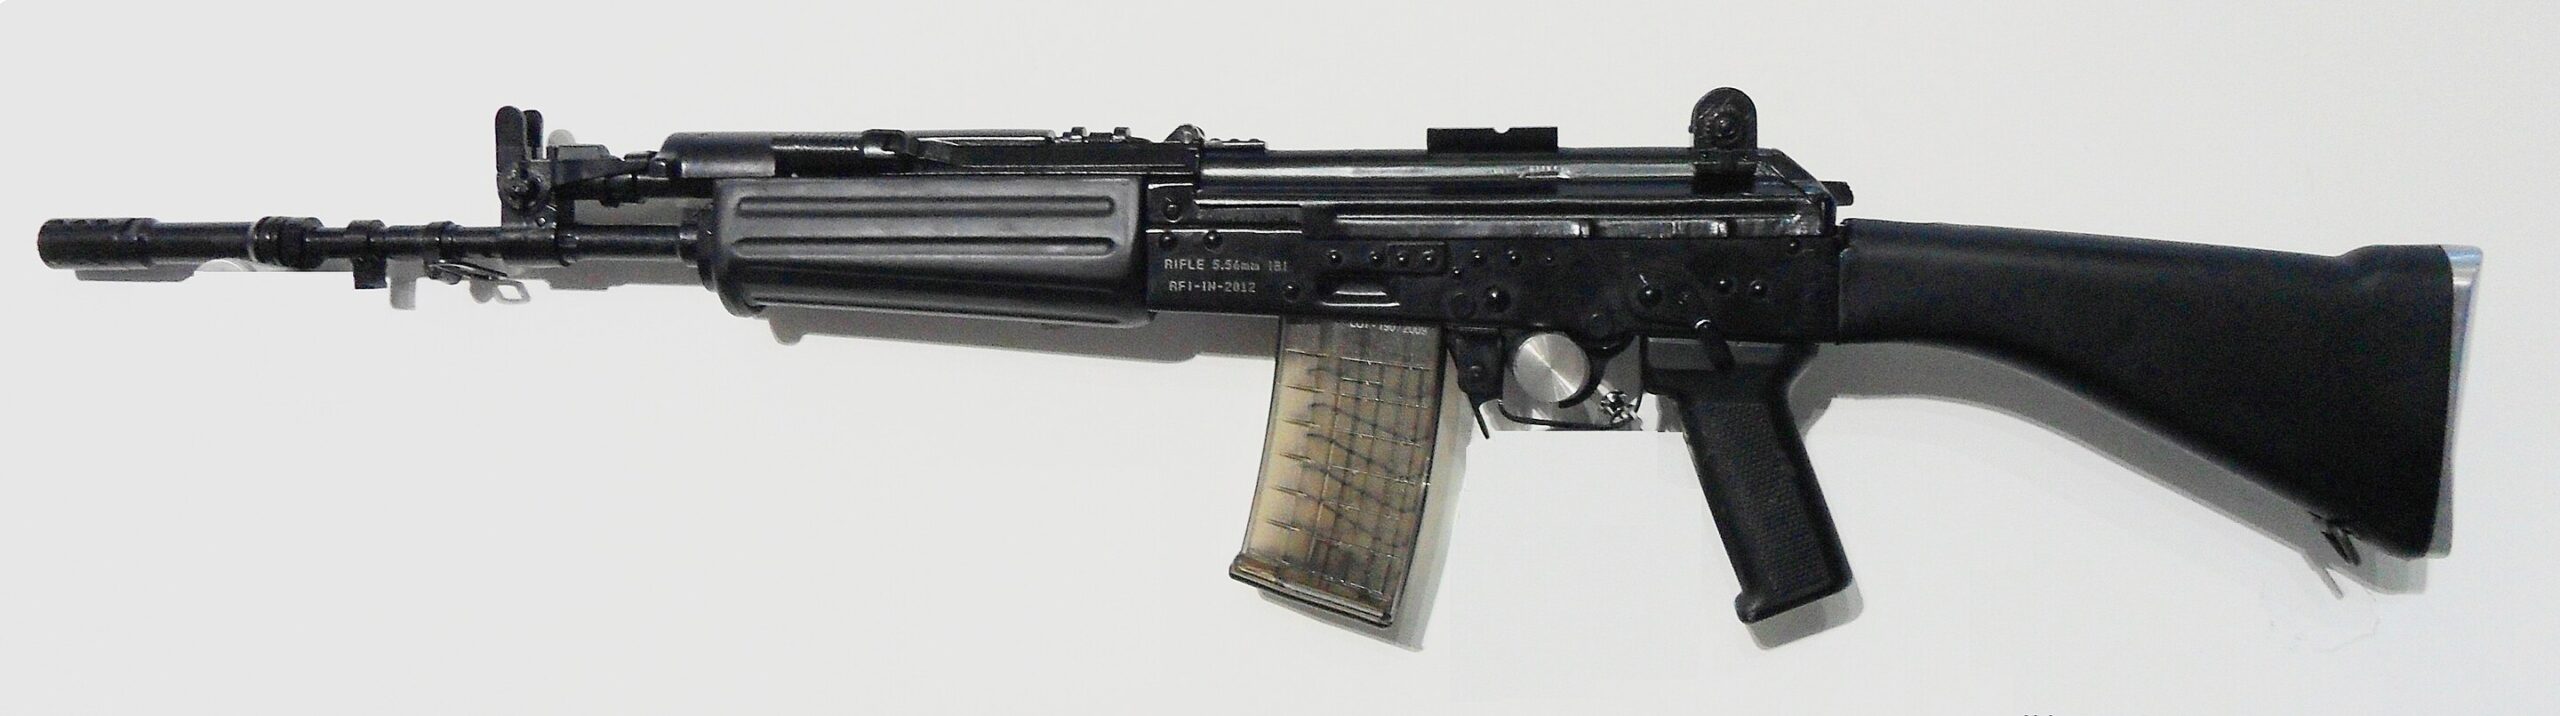
3.17. India
- Manufacturer(s): Ordnance Factories Board (OFB); Armament Research and Development Establishment (ARDE) for design; Indo-Russia Rifles Private Limited (IRRPL) for AK-203 production.2
- Models & Details:
- INSAS (Indian Small Arms System) Rifle: While incorporating features from other rifles, the INSAS is primarily based on the Kalashnikov (AKM) operating system, utilizing a long-stroke gas piston and rotating bolt.78 Caliber: 5.56x45mm NATO. Development began in the mid-1980s, it entered service in 1990, with mass production starting in 1997.4 The rifle has faced criticism for reliability issues, particularly in extreme conditions.79 Design influences include the Galil and, at least indirectly, the Valmet RK 62..
- AK-103: India has arranged for licensed production of the AK-103.13
- AK-203: A significant contract was signed for the licensed production of over 600,000 AK-203 rifles in India by IRRPL, a joint venture between Indian OFB and Russian Kalashnikov Concern. An additional 70,000 rifles were to be imported directly from Russia.13 Caliber: 7.62x39mm.
- Trichy Assault Rifle: An Indian-produced clone of the Bulgarian AR-M1 series (itself an AK derivative).44
- Notes: India’s adoption of the INSAS marked a move to a NATO standard caliber, though its performance has been controversial. The recent large-scale adoption and licensed production of the AK-203 indicates a renewed reliance on the Kalashnikov platform.
3.18. Iran
- Manufacturer(s): Defense Industries Organization (DIO).80
- Models & Details:
- KLS: A copy of the AK-47/AKM with a fixed wooden stock. Caliber: 7.62x39mm.4
- KLF: A copy of the AKS/AKMS with an underfolding metal stock. Caliber: 7.62x39mm.4
- KLT: A copy of the AKMS with a side-folding metal stock. Caliber: 7.62x39mm.4
- AK-103 copies: Iran produces licensed versions designated AK-133 and unlicensed copies called KL-133. Additionally, some AK-103s were directly imported from Russia.13
- Production Dates/Numbers: Specific production dates and quantities for the KLS/KLF/KLT series are not detailed, though these rifles typically feature seven-digit serial numbers.80
- Notes: Iranian Kalashnikov variants are often based on Soviet and Chinese models.
3.19. Iraq
- Manufacturer(s): Al-Qadissiya Establishments.4
- Models & Details:
- Tabuk Sniper Rifle: A designated marksman rifle (DMR) chambered in 7.62x39mm. It is a modified version of the Yugoslav Zastava M76 sniper rifle, which itself is an AK-pattern derivative. The Tabuk features a longer barrel than a standard AKM and is designed for semi-automatic fire only.4
- Tabuk Assault Rifle: These are direct clones of the Yugoslavian Zastava M70 series of assault rifles (which are AKM derivatives), available with fixed or underfolding stocks. Caliber: 7.62x39mm.4
- Production Dates: Production of the Tabuk Sniper Rifle began in 1978 and is reported as ongoing.84 The Tabuk Assault Rifles (M70 clones) were produced from 1978 into the 1990s.83
- Estimated Numbers Produced: Not specified.
- Notes: The machinery and technical assistance for establishing Iraqi Kalashnikov production were provided by Zastava Arms of Yugoslavia.84
3.20. Israel
- Manufacturer(s): Israel Military Industries (IMI), later privatized as Israel Weapon Industries (IWI).2
- Models & Details:
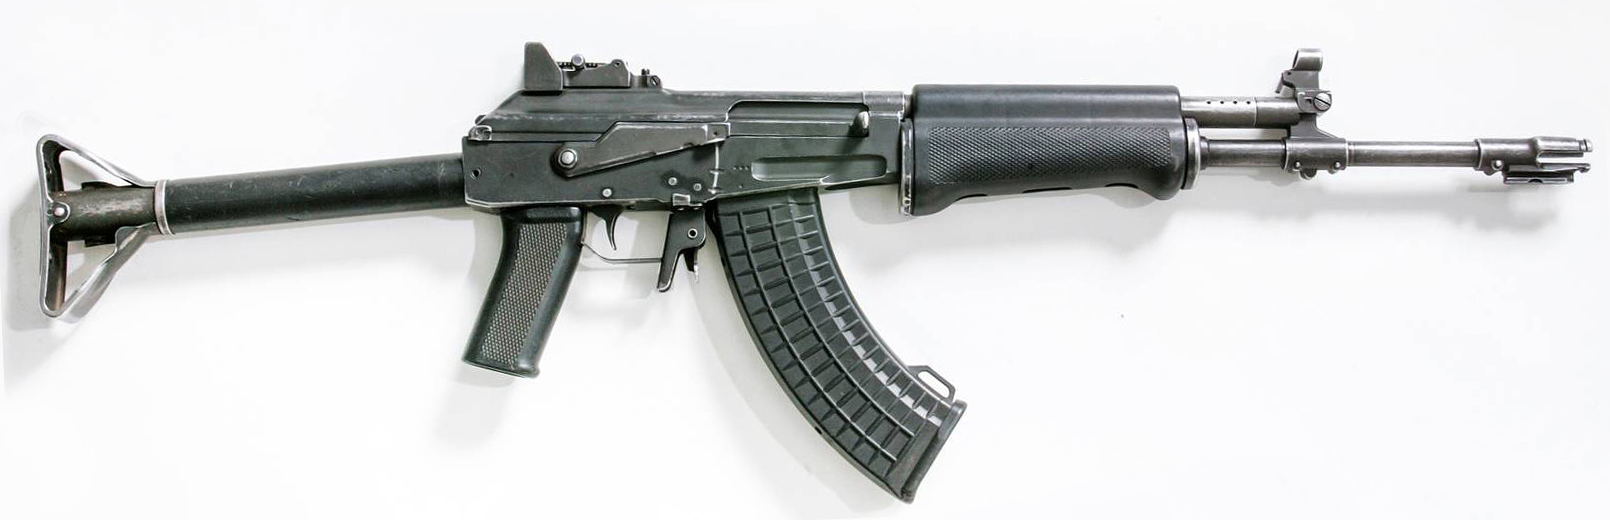
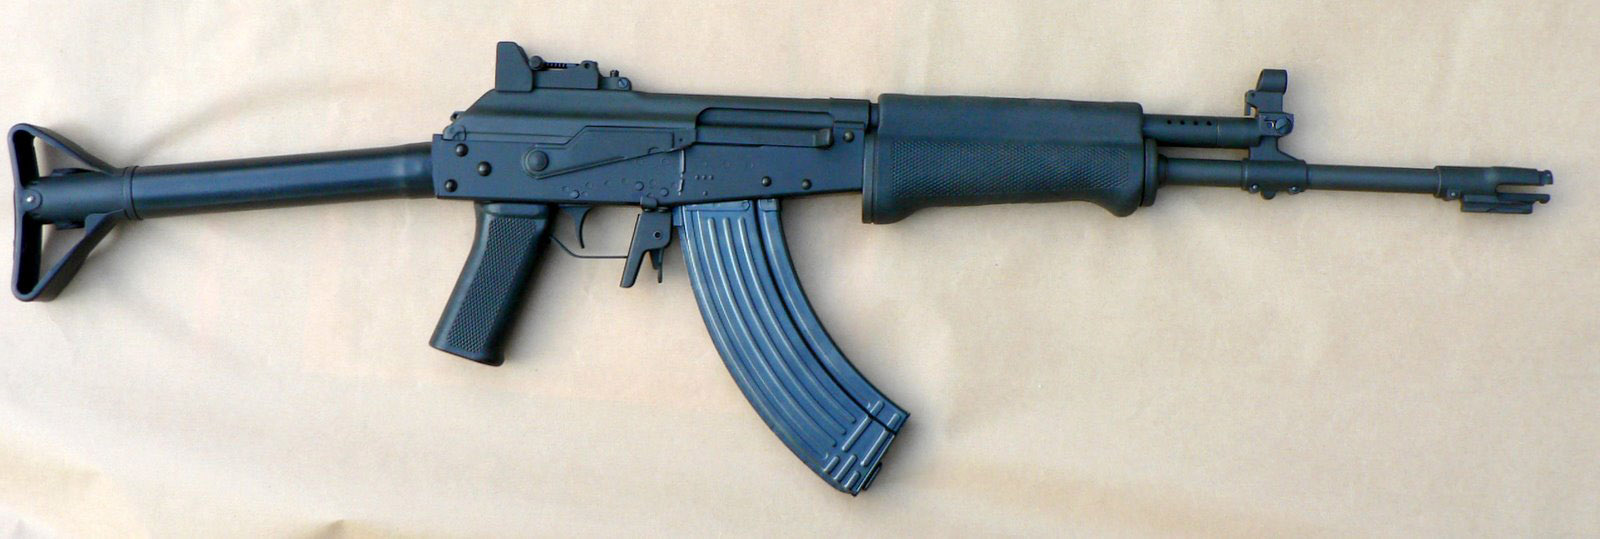
- IMI Galil: An assault rifle family developed in the late 1960s and adopted in 1972. The Galil’s design is heavily based on the Finnish RK 62 (Valmet M62), which is a high-quality AK-47 derivative. The first Galils were even manufactured using Valmet Rk 62 receivers.69 It features the Kalashnikov long-stroke gas piston system.86
- Calibers: Primarily 5.56x45mm NATO and 7.62x51mm NATO.70
- Production: IMI produced the Galil from 1972 to 1998; IWI continues to export and develop versions.70
- Variants: ARM (Automatic Rifle Machine-gun, with bipod and carry handle), AR (Automatic Rifle), SAR (Short Automatic Rifle).70
- IWI Galil ACE: A modernized and redesigned version of the Galil, introduced in 2008. It retains the core Galil/Kalashnikov mechanism but incorporates modern materials, Picatinny rails, and improved ergonomics.4
- Calibers: 5.45x39mm, 5.56x45mm NATO, 7.62x39mm, and 7.62x51mm NATO.87
- Estimated Numbers Produced: Specific numbers for the original Galil are not provided. The Galil ACE production is ongoing.
- Notes: The Galil is a highly respected Kalashnikov derivative, known for its reliability, particularly in harsh desert environments, and improved ergonomics over basic AK models. It has been licensed for production to several other countries, including Italy, Colombia, South Africa (as the R4), and Vietnam.85

3.21. Italy
- Manufacturer(s): Vincenzo Bernardelli S.p.A..4
- Models: Bernardelli VB-STD / VB-SR
- Caliber: Likely 5.56x45mm NATO, as Bernardelli produced the IMI Galil (which was available in this caliber) under license.86
- Production Dates/Numbers: Not specified in the provided materials.
- Notes: The Bernardelli VB-STD and VB-SR are listed as “similar rifles” to the Kalashnikov family.4 Given that Bernardelli held a license to produce the Israeli Galil 86, these models are almost certainly Galil derivatives, and therefore share the Kalashnikov-derived operating mechanism. The VB-SR is specifically noted as a modified Galil.
3.22. Nigeria
- Manufacturer(s): Defence Industries Corporation of Nigeria (DICON).4
- Models & Details:
- OBJ-006: A Nigerian copy of the AK-47 assault rifle. Caliber: 7.62x39mm. Production began in 2006.4
- Licensed Polish Beryl: DICON has acquired rights to manufacture a copy of the Polish FB Kbs wz. 1996 Beryl assault rifle.90 Caliber: 5.56x45mm NATO.
- Production Dates/Numbers: OBJ-006 production started in 2006; specific numbers are not available. Timelines and quantities for the Beryl production are also not specified. DICON has partnered with a firm called D7G to enhance local defense production, including establishing AK-47 assembly lines.89
- Notes: Nigeria is working to increase its indigenous small arms manufacturing capacity.
- Wikimedia Photo Link (OBJ-006): 93
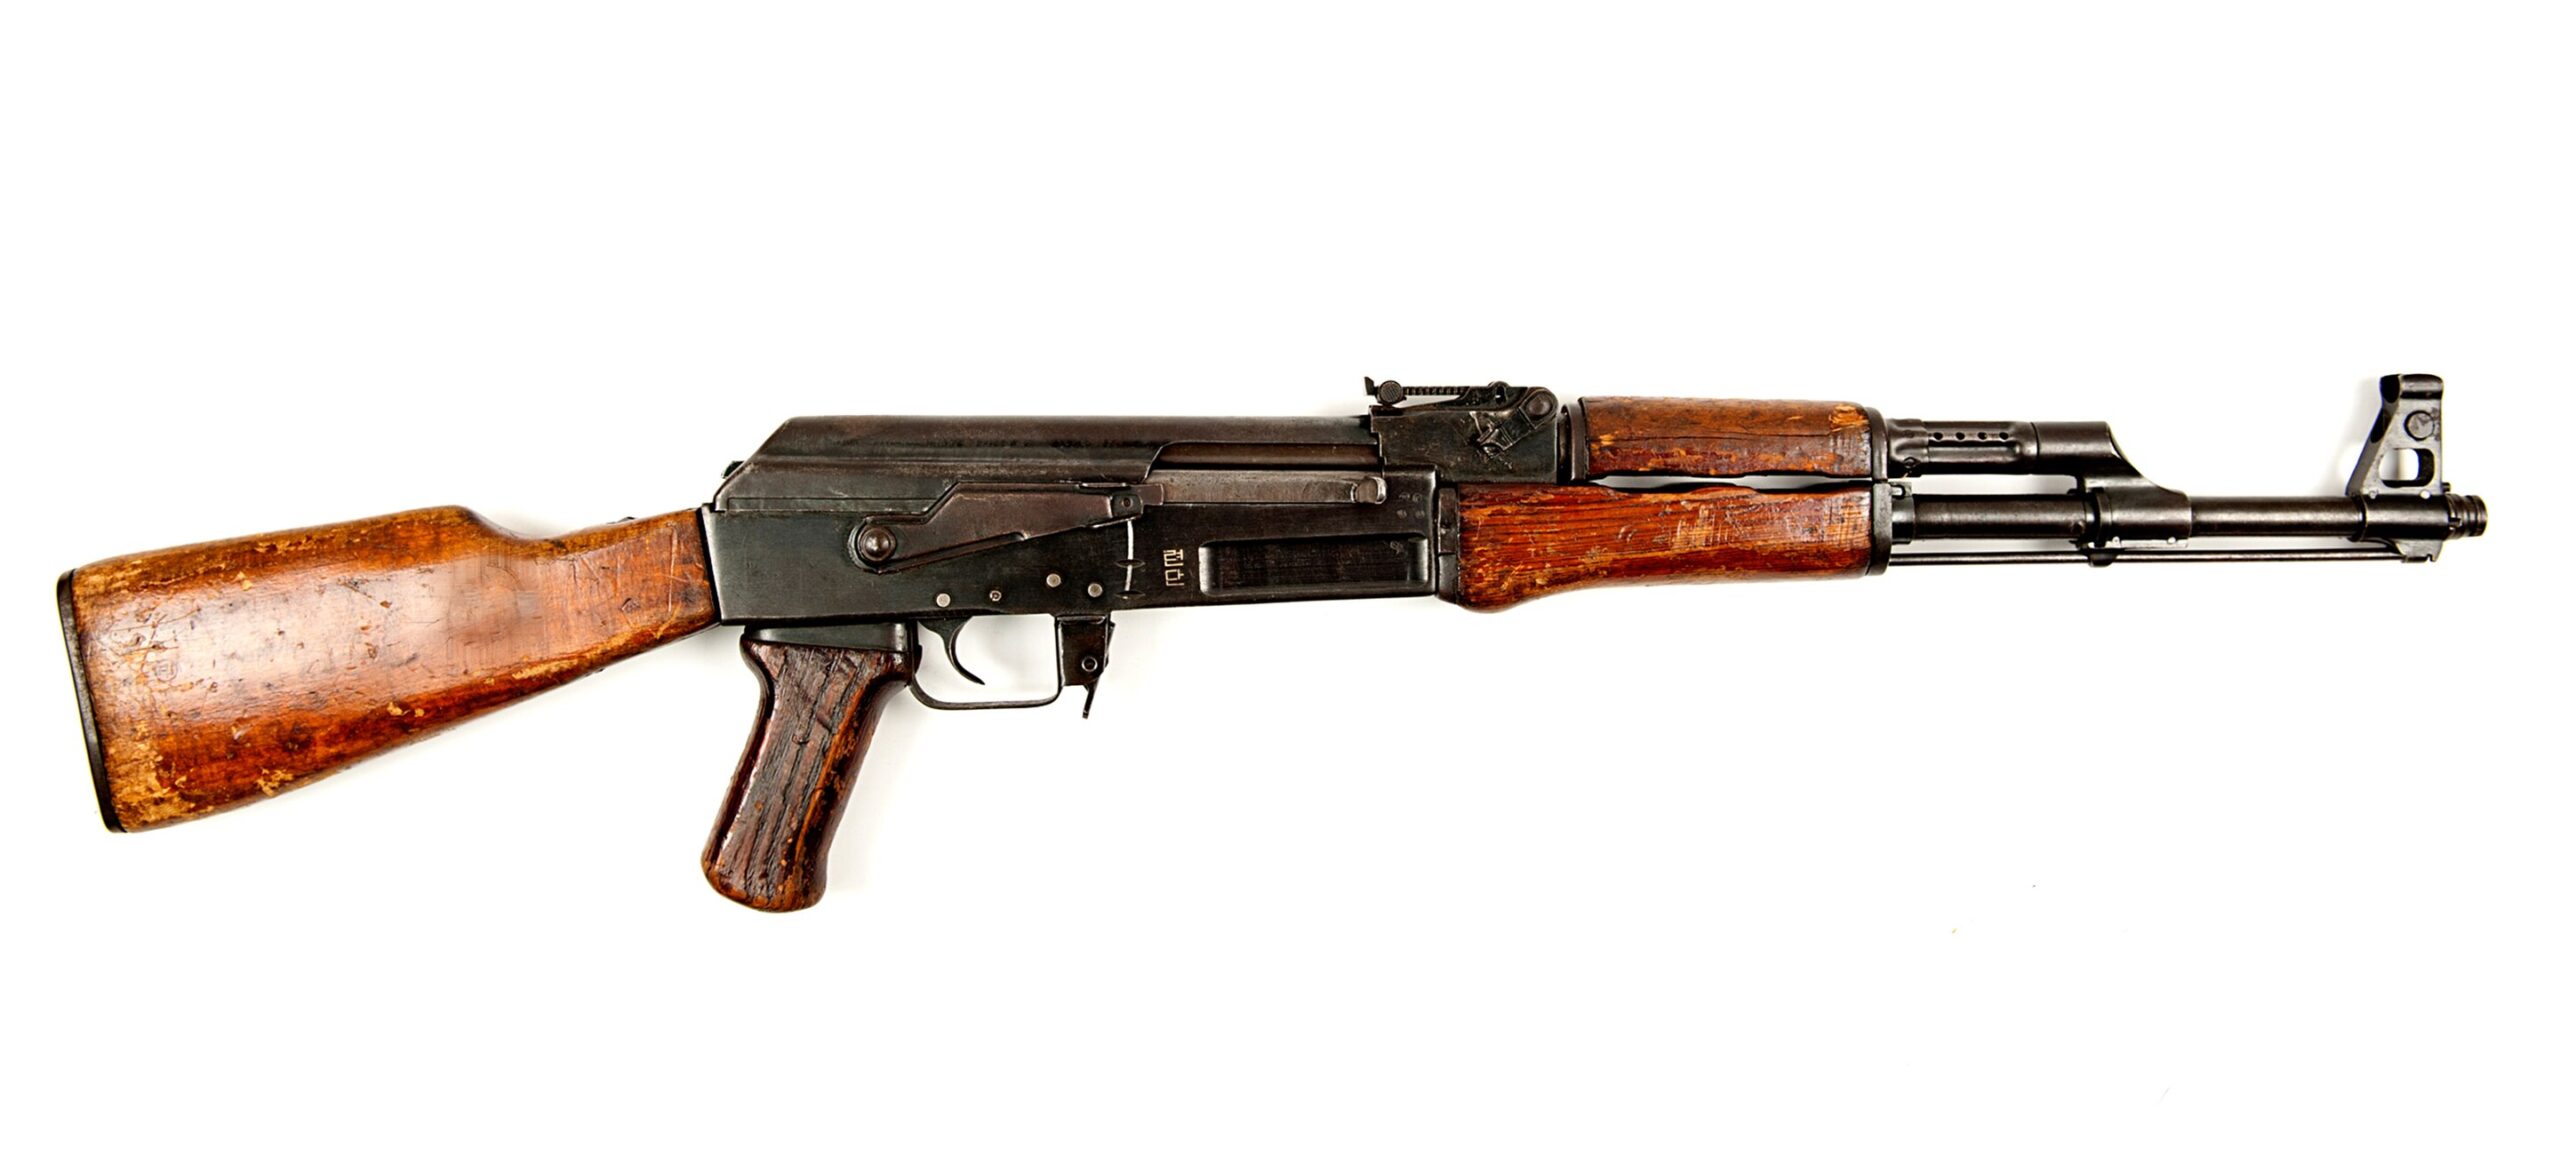
3.23. North Korea
- Manufacturer(s): State Arsenals, including Factory 61 and Factory 65 in Chongjin.4
- Models & Details:
- Type 58 (A/B): A direct copy of the Soviet AK-47, specifically the Type 3 with a milled receiver. The Type 58A is the fixed-stock version, and the Type 58B (or Type 58-1) is the underfolding stock version (AKS equivalent).4 Caliber: 7.62x39mm. Production: 1958–1968.94
- Estimated Numbers Produced: Approximately 800,000 units.94
- Type 68 (A/B): A copy of the Soviet AKM (stamped receiver) and AKMS (stamped receiver, underfolding stock). Caliber: 7.62x39mm. Production began in 1968 to replace the more time-consuming Type 58.4 The Type 68-1 features a weight-reducing holed underfolding stock.94
- Type 88: A copy of the Soviet AK-74 (primarily AKS-74 with side-folding stock). Caliber: 5.45x39mm.4 The Type 88 carbine is noted as a localized copy of the AK-105.23
- Notes: Initial North Korean production of the Type 58 utilized Soviet-supplied components before transitioning to fully domestic parts.94 North Korean Kalashnikovs have been exported to various countries and non-state actors.94 Identifying marks include a five-point star in a circle and model designations in Hangul script.94
3.24. Pakistan
- Manufacturer(s): Pakistan Ordnance Factories (POF) for some models; numerous small workshops in the Khyber Pass region for unlicensed copies.4
- Models & Details:
- Khyber Pass Copies: A general term for a wide variety of often crudely made, unlicensed copies of Kalashnikov assault rifles (AK-47, AKM, and others). Quality and specifications can vary significantly. Caliber: Typically 7.62x39mm.4
- POF PK-10: Listed as a POF product.4 Specific details are sparse in the provided material.
- POF PK-21: An unlicensed clone of the Russian AK-103, manufactured by Pakistan Ordnance Factories.18 Caliber: 7.62x39mm.
- Production Dates/Numbers: Production of Khyber Pass copies has been ongoing for decades and is decentralized, making numbers impossible to track. Specific production dates and numbers for POF’s PK-10 and PK-21 are not detailed.
- Notes: The Khyber Pass region is notorious for its artisanal firearms production, including many Kalashnikov variants. POF produces a range of military hardware under license and develops indigenous designs.
- Wikimedia Photo Link: (No specific links for PK-10/PK-21 found. Khyber Pass copies are too varied for a single representative image. An image of a POF-produced rifle would require a specific search.)
3.25. Poland
- Manufacturer(s): Łucznik Arms Factory (Fabryka Broni “Łucznik” – Radom), formerly Factory 11.4
- Models & Details:
- pmK (kbk AK) / pmKS (kbk AKS): Licensed copies of the Soviet AK-47 and AKS (folding stock). Caliber: 7.62x39mm. Production started in 1957.4
- kbk AKM / kbk AKMS: Licensed copies of the Soviet AKM and AKMS. Caliber: 7.62x39mm. Production: Circa 1965 until 1992, with a short additional run in 2000 primarily from leftover parts.4
- kbk wz. 1988 Tantal: An assault rifle chambered in 5.45x39mm, based on the AK-74 but with distinct Polish design features, such as a unique fire selector mechanism allowing for semi-auto, full-auto, and 3-round burst fire, and a side-folding wire stock. Production: 1989–1994.4
- Estimated Numbers Produced: Approximately 25,000 units.100
- skbk wz. 1989 Onyks: A compact carbine version of the Tantal.4
- kbs wz. 1996 Beryl: An assault rifle chambered in 5.56x45mm NATO, developed to meet NATO standards and replace the Tantal. Production: 1997–present.4
- kbk wz. 1996 Mini-Beryl: A compact carbine version of the Beryl.4
- Estimated Numbers Produced: For the Tantal, around 25,000 units.100 The Radom factory had a capacity of 70,000 rifles per year in the late 1980s/early 1990s.99
- Notes: Polish Kalashnikov derivatives are generally well-regarded. The Tantal and Beryl represent significant indigenous developments on the Kalashnikov platform.
3.26. Romania
- Manufacturer(s): Cugir Arms Factory (now part of ROMARM), with some limited production outsourced to Uzina Mecanica Sadu.4
- Models & Details:
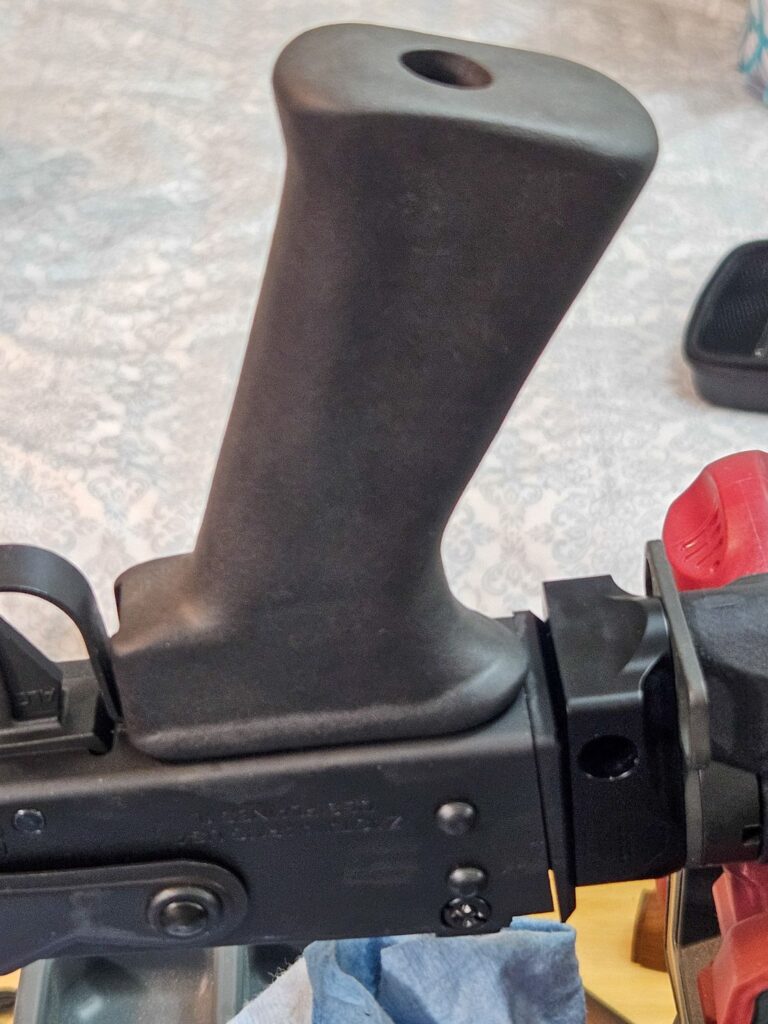
- PM md. 63 (Pistol Mitralieră model 1963): A licensed copy of the Soviet AKM. A distinctive feature of many md. 63 rifles is a forward-pointing laminated wooden vertical foregrip integrated into the lower handguard. Caliber: 7.62x39mm. Production: 1963–present.4
- PM md. 65 (Pistol Mitralieră model 1965): The underfolding stock version, equivalent to the AKMS. To accommodate the folding stock, the vertical foregrip, if present, is often canted rearwards or is absent on some sub-variants. Caliber: 7.62x39mm. Production: 1965–present.4

- PA md. 86 (Pușcă Automată model 1986): A Romanian derivative of the Soviet AK-74, chambered in 5.45x39mm. It features a distinctive side-folding wire stock (similar to East German designs) and sometimes a 3-round burst capability. It retained some AKM elements like the gas block design.4 Production: Late 1980s–present.
- PM md. 80: A short-barreled AK variant, often with a unique side-folding stock and a combined front sight/gas block.4
- PM md. 90: A 7.62x39mm rifle that incorporates the side-folding wire stock of the PA md. 86.4 There is also a short-barreled carbine version of the md. 90.
- Estimated Numbers Produced: “Several million” total PM md. 63/65 rifles have been produced.105 Over 400,000 were acquired by the Romanian armed forces.105
- Notes: Romanian Kalashnikovs are widely exported, often under the designations AIM (for fixed stock md. 63 types) and AIMS (for folding stock md. 65 types).106 Versions marked with a “G” on the trunnion were semi-automatic rifles produced for the Romanian Patriotic Guards and are well-known in the US parts kit market as “Romy G’s”.104
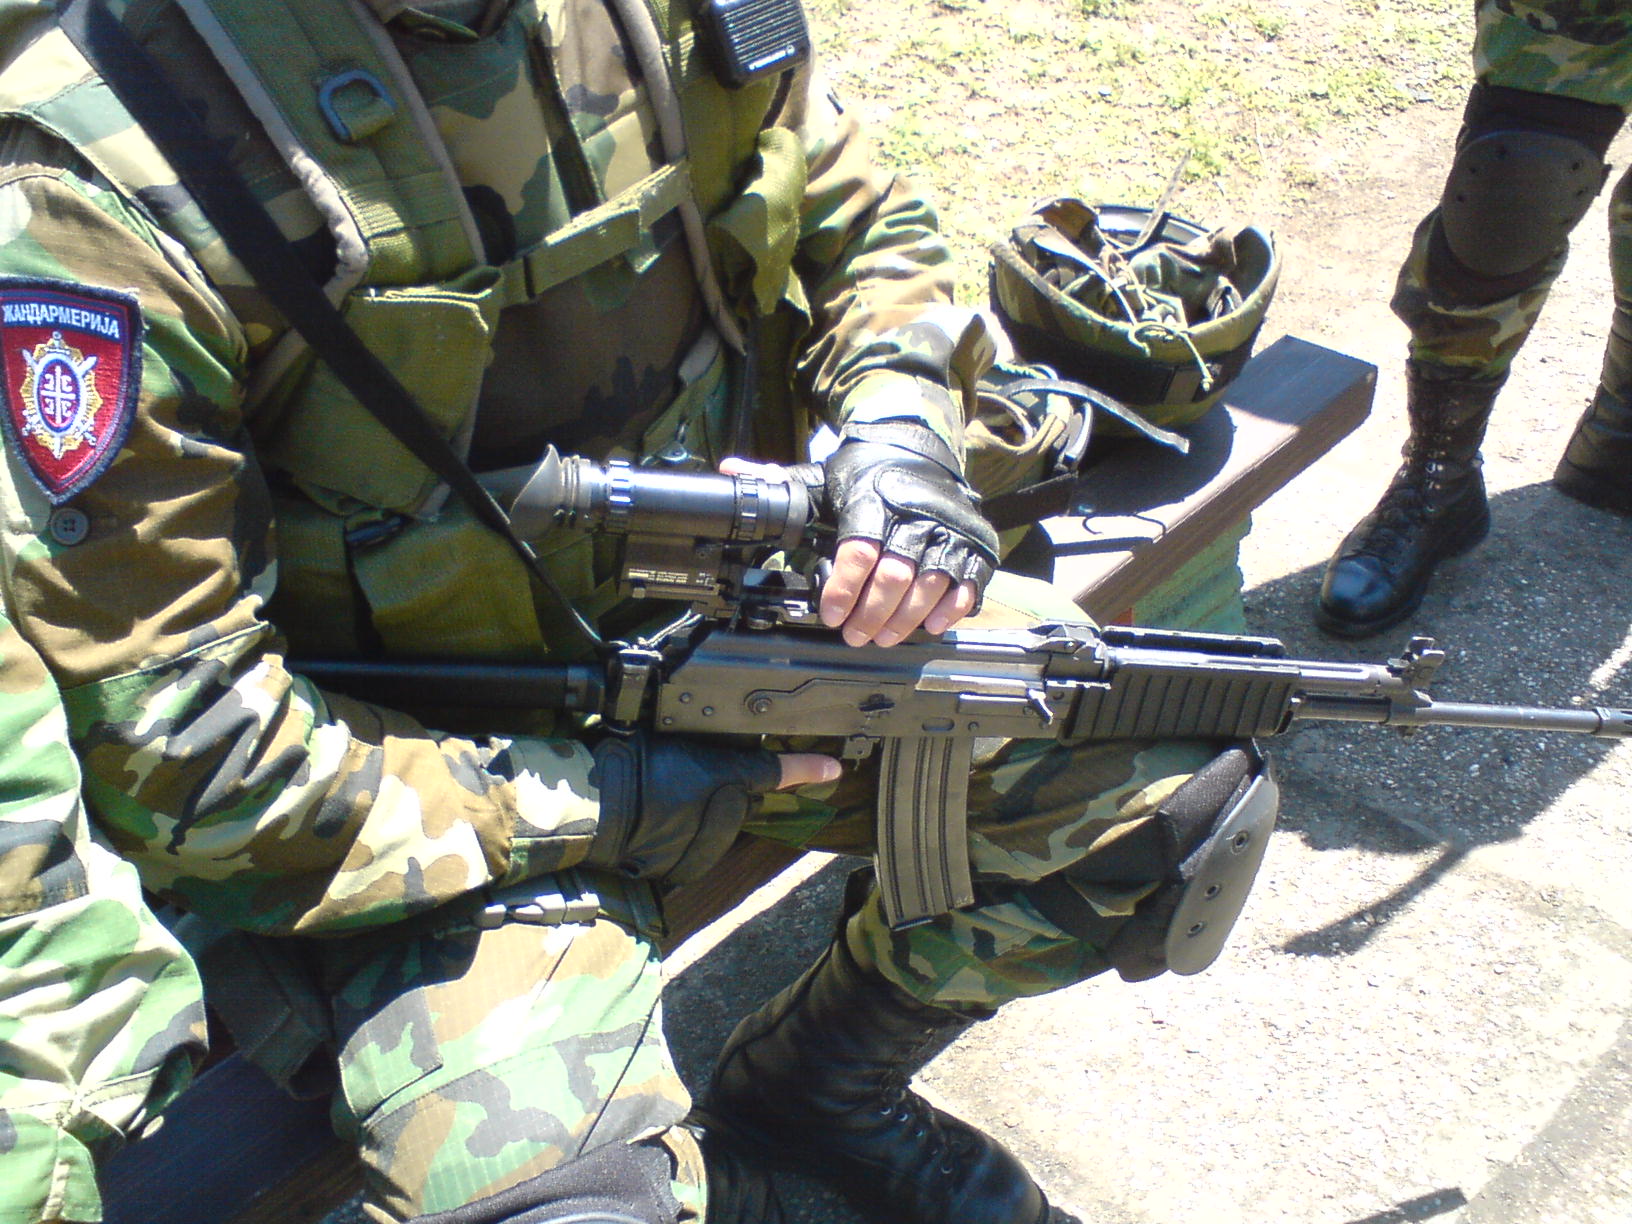
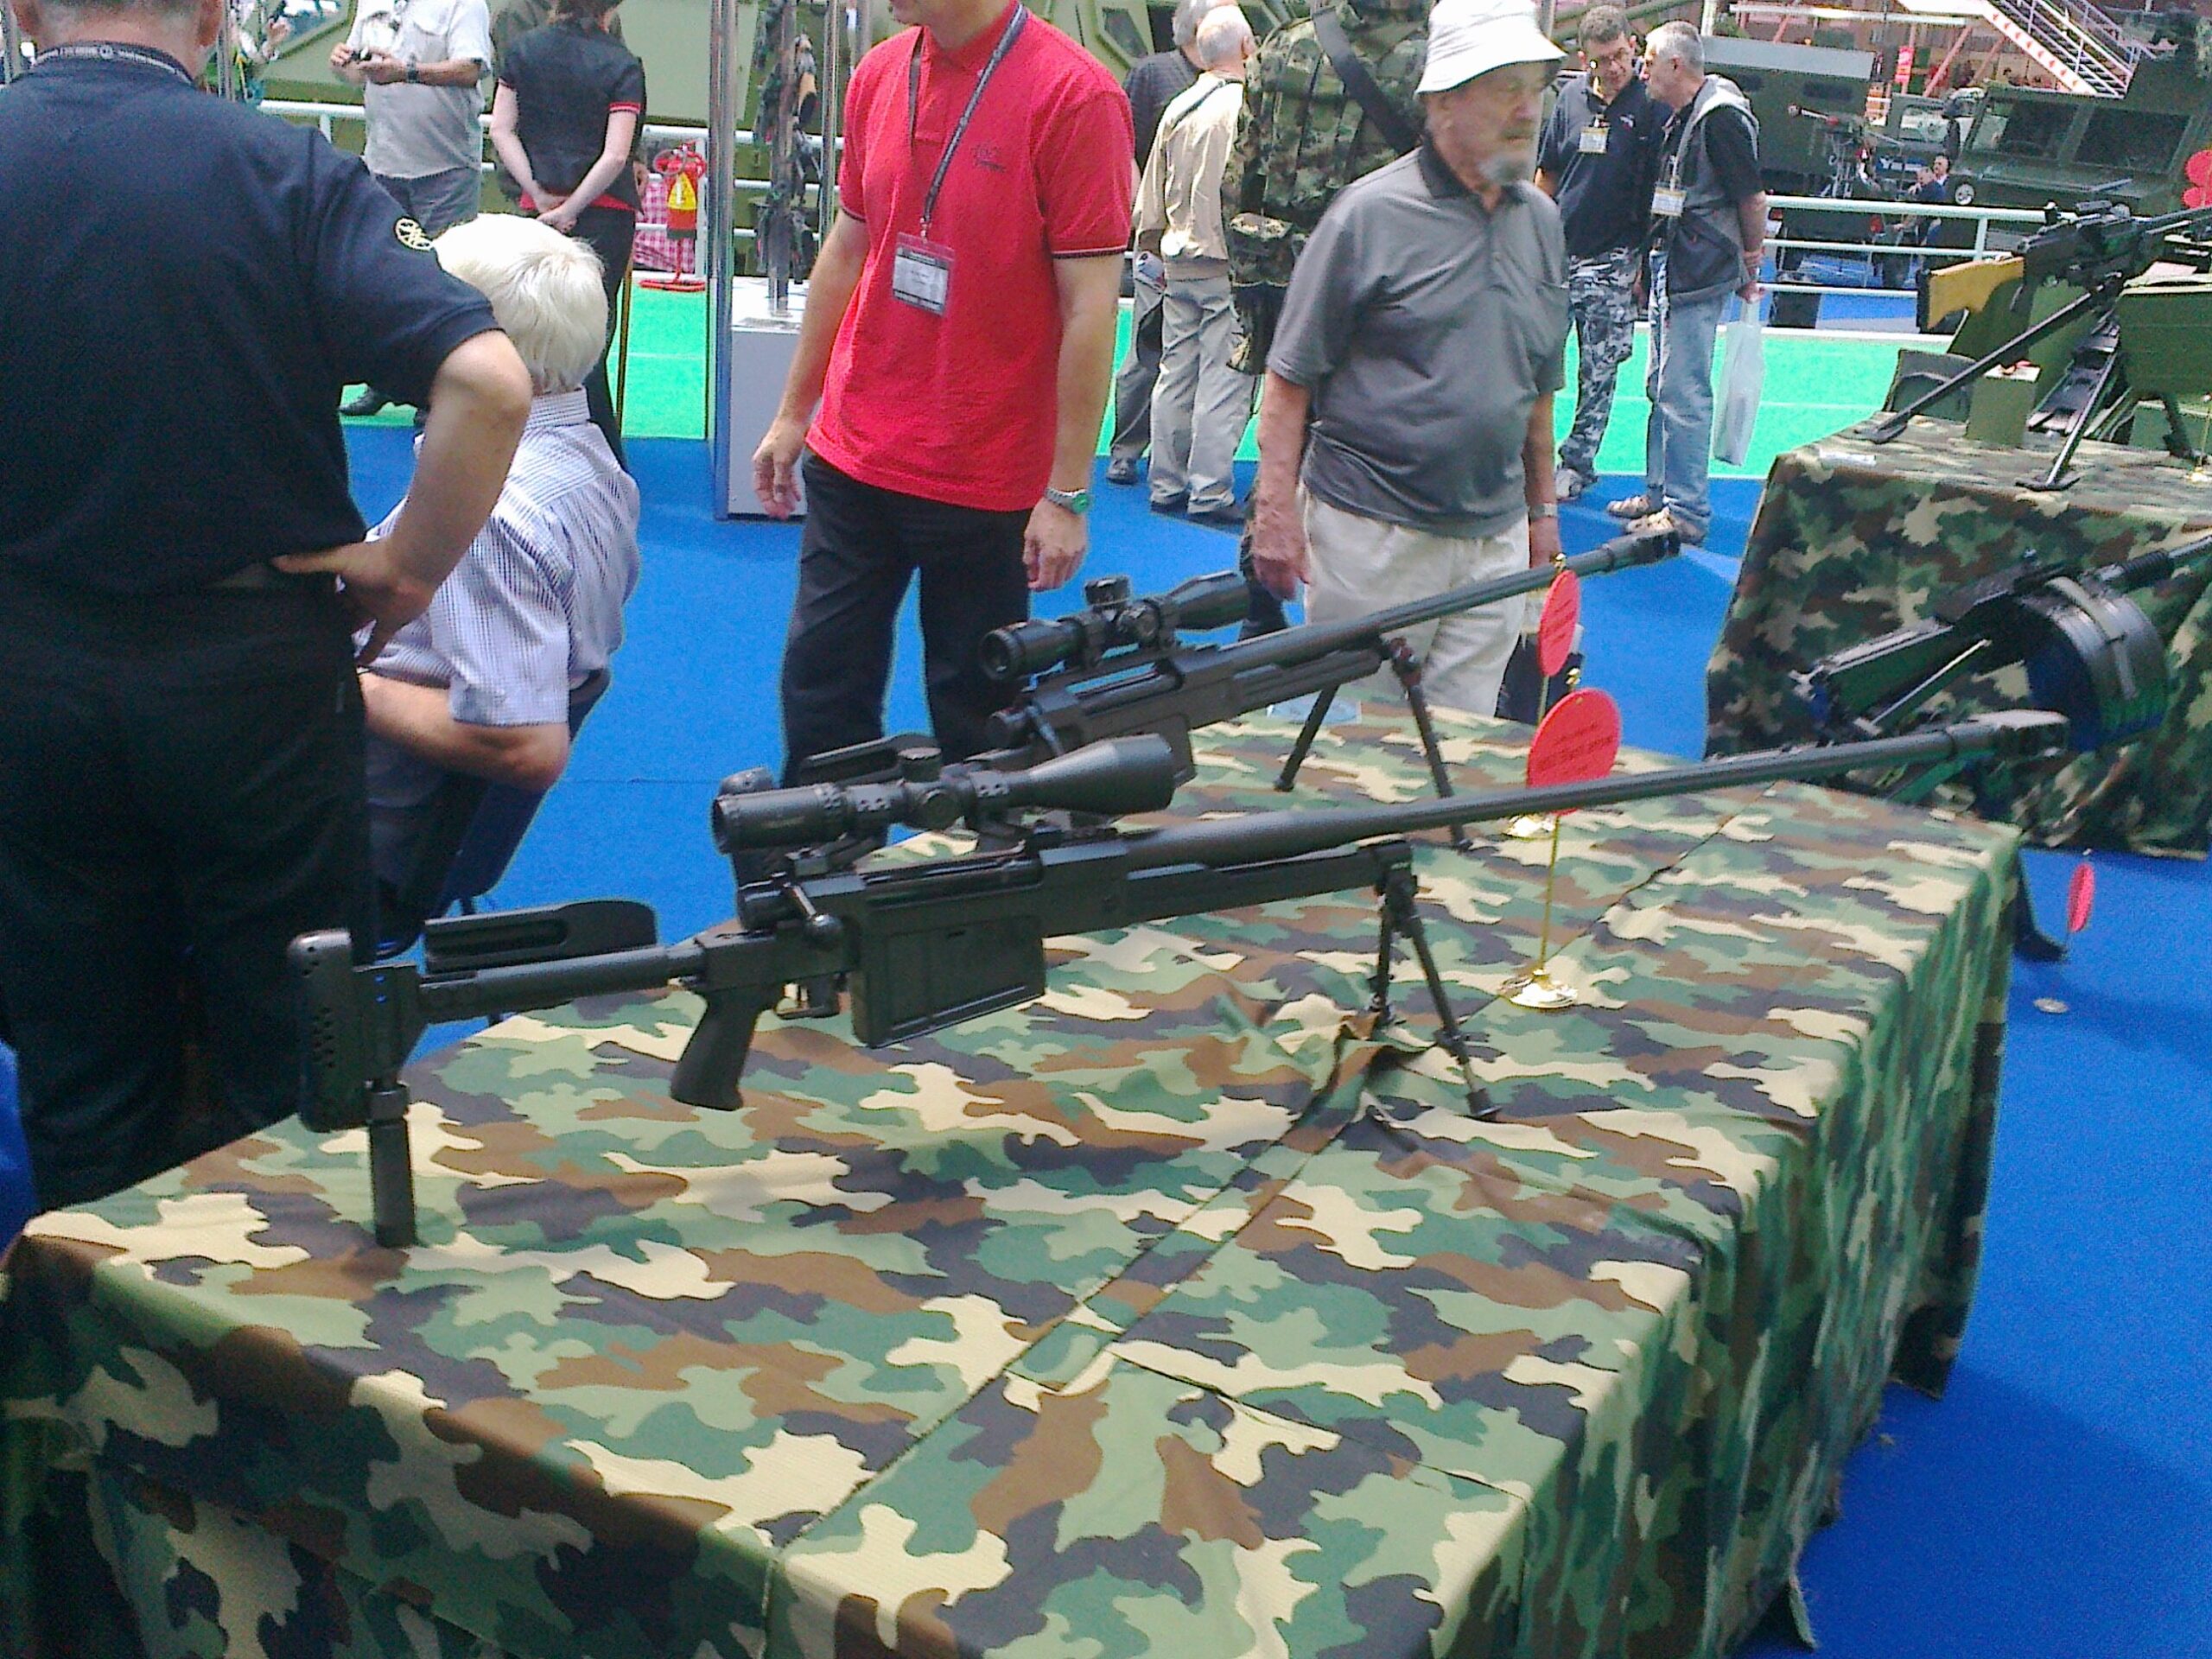
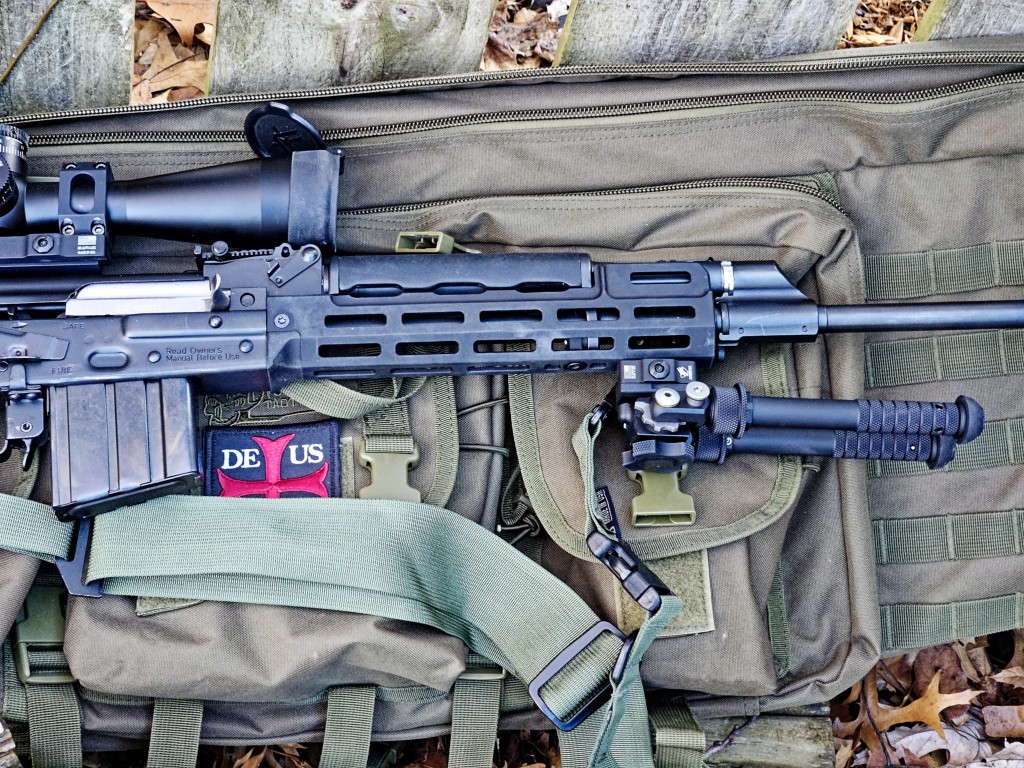
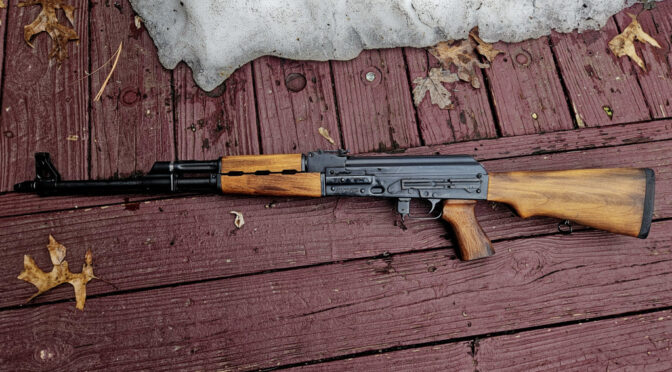
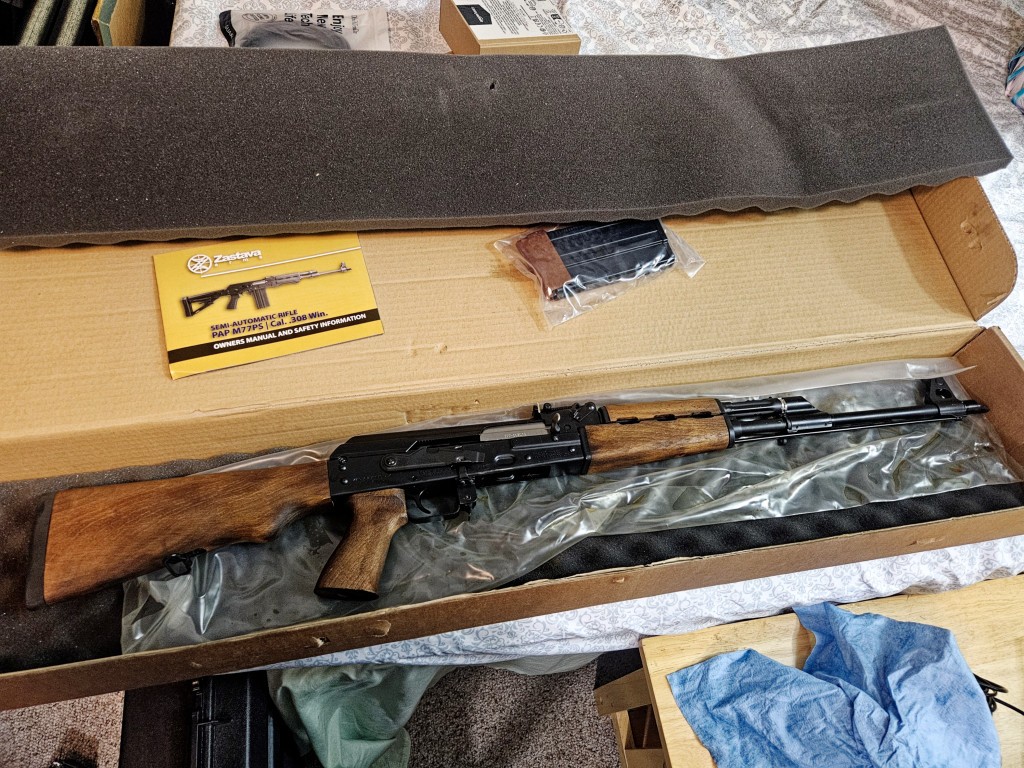
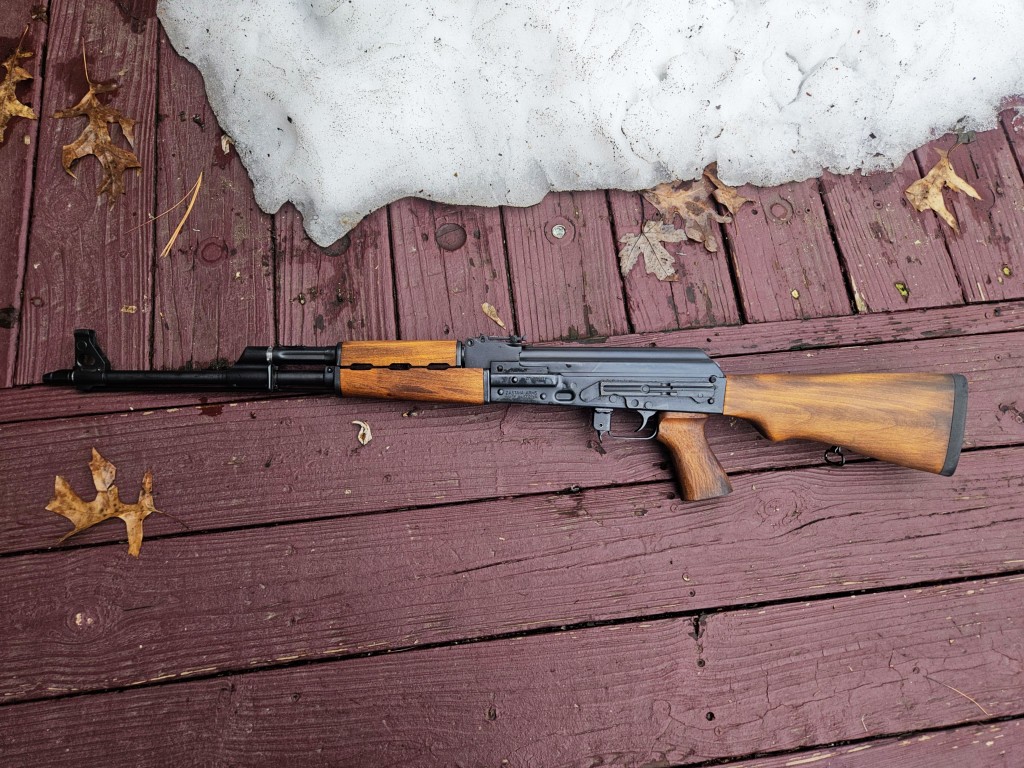
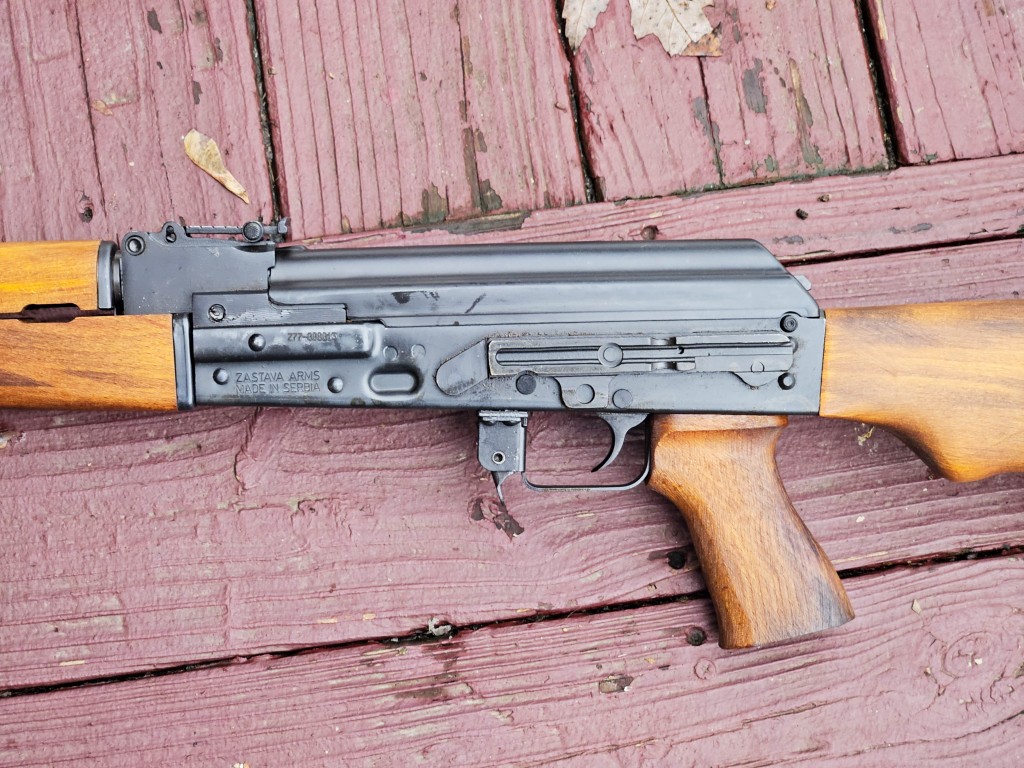
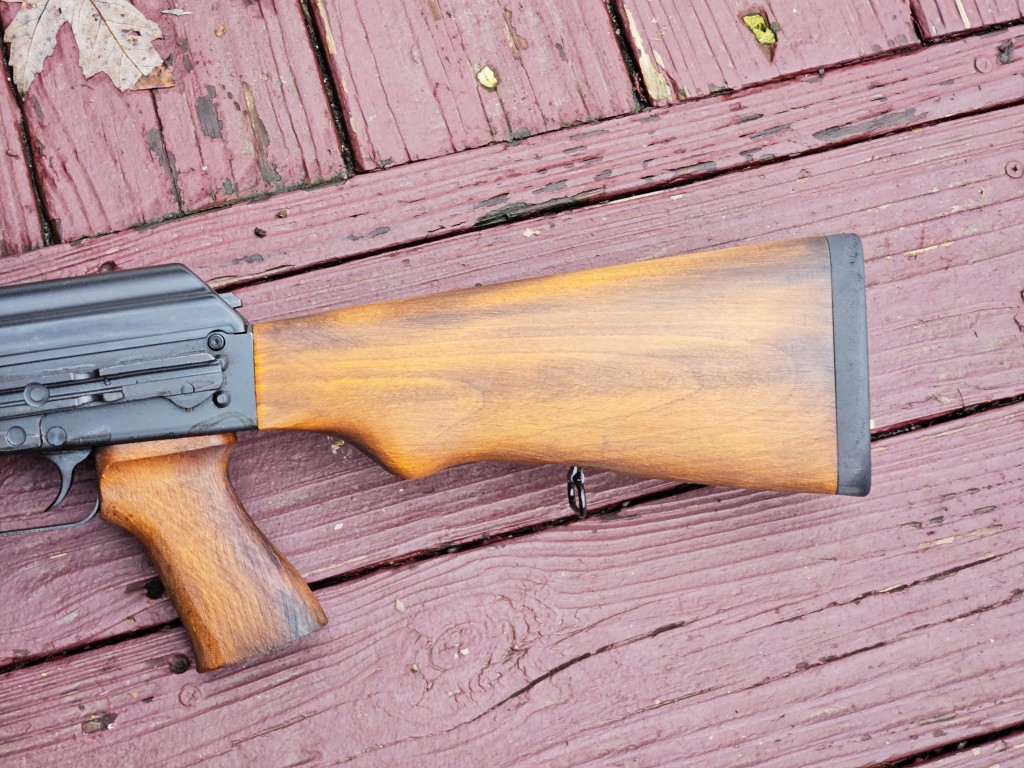
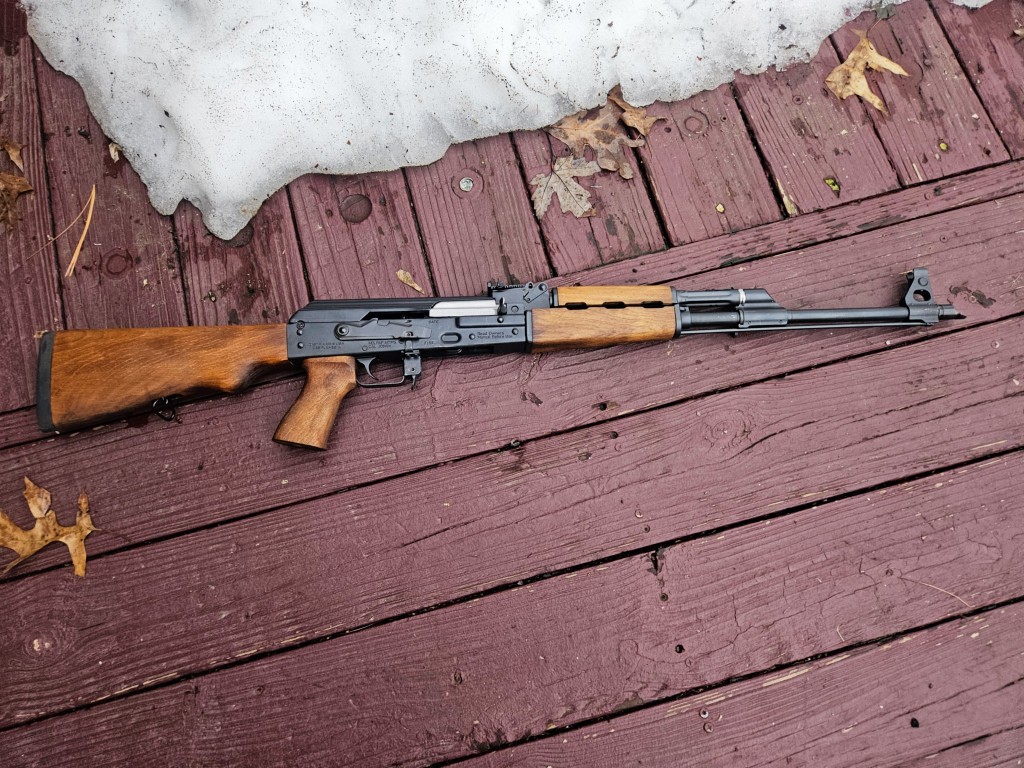
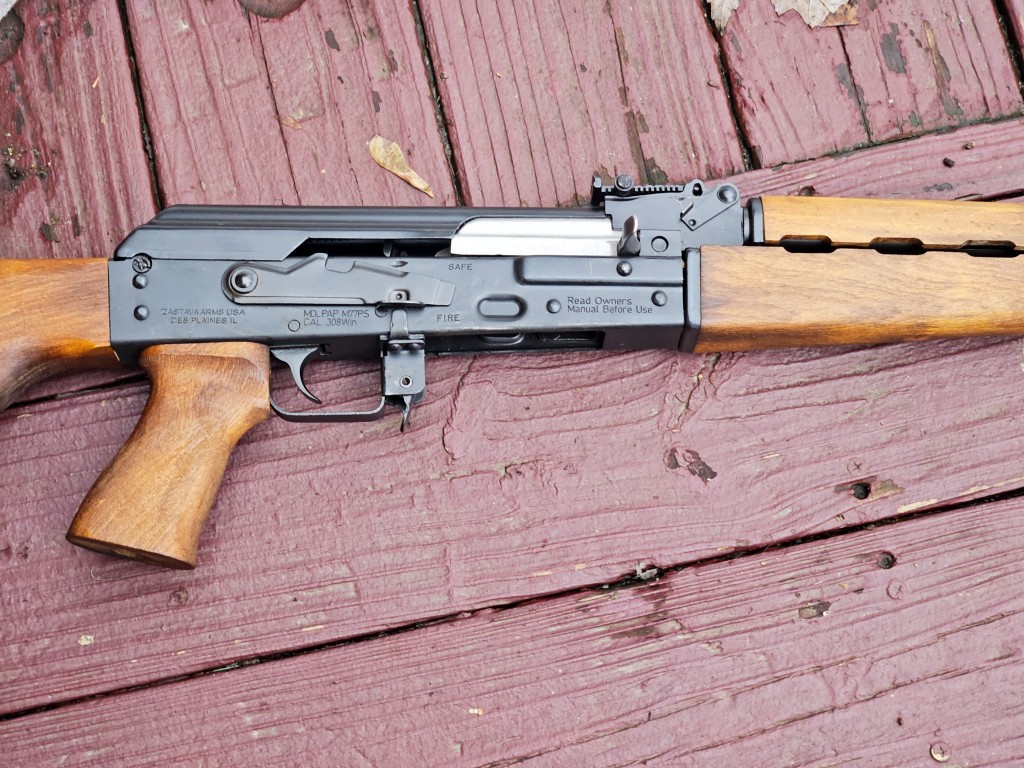
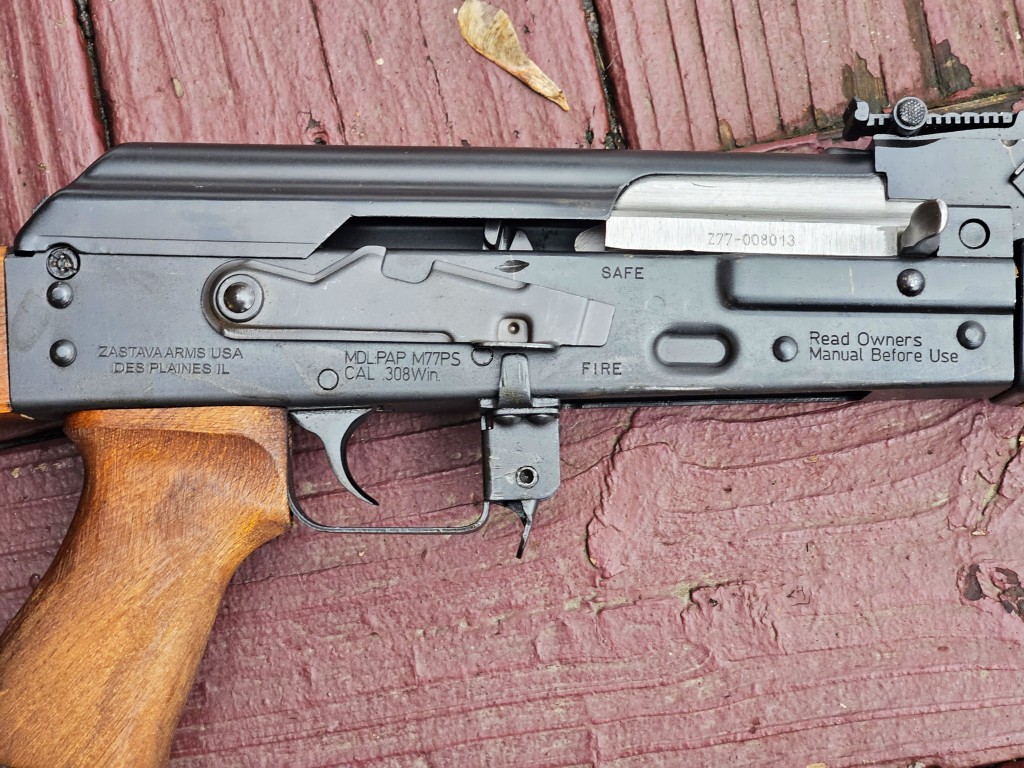
3.27. Serbia (formerly Yugoslavia)
- Manufacturer(s): Zastava Arms (Kragujevac).4
- Models & Details (Examples):
- M64: An early Yugoslav Kalashnikov derivative, which led to the M70.
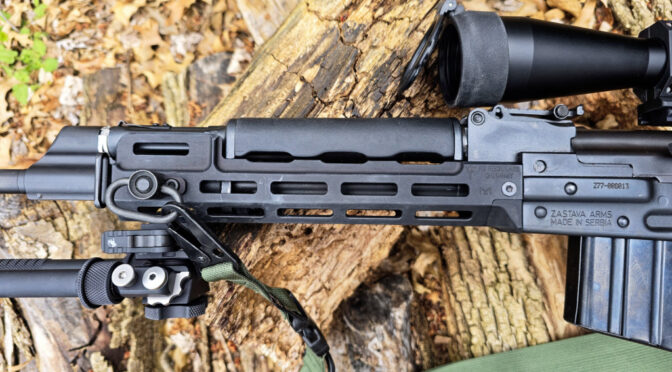
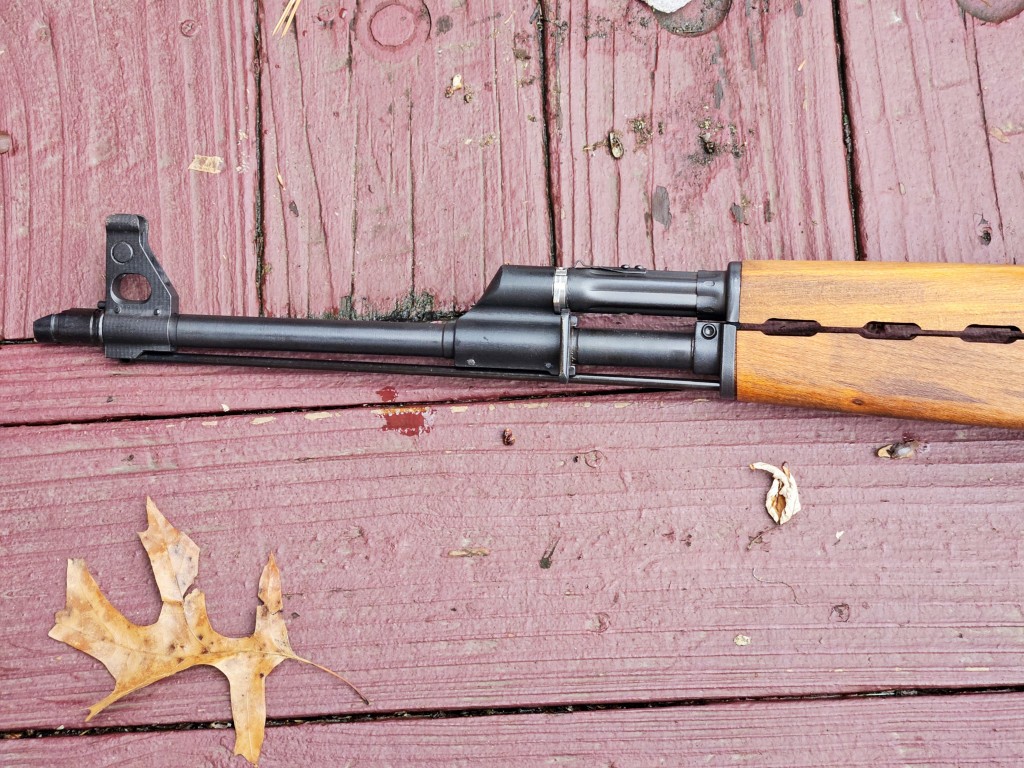
- M70 (Automatska Puška M70): The standard issue rifle of the Yugoslav People’s Army, based on the AK-47/AKM design but with several distinct Yugoslav features. These often include a thicker RPK-style receiver (1.5mm stamped or milled on early versions), a longer handguard with three cooling slots, an integral grenade launching sight, and typically a non-chrome-lined barrel.4 Caliber: 7.62x39mm. Production: 1970–present.83
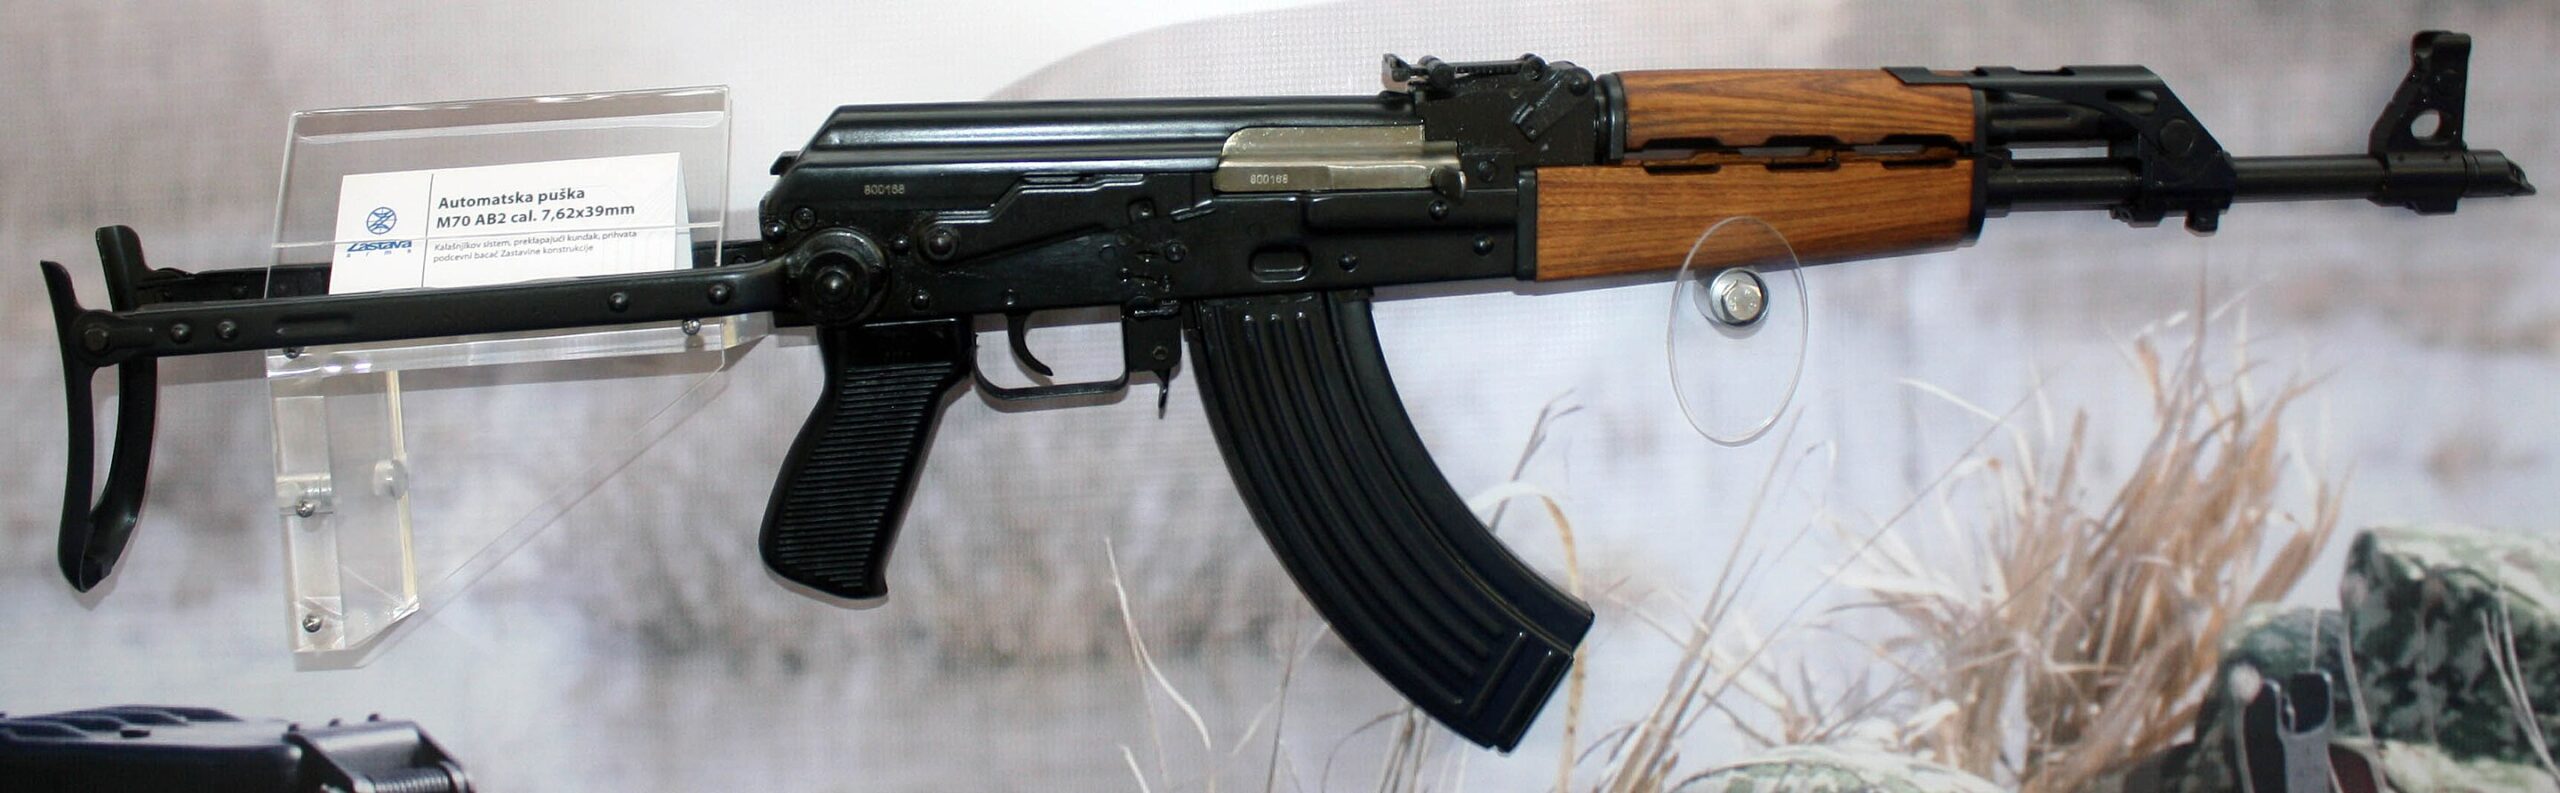
- Variants: M70 (milled receiver), M70B1 (stamped receiver, fixed stock), M70AB2 (stamped receiver, underfolding stock).
- Estimated Numbers Produced: Approximately 4,000,000 units of the M70 family.83
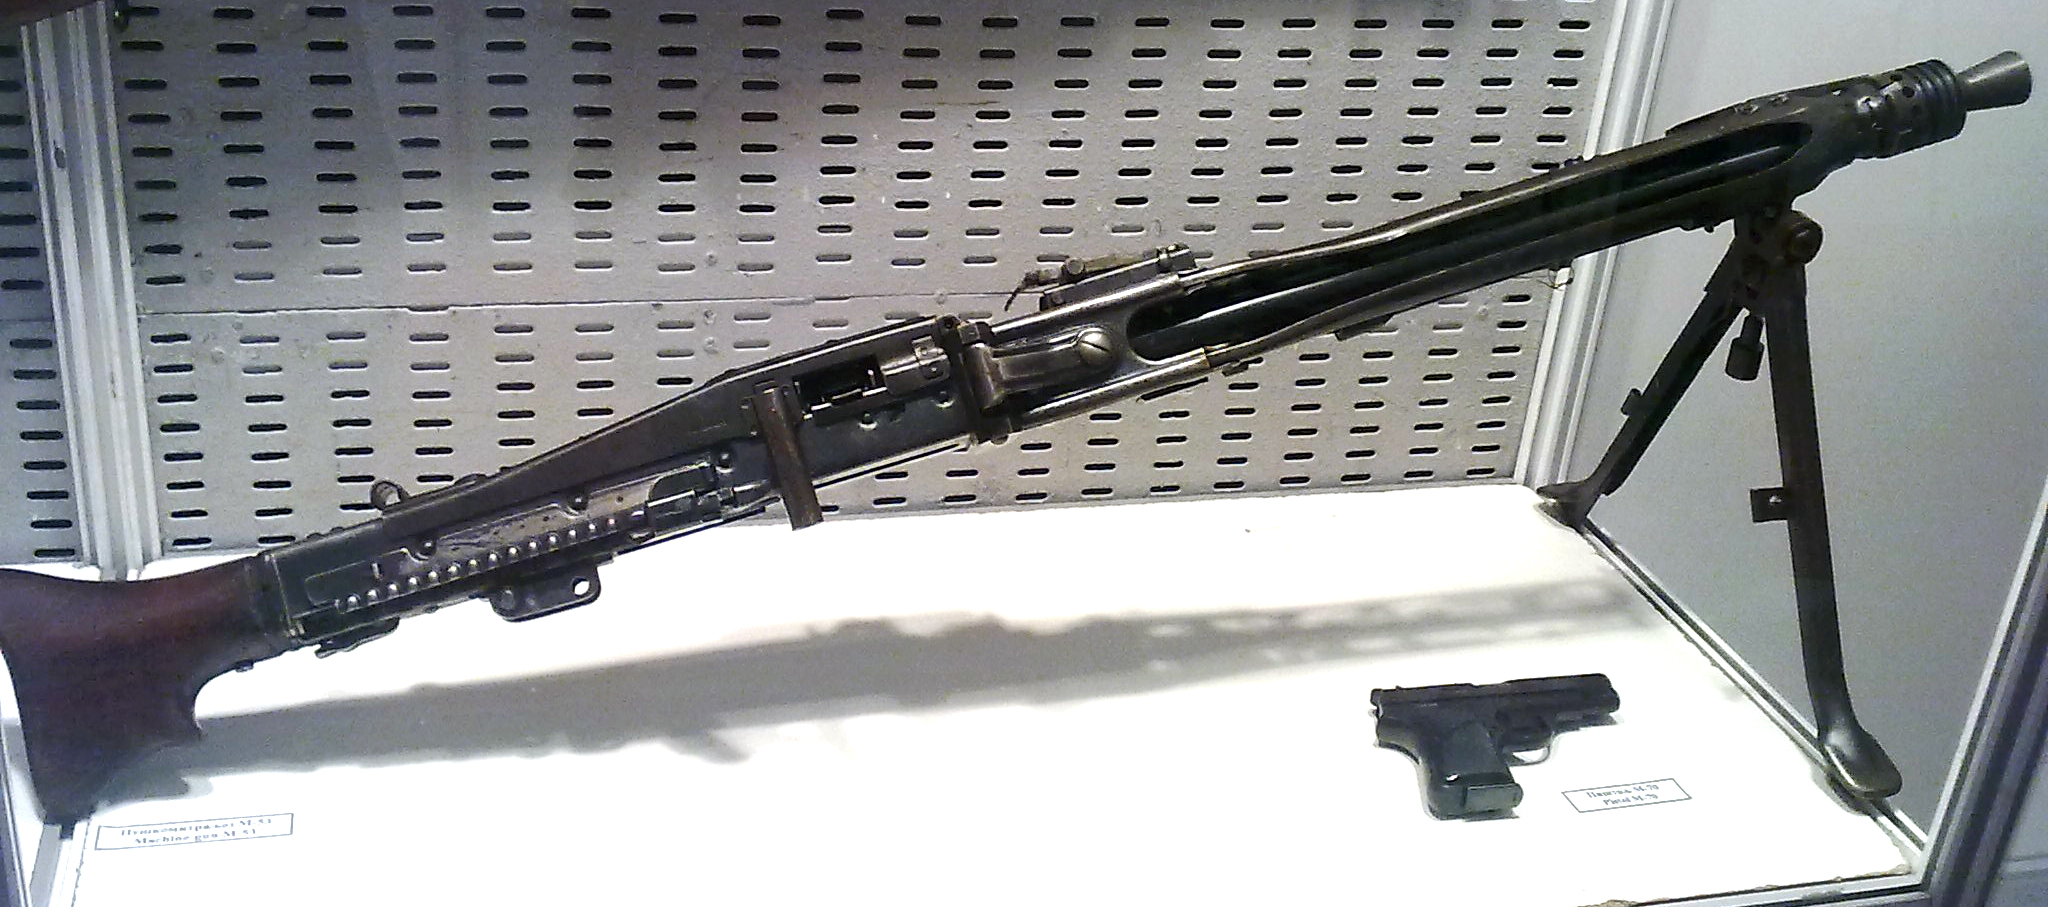
- M72: A light machine gun version, analogous to the RPK, based on the M70 design.4
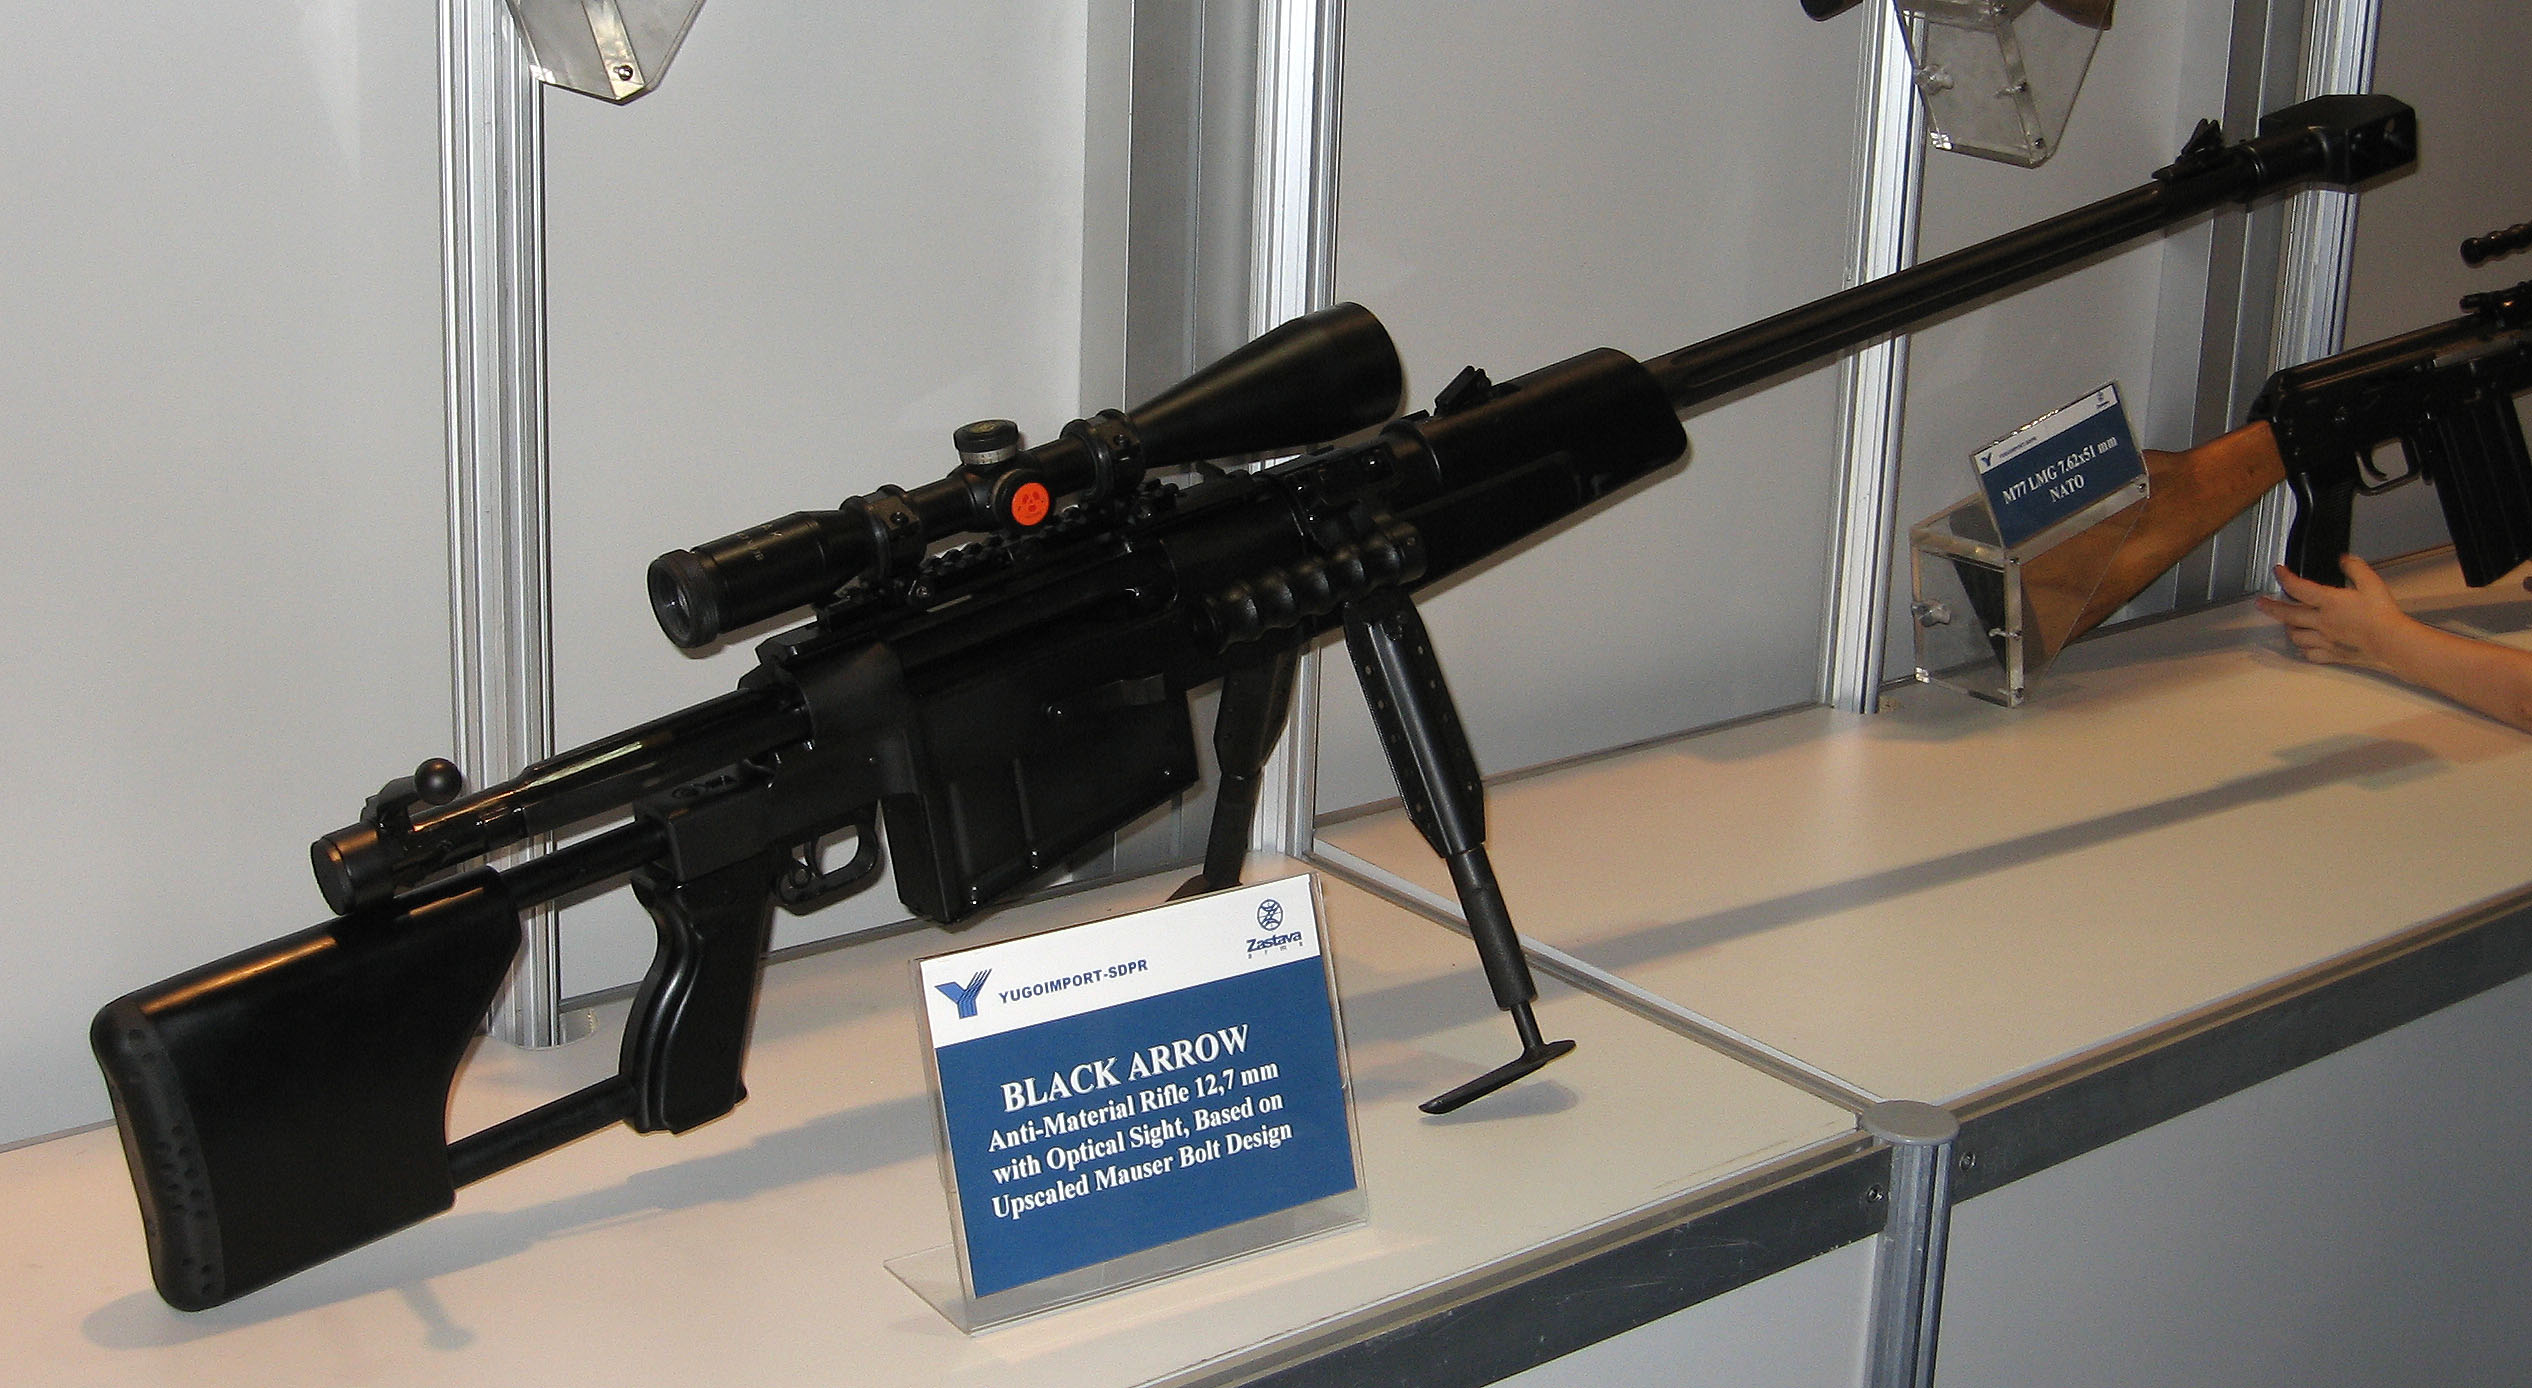
- M76: A designated marksman rifle chambered in 7.92x57mm Mauser, based on the long Kalashnikov action.4
- M77: A battle rifle chambered in 7.62x51mm NATO, also using the Kalashnikov action.4
- M85: A compact carbine chambered in 5.56x45mm NATO.4
- M90: An assault rifle chambered in 5.56x45mm NATO.4
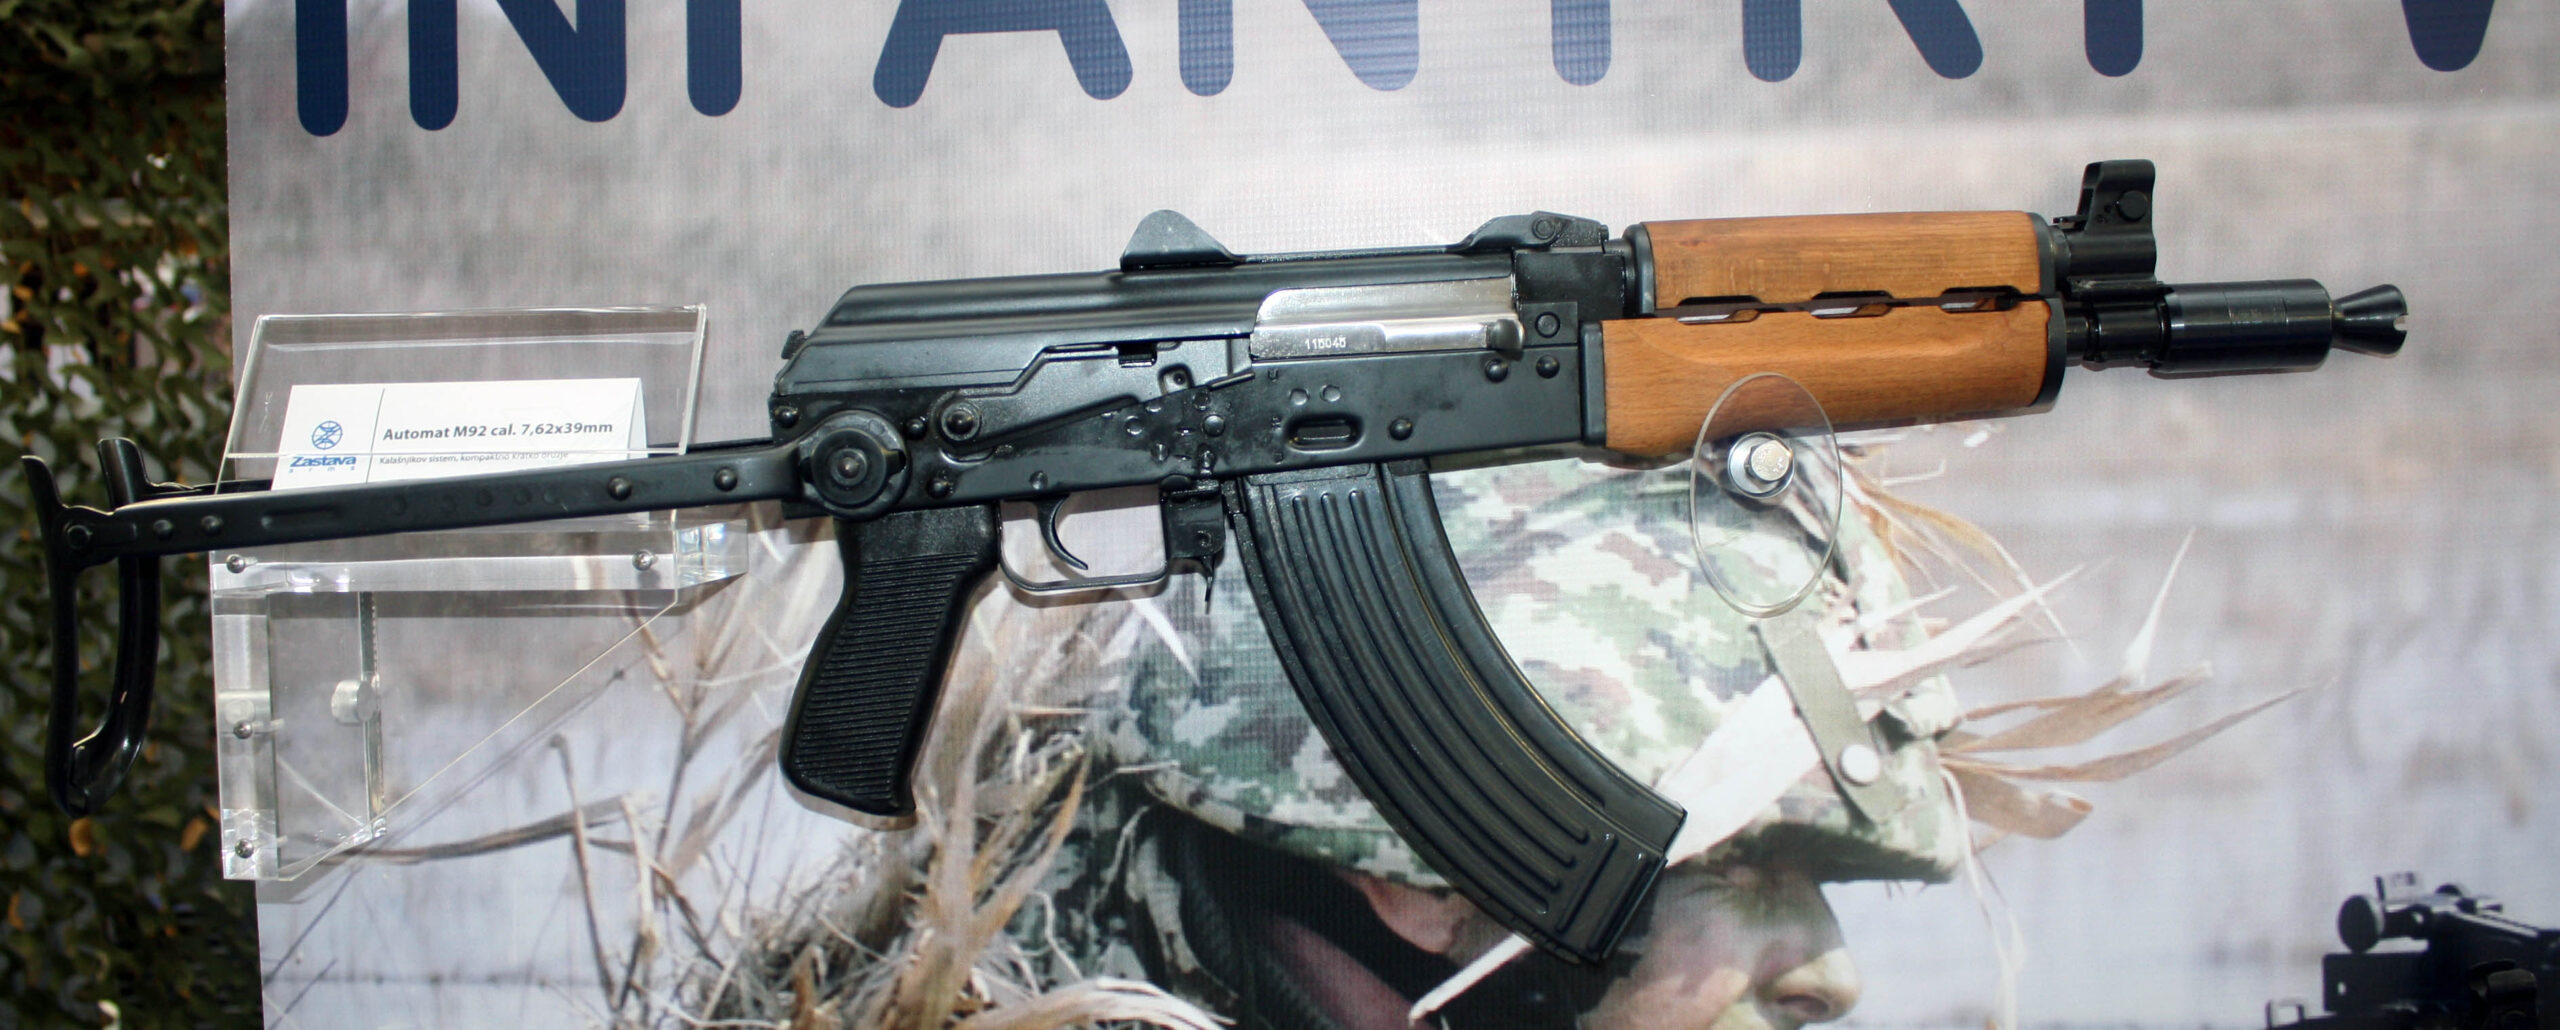
- M92: A compact carbine version of the M70, chambered in 7.62x39mm (similar to AKS-74U in role).4
- M21: A modern assault rifle system chambered in 5.56x45mm NATO, incorporating Picatinny rails and modern furniture, but still based on the Kalashnikov operating system.4
- Notes: Yugoslavian/Serbian Kalashnikov derivatives are known for their robust construction and unique features tailored to Yugoslav military doctrine, such as integrated rifle grenade launching capabilities. They often differ significantly in receiver construction and furniture from Soviet models. We have posts on the M70 and M72 families of rifles.
3.28. South Africa
- Manufacturer(s): Lyttelton Engineering Works (LIW), later Armscor, now Denel Land Systems.2
- Models & Details:
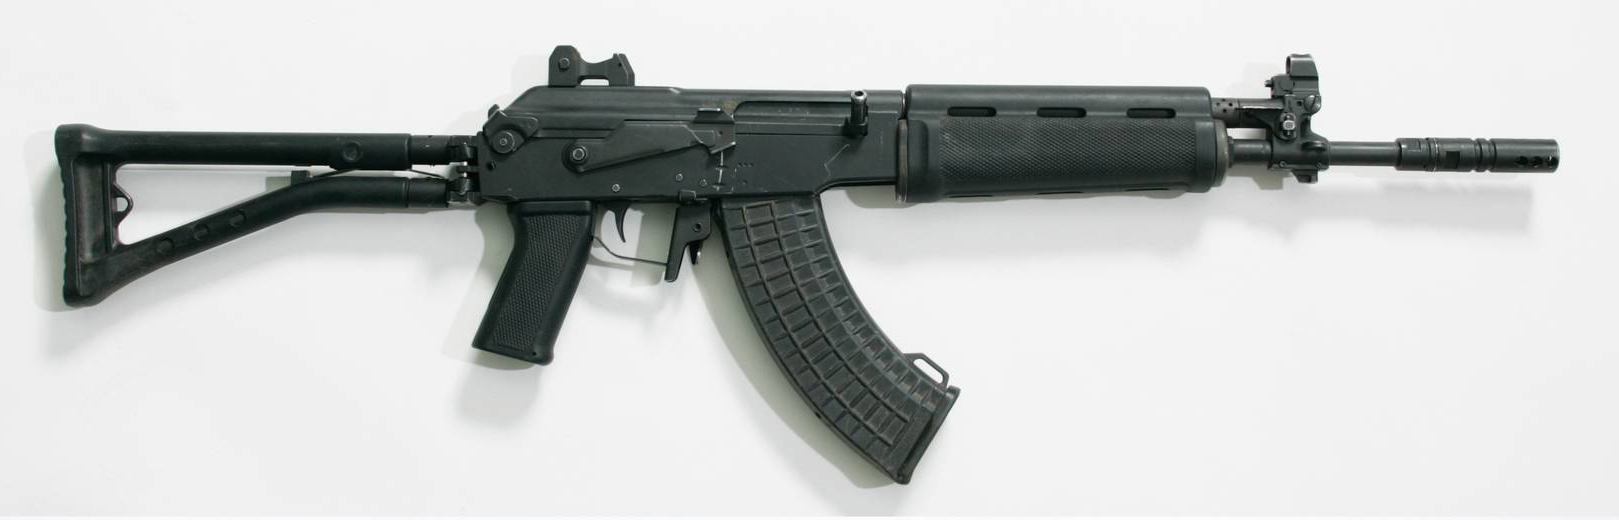
- Vektor R4: A licensed variant of the Israeli IMI Galil ARM (which is itself a derivative of the Finnish RK 62, tracing back to the AK-47). The R4 was adapted for South African conditions, featuring a longer stock made of high-strength polymer and other polymer components to reduce weight. Caliber: 5.56x45mm NATO. It entered service with the South African Defence Force (SADF) in 1980.2
- Estimated Numbers Produced: Approximately 420,000 units.109
- Vektor R5: A carbine version of the R4, similar to the Galil SAR, with a shorter barrel and handguard. It lacks a bipod.85
- Vektor R6: An even more compact carbine version designed for paratroopers and vehicle crews.85
- Truvelo Raptor: Mentioned as a “similar rifle” with AK-basis.4 Specific details are sparse in provided material.
- Notes: The R-series rifles are a clear example of the Kalashnikov design’s adaptability, modified through several iterations (AK -> RK 62 -> Galil -> R4) to suit specific national requirements.
3.29. Sudan
- Manufacturer(s): Military Industry Corporation (MIC).4
- Model: MAZ
- Caliber: Assuming its basis on the Chinese Type 56 4, that strongly suggests the 7.62x39mm cartridge.
- Production Dates/Numbers: Not specified in the provided materials.110
- Notes: The MAZ rifle is reported to be based on the Chinese Type 56 assault rifle and manufactured using Chinese-supplied machinery.4
3.30. Turkey
- Manufacturer(s): Sarsılmaz Silah Sanayi A.Ş..4
- Models & Details:
- SAR 15T: Described as an AK-47 clone.4 Caliber is likely 7.62x39mm given its AK-47 clone designation.
- SAR 308 (V2): Also listed as an AK-47 clone.4 The “308” in its name might suggest the 7.62x51mm NATO (.308 Winchester) cartridge, which would make it more of a battle rifle or DMR if based on the Kalashnikov action, rather than a standard assault rifle. 4 lists it as “SAR 15T/308(V2)”. Further clarification on caliber would be needed for precise classification.
- Production Dates/Numbers: Not specified. Sarsılmaz is a major Turkish arms manufacturer founded in 1880 and exports to over 80 countries.112
- Notes: Sarsılmaz produces a wide range of firearms for military, police, and civilian markets.
3.31. Ukraine
- Manufacturer(s): State Space Agency of Ukraine (for Vepr); Interproinvest (IPI) / Krasyliv Assembly Manufacturing Plant (for Malyuk).4
- Models & Details:
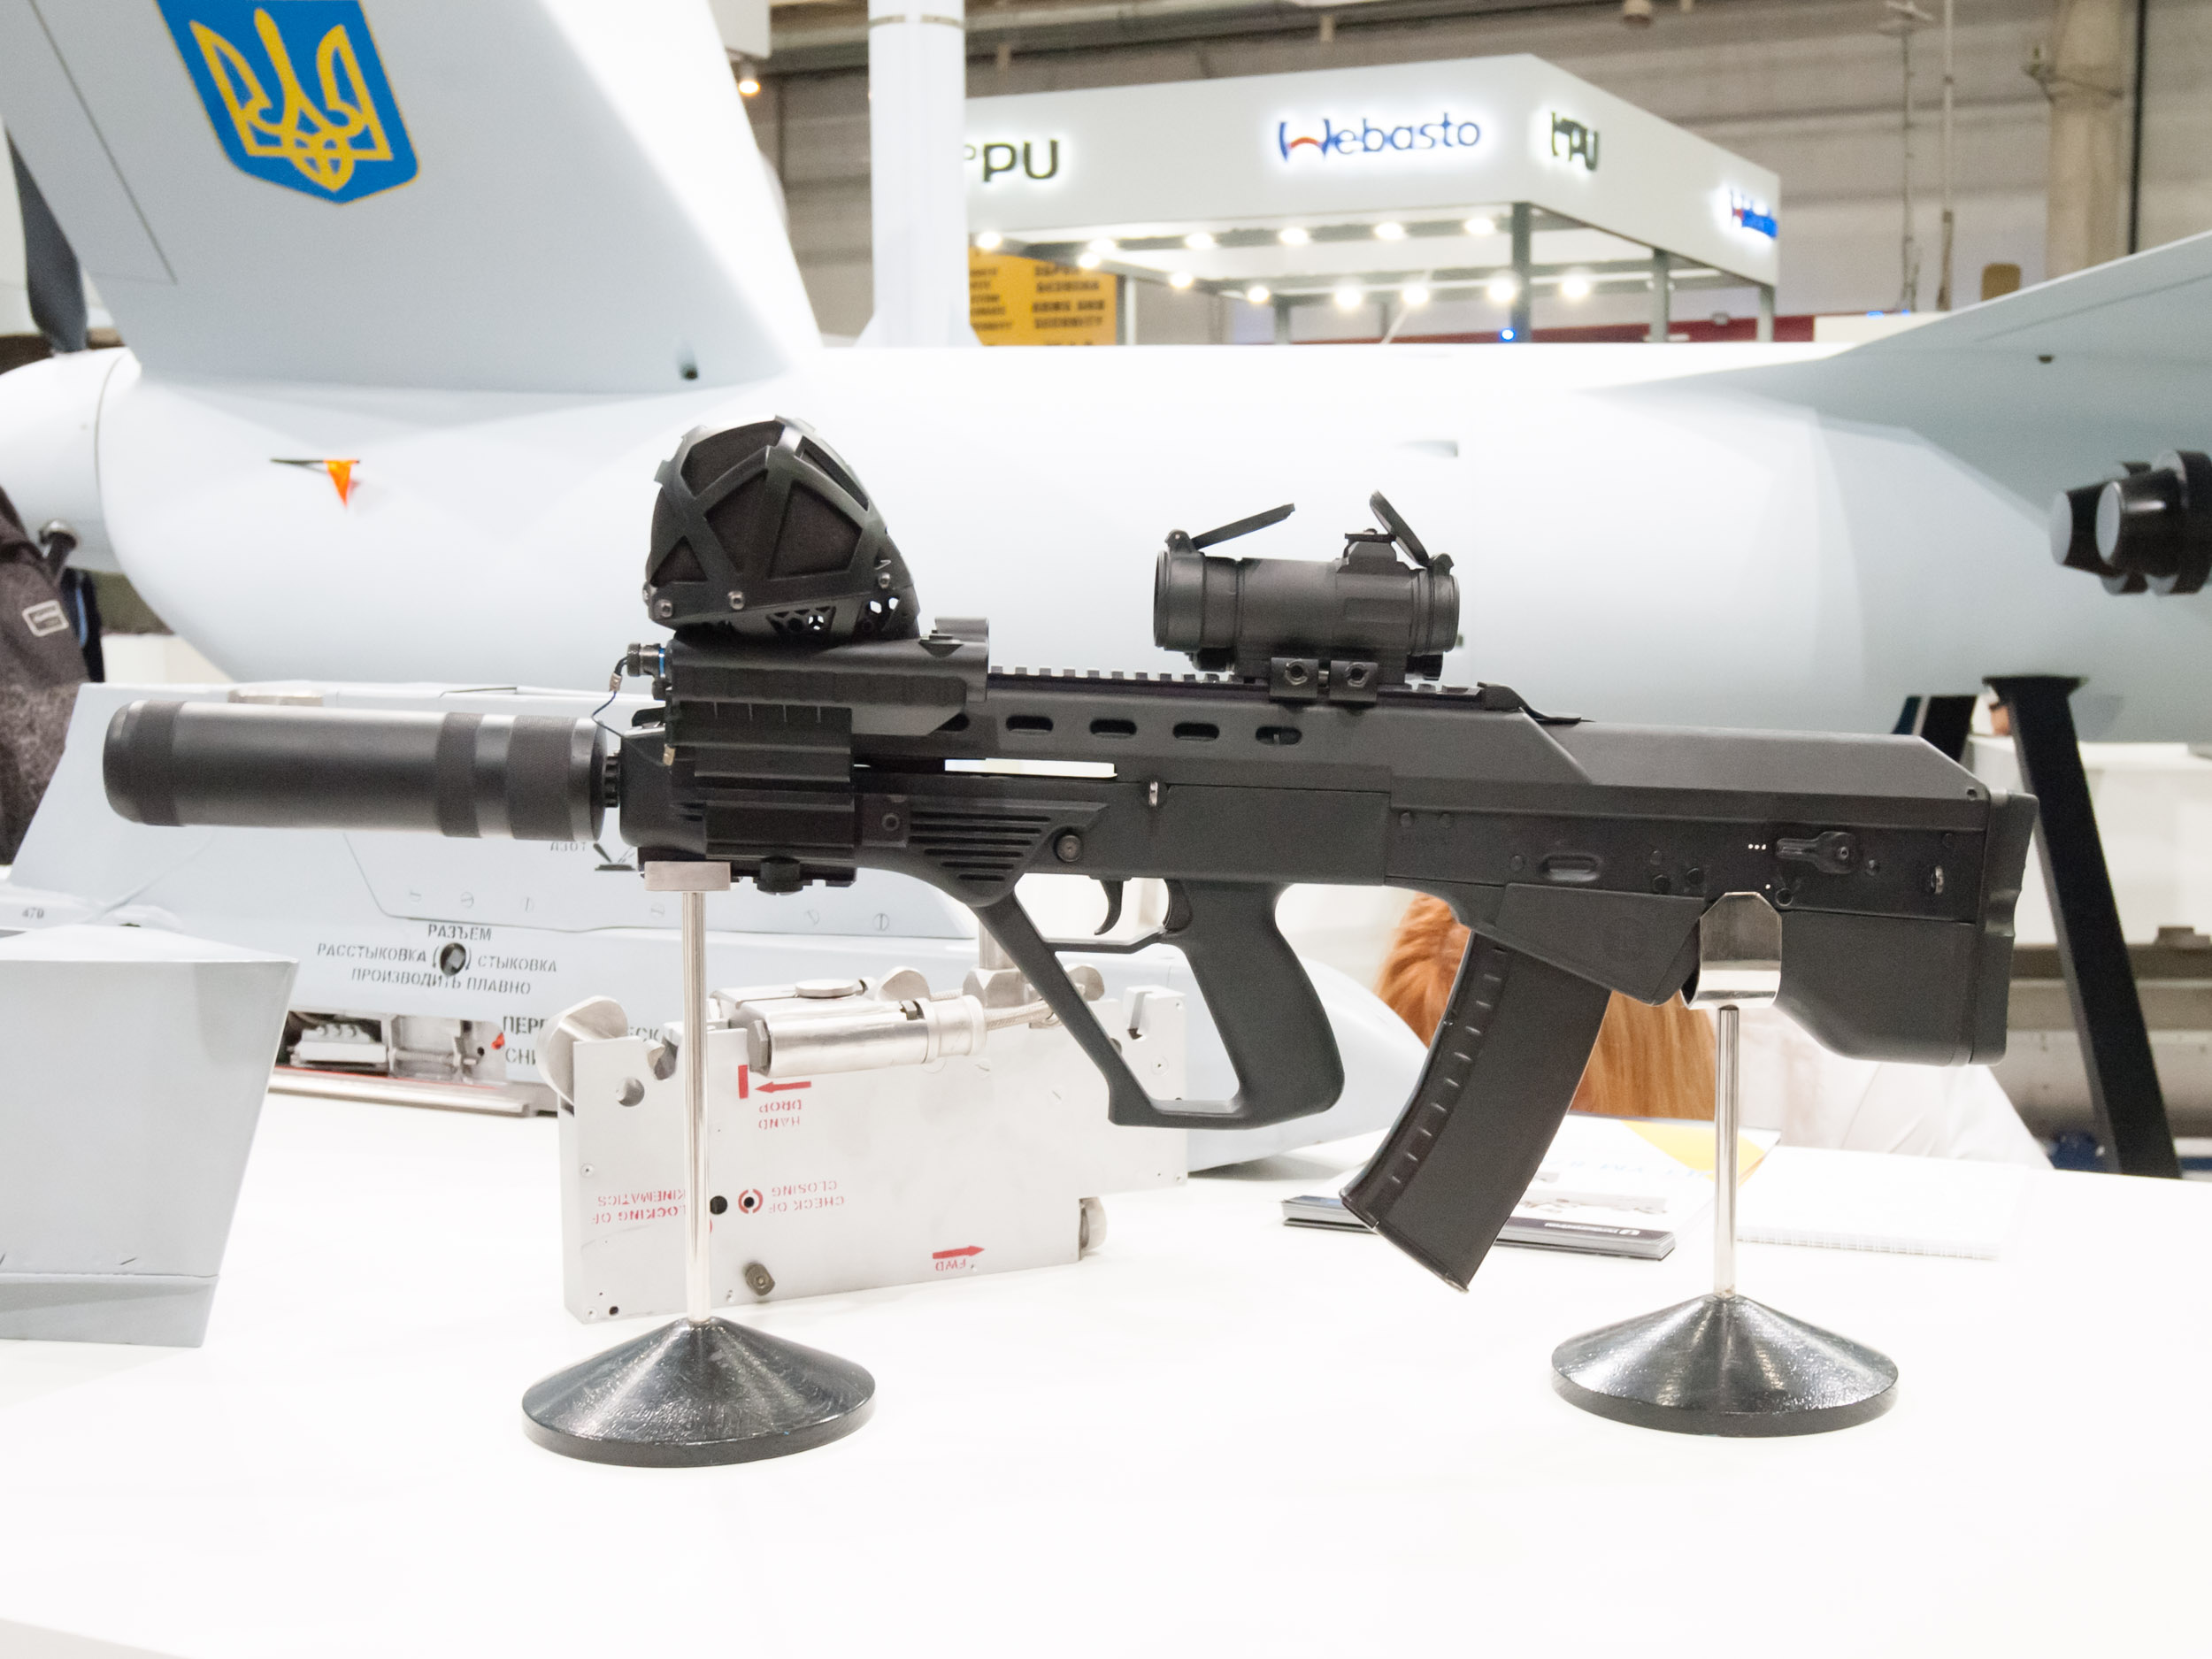
- Vepr (“Wild Boar”): A bullpup conversion of the AK-74 assault rifle. Designed in 1993-1994 and announced in 2003. It retains the AK-74’s operating mechanism and 5.45x39mm caliber.4
- Malyuk (“Baby” or “Vulcan”): Another Ukrainian bullpup assault rifle based on the Kalashnikov operating system (derived from AKM/AK-74 and lessons from the Vepr project). Development started in 2005, it debuted publicly in 2015, and has been in service with Ukrainian special forces since 2017.4
- Calibers: Available in 5.45x39mm, 7.62x39mm, and 5.56x45mm NATO.117
- Production Dates/Numbers: Specific production numbers and detailed timelines are not extensively provided.
- Notes: Both the Vepr and Malyuk represent efforts to modernize existing Kalashnikov-pattern rifles into more compact bullpup configurations, suitable for modern combat scenarios, particularly in confined spaces. The Malyuk notably features ambidextrous controls and improved ergonomics.117
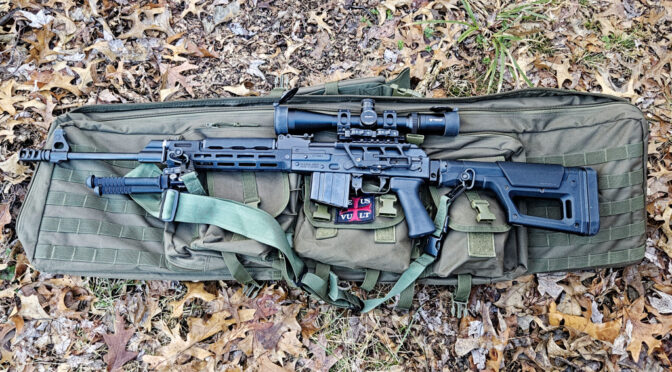
3.32. United States
- Manufacturer(s): Numerous commercial and custom manufacturers, including:
- Palmetto State Armory (PSA): Produces a wide range of AK-pattern rifles, including:
- PSAK-47 series (e.g., GF3, GF4, GF5) in 7.62x39mm.4
- PSA AK-556 in 5.56x45mm NATO.4
- PSAK-74 in 5.45x39mm.4
- PSAK-104 (semi-automatic clone of the AK-104 carbine).20
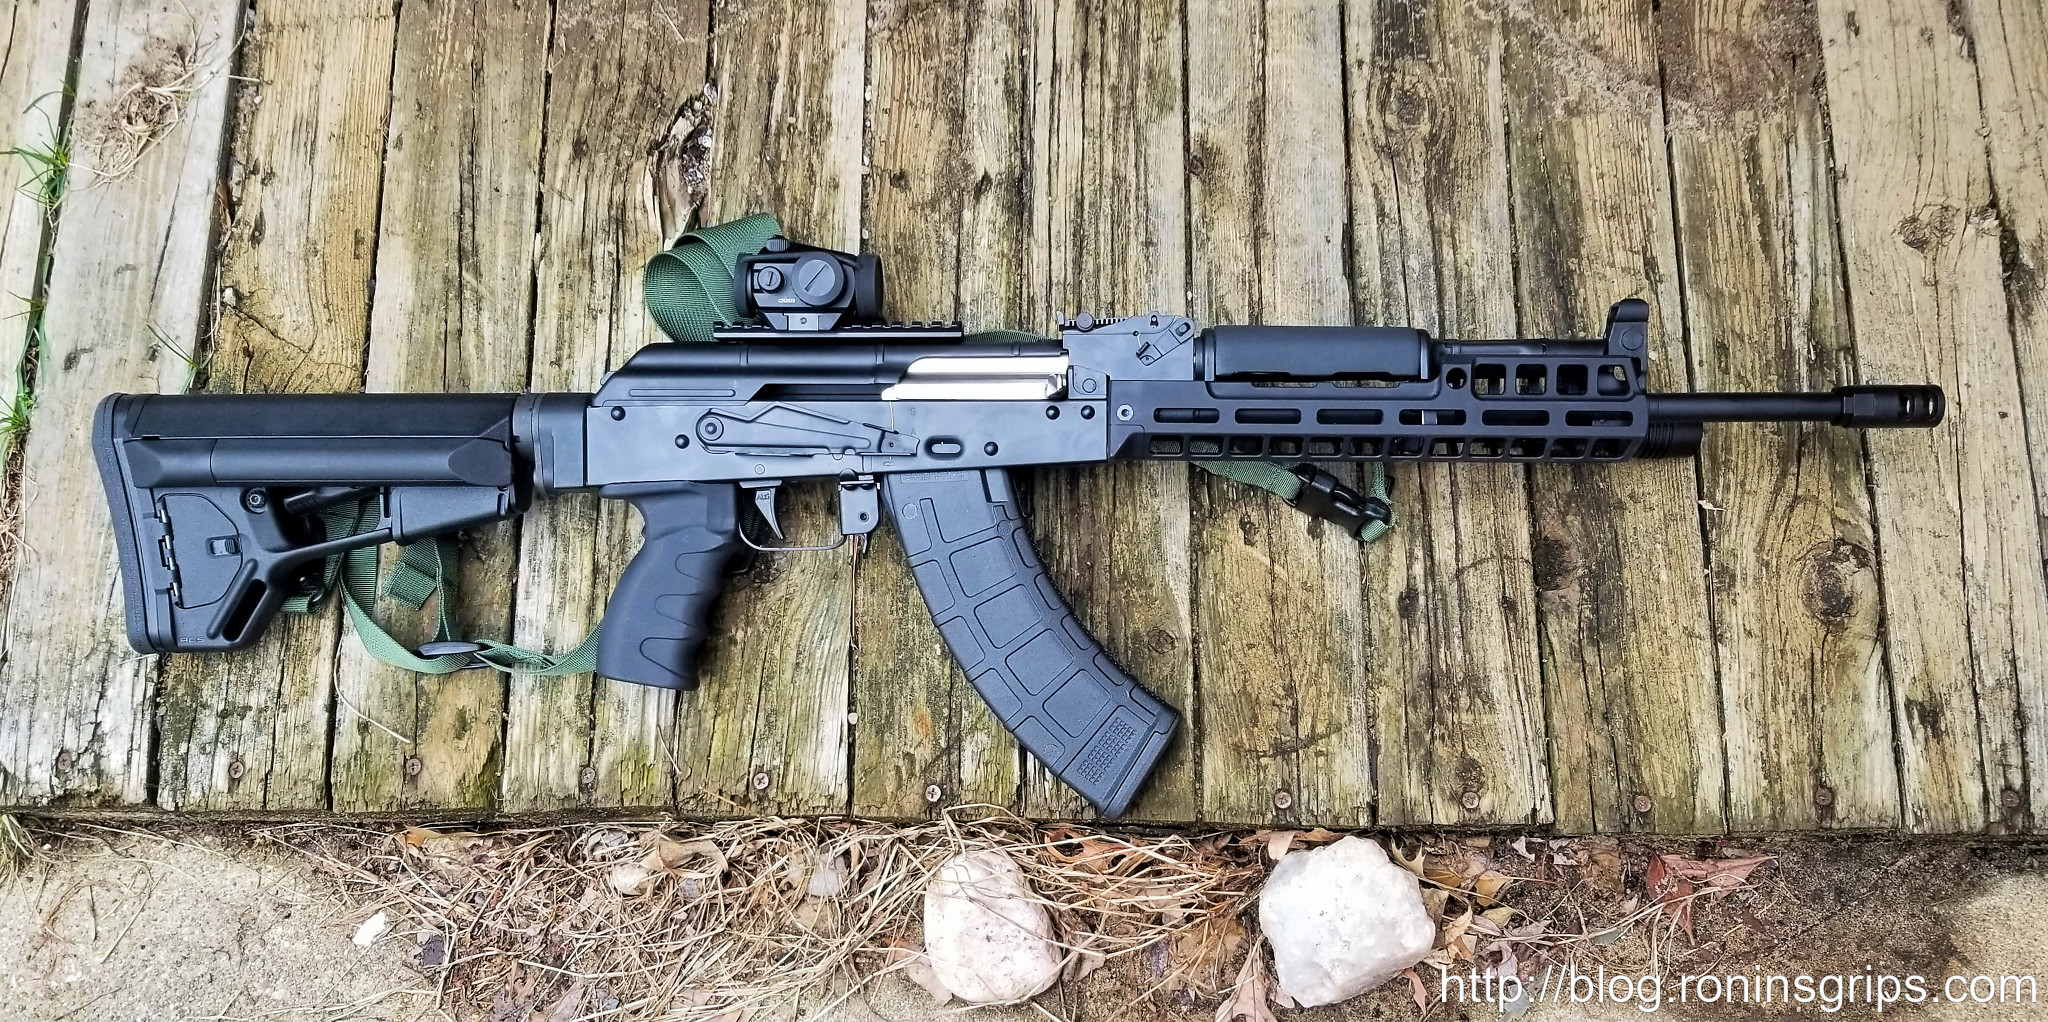
- Notes: The vast majority of US-produced Kalashnikov-pattern firearms are semi-automatic versions intended for the civilian market, complying with US firearms regulations (e.g., 922R compliance for imported parts). Quality and adherence to original Kalashnikov specifications can vary widely among manufacturers.
3.33. Venezuela
- Manufacturer(s): CAVIM (Compañía Anónima Venezolana de Industrias Militares).4
- Model: AK-103 (produced under license from Russia)
- Caliber: 7.62x39mm.4
- Production Dates: The license agreement was made in 2006. Factories were officially opened in 2012, and initial deliveries of CAVIM-made AK-103s to the Venezuelan Army occurred in 2013. Full-scale production was planned to commence by the end of 2019, but the project faced significant delays and challenges, including issues with the Russian contractor and allegations of fraud, forcing CAVIM to attempt to complete construction themselves. The current operational status and output of the plant are unclear.119
- Estimated Numbers Produced: The plant was planned to have an annual production capacity of approximately 25,000 rifles.119 However, actual numbers produced are not specified and are likely much lower than initially planned due to the aforementioned issues.
- Notes: Venezuela also planned to produce over 50 million rounds of ammunition annually at an associated plant.119 The project has been a subject of scrutiny due to delays and costs.
3.34. Vietnam
- Manufacturer(s): Z111 Factory.4
- Models & Details:
- AKM-1 / AKM-VN: Local designations for AKM pattern rifles, possibly upgraded or locally assembled versions of the Soviet AKM [4 (STL-1A from AKM)]. Caliber: 7.62x39mm.
- TUL-1: A light machine gun, likely based on the RPK.4 Caliber: 7.62x39mm.
- STL-1A: An upgraded version of older AKM rifles, featuring new polymer handguards, a folding buttstock, an ergonomic pistol grip, an updated muzzle brake, and compatibility with M203-type grenade launchers.122 Caliber: 7.62x39mm.
- STV Series (Súng Trường Việt Nam): A family of modern assault rifles based on the IWI Galil ACE design (itself a Kalashnikov derivative), chambered in 7.62x39mm and using standard AK-47/AKM magazines. These were revealed around 2019-2020 and are becoming standard issue for the Vietnam People’s Army.4
- STV-215: Carbine version with a 215mm barrel.121
- STV-380: Standard rifle version with a 380mm barrel.121
- STV-410: Rifle with a 410mm barrel and adjustments to handguard/gas block for grenade launcher compatibility.121
- STV-416: Similar to STV-410 but lacks Picatinny rails.121
- Production Dates/Numbers: Production of older AKM types and upgrades is ongoing. The STV series entered production more recently (post-2019). Specific numbers are not provided.
- Notes: Vietnam has a long history of using Kalashnikov-pattern weapons and has more recently moved towards producing modern derivatives like the Galil ACE-based STV series. Z111 Factory also produces the Galil ACE 31/32 under license.4
4. Summary Table of Kalashnikov-Inspired Rifle Production by Country
The following table summarizes the countries identified as producers of Kalashnikov-inspired rifle designs, along with key details for representative models. It is important to note that “Estimated Numbers Produced” are often broad estimates or refer to total production of all AK types by a specific factory or country, rather than individual models, unless specified. “N/A” indicates data was not available in the provided sources.
| Country | Representative Model(s) | Caliber(s) | Manufacturer(s) | Production Dates (Period) | Estimated Numbers Produced | Notes |
| Soviet Union / Russia | AK-47 | 7.62x39mm M43 | Izhmash (Kalashnikov Concern), Tula Arms Plant | 1948–Present (family) | ~75 million (AK-47s), ~100 million (Kalashnikov family total) 3 | Original design, milled receiver initially. |
| AKM | 7.62x39mm M43 | Izhmash, Tula Arms Plant | 1959–1977 (USSR) | 10,278,300 (Soviet production) 6 | Modernized, stamped receiver, widespread. | |
| AK-74 / AK-74M | 5.45x39mm M74 | Izhmash (Kalashnikov Concern), Tula Arms Plant | 1974–Present (AK-74M) | 5,000,000+ (AK-74) 10 | Smaller caliber, distinctive muzzle brake. AK-74M has folding stock, scope rail. | |
| AK-100 Series (e.g., AK-101, AK-103, AK-105) | 5.56x45mm, 7.62x39mm, 5.45x39mm | Kalashnikov Concern | 1994–Present | AK-103: 250,000+.18 AK-101: 270,500+ (may include others).16 Overall series numbers vary by source. | Export-focused, polymer furniture, multi-caliber. | |
| AK-12 / AK-15 | 5.45x39mm, 7.62x39mm | Kalashnikov Concern | 2018–Present | 150,000+ (AK-12/15 combined by 2021) 24 | 5th Gen, improved ergonomics, Picatinny rails. | |
| Albania | ASH-78 Tip-1 | 7.62x39mm | KM Poliçan & Gramësh | 1978–1993 | 100,000+ 27 | Copy of Chinese Type 56. Unique selector markings. |
| Argentina | FARA 83 | 5.56x45mm NATO | FMAP-DM | 1984–1990 (limited) | ~1,193 (initial run) 33 | Inspired by Beretta AR70; Kalashnikov operating system lineage unconfirmed by sources. |
| Armenia | K-3 | 5.45x39mm | Not Specified | c. 1996 | Not Specified | Bullpup design based on AKS-74U. |
| Azerbaijan | Khazri (AK-74M licensed) | 5.45x39mm | Ministry of Defence Industry (MODIAR) | 2011–Present | Potential up to 120,000 (licensed production capacity) 37 | Licensed AK-74M for domestic use. |
| Bangladesh | BD-08 | 7.62x39mm | Bangladesh Ordnance Factories (BOF) | Not Specified | Not Specified | Likely Type 81 derivative (Type 81 uses distinct short-stroke piston). |
| Bulgaria | AR-M1 | 5.56x45mm, 7.62x39mm | Arsenal AD | 1998–Present | >1,000,000 (total Arsenal AK production) 15 | Modernized milled receiver AK, AK-74 features. Highly regarded. |
| China | Type 56 | 7.62x39mm | Norinco, PolyTech, State Factory 66 | 1956–Present | 10,000,000+ 48 | AK-47 copy (milled then stamped receiver), often has spike bayonet. |
| Croatia | APS-95 | 5.56x45mm NATO | Končar-Arma d.o.o | 1993/1995 – c. 2007 | Small quantities 51 | Based on Vektor R4 (Galil derivative), integrated optic. |
| Cuba | AKM derivatives | 7.62x39mm | Unión de Industrias Militares (UIM) | Not Specified | Not Specified | Local production details sparse. |
| East Germany | MPi-KM | 7.62x39mm | VEB GSW Wiesa, VEB Suhl | c. 1966–1980s | ~3-4 million (total MPi series) 58 | AKM copy, distinctive plastic furniture. |
| MPi-AK-74N | 5.45x39mm | VEB GSW Wiesa, VEB Suhl | 1983–1990 | Part of total MPi series production. | AK-74 copy. | |
| Egypt | Misr / Maadi ARM | 7.62x39mm | Maadi Company for Engineering Industries (Factory 54) | From 1958 (AK types) | Not Specified | AKM copy. |
| Ethiopia | Et-97/1 (AK-103 licensed) | 7.62x39mm | Gafat Armament Engineering Complex (GAEC) | From 1986 (AK types), AK-103 ongoing | Not Specified | Licensed AK-103 production. |
| Finland | RK 62 (Valmet M62) | 7.62x39mm | Valmet, SAKO | 1965–1994 | 350,000+ 68 | High-quality AK-47 derivative, milled receiver. Basis for Galil. |
| Hungary | AK-63 (AMM) | 7.62x39mm | Fegyver- és Gépgyár (FÉG) | 1977–2001 | ~11,000 exported to C. America 72; 7,700 AK-63MF modernized. | AKM copy with traditional furniture. |
| AMD-65 | 7.62x39mm | Fegyver- és Gépgyár (FÉG) | 1965–1980 | “Tens of thousands” 73 | Shortened, folding stock, distinct foregrip. | |
| India | INSAS Rifle | 5.56x45mm NATO | Ordnance Factories Board (OFB) | 1997–Present (Mass Prod.) | Not Specified (700k replacements ordered for various rifles) 79 | AKM-based operating system, reliability issues noted. |
| AK-203 | 7.62x39mm | Indo-Russia Rifles Pvt. Ltd. (IRRPL) | Production starting/ongoing | >600,000 planned (local prod.) + 70,000 imported 13 | Licensed modern Kalashnikov. | |
| Iran | KLS / KLF / KLT | 7.62x39mm | Defense Industries Organization (DIO) | Not Specified | Not Specified | AK-47/AKM/AKMS copies. |
| Iraq | Tabuk Assault Rifle | 7.62x39mm | Al-Qadissiya Establishments | 1978–1990s | Not Specified | Clone of Zastava M70. |
| Tabuk Sniper Rifle | 7.62x39mm | Al-Qadissiya Establishments | 1978–Present | Not Specified | DMR based on Zastava M76 (AK-derived). | |
| Israel | IMI Galil ARM/AR/SAR | 5.56x45mm, 7.62x51mm | Israel Military Industries (IMI) / IWI | 1972–1998 (IMI) | Not Specified | Based on Finnish RK 62. Highly regarded. |
| IWI Galil ACE | Various (incl. 7.62x39mm) | Israel Weapon Industries (IWI) | 2008–Present | Not Specified | Modernized Galil. | |
| Italy | Bernardelli VB-STD / VB-SR | 5.56x45mm NATO (likely) | Vincenzo Bernardelli S.p.A. | Not Specified | Not Specified | Galil derivative (licensed Galil production). |
| Nigeria | OBJ-006 | 7.62x39mm | Defence Industries Corp. of Nigeria (DICON) | 2006–Present | Not Specified | AK-47 copy. |
| North Korea | Type 58 | 7.62x39mm | Factory 61/65 | 1958–1968 | ~800,000 94 | AK-47 Type 3 copy (milled receiver). |
| Type 68 | 7.62x39mm | Factory 61/65 | 1968–Present | Not Specified | AKM copy (stamped receiver). | |
| Pakistan | PK-21 | 7.62x39mm | Pakistan Ordnance Factories (POF) | Not Specified | Not Specified | Unlicensed AK-103 clone. Khyber Pass copies also prevalent (various makers). |
| Poland | kbk wz. 1988 Tantal | 5.45x39mm | FB Radom (Łucznik) | 1989–1994 | ~25,000 100 | AK-74 derivative with unique features. |
| kbs wz. 1996 Beryl | 5.56x45mm NATO | FB Radom (Łucznik) | 1997–Present | Factory capacity 70k rifles/yr (late 80s) 99 | Modern NATO-caliber rifle. | |
| Romania | PM md. 63 | 7.62x39mm | Cugir Arms Factory | 1963–Present | “Several million” (md. 63/65 total) 105; >400k for Romanian forces 107 | AKM copy, often with vertical foregrip. |
| Serbia (Yugoslavia) | Zastava M70 | 7.62x39mm | Zastava Arms | 1970–Present | ~4,000,000 (M70 family) 83 | Robust AKM derivative, RPK-style receiver, grenade sight. |
| South Africa | Vektor R4 | 5.56x45mm NATO | Denel Land Systems (LIW) | 1980–Present | ~420,000 109 | Licensed Galil variant, polymer furniture. |
| Sudan | MAZ | 7.62x39mm (likely) | Military Industry Corporation (MIC) | Not Specified | Not Specified | Based on Chinese Type 56. |
| Turkey | SAR 15T / SAR 308 | 7.62x39mm (likely for 15T) | Sarsılmaz Silah Sanayi A.Ş. | Not Specified | Not Specified | AK-47 clones. SAR 308 may be 7.62x51mm. |
| Ukraine | Vepr | 5.45x39mm | State Space Agency | Designed 1993-94, announced 2003 | Not Specified | Bullpup AK-74. |
| Malyuk | 5.45x39mm, 7.62x39mm, 5.56x45mm | Interproinvest (IPI) / Krasyliv | 2017–Present (service) | Not Specified | Bullpup Kalashnikov derivative. | |
| United States | Various (e.g., PSAK-47, KR-103) | Various (incl. 7.62x39mm, 5.56x45mm) | Palmetto State Armory, Kalashnikov USA, Century Arms | Ongoing commercial | Varies by manufacturer | Semi-auto civilian market versions. |
| Venezuela | AK-103 (licensed) | 7.62x39mm | CAVIM | From 2012 (initial deliveries) | Planned 25,000/year; actual output unclear due to delays 119 | Licensed Russian AK-103, production issues. |
| Vietnam | STV-380 / STV-215 | 7.62x39mm | Z111 Factory | c. 2019–Present | Not Specified | Based on Galil ACE design. |
Photo Sources
Main photo of Mikhail Kalashnikov superimposed over a map with countries using or licensing firearms based on his designs highlighted was generated by Ronin’s Grips using Sora. It is release to the creative commons as long as blog.roningsgrips.com is cited as the source.
The majority of photos were obtained from Wikimedia and Wikipedia and are unaltered. Links to their respective pages are included and they remain the copyright of their respective authors.
Works cited
- AK-47 | Definition, History, Operation, & Facts – Britannica, accessed May 17, 2025, https://www.britannica.com/technology/AK-47
- The AK-47: the world’s favourite killing machine – Amnesty International, accessed May 17, 2025, https://www.amnesty.org/ar/wp-content/uploads/2021/07/act300112006en.pdf
- AK-47 – Wikipedia, accessed May 17, 2025, https://en.wikipedia.org/wiki/AK-47
- Kalashnikov rifle – Wikipedia, accessed May 17, 2025, https://en.wikipedia.org/wiki/Kalashnikov_rifle
- File:AK-47-Rifle.svg – Wikipedia, accessed May 17, 2025, https://en.wikipedia.org/wiki/File:AK-47-Rifle.svg
- AKM – Wikipedia, accessed May 17, 2025, https://en.wikipedia.org/wiki/AKM
- The AKM Assault Rifle | PDF | Personal Weapons – Scribd, accessed May 17, 2025, https://www.scribd.com/document/137559756/The-AKM-Assault-Rifle
- AK Variants: A Closer Look – The Primary Source On PrimaryArms.com, accessed May 17, 2025, https://blog.primaryarms.com/guide/ak-variants-explored/
- File:AKM (rifle).jpg – Wikimedia Commons, accessed May 17, 2025, https://commons.wikimedia.org/wiki/File:AKM_(rifle).jpg
- AK-74 – Wikipedia, accessed May 17, 2025, https://en.wikipedia.org/wiki/AK-74
- Guns in Movies, TV and Video Games – AK-74 – Internet Movie Firearms Database, accessed May 17, 2025, https://www.imfdb.org/wiki/AK-74
- File:AK-74 RPK-74 DA-ST-89-06612.jpg – Wikipedia, accessed May 17, 2025, https://en.wikipedia.org/wiki/File:AK-74_RPK-74_DA-ST-89-06612.jpg
- AK-100 (rifle family) – Wikipedia, accessed May 17, 2025, https://en.wikipedia.org/wiki/AK-100_(rifle_family)
- AK-100 – Weapon Systems, accessed May 17, 2025, https://old.weaponsystems.net/weaponsystem/AA04%20-%20AK-100.html
- Kalashnikov & Variant Factory Dataset (1947-present) – Audrey Kurth Cronin, accessed May 17, 2025, https://www.audreykurthcronin.com/p2p-pvid/p2p-pvid-kalashnikov/kalashnikov-variant-factory-dataset-1947-present/
- AK-101 – Wikipedia, accessed May 17, 2025, https://en.wikipedia.org/wiki/AK-101
- AK-102 – Wikipedia, accessed May 17, 2025, https://en.wikipedia.org/wiki/AK-102
- AK-103 – Wikipedia, accessed May 17, 2025, https://en.wikipedia.org/wiki/AK-103
- AK-103 assault rifle with GP-34 grenade launcher at Engineering Technologies 2012.jpg- Wikimedia Commons, accessed May 17, 2025, https://commons.wikimedia.org/wiki/File:AK-103_assault_rifle_with_GP-34_grenade_launcher_at_Engineering_Technologies_2012.jpg
- AK-104 – Wikipedia, accessed May 17, 2025, https://en.wikipedia.org/wiki/AK-104
- Category:AK-104 – Wikimedia Commons, accessed May 17, 2025, https://commons.wikimedia.org/wiki/Category:AK-104
- AK-100 Series – Small Arms Survey, accessed May 17, 2025, https://www.smallarmssurvey.org/sites/default/files/SAS-weapons-assault-rifles-AK-100-series.pdf
- AK-105 – Wikipedia, accessed May 17, 2025, https://en.wikipedia.org/wiki/AK-105
- AK-12 – Wikipedia, accessed May 17, 2025, https://en.wikipedia.org/wiki/AK-12
- Russia’s Modernized AK-12 Assault Rifles Are Being Delivered This Year, accessed May 17, 2025, https://nationalinterest.org/blog/buzz/russias-modernized-ak-12-assault-rifles-are-being-delivered-this-year
- What Are the Different Types of AKs? – Guns.com, accessed May 17, 2025, https://www.guns.com/news/what-are-ak-variants
- ASH-78 – Wikipedia, accessed May 17, 2025, https://en.wikipedia.org/wiki/ASH-78
- Shotgun news, accessed May 17, 2025, https://www.arsenal-bg.com/uploads/2016/06/583abffafca0f9dd4ae3c8ba685a074c.pdf
- ASH-78 – Customer Build, accessed May 17, 2025, https://akresources.childersguns.com/2024/03/ash-78-customer-build.html
- File:Ash-78.jpg – Wikimedia Commons, accessed May 17, 2025, https://commons.wikimedia.org/wiki/File:Ash-78.jpg
- Centrefire automatic rifle – ASH-82 (Kalashnikov AKM) – dated 1981 | Collection Object | Royal Armouries, accessed May 17, 2025, https://royalarmouries.org/collection/object/object-282536
- Centrefire automatic rifle – Automatiku SHqiptar – Model of 1982 (ASH-82) – 1986 | Collection Object | Royal Armouries, accessed May 17, 2025, https://royalarmouries.org/collection/object/object-282534
- FARA 83 – Wikipedia, accessed May 17, 2025, https://en.wikipedia.org/wiki/FARA_83
- Assault Rifles | PDF | Ammunition – Scribd, accessed May 17, 2025, https://www.scribd.com/document/145375992/Assault-Rifles
- Argentine indigenous assault rifle design FARA-83 : r/ForgottenWeapons – Reddit, accessed May 17, 2025, https://www.reddit.com/r/ForgottenWeapons/comments/19cn75i/argentine_indigenous_assault_rifle_design_fara83/
- Category:FARA 83 – Wikimedia Commons, accessed May 17, 2025, https://commons.wikimedia.org/wiki/Category:FARA_83
- Azerbaijan PKM Production | thefirearmblog.com, accessed May 17, 2025, https://www.thefirearmblog.com/blog/azerbaijan-pkm-production-44818135
- Ministry of Defence Industry of Azerbaijan – Wikipedia, accessed May 17, 2025, https://en.wikipedia.org/wiki/Ministry_of_Defence_Industry_of_Azerbaijan#Products
- File:Khazri 2.jpg – Wikimedia Commons, accessed May 17, 2025, https://commons.wikimedia.org/wiki/File:Khazri_2.jpg
- Type 81 Assault Rifle – Wikipedia | PDF | History – Scribd, accessed May 17, 2025, https://www.scribd.com/document/665459028/Type-81-assault-rifle-Wikipedia
- Type 81 assault rifle – Wikipedia, accessed May 17, 2025, https://en.wikipedia.org/wiki/Type_81_assault_rifle
- AR-M1, accessed May 17, 2025, https://wikipedia.nucleos.com/viewer/wikipedia_en_all/A/AR-M1
- Arsenal AD – Wikipedia, accessed May 17, 2025, https://en.wikipedia.org/wiki/Arsenal_AD#Products
- AR-M1 – Wikipedia, accessed May 17, 2025, https://en.wikipedia.org/wiki/AR-M1
- What country produces the best variations of Ak. Personally I would say Poland, because the tantal, wbp, fox, and Beryl. What would you all say, and why. : r/ak47 – Reddit, accessed May 17, 2025, https://www.reddit.com/r/ak47/comments/101jymx/what_country_produces_the_best_variations_of_ak/
- AR-M1 – Wikiwand, accessed May 17, 2025, https://www.wikiwand.com/en/articles/AR-M1
- Guns in Movies, TV and Video Games – AK-47 – Internet Movie Firearms Database, accessed May 17, 2025, https://www.imfdb.org/wiki/AK-47
- Type 56 assault rifle – Wikipedia, accessed May 17, 2025, https://en.wikipedia.org/wiki/Type_56_assault_rifle
- Type 56 assault rifles – Wikimedia Commons, accessed May 17, 2025, https://commons.wikimedia.org/wiki/Type_56_assault_rifles
- The Chinese Type 81 Information | Total War Center, accessed May 17, 2025, https://www.twcenter.net/threads/the-chinese-type-81-information.175527/
- APS-95 – Wikipedia, accessed May 17, 2025, https://en.wikipedia.org/wiki/APS-95
- List of assault rifles – Wikipedia, accessed May 17, 2025, https://en.wikipedia.org/wiki/List_of_assault_rifles
- Cuban Revolutionary Armed Forces – Wikipedia, accessed May 17, 2025, https://en.wikipedia.org/wiki/Military_of_Cuba#Infantry_weapons
- The Gun That Is in Almost 100 Countries: Why the AK-47 Dominates – The National Interest, accessed May 17, 2025, https://nationalinterest.org/blog/buzz/75-million-guns-ready-war-why-the-ak-47-dominates-20561
- SAMOPAL vz. 58: A rifle that looks like an Soviet AK-47 but it is not – Combat Operators, accessed May 17, 2025, https://combatoperators.com/firearms/rifles/samopal-vz-58/
- Differences Between the VZ-58 and the AK – Firearms History, Technology & Development, accessed May 17, 2025, http://firearmshistory.blogspot.com/2015/01/differences-between-vz-58-and-ak.html
- vz. 58 – Wikipedia, accessed May 17, 2025, https://en.wikipedia.org/wiki/Vz._58
- East German MPiKM assault rifle | Imperial War Museums, accessed May 17, 2025, https://www.iwm.org.uk/collections/item/object/30029525
- East German Wieger STG Rifle – Small Arms Review, accessed May 17, 2025, http://archive.smallarmsreview.com/display.article.printable.cfm?idarticles=1382
- East German AK History – Faktory 47, accessed May 17, 2025, https://www.faktory47.com/blogs/kalashnikov/east-german-ak-history
- East German MPi-KM-72 (AKM) Operator’s Manual : r/milsurp – Reddit, accessed May 17, 2025, https://www.reddit.com/r/milsurp/comments/11l19wp/east_german_mpikm72_akm_operators_manual/
- File:MPi-KM.jpg – Wikimedia Commons, accessed May 17, 2025, https://commons.wikimedia.org/wiki/File:MPi-KM.jpg
- File:MPI-KMS-74.JPG – Wikimedia Commons, accessed May 17, 2025, https://commons.wikimedia.org/wiki/File:MPI-KMS-74.JPG
- Hakim rifle – Wikipedia, accessed May 17, 2025, https://en.wikipedia.org/wiki/Hakim_rifle
- Egyptian Maadi MISR S/A AKM 7.62×39 16″ Rifle AK-47 Romanian Dong, accessed May 17, 2025, https://lsbauctions.com/egyptian-maadi-misr-s-a-akm-7-62×39-16-rifle-ak-47-romanian-dong/
- File:Maadi Rifle.webp – Wikimedia Commons, accessed May 17, 2025, https://commons.wikimedia.org/wiki/File:Maadi_Rifle.webp
- Gafat Armament Engineering Complex – Wikipedia, accessed May 17, 2025, https://en.wikipedia.org/wiki/Gafat_Armament_Engineering_Complex
- AKs from Finland. Part 2: Valmet RK 62, Advanced AK Designed 62 Years Ago | thefirearmblog.com, accessed May 17, 2025, https://www.thefirearmblog.com/blog/2024/04/18/aks-from-finland-part-2-valmet-rk-62-advanced-ak-designed-62-years-ago/
- RK 62 – Wikipedia, accessed May 17, 2025, https://en.wikipedia.org/wiki/RK_62
- IMI Galil: An Israel’s derivative of legendary AK-47 – Combat Operators, accessed May 17, 2025, https://combatoperators.com/firearms/rifles/imi-galil/
- Valmet M62 – Wikimedia Commons, accessed May 17, 2025, https://commons.wikimedia.org/wiki/Valmet_M62
- AK-63 – Wikipedia, accessed May 17, 2025, https://en.wikipedia.org/wiki/AK-63
- AMD-65 – Weaponsystems.net, accessed May 17, 2025, https://weaponsystems.net/system/816-AMD-65
- Fegyver- és Gépgyár – Wikipedia, accessed May 17, 2025, https://en.wikipedia.org/wiki/Fegyver-_%C3%A9s_G%C3%A9pgy%C3%A1r
- Place: Hungary | Collection Term – Royal Armouries, accessed May 17, 2025, https://royalarmouries.org/collection/facet/place_made/creation/Hungary
- Category:AK-63 – Wikimedia Commons, accessed May 17, 2025, https://commons.wikimedia.org/wiki/Category:AK-63
- Category:AMD 65 – Wikimedia Commons, accessed May 17, 2025, https://commons.wikimedia.org/wiki/Category:AMD_65
- INSAS rifle – Wikipedia, accessed May 17, 2025, https://en.wikipedia.org/wiki/INSAS_rifle
- Why is the INSAS rifle considered to be so bad? : r/WarCollege – Reddit, accessed May 17, 2025, https://www.reddit.com/r/WarCollege/comments/1knj4iv/why_is_the_insas_rifle_considered_to_be_so_bad/
- Identifying Small Arms and RPGs Produced in Iran, accessed May 17, 2025, https://irp.fas.org/world/iran/smallarms.pdf
- Defense Industries Organization – Wikipedia, accessed May 17, 2025, https://en.wikipedia.org/wiki/Defense_Industries_Organization#Small_Arms
- List of equipment of the Iranian Army – Wikipedia, accessed May 17, 2025, https://en.wikipedia.org/wiki/List_of_equipment_of_the_Iranian_Army
- Zastava M70 | Weaponsystems.net, accessed May 17, 2025, https://weaponsystems.net/system/376-Zastava+M70
- Tabuk Sniper Rifle – Wikipedia, accessed May 17, 2025, https://en.wikipedia.org/wiki/Tabuk_Sniper_Rifle
- Galil (& close derivatives) – Small Arms Survey, accessed May 17, 2025, https://www.smallarmssurvey.org/sites/default/files/SAS_weapons-assault-rifles-Galil.pdf
- IMI Galil – Wikipedia, accessed May 17, 2025, https://en.wikipedia.org/wiki/IMI_Galil
- IWI Galil ACE – Wikipedia, accessed May 17, 2025, https://en.wikipedia.org/wiki/IWI_Galil_ACE
- File:Bernardelli VB Practical 9mm (32795519385).jpg – Wikimedia Commons, accessed May 17, 2025, https://commons.wikimedia.org/wiki/File:Bernardelli_VB_Practical_9mm_(32795519385).jpg
- DICON Partners With Firm On Military Hardware Production – Voice of Nigeria, accessed May 17, 2025, https://von.gov.ng/dicon-partners-with-firm-on-military-hardware-production/
- Defence Industries Corporation of Nigeria – Wikipedia, accessed May 17, 2025, https://en.wikipedia.org/wiki/Defence_Industries_Corporation_of_Nigeria
- Defence Industries Corporation of Nigeria – Wikipedia, accessed May 17, 2025, https://en.wikipedia.org/wiki/Defence_Industries_Corporation_of_Nigeria#Products
- FB Beryl – Wikipedia, accessed May 17, 2025, https://en.wikipedia.org/wiki/FB_Beryl
- Nigerian made weapons, a complete list – World Defense, accessed May 17, 2025, https://world-defense.com/threads/nigerian-made-weapons-a-complete-list.7541/
- Type 58 assault rifle – Wikipedia, accessed May 17, 2025, https://en.wikipedia.org/wiki/Type_58_assault_rifle
- List of military equipment manufactured in Pakistan, accessed May 17, 2025, https://wikipedia.nucleos.com/viewer/wikipedia_en_all/A/List_of_military_equipment_manufactured_in_Pakistan
- Bayonets of Poland – WorldBayonets.com, accessed May 17, 2025, https://worldbayonets.com/Bayonet_Identification_Guide/Poland/Poland_2.html
- Polish Radom (11) AKM Barreled Action/Rifle w/ original Polish Chrome Lined Barrel & Polish Imported Receiver – Arms of America, accessed May 17, 2025, https://armsofamerica.com/polish-radom-11-akm-barreled-action-rifle-w-original-polish-chrome-lined-barrel-polish-imported-receiver/
- FB “Łucznik” Radom – Wikipedia, accessed May 17, 2025, https://en.wikipedia.org/wiki/FB_%22%C5%81ucznik%22_Radom
- BERYL TANTALSSON: THE SAGA OF THE POLISH KALASHNIKOV CONTINUES, accessed May 17, 2025, https://smallarmsreview.com/beryl-tantalsson-the-saga-of-the-polish-kalashnikov-continues/
- FB Tantal – Wikipedia, accessed May 17, 2025, https://en.wikipedia.org/wiki/FB_Tantal
- en.wikipedia.org, accessed May 17, 2025, https://en.wikipedia.org/wiki/FB_Radom
- Polish kbk AKM and AKMS rifles, 1991-2000. End of an era for the FB Radom AK Kalashnikov – YouTube, accessed May 17, 2025, https://www.youtube.com/watch?v=GRAXF6GmzLA
- Pistol Mitraliera model 1963 ( PM md. 63) AKM Variant – The Armoury, accessed May 17, 2025, https://www.wargm.org/armoury/index.php?mode=2&cat=Fully+Automatic+and+Self+Loading+Rifles+and+Carbines&item=121
- Pistol Mitralieră model 1963/1965 – Wikipedia, accessed May 17, 2025, https://en.wikipedia.org/wiki/Pistol_Mitralier%C4%83_model_1963/1965
- PM md. 63 – Weapon Systems, accessed May 17, 2025, https://old.weaponsystems.net/weaponsystem/AA04%20-%20PM%20md%2063.html
- Guns in Movies, TV and Video Games – PM md. 63 – Internet Movie Firearms Database, accessed May 17, 2025, https://www.imfdb.org/wiki/PM_md._63
- PM md. 63 – Weaponsystems.net, accessed May 17, 2025, https://weaponsystems.net/system/489-PM+md.+63
- Zastava M70 assault rifle – Wikipedia, accessed May 17, 2025, https://en.wikipedia.org/wiki/Zastava_M70_assault_rifle
- Vektor R4 – Wikipedia, accessed May 17, 2025, https://en.wikipedia.org/wiki/Vektor_R4
- Military Industry Corporation – Wikipedia, accessed May 17, 2025, https://en.wikipedia.org/wiki/Military_Industry_Corporation_(Sudan)#Products_and_Services
- Category:Military of Sudan – Wikimedia Commons, accessed May 17, 2025, https://commons.wikimedia.org/wiki/Category:Military_of_Sudan
- Sarsılmaz Silah, accessed May 17, 2025, https://sarsilmaz.com/public/uploads/1738761377en.pdf
- Sarsılmaz Arms – Wikipedia, accessed May 17, 2025, https://en.wikipedia.org/wiki/Sars%C4%B1lmaz_Arms
- Sarsılmaz Arms – Wikipedia, accessed May 17, 2025, https://en.wikipedia.org/wiki/Sars%C4%B1lmaz_Arms#Assault_Rifles
- Why Ukraine Special Ops Use This Bullpup. The Malyuk. – YouTube, accessed May 17, 2025, https://www.youtube.com/watch?v=fD8W7Ps6Yj8&pp=0gcJCfcAhR29_xXO
- Vepr – Wikipedia, accessed May 17, 2025, https://en.wikipedia.org/wiki/Vepr
- Malyuk – Wikipedia, accessed May 17, 2025, https://en.wikipedia.org/wiki/Malyuk
- AK Rifles – Century Arms, accessed May 17, 2025, https://www.centuryarms.com/ak-rifles
- Kalashnikov Venezuela Plant to Start AK-103 Production by 2019 End – Defense Mirror, accessed May 17, 2025, https://www.defensemirror.com/news/22279/Kalashnikov_Venezuela_Plant_to_Start_AK_103_Production_by_2019_End
- CAVIM – Wikipedia, accessed May 17, 2025, https://en.wikipedia.org/wiki/CAVIM#Firearms
- STV rifle – Wikipedia, accessed May 17, 2025, https://en.wikipedia.org/wiki/STV_rifle
- Z111 Factory – Wikipedia, accessed May 17, 2025, https://en.wikipedia.org/wiki/Z111_Factory#Products
- File:VD2022 STV380.jpg – Wikipedia, accessed May 17, 2025, https://en.m.wikipedia.org/wiki/File:VD2022_STV380.jpg
If you find this post useful, please share the link on Facebook, with your friends, etc. Your support is much appreciated and if you have any feedback, please email me at in**@*********ps.com. Please note that for links to other websites, I may be paid via an affiliate program such as Avantlink, Impact, Amazon and eBay.


.jpg)
.jpg)