The iron sights of the Kalashnikov series of rifles are one of its most recognizable and, in Western circles, most frequently criticized features. Often dismissed as crude or archaic, this perception fundamentally misunderstands the engineering philosophy and military doctrine that gave them form. The Kalashnikov’s sight system was not a flaw or a primitive compromise, but a masterfully pragmatic engineering solution perfectly aligned with the Soviet Union’s post-World War II strategic realities. It was a system designed not for the idealized conditions of a firing range, but for the brutal, chaotic, and unforgiving nature of modern, mechanized warfare as envisioned by Soviet military planners.
This report will deconstruct the design of the Kalashnikov’s sights from a Soviet and Russian engineering and historical perspective, relying on technical documentation and archival analysis. The sights—a robust tangent leaf rear sight and a protected front post—serve as a microcosm of the entire AK design philosophy: a system that prioritizes absolute reliability, simplicity of training for a massive conscript army, and battlefield effectiveness under the most adverse conditions. The analysis will explore the foundational requirements that dictated this design, the alternatives considered during its conception, its evolution over seven decades, and its strengths and weaknesses when viewed through the proper doctrinal lens. The story of the AK’s sights is the story of a deliberate choice, where uncompromising durability was consciously elevated above theoretical precision.
Section 1: The Post-War Mandate and the 1946 Automaton Trials
To understand the Kalashnikov’s sights, one must first understand the crucible in which the rifle itself was forged: the aftermath of the Great Patriotic War and the stringent requirements of the 1946 automaton trials. The experience of total war against a technologically advanced adversary had seared into the Soviet military consciousness the need for equipment that was not just effective, but also simple to manufacture, easy to maintain, and utterly reliable in the hands of hastily trained soldiers.
The GAU’s Tactical-Technical Requirements (Тактико-технические требования)
In 1946, the Main Artillery Directorate (Главное артиллерийское управление, or GAU) issued a set of tactical-technical requirements for a new automatic weapon to be chambered in the revolutionary 7.62x39mm intermediate cartridge. These requirements were not merely a list of desired performance metrics; they were a codified philosophy of war. The primary criteria for the new weapon were “maneuverability, скорострельность (rate of fire), убойное действие пули (lethality of the bullet) and меткость стрельбы (accuracy of fire)”.1 While accuracy was a factor, it was listed alongside, not above, other battlefield-centric attributes.
Critically, the GAU mandate included specific constraints on the weapon’s physical profile. A crucial but often overlooked requirement stipulated that the rifle “should not have protruding parts” that could interfere with its use in confined spaces or snag on a soldier’s equipment.2 The weapon had to be convenient and effective whether fired from “on the move, standing, from the knee, lying down, from a tree, from an attic, from a tank and so on”.2 This single requirement had profound implications for the design of the sighting system. It immediately placed a premium on a low-profile, robust design that was integral to the weapon’s frame and resistant to the shocks and impacts of combat. Delicate, complex, or large aperture sights, which might be easily damaged or knocked out of alignment, were effectively disqualified from consideration before the first blueprint was even drawn. The mandate was for a system that would not compromise the soldier’s mobility or the weapon’s fundamental durability.
The GAU’s requirements thus acted as a powerful design filter. The Soviet military leadership, shaped by the immense human and materiel losses of WWII, envisioned a future conflict fought by a massive, rapidly mobilized conscript army. This army would operate in diverse and difficult environments, from the rubble of cities to the dense forests of Eastern Europe, and would be heavily supported by armored personnel carriers and tanks. In this context, the primary attribute of an individual soldier’s rifle was its ability to function, always. A sight system that was fragile, prone to snagging, or easily clogged with mud or debris would render the entire weapon useless. Therefore, the design of the sights was necessarily subordinate to the overarching principles of reliability and battlefield utility. This logic led directly to the selection of a system with minimal protruding parts and maximum resilience—a description that perfectly fits the classic tangent-and-post configuration that would come to define the Kalashnikov.
Section 2: Engineering the AK-47 Sight System: Form Follows Function
The sight system chosen for the AK-47 is a direct reflection of the GAU’s mandate. It is a simple, robust, and mechanically sound design that prioritizes function over form and durability over delicacy. Its components are few, its operation is intuitive, and its construction is designed to withstand the rigors of the battlefield.
Mechanical Breakdown of the Sighting Apparatus
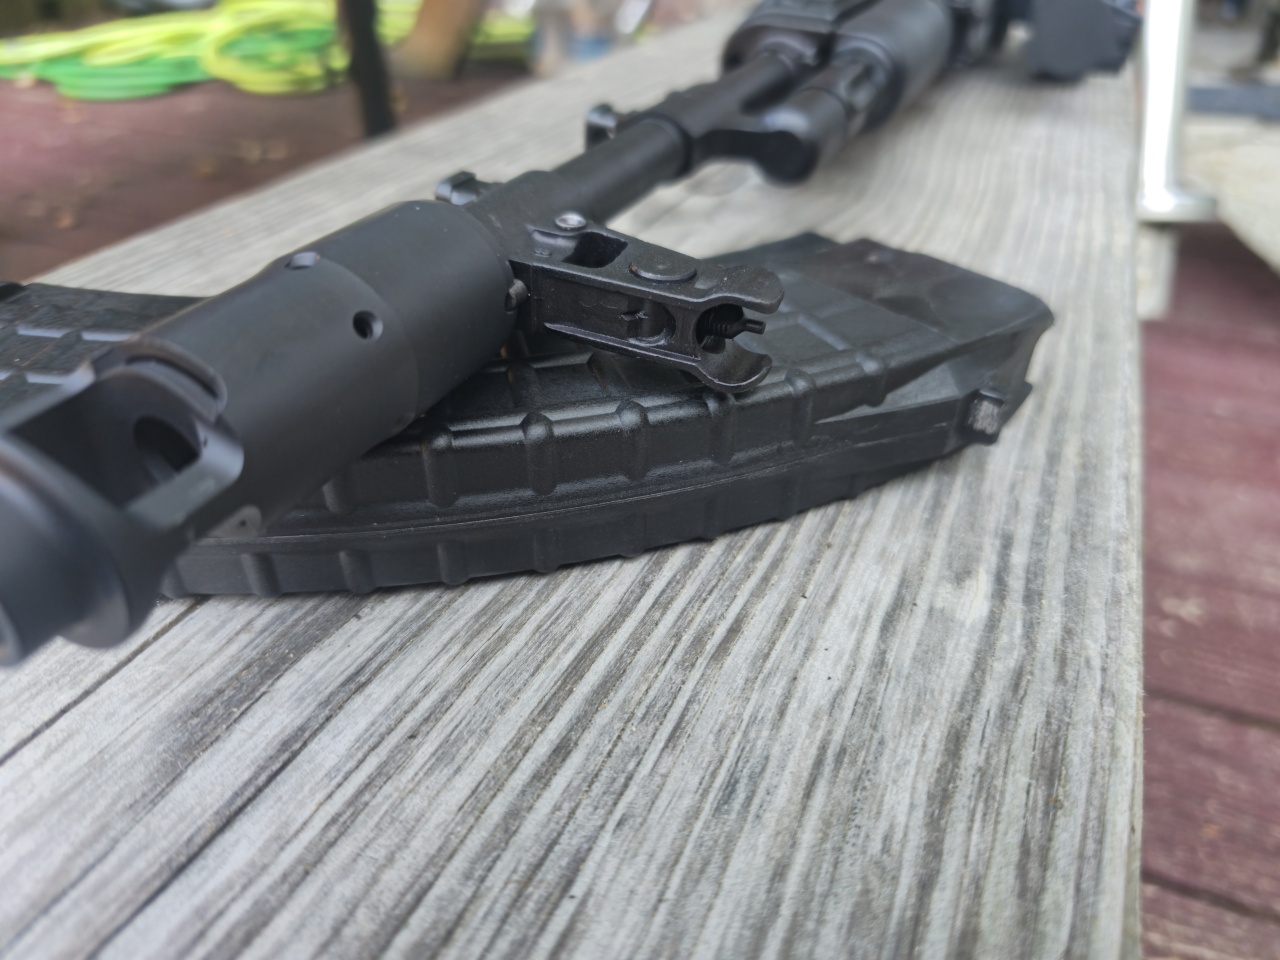
The AK’s iron sights consist of two primary assemblies: the rear sight and the front sight.
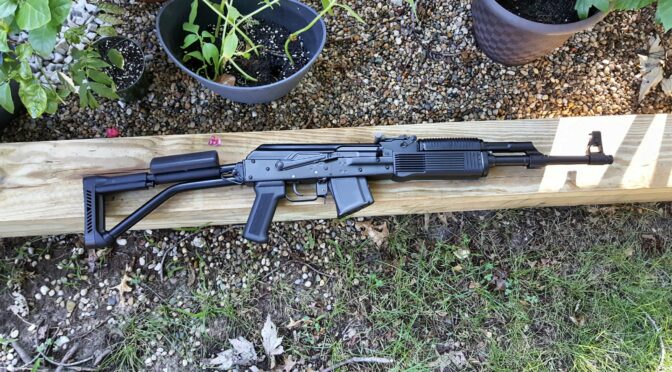
The rear sight, known in Russian technical literature as a “секторный прицел” (sector sight), is a tangent leaf design.3 It is composed of the “колодки прицела” (sight base), which is permanently affixed to the barrel just forward of the receiver; a “пластинчатая пружина” (leaf spring) that provides upward tension on the sight leaf; the “прицельная планка” (sight leaf) itself, which is a long, curved bar with a U-shaped notch at the rear; and a “хомутик” (slider) that moves along the leaf.4 The top of the sight leaf is graduated with markings from ‘1’ to ‘8’, representing range settings in hundreds of meters (100 m to 800 m).5 By depressing the buttons on the slider and moving it along the leaf, the soldier can quickly adjust for bullet drop at different ranges without any tools.
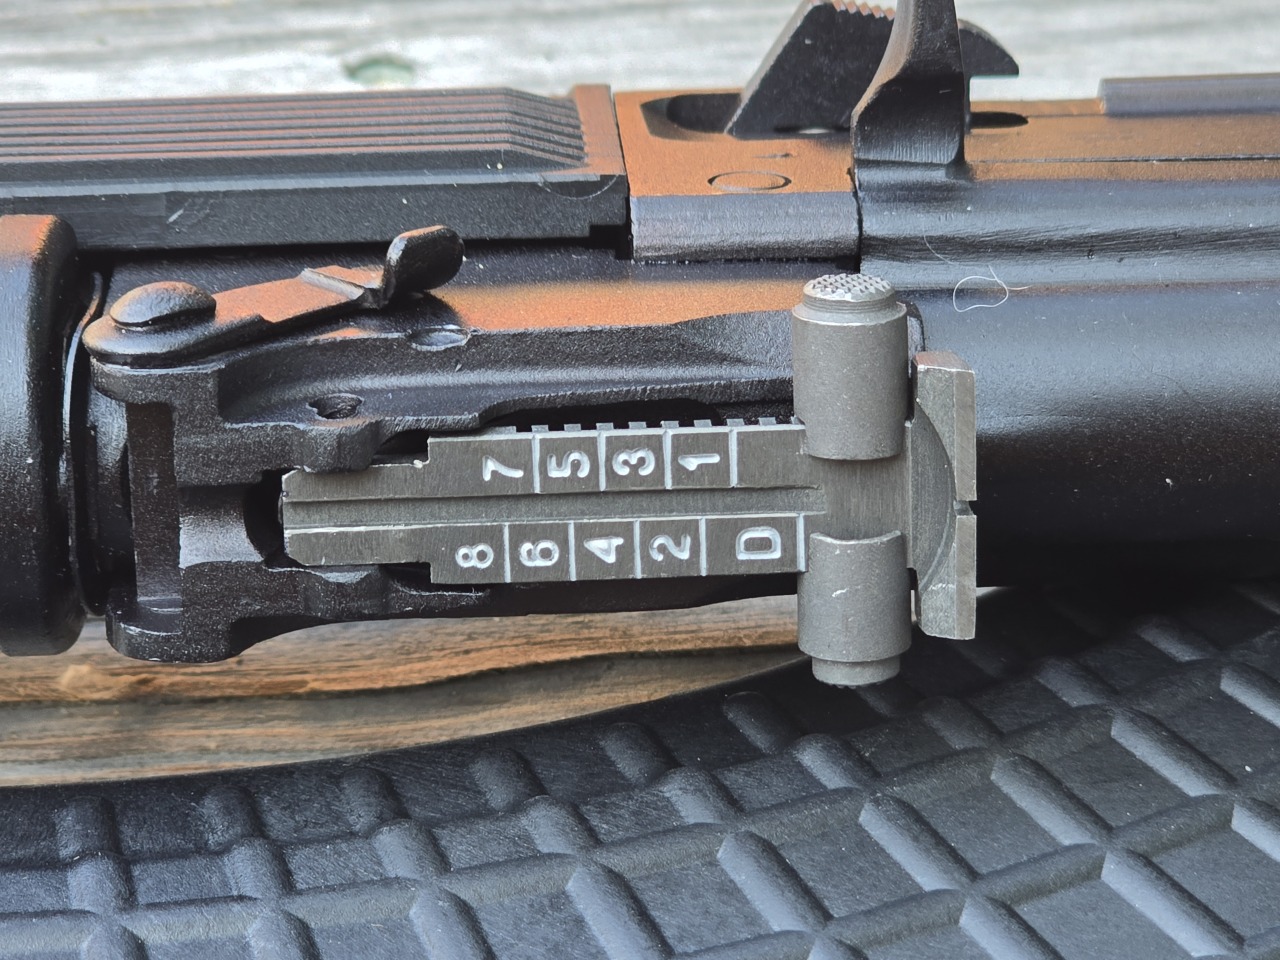
The front sight, or “мушка,” is a simple threaded post protected by two thick, stamped steel “wings.” These wings are not merely for protection; they also aid in rapid sight alignment. The post itself is adjustable for elevation by screwing it in or out of its base, and for windage by drifting the entire base left or right within its dovetail on the gas block.6 Crucially, these adjustments are not intended to be made by the soldier in the field. They are performed by a unit armorer or NCO using special tools during the initial zeroing process, a procedure known as “приведение к нормальному бою” (bringing to normal combat).6 This design choice deliberately prevents an untrained conscript from incorrectly adjusting the weapon’s zero.
The Engineering Trade-Off: Sight Radius vs. Maintainability
A common critique of the AK platform is its “короткая прицельная линия” (short sight line), which is the distance between the rear sight and the front sight.7 A shorter sight radius magnifies any aiming error, inherently limiting the weapon’s potential for high-precision shooting at longer ranges. For comparison, the contemporary SKS carbine had a sight radius of 480 mm, while the AK-47’s was only slightly longer at 520 mm.8 Many Western rifles, such as the M16, achieve a significantly longer sight radius by placing the rear sight at the rearmost point of the receiver.
The AK’s shorter sight radius was not an oversight or a design flaw; it was a deliberately accepted consequence of a higher-priority design decision. The core of the Kalashnikov’s legendary reliability is its ease of maintenance, which is enabled by its simple disassembly. A soldier can field-strip the rifle in seconds without tools, primarily by removing the large, stamped receiver cover to gain immediate access to the bolt carrier group and the interior of the action. This receiver cover is a non-stressed part, meaning it does not bear the forces of firing, and as such, it cannot provide a stable platform for mounting a sight. Any sight mounted on the removable cover would lose its zero every time the weapon was cleaned.
This reality forced the design team to mount the rear sight on the most stable, fixed point available forward of the receiver cover: the rear sight block, which is pinned securely to the barrel trunnion. This placement, by definition, resulted in a shorter sight radius. The Kalashnikov team consciously and correctly traded the potential for higher theoretical precision (which would come from a longer sight radius) for the absolute certainty of higher reliability and vastly superior ease of maintenance in the field. This decision reveals the clear and logical hierarchy of their design priorities: a rifle that works and can be easily maintained by a conscript in the mud is superior to a hyper-accurate rifle that is difficult to service or has been rendered useless by a faulty sight.
Section 3: The Competitive Landscape: Assessing Alternative Designs
The selection of the tangent-and-post sight system for the AK-47 was not an isolated or idiosyncratic choice made by Mikhail Kalashnikov’s team alone. An examination of the competing designs from the 1946 trials reveals a powerful case of design convergence, where multiple independent engineering teams, faced with the same set of doctrinal and technical requirements, arrived at the same fundamental solution. This consensus validates the design as the optimal choice for its time and purpose.
The Bulkin AB-46 (TKB-415): The Primary Competitor
The main rival to Kalashnikov’s entry during the trials was the AB-46, designed by Alexei Bulkin at the Tula-based TsKB-14 design bureau.9 The AB-46 was a formidable contender, and in some early stages of the competition, it was considered superior to the Kalashnikov prototype. An analysis of its features provides a crucial point of comparison.
The AB-46’s sight system was described in technical documents as consisting of a “мушки регулируемого типа с кольцевой защитой” (adjustable front sight with a protective ring) and a “прицела секторного типа” (sector-type rear sight).9 Like the AK-47, its rear tangent sight was graduated for a maximum effective range of 800 meters.10 The configuration was, for all practical purposes, identical to that of the Kalashnikov. This is a monumental finding. It demonstrates that the open tangent leaf rear sight and protected post front sight was not a unique Kalashnikov feature but was, in fact, the prevailing Soviet engineering consensus on how to best meet the GAU’s requirements for a durable, simple, and effective sighting system for a modern assault rifle.
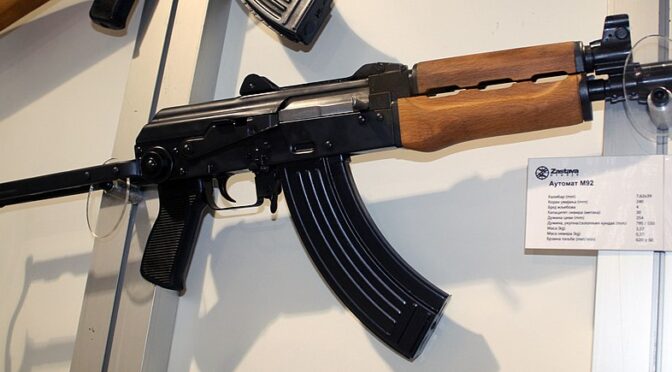
The Simonov SKS-45 Carbine
Further evidence for this design consensus can be found in the SKS-45 self-loading carbine, designed by Sergei Simonov. Although it was chambered for the same 7.62x39mm cartridge, the SKS was a more traditional design and was adopted shortly before the AK-47. Its sighting system was, once again, the same fundamental pattern. The SKS featured a “секторный прицел” (sector sight) graduated to 1000 meters and a front post protected by a sturdy hood.12 The widespread use of this sight style on the SKS, the AK-47, and the AB-46 proves that it was the established and accepted standard for Soviet infantry small arms of the period, valued above all for its robustness, simplicity, and reliability. The notion that the AK’s sights were somehow “primitive” is refuted by the fact that the top arms designers in the Soviet Union all converged on the same solution when tasked with creating a weapon for the common soldier.
Section 4: A Critical Analysis: Strengths and Weaknesses in Doctrinal Context
When evaluated in isolation, the AK-47’s sight system has clear strengths and weaknesses. However, a truly insightful analysis requires placing these characteristics within the framework of Soviet military doctrine, which prioritized massed fire and maneuver over individual marksmanship.
Strengths: Optimized for the Conscript and Close Combat
The primary strength of the Kalashnikov’s sights is their phenomenal durability. The entire assembly is made of steel, with the front post heavily protected and the rear sight base milled as part of a solid block of steel pinned to the barrel. The system can withstand significant abuse in the field without losing its zero or breaking—a critical advantage for a weapon intended for a conscript army.7
Secondly, the open nature of the U-notch and post sight picture offers a significant advantage in rapid target acquisition and engagement of moving targets. Unlike aperture (or “peep”) sights, which can feel constricting, the open sight provides a wide, unobstructed field of view, allowing the soldier to maintain better situational awareness of the battlefield.3 This is particularly valuable in the close-quarters, chaotic engagements at ranges under 300 meters, which Soviet doctrine considered the most likely scenario for infantry combat.7
Finally, the relatively coarse sight picture is an asset in low-light conditions. The wide U-notch and thick front post are easier for the human eye to align during dawn, dusk, or in poor weather than a small aperture and a fine needle-like post, which can become difficult or impossible to see.
Weaknesses: The Price of Pragmatism
The most cited weakness of the AK sight system is its inherent limitation on precision. The combination of the short sight radius and the coarse sight picture makes consistent, long-range accuracy challenging.7 Russian sources, comparing the AK-47 to its American rival, note that while an M16 can achieve groupings of 2-3.5 inches at 100 yards, a standard AK-47 produces groupings of 6-7 inches.14 This is a significant difference in mechanical accuracy.
Another perceived weakness is the method of adjustment. While elevation can be changed quickly by the user, windage adjustment requires a special tool (a “мушковод” or front sight adjustment tool) or a clamp and is not intended to be performed in the field.6 This was a deliberate choice to prevent soldiers from tampering with their zero, but it means that a soldier cannot easily compensate for factors like wind drift on their own.
However, it is a profound analytical error to label these characteristics as simple “weaknesses.” They are better understood as calculated trade-offs made in service of a specific military doctrine. Soviet doctrine did not envision its soldiers as individual marksmen engaging point targets at long range. Instead, it emphasized the squad as the primary fire unit, tasked with delivering a high volume of suppressive fire on an area target. The goal was to fix the enemy in place, allowing for flanking maneuvers or assault by other elements. For this role, the ability to quickly bring the weapon to bear, maintain situational awareness, and fire reliably in any condition is far more important than the ability to place a single, precise shot at 500 meters. The “weakness” of lower precision was an acceptable price to pay for the doctrinal “strength” of a simple, fast, and unbelievably rugged weapon system optimized for the 300-meter fight.
Section 5: In Practice: Doctrine, Zeroing, and Field Use
The practical application of the Kalashnikov’s sights reveals a sophisticated system designed to be simple for the end-user but precise in its setup. This dichotomy between user simplicity and armorer precision is key to understanding its effectiveness.
“Приведение к нормальному бою” (Bringing to Normal Combat): The Science of Zeroing
The Soviet military did not treat the AK as an inaccurate weapon; on the contrary, it developed a highly standardized and scientific procedure for zeroing it, known as “Приведение к нормальному бою”.6 This process refutes any notion that the sights are crude or imprecise. The procedure, detailed in official manuals, is methodical: the weapon is fired from a stable, supported position at a distance of 100 meters at a specific verification target. The rear sight leaf is set to “3” (for 300 meters), and a group of four shots is fired.15
The armorer then measures the deviation of the group’s center from the point of aim. The required adjustment is not guesswork; it is calculated using a precise formula:
adjustment(mm) = shooting distance,mm x (sight line length,mm×deviation,mm)
This formula ensures that small, precise changes are made to the front sight to perfectly align the point of impact with the point of aim.6 The values for these adjustments are well-defined. For an AKM, one full 360-degree rotation of the front sight post will shift the mean point of impact (MPI) vertically by 20 cm at a distance of 100 meters. A 1 mm lateral shift of the front sight base will move the MPI horizontally by 26 cm at 100 meters.16 This rigorous, mathematically-driven process 17 ensures that once the rifle is “brought to normal combat,” it is a precisely calibrated tool.
The “П” Setting: The Conscript’s Battle Zero
The true genius of the system for the common soldier lies in the “П” setting found on the rear sight of the AKM and later models. “П” stands for “Постоянная,” or “Constant,” and represents the weapon’s battle sight zero. This setting is calibrated to take maximum advantage of the cartridge’s trajectory.
For an AKM chambered in 7.62x39mm, setting the sight to “П” (equivalent to the 300m setting on the AK-47) allows a soldier to aim at the center of mass of a man-sized target and be confident of a hit at any range out to the “дальность прямого выстрела” (direct fire range) of 350 meters.18 The bullet will rise slightly above the line of sight at intermediate ranges and fall back through it at the zeroed distance, but it will never travel outside the vertical dimensions of a human torso. For the flatter-shooting 5.45x39mm cartridge of the AK-74, this point-blank range extends to 440 meters for a chest-sized target.5
This feature is a brilliant solution to a human-factors problem. It removes the need for a stressed, frightened conscript to estimate range and make sight adjustments in the heat of battle. The soldier is trained to simply leave the sight on “П,” aim center-mass, and fire. This approach—a complex, precise setup by a trained armorer followed by an incredibly simple combat application for the user—perfectly encapsulates the Soviet understanding of its soldiers’ capabilities and limitations under fire.
Section 6: An Evolutionary Trajectory: From the AKM to the AK-12
The evolution of the Kalashnikov’s sights over more than 70 years is a story of remarkable stability followed by radical change. This trajectory directly mirrors the transformation of the Russian military itself.
The Era of Stability: AKM and AK-74
From the adoption of the original AK-47 through the modernized AKM in the late 1950s and the AK-74 in the 1970s, the fundamental sight design remained unchanged. The AKM’s sight leaf was extended to a 1000-meter maximum setting and incorporated the “П” battle zero, and some models began to feature a “dovetail” side rail for mounting night vision optics, but the core system of a forward-mounted tangent leaf and protected front post was untouched.18 When the AK-74 was introduced with the new 5.45x39mm cartridge, the sight leaf was simply recalibrated for the new round’s flatter trajectory; the mechanical design was identical.5
This nearly half-century of design stasis is not evidence of stagnation. It is a testament to the system’s perceived adequacy for its mission. For a mass-mobilization army based on conscription, the simple, rugged, and “good enough” sight system was the correct solution. It worked, it was reliable, and it was easy to train.
The Paradigm Shift: The AK-12
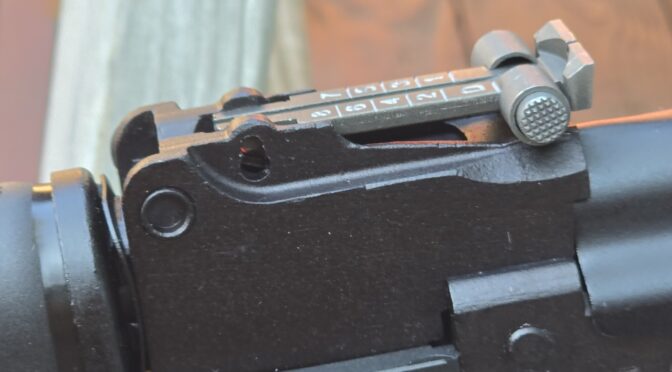
The introduction of the AK-12 in the 2010s represents the most significant evolution in the Kalashnikov’s sighting philosophy since 1947. The new rifle signals a complete paradigm shift. The traditional tangent leaf sight is gone. In its place is a rear-mounted, rotary diopter (aperture) sight, described as “Закрытый/диоптрический” (Closed/diopter).20 This sight is located at the rearmost part of the receiver, mounted on a redesigned, more stable, and hinged receiver cover that is integrated with a full-length Picatinny rail.21
This change is revolutionary for several reasons. First, moving the sight to the rear of the receiver dramatically increases the sight radius, significantly enhancing the weapon’s potential for mechanical accuracy. Second, the switch from an open U-notch to a diopter aperture sight prioritizes a precise sight picture over the wider field of view of the old system. Third, and most importantly, the integral Picatinny rail acknowledges that for a modern army, optical sights are now the primary sighting method, and iron sights serve as a backup. The AK-12’s rear sight is a simple rotating drum with settings for 100, 300, and other ranges, designed for quick use when a primary optic fails.20
This evolution in hardware is a direct reflection of an evolution in doctrine and personnel. The sight system of the AK-47 was designed for the Soviet conscript. The sight system of the AK-12 is designed for the modern Russian professional soldier (the “контрактник”). This new type of soldier is better trained, expected to operate with greater individual precision, and equipped with advanced optics. The change in sights is not merely a technical upgrade; it is a physical manifestation of the Russian military’s transformation from a mass-mobilization force to a smaller, more professional, and more technologically advanced fighting force.
Conclusion: A Legacy of Pragmatism
The iron sights of the Kalashnikov rifle are not an afterthought or a flaw; they are a product of brilliant, context-aware engineering. The design team, guided by the harsh lessons of the Second World War and the stringent requirements of the GAU, created a system that was purpose-built for a specific time, a specific doctrine, and a specific user. It was a system born of deliberate compromise, where the unassailable requirements of absolute reliability, manufacturing simplicity, and ease of use for a vast conscript army rightly took precedence over the theoretical benefits of maximum precision.
The long stasis of the design, from the AK-47 through the AK-74, is the ultimate testament to its success in fulfilling that demanding role for half a century. The recent, radical evolution seen in the AK-12 is not a repudiation of that legacy but its logical continuation. It is a necessary adaptation to the new realities of 21st-century warfare and the fundamental transformation of the Russian soldier from a component of a massed force to a more precise and lethal individual warrior. The legacy of the Kalashnikov’s sights, from the simple sector sight of 1947 to the railed diopter of today, is one of profound and uncompromising pragmatism.
If you find this post useful, please share the link on Facebook, with your friends, etc. Your support is much appreciated and if you have any feedback, please email me at in**@*********ps.com. Please note that for links to other websites, we are only paid if there is an affiliate program such as Avantlink, Impact, Amazon and eBay and only if you purchase something. If you’d like to directly contribute towards our continued reporting, please visit our funding page.
Sources Used
- Первый тур конкурса 1946 г.. Автомат Калашникова. Символ России, accessed July 31, 2025, https://military.wikireading.ru/43939
- История русского автомата. Часть 1. Автоматическое оружие под «промежуточный» патрон. Глава 5. Первый тур конкурса 1946 г » COMGUN.RU – Сайт для увлеченных людей!, accessed July 31, 2025, https://www.comgun.ru/gun/7708-istorija-russkogo-avtomata-chast-1-avtomaticheskoe-oruzhie-pod-promezhutochnyj-patron-glava-5-pervyj-tur-konkursa-1946-g.html
- Прицельные приспособления – Статьи об оружии и боеприпасах, accessed July 31, 2025, https://weaponland.ru/publ/pricelnye_prisposoblenija/17-1-0-219
- 17. Механические прицельные приспособления АК – YouTube, accessed July 31, 2025, https://www.youtube.com/watch?v=mVRT47weYlY
- Зачем на прицельной планке АК-74 и АКМ нанесена буква “П”? – YouTube, accessed July 31, 2025, https://www.youtube.com/watch?v=IwSG0b0kE-8
- Порядок пристрелки оружия на базе автомата АК – Застава Ижевск, accessed July 31, 2025, https://zastava-izhevsk.ru/3/prakticheskoe-rukovodstvo-po-pristrelke-saygi-410k-02-i-drugikh-avtomatoobraznykh/
- Приемущества и недостатки штурмовой винтовки АК-47 | Автомат Калашникова, accessed July 31, 2025, https://vk.com/topic-4997389_8700269
- Охотничий карабин СКС-45: обзор, ТТХ, модификации, отзывы, accessed July 31, 2025, https://strelyaem.com/ohotnichij-karabin-sks-45/
- Главный конкурент АК-47 на конкурсных испытаниях – автомат …, accessed July 31, 2025, https://topwar.ru/13322-glavnyy-konkurent-ak-47-na-konkursnyh-ispytaniyah-avtomat-bulkina-ab-46.html
- 7,62 опытный автомат Булкина АБ-46 (ТКБ-415) (1946-48гг.), accessed July 31, 2025, http://war-russia.info/index.php/nomenklatura-vooruzhenij/428-sukhoputnye-vojska/strelkovoe-oruzhie/strelkovoe-oruzhie-2/avtomaty-pistolety-pulemety-2/2687-7-62-opytnyj-avtomat-bulkina-ab-46-tkb-415-1946g
- Опытный образец АБ-46 системы Булкина – mgewehr – WordPress.com, accessed July 31, 2025, https://mgewehr.wordpress.com/2018/08/26/bulkin-ab-46/
- Игровой комплект СКС-45 «Симонов» серии «STEEL» – LASERWAR, accessed July 31, 2025, https://laserwar.ru/equipment/product-igrovoy-komplekt-sks-45-simonov-serii-steel-527/
- СКС-45 – Оружие солдата и охотника России – maksimov.su, accessed July 31, 2025, https://maksimov.su/oruzie-i-boepripasi/nareznoe-oruzie/nareznoe-oruzhie-sssr-i-rossii/144-sks-45-orujie-soldata-i-ohotnika-rossii.html
- Противостояние автоматов АК 47 и М16. Военное дело, accessed July 31, 2025, https://weaponland.ru/video/vip/270/shturmovye_vintovki_i_avtomaty/protivostojanie_avtomatov_ak_47_i_m16_voennoe_delo
- Тема 1. 5,45 мм автомат Калашникова (АК-74) – Главная, accessed July 31, 2025, https://ebooks.grsu.by/voen_podgotovka/tema-1-5-45-mm-avtomat-kalashnikova-ak-74.htm
- Приведение АКМ – 7.62 (АК -74) к нормальному бою. – Инфоурок, accessed July 31, 2025, https://infourok.ru/privedenie-akm-7-62-ak-74-k-normalnomu-boyu-5786202.html
- Приведение к нормальному бою АК. Как пристрелять ЛЮБОЕ оружие. – YouTube, accessed July 31, 2025, https://m.youtube.com/watch?v=DGwnRgmd48E&pp=ygUGI252cDcz
- Автомат Калашникова модернизированный – Википедия, accessed July 31, 2025, https://ru.wikipedia.org/wiki/%D0%90%D0%B2%D1%82%D0%BE%D0%BC%D0%B0%D1%82_%D0%9A%D0%B0%D0%BB%D0%B0%D1%88%D0%BD%D0%B8%D0%BA%D0%BE%D0%B2%D0%B0_%D0%BC%D0%BE%D0%B4%D0%B5%D1%80%D0%BD%D0%B8%D0%B7%D0%B8%D1%80%D0%BE%D0%B2%D0%B0%D0%BD%D0%BD%D1%8B%D0%B9
- Как различать модификации Ак? 2019 – ВКонтакте, accessed July 31, 2025, https://vk.com/@strelok_sniper_sniper-kak-razlichat-modifikacii-ak
- Автомат Калашникова АК-12 || Группа компаний «Калашников», accessed July 31, 2025, https://kalashnikovgroup.ru/catalog/boevoe-strelkovoe-oruzhie/avtomaty/avtomat-kalashnikova-ak-12
- 5,45 ММ АВТОМАТ КАЛАШНИКОВА АК-12, accessed July 31, 2025, https://smolgu.ru/science/%D0%A0%D1%83%D0%BA%D0%BE%D0%B2%D0%BE%D0%B4%D1%81%D1%82%D0%B2%D0%BE%20%D0%BF%D0%BE%205.45%20%D0%BC%D0%BC%20%D0%90%D0%9A-12.pdf