Category Archives: Tools

Cordless screwdrivers can make a difference for folks with Carpal Tunnel – the Dewalt DCF682

Folks, the first time I saw a cordless screwdriver, or power screwdriver, it was a little Black & Decker Quantum 3.6 volt model – probably 15-20 years ago.  Do you remember Quantum?  They were the green and black line of tools that B&D introduced to try and be a step up from their basic black and orange B&D line.  My dad had bought it for me because I had been diagnosed with carpal tunnel and my hands were in tremendous pain and stiff.  For folks who have carpal tunnel syndrome (CTS), you know it sucks.  For those of you who do not have it but use your hands a ton, you do need to worry about it.  Let’s talk about this injury known as CTS that totally sucks for people that use their hands a lot.  By the way, did I mention it sucks?

This definition is from Wikipedia “Carpal tunnel syndrome (CTS) is a medical condition due to compression of the median nerve as it travels through the wrist at the carpal tunnel. The main symptoms are pain, numbness, and tingling, in the thumb, index finger, middle finger, and the thumb side of the ring fingers. Symptoms typically start gradually and during the night. Pain may extend up the arm. Weak grip strength may occur and after a long period of time the muscles at the base of the thumb may waste away. In more than half of cases both sides are affected.”

As your tendons go through your wrist, there is this sheath called the carpal tunnel (CT) that they go through.  As the tendons pass, they rub the ligament and can get irritated and swell thus reducing space and compressing nerves, which then causes more irritation, more swelling and more irritation and more swelling, etc.

For me, manual screwdrivers suck.  My hand is bent and fingers closed and then I am twisting my hand to turn the screwdriver.  This really puts strain on the tendons going through the CT.  Whenever I do a lot of work with a screwdriver, boy do I feel it later or the next day.  Guess what, because of all the stuff I do in my shop, typing on the computer and what not, I can’t escape it.  I’ve had CTS for 22+ years but opted to manage it vs. have surgery.  Some days, I manage it and others it manages me might be a better way of putting it but I have learned a lot.

To be clear though, when you have carpal tunnel, it really pays off to learn what you need to do differently to put less stress on the tendons going through the carpal tunnel that causes the inflammation.  It used to be that after working on something, I would definitely feel it but by trying to reduce the manual twisting as much as I could, I didn’t hurt as much later that night or the next morning.  I also learned how to stretch my hands and the benefits of Aleve (naproxen) and Advil (ibuprofen).  It wasn’t “one” thing that had to change – it was changing as many things as I could – even how I typed on a computer.  Using a cordless screwdriver was one of many changes that helped.

So, back to the story.  My dad gave me the cordless screwdriver and I immediately scoffed at the notion of a cordless screwdriver (manly men don’t need them, right? I was wrong!) but the fact of the matter was that the twisting motion used to set and remove screws was tearing up my hands.  So, almost reluctantly, I gave it a try while questioning my man hood!  What I found out was that it actually made a big difference.   By using the cordless screw drivers as much as I could, I found that it made a big difference with my hands because I did not need to do the repetitive twisting motion when I needed to do a lot of screwdriver work — I was going to say screwing but that really looks funny in writing 🙂  It made such a big difference that I was a convert to power screw drivers.  Sure, I still have dozens of screwdrivers and nut drivers that I use when I must, but when there is a lot of work to be done, I grab the power screw driver.

In addition to reducing wear and tear on my hands, there was another big benefit too in regards to productivity – I could set and remove screws way faster than before.  Granted there were still times where I needed more torque or needed to “feel” the screw that made me do stuff by hand or break out one of my big cordless drills.  In case you are wondering, cordless screw drivers are smaller, lighter, easier to maneuver and can turn slower for hand work than a drill.  Bottom line, I did a lot less manual twisting with my hands.

My dad had the foresight of getting me a unit with removable batteries and over the years with many cordless tools, I’ve found it pays off to have more than one battery so you aren’t dead in the water waiting for the battery to charge.

I also found out that using the magnetic quarter inch bit holders allowed tremendous flexibility for driving all kinds of screws – philips, blade, torx, hex, small nuts, etc.  Over the years, I have tried tons and tons of them.  Cheap bits break or wear faster – for example, the sharp edges of a philips bit rounding over, the magnetic bit older cracking, etc.

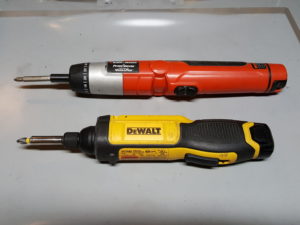
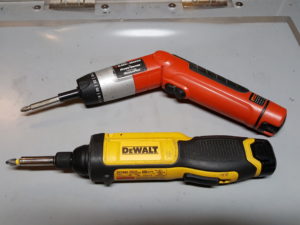
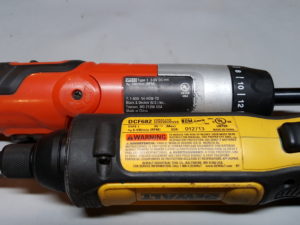
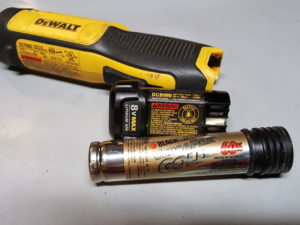
I eventually wore out the Quantum and bought a B&D Vp810 Pivot Driver that used the same Versapak 3.6 volt batteries and both had a clutch and the handle that could pivot.  I used the heck out of that thing for a few years (and it is still on a shelf in my shop) but wanted more torque as I really wanted the tool to have broader use so I dug around and bought my current cordless screwdriver, which is an 8 volt Dewalt DCF682 that I’ve had for probably at least two years and use it constantly – probably at least once a day on average.
Being a tool geek, this unit has a gyroscope that senses the direction your hand is turning and by how much.  It then turns the motor in the same direction and boosts the speed up according to how much you turn your hand.  It’s a bit weird at first but then it becomes second nature.  There have been a few tight spaces where I wished there was a switch but 90% of the time, I am pretty happy.  It’s also faster at speeds up to 430RPM than the old VP810, which was up to 180 RPM and it does have more torque as you’d expect given the higher voltage.
My exact model is no longer being produced but you can find it on eBay and other secondary markets.  Dewalt now has a new model – the DCF682N – that also gets great reviews.  From what I can gather, it has two notable improvements over my model, namely a handle that can pivot and a 15 position clutch.  I’ve never really missed having a handle that angles but a clutch comes in handy to prevent over-driving a screw.  It’s the DCF682N1 and it gets great reviews.  You can get it with just the driver, battery and charger or a better deal with the driver, charger, two batteries and a carry bag.  I would recommend the kit because for the price of a second battery you can get it and you absolutely want a second battery to avoid delays.

I hope this helps you some.  Over the years, I’ve gone from scoffing at these cordless screwdrivers to absolutely being a user and defender of them.  Like all tools, they have value when used at the right time for the right task.
I hope this helps some.  Bottom line, if you have CTS or are worried about CTS due to a lot of handwork including driving screws, get yourself a power screwdriver.  It’s another tool that has a time and a place to help you out.

At the bottom of the page I will have links to the screwdriver and bits on Amazon.

If you want to learn more about CTS and how to manage it, check out:

Definitely learn about stretches that can help.  There are a ton of videos on youtube and it pays to actually see how to do them.  Here’s one example:

Please note that I am not a doctor and the above is not medical advice – just my experiences and opinions.  See a doctor if you are having pains and get the problem properly diagnosed.


If you find this post useful, please share the link on Facebook, with your friends, etc. Your support is much appreciated and if you have any feedback, please email me at in**@ro*********.com. Please note that for links to other websites, I may be paid via an affiliate program such as Avantlink, Impact, Amazon and eBay.


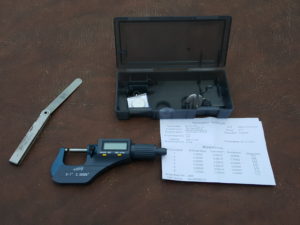
Here is a great digital micrometer that is also very affordable for your shop.


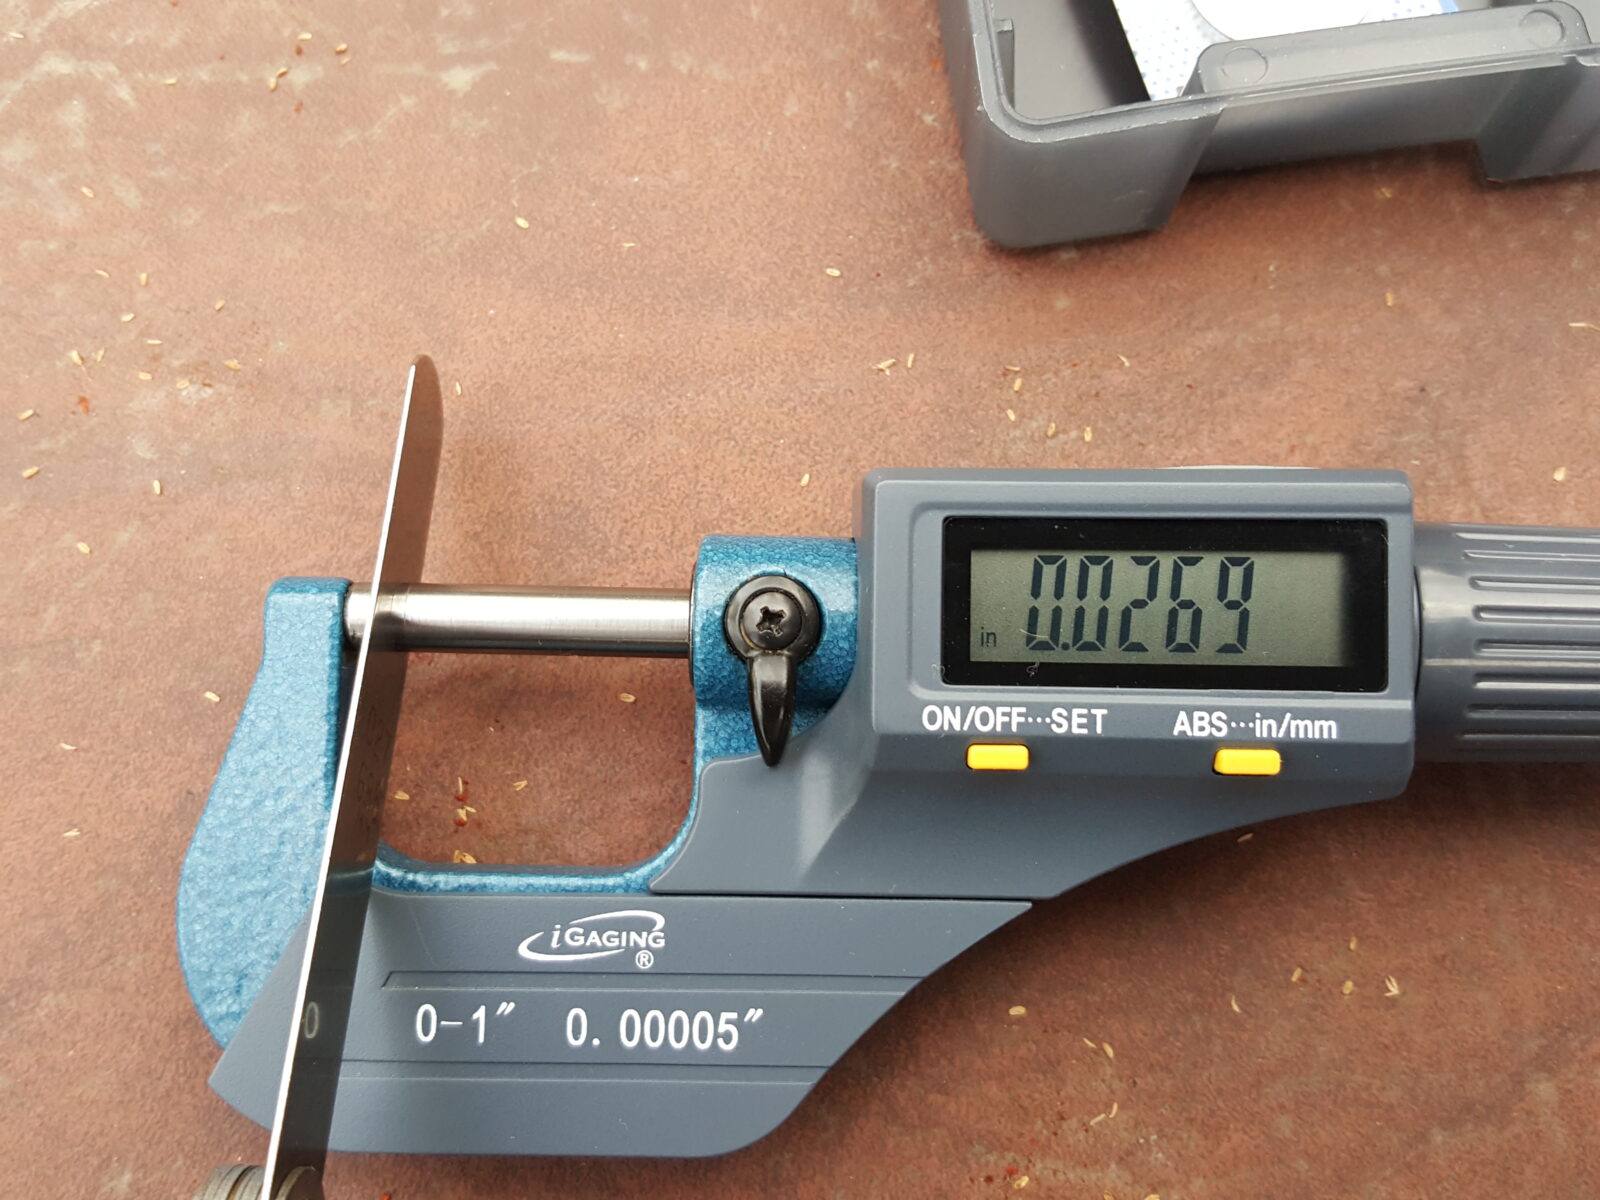
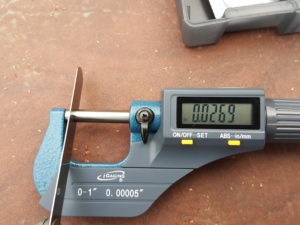
When you are working in the shop, it is frequently very important to have reliable measurements. I have owned a number of calipers and one good dial micrometer (which I can’t find) over the years.  I am definitely not a machinist but I run into situations regularly where I need more reliable measurements then what a normal pair of digital calipers can give. I don’t know if you’ve noticed but it is really easy to get readings all over the place on a caliper depending on how hard you squeeze it. At any rate, I realize I really should invest in a digital micrometer but had a limited budget also I started doing a bunch of research and found the IGaging 0-1″ micrometer at Amazon. I bought it back in January 2017 and have been very happy. Everything about it is very easy to use.  This is exactly what I have and you can click on the link to learn more and order one:

4/10/2017 Testing:


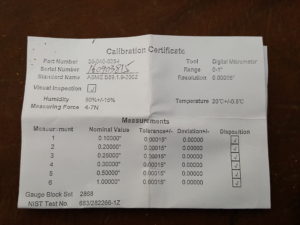
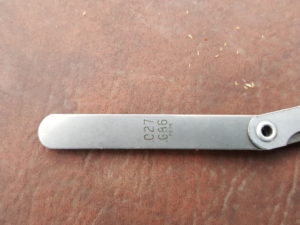
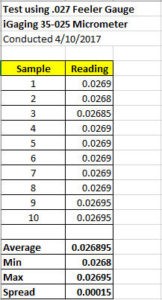
After I posted the blog, some guys asked me to take a feeler gauge, get some samples and post the results.  I must admit I know I should take 30 samples but opted just to do 10 for the sake of time. I zeroed the micrometer and pulled out the .027″ blade and I have no idea where the set came from – quite possibly Autozone or Harbor Freight so just how exact it is, I don’t know.  I would take a measurement, back the anvil off a few turns, and bring it in again until I could hear the clutch click.  The work and the micrometer were resting on the table at all times unlike the photo I took above.  Here is the results that I generated in Excel:

I think it is remarkable that out of 10 scores there was only a spread of 0.00015″ – that repeatability is pretty cool given the price of this micrometer and is exactly why I wanted a micrometer vs. a caliper for some of the stuff I do.

What I like:

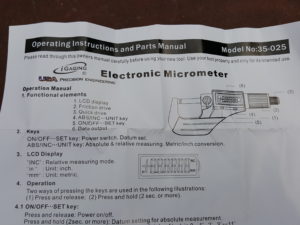
  • Very easy to use with simple instructions
  • Large easy to read digits
  • You can adjust a little clutch to get consistent clamping during measurements
  • The battery is easy to get to
  • Appears to take consistent measures
  • As you can see from testing, repeatability appears to fall very close to their 0.0001″ claim
  • If we assume that the gauge really is .027, then the average (.026895) is exactly .000105 short of that but that is an assumption
  • Easy to toggle between inches and millimeters, which I have to do all the time

Con:

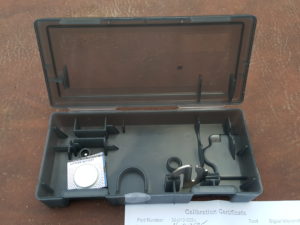
  • One small complaint is a very cheap case. Now, I’d rather have the money spent on the tool so this is a nit-picking con but also the only one I have so far.

If you’re looking for a good budget 0-1″micrometer that does not break the bank, I would recommend you buy it.

7/19/2019 Update:  Still going strong.  No problems to report.


If you find this post useful, please share the link on Facebook, with your friends, etc. Your support is much appreciated and if you have any feedback, please email me at in**@ro*********.com. Please note that for links to other websites, I may be paid via an affiliate program such as Avantlink, Impact, Amazon and eBay.


Use a Wen 3410 Air Filtration System to Remove Fine Floating Dust In Your Shop

Okay folks, with all the sanding of plastic I do, my shop has tons and tons of dust in it.  In 2015 I read an article about how small fine dust particles are unhealthy – in general, the smaller the particle, the more it gets to places in your lungs where you don’t want it to and it may get stuck there.  Now I may be a slob, as my wife will readily agree, but I do get concerned about safety.  Now I investigated improving my dust collection off the tools and that was way too expensive.

At some point I will upgrade my dust collection at the tools but that will have to wait.  What you will notice when talking to a lot of the vendors, and Grizzly is one example, is that they only warranty their products for wood.  What this tells you is that they are using open bearings (not sealed bearings) and if other materials get in there (like my glass reinforced plastic), it will shred them.  Grizzly product support was real cool about answering my questions and cautioning me up front before I dropped a big amount of cash on one of their dust systems so kudos to them for being up front and honest.

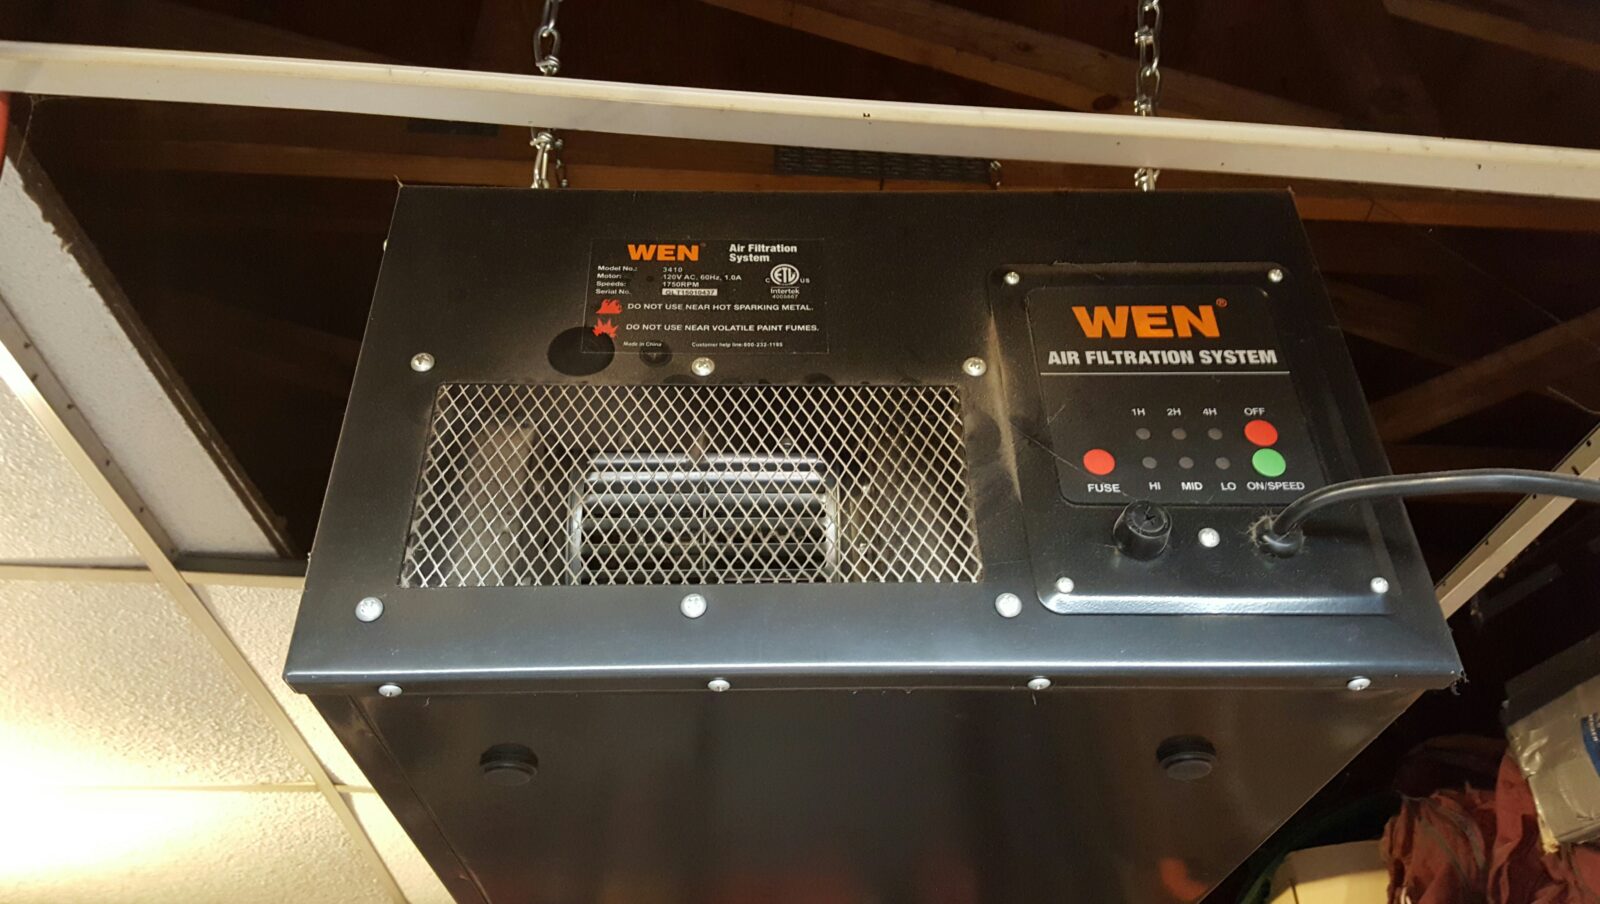
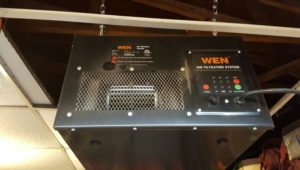
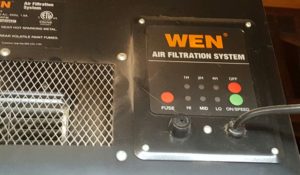
Fine air filter systems are supposed to be on layer of a multi-layered defense but at this point, I was really worried about were the fine particles as I already have some basic dust management in place.  In addition, I always wear a quality Moldex 2310 N99 particulate respirator when drilling and sanding but all that junk was just floating around and getting on stuff in the shop, etc.  So the immediate need was to get rid of that fine dust.  I did some digging and there is a model of suspended fine air filter that seems to be sold under many brand names.  I did some digging on Amazon, read the reviews and went with the Wen 3410.  Just to be clear, I actually bought this – you are reading a review from a real user and not someone who got something for free in exchange for a review.

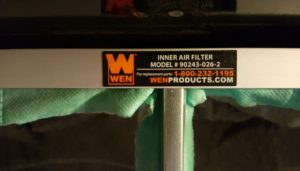
The unit arrived on November 9, 2015, and I have used it a ton – replacing both the outer and inner filters many times.  Let me tell you a bit first.

Before I did anything, I plugged the unit in and tested it.  I learned years ago not to do a ton of work installing something and then test it!  Test it up front so it is easy to send back or get tech support on the line and work on it.

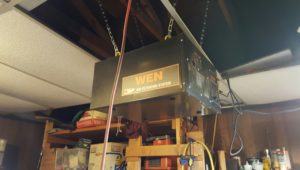
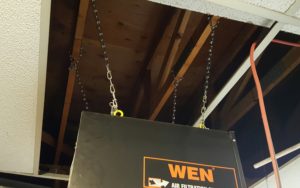
I figured out where I wanted to hang the air filter and bought some heavy sign chain from Ace Hardware so I could get it just where I wanted it.  The unit isn’t very heavy but given me and some expensive tools would be right under it, I went for overkill.  It’s around 30 pounds and the chain is around 120 pounds if I recall right.  At any rate, I hung the unit and adjusted the hooks until I got it level.  I then ran an extension cord over to it and turned it on.  It was a tad loud on the highest setting but definitely something I could live with – I usually have the stereo cranked in my shop anyways so that wasn’t a big deal.

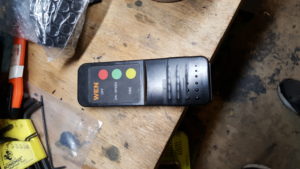
The unit comes with a remote for turning the unit on and off, setting the speed (low, medium or high) and whether to use a timer setting for 1, 2 or 4 hours.  I really like the timer as I can have it set to constant on while I am in the shop and then set it to the timer so that it can keep cleaning the air after I leave to get remnants out of the air.  Truth to tell, the remote’s battery door has been the only casualty since I bought it.  The little tab that held the battery cover in place was never very firm so I resorted to a couple of layers of black electrical tape wrapped around the remote and have never had a problem since.

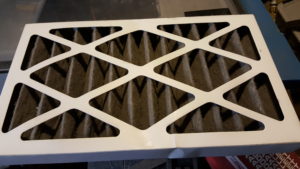
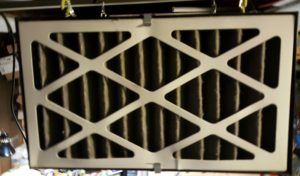
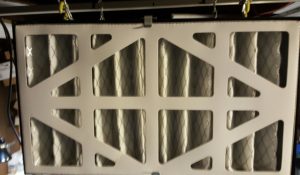
What I noticed over the coarse of the next few days was that stuff in the shop was not getting a thin layer of dust on it like it was in the past.  The unit has an outer coarse filter that is 5 microns and an inner filter at 1 micron.  It’s good that it is two stage like that as you can see them both getting filled with dust or at least I can.  I probably make it about 2-3 months before I have to change the outer filter and in general I make it about two outer filter changes before I change the inner filter.  The life of the filter really depends on how much sanding I am doing and the material I am working with.  Once I saw all the crap in the filters, it made me realize that some percentage of that junk was going in my lungs – probably more than I knew.

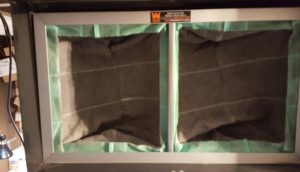
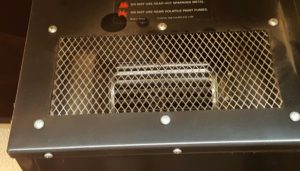
The next photo is telling – this is the exhaust side of the Wen.  After using the unit for over a year with a ton of hours, look how clean it is.  I have never cleaned it.  That gives you an idea how effective the filters are.

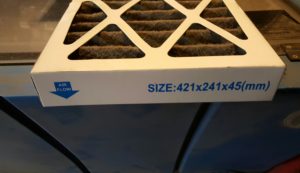
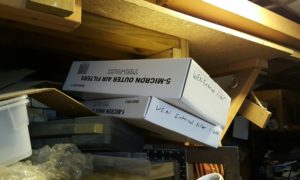
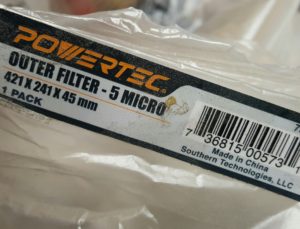
I go by the looks of the filters as to when I change them and I definitely keep spares on hand.  The Wen brand filters come in two packs and I’ve noted some of the sizes in case you want to try other brands of external filter.  For example, I used a few Powertec 421x241x45, 5 micron external filters worked fine.  In general, I try to use Wen.  I have only used Wen for the internal 1 micron filter but have seen other identical looking filters but have not tried them.  Note how white a new filter is (that is a new Powertec in the machine) vs. the filthy used one sitting on the blast cabinet.


So, I am very happy with the Wen and am actually thinking about a second for the other end of the shop.  If you are looking for a fine air filter, I’d recommend this one for sure.

2/22/2018 Update:  The Wen is still going strong.  No problems at all and I’m still very happy with it.

1/2/2019 Update:  Still going strong.  No problems.

5/21/2019 Update:  Still using it all the time.  This has really held up great.

2/19/20 Update:  Still holding up great.  Just replaced all the filters.


If you find this post useful, please share the link on Facebook, with your friends, etc. Your support is much appreciated and if you have any feedback, please email me at in**@ro*********.com. Please note that for links to other websites, I may be paid via an affiliate program such as Avantlink, Impact, Amazon and eBay.


Acid Etching Steel With Apple Cider Vinegar

Some folks have asked how I get the dull grey look on khukuris that I used to work on.  The answer is simple – apple cider vinegar straight from the grocery.  I’ve also experimented with various ratios of Prep-and-Etch, which contains Phosphoric Acid, and gotten a darker color but apple cider works remarkably well.  Apple cider vinegar contains 5-10% acetic acid (CH3COOH) depending on how it is made.  For example, I read that Heinz is about 5%.  My local store carries Spartan brand, which is their store brand, and it works just fine – again, this is apple cider vinegar from the grocery store.  

This process only works with steels that can rust.  For example a mild steel or high carbon.  It will not work on stainless, aluminum, etc.

Safety Notes:

I would recommend doing this outside or some place very well ventilated or else if the acetic acid condenses on metal surfaces in your shop/garage, it will cause rust.

Wear safety glasses and don’t goof around with the stuff.  I’ve never had a problem but probably need to say some kind of warning here.

Process:

  1. Clean the part and remove all oil and grease.  Either hose it down really well with brake cleaner or soak it in acetone.  Any oil, even from your skin, will mess you up.  
  2. Abrasive blast the part – I use “The Original Black Beauty” media that I get at my local farm supply store.  It’s made from coal slag and is fairly environmentally friendly.  It does break down quick so if you use your blast cabinet a lot, be prepared to clean it out and add new media when performance starts to suffer.  Blasting will get you a really nice uniform surface color.  I suppose you could try sanding or wire brushing but blasting has worked the best for me and is all I do now.  My only recommendation is not to use sand because as it breaks down it creates a fine dust that will never come out of your lungs – read that as “bad”.  I do use a blast cabinet with a vacuum to get rid of dust, you could do this outside with a hand blaster or tank blaster and dust mask if you needed to.  I wear a hood when blasting outside as the media goes everywhere.  Just protect yourself is the bottom line.
  3. Wear rubber gloves and clean the part again – the gloves are to keep oils from your skin from contaminating the part and preventing etching.  Cleanliness is critical.
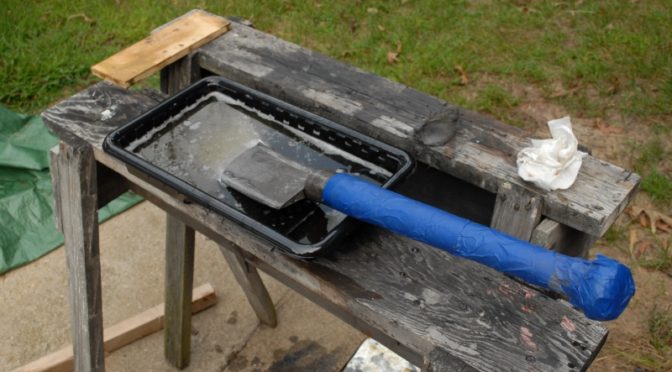
  4. Put the part in cider that is at least 70 degrees.  I like 100-150.  If it is too cold the reaction slows waaaaay down.  I don’t like to get it super hot or boil it as you lose a ton of cider with no real benefit.  I have done this in everything from stainless steel containers to plastic containers and even plastic trays used for wallpaper with halogen lights warming it up.  In general the colder the cider the slower the etching and the hotter the cider the faster the etching bearing in mind you will have the cider evaporating faster.
    Note:  If you do not see bubbles coming off the part then either the solution is too cold (especially on cold days under 70F), the part is not clean or ready (so clean and blast it) or the cider too weak.  I’ve never had an issue with weak cider – always the first two.
  5. Submerge the part in the acid and let it sit for 15-30 minutes.  It’s not a strong acid so there’s no rush.  Just check the part and stop at the color you want. The warmer the water and the part, the faster the reaction and vice versa.
  6. Rinse with hot water
  7. Rub down with WD40 and steel wool to get the loose particles off
  8. Then I like to seal it with boiled linseed oil (BLO).  Some of you may know BLO for woodworking but it is an old school rust inhibitor.  If you don’t want BLO, then thoroughly oil your part.

I like the results.  No real harmful chemicals are used, it’s cheap and looks great.

3/4/2020 Update: I recently did some blog posts on building a cost effective digitally controlled heat tank from PVC pipe that is perfect for acid etching – click here for that one. I’m also using a ferric chloride and apple cider etching solution now – click here for that one.

Photos:

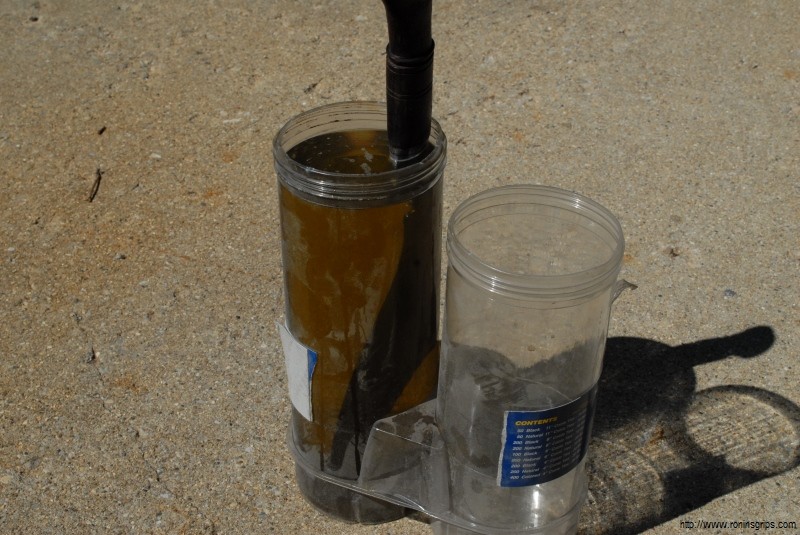
The light brown solution is just apple cider.  If it is darker, it was 25-50% Prep-and-Etch + the vinegar.

Use whatever container works. These were from a bunch of zip ties I bought once.
You can see the abraded surface from the abrasive blaster. You can acid etch without this step but I find doing this first really makes for a good finish plus all the tiny nooks and crannies really let the BLO grab hold.
This one is getting ready to go it. I use WD40 when done to remove the water – it literally means “Water Displacement” forumula 40 and excels at that.
You will see lots of little bubbles. I go by the color of the etched steel more than I do the degree of fizzing or time.
These two have already gone through the process.
I like the post apocalyptic look it gives.
This giant cleaver was acid etched and then sealed with BLO.
Another angle of the big “splitter”. The blade is over a 1/2″ thick!
Another cleaver.

Abrasive Blasting

You can usually get a coal slag blast media very, very cheap from farm stores.  Check there first because off Amazon you are paying a pretty penny for shipping whether they bury it in the item’s price or call it out separate.  I think I pay $7-9 per 25# bag at Family Farm and Home.

This is the actual product I use:  http://www.blackbeautyabrasives.com/products/black-beauty-original-abrasives.php

Now for the blasting, you have tons of options – hand blaster for small work, siphon blaster, pressurized tank or cabinets.  It all depends on how much blasting you plan to do.  I started out with a siphon blaster – dirt cheap but very slow.  I then got a tank and it was very fast and portable but media went everywhere.  I still have that for working on cars and big parts.  However, for my grips, gun parts and knives, I use my blast cabinet.  I have a Cyclone brand large bench unit and am relatively happy.  If I had it to do over, I would have gotten a free standing unit with a bigger and deeper hopper so I’m not constantly hitting the side or moving media around by hand.  I have a foot control pedal and that really helps plus it gets a the pneumatics out of the cabinet where they would normally be subject to abrasive dust and wear.

Cyclone Manufacturing
http://www.cycloneblasters.com/

My pressurized tank blaster is a Harbor Freight unit.  It’s held up relatively fine other than my constantly wearing out valves and tips.  The tank itself is just fine.
http://www.harborfreight.com/40-lb-pressurized-abrasive-blaster-68992.html

Summary

Acid etching is easy and rewarding. I like using BLO to seal things partly because of the color it imparts.

I hope this gives you some ideas!


If you find this post useful, please share the link on Facebook, with your friends, etc. Your support is much appreciated and if you have any feedback, please email me at in**@ro*********.com. Please note that for links to other websites, I may be paid via an affiliate program such as Avantlink, Impact, Amazon and eBay.


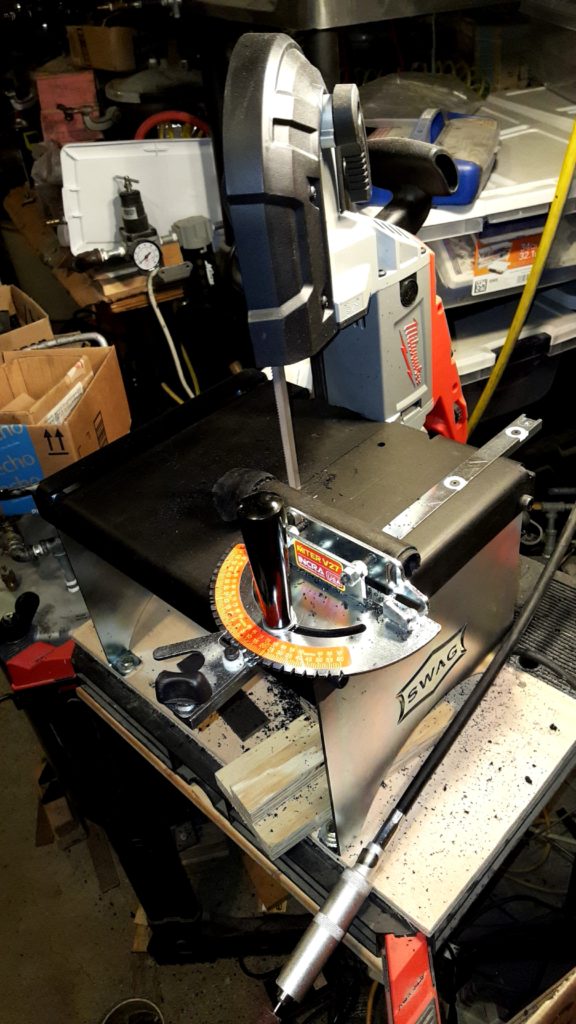
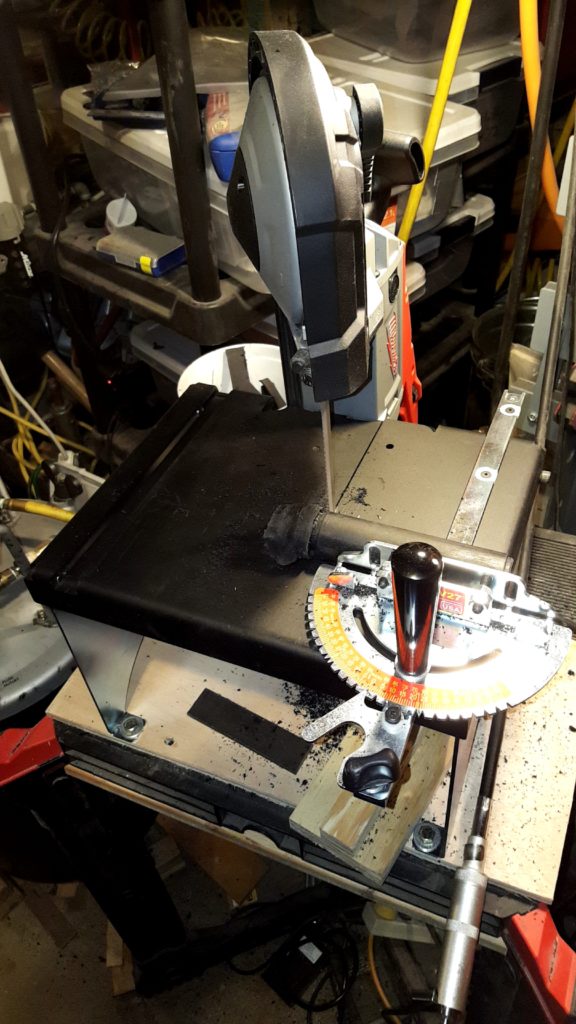
Great New Bandsaw – Milwaukee Portaband + SWAG Offroad Table, Incra Mitre and Foot Pedal

Folks, one of my challenges is that I have a small shop.  When making my grips and handguards, I use a bandsaw to cut off the sprue – the waste plastic from where the liquid is poured into the mold.  Since I started, I used the relatively cheap Ryobi bandsaws from Home Depot and would get about a year to a year and a half out of them.  The glass fibers in my plastic would dull the HSS blades pretty quick plus it would absolutely eat the unsealed bearings alive to the point that they would fall apart.  I can’t fault them too much – the bandsaw was intended for wood really.

So as my last Ryobi started to get worse and worse (even with teflon sprayed into the bearings to coax a bit more life out of them), I knew I needed to move to something better.  During surfing, I found a company called SWAG Offroad made a really cool little table that could hold a Milwaukee Portaband saw and let you use it then as a vertical saw.  Now this seemed like a perfect fit – small, portable, sealed bearings, metal cutting capability and Milwaukee quality.  So, armed with that, I bought the SWAG Offroad table with Incra Jig and foot pedal plus a Milwaukee Portaband (Model 6232-21 Deep Cut Saw) in January 2017.

There are only certain models of saw that the table supports so be careful to get the right one.  In fact, they say it fits:

  • Milwaukee 6232-20, 6232-21, 6238-20, 6238-21
  • Milwaukee Fuel M18 2729-20, 2729-21 & 2729-22

My 6232-21 saw has a deep throat and uses a power cord as I really didn’t need the portability of a battery model or having to deal with keeping the battery charged given the way I use it.

Set up was very easy.  I think I had it all together in about 30 minutes including using a square to get the blade trued to the table.  I have been using this combination for about three months now and love it.  The table is heavy gauge and has held up great and I really appreciate the excellent Incra mitre guide and the foot pedal.  I’ve cut a ton of grips, Kydex and even steel with this and am still on my first blade.  Another positive is that the blades are much more sturdy and don’t “walk” around as easy when I am cutting something.

The only con I have encountered is that the blade faces you.  This means when you feed something to be cut, it is going straight back towards the neck of the saw vs. parallel.  This is not a big deal for me as I can turn around whatever I am working on and come at it from the other direction if need be.

In short, I really recommend this combination of saw, table, Incra mitre and foot pedal.  They definitely work great for me.

June 2, 2019 Update:  Still going great.  I’ve cut a lot of steel, aluminum and composites with this unit.  It’s holding up great.  By the way, the foot pedal and Incra jig are totally worth it.

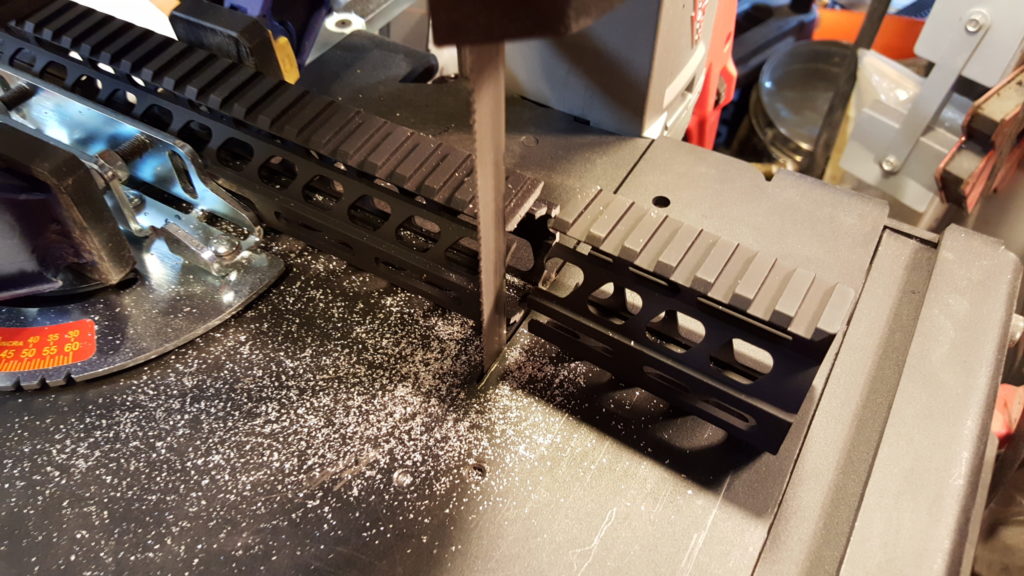
June 30, 2017 Update:  I’m still very happy.  Not one glitch and I have cut a ton of steel, aluminum, wood and the composite plastic I work with.  I had to cut a free float AR handguard to a custom length and that combination of the Incra mitre and heavy blade cut it as square as I could ask for with no wandering.

February 7, 2020 Update:  I use this almost every day and it is still going strong.  Other than changing blades, which is to be expected, nothing has worn out.  I’ve found Milwaukee blades hold up the best – at least of the brands I have tried – and Amazon is a very good source for them.


If you find this post useful, please share the link on Facebook, with your friends, etc. Your support is much appreciated and if you have any feedback, please email me at in**@ro*********.com. Please note that for links to other websites, I may be paid via an affiliate program such as Avantlink, Impact, Amazon and eBay.


How to Make a Simple and Effective AK Barrel Back Out Tool

DSC_0341
The barrel pin is popped out of this Yugo.

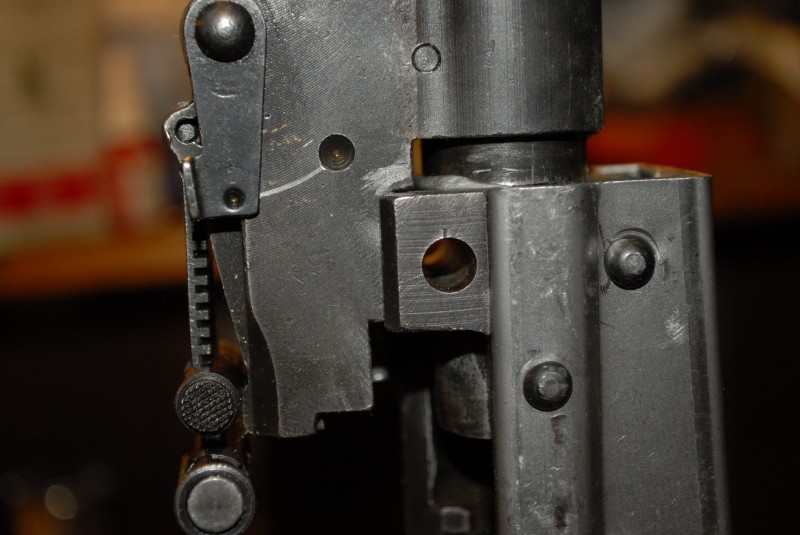
AK rifles use press-fit barrels wherein the barrel is pressed into either the forged trunnion (if it is a sheet metal receiver) or the receiver and then held in place by the 7mm barrel pin.  As part of this, the barrel must be headspaced to the bolt to help ensure the cartridge is properly seated.  A challenge that commonly happens is that a builder inserts the barrel using whatever method ranging from a big hammer to a hydraulic press but when they try to use their headspace gauges, they find they have gone too far.  Alternatively, folks trying to insert a barrel back in that was already headspaced notice that they overshot the barrel pin groove when looking through the holes across the groove in the barrel.  Regardless of how the mistake is identified, the question becomes “what do I do now?”

There is a relatively quick and easy solution – use a long shaft to drive the barrel back out.  These tools are generically called “barrel back out tools” and you can make one many ways.  They can all be summarized as having a long shaft to reach through the receiver to the chamber end of the barrel and then either a copper or brass fitting to protect the chamber from being damaged by the rod.   I have seen everything from guys using socket extensions, to pieces of round steel, to custom purpose built tools.

One time, I pressed in a Yugo M72 barrel too far and had to press it back out so I came up with a quick and easy tool that I kept in my tool box and even sold for a while until I stopped because the profit margin just wasn’t sufficient.  With that said though, it’s worth sharing with folks just in case they wind up in a jam.

Here is what you need:

  • One 1/2″ grade one or two bolt that is about 12″ long (or however long you want to make it)
  • One 1/2″ grade one or two steel nut
  • One 1/2″ brass nut

For my first tool, that I still have, I just went to my local Ace Hardware store and bought the parts.

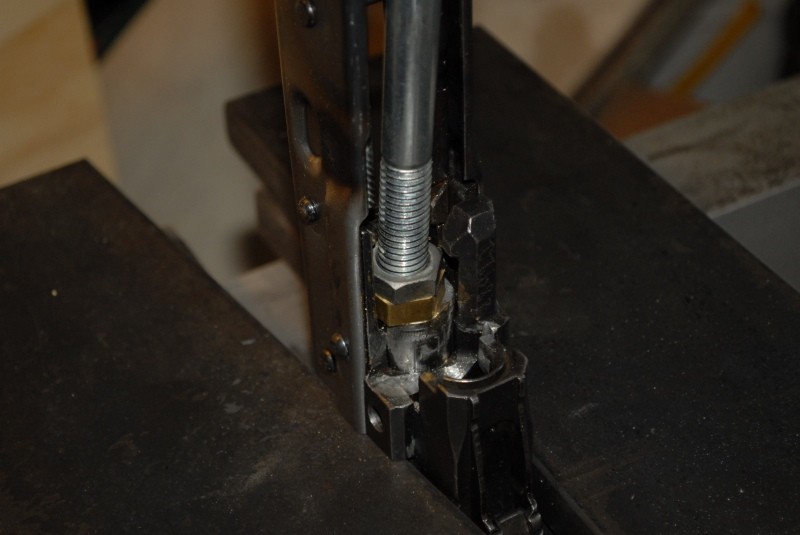
Basically, the long bolt allows you to reach into the receiver to the chamber end of the barrel to apply pressure.  I used a really long bolt because a Yugo’s rear trunnion is solid and you have to go down at a long shallow angle to press the barrel back out.  With AKMs or other AKs with open rear trunnions, you can simply go straight from the back to the front.  Note that you need to clear the ejector without damaging it.  I purposefully used a low grade bolt as I did not want it brittle from hardening.

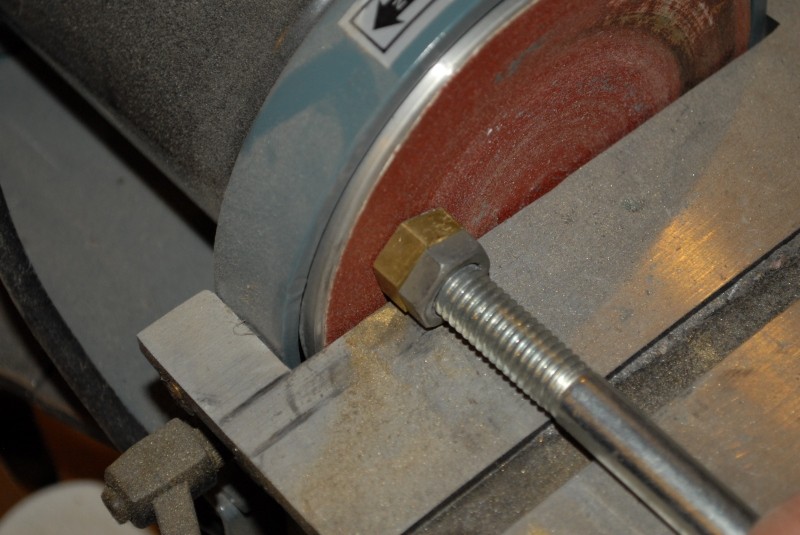
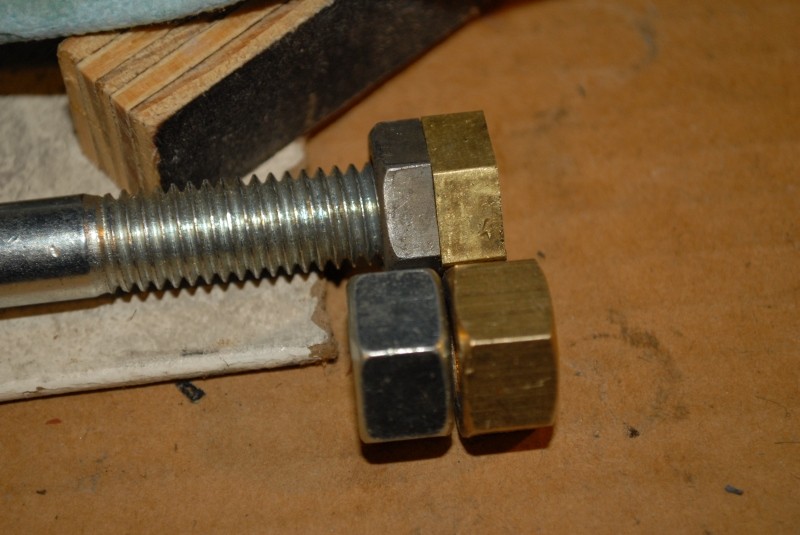
The steel nut needs to be ground down enough so that the combination of it and the brass nut can fit in the area where the bolt normally locks up.  You want as much brass as possible to be in front of it and the brass nut should protrude from the bolt.  You don’t need a great deal of the brass nut threaded on the bolt as the steel nut is backing it up to provide much needed support.  I would grind and test repeatedly until the timing was such that the two nuts matched up just right when I tightened them down.

DSC_0431
Use the bolt to hold each nut and sand them down. The steel nut is there to reinforce the brass nut.
DSC_0434
I don’t have exact dimentions so you can experiment. The steel nut is about half it’s original thickness and the brass is about two thirds. You need enough steel for strength, enough brass to be able to deform yet the assembly must fit in the pocket area inside the trunnion just before the chamber.

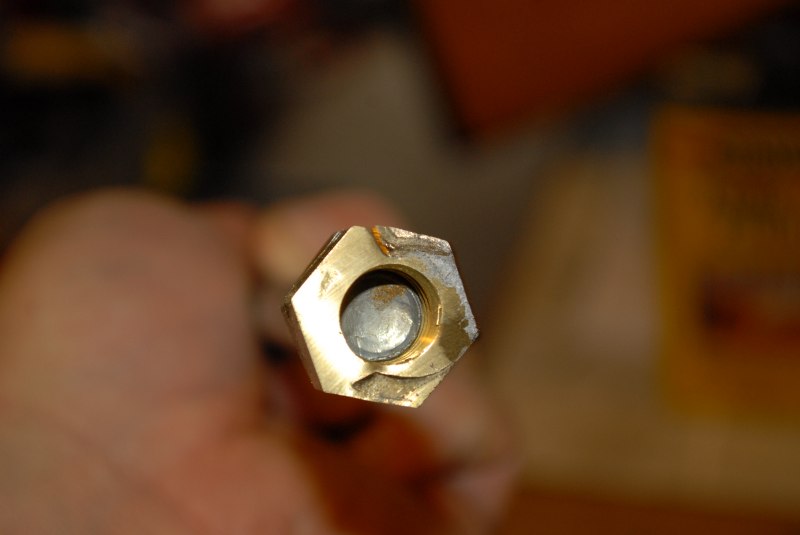
Note, I used to grind the brass nut to match the extractor notch in the barrel but have stopped doing so as the brass simply deformed anyways.  The following photo shows how the brass simply bends and conforms to the extractor notch plus you can see that the brass nut extends well forward of the steel bolt.

DSC_0432
I just let pressure form the end of the brass nut however it needs to. I just grind the brass nut flat. Very important note – the brass nut must extend past the end of the bolt by about 1/4-3/8″ thick. The longer the better. You do not want the steel bolt to contact the chamber even when compressed – just the brass. I talked to guys who used to put two real copper pennies on the end of the barrel to press it out so I used that as my minimum thickness.

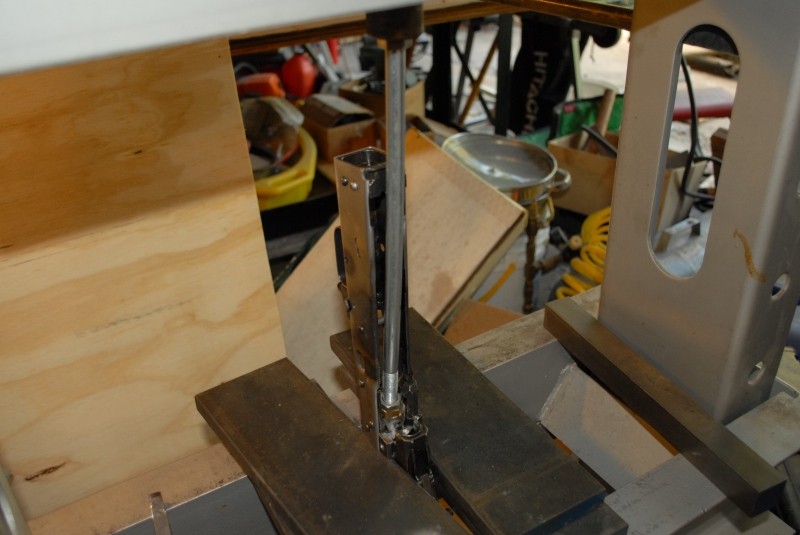
In the next photo, you can see the shallow angle I used to press the Yugo barrel back out.  Again, you would not need the same if you could go straight through the receiver:

DSC_0344
I actually have a few of these pushers made and ready to use. I have a long 12″ one to be able to reach down at an angle in Yugos (their rear trunnion is solid) plus a much shorter one – maybe about 6″ that I have when I am just working with a barrel in a trunnion.
DSC_0345
This is actually under load. Only the brass nut is touching the end of the barrel.

Historically I did all my barrel work with my 20 ton press but now I mainly use air tools except for really stubborn parts.   When I originally did this post in 2014, I used my press.

With the M72, I was able to very simply move the barrel back out a bit, turn things around and then press the barrel in until the proper headspace was achieved.  The tool worked so well that I have it in my tool box still and have used it a few more times plus I did make a dozen or so and sold them to guys who had good luck as well.

As a caution, make sure the trunnion is well supported – you can see I have it resting on the press plates in the photo above.  Make sure everything is set up, stable and that you are clearing everything else before you apply pressure with the press. 

Lastly, be safe – take your time and play it smart.  A press can develop massive pressure.  Wear safety glasses and do not dream of having your hands anywhere in, on or around the parts being pressed.  All things considered, backing a barrel out should take very little force but you do not want an accident to happen.  If you are tired and frustrated, stop and wait until the next day or when you have relaxed and calmed down.  Most of my personal accidents have happened when I was in a rush, tired or angry – don’t be me 🙂

In closing, I hope this helps you in your building efforts!


Note, I have to buy all of my parts – nothing here was paid for by sponsors, etc. I do make a small amount if you click on an ad and buy something but that is it. You’re getting my real opinion on stuff.

If you find this post useful, please share the link on Facebook, with your friends, etc. Your support is much appreciated and if you have any feedback, please email me at in**@ro*********.com. Please note that for links to other websites, I may be paid via an affiliate program such as Avantlink, Impact, Amazon and eBay.


Use An Air Riveter to Get Barrel Pins Out Fast

One of the things that used to drive me nuts with AK builds was driving out barrel pins and then I got a tip from Gunplumber – a variable trigger air hammer or air riveter makes it way easier.   Many cheap import air hammers have an air valve behind the trigger that is either on or off and not much in between.  Some guys call the variable valve triggers “tickle triggers” – why?  I have no idea.  At any rate, every air riveter, which looks like an air hammer, that I have seen has a tickle trigger to allow the user more control when setting rivets.

I use the pointed conical air chisel to start the rivet and that is the hard part.  Once you get it moving, then use a big hammer and the largest punch you can fit in the hole to drive the rivet the rest of the way out.  Note, I only do this when demilling.  I use a barrel pin jig to install barrel pins because you have so much more control.

DSC_0021


The following photo is of an ATS brand Pro Series 3X riveter.  The bigger the number, the more poweful the riveter.  I also have a big 4X equivalent Ingersol Rand that I use on large rivets or work needing a powerful tool.  The 3X has a nice combination of power and weight and it almost always works on barrel pins and certainly on small trigger guard AK rivets.


DSC_0018


DSC_0016

You can find rivet guns from many suppliers – even Harbor Freight.  I’d recommend you get a 3X for most work and a 4X if you want even more options.

The following is the riveter shown above:

When the conical chisel gets beat up, I grind the tip down and when it is really fried, I just pull out another.   I would recommend going with a good brand name.  For example, Ingersoll Rand, Chicago Pneumatic, etc.  

The big 4x equivalent air hammer I use is the IR 117K standard duty model and it hits hard:


If you find this post useful, please share the link on Facebook, with your friends, etc. Your support is much appreciated and if you have any feedback, please email me at in**@ro*********.com. Please note that for links to other websites, I may be paid via an affiliate program such as Avantlink, Impact, Amazon and eBay.