Category Archives: Flashlights and Lasers

Discussions of various flashlights and lasers used – both handheld and weapon mounted.

What Is The Best Optic For A Yugo M76 Rifle?

I did a series of posts back in the Fall of 2019 about a custom Yugo M76 that I had Two Rivers Arms build for me that I then added my own optic to [click here for the series]. A fellow recently contacted me about what optic he ought to get for his rifle, I replied and it also occurred to me that more explanation would make for a good blog post.

What is a Yugo M76?

It is a smei-automatic 10-round Designated Marksman’s Rifle (DMR) designed and built by Zastava for the Yugoslav military chambered in 8mm Mauser (7.92x57mm with an IS or JS designator at the end of the size). The 8mm Mauser round is in the same ballpark class as the American .30-06 round to give you a rough equivalent.

Let me revisit the “DMR” designation – because that is what the M76 is. The M76 was designed for a designated marksman in a squad to have much further reach than the rest of the team would have. It was not a surgical weapon and instead stressed reliability and good enough accuracy with an effective range of about 800 meters with 1.5-2 minutes of angle (MOA).
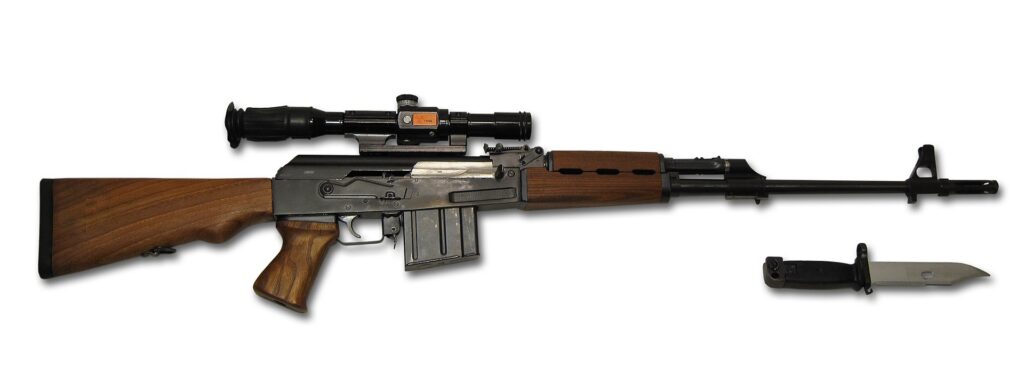
This photo is from Wikipedia and it lets you see the ZRAK optic on the M76. By the way, Wikipedia does have a nice summary write up on the M76.

What does that tell us?

That short intro starts hinting at the type of scope you might want to consider. It’s firing a relatively powerful cartridge but isn’t the most precise rifle on the planet. I can also tell you that while there is recoil, it’s not bad at all.

Choice #1 – Mounting Styles

The very first thing to consider is what type of mount you wish to use. The M76 inherits the robust side-mount rail but with some unique dimensions. The rifle was originally paired with an offset 4x ZRAK scope that slid onto that rail and clamped into place. This offset design isn’t for all folks but it definitely works for people familiar with it.
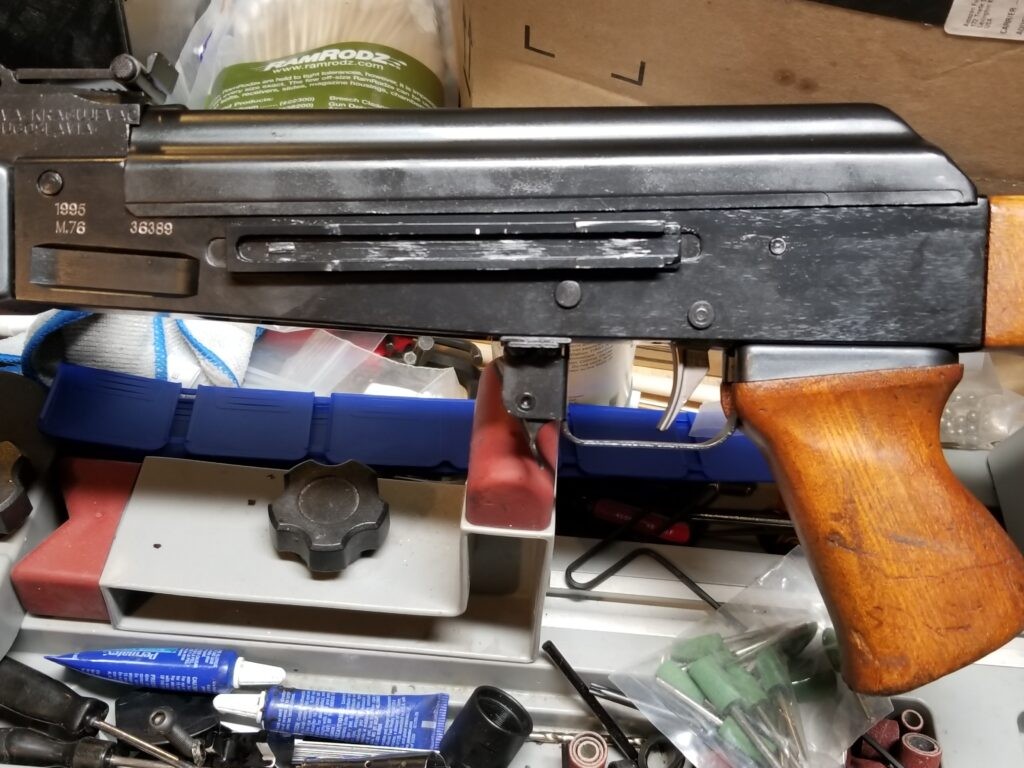
Here you can see the optic side mount rail. It sits securely in a groove in the milled receiver and is riveted in place.

The second route is to get a mount that clamps on the above rail but then centers the optic over the centerline of the bore. Call me an old school American but that is definitely my preference.

You can get mounts this way that directly hold the optic directly with the scope rings being built directly into the mount or you can get mounts that have a Picatinny rail on top that you can then secure whatever optic you want. This is my preference just so you know because it gives me more flexibility down the road.

RS Regulate mounts are the way to go!!

The best side mounts I have found that enable a ton of flexibility and adjustment are the RS Regulate brand mounts designed by Scot Hoskinson. He offers a number of different options so you need to stop by his site and take a look.
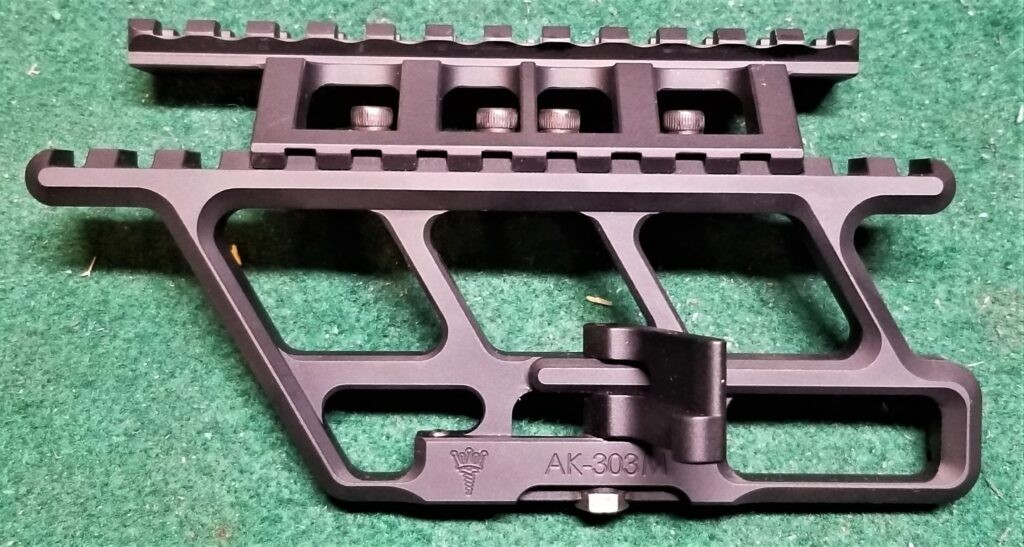
This is the RS Regulate AK-303M lower paired with the AKR upper rail.

Note, RS Regulate mounts are being counterfeited in China. I’d recommend only buying direct or from a reputable dealer below:

What optic to use?

On one hand, you could stick with the communist block styling . You can hunt around and buy 4x ZRAK optics still. There are also a lot of different offset mount optics that you can look into that are side mounted for example 8x and variable power. Just confirm the clamp on a particular model has enough adjustment to fasten onto the M76’s rail.

As of my writing this, there aren’t any ZRAK scopes on eBay but Apex Gun Parts does have some in fair to good condition (meaning very worn) and they are a good firm to deal with. Kalinka Optics has a variety of offset mount optics and is also reputable. If you really want an offset scope, I’d recommend Kalinka and go with something new.

With that said, you may be wondering “but what size scope?” The 8mm round definitely has some reach and you have to ask yourself what do you really plan on doing? This “what am I going to use it for” question is known as the “use case”.

When the Yugoslavs designed the M76, they needed a middle of the road simple optic that would allow the shooter to hit something man sized out to 800 meters. Four power magnification fits that bill because it gives you a wide field of view (meaning what you can see left to right and up and down in he scope – the more you see, the wider the field of view). They weren’t looking for precision by any means – just good enough to extend the reach of the shooter.

I’m 53 and while I grew up shooting a lot with iron sights, I can’t see very well at 100 yards and I sure can’t shoot precisely. Now remember, the M76 you have will likely be shooting1-4 MOA (1-4″ at about 100 yards, 2-8″ at 200 yards and so forth). It all depends on the condition of the rifle and the type of ammo you are shooting not to mention your own abilities. Spending a fortune on a giant quality surgical scope, like a 6-24x, is overkill…. unless that is what you really want.

What I would recommend is a variable power and I tend to favor 4-16x because I have the nice bright field of view at 4x and can zoom in if needed. Most of my shooting is within 200 yards so this works just fine for me on my DMR rifles.

Now you may be wondering “But I saw the photo of that giant scope you are running – what’s up with that?” Good question and let me explain.
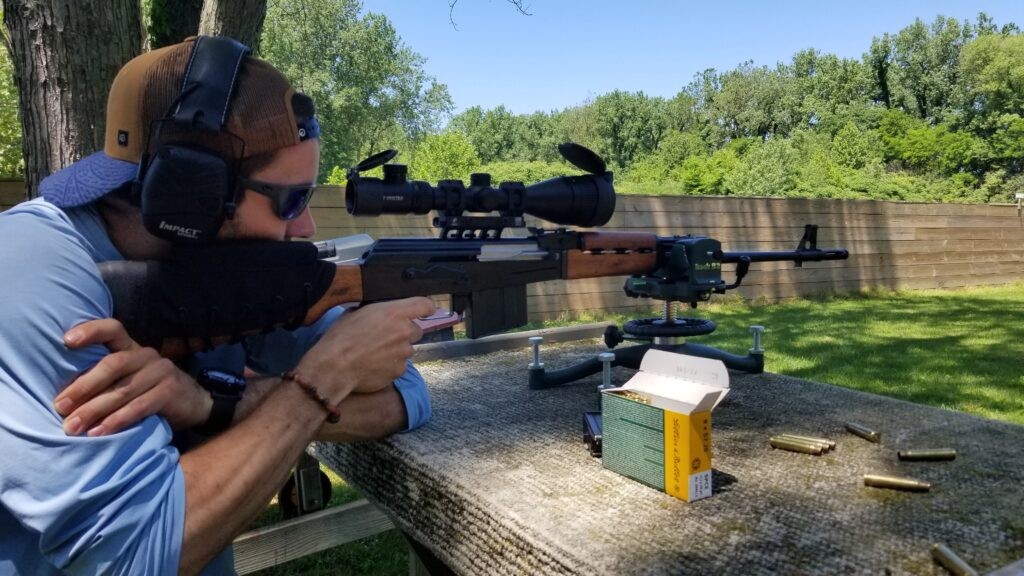
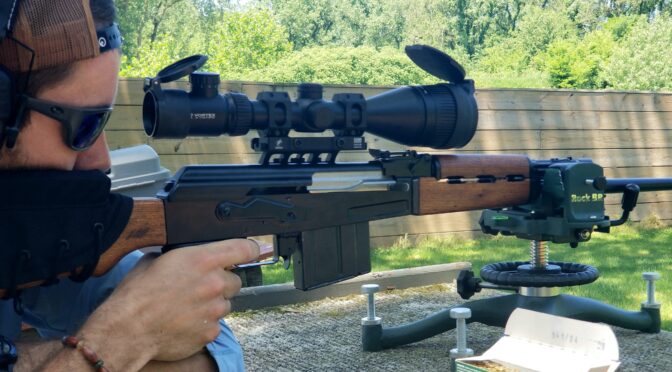
That’s a Vortex Crossfire II 3-12×56 scope known as the “hog hunter” and my buddy shooting it during a range visit this summer.

My “use case” when I was planning for the optics was for hog hunting. I wanted a really big objective to suck in light for shooting at dusk and an illuminated recticle. I also happened to already have it left over from another project. It is quite affordable by the way.

So, the Hog Hunter seemed like a great match – 3-12x for fast shooting in close to having a 12x for distance shots. The big 56mm objective does pull in a lot of light. The lit recticle is only bright enough to make a difference at night and isn’t as bright as what you would see on a tactical scope.

Having used it for a while now, I’ll tell you that it delivers on the above with a couple of caveats that may make you stay away from it unless thye don’t bother you:

First, it is a big scope – far bigger than what you may think in terms of dimensions and weight due to the big objective. It’s almost 13.5″ long and 21.1 ounches.

Second. it is a giant objective and you will need to plan for. I had to carefully calculate the rings needed for it to clear the front handguard and I needed them to be quick release because the scope mount could not slide backwards due to the big objective hitting the rear sight block (RSB) of the rifle. I am still using the AD-RECON-SL mount and it is solid!

For a lot of folks, starting with an objective around 40mm tends to give you a nice bright image. I tend to use 44-50mm objectives scopes the most. Think of it this way – the bigger the objective, the more light it can pull in all other things being equal.

So where am I at today and what scope would I recommend?

I still am running the Hog Hunter and like it. If I had it to do over,I would get a 4-16x magnification and a 44-50mm objective. Recticle-wise, I’m fine with just about anything for what I plan to use it for but if I were to specify one, I’d get one with Mil-Rad (Mil-Dot) graduations because that is what I am familiar with.

There are also other variable zoom scopes out there as well such as 2.5-10x, 3-9x, 1-6x, 1-8x, etc. These are all options if you still have good eyes and want an even wider field of view on the low end. I run all of those combinations on rifles where I plan to be relatively close and not so much for long distance. Point being it is up to you – I wanted a higher power scope for shots starting often at 100 yards.

Vortex makes really good optics and I would move with whatever I could afford at the time. What you will notice is that as you move up their product line , the bigger price tag also comes with clearer and brighter optics *but* they all have Vortex’s no nonsense warranty.

Vortex Optics Offerings

I am going to present their various offerings that I would recommend and am able to show the scopes listed at various merchants as well so you can shop around:

Let’s start with their entry-level Crossfire II scopes:


Next, let’s look at the Diamondback and Diamondback Tactical series scopes:


The following are Strike Eagle scopes and the designs are focusing more on tactical versatility.


Even higher end are the various Viper HS scopes. I have a number of these and find them to be bright, clear and rugged:


My favorite Vortex scopes that I afford is the Viper PST Gen III series. Yeah, budget does have a role and have not been able to afford a Razor but the PSTs excellent. When I can afford a really exceptional optic, I look at the PSTs. A number of vendors still carry Gen II scopes and they work great also. I’ve had several Gen IIs and only one Gen III so far.


In Conclusion

I hope this helps give you some ideas of what optic to put on your M76 rifle. I really like Vortex Optics and am a user – I’m happy with the Hog Hunter but it is big. I think you’d be very happy with just about any of their scopes depending on what you want to do.


Note, I have to buy all of my parts – nothing here was paid for by sponsors, etc. I do make a small amount if you click on an ad and buy something but that is it. You’re getting my real opinion on stuff.

If you find this post useful, please share the link on Facebook, with your friends, etc. Your support is much appreciated and if you have any feedback, please email me at in**@ro*********.com. Please note that for links to other websites, I may be paid via an affiliate program such as Avantlink, Impact, Amazon and eBay.
How to Move Streamlight TLR Weapon Light To Another Pistol If you Lost Your Keys

Years ago, I found out that cheap lights are not something to put on a firearm for self-defense. They simply are not reliable enough. I’ve also found that Streamlight weapons lights hold up plus are backed by top notch support. For pistols, I have a number of the TLR series weapons lights and found them to be solid. With that said, we do need to address the topic of the post – if you install the light on one pistol, how do you move it to another?

How do the TLR lights secure to a weapon?

First off, the TLR design is modular built around an adjustable clamp and then different “key” inserts that allow the TLR to fit a variety of weapons. When you purchase a TLR, it comes with keys to fit:

  • “1913” – Mil-Std-1913 Picatinny rails
  • “GL” – Glock rails as well as Tuger KP345 and SR-9
  • “TSW/99” – Smith & Wesson and TSW/99, Post 2004 Walther 99 Full size
  • “90two – Beretta 92

There are some other keys and adapters depending on the TLR model you buy – click here for Streamlight’s brief compatibility list.

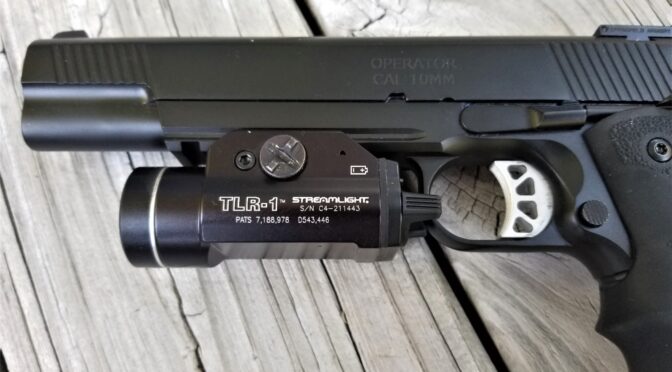
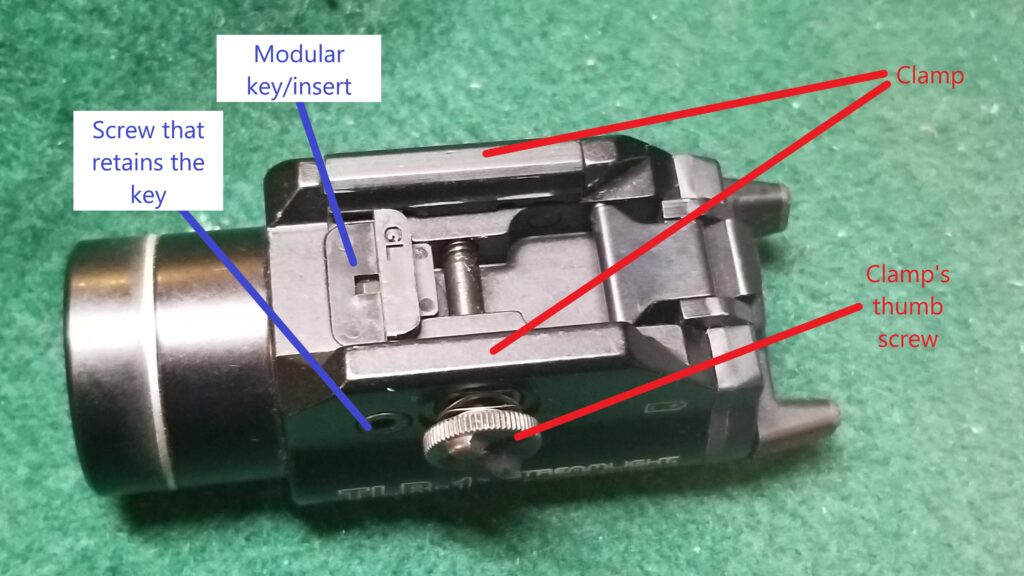
When you buy a TLR, you must insert the proper key to get it to fit the rail on your weapon. While they were intended for pistols, I’ve used them on a variety of rifles and shotguns over the years as I move lights from weapon to weapon. The key shown above has the “GL” code which means it the one for interfacing with the rail on Glock pistols assuming the pistol model both has a rail and is large enough to hold the particular model of light. For example, you can run the above TLR-1 on a full size Glock 34 but will stick out past the end on a 17. Some people don’t care but I prefer a TLR-4 for a 17 as the TLR-4 is shorter and ends flush with the bottom of the receiver.

Ok, but what if I want to move the light to another weapon?

So, this brings us to the main point – can you move a TLR from one platform to another? The short answer is absolutely – you remove the retaining screw and replace the key with the appropriate one for the new pistol.

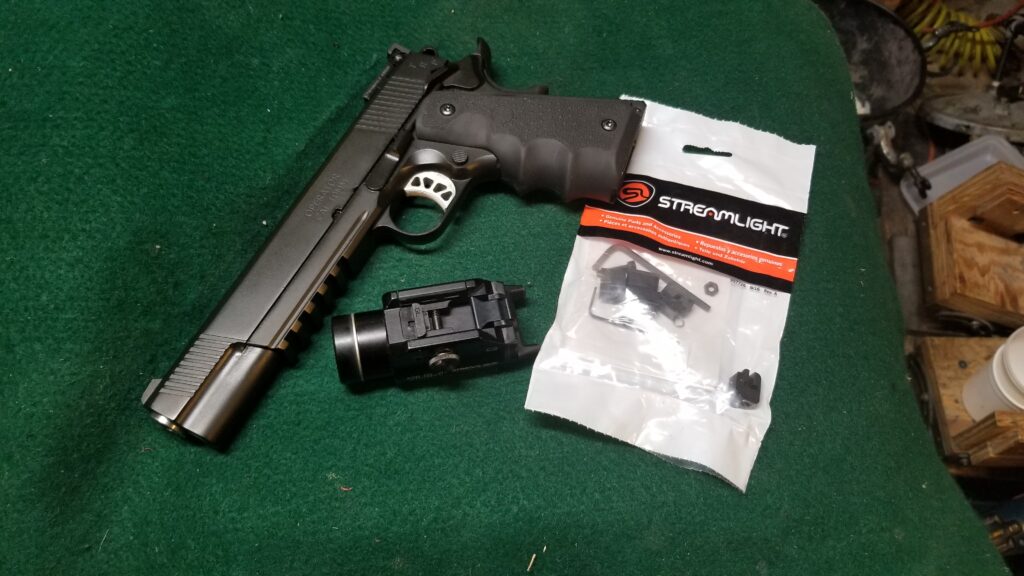
And there’s the rub – what if you’ve lost or “temporarily misplaced” your bag of keys? Folks, that is what happened to me. I could not find any of my keys and needed to change the TLR-1 from Glock to 1913 to fit my new TRP Operator. Here’s the good news – you can buy just the keys. Streamlight realized there would be people like us and sell kits that have the keys, the screw, small nut and even a the hex key needed to do the job. The kit does depend on the model of TLR you have so make sure they match the light and the weapon you want to move to.

Streamlight Kit 69175 fits the TLR-1 and TLR-2. The 69176 kit is specifically for TLR-3 and TLR-4 models.

Here’s my 6″ TRP Operator, the TLR-1 and the replacement key set 69175.

You can find the two key kits very readily both on Amazon and on eBay:

Conclusion

I really like the TLR lights and hope this post helps you out if you need to move your TLR but can’t find your keys.


Note, I have to buy all of my parts – nothing here was paid for by sponsors, etc. I do make a small amount if you click on an ad and buy something but that is it. You’re getting my real opinion on stuff.

If you find this post useful, please share the link on Facebook, with your friends, etc. Your support is much appreciated and if you have any feedback, please email me at in**@ro*********.com. Please note that for links to other websites, I may be paid via an affiliate program such as Avantlink, Impact, Amazon and eBay.


The Streamlight 88081 PROTAC HL 5-X 3500 Lumen Light IS a Beast On Your Side – Part 2 – Out of the box & performance report

As mentioned in the first post, I ordered a Streamlight 88081 from Amazon. It arrived and, of course, I had to immediately check it out. Here are a series of photos with the story told in the captions.

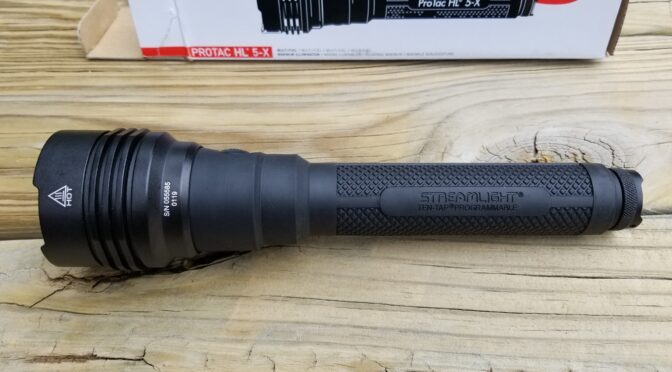
This is the 88081 with the 18650 USB rechargeable batteries
The box has two tables talking about performance metrics based on the type of battery used. The left table is for CR123A batteries and the right is for 18650 batteries. The model I bought comes with the 18650 class batteries (two of them are used at a time) so the right table is applicable.
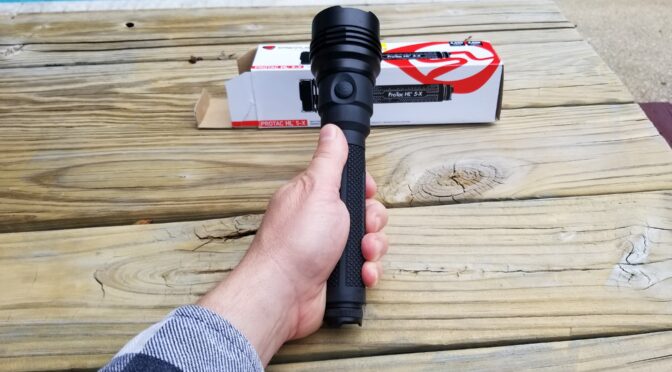
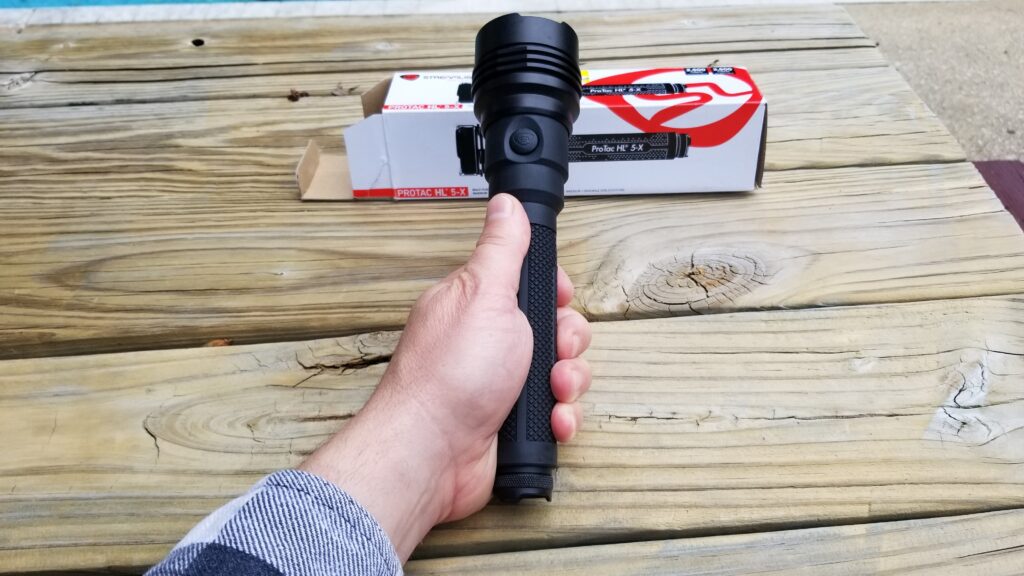
The first thing I noticed was how it felt – there’s a nice solid heft to it, the rubberized grip is very positive and it fits my hand real nice. Note, I wear XL-sized gloves for reference.
Here’s the business end of the light. Notice the interesting lens. It kicks out one hell of a bright focused center but still radiates a very broad cone of light. It is not adjustable but I really haven’t found the need to change it after using it for over a month.
It has some big fins for heat dissipation. Note, the rubberized surface is only on the handle – the emitter head is just anodized aluminum to allow for cooling. Good idea on their part. The longest I’ve run the light about 5-10 minutes. It does warm up but I’ve not run it long enough to see just how hot it can get.
These are the Streamlight brand Micro USB rechargeable 18650 batteries. I was unsure about the concept at first but they give you a ton of options for recharging in your home, vehicle or even with a big battery in the field.
Because I already have an 18650 charging cradle, I bought some spare 18650 batteries. OLight makes good gear so I got a pair of their batteries. As I write this, they are in the light right now. I also bought them because I wasn’t sure how the Streamlight USBs would perform and the short answer is that if I had it to do over, I’d buy a second pair of Streamlight USBs because of the flexibility to charge just about anywhere. DO NOT BUY CHEAP BATTERIES!! You risk performance and them catching fire/exploding.
They use a nice beefy spring on the tailcap. This spring is a failure point on cheap lights along with the switch. I’ve never had a spring or switch fail on a Streamlight product.
According to my Bushnell 1200 laser range finder, the hedge row at the back behind the trees is 65 yards. You can see the very bright center and flood light around it.
The bush to the left of the driveway is 62 yards away. Again, you can see the very bright focused center beam and broad light to the sides.

TEN-TAP Programming

I have a pet peeve with some lights – I loathe the ones with tons of modes where you need to click the power switch to cycle through them – low, medium, high, strobe, SOS, etc. What a pain in the butt!! Streamlight wisely made the PROTAC HL programmable via what they call “TEN-TAP”. Mine is set to high beam on and off. That’s it. Sure, I can adjust it if I ever want to but all I need right now is the high beam and I don’t want to have to fumble around clicking the button to get to the high beam mode. Streamlight has a page that tells more about how to program your light – click here.

Bottom Line

I really, really like this light. It is the brightest one I own now and when we pull down the trash at night, we can see everything very clearly. If there are any coyotes, I am sure they are getting the heck out of Dodge as soon as they see that light and hear us coming. Furthermore, the light has enough heft that if we do need to hit something with it, the blow will do massive damage – you’d be amazed what a freaked out fat man can do 🙂 At any rate, I have no reservations recommending this light to you.


If you find this post useful, please share the link on Facebook, with your friends, etc. Your support is much appreciated and if you have any feedback, please email me at in**@ro*********.com. Please note that for links to other websites, I may be paid via an affiliate program such as Avantlink, Impact, Amazon and eBay.


The Streamlight 88081 PROTAC HL 5-X 3500 Lumen Light IS a Beast On Your Side – Part 1

One Sunday morning at about 7am, I was putting stuff in the trunk of my wife’s car when a surprised coyote carrying a dead reddish brown cat in its jaws ran by me about 20 feet away. I was startled but not especially worried – you could tell the ‘yote was just as surprised as I was. I knew we had them in the area but this was the closest I had been to one.

A few days later, my wife and I were pulling our trash cans down our long 300 foot driveway at night and all the woods and bushes are dimly lit. My wife said she saw a dog or something running across our yard in front of a hedge. My eyes are crap now and I didn’t see it until it reached the driveway and turned to run away from us – it was another coyote. Well, that did it for me, I wanted us to have a heavy flashlight with one hell of a bright beam to carry when we pulled the trash cans out at night.

My wife will tell you that I am fascinated by flashlights and have quite a collection. I have converted 3, 4 and 5 cell MagLites to LED – they had the weight but not the brightness that I wanted. I wanted something that would absolutely nuke the immediate area in light. I needed something that would push a ton of light in a flood pattern about 100-200 yards and that meant something with well over 1,000 lumens. My 250-500 lumen lights would light up a pretty large area but I wanted a tactical nuke that would light up a big chunk of our yard and stun/scare anything caught in its beam.

The other mandatory requirement that I must emhasize was reliability. I’ve had a ton of cheap import lights fail me – sometimes its the switch, sometimes the cheap under-powered spring pushing the batteries forward, etc. Most of the time, when you buy a cheap light, you get a cheap light. I honestly wanted a light the family could rely on and if they needed to swing it as a club in self-defense to hit a coyote, or any attacker really, it would still reliably work.

If I am going to put my family’s safety on the line with a light, such as this case, there are only two brands of light to be considered – Surefire and Streamlight. Surefire lights are excellent but usually priced outside of my reach. Streamlight on the other hand, is a great combination of excellent quality and affordability. My everyday carry light is usually a Streamlight Microstream and has been for the last 2-3 years. The only weapons lights I buy are Streamlights – either from the TLR or PROTAC series. I’ve never had one fail on me so I am confident with this brand in general.

Thus, I started my journey broad by surfing the web and reading and quickly narrowing my choice down to the Streamlight 88081 PROTAC HL 5-X LED light.

The PROTAC HL 5-X Flashlight

As mentioned, I did a ton of reading. The specs on this light were wicked and convinced me to order one:

  • 3,500 lumen on high using 18650 batteries or only 2500 if using CR123A
  • Can use either two 18650 reachargeable batteries or four CR123A batteries
  • Three operating programs – 1) High/Low/Strobe 2) High Only 3) Low/Medium/High
  • Light output and battery life depends on both the mode and the type of battery:
    • High (18650 USB): 3,500 lumens; 452m beam; runs 1.25 hours; 51,000 candela
    • High (CR123A): 2,500 lumens; 385m beam; runs 1.5 hours; 37,000 candela
    • Medium: 1,000 lumens; 237m beam; runs 2.5 hours (CR123A); runs 3 hours (18650 USB); 14,100 candela
    • Low: 250 lumens; 120m beam; runs 10.5 hours (CR123A); runs 11.5 hours (18650 USB); 3,620 candela
    • Strobe for signaling or disorienting: runs 1.5 hours (CR123A); runs 1.25 hours (18650 USB)
  • 9.53 inches long
  • Weighs 1 pound 3.4oz with the Streamlight USB batteries
  • Rubber sleve over an aluminum body gives both a sure grip and is a thermal insulator

Yeah, it was definitely #1 on my “this is the light to get” list. An interesting note is that you can buy complete kits including Streamlights USB reachargeable 18650 batteries. I’m used to the traditional batteries that go in a charger so this was new to me – these batteries have a small micro USB port on each of them and Streamlight can supply a USB cord that plugs into the charger of your choice. Their cord has a split head for charging the two batteries at once. The more I thought about it, the more it made sense.

The problem with a great many rechargeable batteries is the need for a dedicated charger -either tying up the whole light as you plug a cord into the light or the batteries are removed and put in a charging cradle of some type. With the Streamlight 18650 USB batteries, things are actually simpler – many folks have USB chargers all over the house, in cars, at work, etc. All you need is a charger and any micro USB cable – there’s nothing proprietary to deal with. The light can still use regular rechargeable 18650 batteries as well – I use both but may well get another set of Streamlight 18650 USB batteries. I already have the charger in my office but I don’t have the flexibility I just mentioned.

So, I ordered the full USB kit from Amazon and they did their usual great job of shipping.

[iframe style=”width:120px;height:240px;” marginwidth=”0″ marginheight=”0″ scrolling=”no” frameborder=”0″ src=”//ws-na.amazon-adsystem.com/widgets/q?ServiceVersion=20070822&OneJS=1&Operation=GetAdHtml&MarketPlace=US&source=ac&ref=qf_sp_asin_til&ad_type=product_link&tracking_id=ronin03-20&marketplace=amazon&region=US&placement=B079D3DDGB&asins=B079D3DDGB&linkId=aa1e36738c8a9dbb6800e7ba64ee07d9&show_border=false&link_opens_in_new_window=false&price_color=333333&title_color=0066c0&bg_color=ffffff”]

How Did It Perform?

As they say, that is a story for another day, or at least the next post so click here to read it. I’ll tell you though, it is one heck of a light and totally lived up to what I hoped for.

Fresh out of the box.

Click here to read the next post that has many photos of the light, its parts and night time photos showing the illumination.


If you find this post useful, please share the link on Facebook, with your friends, etc. Your support is much appreciated and if you have any feedback, please email me at in**@ro*********.com. Please note that for links to other websites, I may be paid via an affiliate program such as Avantlink, Impact, Amazon and eBay.


The following are current eBay listings for a variety of PROTAC HL 5-X lights and not just the one I bought:


A Kershaw Knockout Knife and Streamlight Microstream LED Light Are In My Pocket These Days

I have quite a selection of folding knives that I use all the time for work – cutting open boxes, plastic pails, insulation, tubing, etc. It’s funny but I wind up rotating through them for one reason or another – it may be because one needs to be sharpened and is too dull (my ZT 0350 is that way right now) or because I just pick up the blade that is by my desk and drop it in my pocket as I head out to the shop. The same is true for whatever small light I am carrying. A while back, I posted about buying both a Kershaw Knockout and Streamlight Microstylus. I’m so happy with both that I figured an update was in order.

Kershaw Knockout

As mentioned, I did buy this blade some months back and posted about it For the last few months, my goto blade has been the Kershaw Knockout. It is a very decent medium sized pocket knife that has a 3.25″ blade made from Sandvik 142C28N steel. It is holding the edge remarkably well – I haven’t needed to sharpen it yet and am very impressed. Note, I use a Work Sharp Ken Onion edition sharpener to true up my blades and it can handle any steel.

The handle is very comfortable, The Knockout gets its name from the cut out in the handle where they rivet in the blade lock. It makes for a very easy to operate locking mechanism. I always like the flag they add to their American made knives also.
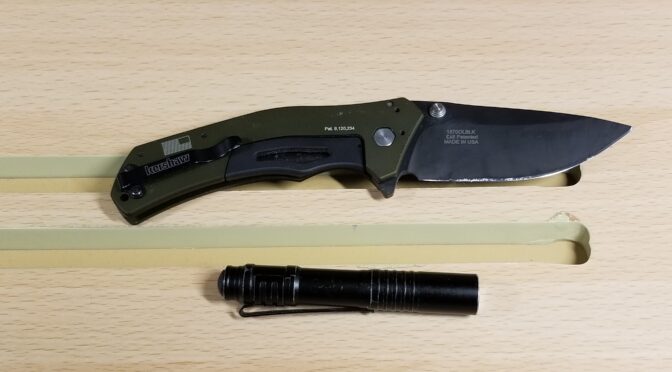
The blade is holding up great. You know, I don’t know the details behind the “Diamond Like Coating” – DLC – process but it is really impressive. I’ve beat my ZT 0350 half to death and that coating is holding up on that knife also. Also, you can see the Streamlight Microstream light.

The second reason is that it is remarkably light and thin. For its size, it really does not drag down my pocket. At the same time, the hande is big enough for me to get a firm grip to cut open plastic pails.

The third big reason is that it uses Kershaw’s “SpeedSafe” flipper mechanism for one handed opening. When I am working, being able to open the knife with only one hand is a huge benefit.

[iframe style=”width:120px;height:240px;” marginwidth=”0″ marginheight=”0″ scrolling=”no” frameborder=”0″ src=”//ws-na.amazon-adsystem.com/widgets/q?ServiceVersion=20070822&OneJS=1&Operation=GetAdHtml&MarketPlace=US&source=ac&ref=qf_sp_asin_til&ad_type=product_link&tracking_id=ronin03-20&marketplace=amazon&region=US&placement=B00I0RUCXK&asins=B00I0RUCXK&linkId=e1a9411f82a324ac93af61b7f24d6724&show_border=false&link_opens_in_new_window=false&price_color=333333&title_color=0066c0&bg_color=ffffff”]

The Streamlight Microstream LED Light

I have bought a number of these little lights – my best guess is 6-8 of them. Simply put they hold up great and are at a very reasonable price especially given the quality. Here’s a blog post that I did after my initial purchase back in 201.

I have put at least four of them through the clotheswasher and as long as the base is on tight, they survive. If the base comes loose and water gets in then it is pretty much always game over.

This is a good photo both of the Knockout and the Microstream. The Microstream is 3.5″ long and has a diameter of about 0.6″.

What I can tell you is that I have never had one fail on me due to worksmanship. Dead battery, yes. The switch, body and LED have all held up just great.

I really like these lights because they are small, don’t weigh much, use regular AAA batteries and only cost $16.22 off Amazon. I should also point out that they produce 28 lumens of light and that little battery will last about 2-2.5 hours. I probably carry this light even more than I do a blade because it is just so handy and I can’t see as well as I used to.

[iframe style=”width:120px;height:240px;” marginwidth=”0″ marginheight=”0″ scrolling=”no” frameborder=”0″ src=”//ws-na.amazon-adsystem.com/widgets/q?ServiceVersion=20070822&OneJS=1&Operation=GetAdHtml&MarketPlace=US&source=ac&ref=qf_sp_asin_til&ad_type=product_link&tracking_id=ronin03-20&marketplace=amazon&region=US&placement=B00R9N4A3Y&asins=B00R9N4A3Y&linkId=77813870fada613ac401f498907564b5&show_border=false&link_opens_in_new_window=false&price_color=333333&title_color=0066c0&bg_color=ffffff”]

In short, I am so happy with both that I wanted to post the update to you folks,


If you find this post useful, please share the link on Facebook, with your friends, etc. Your support is much appreciated and if you have any feedback, please email me at in**@ro*********.com. Please note that for links to other websites, I may be paid via an affiliate program such as Avantlink, Impact, Amazon and eBay.


This Rechargeable LED Worklight is Bright, Long-Lasting and Very Affordable

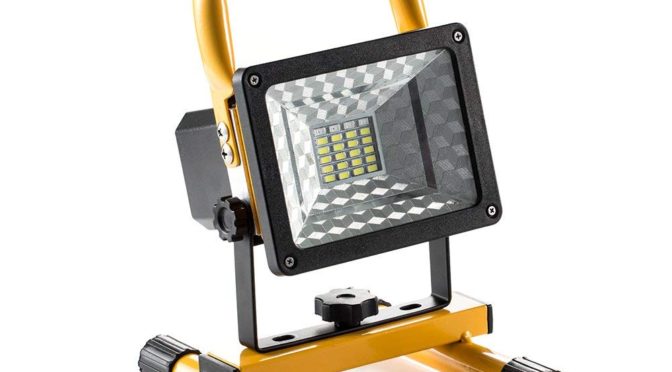
This is a pretty slick little light. It’s compact, doesn’t weigh much and can kick out quite a bit of light for at least eight hours.  Because it LED, you don’t need to worry about the bulbs burning out plus it runs cool vs. the scorching hot halogen worklights.

It does have one weird feature that I would tell you not to use – it has a red and blue light emergency situation flasher. In Michigan anyways, red is fine but the blue light is reserved for police. I didn’t buy this light for that feature and simply will not use it.

As small rechargeable worklights go, this is a great deal.  I bought mine because over 1,100 reviewers on Amazon gave this 4.3 out of 5 stars. You can’t have a rating like that unless your product is solid.


If you find this post useful, please share the link on Facebook, with your friends, etc. Your support is much appreciated and if you have any feedback, please email me at in**@ro*********.com. Please note that for links to other websites, I may be paid via an affiliate program such as Avantlink, Impact, Amazon and eBay.


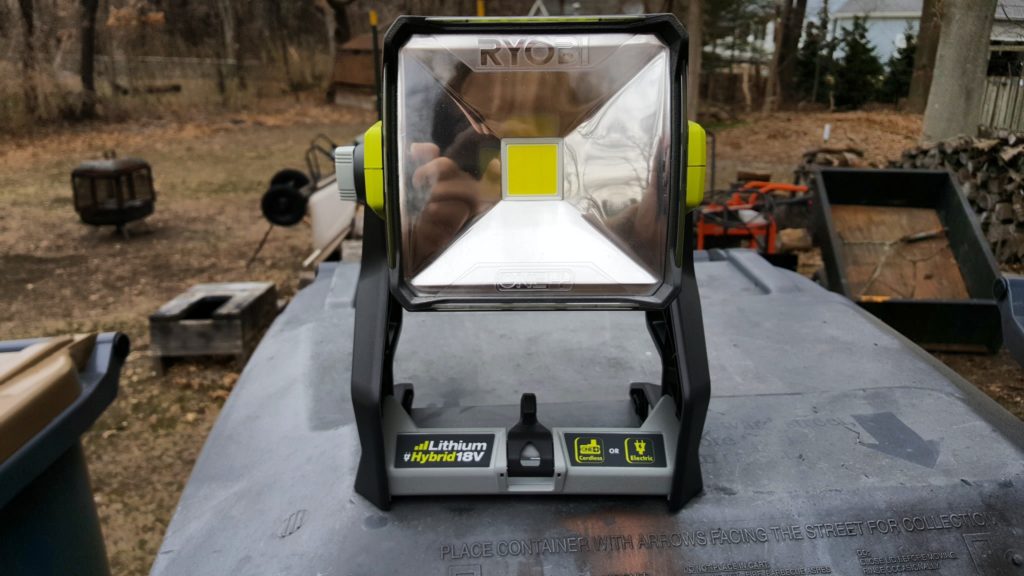
Ryobi P721 Hybrid 20 Watt LED Work Light is Fantastic!!

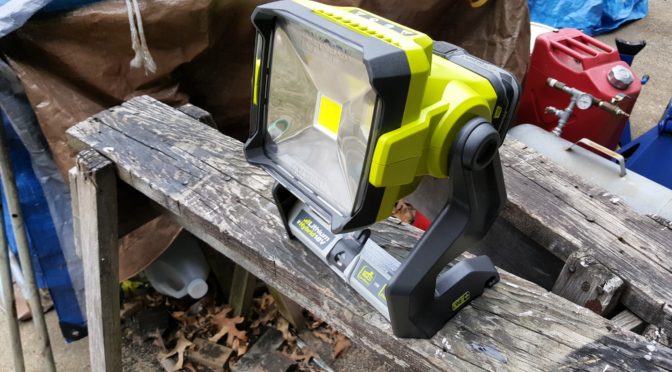
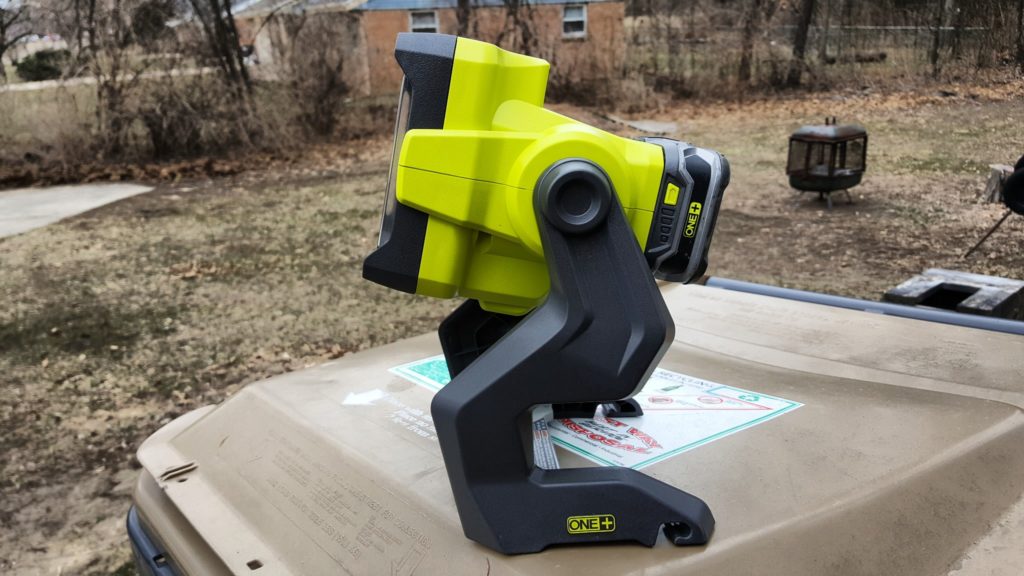
I finally gave up trying to keep my old Ryobi 18 volt flashlights working or converting them to LED.  Ryobi sells a 20 watt LED worklight, model # P721 that is really slick and uses their 18 volt batteries.  I bought one at my local Home Depot and used it all summer while working on cars, plumbing and electrical work.  I must say that I am impressed.

The light has two settings, low and high.  When I was working in a room or under a car, the high setting was great.  Inside a bathroom vanity it was way too bright and the low setting worked much better.  They say the high setting is 2,400 lumen — let me tell you, it’s bright.

The problem I used to run into with incandescent bulbs is that the filament would burn out and I would need to install a new bulb.  LED lights do not have that problem.  Ryobi estimates the bulb will last 50,000 hours.  To put that in perspective, if you ran the light for one year, it would run for 8,760 hours non-stop.  Of course you would drain the battery over and over but the point is that it will be a long time before the LED gives out.

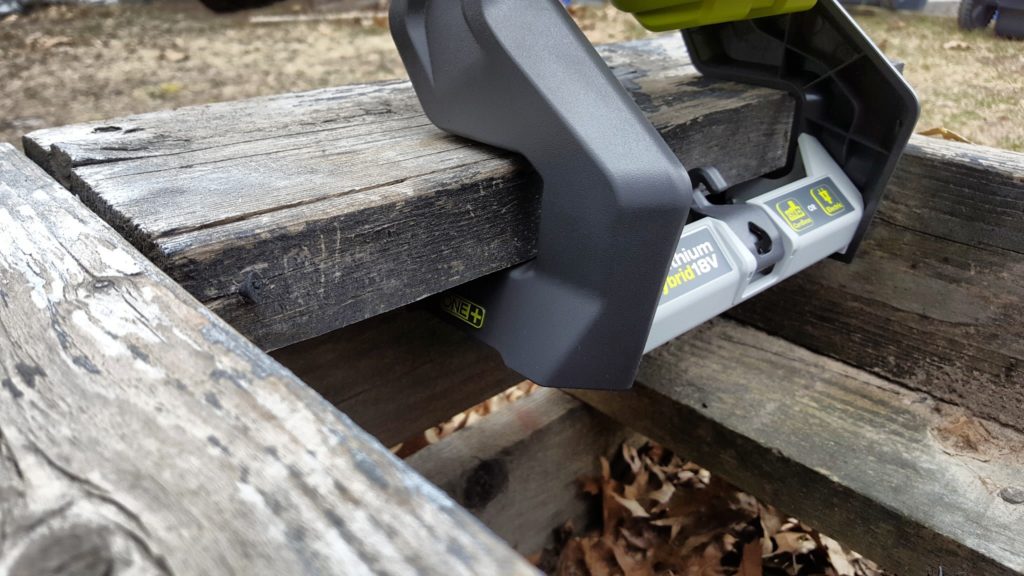
The legs are an interesting design and can hang on a two by lumber such as framing or a floor joist.

They claim 34 hours on one of the big Lithium Ion batteries and I suspect that is the low setting.  When I was doing plumbing and electrical work at my mother-in-law’s house, I killed a big battery in less time than that on full power.

All in all, it is a great light.  Since I have Ryobi tools and batteries, this purchase was a no-brainer and I plan to buy a second one for ever better coverage while working and the occasional power outage.

2/17/20 Update:  Both lights are still going strong.  I have used them a ton and it is so handy to have a ton of light available on demand.  I still strongly recommend these.

5/30/2019 Update:  I did buy a second one and these things are great.  For example, I just used them the other night to light up an area outside where my wife and I were working.   The batteries last a surprisingly long time on the lower power setting but I can’t tell you for sure how long.  Also, that base is so well thought out.  You can attach it to two-by lumber or even use the hook to dangle it – which I did from a rope.


If you find this post useful, please share the link on Facebook, with your friends, etc. Your support is much appreciated and if you have any feedback, please email me at in**@ro*********.com. Please note that for links to other websites, I may be paid via an affiliate program such as Avantlink, Impact, Amazon and eBay.


How to Upgrade Mini Maglites to LED, Replacing the Lens and Adding a Switched Tail Cap

Okay, I have to admit it up front – I’m nostalgic.  When I was a teenager in the 1980s Maglites were a big deal.  I had a four D-Cell unit and a friend encouraged me to get a Mini Maglite probably in the 1985-ish timeframe and I have used it a ton.

I also bought a Mini Maglite with remote switch and shot gun barrel adapter for my dad.  He would slip out the door at night to see what the dog was barking at and would often take a firearm with him – often an old reliable 16 gauge single shot Iver Johnson.  It really creeped me out.  It wasn’t until years later that I understood how my dad viewed that having both grown up on a rural farm in New Hampshire and serving in the 6th Infantry in Pusan at the end of WWII (Yes, we had troops in Korea towards the end of WWII to prevent the Japanese from returning).

At any rate, I bought my dad a Mini MagLite with a remote switch for that old Iver Johnson and installed it.  Years later I would find the shotgun and the light separate – I suspect my dad never really needed it.

At any rate, I wound up with both my old light and my dad’s sitting next to each other and figured it was time to upgrade them and return them to service.

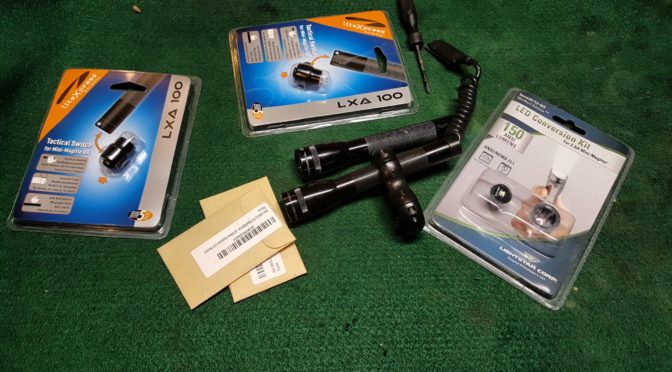
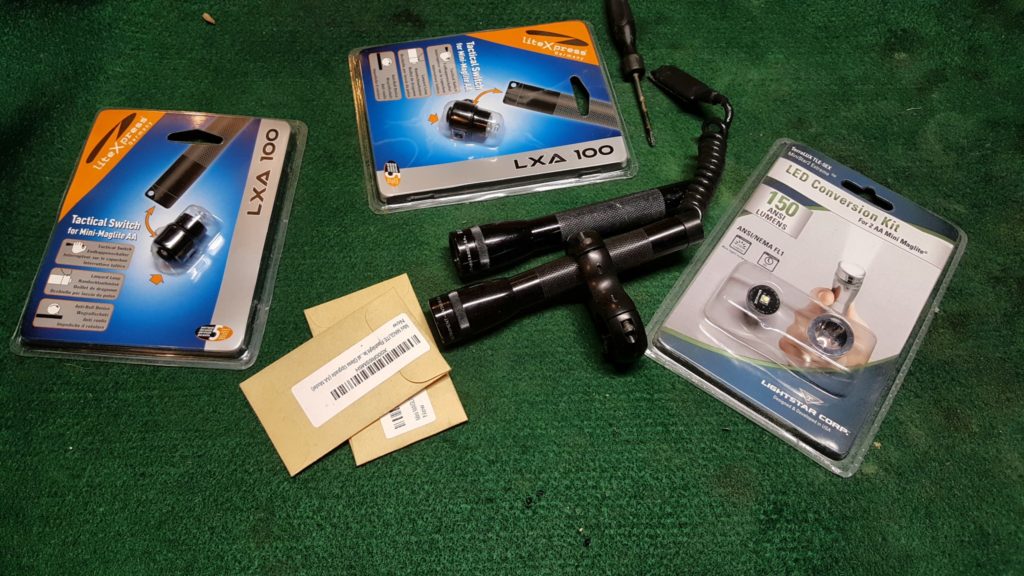
For me, researching is part of the fun so I dug around on replacement tail caps, LED upgrade units and lenses.  So, I wound up with the following pile on my work bench:

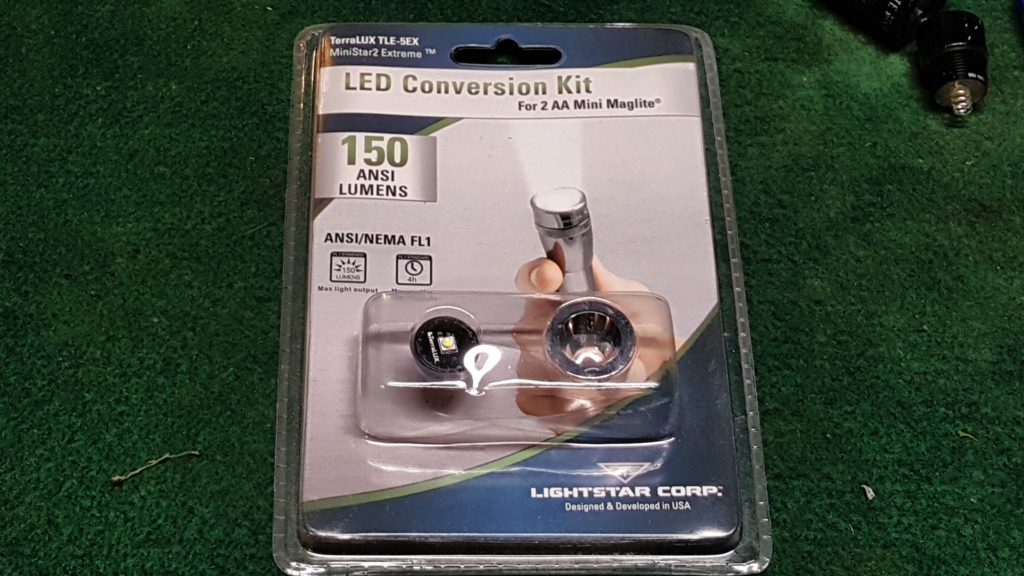
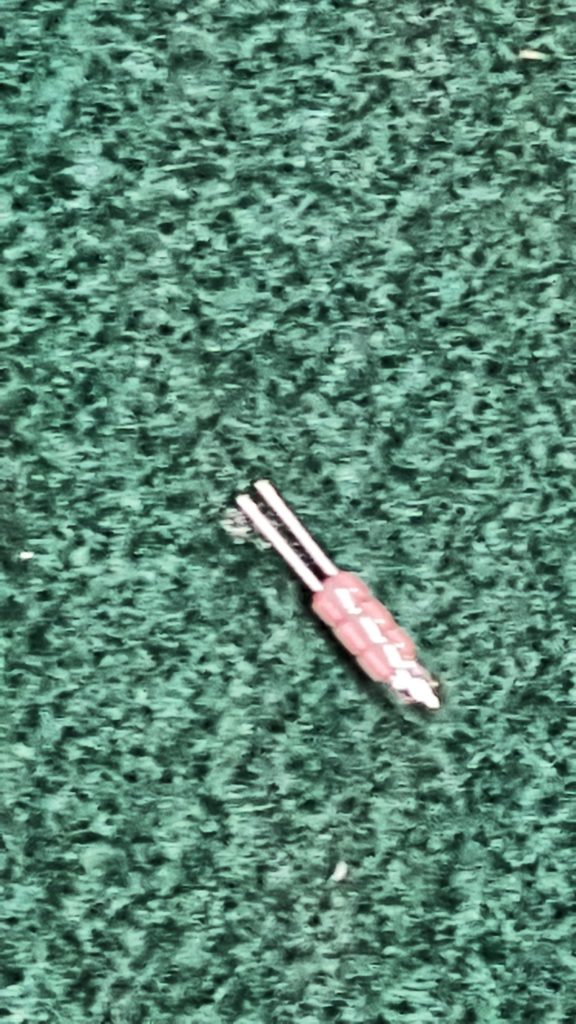
I bought two of the LED upgrades but had already installed one before it dawned on me that I better get a picture 🙂

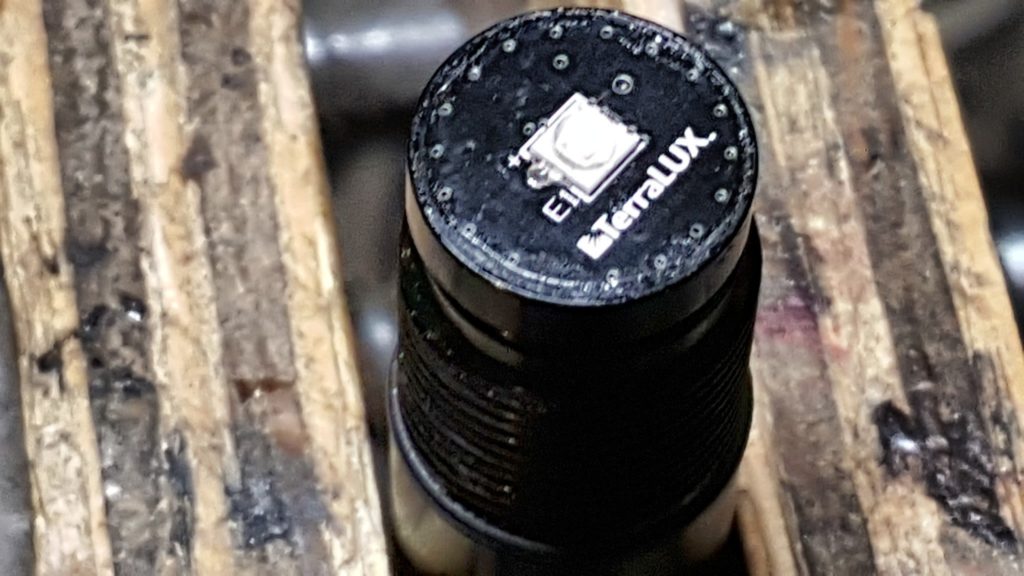
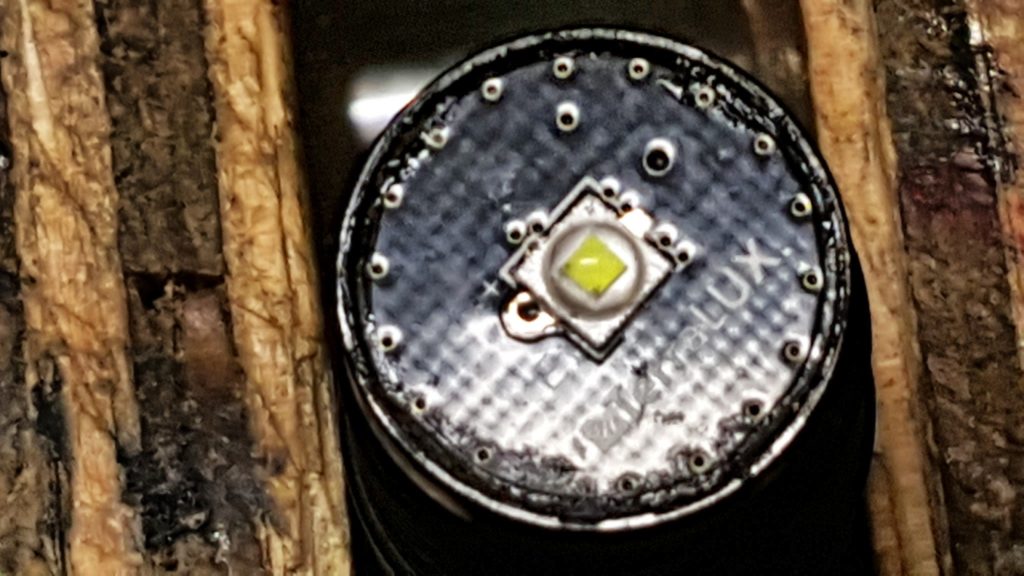
The  LED upgrade is from TerraLux and is their TLE-5EX MiniStar2 Extreme.  They claim 150 maximum lumens for four hours.  I can’t speak to the duration but they are definitely bright – brighter than my 80 and 100 lumen lights for sure with a really nice solid coverage. 

[iframe style=”width:120px;height:240px;” marginwidth=”0″ marginheight=”0″ scrolling=”no” frameborder=”0″ src=”//ws-na.amazon-adsystem.com/widgets/q?ServiceVersion=20070822&OneJS=1&Operation=GetAdHtml&MarketPlace=US&source=ac&ref=tf_til&ad_type=product_link&tracking_id=ronin03-20&marketplace=amazon&region=US&placement=B000B868MK&asins=B000B868MK&linkId=485e0fccfc732570aa5733c88ee0d7b2&show_border=false&link_opens_in_new_window=false&price_color=333333&title_color=0066c0&bg_color=ffffff”]  [iframe style=”width:120px;height:240px;” marginwidth=”0″ marginheight=”0″ scrolling=”no” frameborder=”0″ src=”//ws-na.amazon-adsystem.com/widgets/q?ServiceVersion=20070822&OneJS=1&Operation=GetAdHtml&MarketPlace=US&source=ac&ref=tf_til&ad_type=product_link&tracking_id=ronin03-20&marketplace=amazon&region=US&placement=B00NVJMBGS&asins=B00NVJMBGS&linkId=7b215b9a4705222a44484254b34c46ae&show_border=false&link_opens_in_new_window=false&price_color=333333&title_color=0066c0&bg_color=ffffff”]  [iframe style=”width:120px;height:240px;” marginwidth=”0″ marginheight=”0″ scrolling=”no” frameborder=”0″ src=”//ws-na.amazon-adsystem.com/widgets/q?ServiceVersion=20070822&OneJS=1&Operation=GetAdHtml&MarketPlace=US&source=ac&ref=tf_til&ad_type=product_link&tracking_id=ronin03-20&marketplace=amazon&region=US&placement=B00C1ERSRQ&asins=B00C1ERSRQ&linkId=4a1f679b50e6a2dea70420c1adedf2e5&show_border=false&link_opens_in_new_window=false&price_color=333333&title_color=0066c0&bg_color=ffffff”]

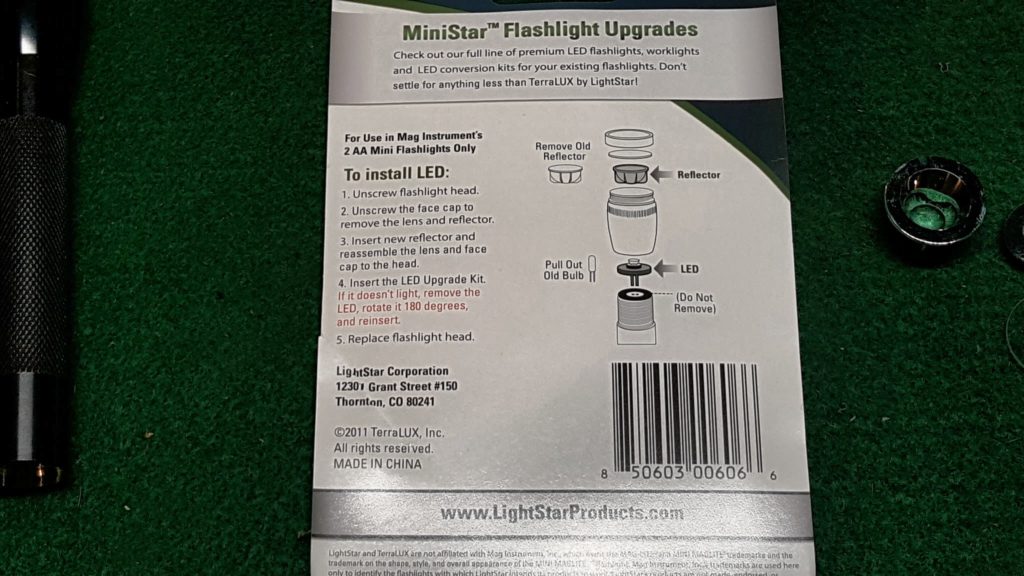
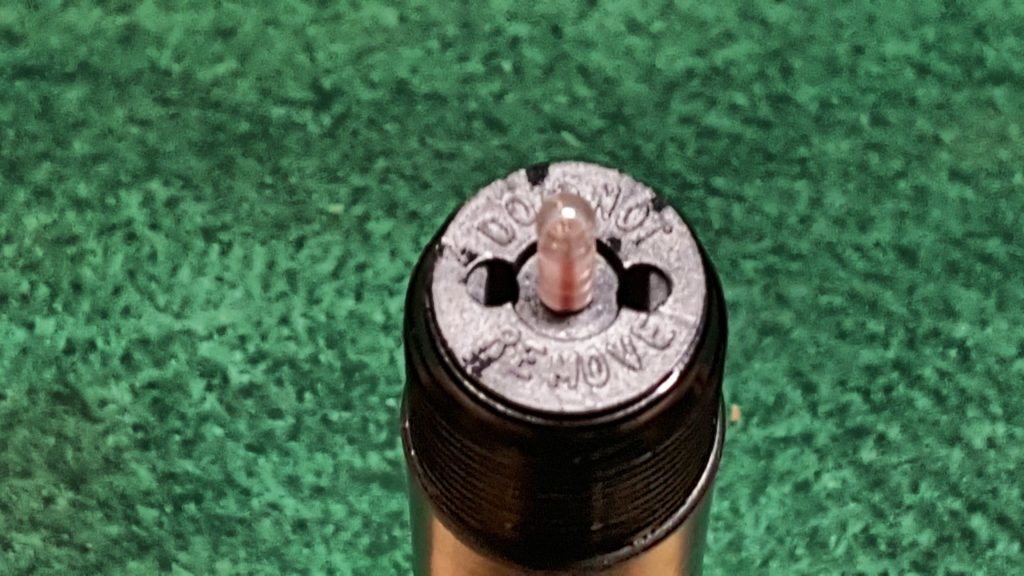
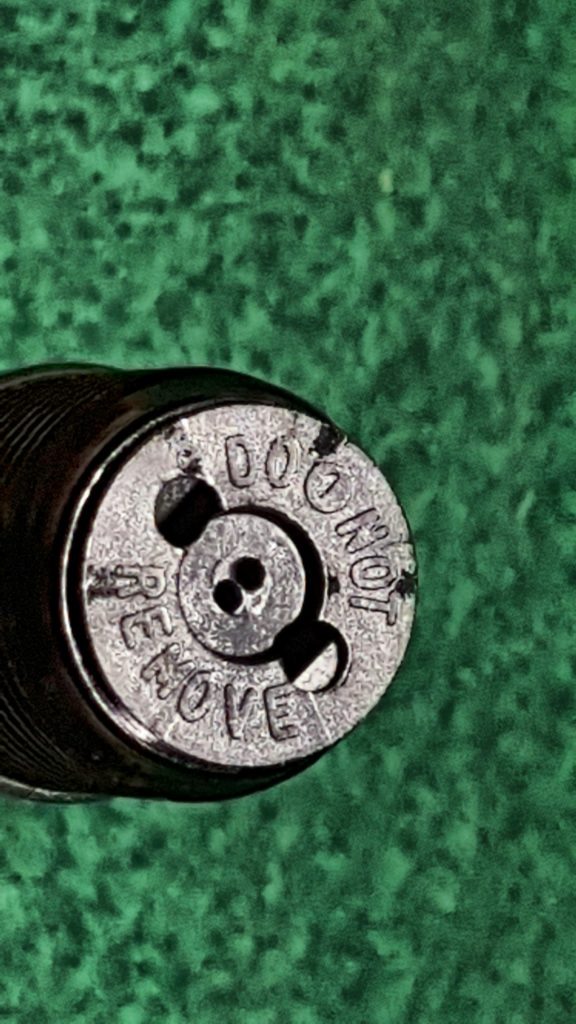
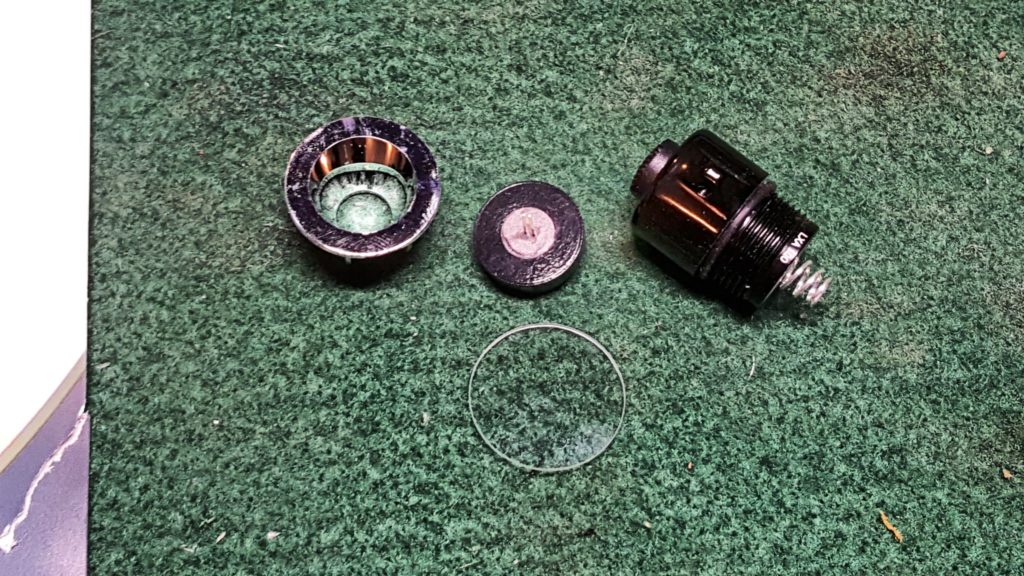
Basically, you unscrew the head from the camera body and while you are at it, remove the lens cap also because you will replace the old lens with a new one.  If you see any stretched, torn or missing O-rings, then replace them while you are at it.

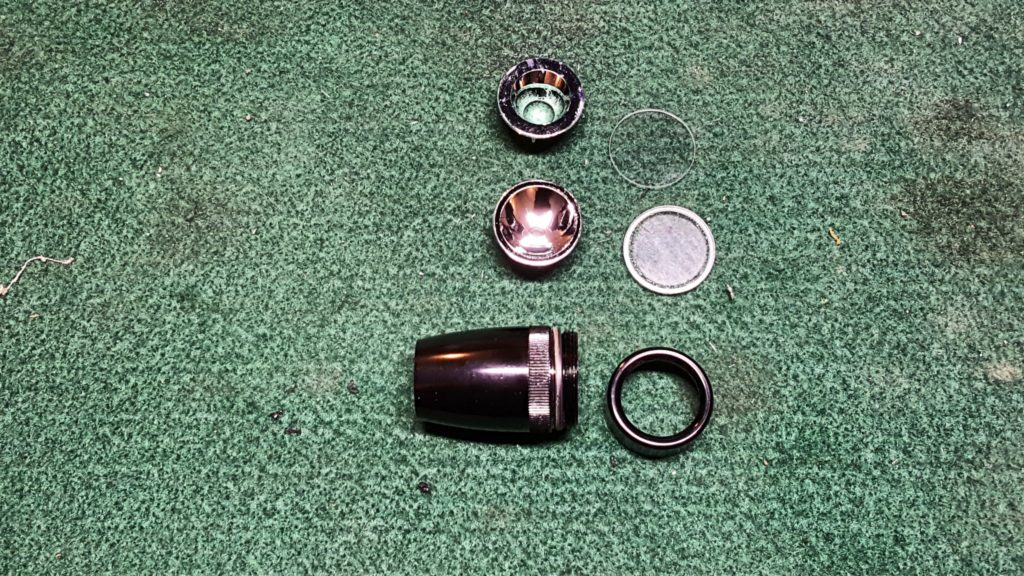
Here are the old and new reflectors and lenses:

The old bulb just pulls straight out of the body.  You don’t need to do anything else – just pull it out.
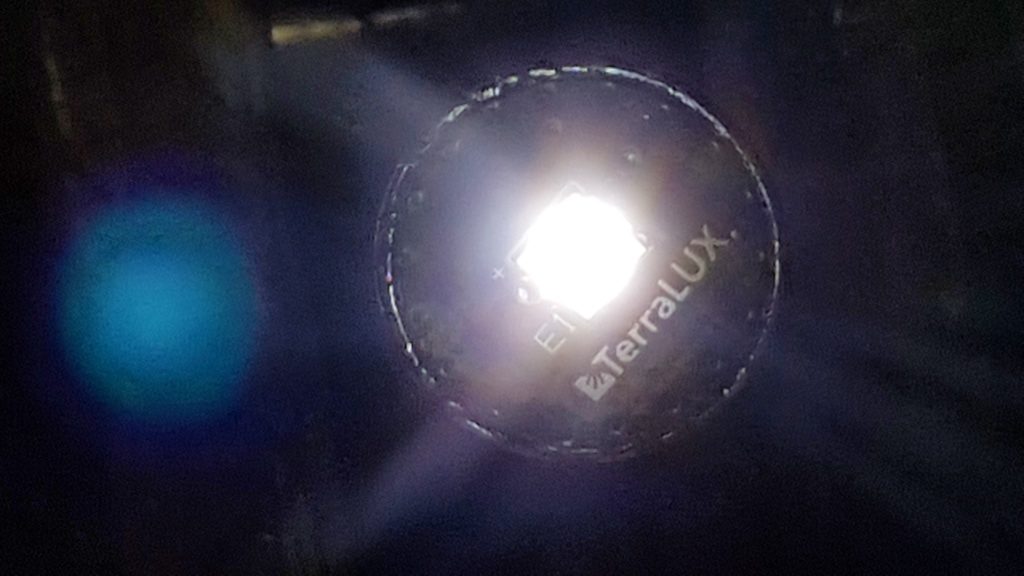
Now the LED module’s legs just go in where you removed the old bulb.  Have batteries in the light because you need to find out if the module is plugged in the right way or not.  What I mean by this is that the polarity does matter.  If you plug the module in and it will not light then turn it the other way so the legs switch the power holes they are plugged in to.

Notice how the reflector that comes with the module has a much wider hole to accommodate the LED.  You can save your old bulb and reflector if you want to.

The module will sit on top of the housing.

I got lucky – the light worked the first try.  If it did not, I would have removed the module and exchanged holes the legs were going into.


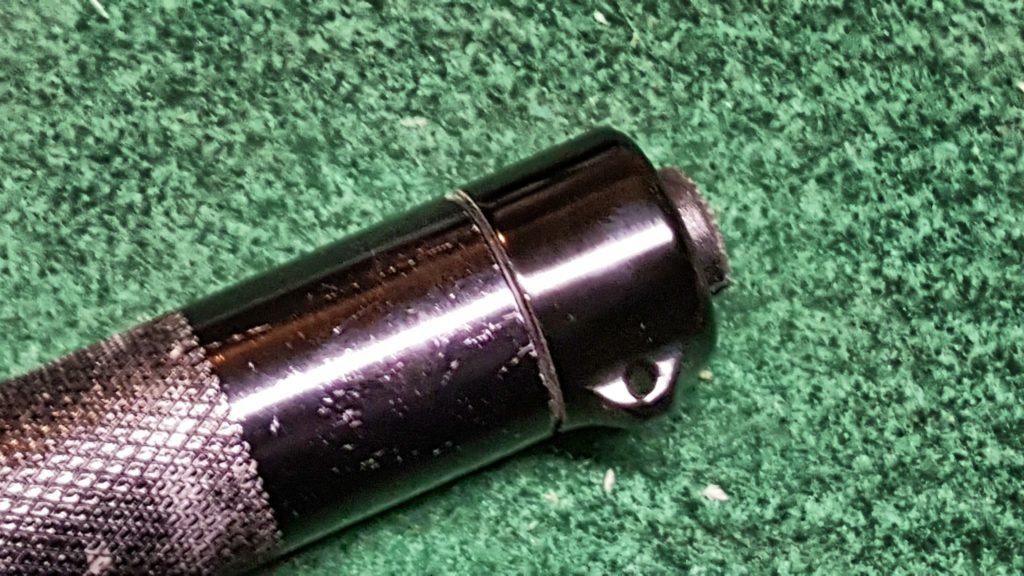
The tailcap has a nice switch.  What I like is that I can adjust the lens how I want and just turn the unit off and on at the tail cap.  If you were packing this, you can still turn the light off the old way and reduce the odds of it turning on.  Lastly, the cap has a perk – it has a lanyard ring on the side and it will prevent the light from rolling off a surface.  On one hand you can’t stand the light up and run it like candle but on the easy on/off switch and elimination of rolling are nice bonuses.

So that’s all there is to it.  I’d say it took me 5-10 minute per light and I satisfied my nostalgia by keeping them and have far, far brighter lights.  I’ve been using one of the lights for almost two months as of writing this blog without any problems at all.

By the way, I also wrote a post about upgrading my bigger 4-D cell Maglites as well.  Click here to read that post.


If you find this post useful, please share the link on Facebook, with your friends, etc. Your support is much appreciated and if you have any feedback, please email me at in**@ro*********.com. Please note that for links to other websites, I may be paid via an affiliate program such as Avantlink, Impact, Amazon and eBay.