Glass Bedding a Practical Solutions 1913 Rail Adapter For a Solid Fit On A VMAC9 or MAC-11N

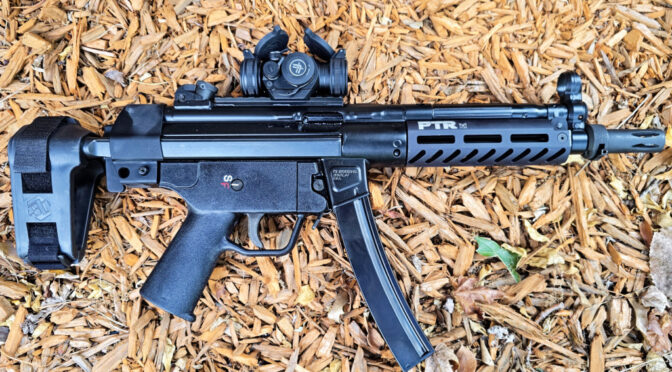
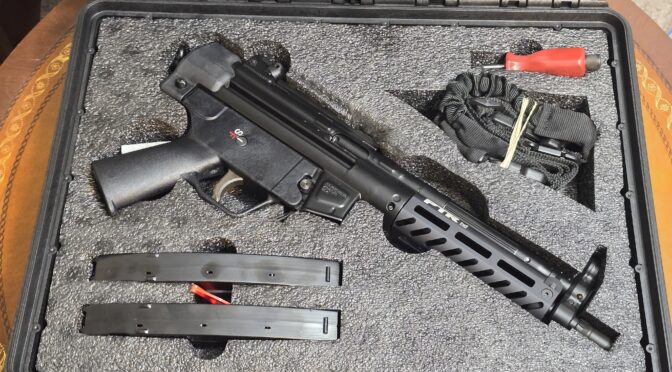
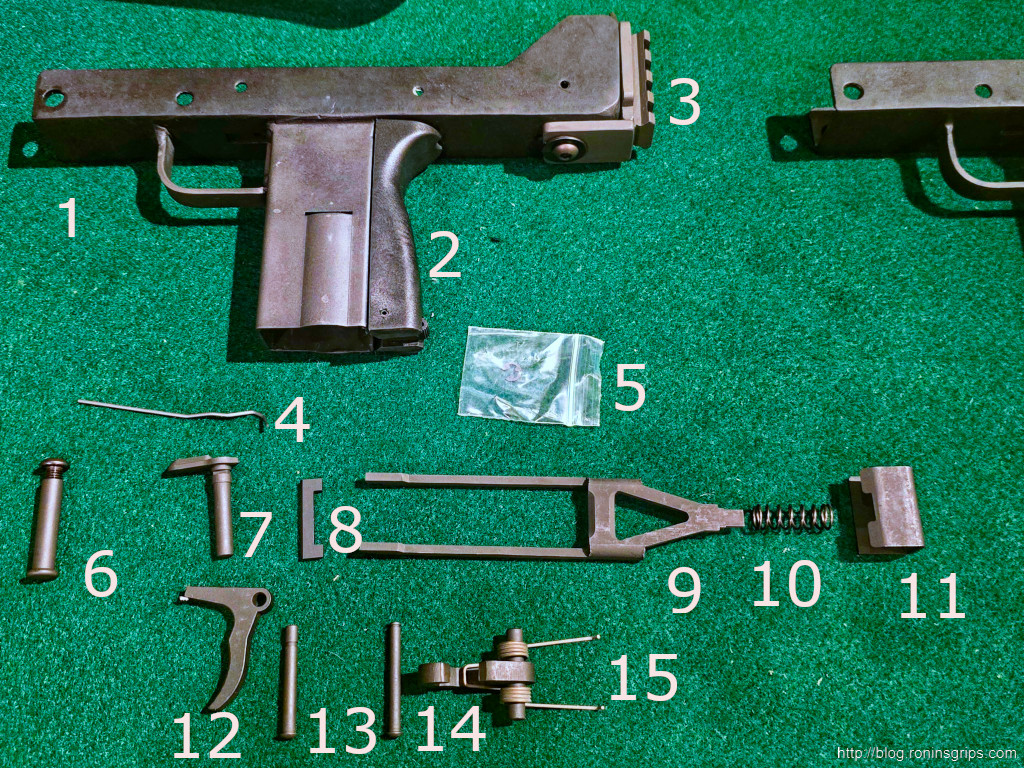
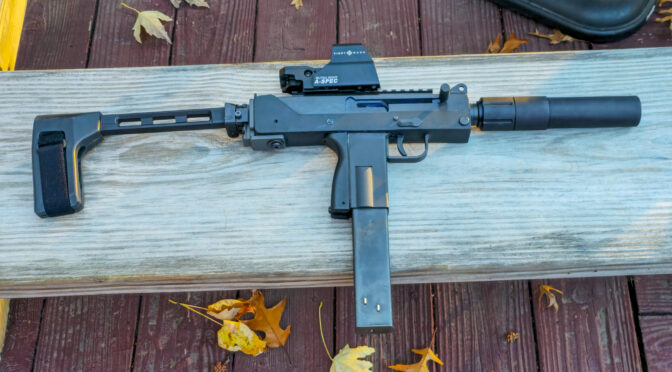
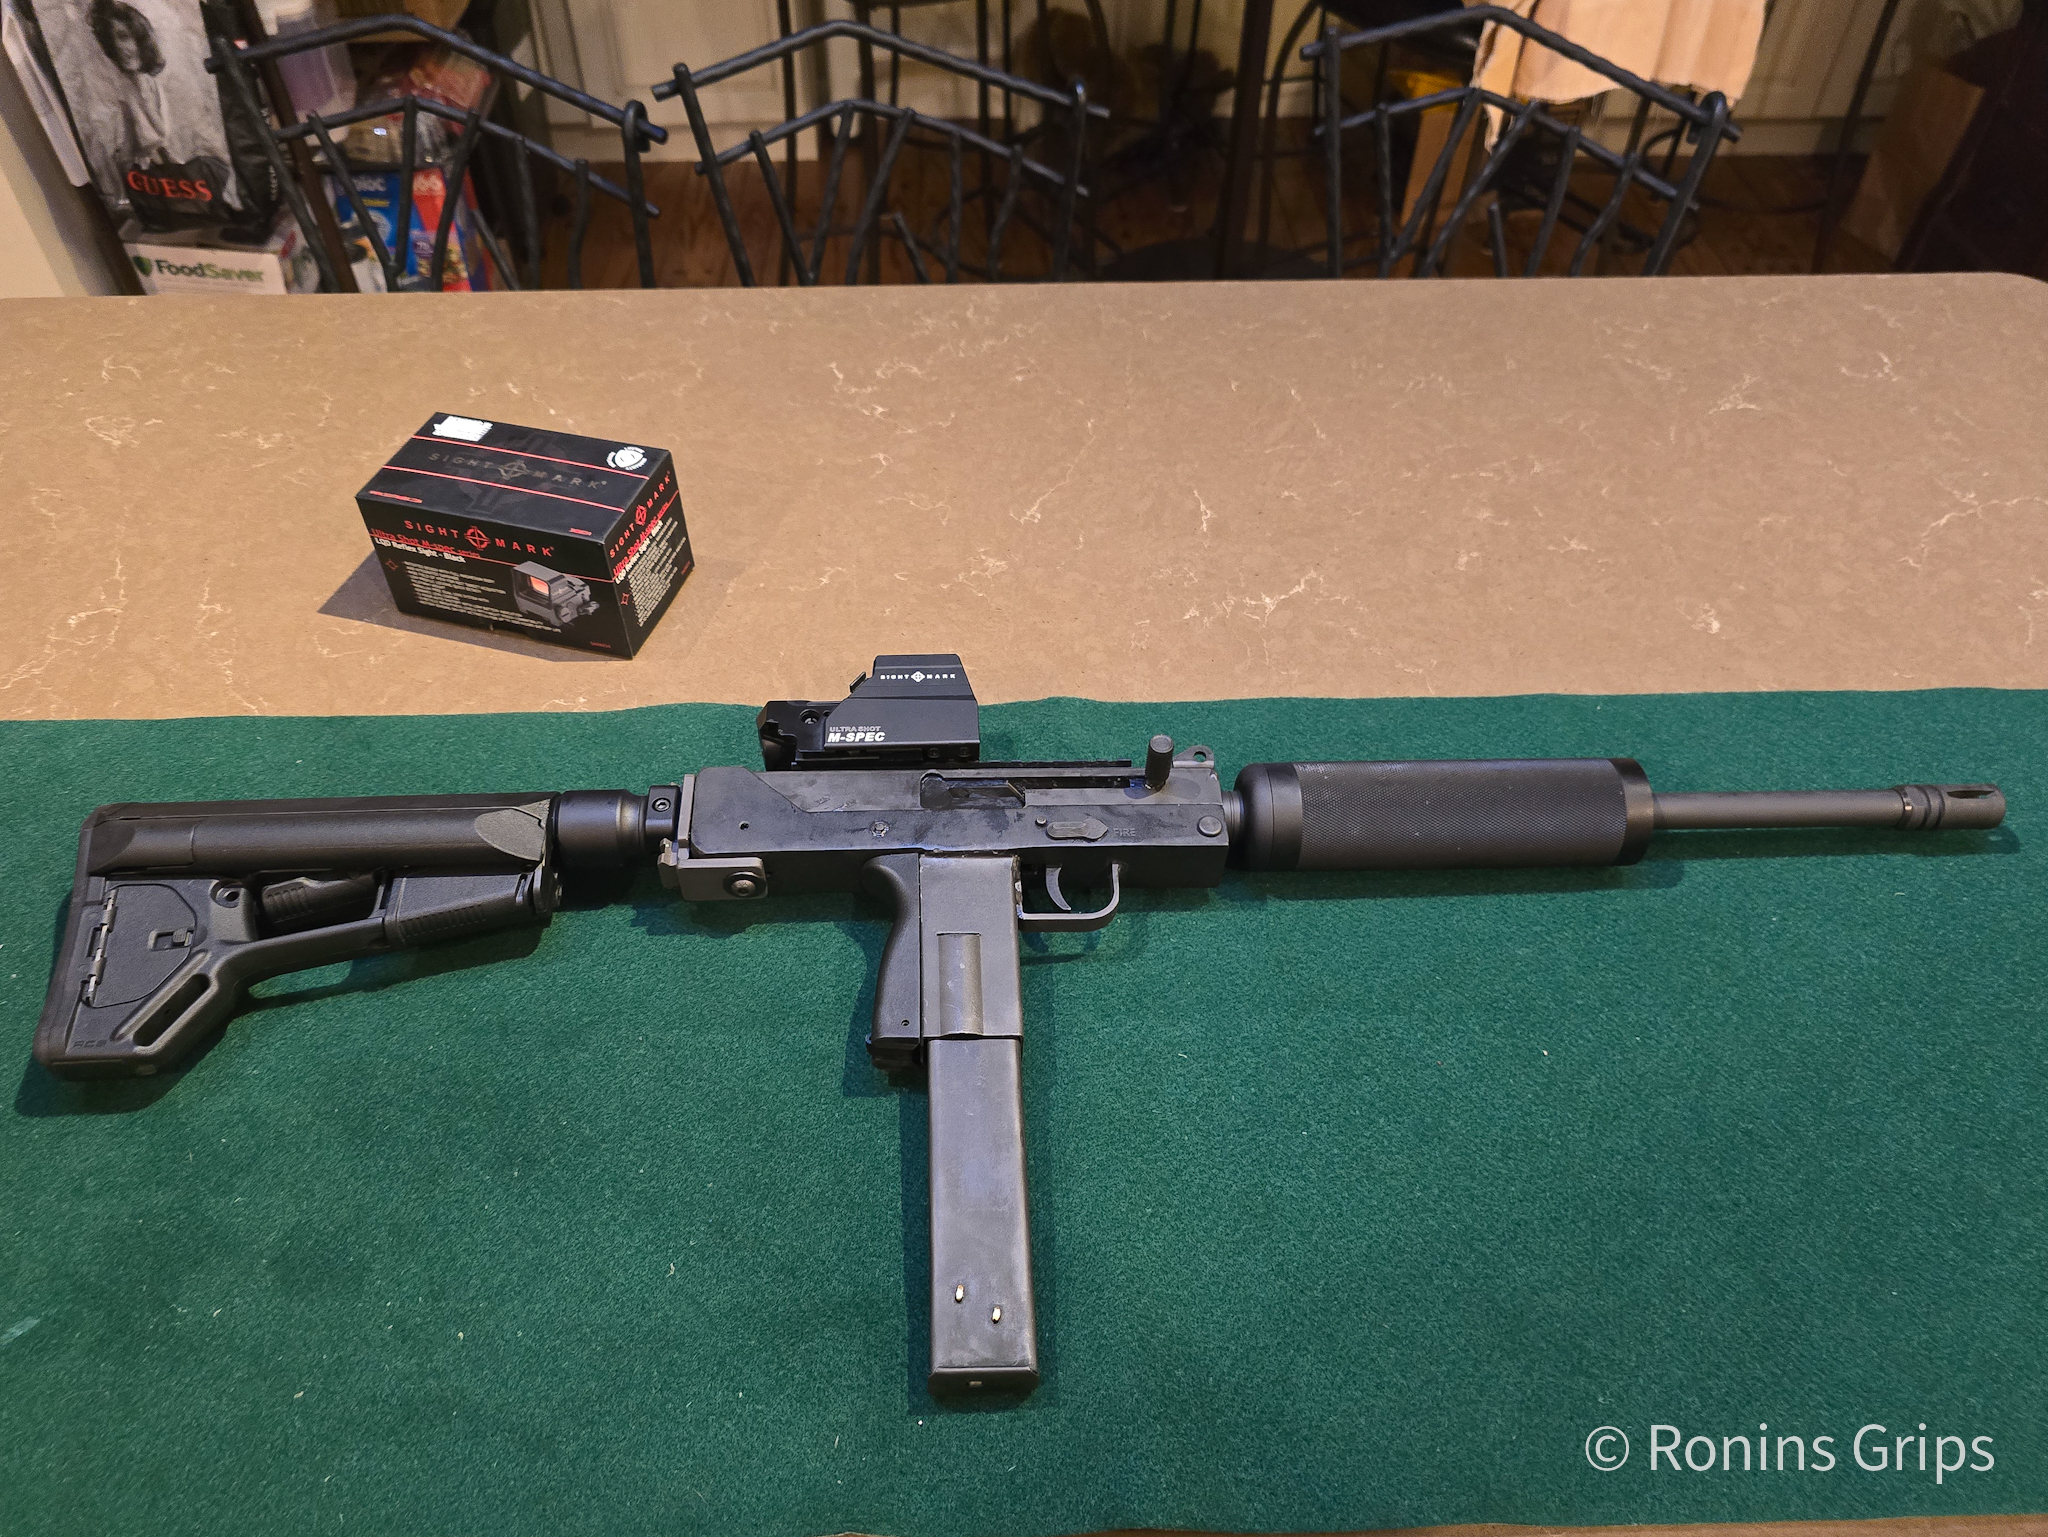
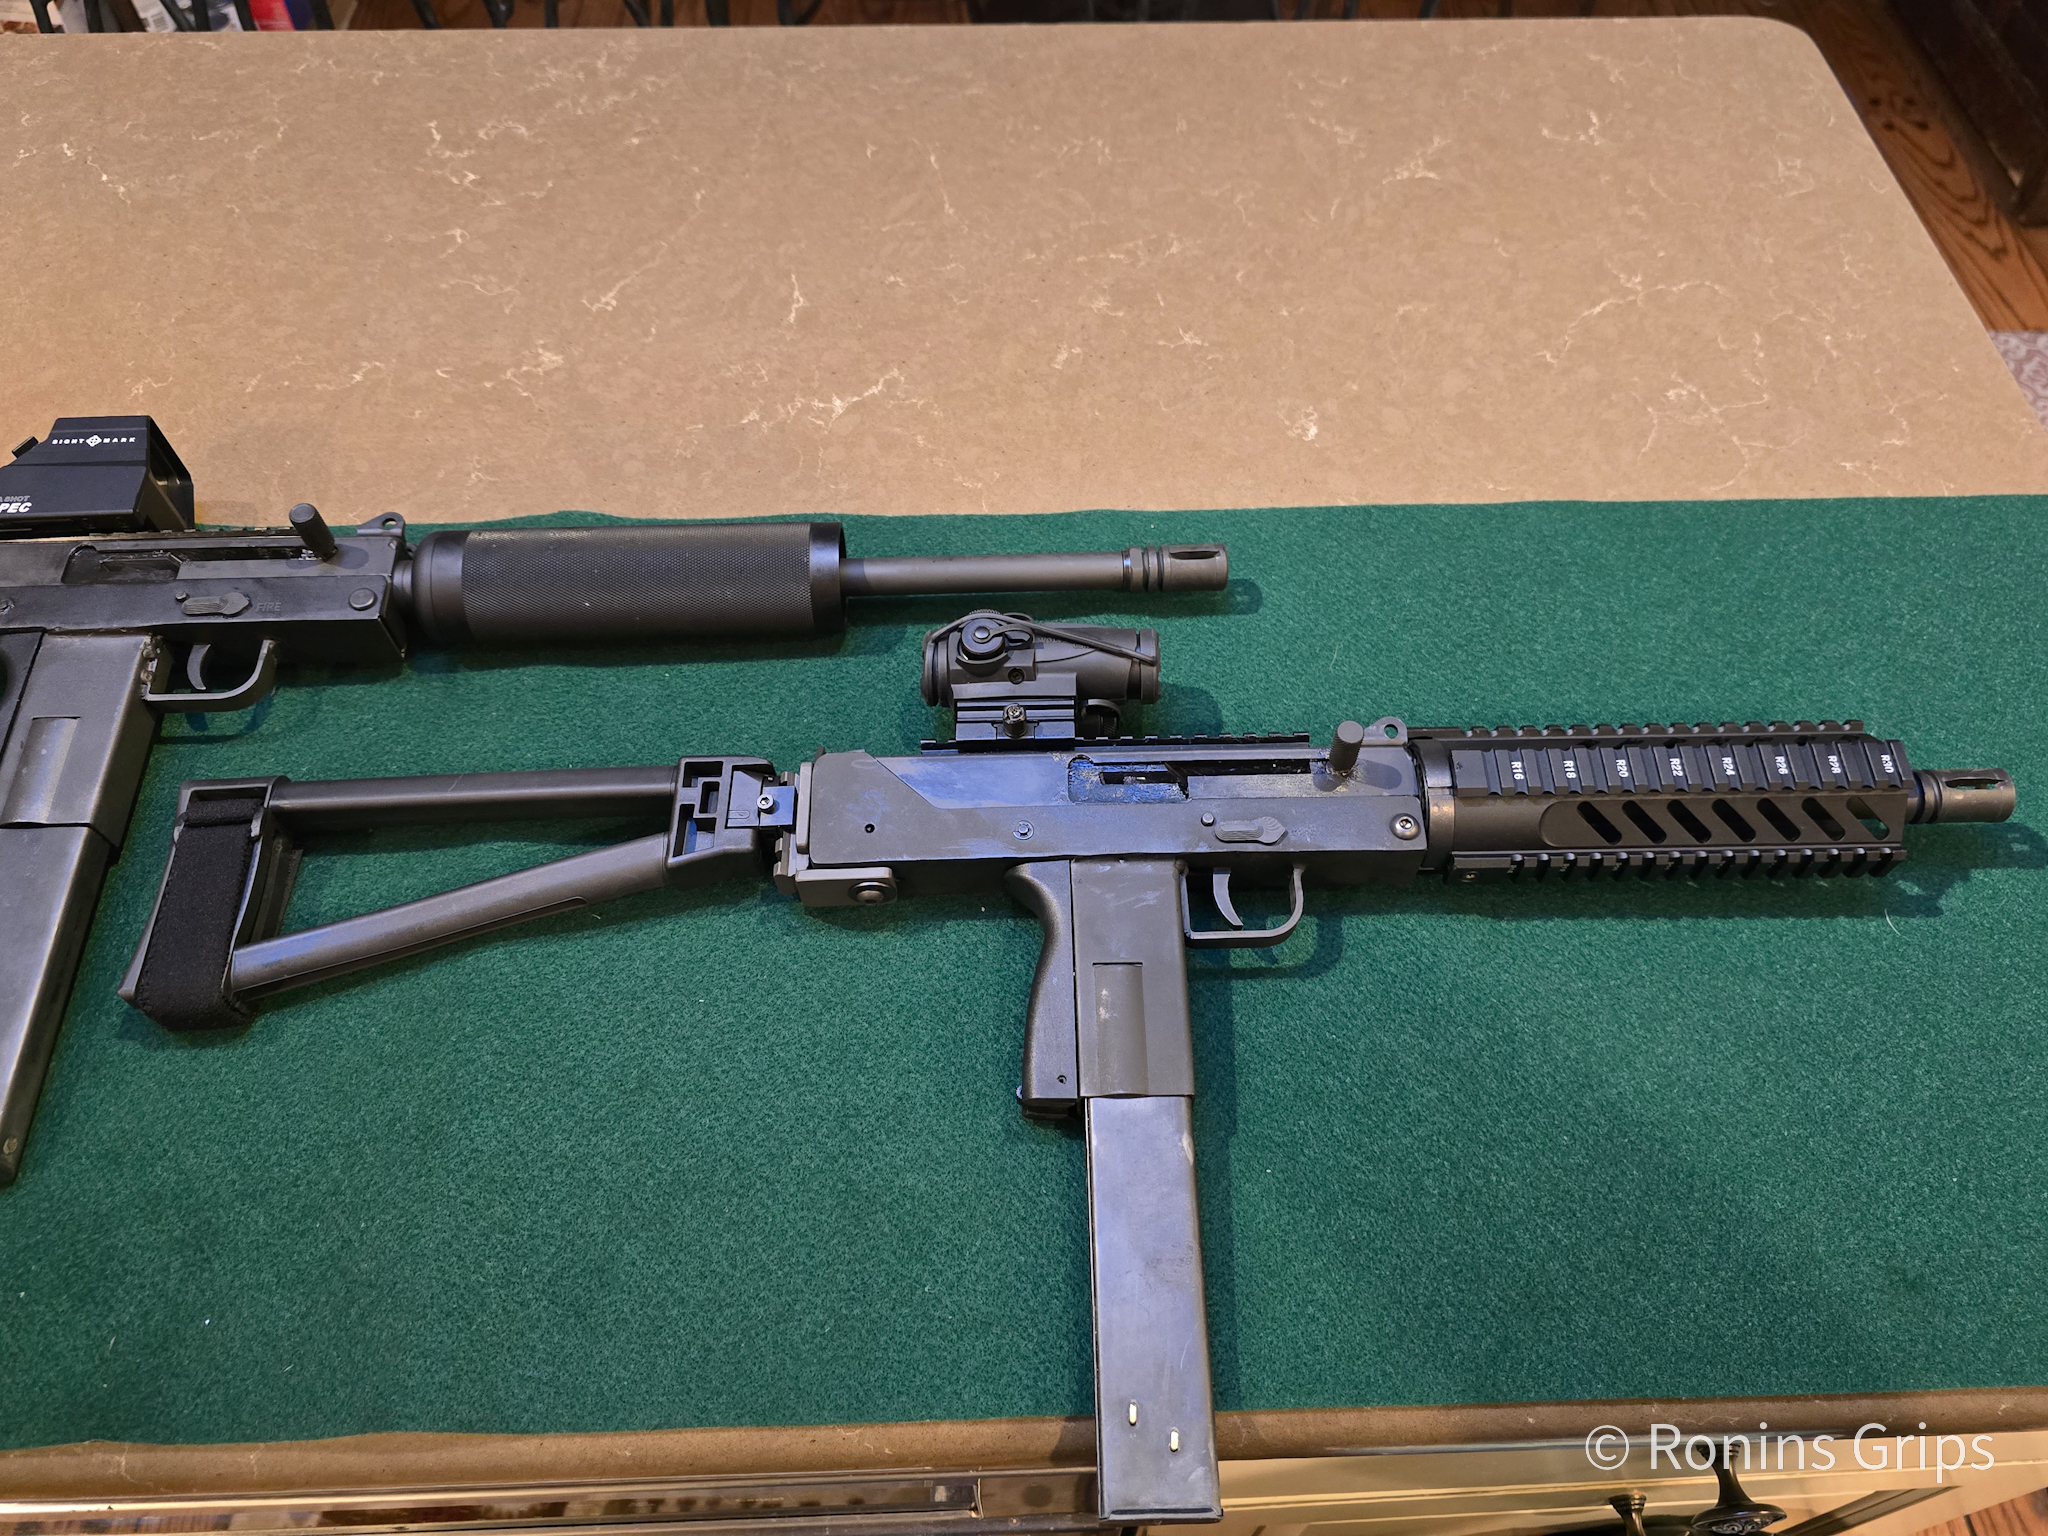
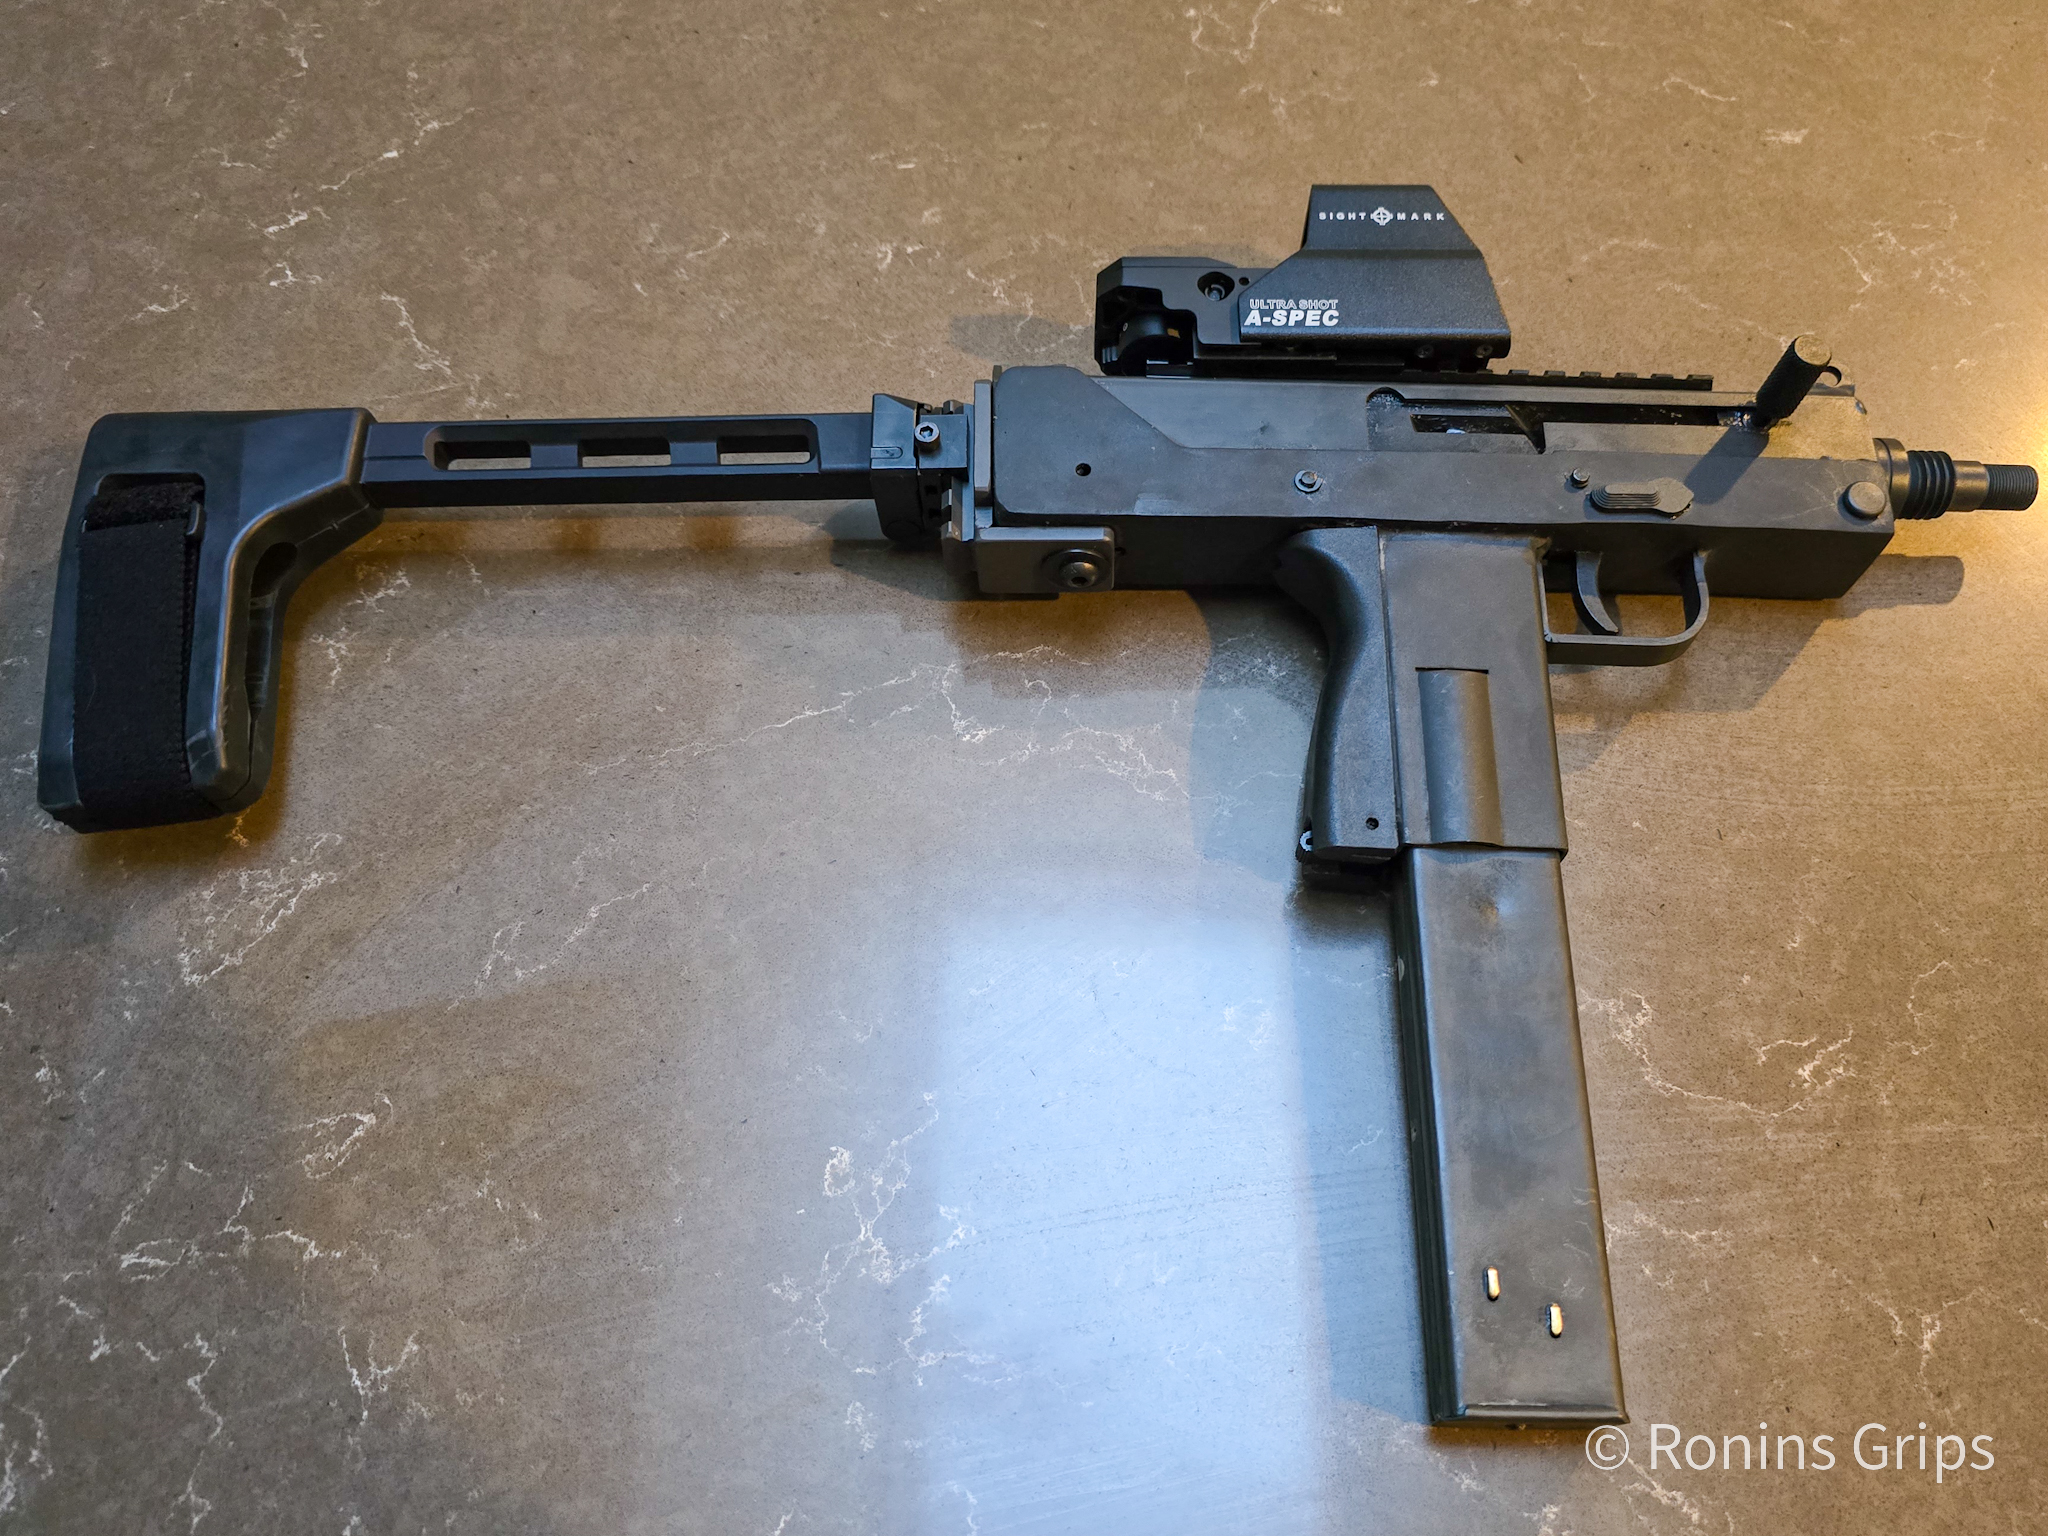
The defacto standard rear connector for braces and stocks on large format pistols is the 1913 Picatinny Rail adapter. The concept was pioneered by Justin McMillion and his firm JMAC. The idea exploded and now tons of companies offer adapters, stocks and braces to do just that. So, when I started planning my VMAC9 builds (they are basically MAC-11 9mm firearms), I knew I wanted a 1913 rear rail for flexibility.

Vendors of Adapters

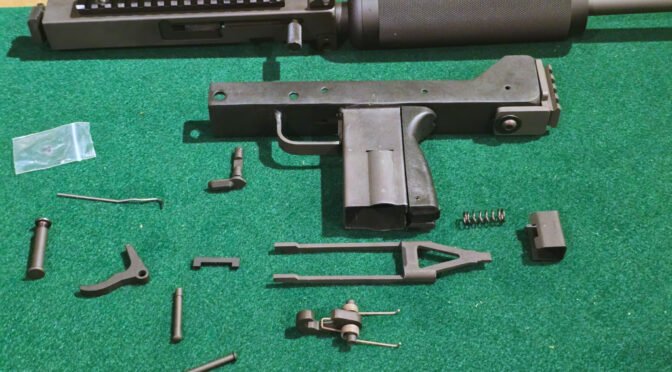
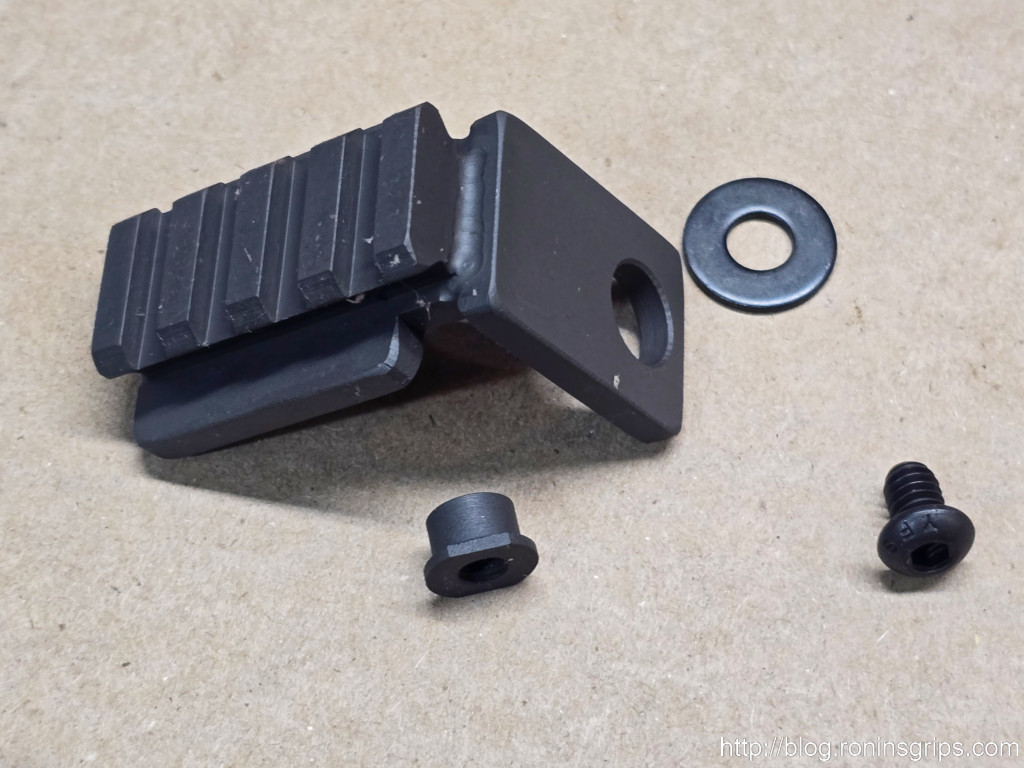
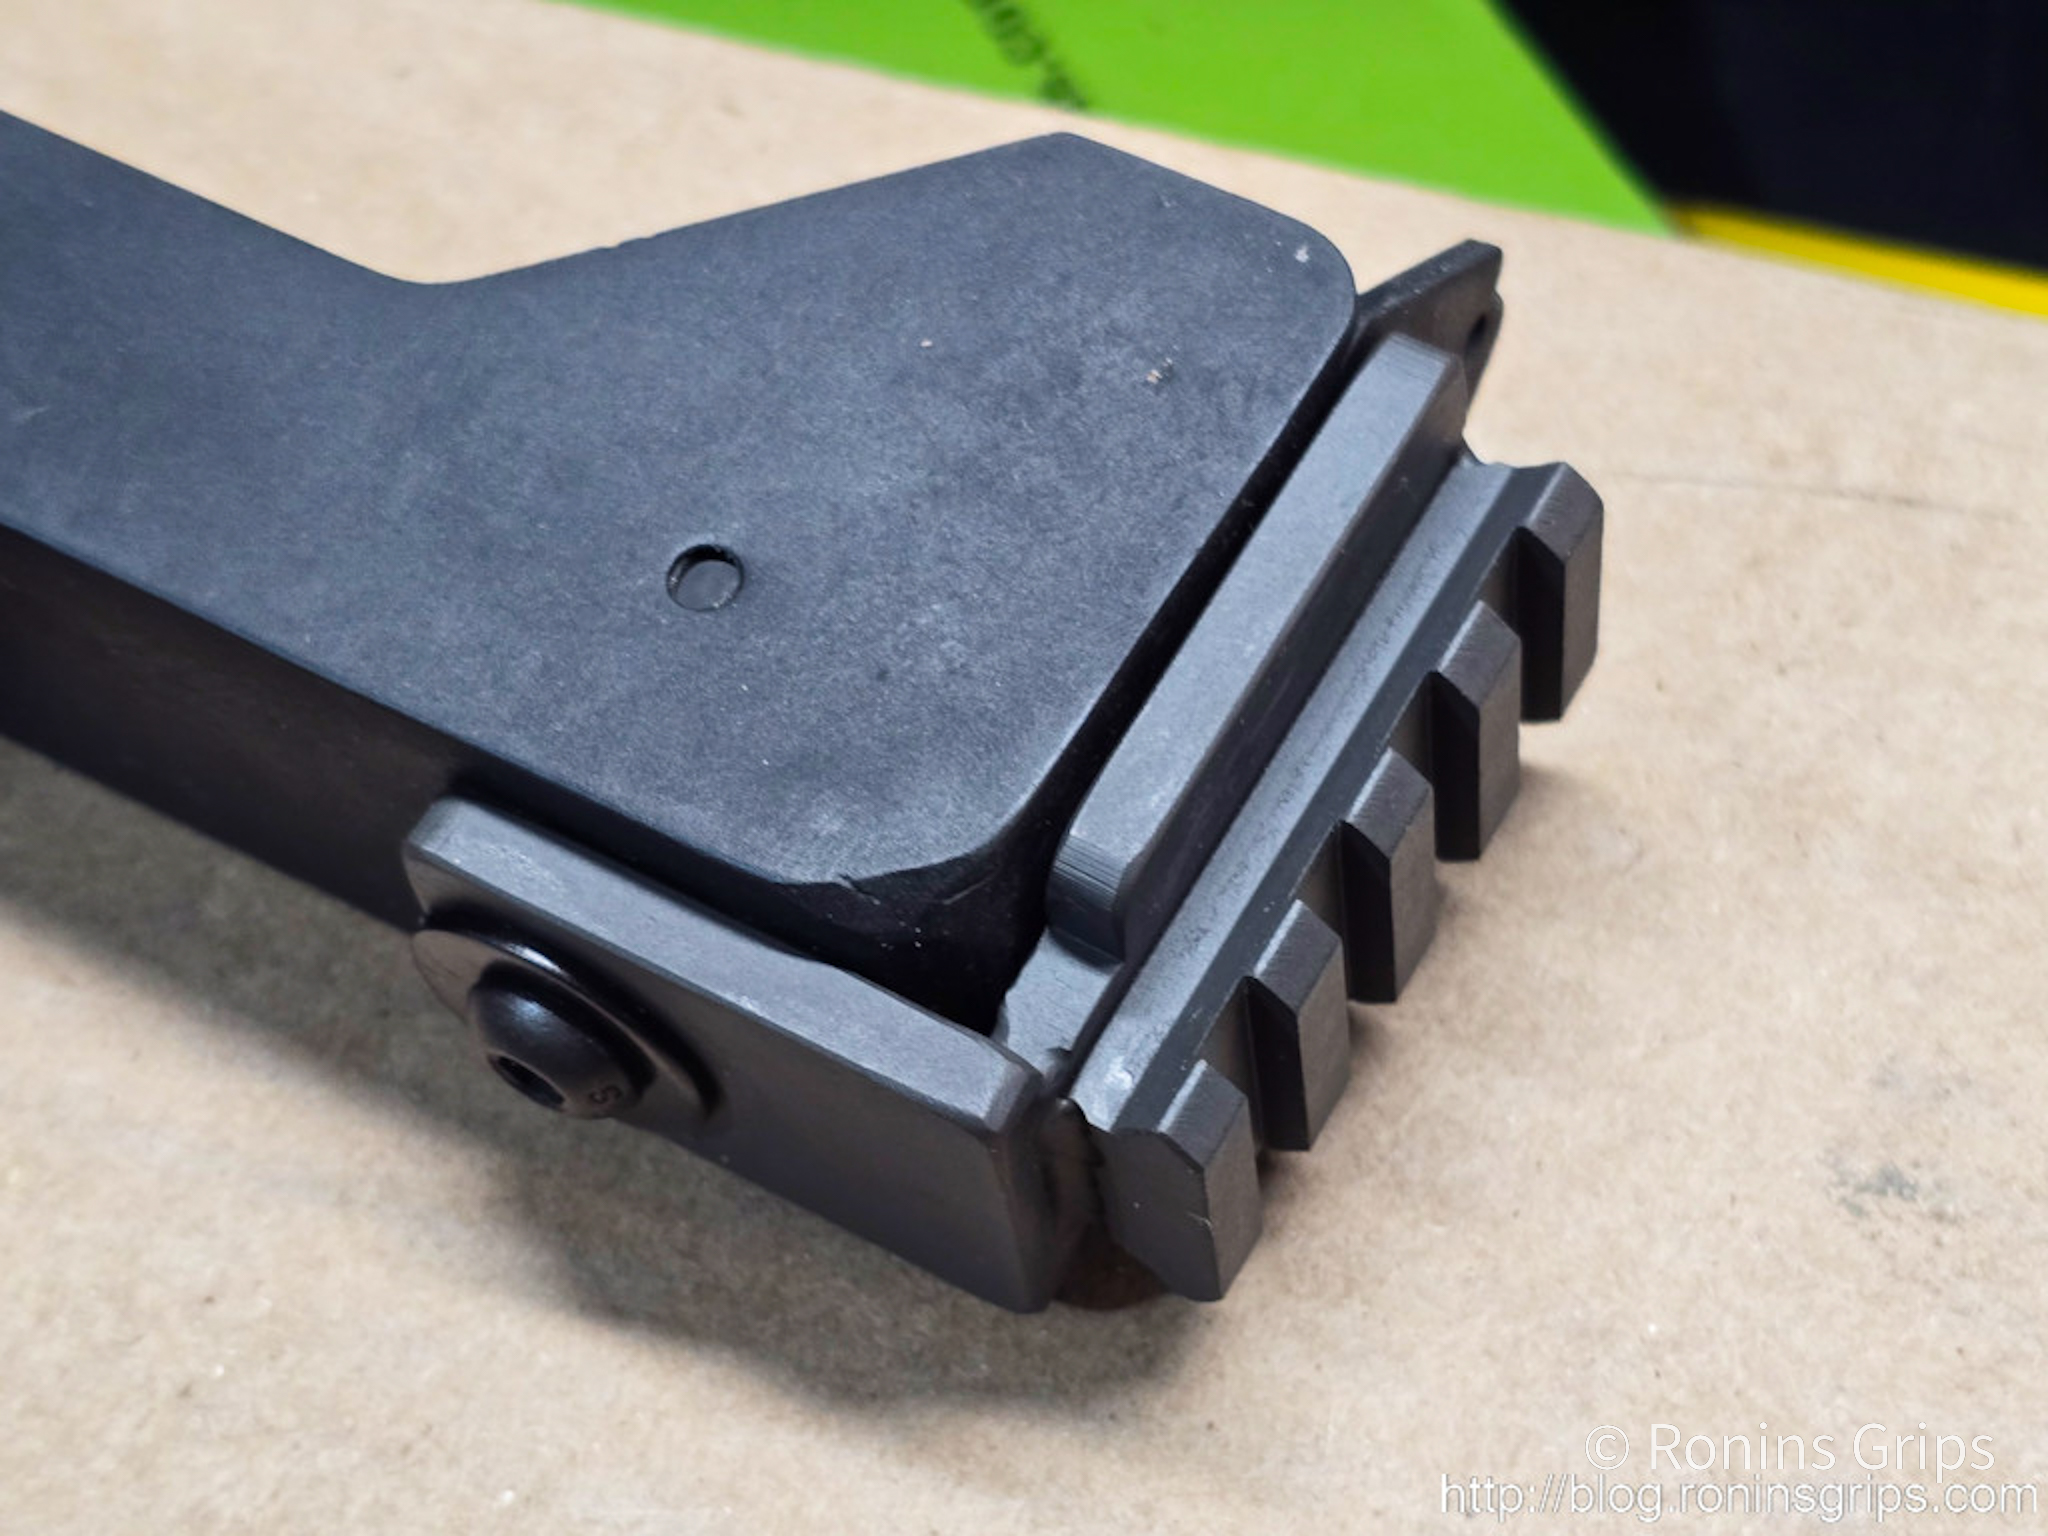
A3 Tactical, Practical Solutions and Stormwerkz were all contenders because I used different products of their’s in the past. The A3 Tactical and Stormwerkz designs are similar – the are aluminum and cradle the rear to limit movement. The Practical Solutions model is a thick chunk of carbon steel welded at a right angle but does not cradle the rear.

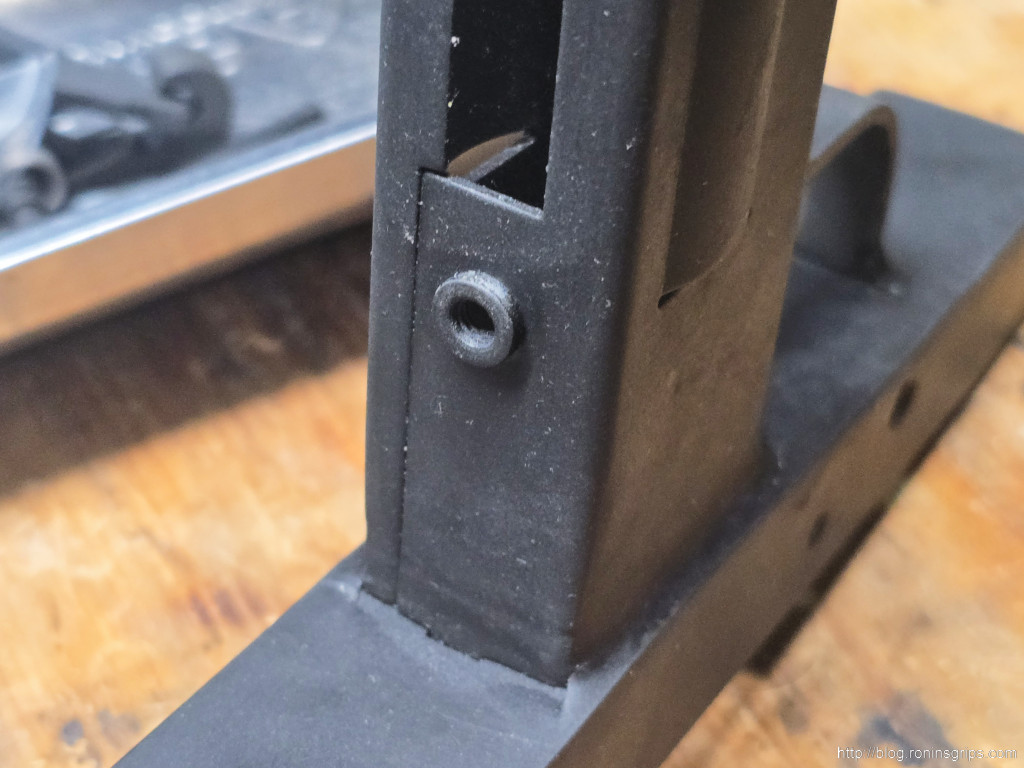
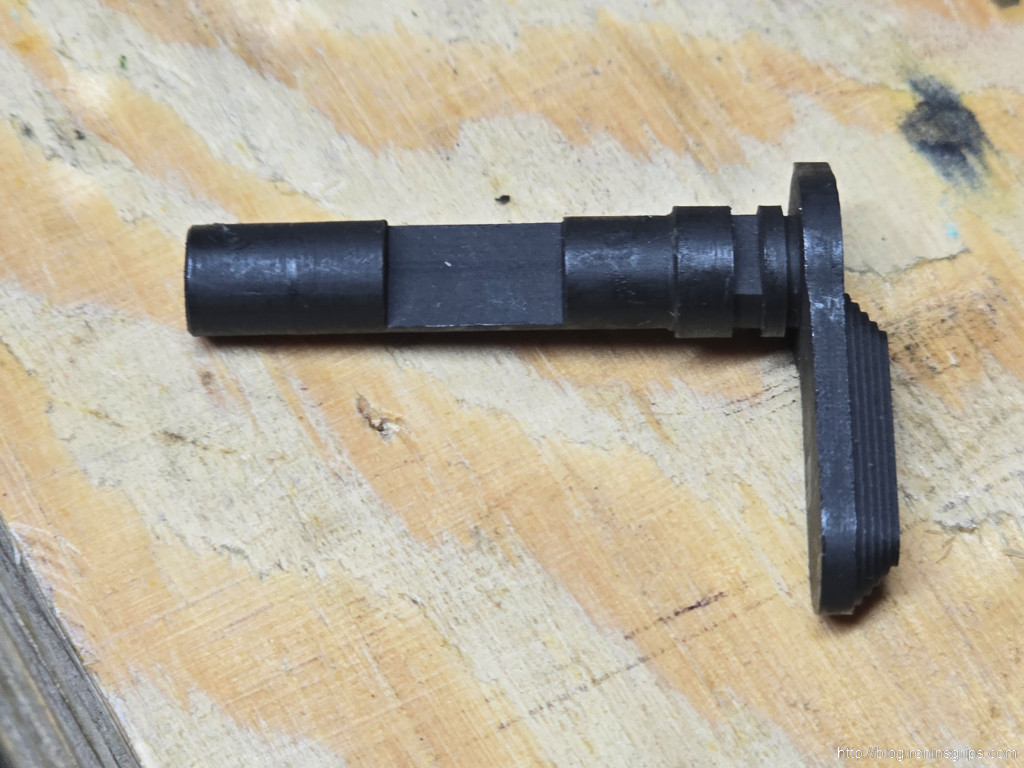
I went with the Practical Solutions model because it is steel and I figured I could compensate if there was movement. Any design with a single mounting point is at risk of moving/working loose over time.

This is the Practical Solutions 1913 adapter for semi-auto pistols.

My Problem

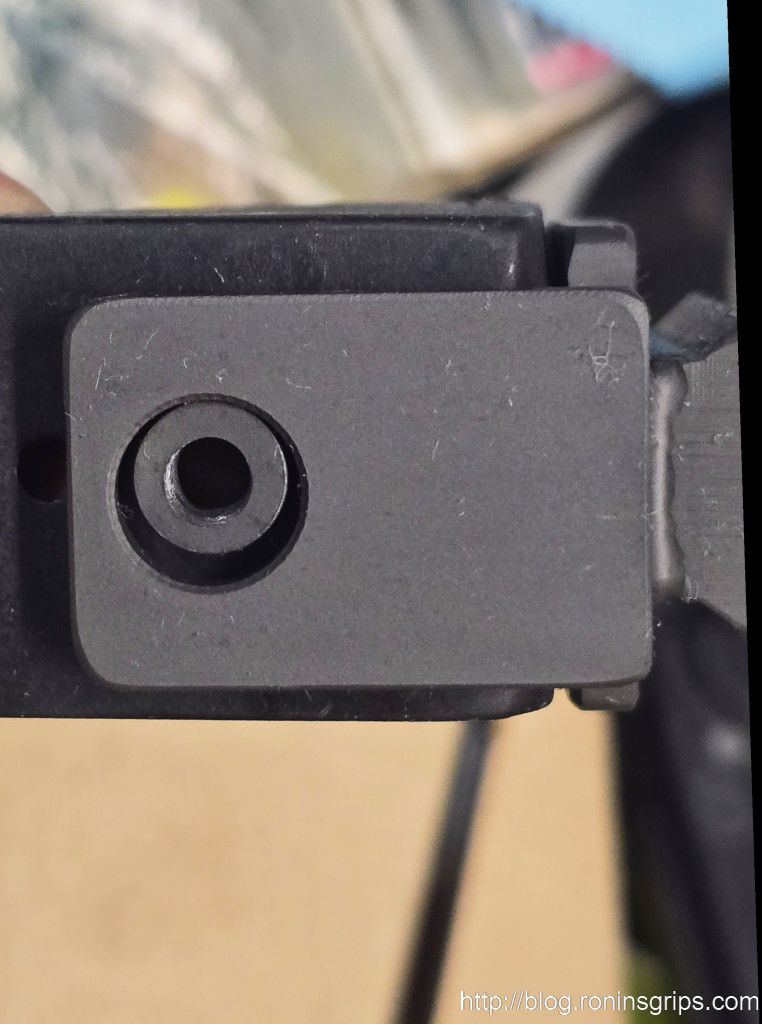
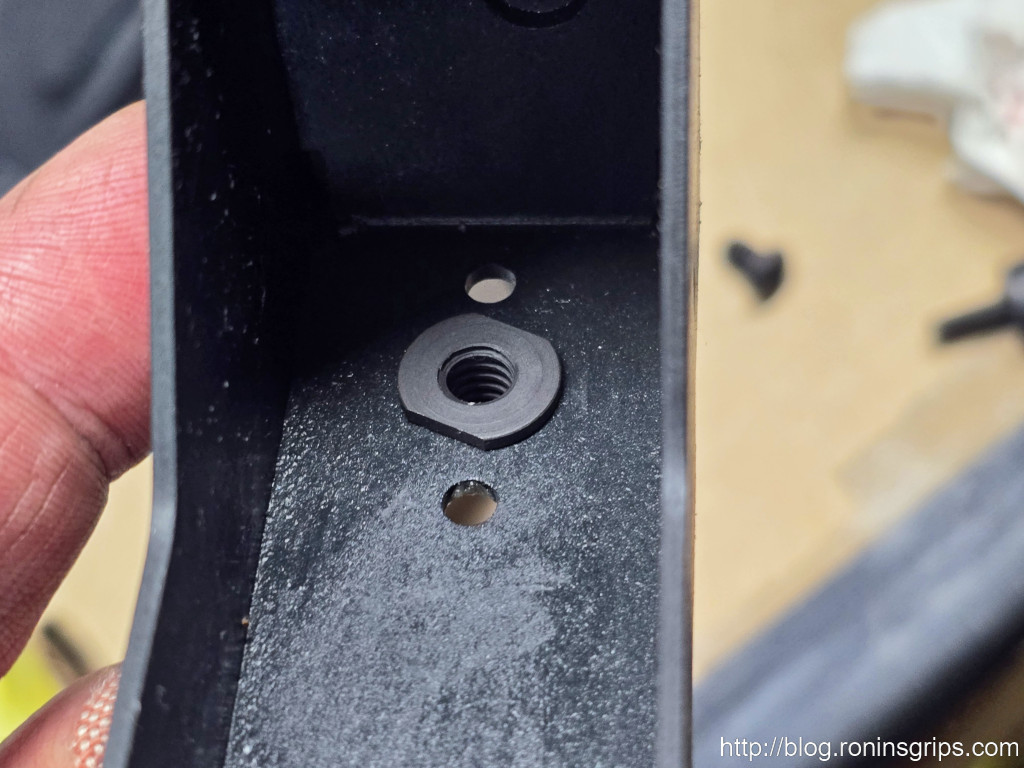
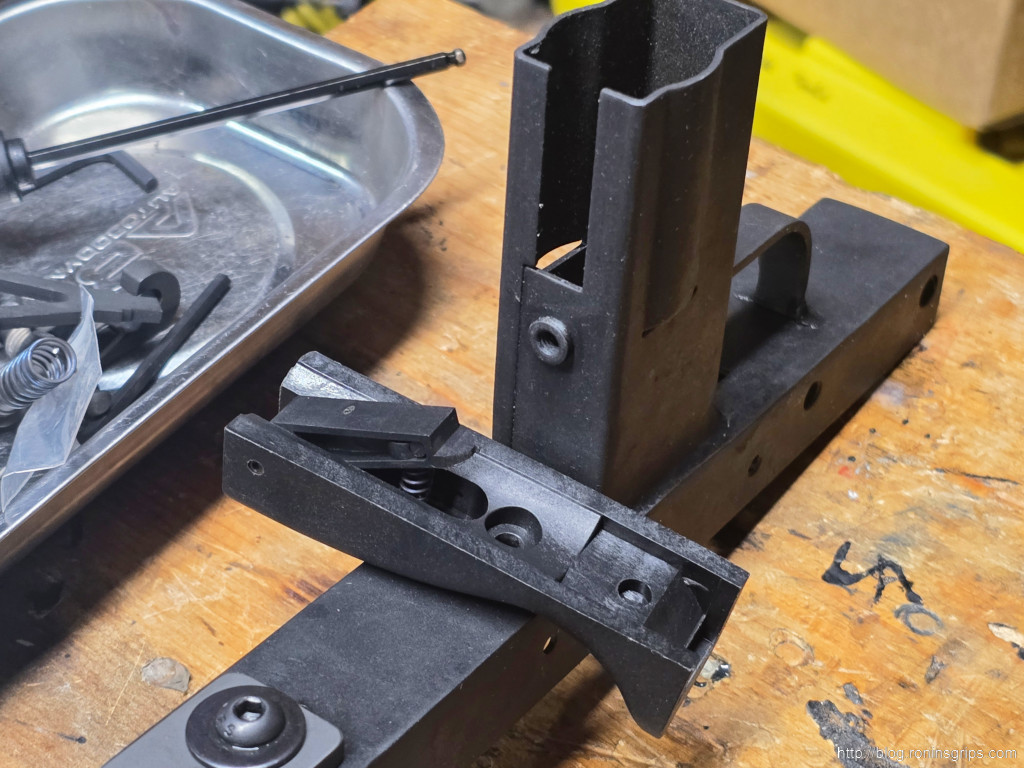
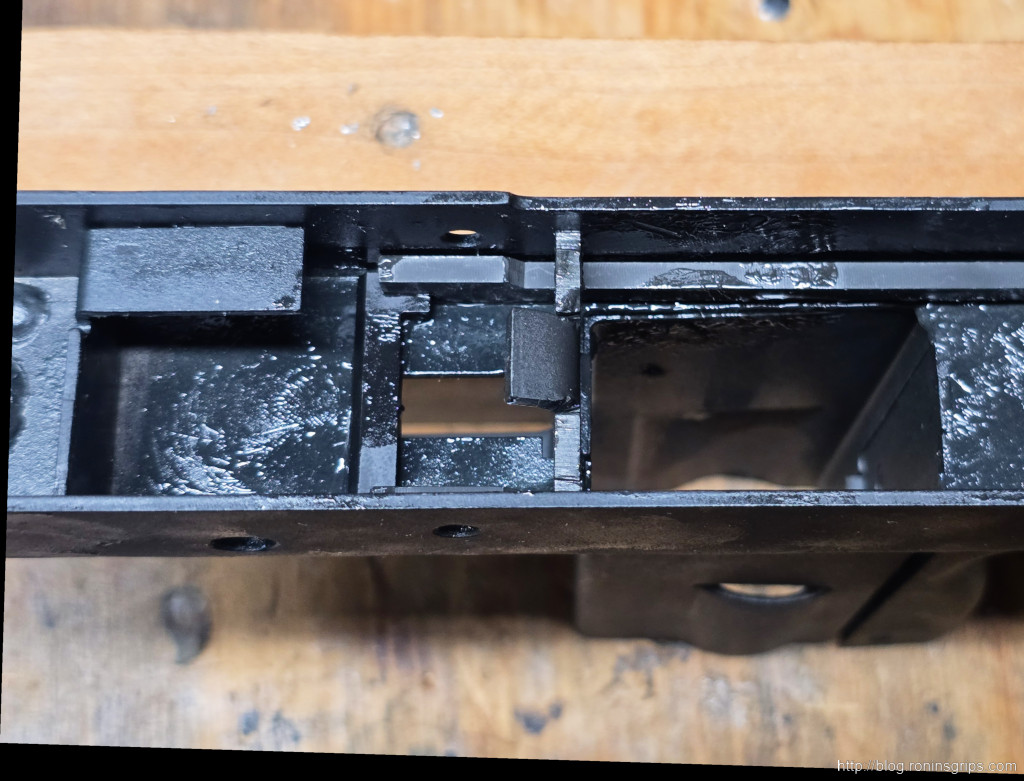
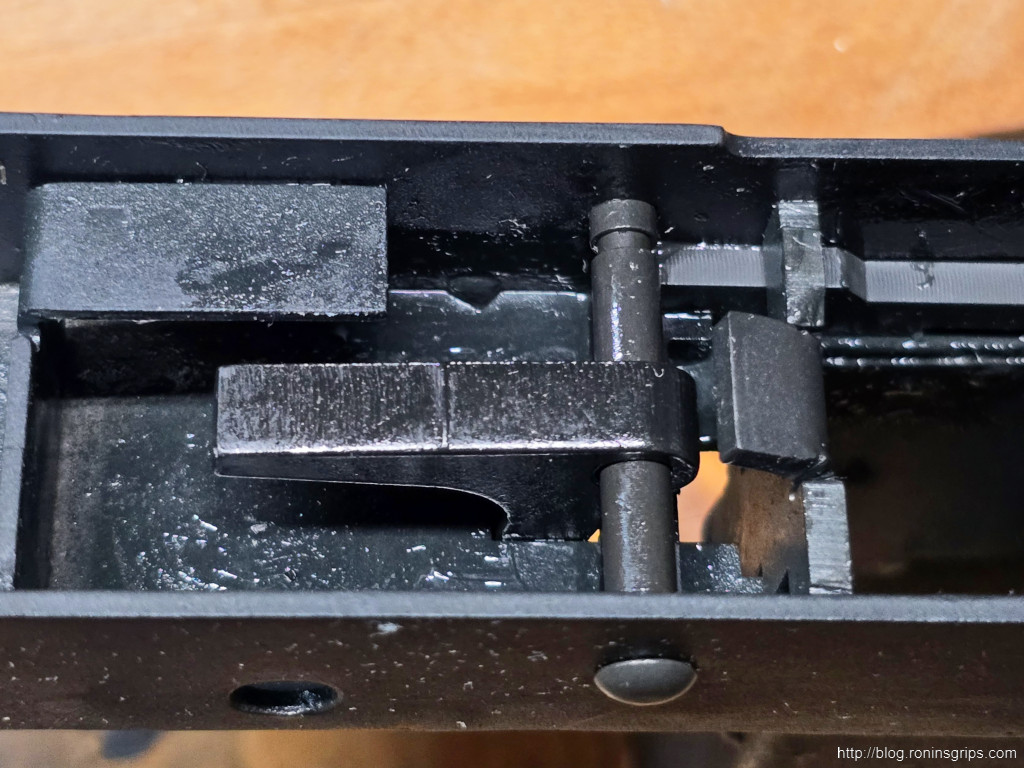
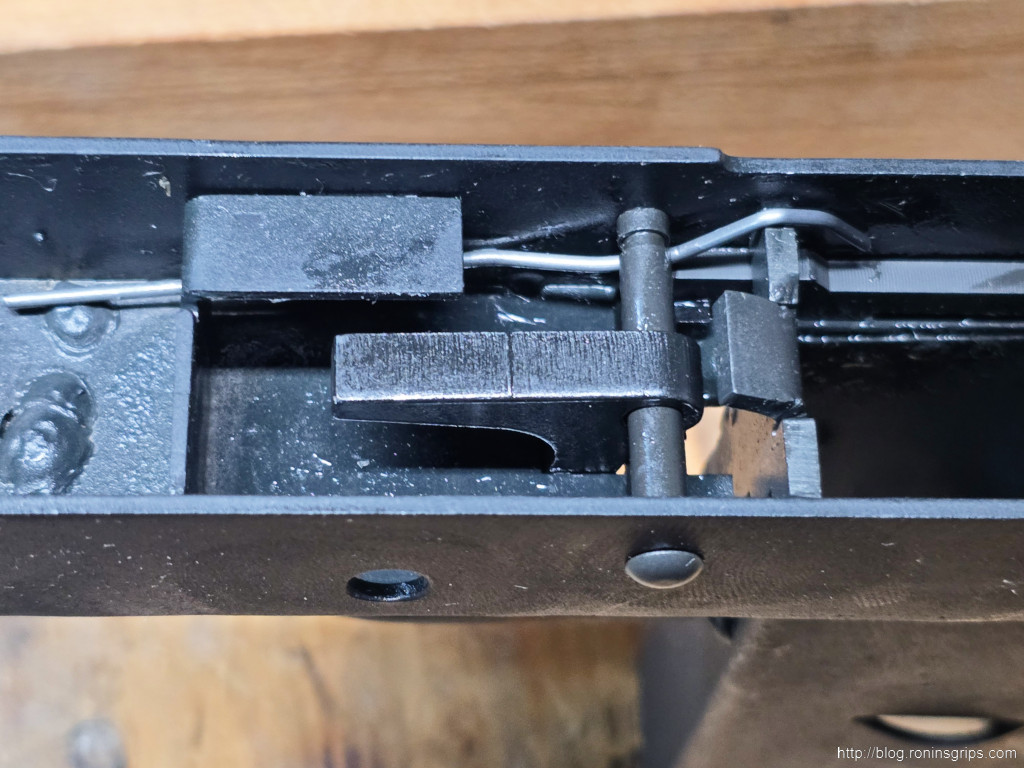
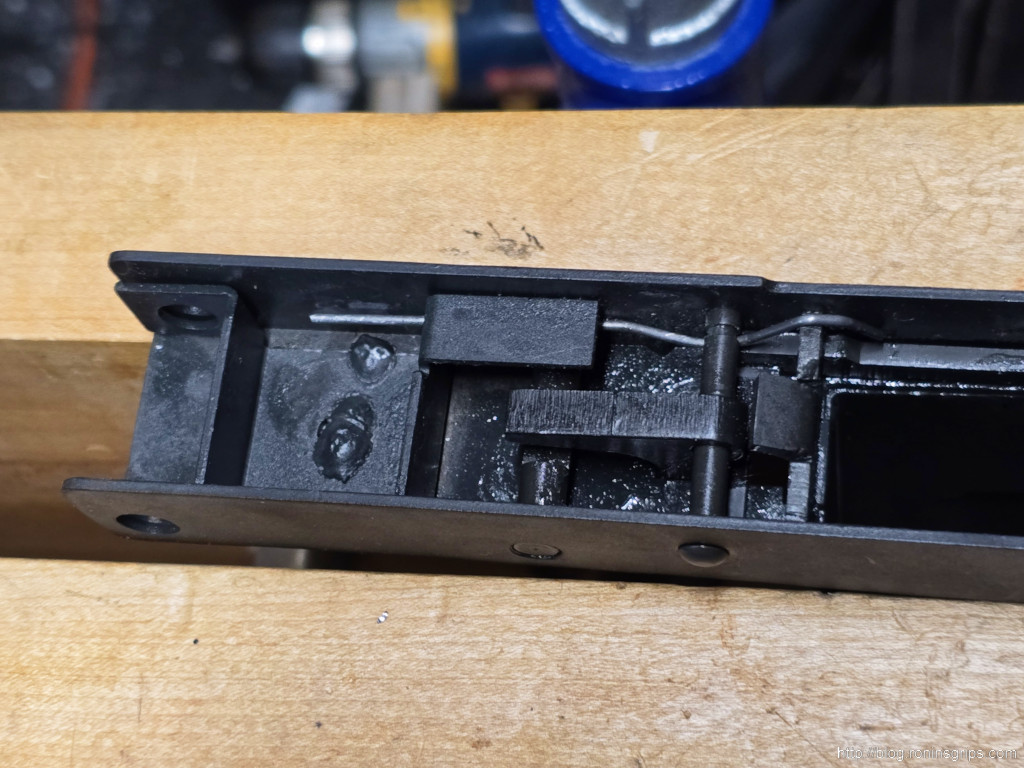
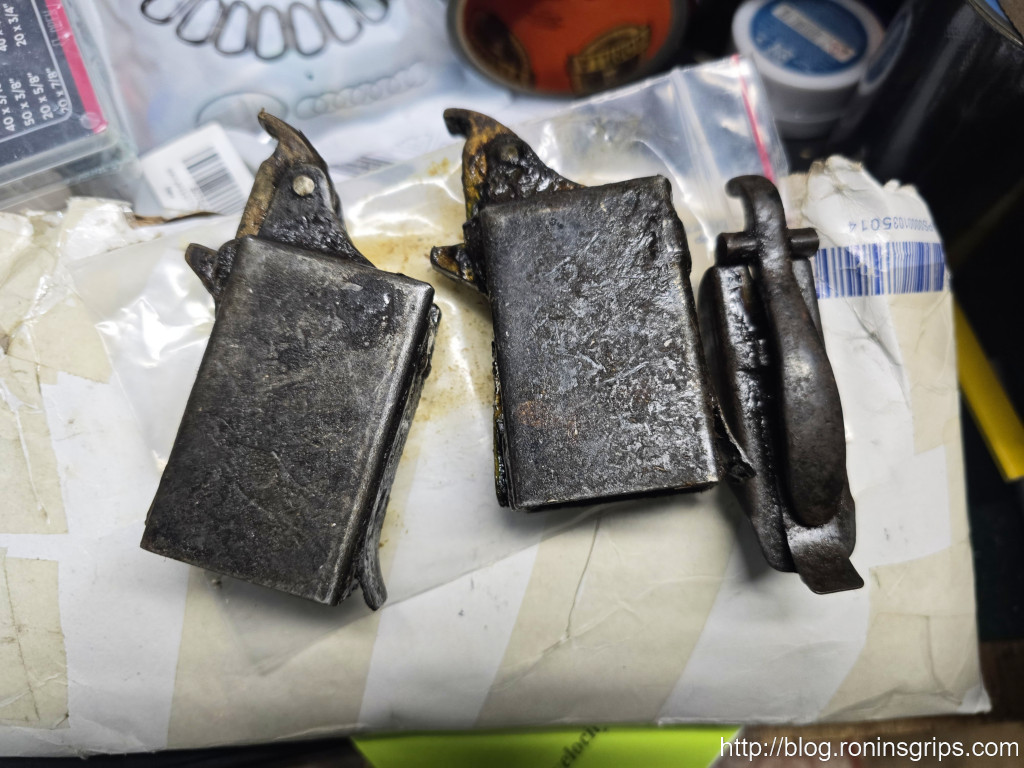
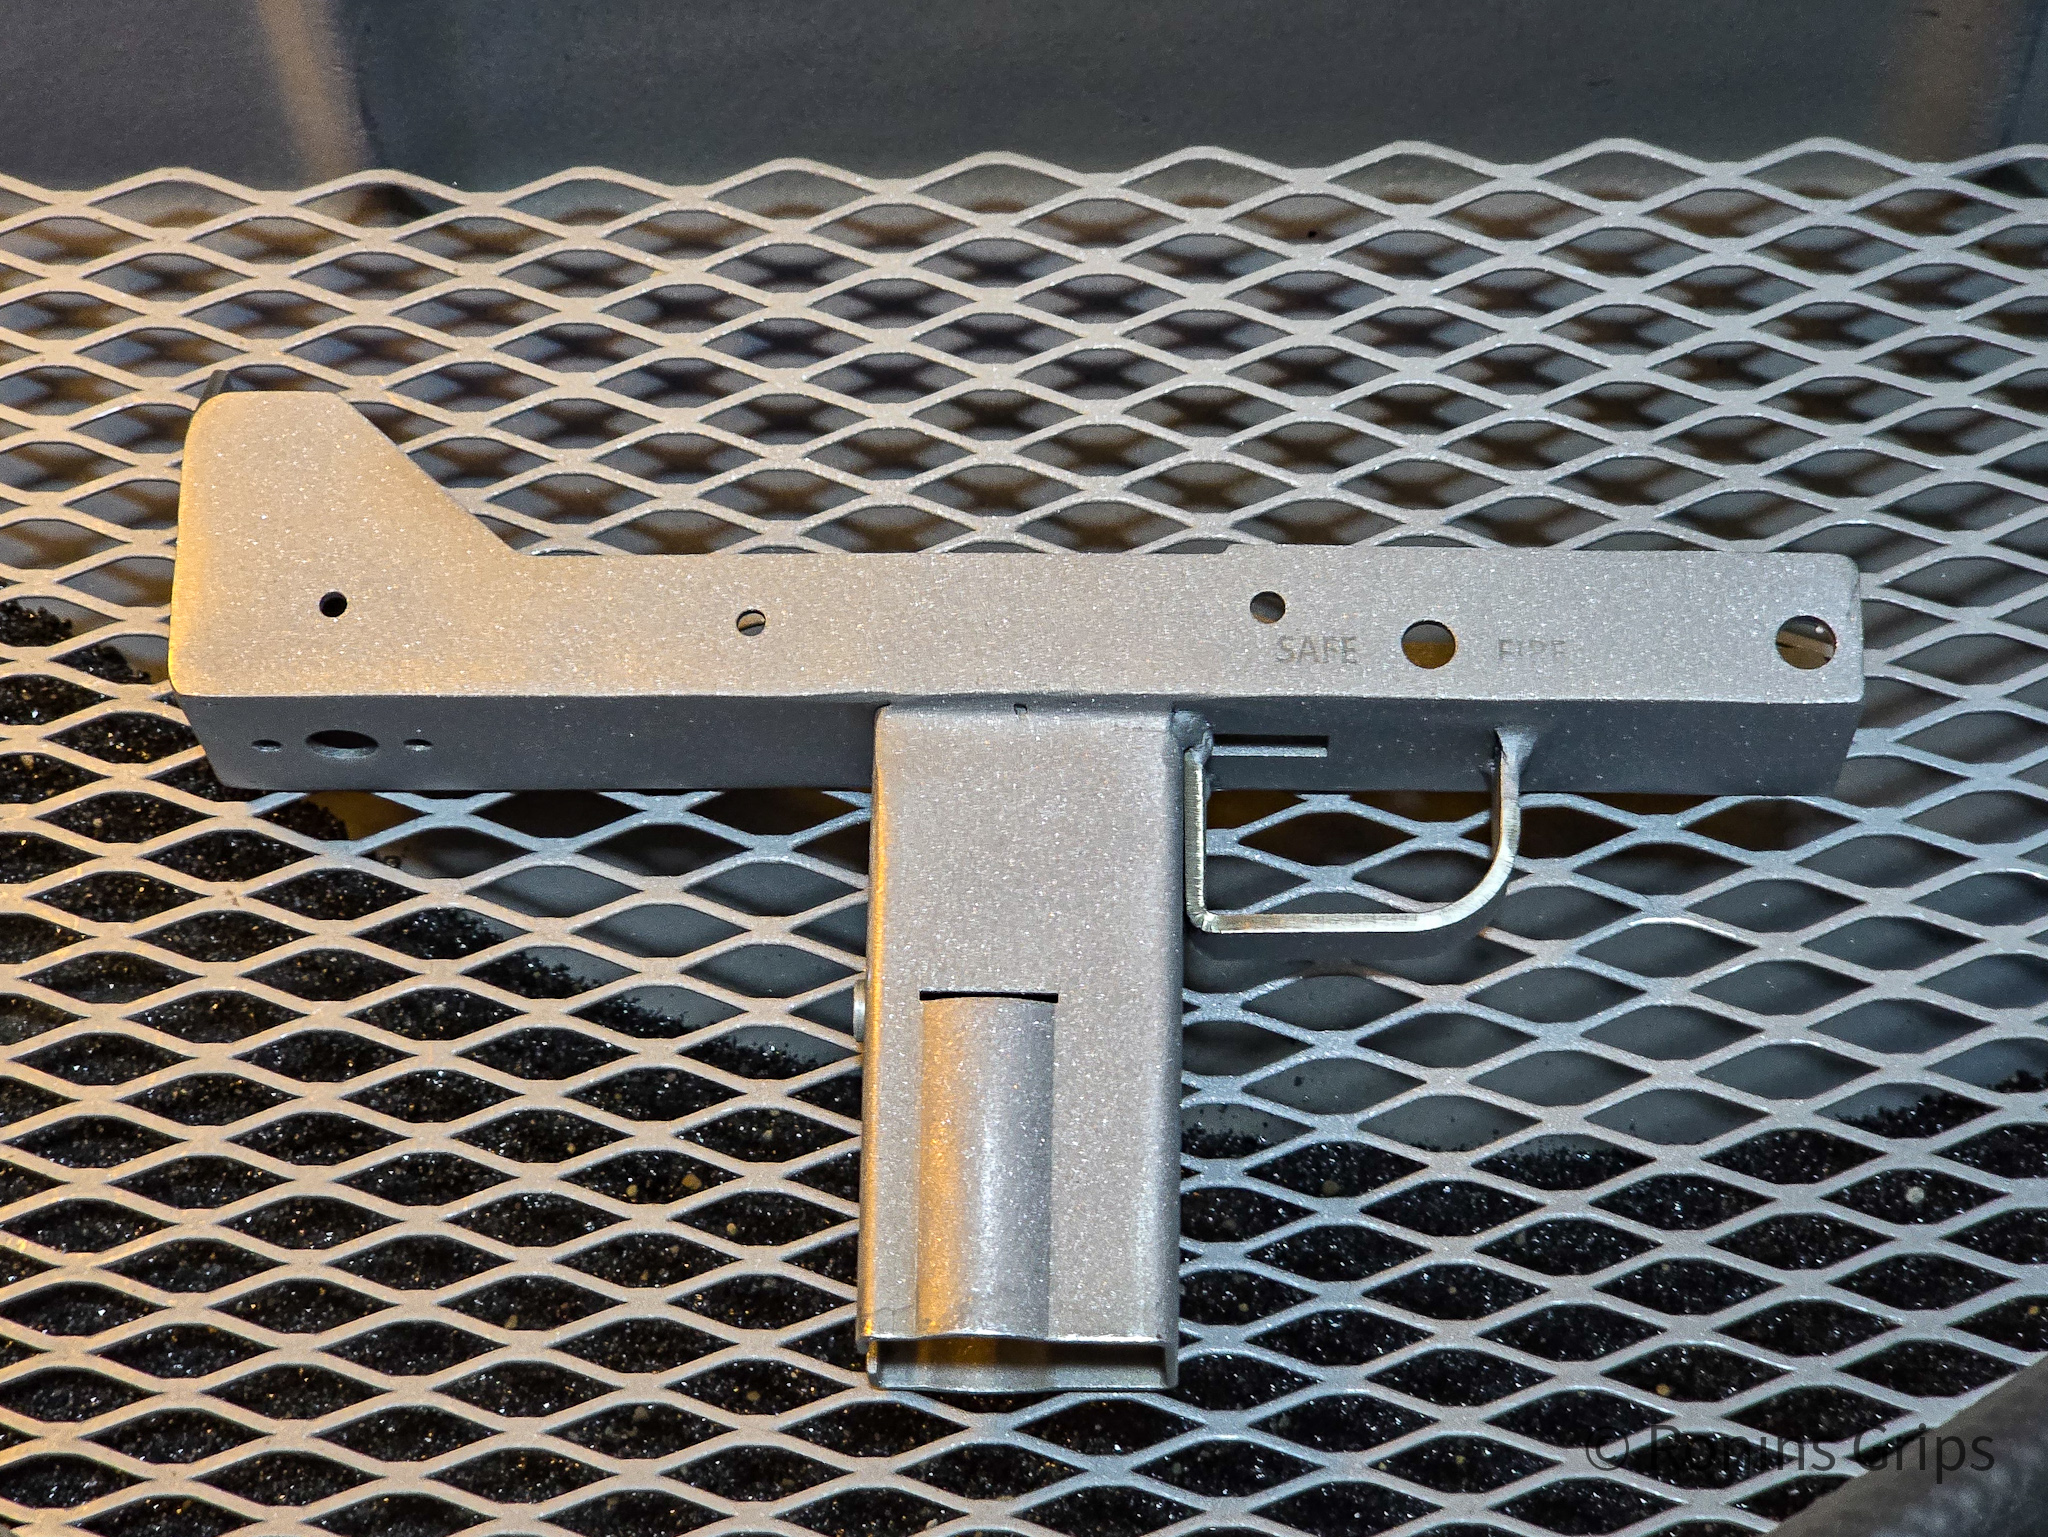
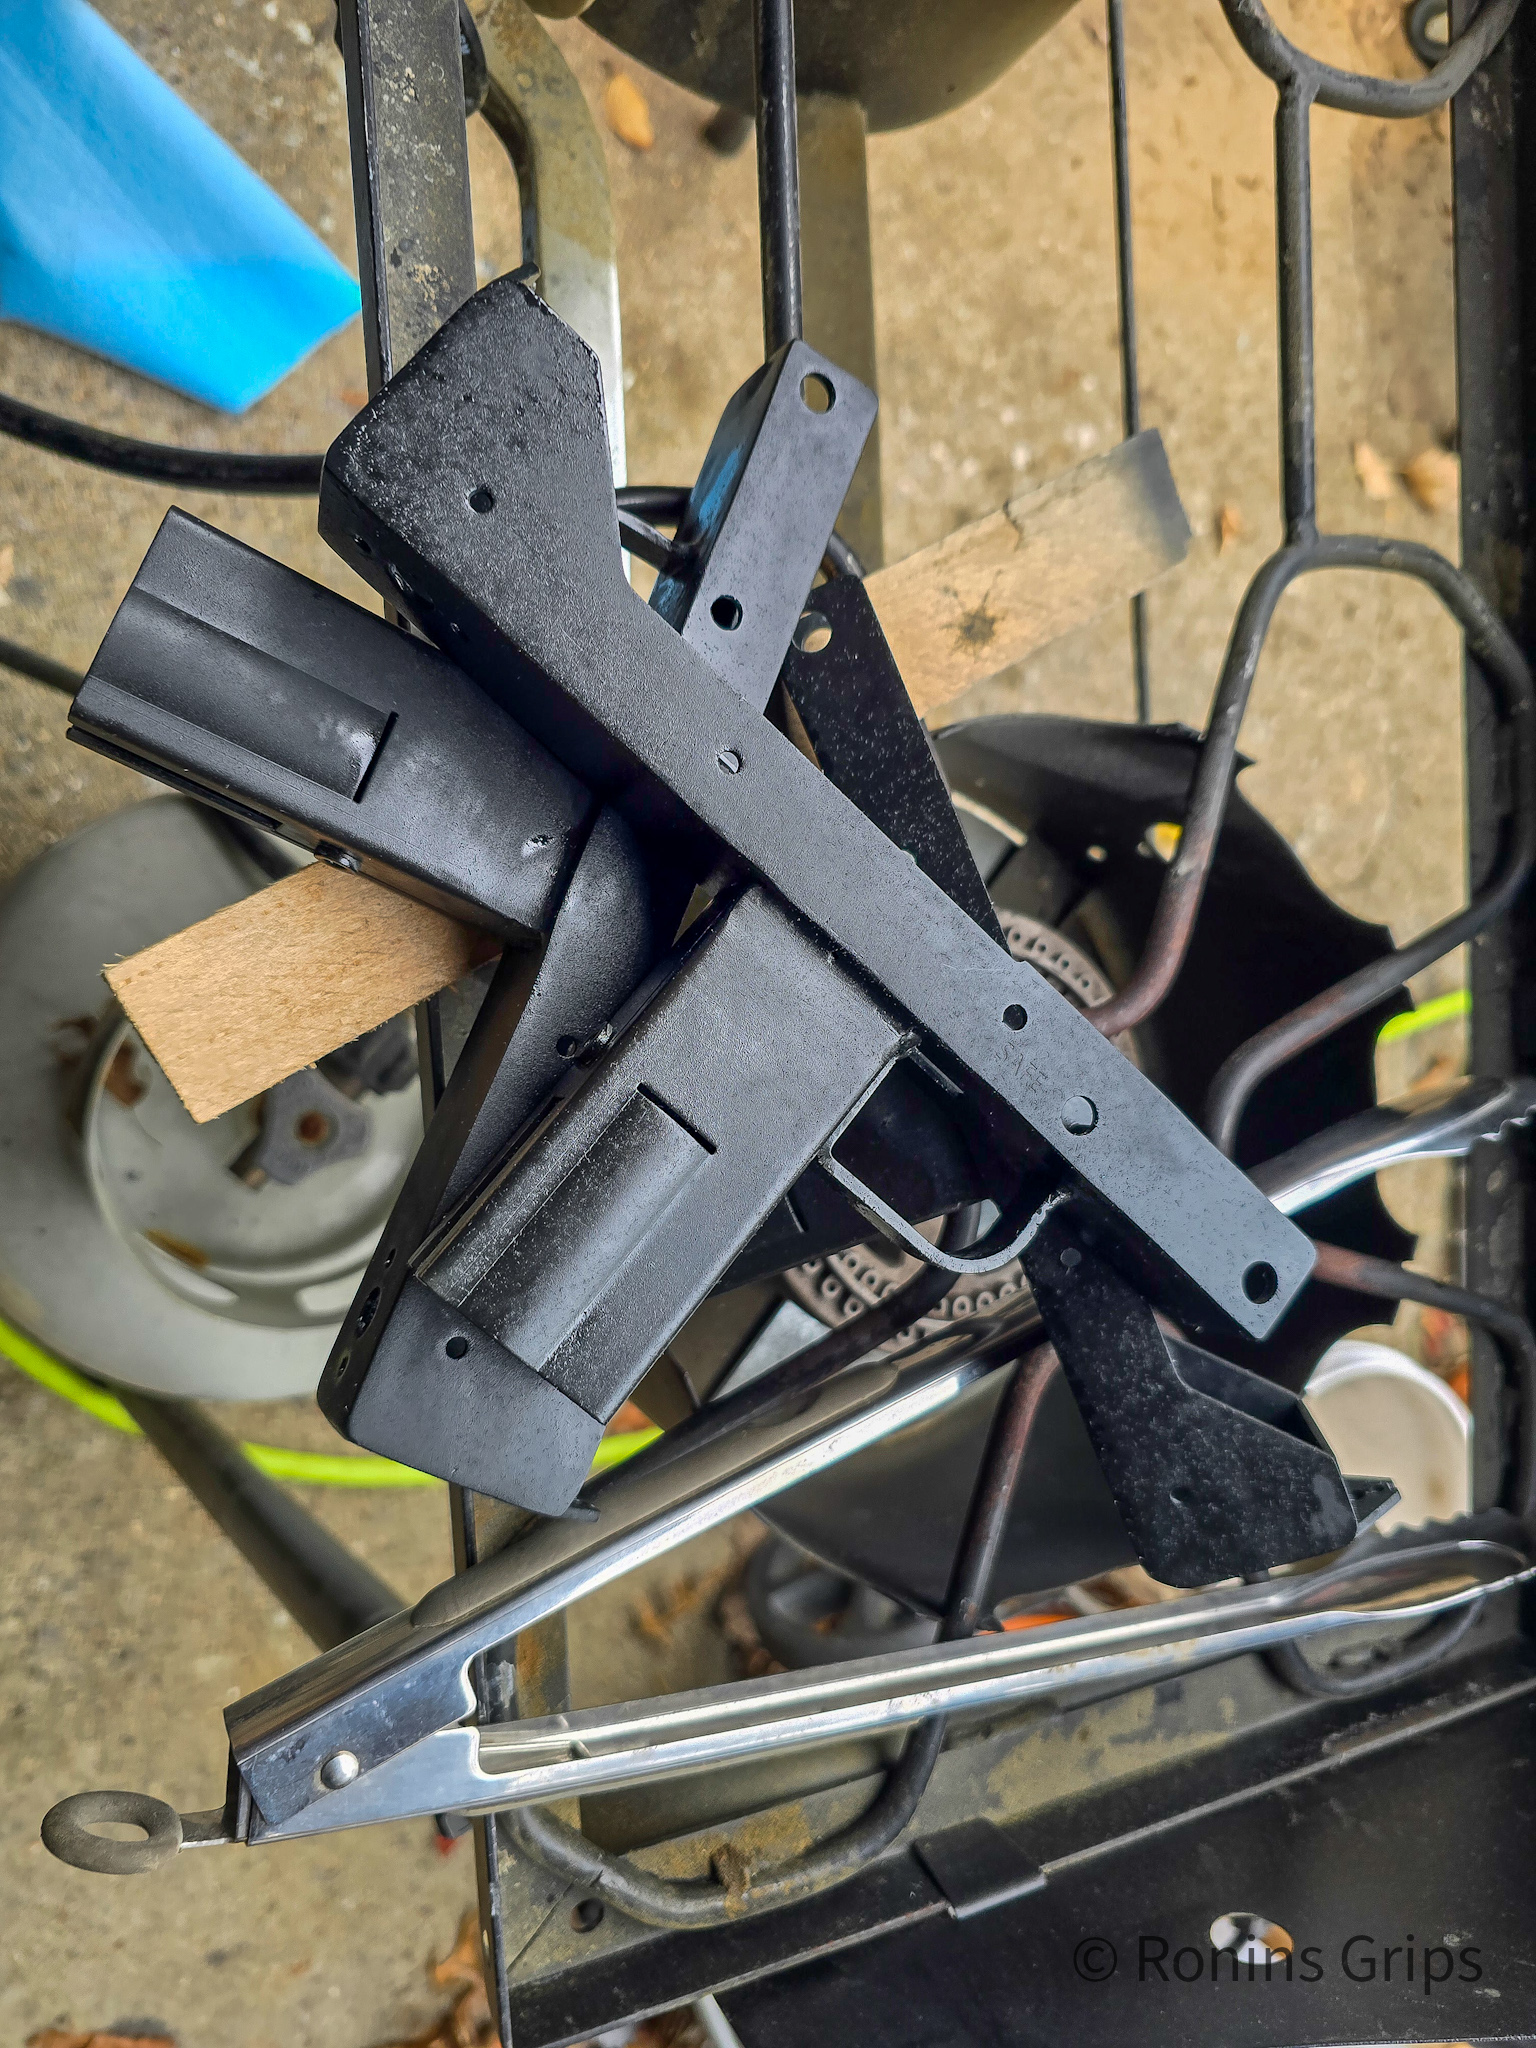
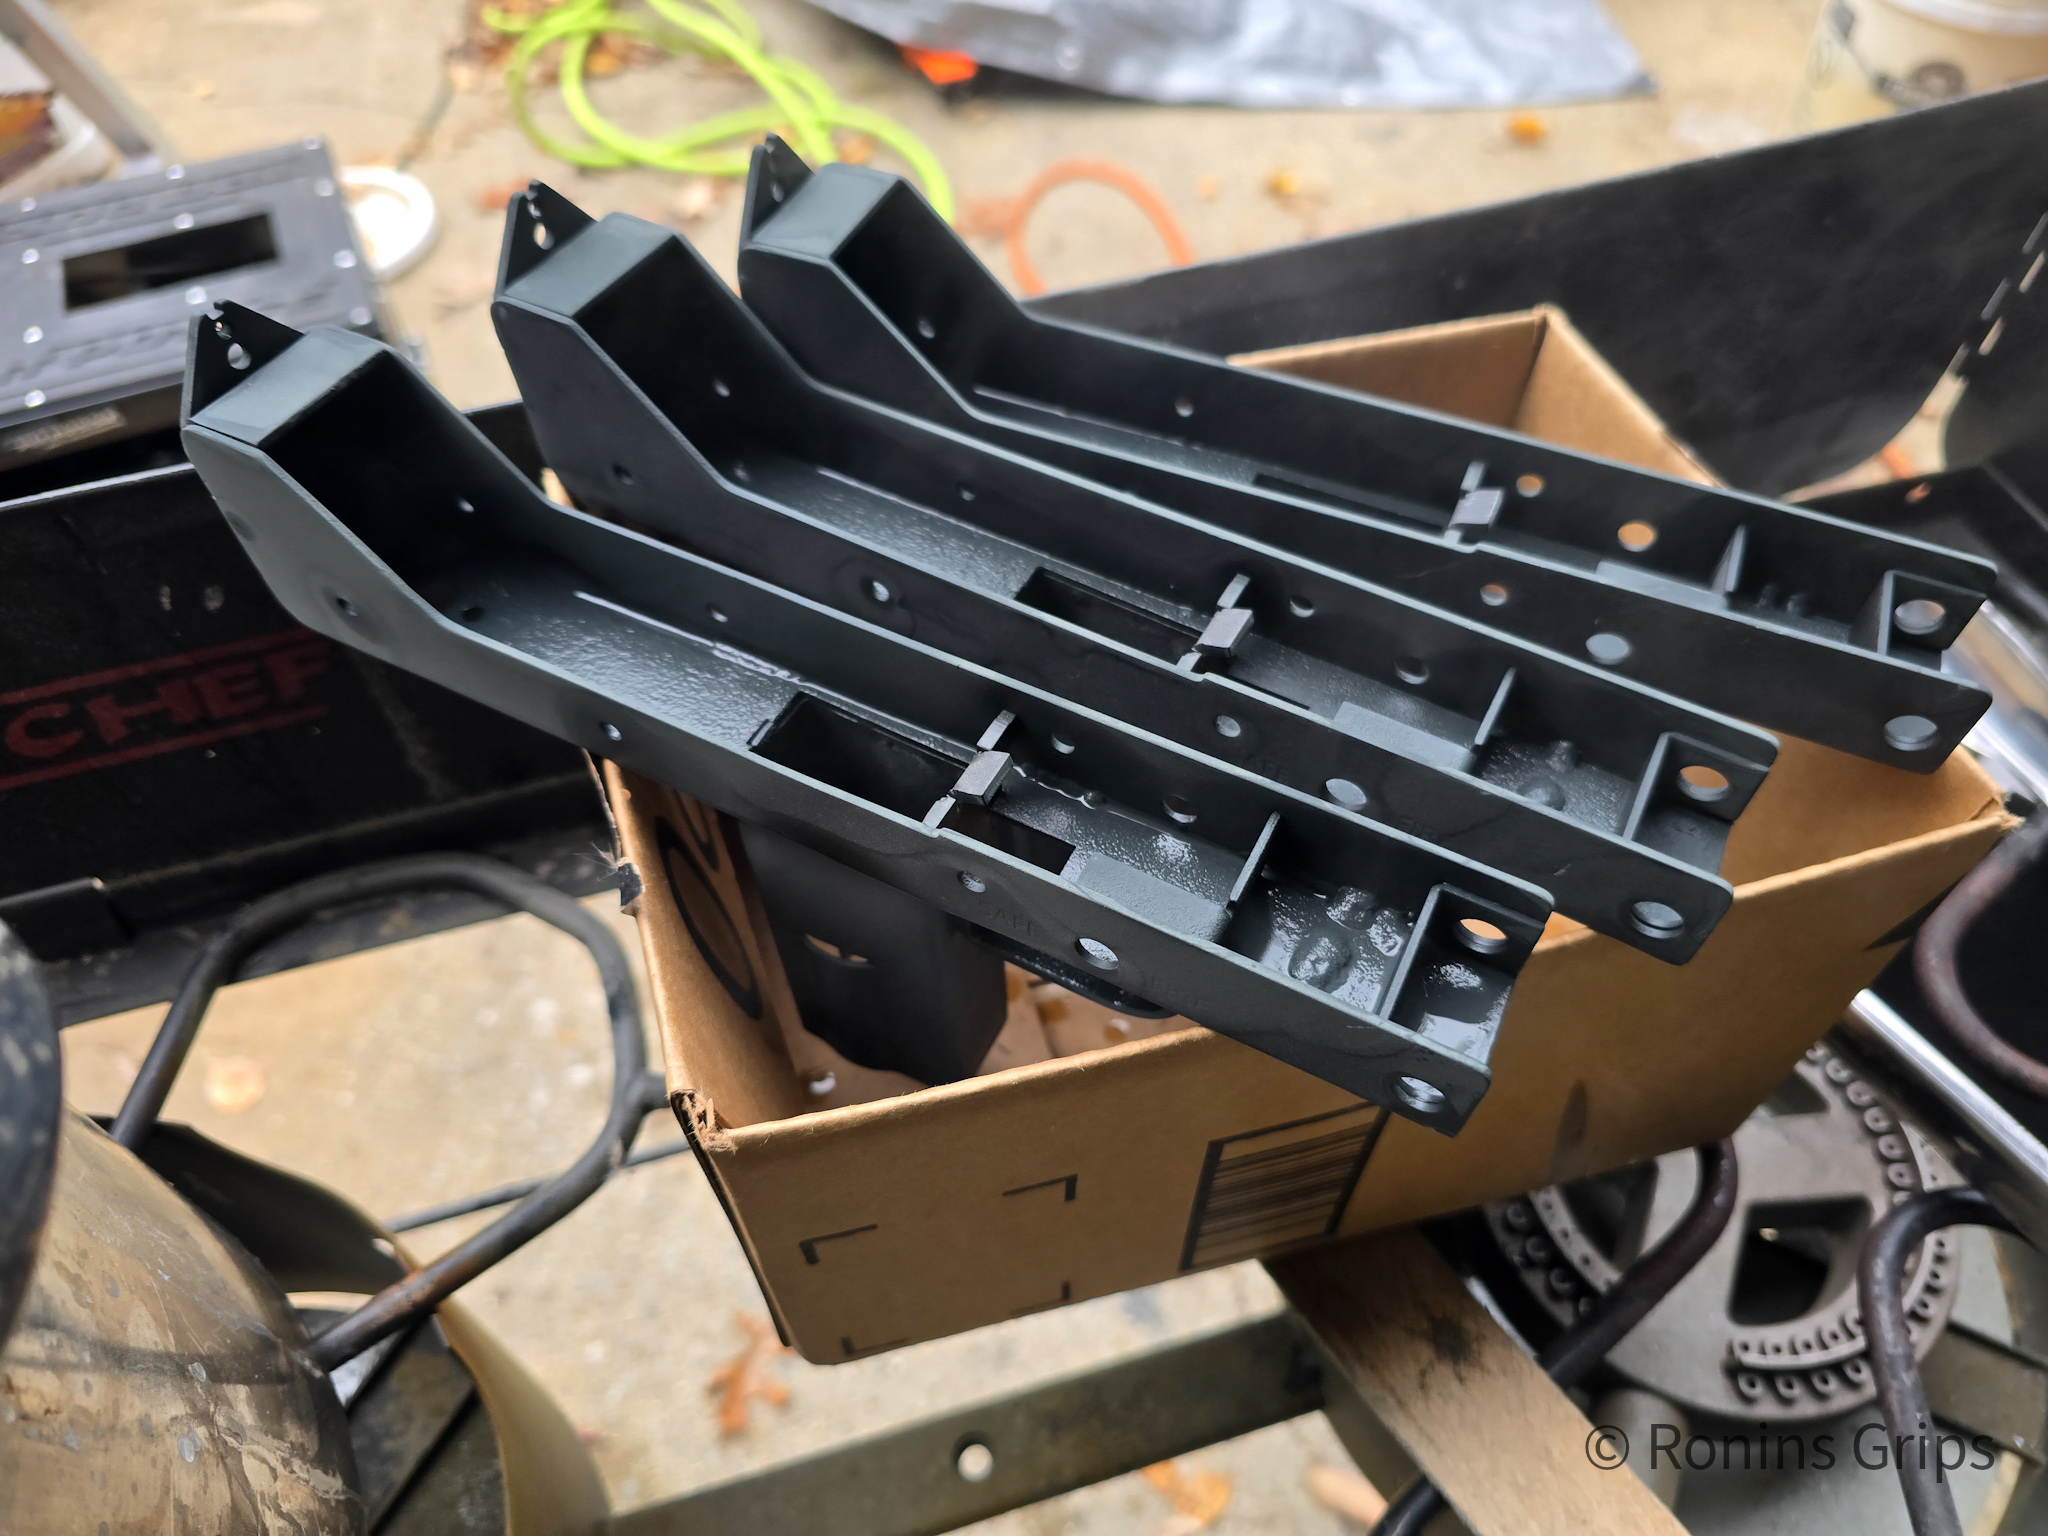
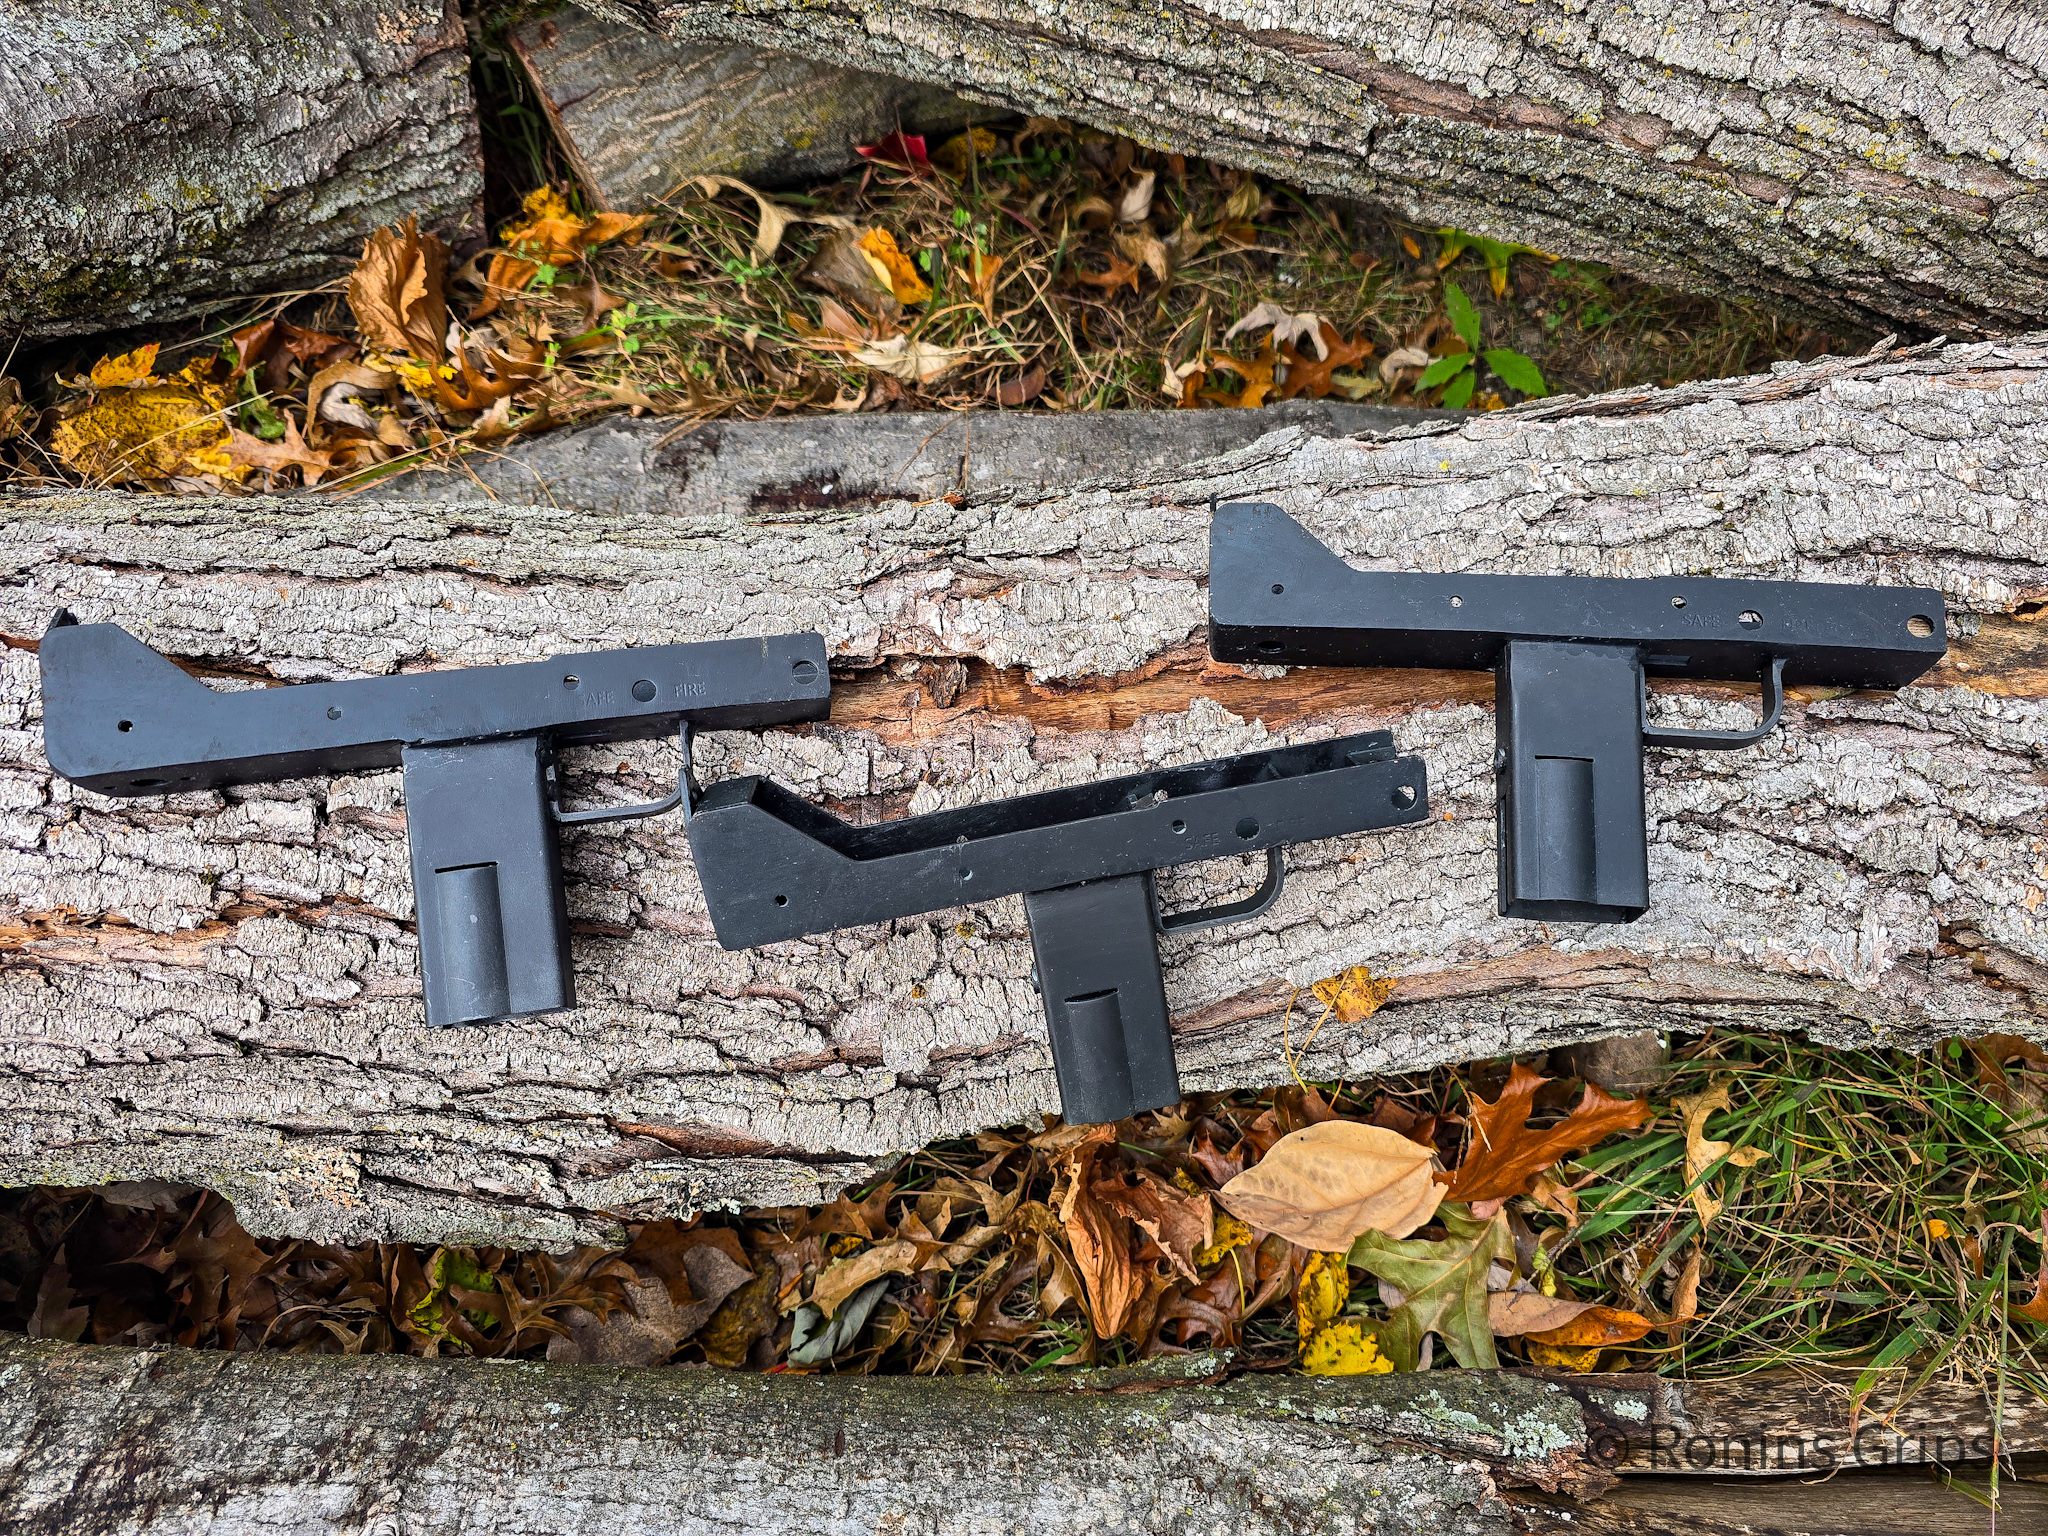
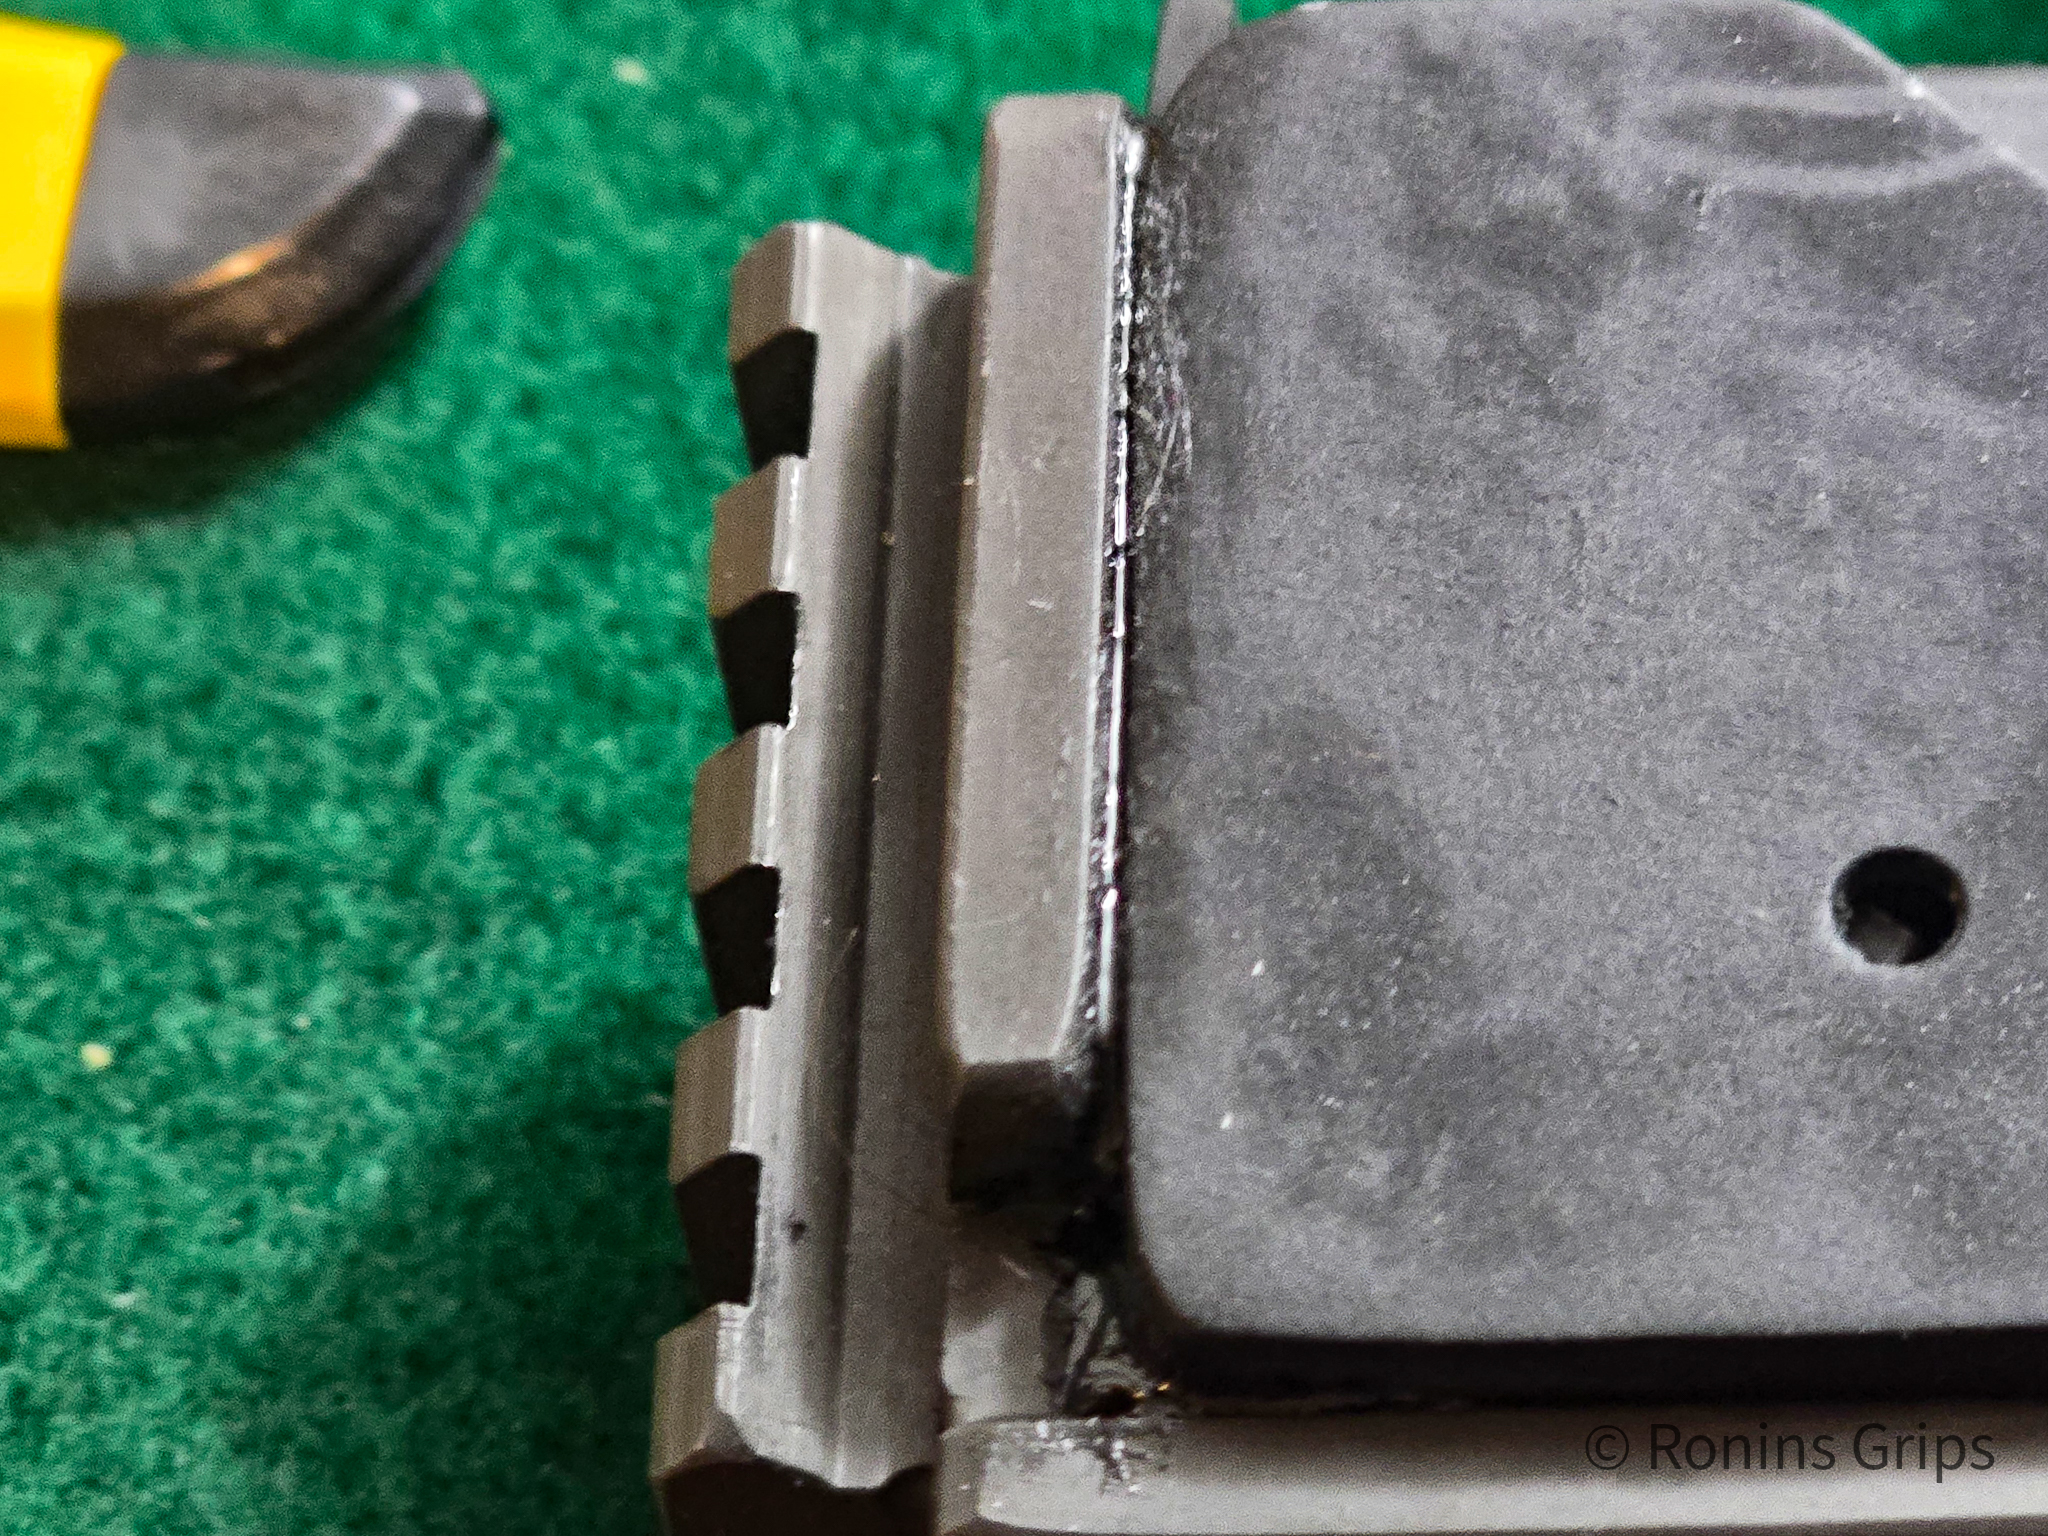
Now, I did run into a challenge. The Practical Solution’s adapter needs to sit flat against the back of the receiver and that assumes the rear is at a right angle from the bottom. For whatever reason, none of my receivers had a rear at a right angle — all were slightly off.

The hole the bushing goes into is oversized presumably to allow for a wider range of fitment. Iou can move the adapter all over – left/right, front/back and angles but there is only the one screw/connection point.
Combine the loose fitting bushing on the botttom andthe back of my VMAC9s that weren’t square and the adapters would never stay tight.

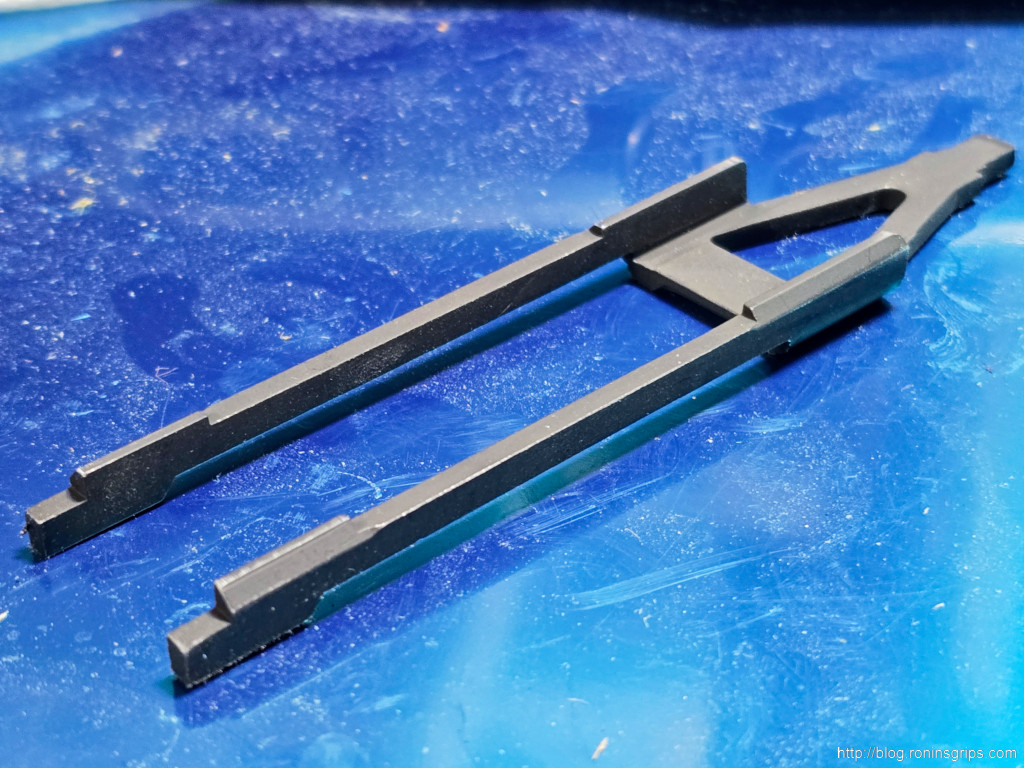
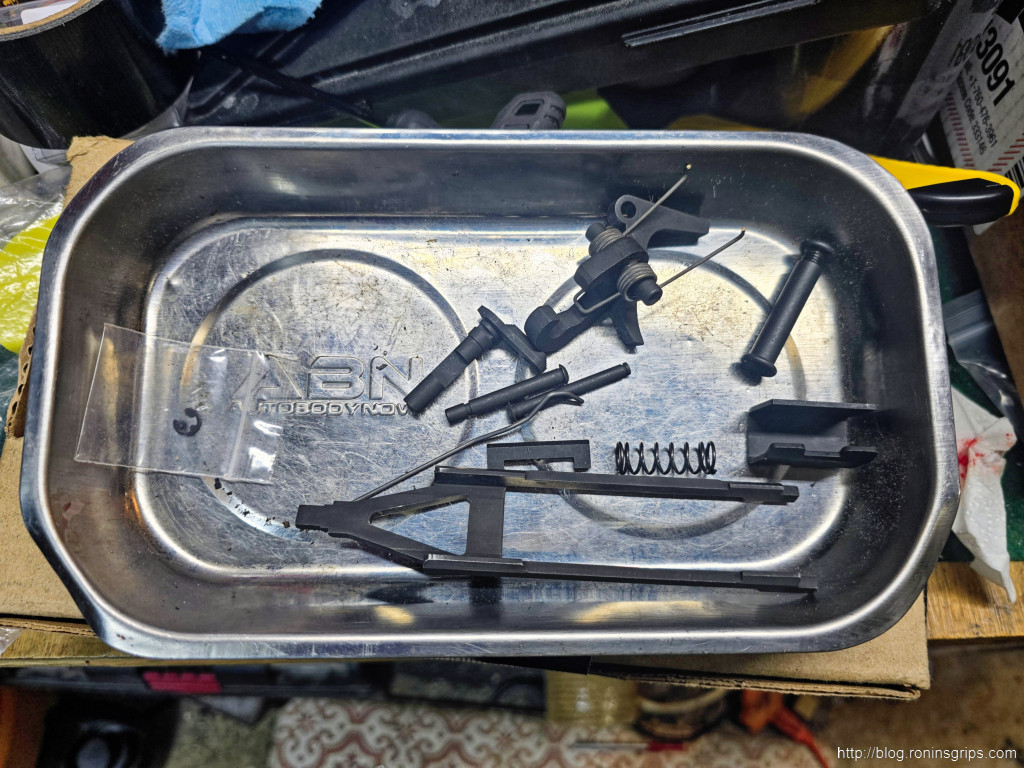
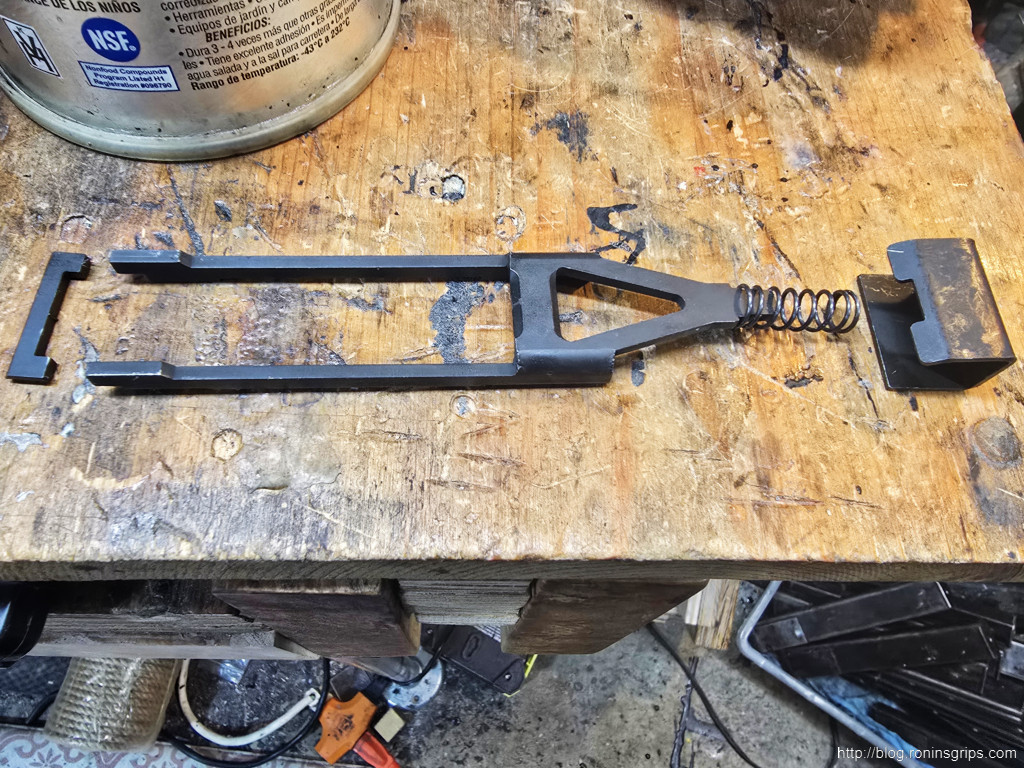
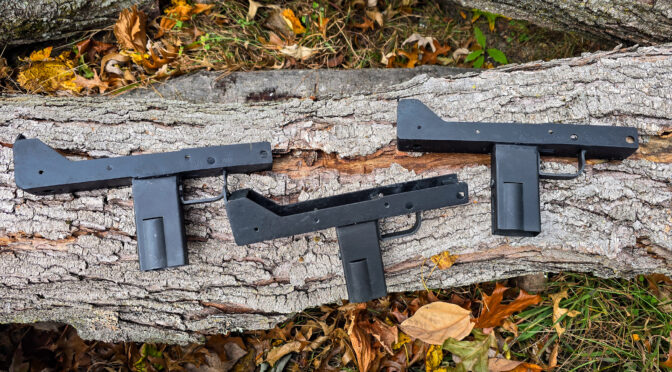
Now, I did experiment and had two braces on each of the pistols and one stock on the carbine. They all acted like lever arms and I could easily get their mounts to turn. Let me show you what they looked like:

This is a carbine with a 16.7″ barrel and has a Midwest Industries 1913 to buffer tube adapter with a Magpul ACS stock. To be honest, that combo has a length of pull over 10.5″ that is just past the limit of what I like and I am exploring other options.
This is a pistol with an 11.25″ barrel and a SB Tactical TF1913 triangle folding brace. It makes for a nice setup at 9.5″ long.
This is a pistol with a 5.4″ barrel and a SB Tactical FS1913A aluminum strut brace that is 9.25″ long. I definitely like the length of this one too.

The Solution

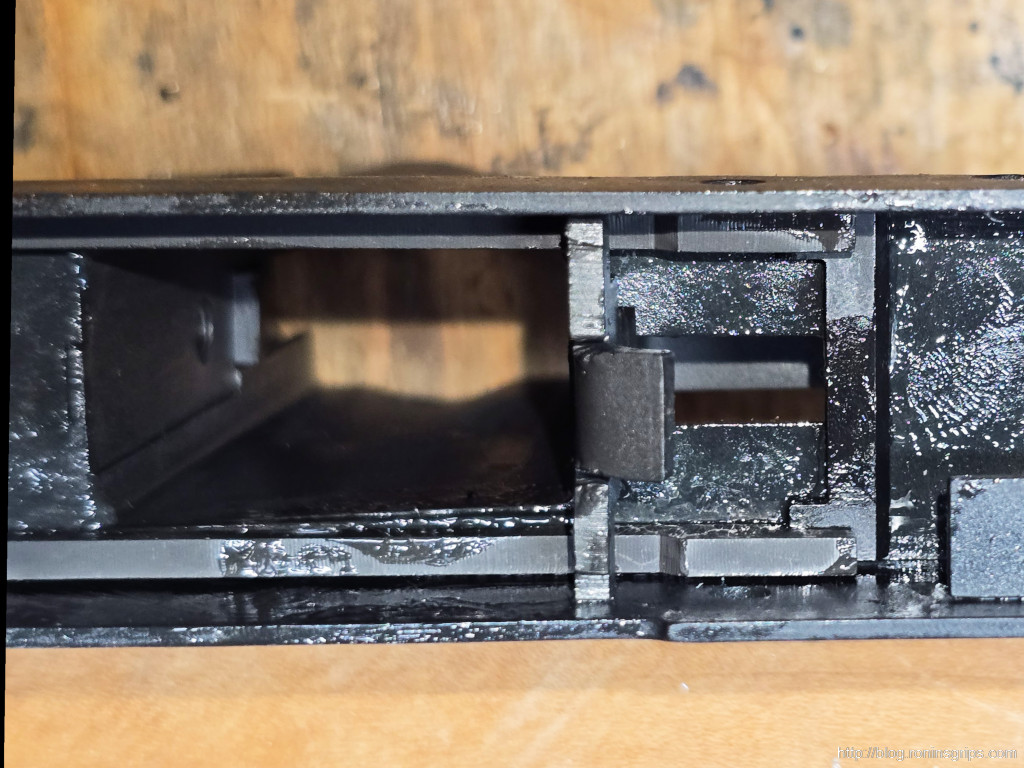
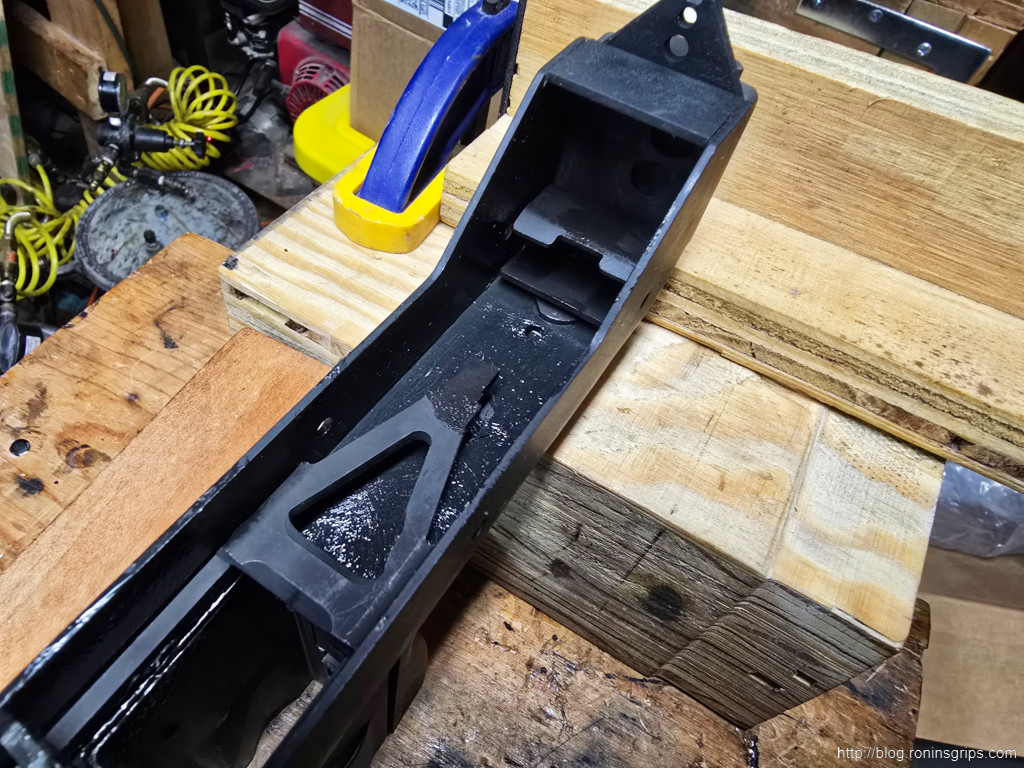
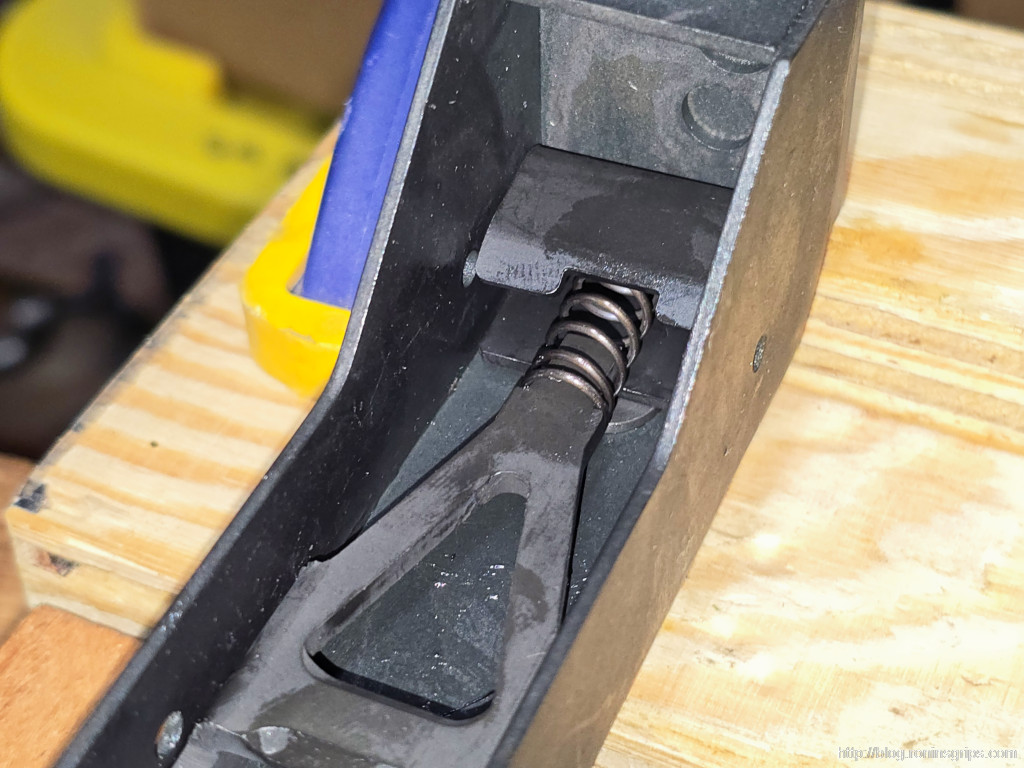
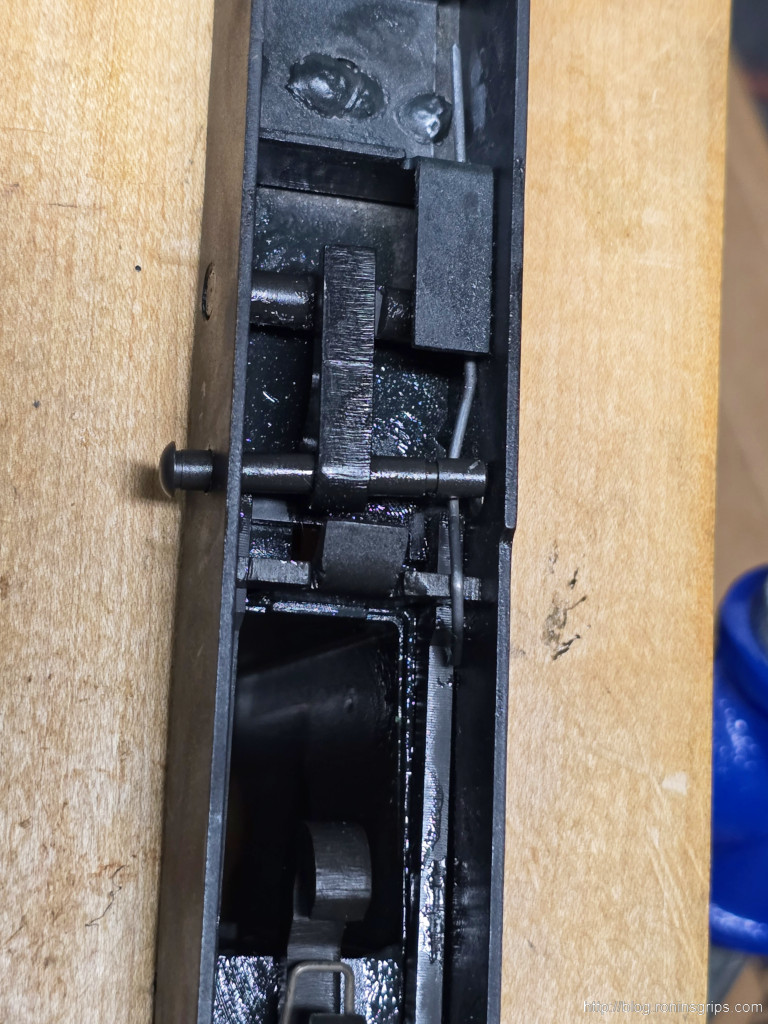
I knew the primary issue as the irregularly shaped receiver back. The way to fix it was to mix up glass reinforced epoxy and “bed” the adapter so it could sit flat.

A second decision was whether to make this nearly permanent by epoxing the adapter directly to the receiver. I decided against that – at least for now – in case I decide to change or repair something. This decision to make what would more or less be a gasket between the two meant that I would spray release agent on the surfaces so the epoxy would cure but not adhere to the parkerizing.

Purely FYI – parkerizing makes an ideal surface for weapons finishes and epoxy due to all of the “nooks and crannies” it creates. If you don’t use some form of release agent, the bond is stunningly good and will only come off with heat.

For general epoxy work lately, I’ve been using PC Products’ Super Epoxy translucent model 502 dispensed from a 50ml cartridge. Cartridge dispensers are a bit more expensive but boy are they convenient. To use a cartridge, you need a gun and then tips – you can get everything off Amazon very cost effectively.

They do sell a black epoxy but I’ve been using the translucent epoxy and can dye it the color I want. Despite the gimmicky sounding name, I’ve been using it for a little over a year now. The working time before it hardens is 15 minutes and mostly cures in 3-4 hours with a complete cure of 4-7 days. This stuff has proven itself for me for general use.

By the way, In general, I would recommend you stick with a known brand of epoxy and the longer it takes to cure, the better it tends to hold up over time. Fast 5-15 minute cure epoxies tend the break down over time when exposed to repeated shocks – sometimes called “sugaring” where you can see the epoxy breaking down into small pieces.

The Steps

  1. Apply the release agent to the receiver and adapter and let it dry. I use Mann’s Ease Release 200 – that’s what I use with the molds for my furniture also. If you read about release agents guys use when bedding rifle actions in stocks, you can see guys have used various forms of wax, etc.
  2. To make the bedding compound, I put the epoxy and 1/32″ milled glass fibers in a cup and sti. The glass fibers help to reinforce the epoxy. You don’t need a lot of glass fibers – maybe 25% of the volume. As you increase the volume of glass fibers, the thicker the material is. In this case, I really just want the fibers to reinforce the epoxy so I went with about 25%.
  3. To make it look decent, I added in black dye so it would blend in and not be so obvious.
  4. I thoroughly mixed everything.
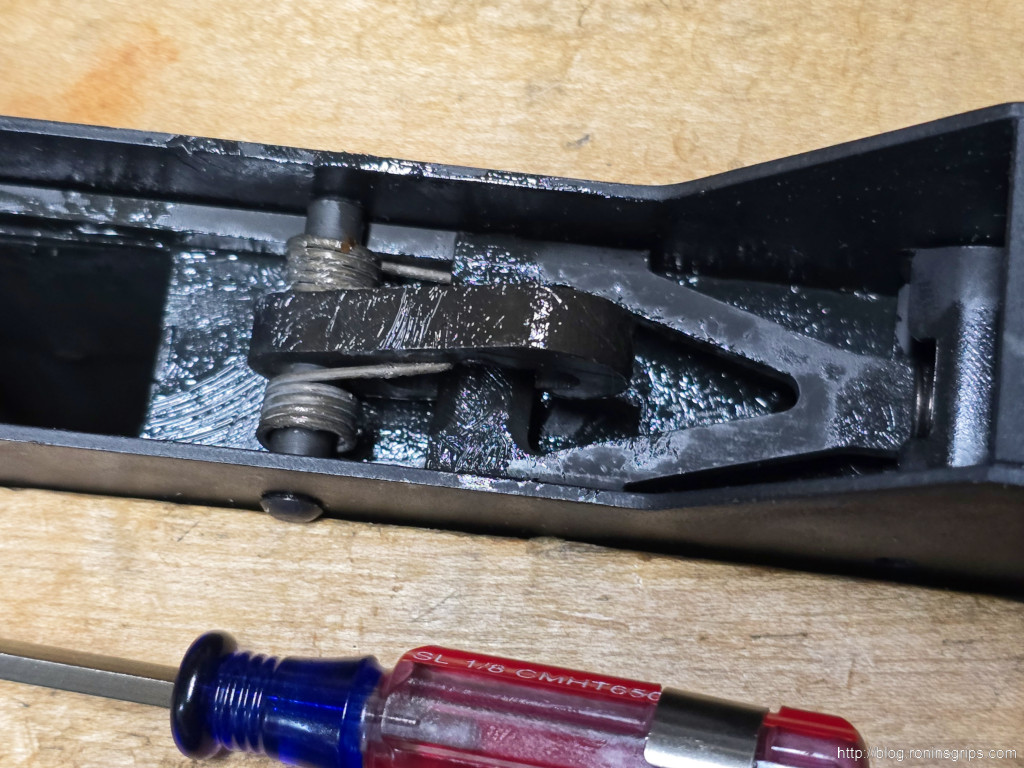
  5. I apply the material using nitrile gloves and a plastic knife.
  6. Acetone can be used to clean up any extra exposed epoxy until it cures.
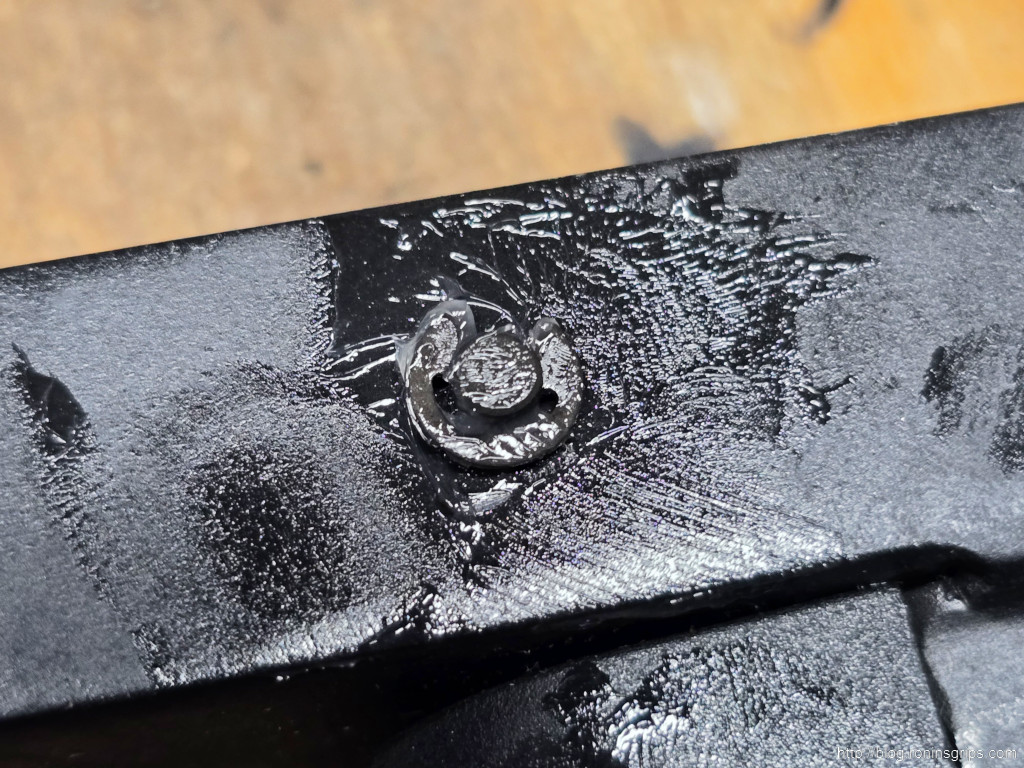
  7. Once everything is position correctly, I tightened down the screw on the bottom and let it cure. made sure everything stayed positioned correctly and checked for any runs or drips. Again, stuff like that can be cleaned up with a rag with acetone on it until it sets up.
  8. Once the material has hardened, I put the part in a 150F degree oven to cure faster. With epoxy, hard to the touch does not mean fully cured.

The results seemed perfectly acceptable. If they loosen up again, then I’ll consider next steps. For now, they seem solid.

The results felt rock solid. Time will tell.

Summary

I like the Practical Solutions adapters. Bedding them made for solid connection points for braces of stocks.


Note, I have to buy all of my parts – nothing here was paid for by sponsors, etc. I do make a small amount if you click on an ad and buy something but that is it. You’re getting my real opinion on stuff.

If you find this post useful, please share the link on Facebook, with your friends, etc. Your support is much appreciated and if you have any feedback, please email me at in**@*********ps.com. Please note that for links to other websites, I may be paid via an affiliate program such as Avantlink, Impact, Amazon and eBay.


Spectacular Sunset on I94 From Indiana to Illinois

We visited some friends last night and were treated to an amazing sunset on I94 starting with golds and moving to reds and purples. It really got spectacular around Porter, Indiana, and we watched it peak and fade. Shortly after we left I94 and turned onto I80 towards Mokena, the sunset faded completely.

My phone was in its cradle so I would just occasionally push the photo button and grab what it saw. When set at 200 megapixels, a Samsung’s S24 Ultra’s camera is pretty cool. My wife, who always takes better pictures than me, has the same model phone and took some also.

The photos are in a “tiled gallery” – if you click on one, it will open up and you can navigate around:

I shot the ones in portrait (tall and narrow) mode and my wife took the cool landscape (wide) oriented photos. See – I told you she’s better.

I hope you enjoy the photos. I’ve driven on I94 so many times, I couldn’t even guess how many sunsets I have seen. Without a doubt, this was probably the most stunning sunset on I94 I’ve ever seen.


If you find this post useful, please share the link on Facebook, with your friends, etc. Your support is much appreciated and if you have any feedback, please email me at in**@*********ps.com. Please note that for links to other websites, I may be paid via an affiliate program such as Avantlink, Impact, Amazon and eBay.


Manila Power Poles – Spaghetti in the Air

We visited family in the Philippines in August 2024 and I was amazed at the power poles in the greater Manila area. Everything is on poles – power, phone, fiber, you name it. So, as we were driving around, I couldn’t help but snap some photos.

Below is a photo gallery – click on one and then you can navigate around:

I hope you enjoyed the photos!

If you’re interested, there are a lot of books and merchandise about Manila on Amazon – click here. Interested in Filipino food recipes? Click here and look for any by Nora Daza. Many Filipinos will have a copy of her classic cookbook – Let’s Cook wiith Nora – we do. Also, before you buy a Nora Daza book off Amazon, be sure to check prices on eBay – they can be way, way cheaper there.


If you find this post useful, please share the link on Facebook, with your friends, etc. Your support is much appreciated and if you have any feedback, please email me at in**@*********ps.com. Please note that for links to other websites, I may be paid via an affiliate program such as Avantlink, Impact, Amazon and eBay.


Lots of Black Friday Sales Going On – More From Blade City, EuroOptic, Aero, Natchez, Bravo Company & More

Vendor Name With Website Link To UseDescription
Aero PrecisionBlack Friday builder sets, parts, uppers & more. 30% off select items through 12/31/24.
Bravo Company USAThey are having a huge sale on uppers, grips, bolt carriers, handguards and more. For example, buy an upper and get a BGC with it,
Blade City50% off select items. Can get up to three free gifts on qualifying purchases. Through 12/1/24.
BrownellsBlack Friday deals are here! Take advantage of the best prices of the year on our most popular parts & upgrades for your AR-15, Glock, Ruger 10/22 including the Brownells BRN4, BRN180, BRN22, BRN Slides, BRN Retro line and exclusives from Daniel Defense, Howa, Aero, Geissele & More!
FREE Shipping on all orders $49+ and nearly everything else is 15% OFF with coupon code 15BF.
EuroOpticBergara Sale – save up to 15% through 12/1/24
EuroOpticAccu-Tac bipods on sale 20% off throgh 12/3/24
EuroOpticNovember 21st through December 15th, take advantage of holiday savings on H&K pistols and rifles! Additionally, most H&K firearms will be eligible for a $25 EuroOptic Gift Code with purchase for a limited time!
EuroOpticSchmdit & Bender Holiday Sale. For a limited time, enjoy savings of up to 40% on select Schmidt & Bender riflescopes! No end date specified yet.
EuroOpticFrom November 25th through December 2nd, 2024, save 15% on select Holosun Optics!
Natchez Shooting & OutdoorsFree shipping when you spend $99.99+. Coupon code fs241129 good through 12/2/24


If you find this post useful, please share the link on Facebook, with your friends, etc. Your support is much appreciated and if you have any feedback, please email me at in**@*********ps.com. Please note that for links to other websites, I may be paid via an affiliate program such as Avantlink, Impact, Amazon and eBay.


Black Friday Sales At Many Vendors

Folks, it’s the time of year my wife gets nervous – I am getting emails constantly with deals going on. Some of the Black Friday Sales I just can’t pass over and some I just can’t afford 🙂

There are a number of reasons merchants are looking to sell stuff this year and are dropping prices for their Black Friday Sales. 1) President Trump was re-elected so no panic buying. 2) There are more sellers than buyers driving prices down. 3) The vendors need to cover their expenses and need to generate cashflow.

With that said, I figured it would be worth sharing some links with you to some of the big vendor sales:

  • Brownells – They are having a big sale and have free shipping on all orders over $49 and almost everything is 15% off if you use the coupon code 15BF during checkout. They are showcasing their BRN180 Gen 2 uppers, BRN4, Brownells G17, G19 & G43 uppers, SCT grames, SIG Tango MSR scopes are 20% off and much more. They have been emailing me 2-3 times per day it seems. So, lots to check out there. I picked up some AR parts due to the prices right now.
  • EuroOptics – many folks don’t know about EuroOptics or think they just sell European scopes. The fact is they normally have great prices on firearms, ammo, and optics of all types. I’ve bought from them many times and they are good to go. They have deals on all kinds of optics and firearms right now including a special Holidays Event for HK firearms and they have a huge selection right now. Use code VTX15 to get 15% off most Vortex Optics. They also are running special prices on Bergara, Christensen, Leica, Leupold, Q LLC, Sig, Steiner, Swavorski, Tikka, Trijicon and may more.
  • GrabAGun – funny name but great prices and service. I have bought a number of firearms and accessories from these folks. They have deal on HK, ATI, HK, Keltec, RIA, CCI, S&W and more.
  • Guns.com – They have a lot of firearms on sale ranging from entry-level bargain basement up to higher end. They also have combo deals like if you buy a gun over $500 then you get free shipping on ammo and they list qualifying guns they have for sale.
  • Palmetto State Armory (PSA) – The folks at Palmetto have the most sales of anyone going on right now – firearms, ammo, parts, you name it. I have built a ton of kits from them over the years as well as ammo, optics, tools and firearms. They are blowing up my inbox with deals so be sure to check them out. Seriously – they have some amazing deals going on right now.
  • Primary Arms – These folks have some great deals right now. I buy the most stuff from PSA and Primary Arms (PA). PA always has fair pricing and quick shipping. Well, now they have some huge deals – Larue triggers, Daniel Defense uppers, their own line of optics and more.
  • Shooting Surplus – They got on my radar a few years back as I was buying a lot of mags from them and since have bought ammo, parts and firearms. They have good prices and are quick to ship. Definitely worth checking them out.

Well, I have a honey-do list to get done before Thanksgiving dinner tonight but wanted to share these so you can check them out while recovering from the food coma 🙂

Happy Thanksgiving everyone!

Assembling a VMAC9’s lower receiver’s internals – applies to many semi-auto Mac-11-type pistols

Need to start this post with a reminder to be legal and safe.

By this point I had welded my receivers, parkerized them and also prepped some old Israeli Sten magazines. It was time to assemble the Velocity Firearms MAC 9 firearms. Two would be registered as pistols and one as a rifle. They all use the same internals in the lower receivers so I bought complete internal lower parts kits from Velocity Firearms plus complete uppers from them as well. Note, the grip assembly with the mag catch is a separate part. I just bought it from them pre-assembled.

Parts Identification

These are the lower parts for a Velocity Mac 9 (VMAC9):

  1. Lower receiver / welded frame
  2. Back grip assembly – includes the Plastic back grip housing, mag catch, mag catch spring and mag catch pin
  3. Optional: This is a Practical Solutions rear 1913 adapter.
  4. Wire retainer for the selector lever and trigger pin
  5. Hammer pin retainer e-clip – it’s still in its bag so I wouldn’t lose it
  6. Takedown pin assembly – tubular body and a hex socket button head screw.
  7. Safety selector
  8. Trigger bar – note bevel goes face up
  9. Sear plate – This is positioned the right way – bevels go down, front slots to cradle the trigger bard are down.
  10. Sear spring
  11. Sear spring holder / spacer – bevel is at the top. This holds the upper in position
  12. Trigger
  13. Trigger pin – note the slot is set further back for the retainer wire
  14. Hammer pin – note slot is out at the end for the retainer e-clip
  15. This is both the hammer and the hammer spring – the spring is oriented properly. The hammer is resting striking face down.

The Practical Solutions 1913 Rear Rail Adapter

I knew I wanted a 1913 Picatiny rear rail for mounting braces or stocks to. I looked at a number and the Practical Solutions model received good reviews. I’ll tell you it is solidly made for sure.

The Practical Solutions unit is well made and easy to install. To create a solid mount that doesn’t flex, I would recommend bedding it with epoxy so there is no “wiggle” room between the rear of the receiver and the adapter.

For the most part I like it because it’s easy to install. You will probably want to bed the adapter in the rear or else it will likely move. I mixed up some epoxy, black dye and 1/32″ glass fibers to make a putty that I then applied between the adapter and the rear of the receiver. Both parts had release agent on them just in case. I did this later because I didn’t realize how easily it could move with a brace or stock acting like a lever arm.

There is a lot of adjustment room to accomodate a wide variety of builds. This is a pro and a con.

Also, the bushing will push the spacer up just a bit so you might want to grind/sand/cut a radius so the spacer can seat properly. Alternatively, just bend the spacer. I just bent the spacer until the upper would fit.

Either notch your spacer to avoid that bushing or bend the spacer to reduce the height enough.
Ok, I found out about this after I fully assembled the VMACs – the rear of the VMAC and the Practrical Solutions adapters do not sit perfectly flat against one another so the adapter could flex left and right. Honestly, not a big deal. I just mixed up some black glass fiber reinforced epoxy and created a filler/spacer between the adapter and the rear of the weapon. Problem solved. By the way, my intent was never to “glue” them. I applied release agent on both surfaces so they can be removed. If you don’t have a release agent like Mann Ease Release 200, use PAM cooking spray or a bit of shoe wax to the surfaces before you apply the epoxy. If you want to bond them directly, go right ahead.

Let’s step through the assembly

  1. Install the plastic grip assembly taking care the mag catch’s half circle end sits outside of the mag well.
  2. Take the sear plate, tip the rear up and lower the front forks down so they slide under the bullet guide’s arms. The beveled front and rear rails are face down. Another way of thinking of the orientation is that the trigger bar slides under the front of the forks and sits in the machined opening. Make sure the sear plate can slide all the way forward to the center support and all the way to the rear. If there are any welds in the way, grind them so everything slides smoothly.
  3. At this point, I start lubricating as I go. If it slides, grease it. If it rotates, oil it. I use SuperLube grease applied with an acid brush to all surfaces that need greasing. Oiling was done with SuperLube oil. I like the two as they are synthetic and don’t get gummy plus they have PTFE (the generic acronym for Teflon) added to improve lubricity. The coarse parkerized surfaces will want to slow everything down while they wear in.
  4. Slide the sear plate forward, install the spacer to the rear with the beveled face up. Try test installing an upper at this point. You may need to squish the spacer a tad in a vice to allow the upper to seat easily.
  5. Slide the sear plate spring onto the sear and move the sear to the rear so it is all inside the sear spring holder / spacer.
  6. Insert the trigger bar with the beveled face up. I used needle nose pliers to do this and slid it under the front of the sear plate.
  7. Move the whole trigger bar and sear plate rearward so you can drop the trigger into the hole in the receiver and also such that the trigger is in front of the trigger bar.
  8. Insert the trigger pin from left to right. This requires a little bit of manipulation to get the pin through both sides.
  9. Install the hammer spring it it hasn’t been already. It should be oriented the way you see above.
  10. Install the hammer in the rear. It sits like an AR hammer with the flat face forward. The spring legs rest between the sear plate’s legs.
  11. Install the hammer pin
  12. Put a daub of grease on the receiver around the hammer pin. This is an old trick and will hold the e-clip in position while you slide it on. I’d recommend using something non-marring to push the e-clip on and you’ll feel the cip snap into position. Another trick is to lower the pin such that the slot is even with the receiver so you don’t have to try and get the clip at the right height while fighting everything else.
  13. Install the retaining wire by sliding the forward portion under the front reinforcement. The hooked portion sits in the groove on the right “ear” of the bullet guide. I’ll show photos below.
  14. Technically, you are supposed to lift the retaining wire up and insert the selector under the wire. This is what adds the tension to lock the selector and trigger pins in place. Uhm .. there was no way I could do that. If you can get it together/ go for it. I was getting pissed off and needed to think of a different approach. So, if you were able to lift the wire up and install the safety selector lever then you are done with the lower. Speaking for myself, I had to add the following:
  15. For the life of me, I could not get the selector lever in due to an elevated area on the inside and I couldn’t get the wire any higher. Instead, I backed off the trigger pin and inserted the selector because the tension was gone. The issue then became how to get the trigger pin in. What I did was to align the pin on the hole and used a grooved screwdriver (spanner bit) to forcefully push the pin and retaining wire down facing the hole while pushing from the other side so the pin would pop into the hole. That worked. One reason it worked was that I could see what I was doing and how to move things whereas with the selector lever and wire, I couldn’t see what was going on.
  16. Note, you will need to help the sear plate and hammer to go into the cocked position before you install the upper.
  17. I did a quick function test while controlling the hammer so it wouldn’t smack into things. Pulling the hammer back, the sear plate would grab it. Pulling the trigger back, the sear plate would release the hammer – again, I caught it vs. letting it fly free. I squeeze the trigger back, moved the hammer back, let go of the hammer while the trigger was squeezed and the sear plate grabbed it. I pulled the trigger and the hammer “fired”. I then made sure the safety worked. Everything was good.

Now For Photos

I find the sear plate fascinating. Yeah, I’m wierd. It’s almost like Ingram was designing a miniature bullpup. He had to create a trigger linkage that could bridge the distance from the trigger located in front of the mag well / grip to the rear where the hammer was. He came up with this design. Folks, this is pretty damned ingenious. First off, I have it flipped upside dowhn and the left would be to the front of the weapon and the top right would be facing the rear. A sear is what holds the bolt, hammer or striker back until enough pressure is applied that said device is released. In the case of the MAC, the sear plate is a forged piece of steel and let’s cover some of the unique design elements (remember it is inverted for this picture): 1) The hammer bar sits in the notches in the arms of the plate. 2) The plate has bevelled skates/runners/thingies that are bevelled to accomodate the radius of of the receiver bend and also reduce the surface area of the plate so there is less friction against the receiver plus they will probably push a fair amount of debris out of the way. 3) the plate is split into a fork to pass the left and right of the mag well. 4) the rear triangle is a lightening cut 5) the sear spring sits on/around the protruding “tail” at the rear of the plate.
Unless you like the fun of “where did that part go?” I’d recommend putting the parts in a magnetic parts tray.
The grip is installed on the steel mag well by keeping the bottom of the mag catch (the half moon shape) on the outside of the mag well so just the square “shelf” of the catch is inside. That half moon sits on the bopttom of the slot in this photo – which would be the top of the slot when the VMAC is upright. The grip is held on by one screw. If that screw doesn’t want to start or you do get it together and then can’t insert the mag, odds are that whole mag catch is accidentally inside the grip.
I did it the wrong way – see how the whole mag catch “arm” is in the mag well? I could install the grip but I could not insert mags. This photo is out of sequence so you can see the mag catch.
See how the squared off “shelf” of the mag catch is the only thing sticking into the mag well? That’s what we want – that is correct. I did not need to do any alterations for surplus or polymer mags. Both mag types lock up nice front to back but are loose left to right.
I welded the heck out of the sides. After looking at the plastic grips a tad bit more closely, I could have done a small weld on that rear tab and it would have cleared the grip. Look at the photo above – the top inside edge of the grip is hollow and would have cleared it. Live and learn I guess. That mag well will not budge given the weld I did on the sides and front corners but I would have done that rear tab had I known.
The intent of the photo is to show you the orientation of the trigger bar, sear plate, sear spring and the spring holder / spacer.

I don’t have a photo but make sure the sear place and trigger bar can slide unobstructed. If there are welds or anything in the way, grind them out, then blow out the receiver before you coat everything in grease.

Insert the sear plate with the rear tipped up at an angle. This will give you enough room to slide the front legs under the bullet guide. Yeah, I grease everything that slides.
Slide the sear platforward and insert the spacer. If your spacer has a bevel, it goes face up as shown in the photo. Since I installed the Practical Solutions adapter already you can see it is riding high. The solution is to cut a notch in the spacer and compress/crush/bend the spacer and trial fit the top. Bend a bit and test over and over until you can full seat the upper.
Slide the sear spring onto the sear plate and side it backwards. I went back later and cut the notch. It will drive you nuts if you leave it on top of the Practical Solutions adapter.
I use needlenose pliers to lower the trigger bar in place with the beveled edge to the front and face up.
Push the trigger bar, sear plate and what have you rearwards and insert the trigger forward of the trigger bar as shown.
To be clear, the top pin is the trigger pin. You can tell because it’s groove is further away from the end and that’s where the retaining wire will sit. The lower pin is for the hammer. The groove is right near the end because the retaining e-clip actually sits outside of the receiver. When looking down at the open receiver with it facing forward, the pins are inserted from the left to the right. In other words, the heads will be on the side opposite the ejection port.
Insert the trigger pin.
Compared to an AR or AK, the hammer assembly goes in without a fight because the hammer can rest without spring tension during installation. The hammer pin can easily be pushed through.
Put a daub of grease on the pin and surrounding area. This will help hold the e-clip and keep it from flying into another dimension only to be found by the next person who owns your shop. I like to lower the pin so the groove and e-clip line up and then I use a non-marring surface to push the e-clip into position. You will feel it click into position.
Here is the pre-bent retaining wire. It was designed by someone who literally wanted to remove all the joy that is left in the world.
So the hook on the retaining wire rests on the bullet guide. You install it by sliding the far end first. There’s no tension yet. That comes when you install the safety selector. That’s also when the swearing starts. You can’t see or get ahold of that wire thanks to that tab that is there, in part, to make this a semi-auto receiver so I wasn’t about to cut it off or bend it.
You are supposed to lift the front of the spring up so this opening is more clear and slide the selector lever in.
Okay, so imagine you are sliding this into the hole. The spring hits that first shoulder to the right of the flat area in the shaft. I could not get the damn wire, which is now under tension, to clear that shoulder and go into the groove. In hindsight, bevelling that surface would probably have solved my problem. At the time, I was pretty pissed off after trying too convince it to go in, pulling up on the wire, etc.
My workaround was to back off the trigger pin and release the tension from the wire. I then installed the safety selector switch. I then used a spanner screw driver bit to push the trigger into the hole. Pushing it down also tensioned the wire so it took some force. The trick was controlling it.
The receiver is sitting with teh bottom cradled in my big woodworking vise. Note the safety selector is installed with the retaining wire in its groove. The trigger pin is lined up with the hole. What I did was push down with the spanner screw driver while pushing the pin to the right with my left hand. I had to use the vise because it took two hands but it worked. I did those for all three lowers and it works just fine.
Well, the retaining spring is installed.
You do need to manuall bring the hammer back and catch it because there is no upper to stop forward travel or bring it back. You absolutely can install an upper with the hammer all the way down and wonder why it’s not cocking. Look in the trigger well – if you see the hammer laying flat it’s because you forgot to cock it before installing the upper. When you see tips like that, it means I did it 🙂

Be sure to do the function testing outlined above. All weapons should be cautiously test fired to ensure safety.

Summary

I was actually impressed by the design other than my extreme dislike for the retaining wire. The trigger is better than I expected. Not great but not horrible either.

In the next post, I’ll take about the first upper and how I configured the firearm.

I hope this helps you out.


Note, I have to buy all of my parts – nothing here was paid for by sponsors, etc. I do make a small amount if you click on an ad and buy something but that is it. You’re getting my real opinion on stuff.

If you find this post useful, please share the link on Facebook, with your friends, etc. Your support is much appreciated and if you have any feedback, please email me at in**@*********ps.com. Please note that for links to other websites, I may be paid via an affiliate program such as Avantlink, Impact, Amazon and eBay.


Refinishing Sten 20 Round Israeli Mags and Magazine Loaders

Back in 2017, I planned to build a Sten Mk. V and actually am planning to move forward with it now that I have built some VMAC9s that use Sten magazines. Well, as part of the VMAC builds, I bought some of the new MPA Polymer Sten mags and also decided to refinish some incredibly flithy Israeli modified Sten mags and loaders just caked in ancient cosmoline.

The Magazines

The Israelis had many different weapons in use following WWII including British Sten guns. Somewhere along the way they realized they could improve reliability by limiting the magazinees to 20 rounds via long skirted followers, adding brass wire on the sides to better stabilize the followers and soldering the bullet count peepholes closed.

At some point in the late 1950s, they phased out the Stens put thousands of these modified Sten magazines into long term storage where the preservative dried out, some rusting started and they became just genuinely filthy.

Closer to modern day, a US importer bought them plus we had Sten kits coming from all kinds of places. I bought two ten packs of filthy Sten mags from Centerfire Systems for a song, I have had the kits and these mags sitting in a tub.

Cleaning Them Up

The surplus steel mags are way too filthy to be reliable out of the box plus they look ancient. So, I opened up one the bags of 10 plus an odd box of six and oh man, did they need cleaning. I fired up my Vevor Ultrasonic cleaner that is filled with Simple Green HD, heated it up and then put the mags in there. My fluid was old to begin with but chunks of who knows what were floating up the surface as I ran 3-4 15 minute cycles trying to clean the things up. I’d do one side a couple of times, flip the mags so the other side was then face up and do it again.

They were in tough shape. The mags in a box were on better shape than the ones in the plastic bag. One of the mags looked like it has been put away wet or something. The inside was very, very rusted.
The mag loaders were caked with old cosmoline.
The solution was about 150 degrees. This is after the first 15 minute cycke.
I took some of the magazines and just oiled them after cleaning vs refinishing. That’s an option for you if you want.

Manganese Parkerizing the Surplus Sten Mags

The mags were disassembled and I used a sanding mop to quickly score the surface of the mags. Abrasive blasting would have given a more consistent surface and better results. I hosed them down with brake cleaner, let them dry and put bodies, followers and base plates in my parkerization solution – click here for more info on how to make your own black manganese park solution and process to follow.

Everything was lubed with 10w30. I like to scrub with steel wool to remove any loose surface phosphate. Note, I did not park the springs or locking plates.
They came out pretty good – better than I had thought they would.
Here’s one of the in process VMAC9 pistols with one of the mags installed. Most of my mags had “character” marks including dings and some light rust. All except for one were salvageable.

Summary

With a VMAC9, you can either use the MPA polymer Sten mags or original steel Sten mags. I actually plan to test both. I like the looks and history of the 20 round Israeli Sten magazines. The steel Sten mags are out there and are affordable if you don’t mind doing a little cleaning.

I hope this helps you out.


Note, I have to buy all of my parts – nothing here was paid for by sponsors, etc. I do make a small amount if you click on an ad and buy something but that is it. You’re getting my real opinion on stuff.

If you find this post useful, please share the link on Facebook, with your friends, etc. Your support is much appreciated and if you have any feedback, please email me at in**@*********ps.com. Please note that for links to other websites, I may be paid via an affiliate program such as Avantlink, Impact, Amazon and eBay.


Finishing New VMAC9 Welded Receivers Using A Black Manganese Parkerized Finish You Can Do At Home

Velocity Arms finishes their VMAC9 uppers using a “manganese phosphate finished IAW 5.3.1.2 of Mil-STD-171” which is a fancy way of saying maganese park, heavy coating, class 2, oil coated. Of course the military gets into a lot of details further specifying it in MIL-DTL-16232. At any rate, Velocity Arms’ uppers are a nice rich dark black manganese park finish and I had a pretty good idea of how to duplicate it based on past experience.

I’m not going to get into all of the chemistry details – if you want that, click here for Wikipedia. I am going to point out, there are two types of park – zinc and maganese. Zinc is more of a grey or grey/green. Manganese is dark grey to black. What I have found purely based on experience is that an abrasive blasted clean steel surface will turn black in a fresh park solution and it approaching boiling and left in for 30-45 minutes.

Surface Prep is Critical

One thing I have found is that you just can’t take steel and drop it in park solution. You may get little to no reaction plus if there is oil or grease on the steel, you may contaminate your park solution so bad you have to discard it.

What I do is put on nitrile gloves, clean the part with brake cleabner thoroughly. If it’s bad, use an ultrasonic cleaner with a good cleaning solution. When the part is dry, then abrasive blast it. I use Black Diamond blast media from my local Tractor Supply (TSC) store. Never use sand – the dust from that is incredibly bad – really, really bad – for your lungs because it goes in and doesn’t come out. With Black Diamond, it does a wear out so I watch my parts and when the blasting starts taking too long, I replace it.

Clean everything and blast the part. The steel should all have a frosted look or it probably didn’t get blasted enough. If you get done with parking and an area didn’t take, hose it down, dry it, blast the affected area and a bit of the surrounding area and try again.

When I am done blasting, I clean it again with brake cleaner, let it dry and it’s time to go into the Manganese park solution.

I usually brew my solution and let it start heating up and aging while I get my parts ready.

A Manganese Home Park Formula That Really Works

I have used this formula for years. One ingredient though, Prep & Etch , is getting hard to find so you will either need to find an alternate or make your own mix.

This recipe generates about two gallons of mix so figure out your ratios if you want to make more:

  • 2 gallons of distilled water  (it gives more consistent results because impurities have been removed – sold at supermarkets and drug stores).
  • 2 “biscuits” of clean plain 0000 steel wool (thinner steel wool dissolves faster hence the use of 0000 grade) – Click here for them on Amazon or here for eBay
  • 1 cup of Klean Strip brand Phosphoric Prep & Etch (or other phosphoric acid etching solution around 35-45% concentrate per the Prep & Etch MSDS sheet. Dilute the acid if higher. For example, if 100% pure then go 60 water:40 acid to make the diluted acid solution that you add to the mix. This is not the ratio in the park solution itself – you can always experiment with the ratio that works for you). I can’t find Prep & Etch at any local stores but my local Ace Hardware is carrying something similar called “Ospho” and the SDS sheet identifies it as 45% phosphoric acid and it ought to work but haven’t tried it yet. I had two gallons of Prep & Etch and that amount has lasted me a number of years because I don’t do a lot of parking but you get the idea. Click here for Phosphoric Acid on Amazon or here for eBay.
  • 6 very rounded tablespoons of manganese dioxide (available at pottery supply stores, Amazon or eBay). Do NOT mess with batteries. You may read about guys who open up batteries to get the manganese – don’t do it. Just buy the actual manganese in bulk. It’s cheap and you know what you are getting.

Heat Source & Vessel

Some years ago, I bought a Camp Chef Explorer two burner stove off Amazon and I really like it. It’s sturdy and can run off any of the common propane tanks. Also, there are many different sizes of stoves out there but I wanted a beefy two burner to be able to also heat my stainless tank when I park long parts.

I use 20 pound tanks because they are easy for me to move. I just swap cylinders when they pass their inspection date but otherwise get them refilled at my local Ace Hardware. Surprisingly, they tend to have the best prices in the area for propane.

In terms of what I use to hold the parts, the receivers were short so I just used a 12 quart stainless pot I have for that purpose. Note, do not use cookware for this. I’m not joking. I can just imagine some guy thinking “Oh – I’ll just use a pot from the kitchen.” This stuff leaves residues that you should never eat. I have a couple places on the bottom of my pot where I can’t scrape some kind of crust off. My best guess is that the alloy wasn’t consistent but regardlss, do not use pots or other containers from the kitchen. Buy and use dedicated pots, tongs, stainless wire, etc.

By the way, good long stiff BBQ tons are definitely worth it. I have one with plastic jaws and another that is completely stainless. While I was worried at first about scratching the parts, I really haven’t had a problem with that. Amazon has tons of affordable tongs with decent reviews.

18-20 gauge stainless wire also is really handy. I use it to suspend smaller parts and keep them together vs. losing track and trying to find them – been there and done that.

In cases where I can’t run a wire through the small parts, I use the strainer/steamer section of my boiler pot or a small kitchen stainless strainer in my big tank if I am using that.

Speaking of long tanks – there are good deal on eBay. That is where I bought mine.

On that point, I use

Steps to Follow

Add acid to water in a stainless pan/pot and heat to 190F – don’t boil and waste it – if it does boil or simmer, it’s not the end of the world and a lid can help reduce evaporative loss.  I use a baking thermometer clipped to the side of the pan or my Fluke infrared thermometer.

Spray each wool biscuit with brake cleaner to remove oils and allow each time to dry.

As the solution warms shred the steel wool into the liquid and add the manganese dioxide. When I did these Vmac9 receivers, I found all I had to do was unwind the steel wool rolls, place them in the solution and that was fine.

Let the mix simmer and dissolve the steel wool before adding parts. This is key. The solution needs to dissolve the steel to get the process started. I usually, get this started and then get my parts ready. Stir periodically to help things mix.

Here, the solution is brewing while I get the receivers ready to go into it. That is a 12 quart stainless pot sitting over one burner of my Camp Chef stove.

I always blast my parts before I parkerize them. I have used sanding mops and other approaches to expose the metal but just find blasting the best for a consistently colored surface.  Blasting removes the oxides and exposes the bare steel. I always do that.

Make sure your parts are very, very clean and degreased — only handle with rubber gloves after they are cleaned or oils from your skin can mess things up.

Before you put your parts in, stir the solution to keep the manganese dioxide suspended. I do not stir once the parts are in the pot or tank.

You can suspend your parts in the liquid with stainless wire.  Leave them until the fizzing stops or about 30-45 minutes.  The time varies depending on many factors including the solution itself and the heat.

All three receivers were in there and I let them simmer for about 45 minutes.
Here they are fresh from the pot. I use kitchen tons to pull them out because they are hot. I also am wearing nitrile gloves and eye protection. Again, do this outdoors. You don’t want this condensing on exposed steel in your shop and case rusting.

Rinse the parts with boiling water thoroughly to remove the acid. I have never found the need to do more than thoroughly hose down the parts. I literally use a garden hose.

Spray parts with WD40 to get the water away from the steel.

Here are all three receivers soaked in WD-40 after being hosed down. I then rubbed them down with 10w30 engine oil.

Wipe down with oil or apply whatever secondary finish you want – don’t do both 🙂  If you are going to apply a finish on top of the parkerized surface, use acetone or brake cleaner to remove any oils and then follow the vendor’s instructions.

Now, you have another option also – After the oil rub, I heated them up to about 125-150F, let them sit for a bit and then rubbed in Sno-Seal boot wax to just really seal things up but also keep the parkerizied look.

Here’s a view of them together:

Three Vmac9 receivers parkerizied a rich black color
Herre they are ready for assembly. The park is nice and consistent. I did need to redo one of them. There was a spot I didn’t blast enough so the park didn’t take well. I blasted that area and a bit more, cleaned it up and then redid it. I did this right after hosing the part down – that’s when I noticed it.

Summary

You can definitely do a manganese park at home and make your own recipe that is just as dark as what Velocity does. The receipe and process above are affordable, easy and generate great results as evidenced above.

I hope this helps you out.


Note, I have to buy all of my parts – nothing here was paid for by sponsors, etc. I do make a small amount if you click on an ad and buy something but that is it. You’re getting my real opinion on stuff.

If you find this post useful, please share the link on Facebook, with your friends, etc. Your support is much appreciated and if you have any feedback, please email me at in**@*********ps.com. Please note that for links to other websites, I may be paid via an affiliate program such as Avantlink, Impact, Amazon and eBay.


When Strength and Quality Matter Most