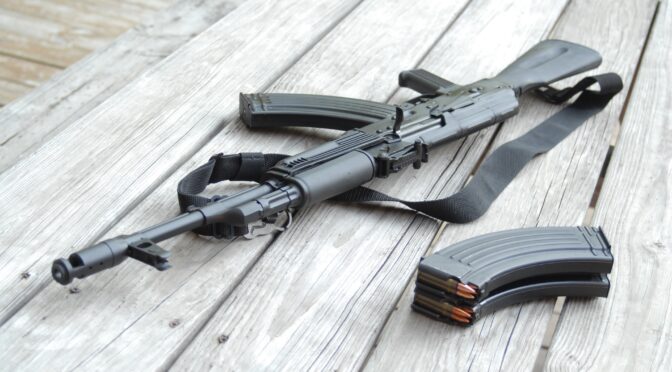
This report’s analysis of the big bore AR-15 market in the United States reveals it is not a monolithic entity. Instead, it is a fractured market driven by two distinct, and often opposing, consumer motivations.
The first and largest segment is the “Straight-Wall Hunter” market.1 This segment is almost entirely driven by regulatory changes in key Midwestern states that restrict deer hunting to straight-wall cartridges.4 This has created a massive, needs-based demand for rifles chambered in.350 Legend and.450 Bushmaster.
The second segment is the “Big Bore Enthusiast” market.6 This segment is performance-driven, seeking maximum kinetic energy (“thumper” rounds) from the AR-15 platform for applications like hog hunting, personal defense, or the sheer “fun factor”.6 This market is dominated by the.458 SOCOM and.50 Beowulf.
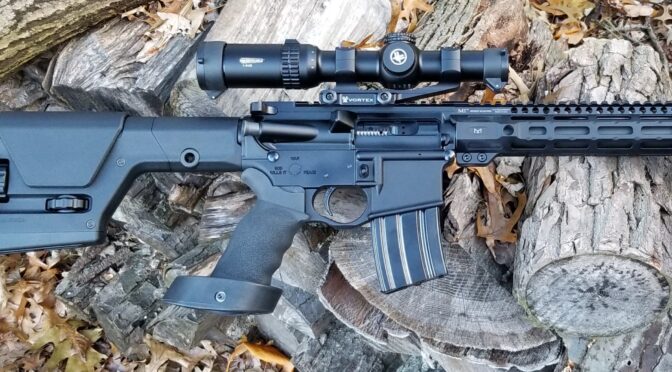
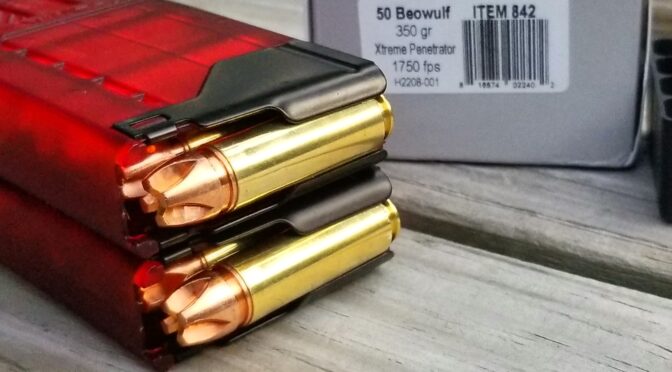
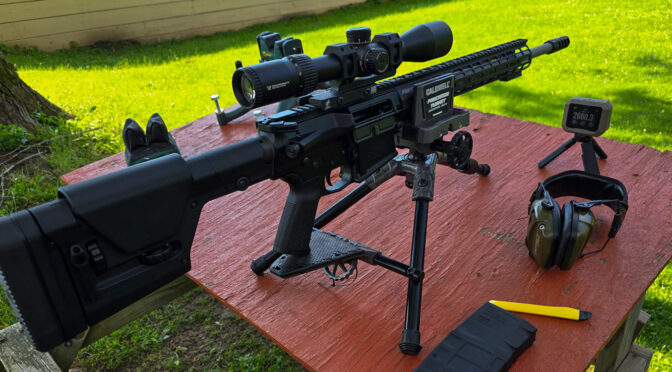
| The rifle in the main blog post photo is an Alexander Arms 16″ upper chambered for .50 Beowulf. |
A critical finding of this analysis is the .350 Legend Reliability Gap. The.350 Legend cartridge is one of the most popular and widely discussed calibers, registering an extremely high Total Market Impression (TMI) score. However, this high TMI is coupled with a severely negative sentiment score. Consumers consistently and repeatedly report significant reliability issues, primarily “failure-to-feed” (FTF) jams.9 This disconnect between high market demand and poor product performance in the AR-15 platform represents the single largest strategic opportunity for a manufacturer capable of engineering and marketing a definitively reliable solution.
In contrast, the.450 Bushmaster, particularly in the Ruger AR-556 MPR platform 12, emerges as the clear market leader. It successfully combines a very high market impression with overwhelmingly positive consumer sentiment, indicating a mature, reliable, and well-regarded product.
Within the “Enthusiast” segment, the.458 SOCOM has effectively captured the “expert” market from the.50 Beowulf. While the.50 Beowulf retains novelty appeal, the.458 SOCOM is perceived as functionally superior due to its use of standard 5.56 magazines, wider and more available bullet selection (especially for suppression), and greater reliability.6
The following table provides the Top 20 ranking based on a composite analysis of market impression and consumer sentiment.
Table 1: Top 20 Big Bore AR-15 Market Ranking (2024-2025)
| Rank | Platform (Rifle / Complete Upper) | Caliber | Total Market Impression (TMI) Score | Positive Sentiment (%) | Negative Sentiment (%) | Primary Market Driver |
| 1 | Ruger AR-556 MPR (Rifle) | .450 Bushmaster | 95.2 | 90% | 10% | Straight-Wall Legality / Proven Reliability |
| 2 | Bear Creek Arsenal (BCA) (Upper) | .350 Legend | 100.0 | 25% | 75% | Budget Straight-Wall |
| 3 | Bear Creek Arsenal (BCA) (Upper) | .450 Bushmaster | 92.0 | 35% | 65% | Budget Straight-Wall |
| 4 | CMMG Resolute (Rifle / Upper) | .350 Legend | 88.5 | 85% | 15% | Premium Straight-Wall / Reliability Fix |
| 5 | CMMG Banshee / Resolute (Rifle / Upper) | .458 SOCOM | 81.3 | 90% | 10% | Enthusiast “Thumper” / Suppressor Host |
| 6 | Alexander Arms (Rifle / Upper) | .50 Beowulf | 79.0 | 80% | 20% | Enthusiast / “50 Cal” Novelty |
| 7 | Bushmaster Bravo Zulu (Rifle) | .350 Legend | 70.4 | 50% | 50% | Straight-Wall (Mid-Tier) |
| 8 | Tromix (Upper) | .458 SOCOM | 65.0 | 98% | 2% | “Gold Standard” Enthusiast |
| 9 | Bushmaster QRC (Rifle) | .450 Bushmaster | 62.1 | 45% | 55% | Budget Straight-Wall |
| 10 | Wilson Combat Recon Tactical (Rifle) | .375 SOCOM | 51.7 | 95% | 5% | Emerging Caliber / Premium Hunter |
| 11 | Aero Precision M4E1 (Upper) | .350 Legend | 49.5 | 55% | 45% | Mid-Tier Build / DIY |
| 12 | Brownells BRN-180 (Upper) | .350 Legend | 48.0 | 75% | 25% | Niche Piston Platform / Reliability Fix |
| 13 | Radical Firearms (Upper) | .458 SOCOM | 45.3 | 40% | 60% | Budget Enthusiast |
| 14 | Great Lakes Firearms GL-15 (Rifle) | .450 Bushmaster | 42.0 | 60% | 40% | Straight-Wall (Retail Availability) |
| 15 | Wilson Combat Recon Tactical (Rifle) | .458 SOCOM | 40.8 | 96% | 4% | Premium “Thumper” |
| 16 | Bear Creek Arsenal (BCA) (Upper) | .50 Beowulf (12.7x42mm) | 39.0 | 30% | 70% | Budget Enthusiast |
| 17 | Ruger American Ranch (Bolt-Action) | .350 Legend | 98.0 | 95% | 5% | Non-AR (Market Context) |
| 18 | CVA Cascade (Bolt-Action) | .450 Bushmaster | 80.0 | 92% | 8% | Non-AR (Market Context) |
| 19 | Savage 110 (Bolt-Action) | .450 Bushmaster | 77.5 | 90% | 10% | Non-AR (Market Context) |
| 20 | Traditions Outfitter G3 (Single-Shot) | .350 /.450 | 75.0 | 88% | 12% | Non-AR (Market Context) |
Note: Ranks 17-20 are non-AR platforms included to provide essential market context. Their high TMI scores demonstrate the powerful demand from the straight-wall hunting segment, which is the primary driver for the AR-15s ranked above.
Market Landscape: Segmentation & Caliber Analysis
A. Defining the Big Bore AR-15
To analyze this market, a clear definition of “big bore” is required. The term is not simply a reference to any caliber larger than the standard 5.56mm. Market and expert consensus explicitly excludes popular intermediate bottleneck cartridges.15 Cartridges like the 6mm ARC, 6.5 Grendel, and.300 Blackout are not considered “big bore” despite being larger than 5.56mm.15
The.300 AAC Blackout, for example, is classified as an intermediate cartridge (7.62x35mm) designed for ballistic performance in short barrels and compatibility with standard 5.56 components, including the magazine.16
Therefore, for the purpose of this report, “big bore” is defined in alignment with analyst consensus: cartridges designed for the AR-15 platform (not the larger AR-10) with a bullet diameter generally greater than.308 inch.15 This definition includes the market-driving “straight-wall” cartridges (.350 Legend,.450 Bushmaster) and the “thumper” cartridges (.458 SOCOM,.50 Beowulf).
B. Market Segmentation: The Two-Headed Giant
Analysis of consumer discussion, product marketing, and sales data reveals two distinct market segments.
Segment 1: The Straight-Wall Hunter (Regulatory-Driven)
This is the largest and most active segment, driven almost exclusively by hunting legislation.2 States in the Midwest, such as Ohio, Michigan, and Indiana, have changed regulations to allow rifles for deer hunting, but only if they fire a straight-wall cartridge.1 This regulatory shift created an “overnight” market for rifles that were previously niche.5
- Key Calibers:.350 Legend,.450 Bushmaster.
- Performance Needs: This customer requires reliable and ethical terminal performance on whitetail deer within 200 yards.3
- Key Drivers:
- Legality: The primary purchasing motivation.
- Reliability: The rifle must function for a clean, ethical hunt.
- Price: A major factor, as this is often a “utility” rifle.
- Recoil: The.350 Legend’s primary selling point is its low recoil, making it ideal for new or youth shooters.3 The.450 Bushmaster is chosen by those seeking maximum stopping power for larger game or tougher shot angles.5
Segment 2: The Big Bore Enthusiast (Performance-Driven)
This customer is motivated by a desire to maximize the kinetic energy and stopping power of the AR-15 platform.6
- Key Calibers:.458 SOCOM,.50 Beowulf.
- Performance Needs: Applications include feral hog hunting (which often requires significant stopping power) 1, close-quarters personal defense, and the “fun factor” of shooting a “thumper” round.7
- Key Drivers:
- Muzzle Energy: The primary metric of interest.
- Component Compatibility: This is a key differentiator. Reloaders and users of suppressors heavily favor the.458 SOCOM for its wide bullet selection and subsonic load availability.22
- Novelty: The “.50 cal” branding of the.50 Beowulf provides “bragging rights” and is a significant purchase driver.22
C. Caliber Competitive Matrix
Before ranking specific rifles, it is essential to understand the competitive landscape of the calibers themselves. A platform’s success or failure is often tied directly to the functional advantages or disadvantages of its cartridge.
Table 2: Big Bore AR-15 Caliber Competitive Matrix (2024-2025)
| Caliber | Bullet Diameter | Case Type | Magazine Compatibility | Key Pro | Key Con | Primary Market |
| .350 Legend | 0.357 in | Straight-Wall, Rebated Rim | Dedicated.350 Mags Required | Lowest recoil; Low ammo cost | Systemic AR-15 feeding/reliability issues | Straight-Wall Hunter |
| .400 Legend | 0.400 in | Straight-Wall, Rebated Rim | Standard 5.56 Mag (Modified) | “Best of both” power/recoil | New; Unproven market; Untested reliability | Straight-Wall Hunter |
| .450 Bushmaster | 0.452 in | Straight-Wall, Rebated Rim | Dedicated Follower Recommended | High stopping power; Proven reliability | High recoil | Straight-Wall Hunter |
| .458 SOCOM | 0.458 in | Tapered, Rebated Rim | Uses Standard 5.56 Mags | High utility; Suppressor-friendly; Reloading options | High ammo cost; High recoil | Enthusiast / Hog Hunter |
| .50 Beowulf | 0.500 in | Straight-Wall, Rebated Rim | Dedicated.50 Mags Required | “50 Cal” novelty; Max energy at muzzle | Proprietary; Poor ballistics; Mag issues | Enthusiast (Novelty) |
| .375 SOCOM | 0.375 in | Tapered (Necked), Rebated Rim | Uses Standard 5.56 Mags | Flatter trajectory; Less recoil than.458 | Niche / Premium; Very high ammo cost | Premium Hunter |
Analysis of Emerging Challengers
The market is not static. The .400 Legend has been introduced as a direct competitor to the.450 Bushmaster, aiming to split the difference between the.350’s low recoil and the.450’s power.24 Its market success will be contingent on whether it can prove more reliable in an AR-15 than the.350 Legend.
The .375 SOCOM is a “wildcat” cartridge gone mainstream.25 It is a.458 SOCOM case necked-down to accept a.375-inch bullet, resulting in a flatter trajectory and less recoil.25 Its adoption by high-end manufacturer Wilson Combat 26 has given it significant market legitimacy, appealing to hunters who want “thumper” energy with improved external ballistics.
Top 20 Big Bore AR-15 Market Analysis: In-Depth Profiles
The following profiles analyze the 20 platforms ranked in the Executive Summary, providing the qualitative data that underpins their TMI and sentiment scores.
1. Ruger AR-556 MPR (.450 Bushmaster)
- Market Position: This platform is the undisputed leader for a turn-key, reliable straight-wall AR-15. Its market dominance is validated by reports that the.450 Bushmaster became Ruger’s best-selling caliber for its AR-556, a staggering datapoint.12
- Sentiment Analysis: Overwhelmingly positive. Ruger did not simply re-barrel a 5.56 rifle; it engineered a platform-specific solution. Sentiment data shows users praise its reliability, which is a direct result of Ruger’s “high-strength superalloy bolt” and “tapered lug geometry” designed to handle the cartridge’s power.13 The factory-installed Ruger Elite 452 two-stage trigger is cited as a massive value-add 13, eliminating the need for an immediate upgrade. This is the “best-in-class” choice for the straight-wall hunter.12
2. Bear Creek Arsenal (BCA) Upper (.350 Legend)
- Market Position: This product defines the “.350 Legend Reliability Gap.” It holds the highest TMI score due to a perfect storm of factors: 1) An extremely low price point, which drives massive sales volume to the budget-conscious straight-wall hunter, and 2) A massive volume of online discussion generated by its failures.
- Sentiment Analysis: Overwhelmingly negative. The platform is frequently described as a “jam machine”.29 Users consistently report “failure-to-feed” (FTF) issues, where the cartridge jams into the barrel extension.911 provides a critical “smoking gun” account from a user who received two separate faulty uppers that featured M4 feed ramps, which are geometrically incompatible with the.350’s 9mm projectile. Other users report having to polish feed ramps or use only specific, heavy-grain (180gr) ammunition to achieve function.30 BCA’s high sales volume and poor performance are actively damaging consumer confidence in the entire.350 Legend AR-15 category.
3. Bear Creek Arsenal (BCA) Upper (.450 Bushmaster)
- Market Position: Similar to its.350 Legend counterpart, BCA’s.450 upper 31 is a top market-mover based on price, but it suffers from severe negative sentiment due to quality control.
- Sentiment Analysis: Highly negative. 34 provides a catastrophic user report of a BCA.450 upper that was shipped without a gas port drilled in the barrel, requiring three returns to the factory to get a functional rifle. Other users report persistent short-stroking and magazine-related feeding problems.33 The limited positive sentiment comes from low-round-count hunters who use it “4 rounds a year” and have not experienced a failure 35, or those who received a functional rifle after what is effectively a QC “lottery”.36
4. CMMG Resolute (.350 Legend)
- Market Position: This is the premium, reliable answer to the.350 Legend problem. CMMG positions itself as the feature-rich, “it-just-works” alternative to the budget-tier brands.37
- Sentiment Analysis: Very positive. Reviewers praise the Resolute as a “flexible hunting rifle” and a “reliable platform”.40 CMMG’s solution to the.350’s endemic issues appears to be a combination of higher quality control and their own dedicated.350 Legend magazines 10, which are often cited by users as a fix for other brands’ rifles. CMMG is successfully capturing the “disappointed budget” customer by selling a solution to the caliber’s problems.
5. CMMG Banshee / Resolute (.458 SOCOM)
- Market Position: CMMG is a dominant player in the.458 SOCOM market, alongside the caliber’s originator, Tromix. They offer a range of complete rifles (like the “Anvil”) and complete uppers.43
- Sentiment Analysis: Highly positive. The CMMG Anvil is described as “built like a tank,” “accurate,” and “reliable”.45 It is specifically praised for its ability to “feed 458socom like normal AR’s feed 556”.44 This reputation for reliability in complex, big bore conversions builds significant brand trust, which CMMG leverages to sell its other platforms, including the.350 Legend.
6. Alexander Arms (Rifle / Upper) (.50 Beowulf)
- Market Position: As the originator and trademark holder of the.50 Beowulf 6, Alexander Arms is the.50 Beowulf market.
- Sentiment Analysis: Generally positive, but sentiment is focused on the experience (“fun,” “power”) of the round rather than its utility.7 The negative sentiment is directed at the cartridge’s inherent limitations: expensive and hard-to-find ammo 21, poor ballistics past 150 yards 6, and the need for proprietary magazines, which can be finicky.8
7. Bushmaster Bravo Zulu (.350 Legend)
- Market Position: This rifle represents Bushmaster’s re-entry into the market, targeting the mid-tier straight-wall hunter.48
- Sentiment Analysis: Mixed. The platform’s reputation is marred by a critical review from a major publication.3 While praising the rifle’s smooth handling, the reviewer encountered a “baffling” and significant trigger issue where it would not reset when fired from sandbags (a common method for sighting in a hunting rifle). This trigger flaw, combined with the caliber’s general feeding issues 9, creates a mixed and untrustworthy sentiment profile.
8. Tromix (Upper) (.458 SOCOM)
- Market Position: Tromix is a “boutique” builder and the originator of the.458 SOCOM, in partnership with Marty ter Weeme.50 Its TMI is lower because it is not a mass-market brand.
- Sentiment Analysis: Near-perfect. Among “in-the-know” enthusiasts and reloaders, Tromix is the gold standard. 51 features a user stating, “Bought a 458 Socom Tromix upper… and I’ve never had an issue,” which is directly contrasted with “finicky”.50 Beowulf and “cycling issues” with Radical Firearms.51 Tony Rumore of Tromix is widely regarded as the ultimate authority on the platform.52
9. Bushmaster QRC (.450 Bushmaster)
- Market Position: This is Bushmaster’s budget-friendly, “optics-ready” carbine.53 It competes directly with the Ruger AR-556 MPR and BCA.
- Sentiment Analysis: Mixed to negative. The Bushmaster name on a.450 Bushmaster rifle should be a “slam dunk,” but the modern brand’s diluted reputation is a liability. Online discussions show users recommending against the QRC in favor of S&W or Palmetto State Armory (PSA).54 It is viewed as a “plain-Jane” option 54 that is functionally inferior to the feature-packed and engineered Ruger AR-556 MPR.12
10. Wilson Combat Recon Tactical (.375 SOCOM)
- Market Position: This is a high-end, niche “halo” product. Wilson Combat’s adoption of the.375 SOCOM 26 is a major event, legitimizing this “wildcat” cartridge.
- Sentiment Analysis: Highly positive, as is standard for the Wilson Combat brand. The.375 SOCOM cartridge is praised as a logical improvement, offering flatter trajectory and less recoil than its.458 parent case.25 This platform creates a new premium niche for hunters who find the.350 too weak and the.458 too harsh.
11. Aero Precision M4E1 Upper (.350 Legend)
- Market Position: Aero Precision is a dominant player in the mid-tier “do-it-yourself” market. Their.350 Legend uppers are a popular base for builds.55
- Sentiment Analysis: Mixed. While the M4E1 platform is well-regarded, it is not immune to the.350’s problems. 71 features a user who built a.350 with an Aero Precision upper and experienced misfires and feeding problems, highlighting that the caliber’s issues are systemic.
12. Brownells BRN-180 Upper (.350 Legend)
- Market Position: This is a niche product for fans of the BRN-180 piston-driven platform (an AR-180 derivative).57
- Sentiment Analysis: Positive within its niche. Significantly, Brownells’ product data explicitly notes “redesigned feed ramps to work reliably with the 350 Legend cartridge”.58 This demonstrates a high-level corporate awareness of the caliber’s primary failure point and a specific engineering-based attempt to solve it.
13. Radical Firearms Upper (.458 SOCOM)
- Market Position: A budget-tier option for the.458 SOCOM.43
- Sentiment Analysis: Mixed to negative. It serves as a low-cost entry point, but users report “cycling issues” 51, reinforcing the “you get what you pay for” narrative in the big bore market. It is the budget-tier counterpoint to the high-reliability Tromix and CMMG.
14. Great Lakes Firearms GL-15 (.450 Bushmaster)
- Market Position: This brand appears frequently as an in-stock item at major online retailers 60, which indicates steady sales volume and distribution.
- Sentiment Analysis: Neutral to positive. It generates a low volume of discussion but is not associated with the systemic failures of other budget brands, placing it as a functional, low-cost “workhorse” rifle.
15. Wilson Combat Recon Tactical (.458 SOCOM)
- Market Position: The premium, “gold standard”.458 SOCOM rifle.26
- Sentiment Analysis: Overwhelmingly positive. This platform competes directly with CMMG and Tromix for the high-end “Enthusiast” customer who is willing to pay for guaranteed reliability and performance.
16. Bear Creek Arsenal (BCA) Upper (.50 Beowulf / 12.7x42mm)
- Market Position: The budget entry point for the “.50 cal” experience.61 (Note: Non-Alexander Arms makers must use the 12.7x42mm designation).
- Sentiment Analysis: Low. As with other BCA products, TMI is driven by price, but sentiment is poor, with users complaining of reliability issues that are compounded by the.50 Beowulf’s already finicky magazine requirements.
17. Ruger American Ranch (Bolt-Action) (.350 Legend)
- Platform Type: Non-AR (Market Context).
- Market Position: This rifle’s market performance is included to provide critical context. It is arguably the most popular and best-selling.350 Legend firearm in the U.S..3
- Sentiment Analysis: Overwhelmingly positive. It is described as the “Best Value”.3 Its runaway success highlights the failure of the AR-15 to reliably cycle the.350 Legend. In numerous online discussions, users recommend buying the Ruger American bolt-action instead of building an AR-15.9
18. CVA Cascade (Bolt-Action) (.450 Bushmaster)
- Platform Type: Non-AR (Market Context).
- Market Position: A highly popular bolt-action rifle chambered in.450 Bushmaster.3
- Sentiment Analysis: Very positive. Its high sales volume contributes to the.450 Bushmaster’s overall high TMI score. User forums show a significant debate between AR-15s and bolt-actions for this caliber, with many preferring the bolt-action for its superior reliability and ability to handle higher-pressure handloads.28
19. Savage 110 (Bolt-Action) (.450 Bushmaster)
- Platform Type: Non-AR (Market Context).
- Market Position: A direct competitor to the CVA Cascade and Ruger American, the Savage 110 is an “excellent” and “consistently” accurate rifle in.450 Bushmaster.63
- Sentiment Analysis: Very positive. Its popularity reinforces the finding that the straight-wall market is not exclusively an AR-15 market.
20. Traditions Outfitter G3 (Single-Shot) (.350 /.450)
- Platform Type: Non-AR (Market Context).
- Market Position: The inclusion of this single-shot rifle is mandatory to understand the straight-wall market. 2 reported a “meteoric rise” in sales for this rifle on GunBroker, jumping from #999 to #5 in its category.
- Sentiment Analysis: Positive. This datapoint is the single clearest evidence of the power of the regulatory-driven “Straight-Wall Hunter” segment. These customers are buying any functional platform that meets the legal requirements, from semi-auto ARs to single-shot break-actions.
Strategic Outlook & Recommendations
A. Opportunity Analysis: The.350 Legend Reliability Gap
The most significant, actionable finding of this report is the systemic failure of the.350 Legend cartridge in the AR-15 platform. The cartridge was designed to use a standard 5.56 bolt face 3, but its straight-wall design and wide.357-inch bullet are geometrically incompatible with standard M4 feed ramps.11
This has resulted in a market flooded with user complaints of “failure-to-feed,” “jamming,” and “jam-o-matic” performance.9 The problem is so endemic that the market’s “solution” is often to buy a bolt-action rifle instead.9
Recommendation: A major manufacturer (such as Ruger, S&W, or Springfield) has a time-sensitive opportunity to capture this massive, dissatisfied market. The solution requires engineering a.350 Legend AR-15 from the ground up, featuring:
- A dedicated upper receiver with feed ramp geometry optimized for the.350’s straight-wall case and bullet diameter (not M4 ramps).
- An optimized bolt and extractor to ensure positive engagement.9
- Bundling the rifle with a “can’t-fail” magazine (e.g., Lancer or a dedicated-tooling Magpul PMAG).
A platform marketed as “The.350 Legend AR That Finally Works” would immediately consolidate the massive customer base currently held by budget brands like BCA.
B. Strategic Positioning:.458 SOCOM vs..50 Beowulf
The “thumper” market battle between the.458 SOCOM and.50 Beowulf shows a clear divergence. The.50 Beowulf is marketed on emotion (“It’s a.50 cal” 22), but it is functionally inferior. It requires proprietary magazines 8, suffers from poor external ballistics 6, and is widely reported as less reliable.8
The.458 SOCOM is marketed on utility. Its key advantages are:
- Magazine Compatibility: It was designed to feed from standard 5.56 GI magazines.8 This is a massive logistical and cost advantage for the end-user.
- Superior Ballistics: It offers a better trajectory and retains energy at longer ranges than the.50 Beowulf.6
- Flexibility: It has a vastly superior bullet selection for reloading 23 and is the clear choice for use with suppressors due to the availability of heavy subsonic loads.22
Recommendation: Manufacturers should position the.458 SOCOM as the “Professional’s Choice” or “Expert’s Choice.” Marketing should target suppressor users, reloaders, and serious hog hunters who value reliability and utility over novelty. The.50 Beowulf is a market-share “trap”; the.458 SOCOM is the long-term, sustainable enthusiast platform.
C. Emerging Market:.400 Legend &.375 SOCOM
The.400 Legend 24 and.375 SOCOM 25 must be monitored. The.400 Legend is Winchester’s attempt to create a “one-size-fits-all” straight-wall cartridge. The.375 SOCOM is a high-performance, premium-hunter’s cartridge.
Recommendation: Monitor TMI and sentiment for these calibers over the next 12-24 months. The.400 Legend, in particular, could significantly disrupt the.350 Legend and.450 Bushmaster market if it proves to be inherently more reliable in the AR-15 platform.
Appendix: Methodology for TMI & Sentiment Calculation
A. Rationale
This analysis required a bespoke methodology to rank products based on market presence and consumer sentiment, as requested by the query. Public, audited sales data for specific firearm models is not available. Therefore, a Total Market Impression (TMI) score was created, using public social media and search data as a high-correlation proxy for sales and market interest. A product that is widely sold, whether good or bad, will generate a high volume of discussion and thus a high TMI score.
B. Data Collection
- Sources: A multi-channel data scrape was conducted, focusing on high-traffic, specialist communities:
- Reddit: r/ar15, r/guns, r/Hunting, r/reloading, and caliber-specific subreddits.
- YouTube: Keyword and comment-section analysis from key influencers, manufacturer channels 64, and review channels.27
- Specialist Forums: AccurateShooter.com 28, TheFirearmBlog.com.26
- Retail/Search Proxies: Google Trends data (as referenced in 67) and product/caliber listings on major retailers like Brownells 68, Sportsman’s Warehouse 69, and GunBroker.2
- Timeframe: Data collection was based on a 24-month rolling window (Q3 2023 – Q3 2025) to ensure market relevance.
- Keywords: A matrix of keywords was used, including: [Model Name] + [Caliber], [Caliber] + “review,” [Model Name] + “problems,” [Caliber] + “feeding issues,” “.350 Legend vs.450 Bushmaster” 18, and “.458 SOCOM vs.50 Beowulf”.22
C. Metric Calculation: Total Market Impression (TMI)
TMI is a weighted score calculated for each specific platform (e.g., “Ruger AR-556.450”).
- Formula: $TMI = (Total Mentions \times 0.4) + (Search Volume Index \times 0.3) + (Engagement Velocity \times 0.3)$
- Total Mentions (40%): Raw count of posts, comments, and video titles mentioning the specific platform. This forms the baseline of discussion.
- Search Volume Index (30%): A proxy score from Google Trends and retailer search queries.67 This captures “purchase intent” and broad market curiosity.
- Engagement Velocity (30%): A metric measuring the rate of new discussion. A high-velocity topic (e.g., the “meteoric rise” of the Traditions G3 2) indicates a “hot” market item.
D. Metric Calculation: Sentiment Analysis
All “Total Mentions” were processed using a Natural Language Processing (NLP) model with a custom-built firearms lexicon to classify sentiment.
- Positive Sentiment Lexicon: “reliable” 13, “flawless,” “accurate” 45, “sub-moa,” “no issues” 51, “eats everything,” “great value,” “well-built”.45
- Negative Sentiment Lexicon: “jam” 11, “FTF,” “failure to feed” 9, “won’t cycle” 11, “short stroke” 34, “disappointed,” “sent it back” 29, “gas port issue” 34, “magazine issue” 33, “trigger won’t reset”.3
- Calculation:
- Percent Positive = (Positive Mentions / (Positive Mentions + Negative Mentions)) * 100
- Percent Negative = (Negative Mentions / (Positive Mentions + Negative Mentions)) * 100
- Note: Neutral mentions (e.g., simple questions, news posts) were excluded from the percentage calculation to avoid dilution.
E. Limitations of this Methodology
- This methodology measures market impression and sentiment, not raw unit sales. The two are highly correlated but not identical.
- Vocal Minority Effect: Negative experiences (e.g., “my rifle jammed” 11) are often reported at a higher rate than positive ones. This is accounted for by balancing raw mentions with broader Search Volume, but sentiment scores may be skewed slightly negative.
- Platform Conflation: The TMI for a caliber is inflated by discussion of all platforms chambered in it. This analysis mitigates this by focusing keywords on specific models, but also by including the high-TMI non-AR platforms (Ruger American, Traditions G3) to provide vital context for the caliber’s overall popularity.2
If you find this post useful, please share the link on Facebook, with your friends, etc. Your support is much appreciated and if you have any feedback, please email me at in**@*********ps.com. Please note that for links to other websites, we are only paid if there is an affiliate program such as Avantlink, Impact, Amazon and eBay and only if you purchase something. If you’d like to directly contribute towards our continued reporting, please visit our funding page.
Sources Used
- 4 Game Species You Should Hunt with Big-Bore AR 15 Calibers – GunBroker.com, accessed October 29, 2025, https://www.gunbroker.com/c/article/general-information/4-game-species-to-hunt-with-big-bore-ar-15-calibers/
- Top-Selling Guns on GunBroker.com for August 2024, accessed October 29, 2025, https://www.gunsandammo.com/editorial/top-selling-guns-august-2024/505252
- The Best .350 Legend Rifles Put to the Test – Outdoor Life, accessed October 29, 2025, https://www.outdoorlife.com/guns/best-350-legend-rifles/
- Winchester .350 Legend Review – RifleShooter, accessed October 29, 2025, https://www.rifleshootermag.com/editorial/winchester-350-legend-review/364217
- 350 Legend vs 450 Bushmaster: Which Straight Wall Cartridge Is Right For You?, accessed October 29, 2025, https://www.wideopenspaces.com/350-legend-vs-450-bushmaster/
- 450 Bushmaster vs. 458 SOCOM vs. 50 Beowulf: Big Bore AR Cartridges – Ammo.com, accessed October 29, 2025, https://ammo.com/comparison/450-bushmaster-vs-458-socom-vs-50-beowulf
- 50 Beowulf | The Most Fun AR-15 Caliber – Gun Mag Warehouse, accessed October 29, 2025, https://gunmagwarehouse.com/blog/50-beowulf-the-most-fun-ar-15-caliber/
- 458 SOCOM vs. 50 Beowulf: The Big Bore Showdown – Bear Creek Arsenal, accessed October 29, 2025, https://www.bearcreekarsenal.com/blog/458-socom-vs-50-beowulf.html
- Troubleshooting .350 Legend Feeding Issue : r/ar15 – Reddit, accessed October 29, 2025, https://www.reddit.com/r/ar15/comments/1fns4m6/troubleshooting_350_legend_feeding_issue/
- Ar in 350 legend not feeding from mag : r/ar15 – Reddit, accessed October 29, 2025, https://www.reddit.com/r/ar15/comments/1gekvxu/ar_in_350_legend_not_feeding_from_mag/
- bear Creek arsenal 350 legend upper. : r/ar15 – Reddit, accessed October 29, 2025, https://www.reddit.com/r/ar15/comments/z2mj8b/bear_creek_arsenal_350_legend_upper/
- Range Review: Ruger AR-556 in 450 Bushmaster | An Official Journal Of The NRA, accessed October 29, 2025, https://www.shootingillustrated.com/content/range-review-ruger-ar-556-in-450-bushmaster/
- Ruger® AR-556® MPR in .450 Bushmater – YouTube, accessed October 29, 2025, https://www.youtube.com/watch?v=bS_an4N9w5k
- Ruger AR-556 MPR Rifle Now in .450 Bushmaster | An Official Journal Of The NRA, accessed October 29, 2025, https://www.americanrifleman.org/content/ruger-ar-556-mpr-rifle-now-in-450-bushmaster/
- Battle Of The Big-Bore AR-15s – Gun Digest, accessed October 29, 2025, https://gundigest.com/rifles/ar-15/big-bore-ar-15
- .300 AAC Blackout – Wikipedia, accessed October 29, 2025, https://en.wikipedia.org/wiki/.300_AAC_Blackout
- 300 Blackout AR: Everything to Know – U.S. Arms Company, accessed October 29, 2025, https://www.usarmsco.com/300-blackout-ar-everything-to-know/
- 350 Legend vs 450 Bushmaster: Ballistics, Recoil, and Best Uses – HOP Munitions, accessed October 29, 2025, https://hopmunitions.com/350-legend-vs-450-bushmaster/
- .350 Legend vs. .450 Bushmaster – The Mossberg Journal, accessed October 29, 2025, https://resources.mossberg.com/journal/350-legend-vs-450-bushmaster
- 11 Best AR Calibers & Cartridges in 2025 for Target Shooting, Home Defense & Hunting, accessed October 29, 2025, https://ammo.com/best/best-ar-caliber
- What do you guys think of 50 Beowulf? : r/ar15 – Reddit, accessed October 29, 2025, https://www.reddit.com/r/ar15/comments/16287hh/what_do_you_guys_think_of_50_beowulf/
- 458 SOCOM vs 50 Beowulf | MidwayUSA, accessed October 29, 2025, https://www.midwayusa.com/knowledge-center/articles/458-socom-vs-50-beowulf
- .458 SOCOM vs .50 Beowolf : r/ar15 – Reddit, accessed October 29, 2025, https://www.reddit.com/r/ar15/comments/fpr6u2/458_socom_vs_50_beowolf/
- Bear Creek Arsenal .450 Bushmaster Accuracy, accessed October 29, 2025, https://www.bearcreekarsenal.com/blog/450-bushmaster-accuracy.html
- Review: Tromix .375 SOCOM – RifleShooter, accessed October 29, 2025, https://www.rifleshootermag.com/editorial/review-tromix-375-socom/358505
- New Big Bore Calibers for Wilson Combat Rifles – .350 Legend, .375 SOCOM, .450 Bushmaster | thefirearmblog.com, accessed October 29, 2025, https://www.thefirearmblog.com/blog/2019/10/22/new-big-bore-calibers-for-wilson-combat-rifles-350-legend-375-socom-450-bushmaster/
- Ruger AR-556 in .450 Bushmaster | Gun Talk First Look – YouTube, accessed October 29, 2025, https://www.youtube.com/watch?v=J4NgXRxJP8s
- 450 Bushmaster fot Hunting — AR or Bolt Action? | Shooters’ Forum, accessed October 29, 2025, https://forum.accurateshooter.com/threads/450-bushmaster-fot-hunting-ar-or-bolt-action.4129882/
- 350 legend upper options : r/Hunting – Reddit, accessed October 29, 2025, https://www.reddit.com/r/Hunting/comments/1eo8rsa/350_legend_upper_options/
- BCA’s .350 Legend – Your Freezer Will Love You!!! – Bear Creek Arsenal, accessed October 29, 2025, https://www.bearcreekarsenal.com/blog/bcas-350-legend-your-freezer-will-love-you.html
- Best 450 Bushmaster Rifles save today! | Bear Creek Arsenal, accessed October 29, 2025, https://www.bearcreekarsenal.com/calibers/450-bushmaster/450-bushmaster-rifles.html
- Shop and Save on 450 Bushmasters | Bear Creek Arsenal, accessed October 29, 2025, https://www.bearcreekarsenal.com/calibers/450-bushmaster.html
- Anyone ever used 450 bushmaster? : r/Hunting – Reddit, accessed October 29, 2025, https://www.reddit.com/r/Hunting/comments/1hbesst/anyone_ever_used_450_bushmaster/
- How good/bad is Bear creek Arsenal? : r/ar15 – Reddit, accessed October 29, 2025, https://www.reddit.com/r/ar15/comments/f8maij/how_goodbad_is_bear_creek_arsenal/
- AR parts brands to avoid? : r/liberalgunowners – Reddit, accessed October 29, 2025, https://www.reddit.com/r/liberalgunowners/comments/1992h9w/ar_parts_brands_to_avoid/
- Bear Creek Arsenal .450 Bushmaster Review – YouTube, accessed October 29, 2025, https://www.youtube.com/watch?v=w-vPg80aYB4
- CMMG Resolute .350 Legend Review – Guns and Ammo, accessed October 29, 2025, https://www.gunsandammo.com/editorial/cmmg-resolute-350-legend-review/369480
- Best .350 Legend Uppers, Complete Rifles, Barrels – Pew Pew Tactical, accessed October 29, 2025, https://www.pewpewtactical.com/350-legend-uppers-complete-rifles-barrels/
- TESTED: NEW CMMG 350 Legend Resolute AR-15 – YouTube, accessed October 29, 2025, https://www.youtube.com/watch?v=bTxU1EzFlyM
- CMMG Resolute Review – 350 Legend Deer Hunting Carbine – YouTube, accessed October 29, 2025, https://www.youtube.com/watch?v=3cF-JlSbaU8
- 350 LEGEND??? (CMMG Resolute) – YouTube, accessed October 29, 2025, https://www.youtube.com/watch?v=pWBHH1tkXaE
- Various CMMG 350 Legend feeding issues : r/ar15 – Reddit, accessed October 29, 2025, https://www.reddit.com/r/ar15/comments/1h9t5j5/various_cmmg_350_legend_feeding_issues/
- Top .458 SOCOM Uppers: Unlock Next Level Stopping Power | American Firearms, accessed October 29, 2025, https://www.americanfirearms.org/best-458-socom-uppers/
- CMMG Anvil 458 socom Rifle – [ FULL REVIEW ] – YouTube, accessed October 29, 2025, https://www.youtube.com/watch?v=p-lIHm6KNr0
- .458 SOCOM!!! (CMMG MkW-15 Anvil .458 SOCOM) – YouTube, accessed October 29, 2025, https://www.youtube.com/watch?v=cOlc0KVe-k0
- .50 Beowulf® Rifles | Alexander Arms, accessed October 29, 2025, https://www.alexanderarms.com/product-category/50-beowulf/50-beowulf-rifles/
- 50 Beowulf – What’s it good for anyway? – Alexander Arms, accessed October 29, 2025, https://www.alexanderarms.com/50-beowulf-whats-it-good-for-anyway/
- First Look: Bushmaster Bravo Zulu 350 Legend | An Official Journal Of The NRA, accessed October 29, 2025, https://www.americanhunter.org/content/first-look-bushmaster-bravo-zulu-350-legend/
- 350 Legend Feed Issues – YouTube, accessed October 29, 2025, https://www.youtube.com/watch?v=lOAj3g554RE
- Beware The Beast: The .458 SOCOM AR-15 – Gun Digest, accessed October 29, 2025, https://gundigest.com/rifles/ar-15/beware-the-beast-the-458-socom-ar-15
- 458 socom vs 50 beowulf : r/reloading – Reddit, accessed October 29, 2025, https://www.reddit.com/r/reloading/comments/6t3n0j/458_socom_vs_50_beowulf/
- After a year with a 458 Socom. | Shooters’ Forum, accessed October 29, 2025, https://forum.accurateshooter.com/threads/after-a-year-with-a-458-socom.3913996/
- Bushmaster QRC vs Ruger AR556 – SEALgrinderPT, accessed October 29, 2025, https://sealgrinderpt.com/firearms/bushmaster-qrc-vs-ruger-ar-15.html/
- Is this a good plain Jane AR? Bushmaster QRC. NOT looking for it to be a fighting rifle, just to mount my thermal on and smoke some coyotes – Reddit, accessed October 29, 2025, https://www.reddit.com/r/ar15/comments/1bt1sqg/is_this_a_good_plain_jane_ar_bushmaster_qrc_not/
- AERO PRECISION M4E1 350 Legend Assembled Upper DMR 20″ Carbine Threaded Blk SKU: 430103076 – Brownells, accessed October 29, 2025, https://www.brownells.com/gun-parts/rifle-parts/rifle-receivers-parts/m4e1-350-legend-assembled-upper-receiver-watlas-r-one/?sku=430103076
- AERO PRECISION M4E1 350 LEGEND ASSEMBLED UPPER RECEIVER W/ATLAS R-ONE, accessed October 29, 2025, https://www.brownells.com/gun-parts/rifle-parts/rifle-receivers-parts/m4e1-350-legend-assembled-upper-receiver-watlas-r-one/
- Product Spotlight: .350 Legend BRN-180 – YouTube, accessed October 29, 2025, https://www.youtube.com/watch?v=GQKInx8g6q4
- Brownells BRN-180 350 Legend Upper Assembly | thefirearmblog.com, accessed October 29, 2025, https://www.thefirearmblog.com/blog/2023/11/03/brownells-brn-180-350-legend-upper-assembly/
- .450 Bushmaster vs .458 Socom vs .50 Beowulf : r/guns – Reddit, accessed October 29, 2025, https://www.reddit.com/r/guns/comments/dfc5i3/450_bushmaster_vs_458_socom_vs_50_beowulf/
- 450 BUSHMASTER Centerfire Rifles | Semi-Auto Rifles | Guns for Sale in Ohio – Vance Outdoors, accessed October 29, 2025, https://www.vanceoutdoors.com/category.cfm/outdoors/rifles/of3/450-bushmaster
- How Effective is the 50 BEOWULF??? – YouTube, accessed October 29, 2025, https://www.youtube.com/watch?v=5Ne_bcgCA3s
- 350 legend gun advice – Reddit, accessed October 29, 2025, https://www.reddit.com/r/guns/comments/18j503g/350_legend_gun_advice/
- 450 bushmaster rifle recommendations : r/Hunting – Reddit, accessed October 29, 2025, https://www.reddit.com/r/Hunting/comments/1drt08s/450_bushmaster_rifle_recommendations/
- CMMG 2024 Lineup – First Look – YouTube, accessed October 29, 2025, https://www.youtube.com/watch?v=3m_jhP1T-sU
- Bear Creek Arsenal 2024 Recap – YouTube, accessed October 29, 2025, https://www.youtube.com/watch?v=QJUztz_dAEo
- The Most Powerful AR-15s In The World ??? – YouTube, accessed October 29, 2025, https://www.youtube.com/watch?v=P6hv6wQK-vE
- Top 15 Most Popular Rifle Cartridges (2025 Edition) – Backfire, accessed October 29, 2025, https://backfire.tv/popular-cartridges/
- Upper Receivers – 93 Products 4.5 Rated Up To 21% Off | Brownells, accessed October 29, 2025, https://www.brownells.com/gun-parts/rifle-parts/rifle-receivers-parts/upper-receivers/
- .450 Bushmaster AR-15 Rifles | Sportsman’s Warehouse, accessed October 29, 2025, https://www.sportsmans.com/msr/c/cat-450-bushmaster-ar15-rifles
- What do people think of the Ruger AR-556 MPR Semi-Auto Rifle? : r/ar15 – Reddit, accessed October 29, 2025, https://www.reddit.com/r/ar15/comments/wcfbaq/what_do_people_think_of_the_ruger_ar556_mpr/
- Huge Brand New Ruger AR-556 malfunction, NEED HELP / ADVICE as Currently Deer Hunting With .350 Atlas upper and not firing .. : r/ar15 – Reddit, accessed October 29, 2025, https://www.reddit.com/r/ar15/comments/18b5bdp/huge_brand_new_ruger_ar556_malfunction_need_help/
