Category Archives: Tools

Getting Unstuck With Traction Mats

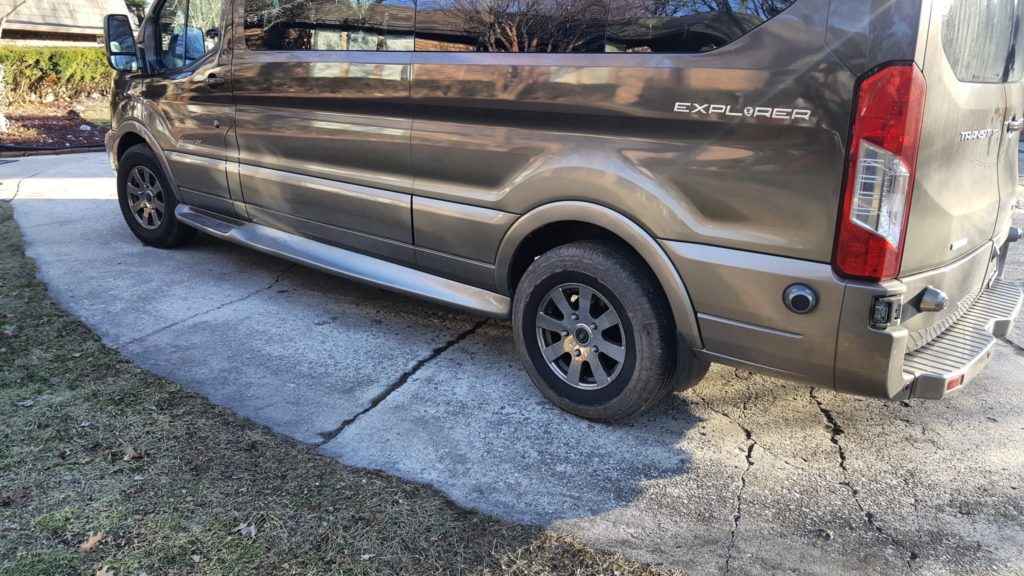
Well, I parked our full size Ford Transit van at the end of the driveway on the grass to get it out of the way.  Of course, given the recent snow melt the ground turned out to be too muddy and soft to support the van’s weight – but I didn’t notice that because it took a while to slowly sink.  Yeah, I didn’t notice anything – my wife did we she went to use it!  Oh crud.  So she called my cell phone and was none too happy.  I didn’t really worry about it because my truck could pull it out – or so I thought.

I drove to the house, cockily pulled my trusty old 96 Landcruiser up in front of the van and got out one of my big tow straps and walked up to the van.   Should have been easy, right?  Wrong.  Nothing, nada to hook on to.  Ford, in their infinite wisdom does not put a tow hook, eye or anything up near the bumper!  Crap, crap, crap.  [Note, near the bottom of this blog post I added in what I found after researching how to recover a full size Transit.  I’m still irked at Ford.]

Did I mention my wife was standing their fuming?  Yeah, she was.  I should have known better than to park the heavy full size van on soft ground.  Point taken – I didn’t realize it was that soft.

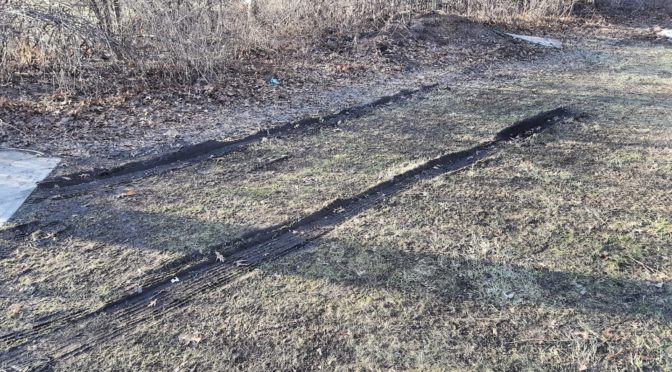
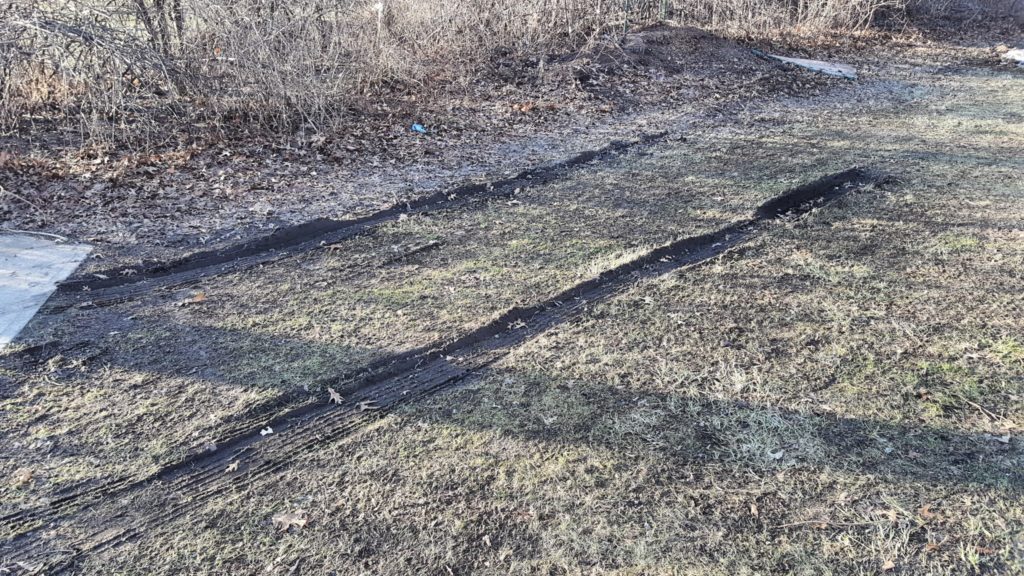
At any rate, I went back and looked at the 5″ deep rut the driver’s side rear tire had dug for itself.  By the way, these photos are after removal.

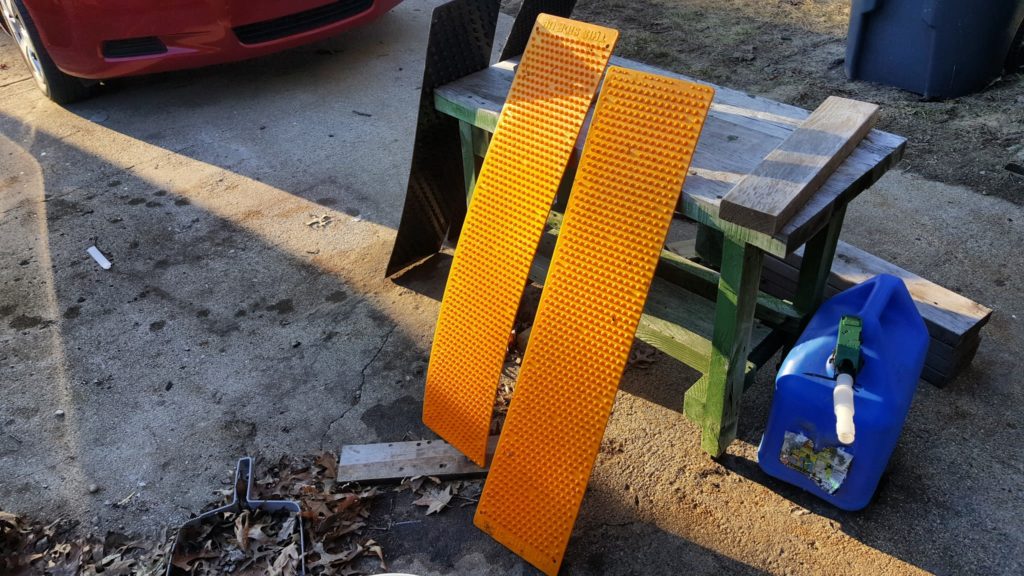
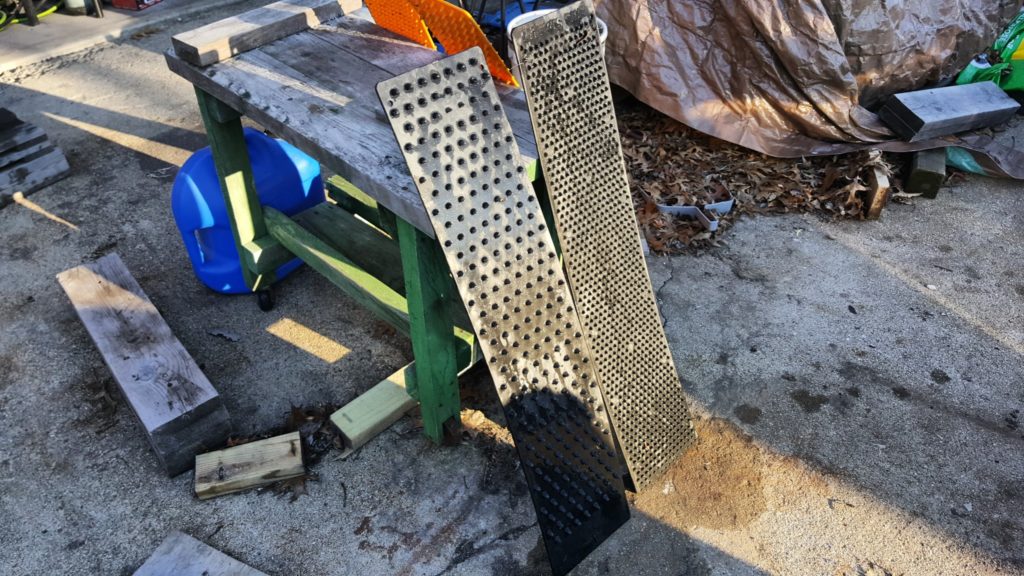
I needed something long to fill the ruts and give traction.  Luckily, back in 2010 and then in 2014 I bought these things called “traction mats” from a company called OTW Enterprises who touted them as portable tow trucks.  In 2010 I bought the black ones after getting my truck stuck on ice with the plow blade buried in a snow mound.  In 2014. I bought an orange set to put in my wife’s car in case she got stuck.  Here they are after I hosed all the mud off.

Well, they bounced around in the trunks for a while and did bail me out a couple of times over the years but were actually leaning on the outside wall of my shop.  They don’t fold and while they fit in the trunk you have the little plastic spikes catching stuff so I tool them out at some point and leaned them against the wall of the shop.  At any rate,  I walked over and they were exactly what I needed.  Each mat measures 36″ long and 8″ wide.  Since I had four, I butted on up against the front of each tire and placed a second one in front of it to help the tire get up and out of the rut.  The sides are labeled by the way – the relative few long spikes go down and the side with many spikes goes up.

I got in and rolled the the van back a bit and then forward to get up on the mats.  I then slowly gave it more gas (not much) and the van up and forward onto the mat and got out of ditch and I kept moving forward onto the pavement.  I don’t have any action photos – things were stressful at the time and I really wasn’t thinking about a blog post 🙂

Well, I was pretty pleased with the outcome.  Wreckers charge at least $65 to come out to our house so avoiding that charge is always a good thing.  My wife was relatively happy but gave me a hard time for causing the problem in the first place.

Are these mats perfect?  No.  They will fly out from under your car if you don’t go slow and make sure you have the correct side down.  Even then they sometimes do so I would never have someone stand behind the car.  My recommendation is to go slow – avoid your spinning tires and rock the vehicle onto the mat if need be – don’t spin your tires onto them.

My wife is so impressed she wants them back in the cars.  I just wish they had a carry case but I do recommend them as another tool to keep in your bag of tricks.

I hope this helps you out.


Comment about Ford and Their Oversight on Towing

By the way, I looked up the tow/winch location up for future reference  so if you are surfing the web trying to figure out how to tow a full size 2016 Ford Transit, here is the reference link at Ford – click here.

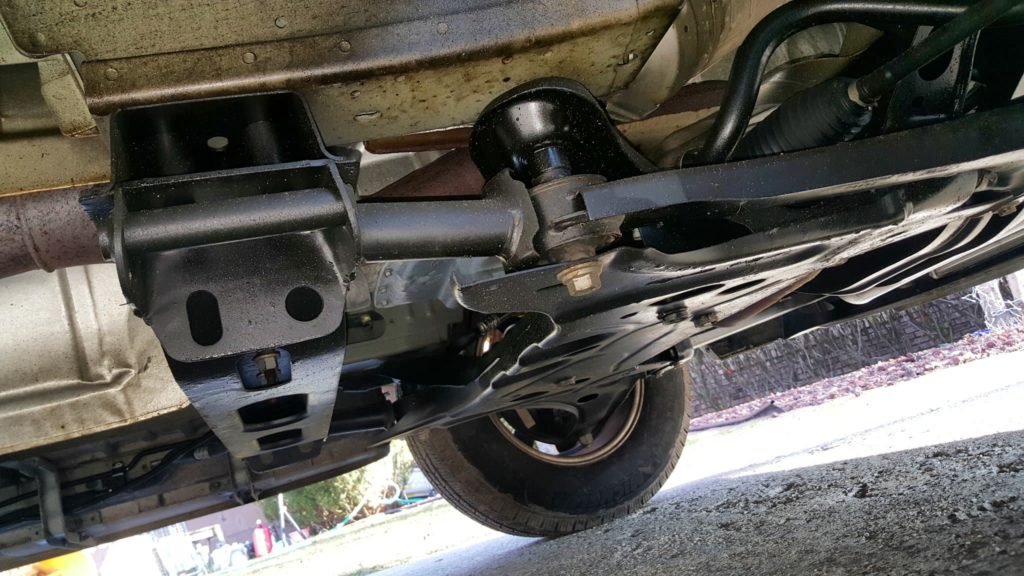
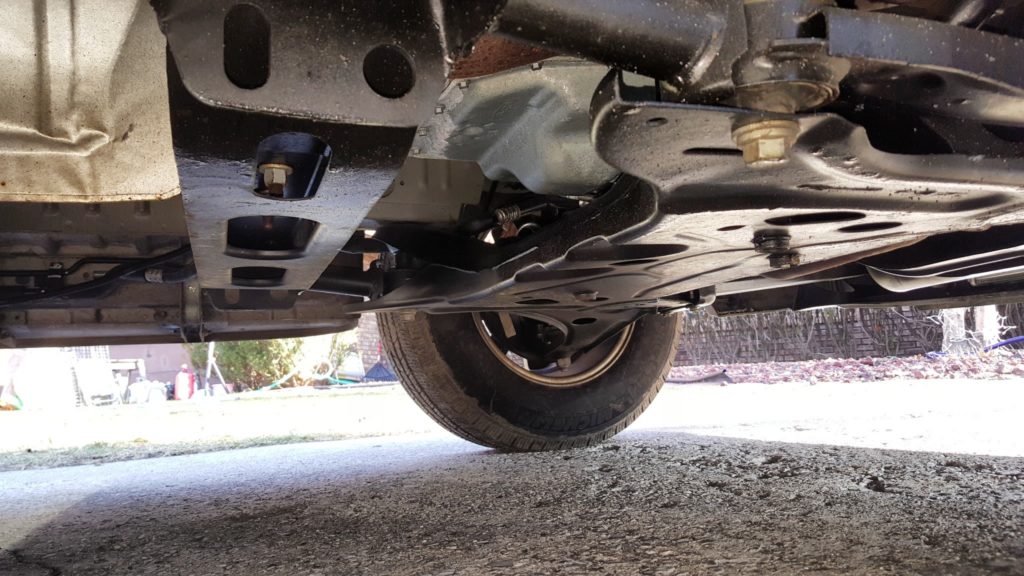
Look just behind the tires at the frame and you’ll see the eye rings that are part of the frame.  You can’t make this stuff up — Thanks Ford.  It drives me nuts when you look at decisions made in ivory engineering towers vs. real world needs.  Sure, let’s bury it under the van, make it hard to get to and pretty much ensure damage will occur if you actually use this to pull the van for whatever reason.

Now look how their factory winch attachment point lines right up with hitting the front radiator.  If you pull this at just about any angle where the recovery vehicle is higher than the van then the cable/strap is going to cut right into the aluminum radiator at the front.   In the next photo, you can see the silver aluminum radiator just above the lip of the bumper molding.

If you wanted to protect that radiator, you’d actually need a harness with something to push the attached cable lower to the ground – or fabricate another attachment method.   Maybe my 4″ drop hitch in my rear class IV receiver would be low enough to tie onto vs. my truck’s winch or front recovery hooks.  … Something for another day.  I didn’t buy a new van to have to worry about something people in rural areas need regularly in the winter.   They should have been in the front.


2/11/2018 Update:  The traction mats bailed me out again when I got the van stuck on ice in our yard while turning around.  I’ve come to realize the van does a fair job on the road but the tires are damn near useless on uneven icy surface,  With this van, it’s really handy to have four.  With only two handy, I could move the van forward and then get stuck, move the mats, move forward again, get stuck, etc.  I had to do the cycle about three times.  I think if I had all four handy it would have done the trick in one shot because I could have built up some forward momentum.  I now have all four stored together,  We’re nearing the end of Winter finally and I think I will keep all four in the van next year and need to find some kind of carrier bag to store them in.

Not Happy With EBLCL LED Upgrade for My Ryobi Worklight Either

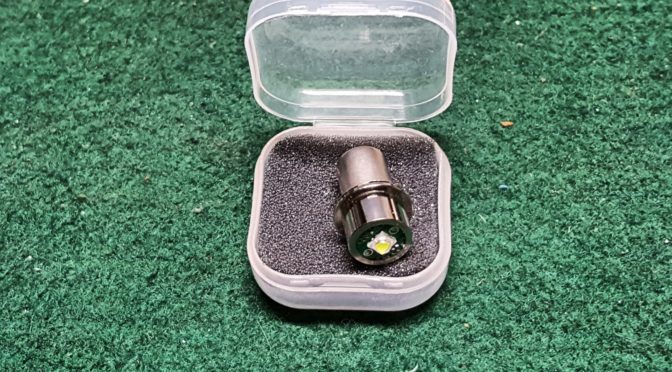
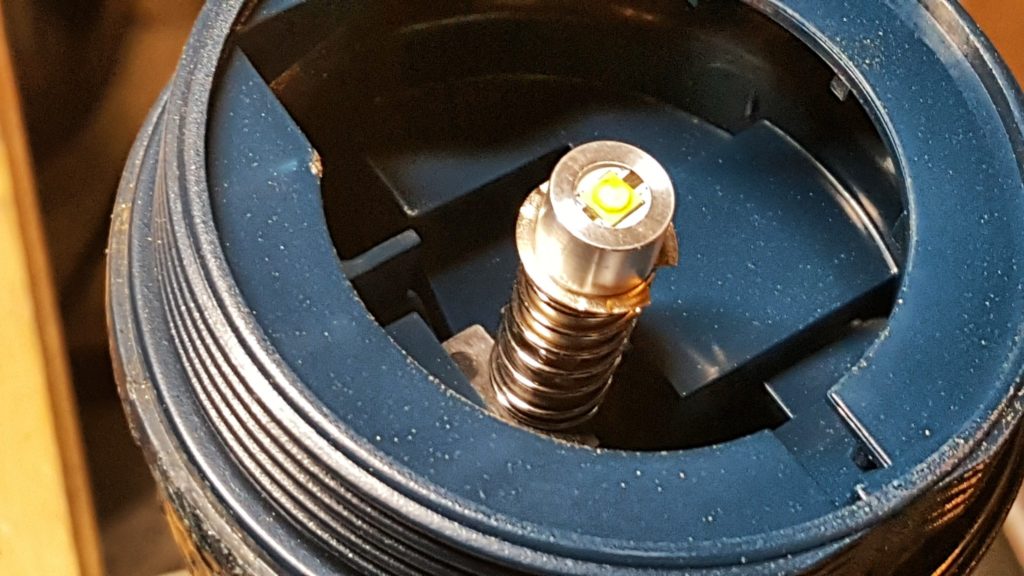
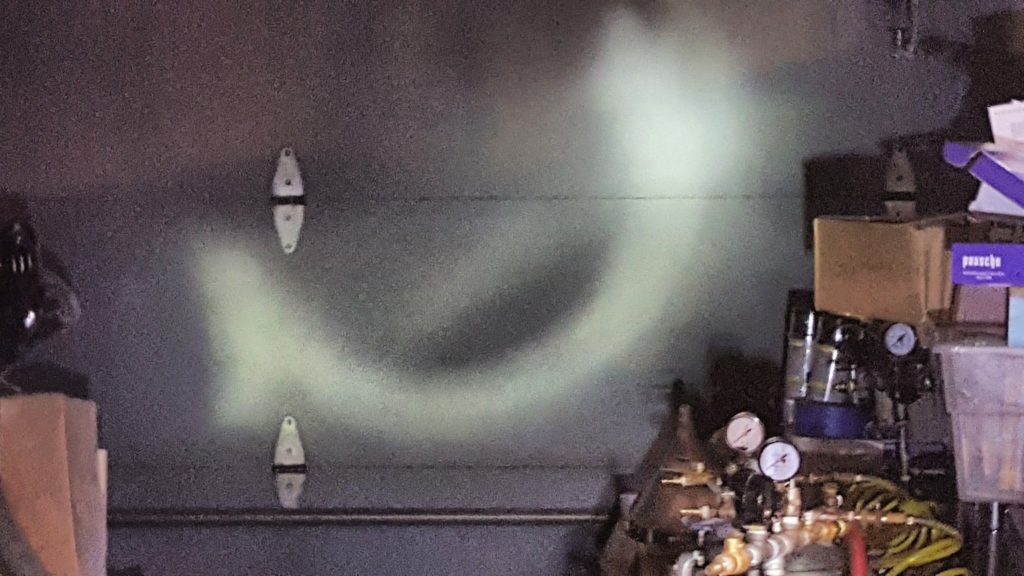
Okay, I ordered the EBLCL CE ROHS FCC PR P13.5S 18V 247 Lumen CREE XP-G2 S4LED upgrade for my 18 volt Ryobi worklight.  To make a long story short, like the Jomitop, it too throws an irregular crescent shaped light that I don’t like.  This unit is sold by a number of vendors on Amazon so buyer beware.

Here’s a photo of the EBLCL unit and the beam it projects:

I’m going to just leave this unit installed and look for a new worklight … I may even just put a replacement bulb in the unit.  I use these things quite a bit and I would rather have a decent wide area of light vs. these oddly shaped beams.

Bottom line, unless you like the shape of the beam shown above, I can’t recommend it.


If you find this post useful, please share the link on Facebook, with your friends, etc. Your support is much appreciated and if you have any feedback, please email me at in**@ro*********.com. Please note that for links to other websites, I may be paid via an affiliate program such as Avantlink, Impact, Amazon and eBay.


Not Happy with Jomitop P13.5S LED Replacement Bulb for Ryobi 18 volt Work Light

Okay, some guys sneer at the Ryobi power tools but I have gotten my money’s worth from their 18 volt drills.  I bought one of their 18 volt sets years ago and have two drills, an impact driver and a hammer drill that I use all the time.  One drill has done 3-4 decks and the other at least two.  I burned out one hammer drill a year ago and replaced it and the others are going strong.

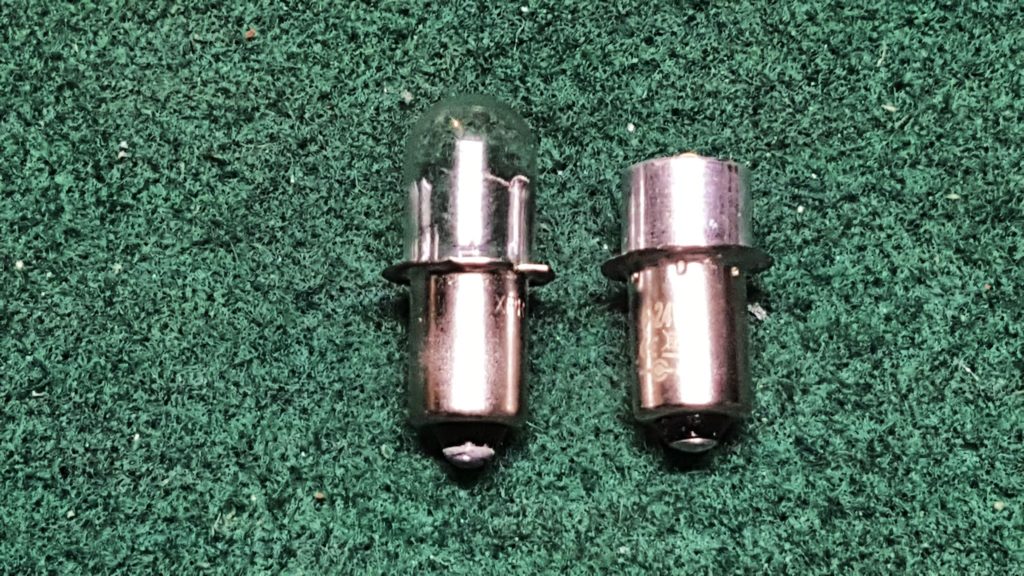
Along with the tools came an 18 volt work light that I have used a ton especially while working on cars.  I’ve replace the incandescent bulb probably at least three times over the years.  As luck would have it, I dropped the light the other day and busted the bulb.  Rather than buy another replacement bulb, I decided to move to an LED unit.

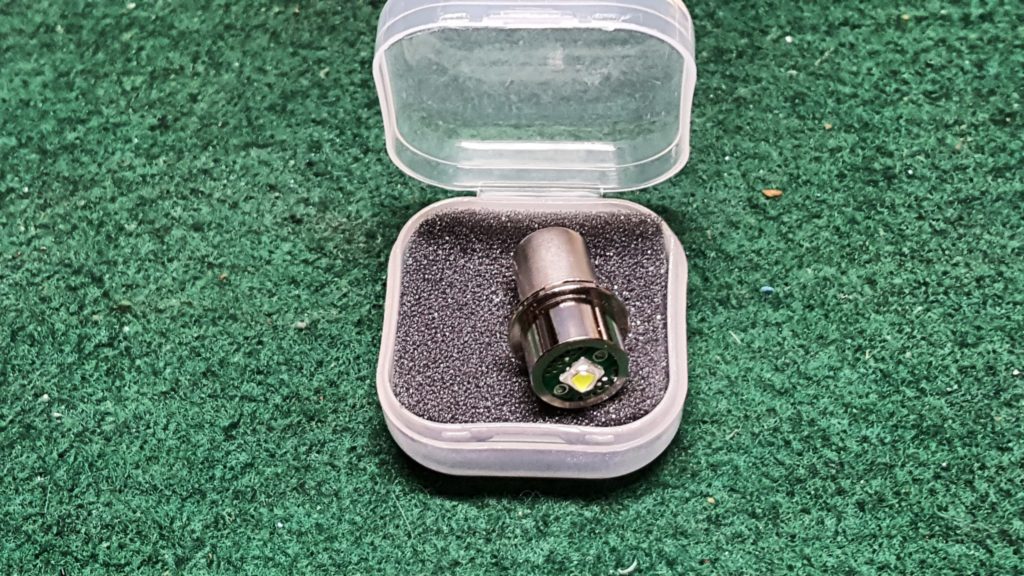
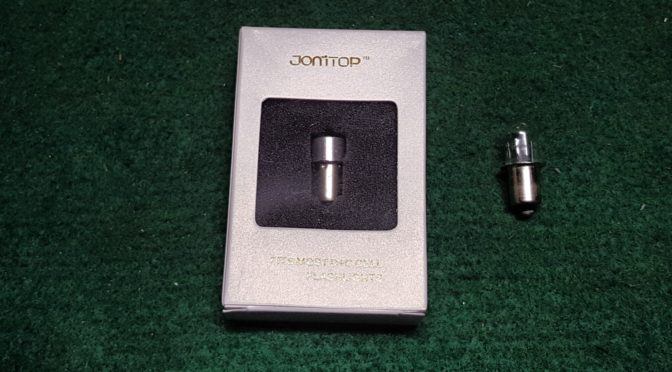
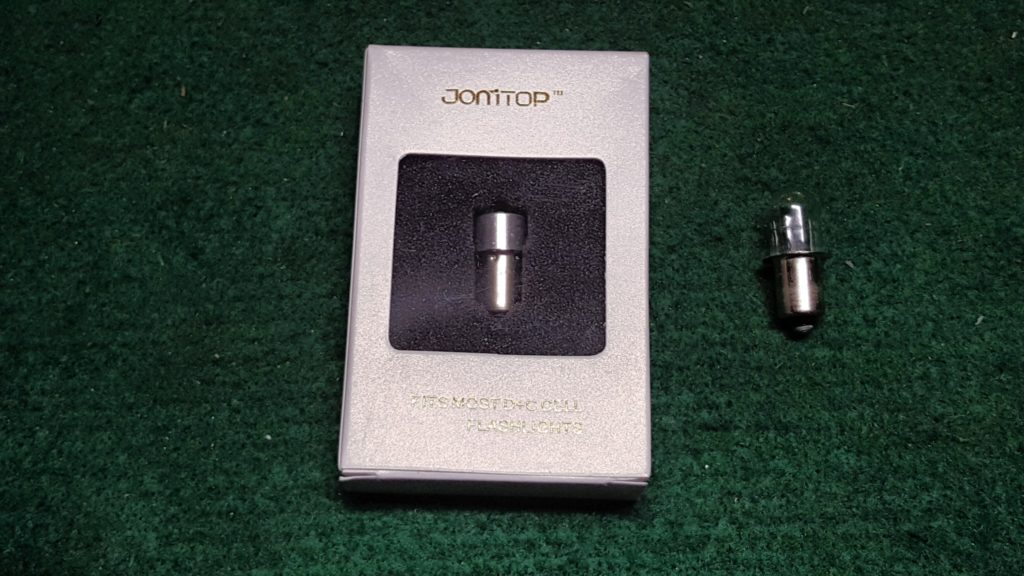
I did some digging and bought a Jomitop P13.5S from Amazon – two of them actually as I have two of the work lights.  Now I wish I could say the upgrade went great but the resulting light is a weird crescent shape – even when it is just the LED by itself with no lens or reflector.  Both LEDs did this.

I plan on returning these two units as defective and have ordered two more models from other sellers on Amazon.  So, for now, pass on the Jomitop P13.5S model.  I’ll post on what works later but wanted to get the honest review out.

I hope this helps you out!


If you find this post useful, please share the link on Facebook, with your friends, etc. Your support is much appreciated and if you have any feedback, please email me at in**@ro*********.com. Please note that for links to other websites, I may be paid via an affiliate program such as Avantlink, Impact, Amazon and eBay.


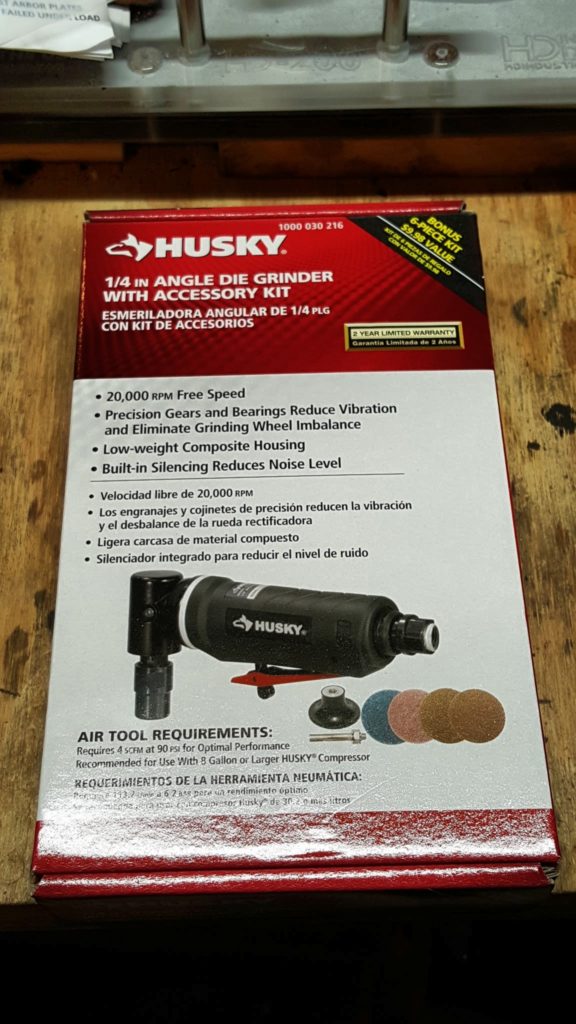
Husky H4230C 1/4″ Angle Grinder Does A Great Job

I use a lot of air tools for sanding and have been slowly upgrading them as stuff has worn out.  Some years back I bought a Harbor Freight (HF) model and the bearings wore out so I did some digging to buy a new one.  I tend to look at a combination of features, reviews and price.  In this case, I needed something local as I was in the middle of some work and couldn’t wait for mail order.

I decided to go with a new one from Home Depot – the Husky H4230C 1/4″ angle grinder.  The price was good and I could walk into my local Home Depot and pick it up.  30 reviews and 4.5 stars was good enough for me.  I really didn’t want another HF tool as they tend to use a lot of air in my opinion.

The Husky is light, compact and like every other angle grinder on the market.  The one thing I immediately noticed is that it didn’t take much air to operate.  Even at 60PSI the thing was clipping right along and at 90PSI it had plenty of speed and torque to turn the 3″ sanding flap and surface prep discs I use.

By the way, I need to do a lot of uneven surfaces and a trick I know is to use the 2″  R-type quick connect mandrel but actually use 3″ discs.  You can save a ton of money by purchasing the discs via Amazon – don’t buy them at a retail store or you will pay a fortune.

I bought unit in August 2017 and have used it a ton with no problems at all.  I need to keep my airlines clean and do not run an inline lubricator so I do add a few drops of air tool oil at the start of each sanding session – that is the only maintenance that I do.  All in all, I am happy with the purchase and thought I would pass along the recommendation.

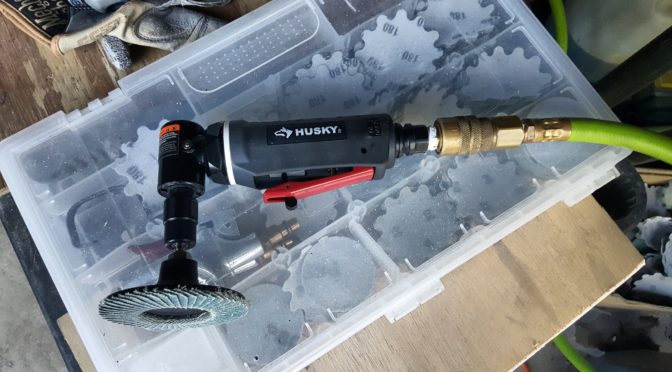
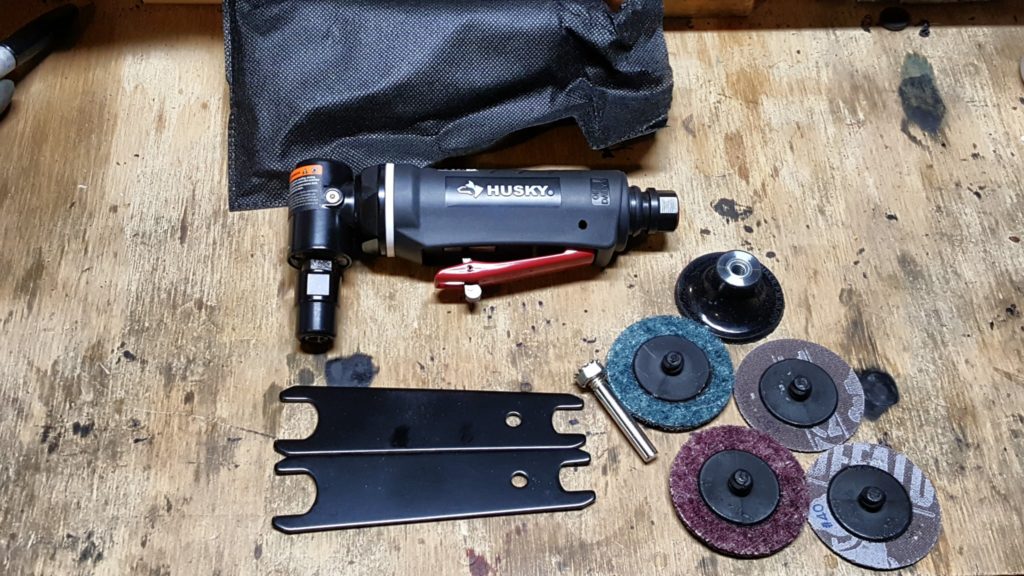
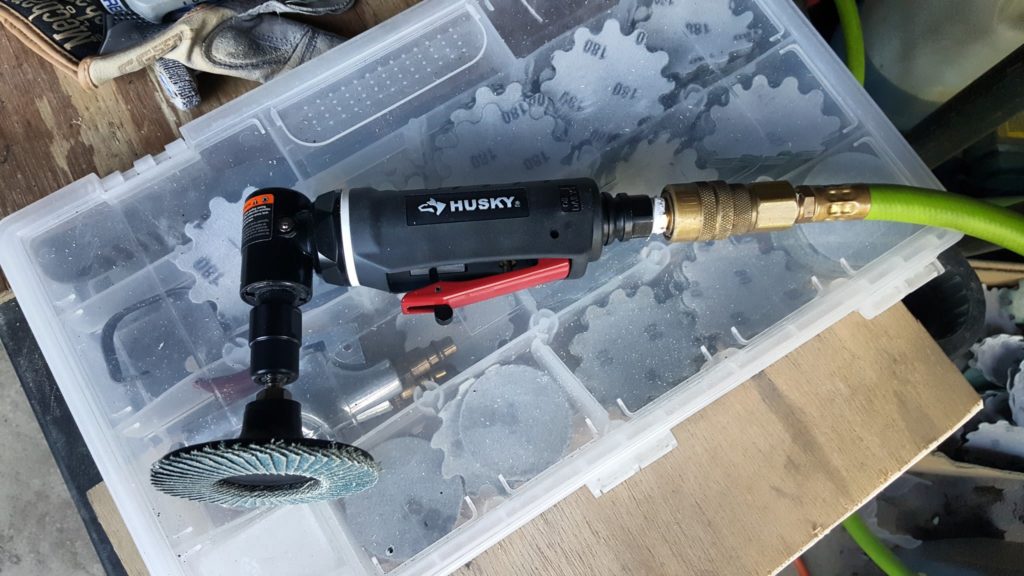
Here are some photos of it including next to the seized HF unit that went in the trash after I tool the photos:

I hope this helps you out!


If you find this post useful, please share the link on Facebook, with your friends, etc. Your support is much appreciated and if you have any feedback, please email me at in**@ro*********.com. Please note that for links to other websites, I may be paid via an affiliate program such as Avantlink, Impact, Amazon and eBay.


How to Connect a Paasche H Air Brush to Your Shop’s Compressed Air System

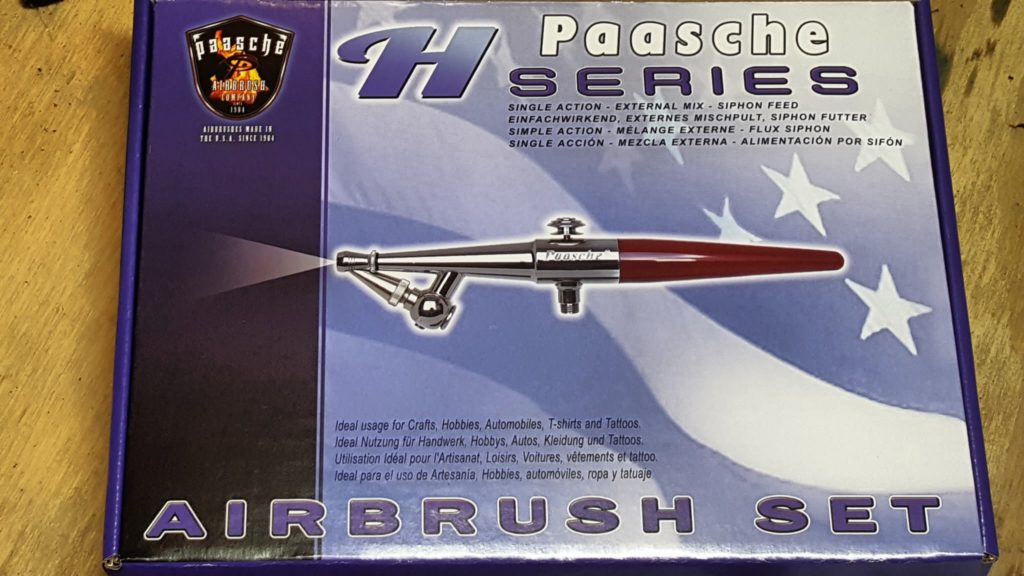
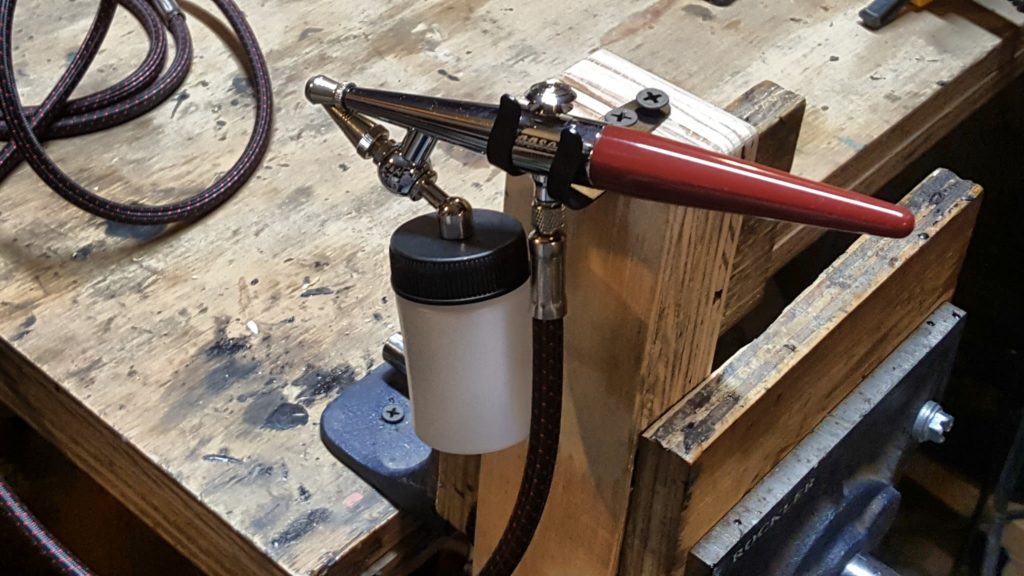
I recently purchased a Paasche H-series kit from Amazon as I wanted to get a quality air brush.  I was surprised at all the confusion around how to hook up the H to a standard shop air system and want to clarify matters.

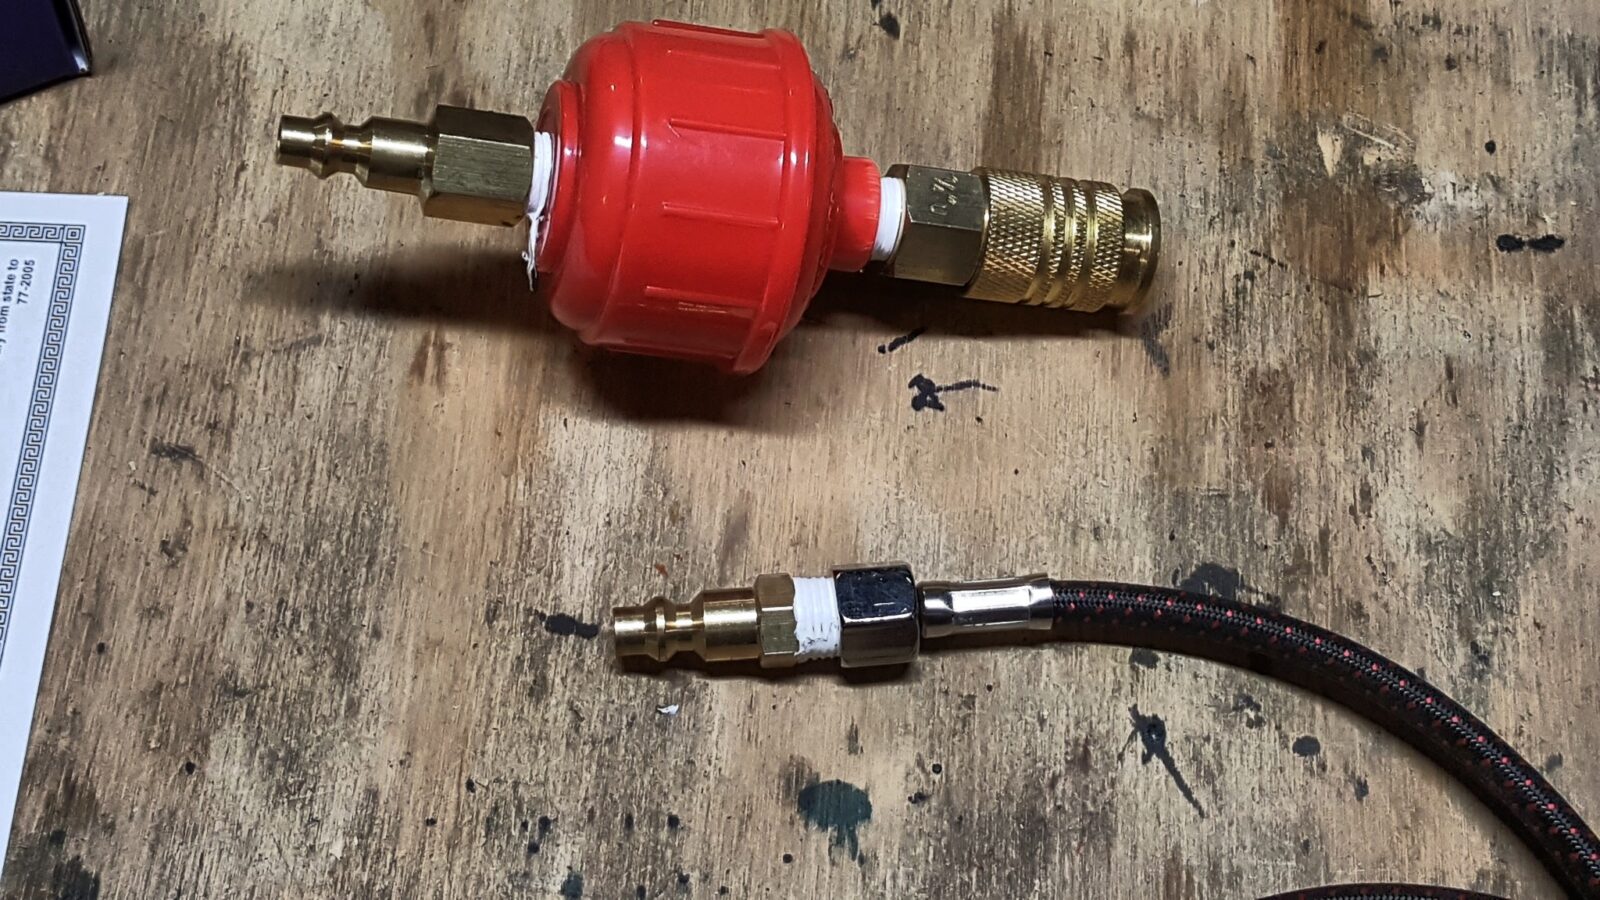
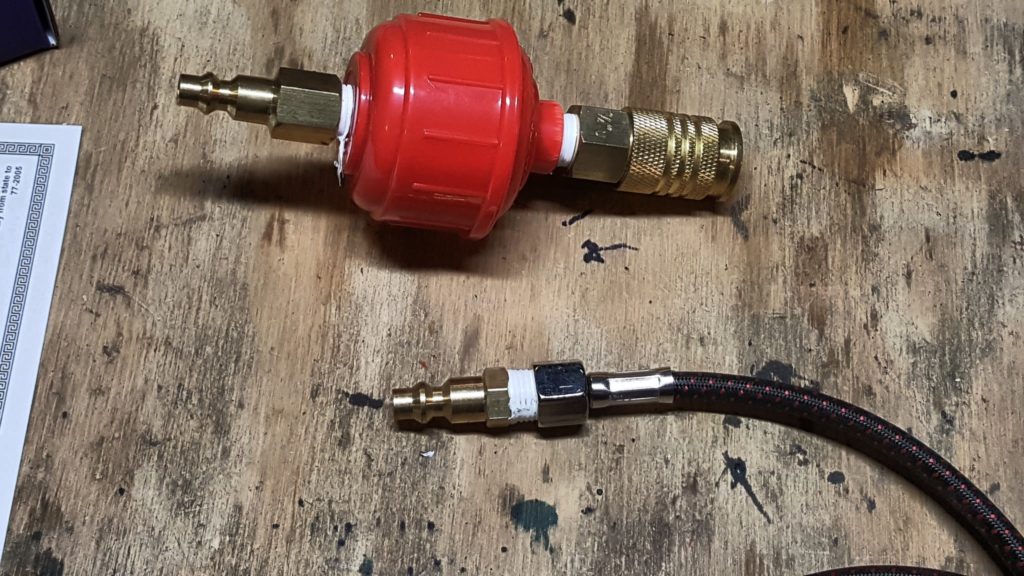
Now the set comes with the airbrush, tips, bottles and an airline.  The airline is the key – on the end that connects to the airbrush, it is 1/8″.  The other is 1/4″ female.  just take 1/4″ air fitting with male thread, apply several layers of PTFE tape to the thread and then screw on the hose and tighten – done.  That’s it.

The red assembly above the plug is a cheap generic inline disposable filter.  I simply have quick connects to make it easy to move my airbrush around to where I need to work in my shop.  I run a high-end filter system in my shop and still put a screw in filter just before the air brush’s air line just to play it safe.  If you run your air brush off your home compressor, you definitely need to do this and the more contaminated your air is, the faster the filter will foul out.  If you have any questions about the quality of your air, shoot a blast at a test mirror and see what all spatters on it – you’re liable to see a ton of goop if you are not filtering out water and/or have a lubricator in the line.

If you do have a ton of contaminants and plan to airbrush a lot, then invest in a good filtering system.  There are tons of them out there.  At a minimum, considering really good disposable filters such as a Motor Guard M30 for 1/4″ lines (technically it uses disposable cartridges inside a permanent housing).  Worst case, just make sure you have the disposable filters installed and change them regularly.  If you are still getting water and other junk when you spray, then decide how to either filter your lines or buy a dedicated airbrush compressor.  For me, it was a no brainer given the air system I already have and the disposable filter is there “just in case”.

At any rate, this is a great airbrush.  Having trashed numerous Harbor Freight airbrushes over the years, this is a wonderful step up.  I hope this helps.

5/2/19 – I lost the little trigger button and was very happy to find that the Paasche website has every replacement part one would need.  The price was reasonable and they shipped quick.


If you find this post useful, please share the link on Facebook, with your friends, etc. Your support is much appreciated and if you have any feedback, please email me at in**@ro*********.com. Please note that for links to other websites, I may be paid via an affiliate program such as Avantlink, Impact, Amazon and eBay.


Boy does this make splitting kindling easy

I grew up helping my dad cut trees, stack firewood, and splitting kindling.  Of the three, kindling always took the most time – trying to get the wood to balance and then hitting it with the axe.  When I got older and had a splitter, I would use the splitter to crack up a load of kindling while I was at it as well.  That worked great if I had the splitter running but if I needed something right away, out came the axe and the balancing act.

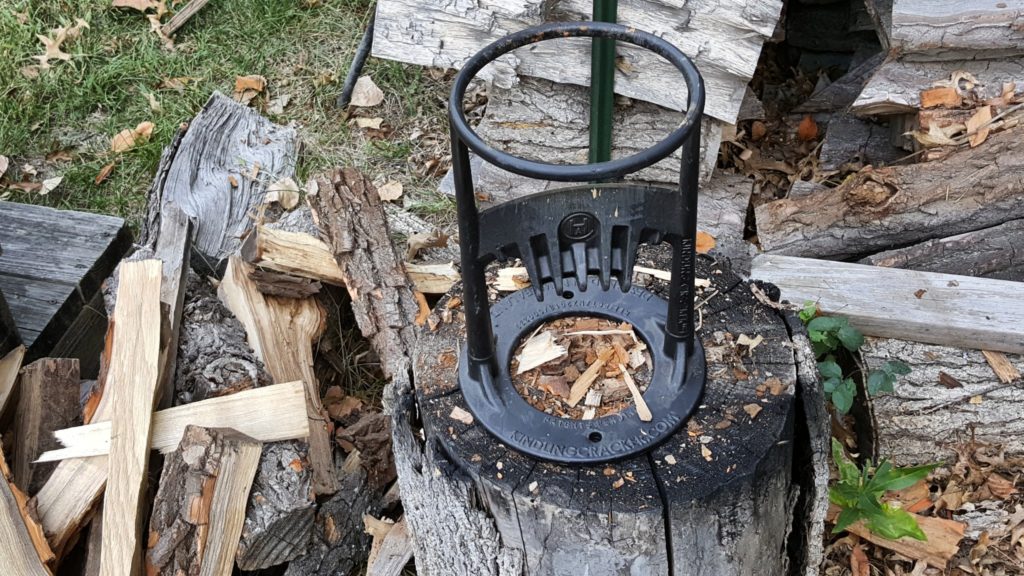
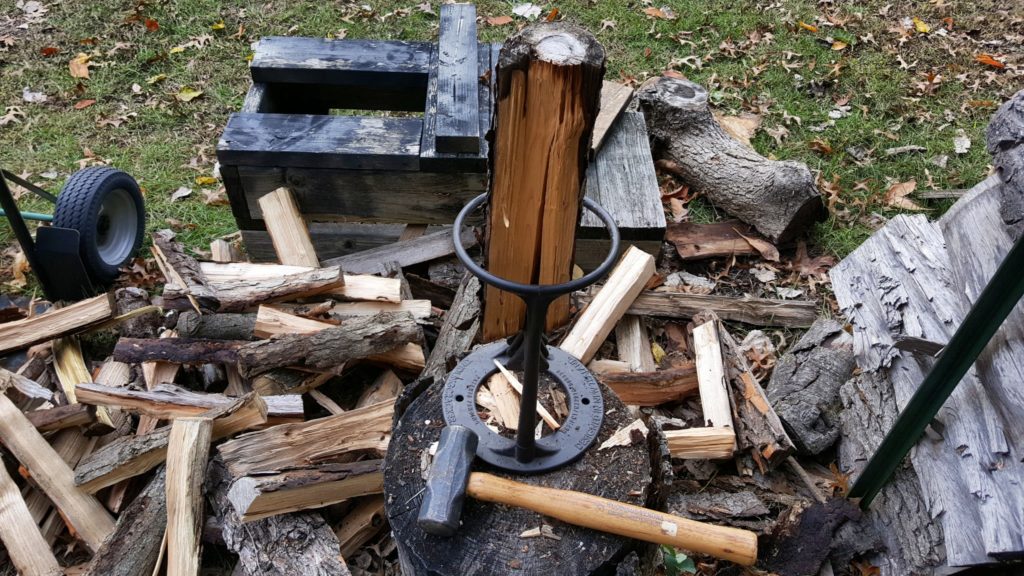
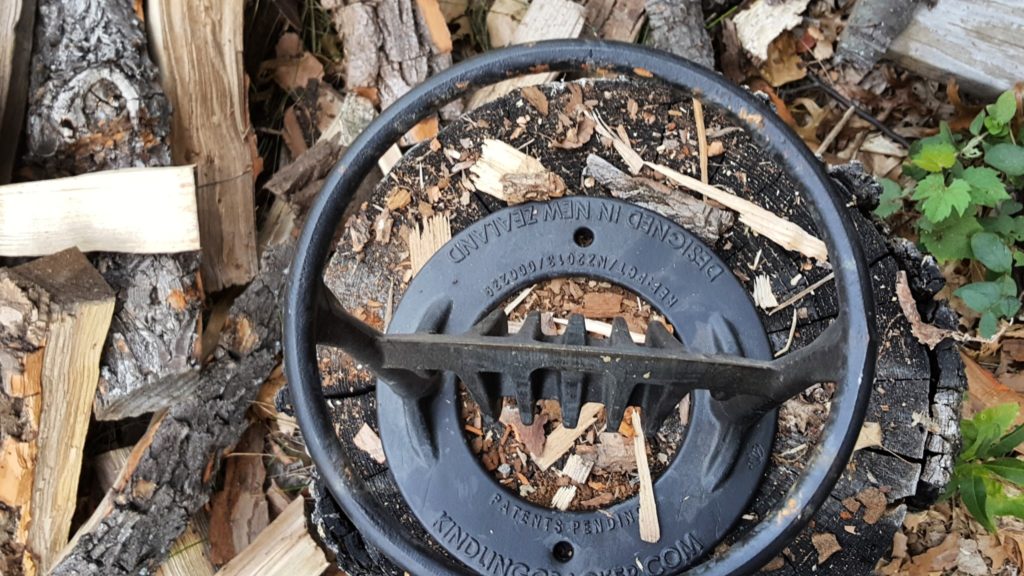
I was reading through some stuff over the summer and heard about something called a Kindling Cracker from Australia.  It looked gimicky so I read up on it and the thing actually works — it gets great reviews actually.  Basically you set the piece of wood to split on this cracker that has the blade facing up side the unit and hit the wood with a small sledge, foundry hammer, etc.  What I especially like is that you can get the kindling down to very small sizes – I could never do that with an axe or hatchet — at least not easily.

It works great!  You could screw it into something if you wanted but I cart it around to where I want to crack the kindling at plus it doesn’t get left out in the winter.  I think this thing is great and have bee building up a pile of kindling for the winter and also my BBQ.


The ring diameter does limit the size of log you start with but its easy enough for me to find wood that will fit – I have several cords to choose from at any given time.  I did learn quickly on to pick small enough pieces of wood so they would not jam during splitting but that was another easy lesson learned.

Because it is steel, it holds the logs quite nicely and I find I can get nice thin kindling because you can set the wood right on the blade to start however you want.  The above is my actual chopping block.  I keep the Kindling Cracker in my garage where it is nice and dry and take it over there when I want to split wood.  It’s very convenient, safe and effective – I’m very happy with it.


If you find this post useful, please share the link on Facebook, with your friends, etc. Your support is much appreciated and if you have any feedback, please email me at in**@ro*********.com. Please note that for links to other websites, I may be paid via an affiliate program such as Avantlink, Impact, Amazon and eBay.


Did you know most consumer vehicle undercoatings are rip offs?

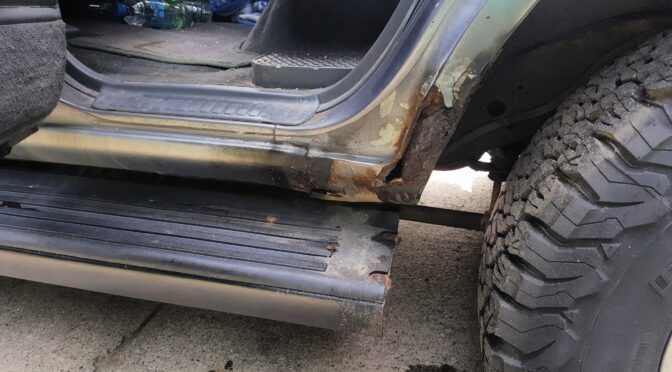
We recently bought a new van and I wanted to undercoat it so it would last — being old school that was the first thing I thought of anyways.  The next was to do some searching around with Google about undercoatings so I could get the best product to use.  You know what I found out?  When most cars and trucks are made, the manufacturers do a ton of stuff now to prevent corrosion straight from the factory – so much so that you may find it hard pressed to find a shop that even does undercoating/rust proofing any more.  The car companies have improved their alloys, finishes and even learned not to leave exposed lips for mud to settle in to and sit – think about how the old wheel wells had the reinforcing lip all the way around that dirt/mud could sit in and hold salty water or even just water against the metal – of course it would rust.  So now you look in to wheel wells and through one method or another that flange is either not there or protected.

So I want to share some things I learned.  First, rubberized spray on undercoatings often caused more problems than they solved.  Now, you may be wondering why – I know I did.  You see, it is a spay on finish the adheres to whatever surface it can stick to – paint, rubber, metal, dirt, etc.  Over time, that undercoating develops small holes from stuff hitting it and then a pocket starts to form, salty water enters in and is held against the very steel it is trying to protect!  So to make a long story short, after reading tons of posts about the various spray on rubber undercoatings one must conclude they are not worth investing in any longer.

Second, rust proofing sounds great but there really is no such thing.  You are delaying the inevitable if we are talking about steel and salt water – eventually something is going to rust.

Okay, enough doom and gloonm, let’s say you live in a state, like Michigan, where they salt the heck out of the roads in the winter.  What do you do to protect new cars even more than what the factory did *or* you want to try and save older vehicles even if they have started to rust?  The answer, interestingly enough, was developed long ago – Fluid Film.  Eureka Chemical Company, yes that really is their name – started in the 1940s when they developed a product with an unlikely source to help the Navy prevent corrosion – the not-so-secret ingredient is lanolin from sheep. If you want to read the whole story, click here.

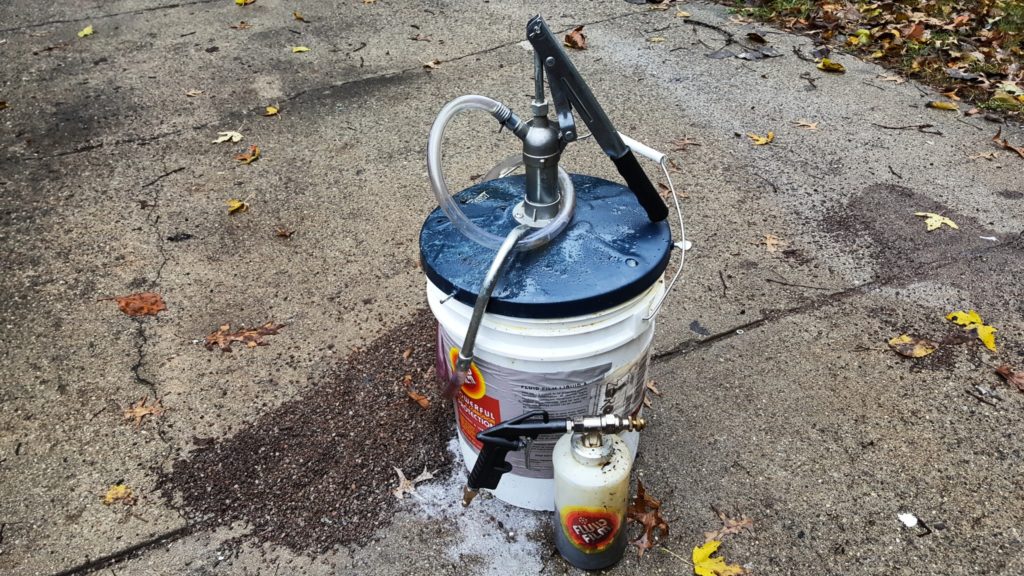
Let me cut to the chase – the reason this stuff works is that it oozes and seals itself if nicked.  DoD, NASA, Coast Guard, Delta and others are still using this stuff!  After doing a lot of reading, I bought a five gallon pail off Amazon, an applicator gun and a pail pump dispenser.  They sell an aerosol can version but I really don’t have much experience with it but am a bit leery of it because the liquid is so thin that comes out compared to what I can spray with the applicator gun.

This is my second year using it on our vehicles and it almost makes it a few months before you can tell it has dried out / faded.  In other words, it doesn’t quite make it the whole winter. I get rid of looser dirt by spraying it down, let it try and go to town spraying this stuff on everything – even the exhaust as it will just bake off after the first time it gets good and hot.

Honestly, I think the FuildFilm helps – our newest car after our van is a 2002 Camry and I spray the heck out of it and our other older cars (the oldest is a 1992 Corolla) and my old 1996 Land Cruiser.  I go through about a quart per car/truck liberally applying it real thick all over the under carriage.  I also spray door hinges, locks and hood latch.  The stuff smells funny for the first day or so but seems to really do the trick.  I just finished putting it on our vehicles for the second year.  I’m about half way through the five gallon pail so if you want to test it out some, you could start with a gallon pail – that would do 4-6 cars or trucks depending on how thick you apply it.

So, thought I would pass along what I learned – don’t bother with rubberized undercoatings and definitely check out FluidFilm.

Note, my local Autozone also sells the below aerosol cans.  I really do not know how long it will protect what you spray it on.  It is way, way thinner than the stuff that comes in the pails.


If you find this post useful, please share the link on Facebook, with your friends, etc. Your support is much appreciated and if you have any feedback, please email me at in**@ro*********.com. Please note that for links to other websites, I may be paid via an affiliate program such as Avantlink, Impact, Amazon and eBay.


My Welding Helmet is an Antra AH6-260-0000 Solar Power Auto Darkening Welding Helmet

A few guys who read my blog post about assembling my SWAG press brake asked about my helmet.  It’s an Antra AH6-260-0000 Solar Power Auto Darkening Welding Helmet that I bought in October 2014 according to my records.  My old helmet died and would no longer automatically switch on and off so I did some digging.  These days I pay a lot of attention to reviews on Amazon and this helmet got great reviews.

At this time, October 3, 2017, the helmet has an amazing 761 reviews with a score of 4.5 out of 5 stars.  That score speaks volumes right there.  I’m very happy with mine and have never had a problem – I use it with my Millermatic 211 MIG.  It’s sensitive enough and switches very fast – I don’t see any flash at all plus it turns off fast which is a plus when I am doing lots of small quick welds on sheet metal.

The viewing port is good sized at 3.86 x 1.73″ and the shade can vary from 4/5-9 and 9-13.  On the low end it could work with plasma if you really wanted it to and the upper end of the scale makes it suitable for TIG and MIG welding certainly.

I’d also tell you that it is very comfortable.  It’s fairly light and the headgear does its job plus has a generous sized sweat band.

Now there are two real important things for me with a helmet and this has both – it must have a solar cell and battery backup plus the lens must change fast.  The reaction time is a very important safety matter that a lot of guys do not realize.  If a helmet changes slowly then damage to the eye due to arc flash accumulates.  The Antra is rated to change in 1/25,000th of a second.  That is pretty darned fast and like I said, I have never seen a flash.  I trigger my MIG, the arc starts and bang – the lens is dark.

My last comment is that you can get spare parts for it too.  A lot of helmets do not have anything and you are more or less buying a disposable unit at that point. 

So, if you are looking for a welding helmet, I sure recommend this one after using it for three years with my MIG.

By the way, to protect it, I bought a Raider BCS-88 helmet bag as my shop is dusty.  I still store it in my welding cabinet but it stays a lot cleaner now.


If you find this post useful, please share the link on Facebook, with your friends, etc. Your support is much appreciated and if you have any feedback, please email me at in**@ro*********.com. Please note that for links to other websites, I may be paid via an affiliate program such as Avantlink, Impact, Amazon and eBay.