Tag Archives: Yugo

CNC Warrior’s M92 PAP Picatinny Rail Mount is Excellent!

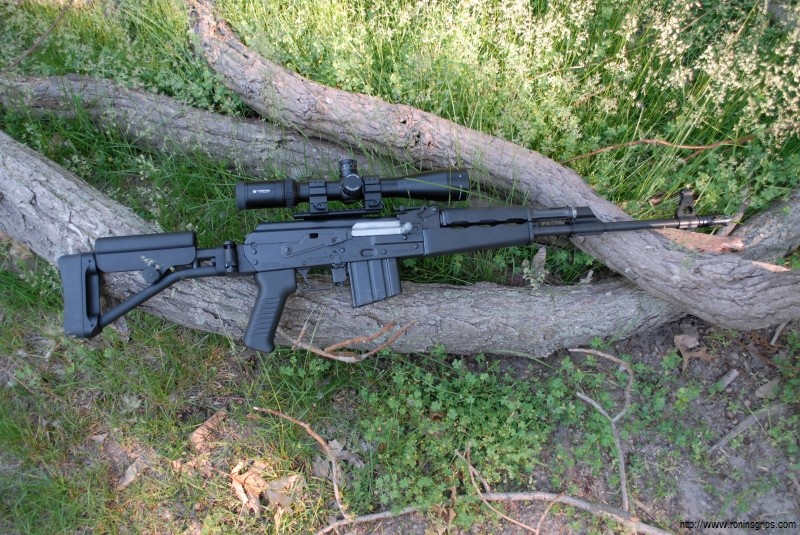
A M92 is screaming for an optic of some type.  My preference is a red dot and I run a Primary Arms M4 clone on my first rifle and will use a Vortex Sparc on this new rifle.

As some of you may know, I have a Stormwerkz rail on my first M92 that I custom built and it has served me well.  The only draw back with the design is that you install the button head screws from inside the dustcover.  Because of this, you will notice the bolt carrier does hit screws.  I have shot a ton of ammo – well over a thousand rounds – from this rifle and the bolt carrier shows no harm but you do see the scuffed screws.

When I heard that CNC Warrior had a mount, I had to take a closer look and sure enough, they had a different approach.  Their screws go through the rail and screw into the thick steel portion of the dust cover that runs to the hinge.

I talked to Denny, the owner of CNC Warrior, about my plans and he recently switched over to a four hole model that will give a person more options when installing the rail to work around the very hard spot welds — basically you just need two screws so with four holes, you pick the two you like that enable you to miss the welds.

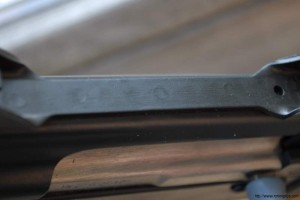
If you look closely at the next photo, you will notice small circular indents in the steel – those are the spot welds that are harder than the surrounding steel and can be an absolute bear to drill through.  Thus, with CNC Warrior’s new four hole rail, you can slide it back and forth until you get two holes that clear these welds.
DSC_0030

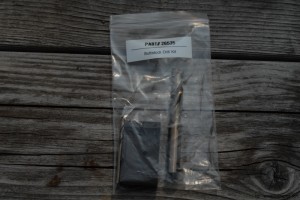
Please note that Denny sent me one of each – the old two hole rail and the new four hole rail – so I could show you folks the difference and he did not have time to have it finished so it is bare metal in the photos.  I used Molyresin to finish it flat black but that is not something you will need to worry about.  Going forward, when you order his mount you’ll get the four hole rail section already finished black.

DSC_0027 DSC_0028 DSC_0029

Included with the picatinny rail is their installation kit and instructions that makes installing it a breeze.  In a future blog post I’ll show you just how easy installation is and how you can do it with a hand drill and some cutting oil.

The rail is on their website at:  http://www.cncwarrior.com/ProductDetails.asp?ProductCode=26454


If you find this post useful, please share the link on Facebook, with your friends, etc. Your support is much appreciated and if you have any feedback, please email me at in**@*********ps.com. Please note that for links to other websites, I may be paid via an affiliate program such as Avantlink, Impact, Amazon and eBay.


CNC Warrior Folding Arm Brace for Zastava M92 PAP

One of the parts I knew I wanted was the folding arm brace from CNC Warrior.  This essentially gives you additional support to either fire the pistol with one hand or to even shoulder the weapon comfortably if so desired.

Now the ATF has reviewed and approved the arm brace as not being a shoulder stock.  Each arm brace that CNC Warrior ships includes a copy of the ATF letter that says it is not a stock and that attaching it will not make a pistol a SBR.

This stock is a joint design effort between Chris Bonesteel, of Bonesteel Arms and CNC Warrior and is very nicely made.  It has a very strong hinge mechanism and is a breeze to install.

When I took the assembly out of the box I immediately noticed how well made it was.  I recalled a talk I had several years back with Chris where he worried about some folders being weak and this design reflects that both he and Denny at CNC Warrior wanted to make a strong one.  The attention to detail and fitment are very apparent.  Hands down, this is my favorite set up that I have seen for the M92.

The following are photos of the brace for people who like to see details:

DSC_0013

DSC_0014

DSC_0015

DSC_0016

DSC_0017

DSC_0018

DSC_0019

The following photos shows how nice brace marries up to the back of the receiver plus the quick release sling hole but it has not been attached yet.

DSC_0021

DSC_0025

It comes with the mounting screw you will need and easy to follow instructions:

DSC_0035

I highly recommend you buy their installation kit.  It comes with the drill bit and mounting jig to make this a breeze:

DSC_0036

In a later blog post, I’ll show you just how easy the installation was. I kid you not, if you have a hand drill and their installation kit, you can do this!!


Note, I have to buy all of my parts – nothing here was paid for by sponsors, etc. I do make a small amount if you click on an ad and buy something but that is it. You’re getting my real opinion on stuff.

If you find this post useful, please share the link on Facebook, with your friends, etc. Your support is much appreciated and if you have any feedback, please email me at in**@*********ps.com. Please note that for links to other websites, I may be paid via an affiliate program such as Avantlink, Impact, Amazon and eBay.


Added RS Regulate Mount and Vortex HS-T Scope to the Zastava M77

I installed the RS Regulate AK-310 base and AKR top rail in preparation for the new beautiful Vortex HS-T 4-16x44mm scope the folks at Vortex helped me select.

The RS Regulate system is genuinely impressive. By installing the bottom rail, you then have options about the front to back location of the AKR rail as well as left to right. If you wanted to, you could install a shim if you needed even more vertical adjustment on one end or the other to compensate for a poorly placed side mount on the rifle.

The only hangup installing the AR-310 base was a poorly formed rivet with a protruding portion of the head that the base was hanging up on. I ground that portion flush and then used Brownells’ Oxpho blue to touch it up. When steel is freshly ground, I apply the Oxpho cold bluing liquid with a Q-tip and the steel instantly turns black. I let it sit for about 30 seconds and then wipe it off and apply oil.

The AK-310 base slides on like any other ComBlock side mount but it has a very nice cam lever and an adjustable bolt on the bottom to get the cam lever nice and secure. Once I got rid of the protruding rivet, it slid right on and then I adjusted to bolt until it was nice and snug when I flipped the lever.

The AKR looks like a reverse picatinny rail on the bottom and interlocks with the rail top of the AK-310. I had to move the AKR all the way to the front to compensate for the M77’s rear mounted rail. The AKR is held to the AK-310 by 4 screws in grooves. The beauty of this is that you can really dial in the centering of the scope. I was able to get the AKR exactly centered over the M77. Now, once you have it located, they give you two staking pins to drill and install to permanently locate AKR. I have held off doing that I may need to move it around some but went ahead and applied blue Loc-tite on the screws.

With the rail centered and ready to go, I turned my attention to the HS-T scope from Vortex. This is one heck of a nice scope. I opted for the MilDot reticle and a 44mm objective to ensure I cleared the rear sight leaf. In hindsight, I could have gone with a 50mm objective as there was plenty of clearance.  I own a Vortex Sparc II red dot and liked it.  This is my first actual Vortex rifle scope and I am very impressed.

I used 30mm medium rings to mount the Vortex. They are extremely beefy tactical rings from UTG. You may laugh but I have had very good luck with their rings. The only shortcoming this time is that they were so long (from front to back) that I ate up some precious real estate for sliding the scope forward. It all worked out in the end but for awhile I wasn’t sure if I could get the eye relief right but I did.

There was some give and take as I moved the scope rings and the AKR around. The photo above shows the AKR sitting in the last groove.  I wound up actually having it overhang by one by the time it was all set.

So, the scope lines up beautifully with the 1″ cheek riser on my Ace skeleton stock. I have heard that the Vortex scopes have good optics but that is an understatement – you have to look through one to realize how good it is – very bright and clear. Couple that with arguably one of the best no questions asked warranties in the industry and now you know why I bought it. I did a ton of research before doing so as well.

Now, the Yugo M77 is complete. It has our traditional front handguard set plus our custom Bulgy ARM-9 grip that I really like.

Only one more thing to do now … find the time to take this hammer shooting with multiple brands and loads of good ammo to stretch its legs.

In the very near future, I will swap out the medium rings for a low offset AR mount so I can get the scope closer to the center of the bore plus move the scope just a bit more forward and that will be a post for another day.

One final comment, Ace Riflestocks emailed me the other day and their modular Zastava adapter is back in stock.  If you are looking for one, I would recommend checking them out as well as Desert Fox.


If you find this post useful, please share the link on Facebook, with your friends, etc. Your support is much appreciated and if you have any feedback, please email me at in**@*********ps.com. Please note that for links to other websites, I may be paid via an affiliate program such as Avantlink, Impact, Amazon and eBay.