Category Archives: Tools

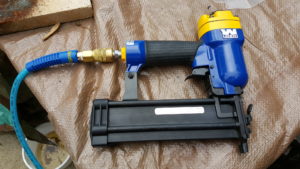
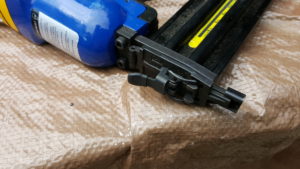
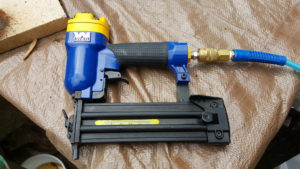
Review: Wen 61720 Brad Nailer Works Great and is VERY Affordable!!

Hiya folks, my hands shake due to what is known as a hereditary tremor.  When I try to do fine work it often gets even worse and I hate trying to drive fine nails/brads.  A number of years back I bought a Harbor Freight brad nailer that broke in 2016 after a few years of very light use (read that to mean the quality was very disappointing from the get go).  So, rather than play Russian Roulette with Harbor Freight, I went to Amazon and started digging on brad nailers and reading the reviews.

I came across the WEN 61720 3/4-Inch to 2-Inch 18-Gauge Brad Nailer.  It is both their best seller and with 926 reviews, it has 4.7 stars.  Folks, when you have that many reviews and that kind of score, it says something.  If a product sucks, reviewers can go back in and change the score so I figured the quality must be pretty decent.  I paid $26.33 for it in May 2016 and now it is $19.34!!  Yes, the price actually went down.  But I tell you what, I have no regrets.

The Wen uses regular 18-gauge brads.  It came in a simple plastic case with a small tube of oil and instructions.  It even had the 1/4″ air fitting installed.  I’ve used Senco, Bostitch, Porter Cable and Harbor Freight brads no problem.  I bought a few variety packs of brads but most of my nailing seems to be 1″, 1-1/4″, 1-3/8″ and 1-1/2″ with this unit.  I have a bigger 16 gauge nailer that I use for longer heavier nails.


To make moving the nailer around easy, I have a 1/4″ x 50′ Amflo Polyurethane air hose on it with Milton fittings.  This hose is light and very flexible.  Even in the winter it has been great – I use it to put air in my truck tires when it is so cold that my rubber hoses are stiff.  By the way, if you want air couplers that hold up over time and do not leak – go with Milton.  They beat the beat the heck out of Harbor Freight and Husky.
I tend to run the tool between 60-90PSI depending on how hard I want it to hit the nail.  If you are working with really soft pine, it can really drive it in so I run a lower pressure, usually 60 PSI, in those cases.  I will drive a test brad and look at the results to decide if I need to adjust the pressure further or not.  Most of my work is with pine but I have also done some poplar as well as a bit of oak trim.

As with just about any air tool, be sure to lubricate it with air tool oil.  I don’t run inline oilers due to needing clean air for my plastic work so I simply put in a few drops when I start using the tool for the day.  I have used all kinds of oil and just stick with name brands.  Right now, I have bottles from ATS and others sitting by various tools.  I would recommend sticking with a name brand and one that is relatively light for use in nailers vs. thicker for impact wrenches (Lucas is an example of a heavier pneumatic tool oil).  Also, unless you have an inline oiler, a squeeze bottle with a spout really helps vs. a pour top that will make a big mess.  For guys getting started, the small bottle that comes with the nailer will last you quite a while – just be sure to use it!!  Don’t run the nailer dry.

My project the other day was to resurrect and old planter from my dad.  I took the screws off and each shelf that was stapled together had become very loose.  I put a few drops of air tool oil int he Wen’s inlet fitting, selected brads that were a hair shorter than the wood I was putting together, and then drove 2-3 of the small 1-1/4″ brads into each individual slat to stabilize it.  I then reassembled the plant stand with new screws, stained it with Minwax Provincial Stain and applied 4 spray on coats of satin spar polyurethane on top.  The project turned out great.  It’s rock solid and it’s a little something from my dad that reminds me of him.

So I have driven probably at least 500 brads with this over the past year without one problem of any kind.  The reliability is a huge plus as I hate having to mess with tools to get them to work.  I have no problem recommending this Wen brad nailer to you for relatively casual use – I do not use it in production.  I’d certainly buy it again – you can’t beat the combination of quality and price.


If you find this post useful, please share the link on Facebook, with your friends, etc. Your support is much appreciated and if you have any feedback, please email me at in**@ro*********.com. Please note that for links to other websites, I may be paid via an affiliate program such as Avantlink, Impact, Amazon and eBay.


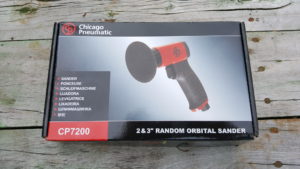
Review: Chicago Pneumatic CP7200 Mini Orbital Sander is Solid!

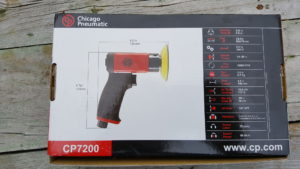
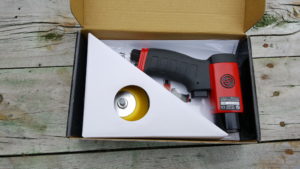
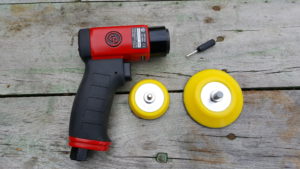
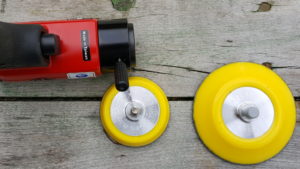
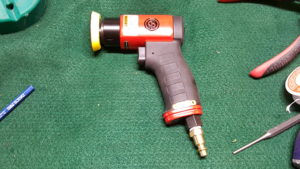
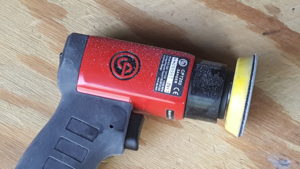
Well folks, I bought three Jet small dual action sanders from a closeout tool shop 4-6 years ago and have to replace the little valve on them several times each.  This year when two failed, there were no little valves to be found so I decided to go with a name brand.  I did this for two reasons – solid quality and replacement parts.  These get a ton of use in my shop.   I did some digging around and ran across the CP7200 that has a nice grip, variable throttle, integral regulator to adjust the speed and both a 2″ and 3″ hook and loop pad.

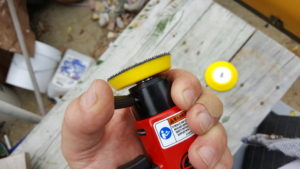
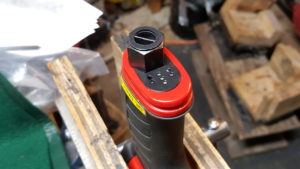
For me, the backer is really important.  I need to sand curved shapes, constantly switch grits of sandpaper and those backing pads do wear out.  I can’t tell you how many I replaced on my Jet sanders and not all of them are good quality.  I made sure this unit used a standard thread (1/4×20) so I could readily find replacement backers.   Note the little tool in the next photo, it slides into a key hole so you can lock the head and screw the backer in securely.  Many of these little sanders are this way.  I have a tool glued into a length of fuel hose to find it easier, I’ve used little philips head screw drivers, etc.  Bottom line is that you need to lock the head in place so you can thread on the backer and tighten it down.

Any air sander uses a lot of air – let’s just be up front about that.    The manual recommends 16.6 CFM @ 90PSI.  That means you’ll want to have a decent compressor and need to figure out how much you want it to run vs. you waiting.  In other words, using this with an air compressor intended for an air nailer is going to suck.  The little compressor will not be able to keep up and it’s tank is way too small.  I have a Ingersoll Rand 2340 with a 60 gallon tank and the pump can deliver 14.3CFM at 90PSI and fills the tank to 175PSI.  This that if I am running the tool wide open non-stop, I will use air faster than the compressor can refill the tank.  However, it is a big tank at an even higher pressure plus I sand and stop, sand and stop over and over.  It really does not tax my compressor at all.

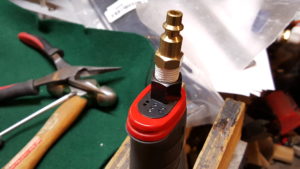
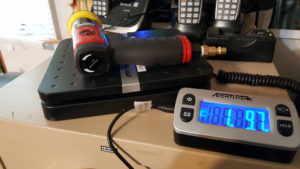
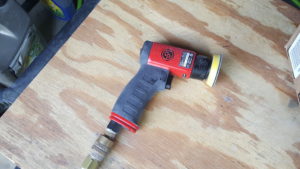
Oh – one last comment about the air supply – use a 3/8″ internal diameter (ID) hose so you can get enough air to the tool.  With a 1/4″ hose you may well starve it because the air will be very restricted until it gets to the tool.  It’s like having too small of a gauge extension cord going to a power tool – you can just get so much air down that small 1/4″ diameter hose.  Quarter inch fittings are fine but do use the 3/8″ hose.  With that said, as usual, the unit did not have a 1/4″ quick connect installed so I took one out of my parts bin, installed some PTFE tape and snugged it down. As you can see, the tools weighs in at 1 pound 9.7oz.  Not too bad and the grip is nice.

Before you put it into production, squeeze in 2-4 drops of air tool oil.  I’ve had good luck with all the oils I have bought and just stick with a name brand such as ATS, Porter-Cable, CH, and even Husky.  Your air tool needs this to run.  If you have an in-line oiler in your air lines then you may be able to skip this step.  I filter the heck out of my air and have to manually oil my tools.  My rule of thumb is to oil them before each day of use.

So I bought the unit on May 14th, 2017, and already have probably 20 hours on it with no hitch.  Not surprisingly the head was a little stiff but everything wore in nicely.  It appears to be working like a champ so I am recommending it to others.

Here it is at Amazon:

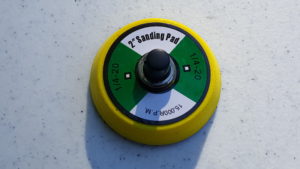
Note, CP backers are a fortune.  I’ve had very good luck with this brand of Chinese backing pad with my other sanders so I’m providing the eBay link.  Be very sure the thread is right (I’ve found three so far – 1/4, 5/16 and M6 so be careful) and look for the particular graphic label.  I’ve had other Chinese backers that just disintegrated with very little use.  You figure the tool can spin up to 15,000 RPM so your pad needs to be rated for that as well.  If you can find them elsewhere, great.  I scrounge around on eBay until I find them.

Update 7/7/2017:  The sander is still working great – no problems at all.  I’d estimate the unit has somewhere between 30-40 hours of use on it at least – it gets used a lot.

Also, I swear by Milton air line fittings.  Harbor Freight and Husky female fittings just do not hold up.  I do have a ton of HF and Husky male fittings that I am slowly using up but only buy Milton female quick connects now and will switch to all Milton as soon as I run out of the old plugs.  I’ve been using Milton Type M female couplers for over a year and they are solid.


If you find this post useful, please share the link on Facebook, with your friends, etc. Your support is much appreciated and if you have any feedback, please email me at in**@ro*********.com. Please note that for links to other websites, I may be paid via an affiliate program such as Avantlink, Impact, Amazon and eBay.


How to remove rust from a tool with apple cider vinegar

I live in Michigan and work in an unheated shop.  In the winter, when I use a space heater to work, condensation forms on metal surfaces and rust happens.  I try to keep my tools oiled but once in a while I miss something.  There is a real simple way to remove rust that is dirt cheap and very effective.  In fact, you may even be surprised.  Apple cider vinegar is a safe and easy way to remove rust.   Note, it may well remove finishes such as bluing so you just want to do this on bare metals.

Apple cider vinegar contains acetic acid at a low concentration.  All you need to do is let your tool, or whatever, sit in the cider while you do other work.  In general, warmer is better.  I’d shoot for 60-70F or it will take forever but I wouldn’t bother boiling the cider either. It was 62F when I fixed these needle nose pliers and it took about half an hour.

Be sure to do this outside or some place well ventilated.  If you don’t, the vapors can cause rust.  I do most of my work out in my drive way to avoid causing problems.

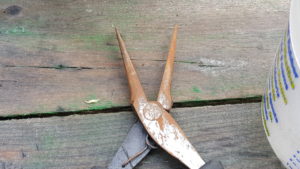
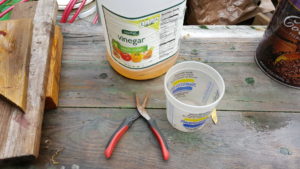
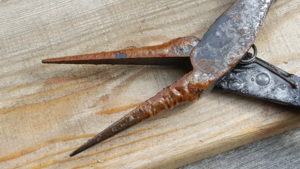
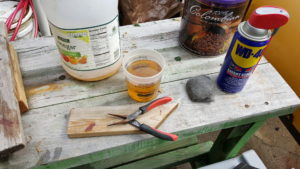
So, here are a decent but rusty pair of small Ace needle nose pliers with plenty of surface rust.  All I needed to start was cheap apple cider vinegar (Spartan is a store brand here) and a small plastic container.  The one caveat is that the pliers can’t have oil or grease on them so I did spray them with brake cleaner to remove any oils before the next step.  You could use whatever cleaner or solvent you like.


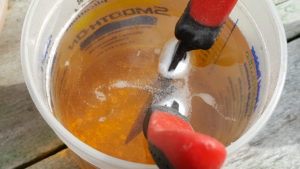
So I just submerged the tool in the vinegar.  I’ve used everything from wall paper tubs to cups to bowls and so forth.  After a while you should see foam around the metal from tiny gas bubbles coming up and this means it is working.  It may take 5-10 minutes before you see any bubbles because this is a slow reaction.  If you never see bubbles then it may mean either there is oil on the metal, the remaining acetic acid is too weak (if you are re-using vinegar over and over the acid gets used up so there is less and less of it per given volume) or it is too cold.  I would not bother doing this under 50F or it will take forever.


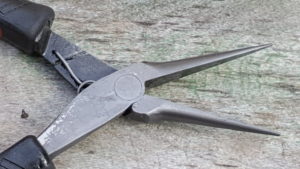
In this example, i was about 30 minutes before I pulled the pliers out.  In general, the warmer the solution the faster it will react.  It was 62F when I did these and I didn’t bother heating anything.  Look at how foamy the rust looks and the steel has turned a grey color.  The rust will come right off.  I used 0000 steel wool to remove it.  If the tool needed more time, I could dunk it back it.   In my case, the tool was definitely done.  I then hosed the tool down liberally with WD40 to remove the vinegar and avoid rusting.  If you want to pour boiling water on it you can but you need to get something on there fast to prevent rust.  In general, I just use WD40 followed by CLP or oil because the acid in the vinegar is so weak and I’ve not had a problem with rust later.  If I was using a stronger acid, then I would be worrying more about neutralizing, then rinsing, applying WD40 and then oil.


Here’s what it looked like after I oiled it.  After that, I just put it away – it was that easy!  I do this a few times a year at least and the process has worked just fine.

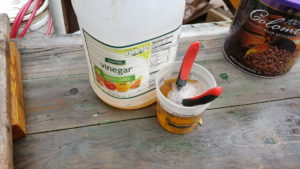
When I was done, I put the vinegar back in a separate container to use again.  If you want, you could throw it out.  It will slowly weaken with repeated use.  If I have any doubt about effectiveness, I toss the cider and use some that is fresh.

I keep this just in the garage and well away from the kitchen.  The point is that you don’t want people consuming contaminated vinegar so label it and keep it away from the kitchen, pantry, etc.


If you find this post useful, please share the link on Facebook, with your friends, etc. Your support is much appreciated and if you have any feedback, please email me at in**@ro*********.com. Please note that for links to other websites, I may be paid via an affiliate program such as Avantlink, Impact, Amazon and eBay.


Buy a big Neiko 10048A set of quarter inch driver bits and not worry about having the right one when you encounter something weird

You know the quarter-inch bit really gives you amazing flexibility 4 installing or removing different types of screws, bolts and even using some tools such as Spade bits and step drills. With them you can overcome the problem of having the right type of screwdriver to install or remove specialty security screws or even things such as Torx and Allen heads.

For the most part when I am using Phillips bits I stick with name brands such as DeWalt, Irwin, Milwaukee and so forth. What I have found is that cheap bits aren’t always very rugged and round the tips over very quickly compared to name brand higher-quality bits.

For security/tamper-proof bits and specialty bits, I have this large set from Neiko.  The below set has served me well so far when I hit the “oh man, do I have a bit for that” moments when working on cars, guns and electronics:

In case you are wondering, here is what Neiko reports about their 10048A bit set:

The 100-Piece Security Bits Set Security bits set contains many of the most common tamper proof type security bit sizes, including tri-wing bits, torx bits, spanner bits, and hex bits. Security bits set contains: 1 – wing nut driver. 1 – magnetic bit holder. 1 – socket bit holder. 1 – 1/4-Inch sq. x 1/4-Inch hex x 1-Inch extension. 1 – 1/4-Inch sq. x 1/4-Inch hex x 2-Inch extension. 3 – clutch bits (No. 1, 2 and 3). 3 – torque bits (No. 6, 8 and 10). 3 – spline bits (M-5, 6 and 8). 4 – tri-wing bits (No. 1, 2, 3 and 4). 4 – square recess bits (No. 0, 1, 2 and 3). 4 – spanner bits (No. 4, 6, 8 and 10). 6 – metric hex tamper proof bits (2, 2.5, 3, 4, 5 and 6). 6 – SAE hex tamper proof bits (5/64, 3/32, 7/64, 1/8, 9/64 and 5/32). 8 – Phillips bits (0, 1, 2{5} and 3). 8 – pozi drive bits (0, 1, 2{5} and 3). 9 – slotted bits (3, 4, 4.5, 5, 5.5, 6, 6.5, 7 and 8). 9 – metric hex bits (1.5, 2, 2.5, 3, 4, 5, 5.5, 6 and 8). 9 – torx bits (T-8, 10, 15, 20, 25, 27, 30, 35 and 40). 9 – torx tamper proof bits (T-8, 10, 15, 20, 25, 27, 30, 35 and 40). 10 – SAE hex bits (1/16, 5/64, 3/32, 7/64, 1/8, 9/64, 5/32, 3/16, 7/32 and 1/4). Set includes plastic storage / carry case.

Based on my experience, for the price it is cheap insurance and it has saved me more than once so you might want to consider a set.


If you find this post useful, please share the link on Facebook, with your friends, etc. Your support is much appreciated and if you have any feedback, please email me at in**@ro*********.com. Please note that for links to other websites, I may be paid via an affiliate program such as Avantlink, Impact, Amazon and eBay.


Irwin Lock-n-Load Quarter-inch bit extensions can save your bacon

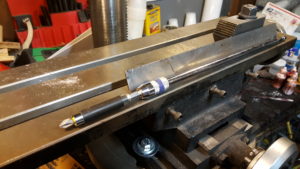
Irwin make some very nice quarter-inch drive extensions in different lengths that you can use for extending your reach of everything from screwdriver bits, socket drivers and even step drills. I have even stacked the units for getting into really bizarre locations. I have use them for everything from reaching down inside butt stocks to loosen Frozen bolts, to truck firewalls, to holding Spade bits while drilling custom holes for recoil absorbing mercury cylinders, and so forth.

They are not very expensive and are definitely something I would recommend keeping in your toolbox for those times you have to reach something that is set way back.


If you find this post useful, please share the link on Facebook, with your friends, etc. Your support is much appreciated and if you have any feedback, please email me at in**@ro*********.com. Please note that for links to other websites, I may be paid via an affiliate program such as Avantlink, Impact, Amazon and eBay.


Blazer GB2001 micro torches are very handy

I work a lot with plastics, paracord and webbing.  Thus, I need to melt ends, heat small tools/probes to poke holes and what have you.  I use lighters for a while but the problem was they didn’t generate very much heat. They were good for searing the end of a paracord but not quickly. Sometimes they quit it heat tools up enough to poke clean holes in webbing.

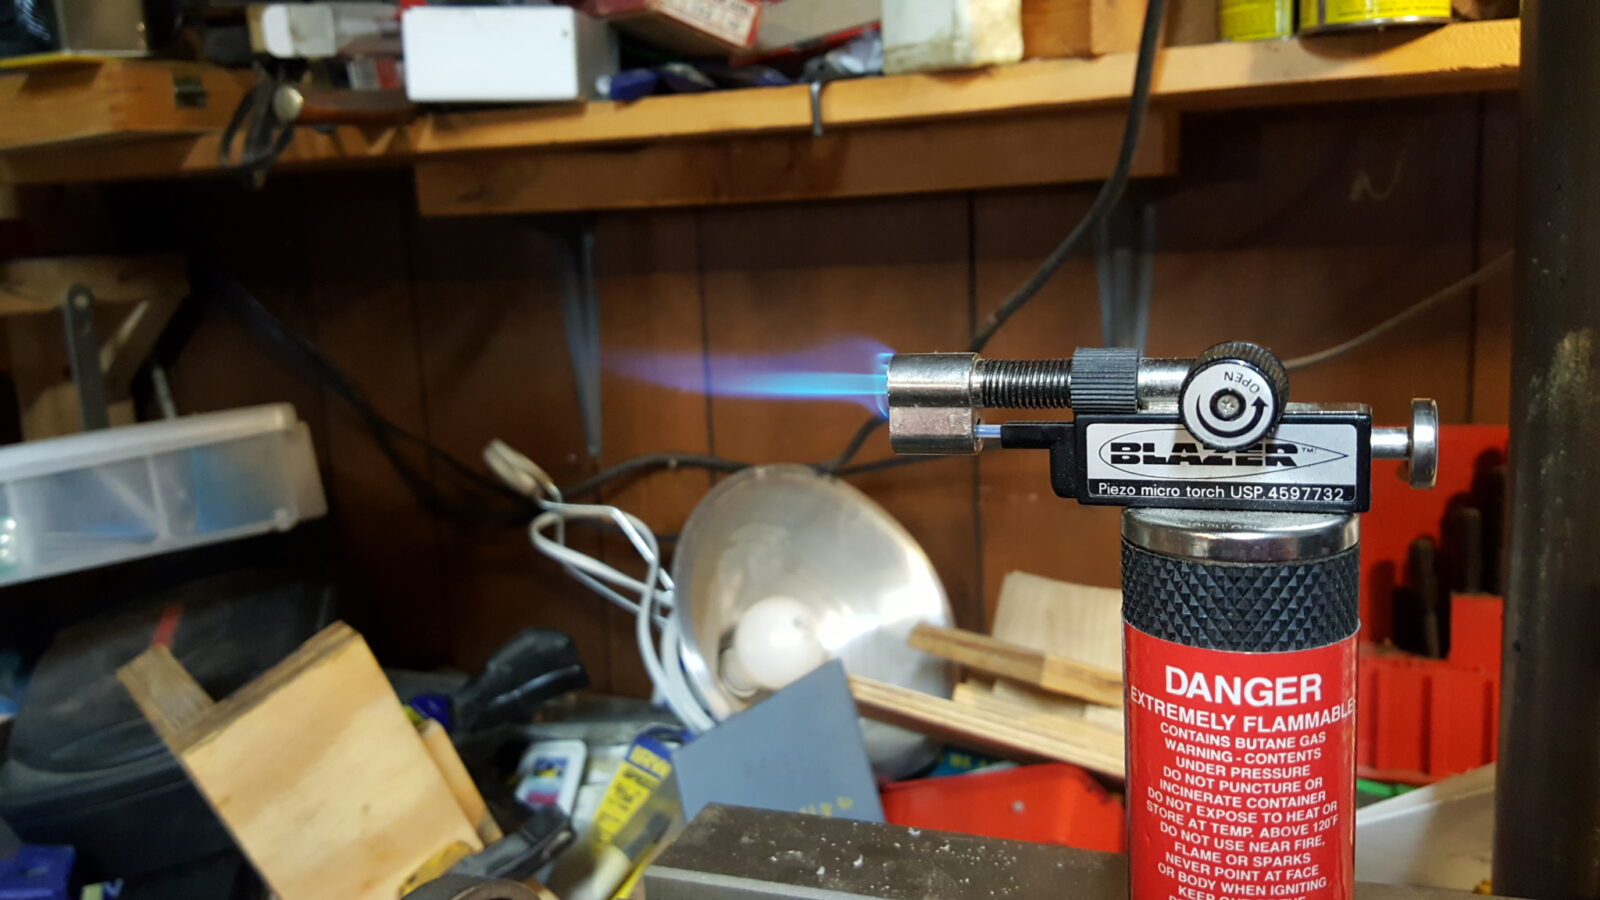
As usual I did some digging around and came across the Blazer torch as you see in the above photo. This thing is fantastic. I have used it for probably at least two years with no trouble. I bought this in 2014 and after hundreds if not thousands of clicks, the little piezoelectric spark unit is still working just fine – as is everything else.  It’s just plain reliable.

It is refilled vs standard butane cartridges. You can save a bundle by buying packages of them off of Amazon versus from the local drug store, grocery store or whatever. Surprisingly the torch does not use a ton of butane fuel at a time. I think it is because the jet is actually fairly small. You can adjust the intensity and the air:fuel ratio depending on what you’re working on. I bought a six-pack of the few will you see in the photo and I think I have only gone through one and a half cans in a couple of years.

The rubber base is removable if you don’t need it and in the next photo you can see a clear picture of the butane fill port.

So if you are looking for a very portable small torch this Blazer has worked great for me and I recommend it so I am listing it below for your reference.

Update:  7/23/2018:  It still works great.  No problems to report and am still using it regularly for rope and nylon.

Update 11/28/19:  The seals went out last month and it will no longer store butane for more than a day or two.  Based on reviews on Amazon, I am going to try out a Bernz-O-Matic ST2200T and see how it lasts.  I bought the Blazer on 11/29/14 so it almost made it four years,


If you find this post useful, please share the link on Facebook, with your friends, etc. Your support is much appreciated and if you have any feedback, please email me at in**@ro*********.com. Please note that for links to other websites, I may be paid via an affiliate program such as Avantlink, Impact, Amazon and eBay.


Step Drills Can Simplify the Drilling of Clean Holes in Sheet Metal and Relatively Thin Stock

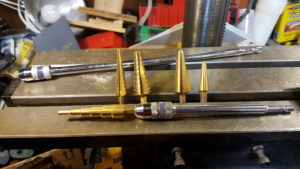
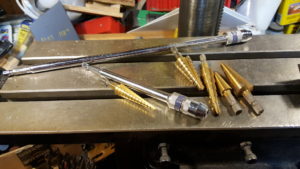
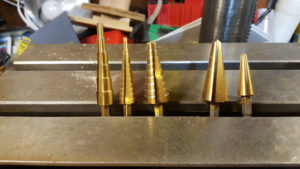
One type of drill I use a lot are step drills.  They are best thing since sliced bread for cutting circular holes in sheet metal and relatively thin stock where the the thickness of the material is less than the height of the “step” in the drill.  Unlike a normal twist drill, the step drills will not thread onto sheet metal and make a mess.  You get a nice hole on one side and if you can reach the back side, you can come at it from that direction and remove burrs very easily.

I keep a variety of step drills including some odd-ball drills that are very similar but stepless that I mainly for opening up some odd non-critical sized hole.

I also have several lengths of Irwin extensions that I use for holding step bits, spade bits, screw-drivers and just about anything else with the common 1/4″ interface.  I’ve even plugged one extension into another to reach really remove parts and can’t even guess how many times these extensions have saved my bacon.

I’d recommend that you keep all of these handy. If you can, buy a known good brand as it will probably last longer.  My problem with imported cheap bits in the past is that they dull fast.  Irwin, Dewalt, Klein, Milwaukee and other name brands might be something you want to invest in if you plan to use them a lot.


If you find this post useful, please share the link on Facebook, with your friends, etc. Your support is much appreciated and if you have any feedback, please email me at in**@ro*********.com. Please note that for links to other websites, I may be paid via an affiliate program such as Avantlink, Impact, Amazon and eBay.


How to read engine codes Via the OBD II Port with your smart phone – welcome to the new age

Guys, I remember tuning a car by ear with a timing light, vacuum gauge, feeling things out literally with my hands and so forth.  Boy has the world changed.  As the vehicles got smarter and smarter, someone decided to add On-Board Diagnostics (OBD) in the early 1980s first with the idiot “check engine” light and then it got more and more involved.  Modern cars and trucks in the US have an OBD II jack where you can plug in, read and clear fault codes, access real-time information and so forth.

Back in 2013 I saved my pennies and finally bought my own Autel Autolink Scanner for $102.  Wow – I thought was so cool.  I used it whenever fault codes popped up to figure out what it was but I had to lug the thing around and it wasn’t something you could readily update, etc.

A friend of mine came over about a year back to check on one of our cars.  He pulled a little black rectangle out of his jacket, plugged it into the car and then started looking at his phone.  I asked him what he was doing and he showed me that he was accessing the codes.  I was floored.

In June 2016, I decided to go the phone route to have a current scanner and a better interface.  After digging, I bought a BAFX Products 34t5 Bluetooth OBDII adapter for Android phones (about $22)  and I got the Torque software for my Samsung Note Android phone off the Google Play store for free.  What a difference.  The BAFX adapter was easy to carry around, I could customize the gauges I was looking at, and so forth.  For me this combo rocks.  It does all I need.  I really like it being cordless – you can walk around and so forth and still see the data.

By the way, installation is simple.  You follow the instructions to pair the scanner to your phone just like you would any other Bluetooth Device.  I downloaded Torque from the Google Play store on my phone in a matter of minutes and it is pretty much good to go.  You can create profiles for different vehicles in the software, change gauges you want to watch, their style, how they are grouped and so forth.

The following are screenshots from my phone plus you can see the little adapter that is a bit smaller than a cigarette box.

I use Torque to read and reset the ODB2 codes as needed. I really like it.
The Torque app lets you set up different gauges or even go in and look at the data.


This plugs into the ODB2 port

For example, my 2002 Camry’s check engine light is on and I could use the BAFX adapter and Torque to find out what the code was and then search using Google to decide what to do:

Yeah, you have to love that check engine light.


I really like the combination and recommend them.  In general, I am amazed by all the functionality that is showing up where the smart phone provides the brain and display thus dropping costs dramatically.  My recent GiraffeCam endoscope is another example.

By the way, I am so happy with this combination of BAFX scanner and Torque software that I sold my Autel scanner on eBay.

9/.29/21 Update: I still have the original two. They have saved my bacon many times and I always take one with us on trips. I highly recommend them. They have bounced around in the glove box, in the console, baked in the summer heat and frozen in subzero weather and they still work.

2/27/20 Update:  I now have a couple of them and use them all the time with Torque.


If you find this post useful, please share the link on Facebook, with your friends, etc. Your support is much appreciated and if you have any feedback, please email me at in**@ro*********.com. Please note that for links to other websites, I may be paid via an affiliate program such as Avantlink, Impact, Amazon and eBay.