Category Archives: Air & C02 Rifles and Pistols

Section to discuss air rifles and pistols include C02. So springers and C02 mainly.

Finally, An Affordable And Reliable 4500 PSI Air Compressor For PCP Airguns! The GX CS3

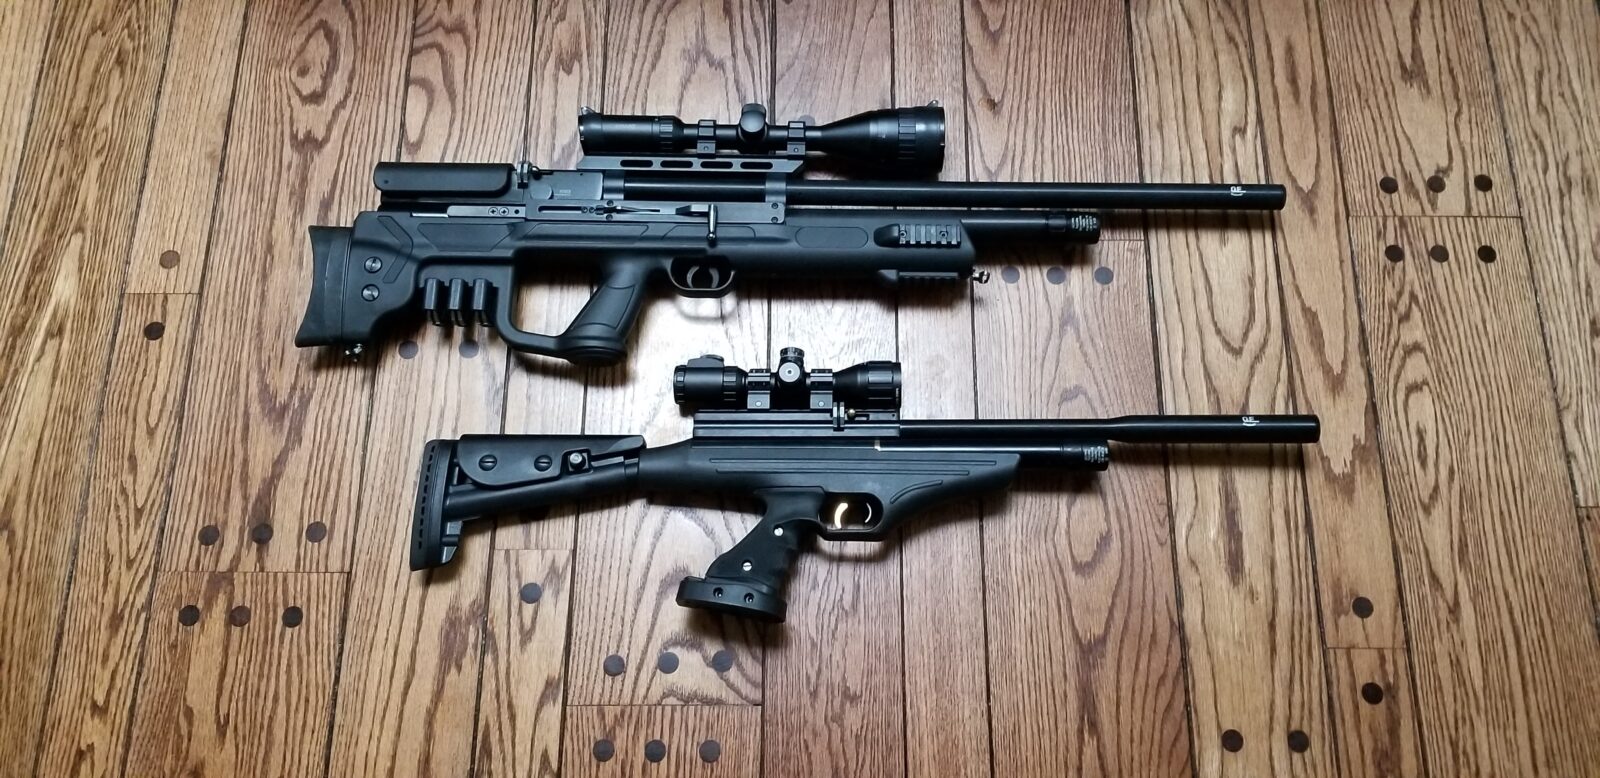
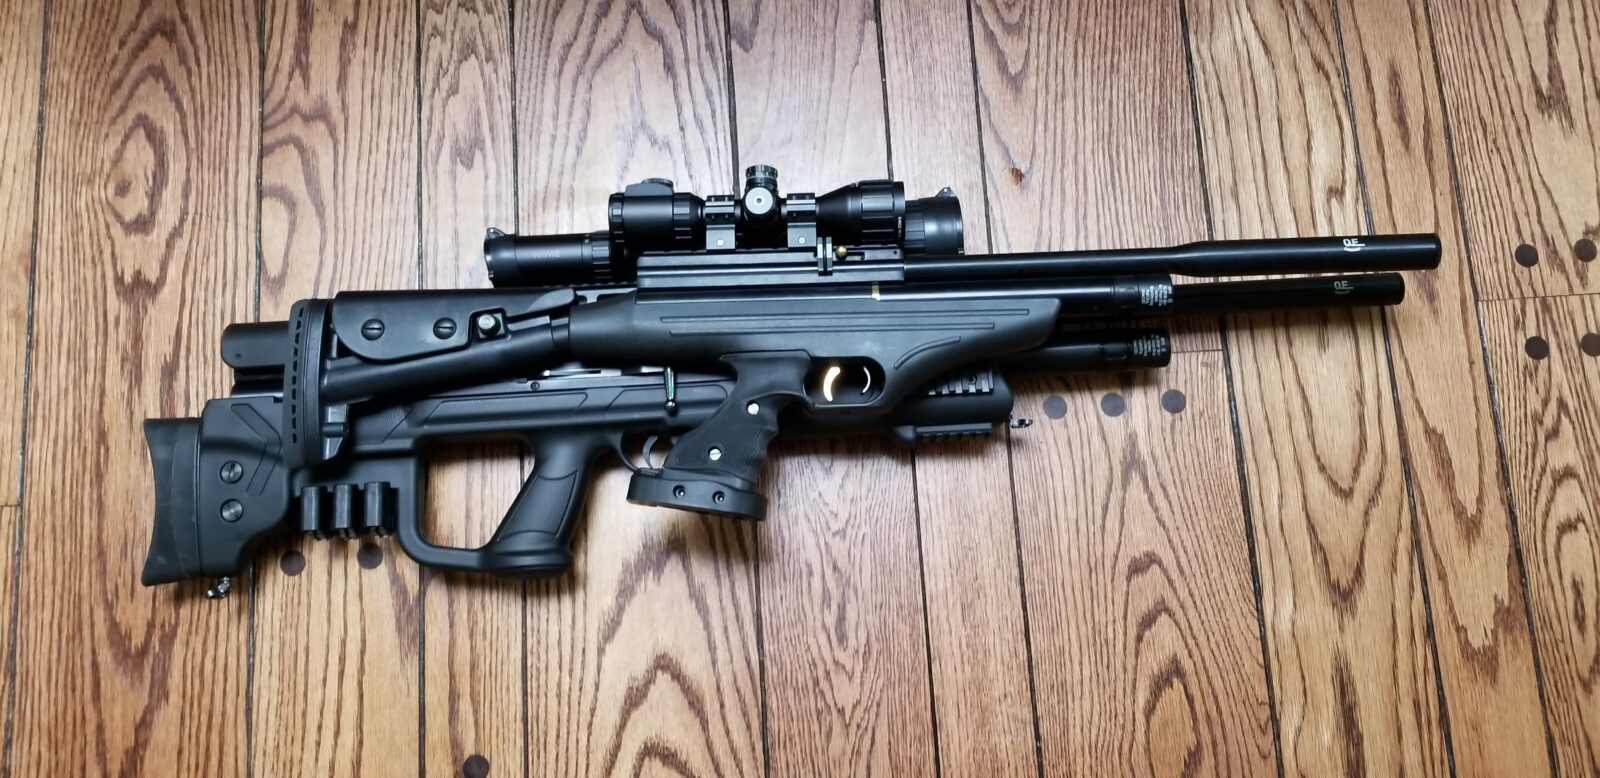
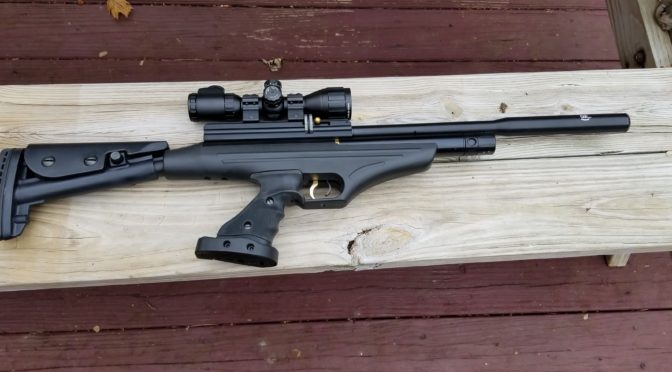
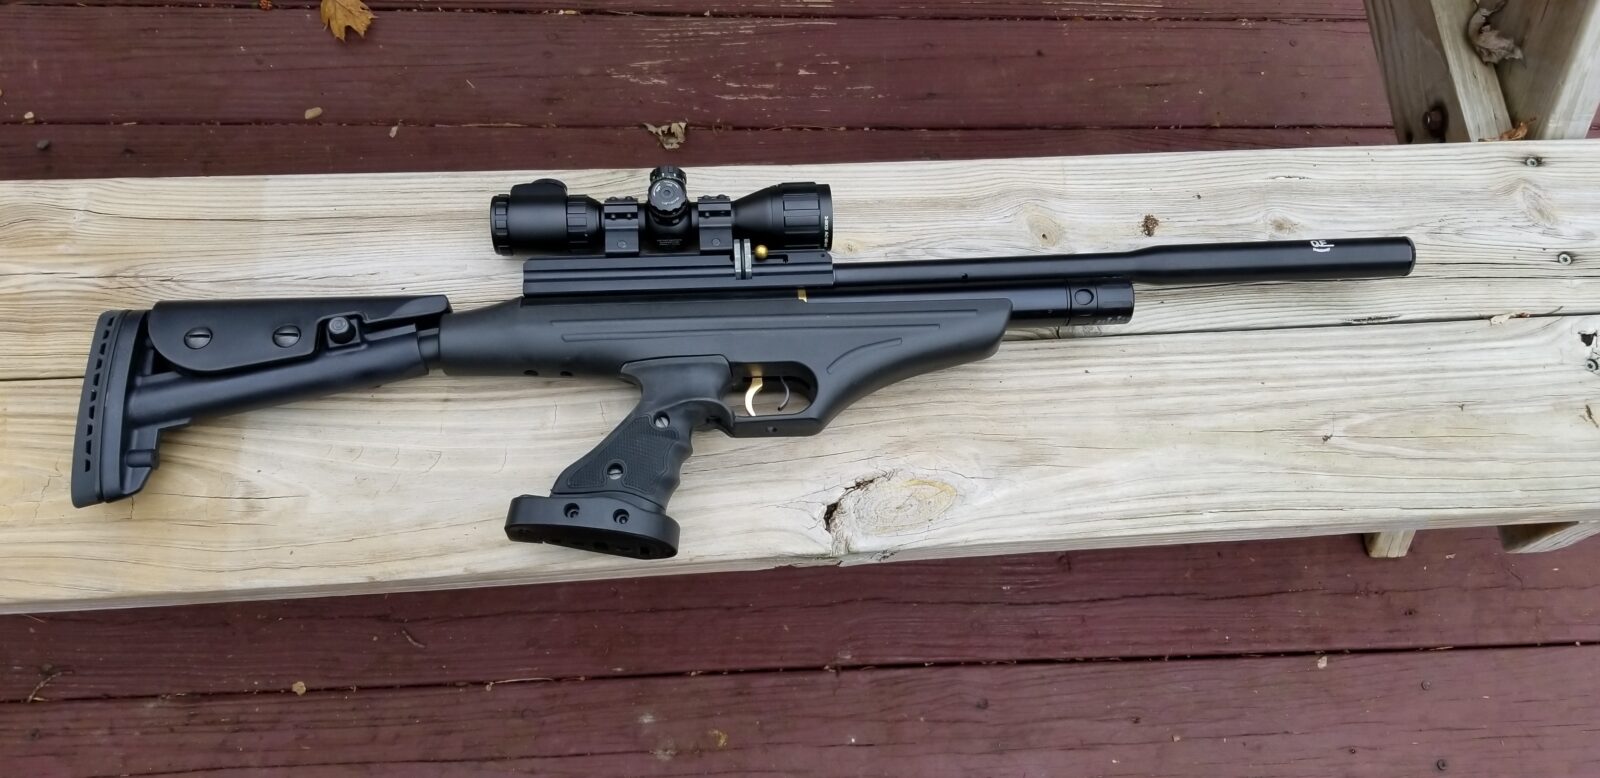
Folks, I think Pre-Charged Pneumatic (PCP) airguns are awesome. They have an onboard high-pressure cylinder that holds enough air to shoot a certain number of rounds before needing to be recharged. After years of having your basic pneumatic and spring-piston air rifles, I bought my first PCP, a Hatsan Gladius Long in .22, back in May of 2017 and a Hill Mk IV hand pump. In this post I want to recap what your options are and then talk about move into the world of having my own compressor.

You Have Three Options To Fill PCP Airguns

To fill a PCP airgun, you have three options: own a hand pump, have an air cylinder or own a compressor. For almost three and a half years, I’ve used a Hill Mk IV hand pump to top off the Gladius and it has worked well. These pumps are like an old fashioned bike tire pump on serious steroids as they can enable you to fill a cylinder with thousands of pounds of air pressure. By the way, the secret to longevity with a hand pump is to keep the shaft lubricated to protect the O-rings with silicone grease and to not overheat parts if you are doing a lot of pumping.

The second option is to have an air tank that you would take to your local dive shop and have them fill it to 3,000 to 4,500 pounds. You would then use this to top off your airgun until it too was low and you’d go back to the dive shop to get the tank refilled. We do have a dive shop in the area but this never appealed to me because I didn’t shoot enough to need a tank vs. the hand pump. I also figured that I could use the hand pump any time day or night as needed. You can only refill an air tank if the dive shop is open or you own your own compressor.

Now, this brings us to the third option and that is to own a high pressure air (HPA) compressor. These are not what you get for a garage and air tools – those only go to 175-200 pounds. With PCP airguns, you are talking 3,000-4,500 PSI depending on the rating of the tank or airgun you are filling. What stopped many people for years was that these HPA compressors were a fortune and then crossed below $1,000 a few years ago and now you can see inexpensive units from China that are below $400 but they require water cooling, lubrication, and don’t always get good reviews (some do though).

In many cases, you get what you pay for. The decent HPA compressors start at $800 and go up from there. In 2019, I ran across an HPA compressor on Amazon that I had not heard about before – the manufacturer was Ankul and the model was the GX CS3 compressor. The price was around $500 and it was getting good reviews. At the time, I didn’t really need it so I added it to be “Save For Later” list in Amazon just in case.

Maybe 3-4 times since then, I would open up the listing and read the reviews. You know what? The reviews stayed solid over time. Ankul released an updated model that was air cooled – no more water to deal with – and it was self-lubricated and didn’t need the user to add oil or grease. What’s more, the reviews stayed positive – it scores a 4.6 out of 5 with 196 reviews. That’s pretty good. So guess what? I bought one.

Please note that I paid full price for the compressor. This was not a paid review and I’ve never been contacted by the seller. This is my honest opinion based on my experience with the compressor – I will get a small commission if you actually order one of Amazon but that’s it.

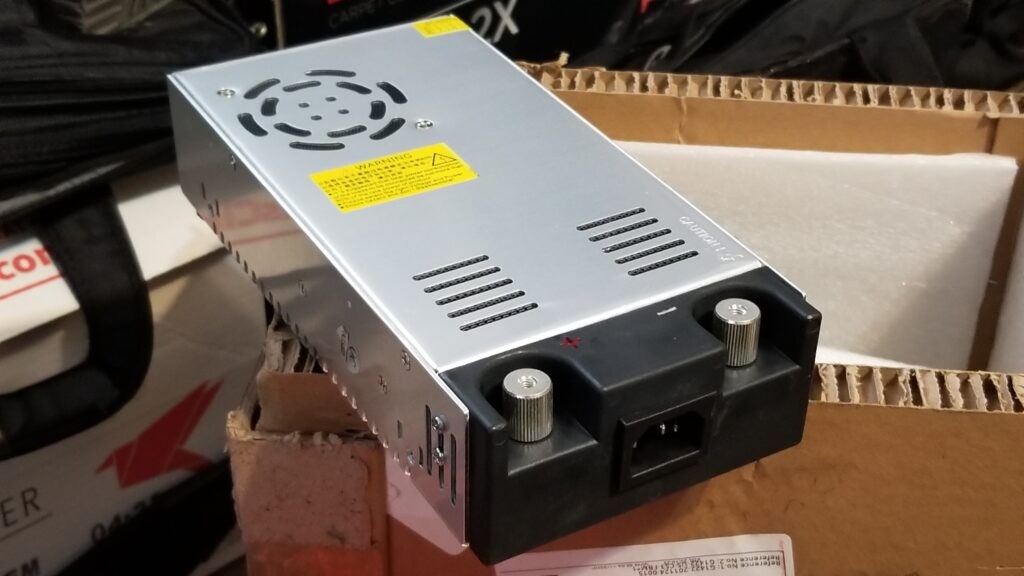
Introducing the GX GS3 PCP Air Compressor

Okay, there are a bunch of reasons why I bought this compressor in addition to the reviews and $499.99 price on Amazon:

  • It can pressurize a cylinder to 4500 PSI
  • It can run off house current with the supplied inverter or it can clamp to a 12 volt vehicle battery
  • There is an automatic-off switch where you can set the pressure via a dial and when it reaches it, the unit shuts off. This gauge is labeled both with PSI and BAR increments.
  • It has an integral filter for oil and water
  • There are three over pressure safeties – the user sets the pressure on the dial plus there is both a safety valve and a burst disc to help prevent a catastrophe.
  • They claimed the unit ran fairly quietly at 75 decibels (this puts it somewhere between average street noise or being in a shower at 70 db and city traffic or a vacuum cleaner being at 80)
  • The unit is maintenance free – no water/antifreeze to deal with or oil or grease to add.
  • The design was elegant with a spool on the side to hold the power cable, the high pressure hose could rotate and there was a carry handle
  • The pump unit measures 10-3/4″ tall, 5-1/8″ wide and just under 9-1/2″ deep — it’s remarkably small – most of my laptop computer bags are bigger and these measures are based on my unit.
  • The duty cycle is 30 minutes run-time and then 20 minutes to cool
  • The unit only weighs 19 pounds 6 oz (I weighed my pump unit)
  • The AC adapter is separate and measures about 8.85″ long x 4.52″ wide x 2.36″ tall and weighs 1 pound 14 oz with the cord.

Click here to see the compressor on Amazon.

2/8/23 Update: GX is really taking the affordable PCP high pressure compressor market seriously. The CS3 model, that this blog post is about, is aimed at 1.5 Liter and smaller air cylinders. They now have a CS4 aimed at tanks up to 6.8 Liters (I now have a CS4 and really like it) and they even have smaller and larger capacity units. By doing this, they are giving you a bunch of selections that you can choose from given the air capacity you need and your budget. Click here for the GX lineup on Amazon.com.
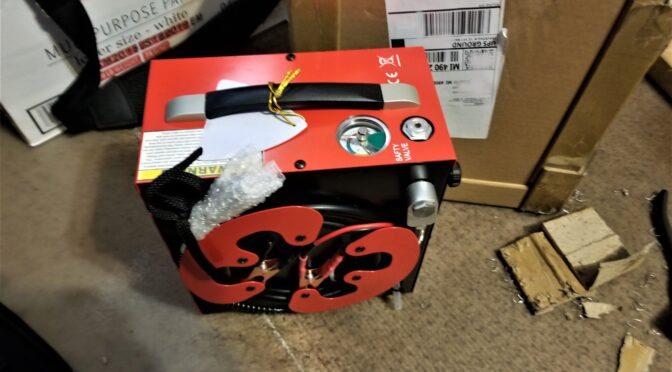
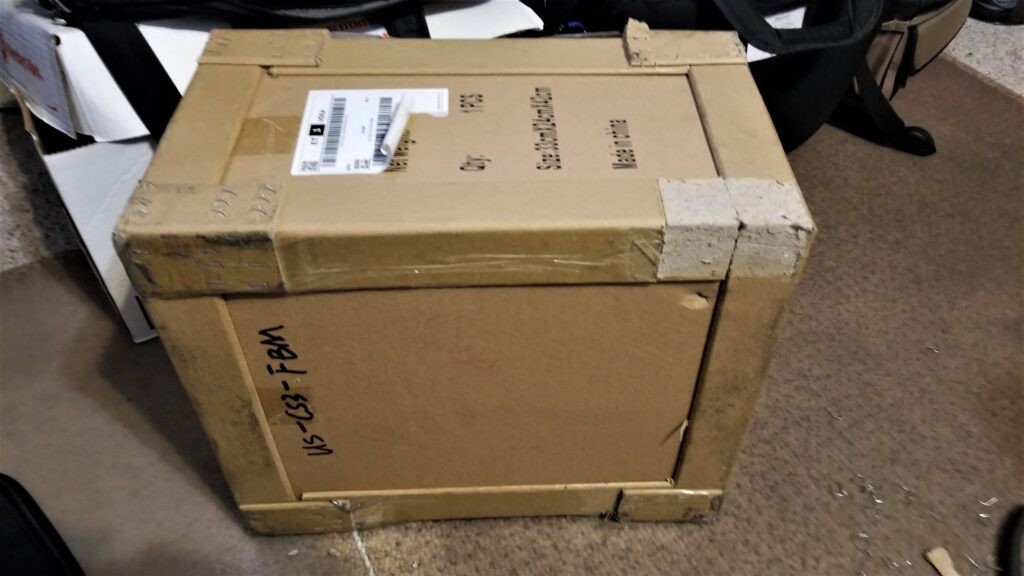
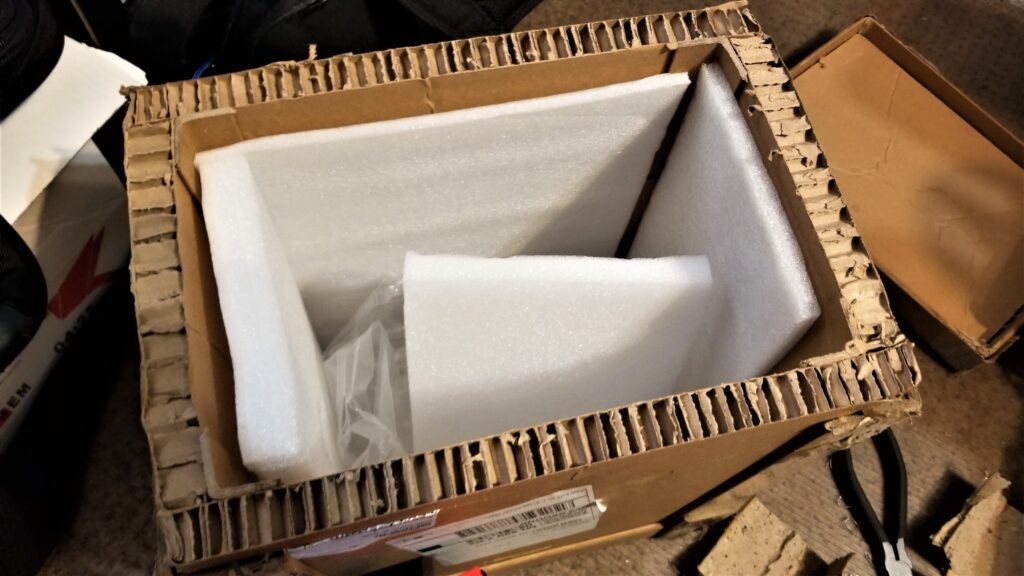
Unboxing it

I ordered the unit on a Monday and it was delivered five days later on Saturday by UPS. The pump and power adapter were packed together in one amazingly well packed box. How often do you here somebody comment on a box? This thing was made from thick cardboard and was practically like opening a wood crate and inside was thick foam cushions protecting the air pump and power adapter from all angles.

I had removed the upper right corner reinforcement already when it dawned on me I better take a quick photo. Tip: Just remove the corner braces and the end cap will slide off. You do not need to disassemble the whole box.
I don’t know who the packaging engineer was but he needs some serious recognition, a beer or both. It was one of the best packed tools that I have seen in a long time. It’s no wonder that my unit arrived in great shape.
Here’s a quick photo of the unit out of the box. Everything was in great shape.
This is the 12 volt power adapter. It’s very straight forward – plug it in and it is running and the fan keeps it cool.

Video Of It Running

I’m going to put this video both here and in the set up blog post. Today, I recorded a quick video as I topped off my tank today – January 7, 2022. It ran for about 20 minutes as I took that tank from about 3,000 to 4,500 PSI.

When done, I let the unit’s fan run for about 10 minutes until the air coming out was cool again. Since the unit is air cooled, give it time for the fan to do just that. I also bled off the unit to replace air pressure and get rid of any condensation.

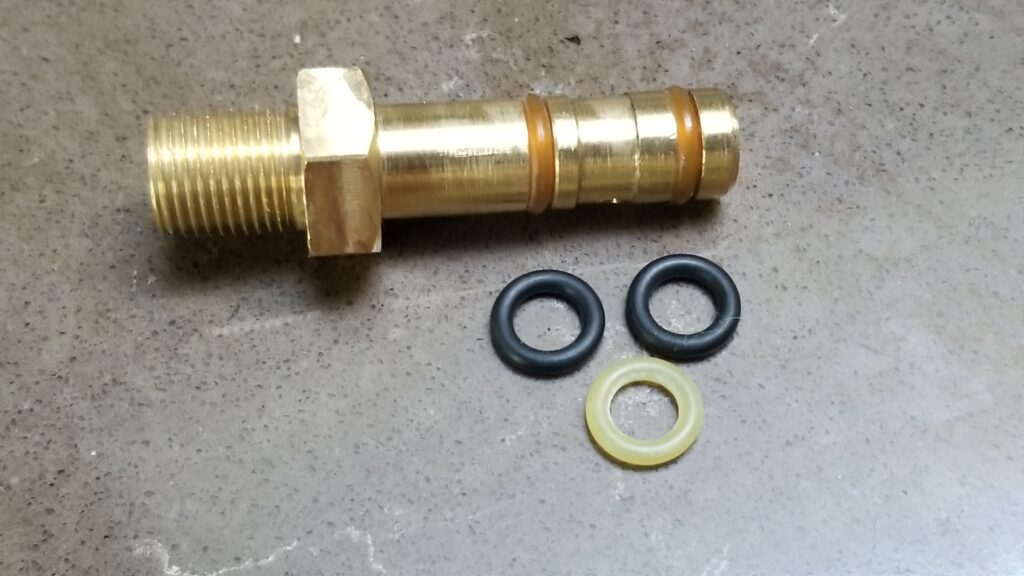
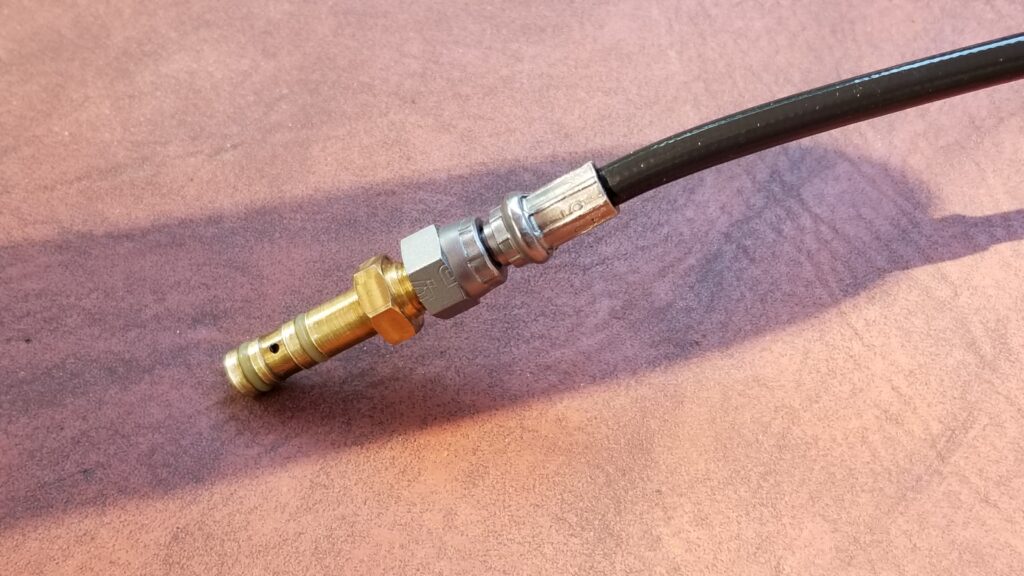
Note the odd double filter rig I am running in the video – that’s just because the double-male Foster fitting will not seat all the way in the big filter’s female fitting. I need to replace it with an Air Venturi brand fitting some day when I have time.

Safety comment: Never try to force fittings apart after a fill. Most likely there is high pressure air that needs to be bled out of the lines. With that big inline filter, the output side from it to the tank stays under pressure so I need to bleed down both the compressor and tank sides before I can safely disconnect the various fittings. Just remember to think things through carefully before you force a fitting off – high pressure air dangerous.


Conclusion

https://blog.roninsgrips.com/setting-up-and-testing-the-gx-cs3-pcp-air-compressor/The unit arrived in great shape and as described. In the next post, I’ll review how to set up, test and use the unit. Again, here’s the link on Amazon and I will jump ahead a bit and tell you that I recommend the unit based on my experience with it so far:

Here are the GX compressors from the CS4 down to the CS1

2/4/23 – GX has released the CS4. The CS3 is aimed at 1.5L and smaller cylinders. The CS4 can handle 6.8L cylinders as it is water cooled. You have two options now. Click here for a new blog post about the CS4.

9/15/2022 Update: They now also have a version of the compressor, the CS3-I, that includes the 120 volt AC power unit inside the compressor. It’s getting good reviews so far – the only thing that is different is there integrating the AC power into the unit.

01/07/2022 Update: Just topped off my tank. Still working just fine. Added a video above so folks can see and hear it run.

10/23/2021 Update: Still no problems. I’m very happy with this purchase. So you know, at this point I am using 1-2x per month to refill my Omega bottle. I’m not shooting as much as I was earlier this summer.

3/4/2021 Update: Still no problems at all. I use my Omega 18 cu ft air tank to top of the FX Compact Impact until it gets down and then I use the GX GS3 to top the bottle back off. I’m really pleased with how this has worked out.

2/2/2021 Update: The compressor is still working great. No problems at all!

2/4/2023 Update: Still working just fine!


Note, I have to buy all of my parts – nothing here was paid for by sponsors, etc. I do make a small amount if you click on an ad and buy something but that is it. You’re getting my real opinion on stuff.

If you find this post useful, please share the link on Facebook, with your friends, etc. Your support is much appreciated and if you have any feedback, please email me at in**@ro*********.com. Please note that for links to other websites, I may be paid via an affiliate program such as Avantlink, Impact, Amazon and eBay.


Here are some well rated hand pumps on Amazon. While I do not have personal experience with them, they do get good reviews:

Review Of The .22 JSB Hades Pellets – Do They Really Work?

I have a Hatsan Gladius Long precharged pneumatic (PCP) air rifle in .22 caliber that I use to dispatch garden pests and have written a number of posts about it. It’s extremely effective because it has power, is accurate and relatively quiet. The one challenge I have with it is over penetration. It does have adjustable power settings but I find that I can’t go below the “3” setting (out of five) to have the range I need and enough power for a humane kill. The problem is that the domed JSB Diablo 18.13gr pellets I’ve used since the start shoot right through a squirrel if I am going for a heart shot vs. a headshot and really wanted to reduce this so I started reading on pellet types.

First off, I really like JSB pellets. They are made in Czechoslovakia and are really uniform. I shoot them in both my PCPs and have no complaints. I saw an advertisement for their new “Hades” series of pellets and started searching on what people were saying about them.

Basically the Hades are a form of hollow point that really need the power of a PCP to mushroom. The ones I bought at 15.89gr and have a very intriguing shape to the head.

A 15.89gr Hades is on the left and an 18.13gr JSB Jumbo Heavy Diablo is on the right. The Diablo has proven to be wonderfully accurate and my farthest shot has been about 50 yards with it.

My Real World Review

There are guys out there with chronographs, blocks ballistic gelatin and what not. I’m not one of those guys. However, I can tell you want I’ve noted after about 150 real world shots.

Most of my pest control happens within 60 feet – yes, feet. I set up a target at 30 feet and zeroed my scope. In firing groups, it seemed consistent enough.

Good enough for me.

Did I see anything different with garden pest control? Not really to be perfectly honest. I can tell you the exit wound was bigger than what the Diablos would leave and it was somewhere around half again the diameter of the pellet.

I still have over-penetration with the Hades and the need to be very careful is still true. Both tree and ground squirrels are small and soft. There’s simply not a lot of mass there to stop a pellet. If you have bigger pests, you might see a difference.

I did one close range headshot of a racoon at the rifle’s highest power setting and did not see a difference over what Diablos would do.

My Hades pellets are on the left. I bought two of the 200 round tins initially and backordered two of the 500 round tins that have since arrived. I have about 1200 rounds of the Hades left as the first tin is almost empty and then I will go back to my Diablos as I have 3-4 of the big 500 round tins.

Conclusion

For my use as described above, I did not see a big difference between the Hades and the Jumbo Diablos. The Hades seems to be a decent pellet as long as you have accurate shot placement. I bought a ton of Diablos way back when so I’ll use up my Hades and then go back to my supply of Diablos.

I hope this helps you out.

9/18/23 Update: I am now using Hades pellets in my .22 Leshiy 2 and I do think they make a difference when it comes to dispatching tree squirrels for pest control. It may be the Hatsan just didn’t push the pellet fast enough – I’m not sure. Amazon is carrying a number of calibers so click here if you’d like to see them.


Note, I have to buy all of my parts – nothing here was paid for by sponsors, etc. I do make a small amount if you click on an ad and buy something but that is it. You’re getting my real opinion on stuff.

If you find this post useful, please share the link on Facebook, with your friends, etc. Your support is much appreciated and if you have any feedback, please email me at in**@ro*********.com. Please note that for links to other websites, I may be paid via an affiliate program such as Avantlink, Impact, Amazon and eBay.


Airgun Depot Has a Ton of Hatsan Airgun Models Ready to Ship Including Gladius Bullpups

Folks, I am very impressed by my Hatsan airguns and have no problem recommending them. I’m rally a fan on the pre-charged pneumatic (PCP) guns that have an onboard air tank and can fire 10-20 rounds for hunting plus if you get one if their models with the Quiet Energy (QE) baffle system, they are on the discrete side for pest control.

Airgun Depot has a ton of models in stock right now including the Hatsan Gladius that I have bagged tons of squirrels, rabbits and even a raccoon cleanly with. I have the Gladius Long model in .22 and it seriously takes out pests with JSB Jumbo Diablo 18.13 grain pellets.

This is my Gladius Long in .22 and I use it all the time for pest control. Probably over 1,000 if not 1,500 pellets have been shot through that airgun now.

The Gladius .22 has a 10 round magazine and is a bolt action repeater. It carries three spare magazines at the rear under the stock and they come in handy when you need to rapidly reload. It does happen with pest control actually.

The Gladius comes with four magazines. I have one loaded in the receiver, two ready to go securely clicked into their storage bays and you can see I already have one magazine that needs to be reloaded.

So, check out Airgun Depot. They have very good prices and availability right now. Click here for Hatsan in general or here for the Gladius specifically. If you are interested, click here for my other blog posts about my Hatsan airguns.


If you find this post useful, please share the link on Facebook, with your friends, etc. Your support is much appreciated and if you have any feedback, please email me at in**@ro*********.com. Please note that for links to other websites, I may be paid via an affiliate program such as Avantlink, Impact, Amazon and eBay.


New Hatsan PCP AirGun Fill Probe Parts – O-rings and Caps

I have two Hatsan precharged pneumatic (PCP) airguns – a full size Gladius .22 long and a compact ATP2. I recently needed to replace the O-rings and started researching what was needed.

The O-Rings

Here’s a Hatsan probe and the brownish/tan O-rings are their OEM rings. The black rings are the Buna-N rubber rings that we are now selling.

My two Hatsan’s get pressurized up to 300 bar, which is 4,351 PSI. That’s quite a bit of pressure that the fill probe’s O-rings need to contain plus they need to be flexible enough to allow for insertion and a good seal. One last consideration is the need to withstand the silicone grease that is used to lubricate them (never use oil-based grease on a PCP or it may diesel under pressure).

The O-rings are wear items meaning they will wear out for a variety of reasons and you can tell because when you go to fill the airgun’s tank, you will hear air escaping plus you probably will not be able to get very much pressure to stay in the line. So when mine went out and I installed the spare set that came with the Gladius, I had to think about getting more spares. Hatsan was out of stock at the time so I decided to dig.

So, I started researching what O-rings would work best and sourced some that work great. They are 70A on the shore hardness scale and made from Buna-N rubber which will withstand the silicone grease.

In addition to fitting Hatsan PCP fill probes, they will also fit the Air Venturi Halestorm, Evanix, FX, Hammerli Pneuma, Kral, Lgun and Raider probes.

Click here for the product page on our website to see pricing and place an order.

Keeping the Probe Clean – Caps

While I was at it, I decided to tackle how to keep the probe clean. I’ve had my Hatsans and my Hill Mk4 air pump for a couple of years and have tried to keep bags on the probe to keep it clean. Those semi-rigid airlines flop everywhere and trying to keep dirt off the probe that is sticky with silicone grease is a challenge.

Here’s the uncovered probe begging to have dirt and debris stick to it.

So, after measuring stuff. I came up with two types of caps for people to choose from. The first is a yellow cap with a pull tab.

Here’s the yellow pull tab cap that extends just past the rear O-ring

These are for folks who want to protect their probe but want a bright color that is easier to find. Click here for the product page to read the measurements, see the pricing and order.

To learn more about the measure, pricing and to order, please click here.


If you find this post useful, please share the link on Facebook, with your friends, etc. Your support is much appreciated and if you have any feedback, please email me at in**@ro*********.com. Please note that for links to other websites, I may be paid via an affiliate program such as Avantlink, Impact, Amazon and eBay.


Hatsan AT-P2 QE: Questions & Answers

As mentioned previously, I purchased a Hatsan AT-P2 QE pistol.  A few guys email med asking questions and I decided to post my answers here for others to read also:

How comfortable is it?  It looks like a kid’s toy.

I’m 5′ 8″ and find it very comfortable shoot.  I wanted a small profile PCP repeating airgun so I bought it wanting to hold it close to show a small profile.  I’m right handed and my left hand naturally goes to the front of handguard.  I think that is why they designed it with that angle.

I have the stock adjusted one click back out of five.  The cheek piece is adjustable but I found it did not need to be changed.  Again, it works fine for me.  I have no interest in trying to use it as a giant pistol.

How tight is the stock?

It wiggles just a tiny bit without a load but once I put it to my shoulder and place my cheek on the rest, it is solid.

Does it have two triggers?

No.  The front thing that looks like a trigger is the safety lever.  It’s actually very slick once you get used to it.  My Gladius has the same safety and trigger set up.  While it may look different, you can very easily turn it on, off or check the status.

The trigger is colored gold and the think safety lever is in front of it.

The trigger itself is Hatsan’s Quattro trigger and is user adjustable.  It has three screws for overall trigger travel, second state engagement and trigger pull weight.  Hatsan USA has a video on how to adjust the trigger – click here.

Does Hatsan make decent air guns?

Yes, they actually make very good airguns.  They are located in Turkey and don’t have the same brand recognition as Daisy, Crosman, Gamo, etc.  I posted factory tour video a while back that I found.

Why did I pick .22 caliber?

Well, I was worried that if I went with .177 that I would not have enough foot pounds of energy (FPE) to cleanly kill the pests I expected – squirrels, ground squirrels, and rabbits.  In talking with guys and reading, I decided to go with .22 for a trade off between power, air use and sound.  The bigger calibers are much louder and use more air.  I’ve found that .22 is plenty for me given I am shooting relatively short distances most of the time. 

Does a hand pump really work or should a person buy a SCUBA tank?

Guys, the last thing I want to do is to buy a tank and deal with going to get it filled.  I have a Hill Mk.4 hand pump and highly recommend it.  I bought it for my Gladius and now use it on the AT-P2 also.  What is nice is that the air cylinder is small on the AT-P2.  I shoot about 8-10 rounds and then top it off back to 200 BAR and that takes about 20-30 pumps.  When I see I am down to 2-3 pellets, I top the magazine off.

This is the Hill MK.4 pump.  The small bottle is Silicone Grease.  I periodically coat the shaft of the pump and the male quick connect plug.  I do it once every couple of months – not much really.

Now if you tell me you plan on shooting a ton, then you might want a tank or one of the new little portable compressors that are available.  I’m using it for pest control so my average number of shots at a time is 1-2 and then I done.  It’s easy for me to top off the magazine and the tank.

In Closing

I appreciated the folks sending in the questions and hope my answers helped them out.

6/29/2020 Update: Still very happy with the AT-P2 – it’s great on pest control with squirrels. We now have replacement fill-probe O-rings and caps to keep your fill probe clean. Click here to learn more.


If you find this post useful, please share the link on Facebook, with your friends, etc. Your support is much appreciated and if you have any feedback, please email me at in**@ro*********.com. Please note that for links to other websites, I may be paid via an affiliate program such as Avantlink, Impact, Amazon and eBay.


Comparing the Hatsan AT-P2 QE Pistol to the Gladius Long

Before I bought my Hatsan AT-P2 QE Pistol, I did a bunch of research. I wanted a very compact yet powerful and accurate pre-charged pneumatic (PCP) carbine or bullpup that was a repeater for quick and accurate follow up shots for pest control of tree and ground squirrels.

I needed something smaller than my Gladius Long, lighter and did not need the power levels that the Gladius Long bring to the table. The Gladius Long is an absolutely wicked PCP bullpup but for what I need most of the time – discrete firepower to dispatch squirrels and rabbits inside of 12-15 yards most of the time – it was overkill. I love it and am not selling it, but definitely needed a different go-to airgun.

So, I watched a ton of videos and decided on the Hatsan AT P2 and decided to go with the QT-P2 QE Pistol. It was compact, lighter, had solid reviews and had both an adjustable stock and in integral noise moderator built in. Hatsan refers to these as their Quiet Energy (QE) line.

In this next photo, I literally set the AT-P2 QE on top of the Gladius Long and tried to line up the muzzles as best I could so you can see the size difference.

So here’s the comparison of the two:

As you can see the actual package weight including the scope of the AT-P2 QE Tact is 4.6 pounds lighter that the Gladius Long and it is 6-5/8″ shorter.

In terms of energy, I did a lot of reading and can’t tell you for certain. Hatsan themselves says the Gladius Long will produce the following power levels but they don’t tell you the velocity or the weight of the pellet.

From the 2018 Airgun catalog, Hatsan reports the AT-P2 QE in .22 has a muzzle energy of 27 joules. All things being equal, that puts it between power levels 3 and 4 of the Gladius Long. I tend to switch between those two settings so for me, the power of the AT P2 is right in the sweet zone of what I wanted.

In terms of sound, the Gladius is relatively quiet at 3 and louder at 4. The AT-P2 QE is remarkably quiet. To me as the shooter, cocking the pistol is louder than firing it!

Both pistols have the noteworthy Hatsan Quattro adjustable trigger. I thought the trigger of the Gladius Long was the best factory airgun trigger I had tried until shooting the AT-P2 QE. From the factory, it is light! I need to measure it but it is a dream to shoot because I can hold it rock solid on target effortlessly. On the point of accuracy, it can shoot 1/2″ groups at 10 yards over and over using JSB Exact Jumbo Diablo 15.89 grain pellets.

Summary

I’m keeping the Gladius Long for distance shots and/or when I want more power. I will be using the AT-P2 QE for my normal close-in pest work.

6/29/2020 Update: Still very happy with both airguns. We now have replacement fill-probe O-rings and caps to keep your fill probe clean. Click here to learn more.


If you find this post useful, please share the link on Facebook, with your friends, etc. Your support is much appreciated and if you have any feedback, please email me at in**@ro*********.com. Please note that for links to other websites, I may be paid via an affiliate program such as Avantlink, Impact, Amazon and eBay.


The Wicked Hatsan AT P2 Pistol / Carbine Combo – Powerful, Compact & Quiet

Hatsan is a Turkish company that was founded in 1976 and makes a number of airguns as well as shotguns. My first Hatsan was .22 Long Gladius Precharged Pneumatic (PCP) bullpup air rifle. The Gladius is amazing but I really wanted to find something smaller and more discrete. Even though the Gladius is a bullpup, it is still fairly big and heavy. I started looking for something else and ran across the Hatsan AT P2 and found what I was looking for.

Hatsan comes up with some radical designs that are well thought out and executed. I was very happy with Gladius so when I saw the AT P2 and that it had their proven Quatro trigger, was a PCP repeater, used their great 10 round magazines, and had integral Quiet Energy baffles, I was pretty much sold but kept reading 🙂

I prefer .22 caliber airguns for dealing with larger pests. The AT P2 claims 780 FPS so that will make around 19.8 ft/lbs of energy at the muzzle. This matters to me because I need the carbine for pest control – chiefly ground squirrels, tree squirrels and rabbits – all of which tear up our gardens. These animals typically need about 3-5 ft/lbs to be dealt with provided accurate shot placement. This means you need an airgun that can put pellets on target in an area of 1″ or less at the range you expect.

I am typically taking care of pests within 10 yards and rarely out to 20. In digging I read reports that the AT P2 was surprisingly accurate, had a good trigger and could hit surprisingly hard with for 10-20 pellets. Unlike the Gladius, there isn’t a power adjustment plus you are talking about a fairly small 50cc air tank compressed to 200 bar (2900 PSI).

Hill Mk4 Hand Pump

Another reason for my buying the AT P2 was that I could continue to use my Hill Mk4 hand pump that really has proven itself to be exemplery. The Gladius and AT P2 use the same air fill probe so I didn’t need to worry about changing probes or buying a second pump.

I actually find the smaller air cylinder works in my favor with the Hill pump. I shoot one magazine and top it off again to 200 bar. It doesn’t take too many pumps to do that compared to a bigger cylinder where you need to put more air into the tank.

UTG 3-9×21 Mil-Dot Bug Buster Scope

So, I ordered the carbine and a UTG 3-9×21 Mil-Dot Bug Buster scope with an adjustable objective. UTG makes great scopes and I’ve used them extensively on airguns and firearms that are not mission critical. I don’t mean this as a negative to UTG – It’s just that I will go to Vortex for those situations.

The Bug Buster scopes are just ideal for this type of application. They are compact, bright, clear and pretty reliable. I’ve had a few over the years and haven’t had one break or fail to hold zero.

They have a number of models of Bug Buster scopes and I don’t think you will be disappointed in any of them. Here’s the one that is on my AT P2:

If I had it to do over, I would buy a scope that has turret for adjusting the illuminated reticle. The push buttons work fine but I prefer the simplicity of a turret – I guess I am just old school. A lit reticle can make a low light shot either early in the morning or at dusk way easier. Here’s what I would recommend:

Plano 1502 Hard Case

I already had a basic Plano 1502 hard case to store everything in. It comes with a little hard case from Hatsan but I wanted to have enough room to put the carbine with the scope attached inside.

The only con in the case of the 1502 is that it has an interior length of 50-7/8″. That is really long relative to the AT P2. I have the stock extended one click and that makes the overall length 32-/34″ and the height from the bottom of the grip to the top of the scope turret is just under 10-1/2″. The AT P2 could have gone in a far smaller case but I made do with what I had.

JSB Exact Jumbo Diablo 15.89gr Pellets

I really like JSB pellets. I’ve shot over a thousand of the 18.23gr pellets through my Gladius. I wanted something lighter to try for better in flight ballistics and less over-penetration so on a gamble I ordered the 15.89 gr pellets.

How did it turn out?

I’m really happy is what it boils down to. I needed to oil the safety lever to smooth it out but other than that, it shoots like a dream. I tell you what, it definitely takes care of tree squirrels – head shots are no problem at all and the trigger is remarkable.

One thing that surprised me is the target grip. It comes with a right hand only grip set that is remarkable comfortable. If you are a Lefty, you can contact Hatsan USA and they will send you a left hand set.

The removable adjustable stock is clearly innovative. I find it way to big to be a pistol plus I want the stability. I didn’t buy it to use without the stock. Removing the stock is simple – push the big detent button and pull straight back.

As mentioned, it is a big pistol as this next photo shows. Unless I was resting it on a fence or something there is no way I would be able to control it. If you have a lot of arm strength and can keep a big pistol steady, then maybe but not me.

The stock can adjust four clicks to be quite long. I just need to go back one click and I am 5′ 8″. The cheek piece is adjustable but I did not need to do so.

This is what it looks like for me:

It’s also remarkably quiet. I haven’t run it side by side with my Gladius to compare the sounds at equivalent feet per second but I can tell you it is way quieter than by Gladius on power setting four. I think the cocking is louder than the report of the airgun and it will put a tree squirrel down hard. Headshots tend to stop in the cranium but heart and lung shots go through the body.

Conclusion

It’s performing exactly the way I had hoped. It is compact, quiet, powerful and also very accurate. I’d definitely recommend it.

If you’d like more comparisons between the Gladius Long and AT P2 QE Pistol, click here.


If you find this post useful, please share the link on Facebook, with your friends, etc. Your support is much appreciated and if you have any feedback, please email me at in**@ro*********.com. Please note that for links to other websites, I may be paid via an affiliate program such as Avantlink, Impact, Amazon and eBay.


Ryobi P739 18 Volt Compressor Is Very Handy And Is Holding Up Great!

The one thing I notice about getting older is that I don’t have the strength to go lugging around as much as I used to not to mention I don’t have a ton of patience either.  This issue affects me when it comes to portable compressors.

Because of Ronin’s Grips, I have a big stationary 60 gallon Ingersoll Rand compressor.  To work on cars, I run 50-100 feet of 3/8″ air hose to where I am working and life is great,  For years I had a portable two gallon compressor that required AC that I sold because it weighed quite a bit and needed an electrical cord.

Last Spring, I started hearing about various tool companies making cordless air compressors that could be used to run nailers, staplers or even inflate tires.  That idea definitely caught my attention.

I then read about the Ryobi P739 1 gallon air compressor that uses their common 18 volt batteries.  I have a ton of Ryobi tools and batteries so I bought one from www.homedepot.com with home delivery.  Note, I specifically bought the model above – there are other previous models but I can’t speak to them.  Also, the website will frequently sell different bundles (the unit with a charger and at least one battery) that you will probably not see in a store so at least check the website before you buy.

First off, this is not an inflator that puts out tiny amounts of air.  This has a 1 gallon tank that is pressurized to 120 PSI and has an adjustable regulator.

This little compressor is meant for tools that have low air requirements or inflation as it does not put out a ton of air – 0.75 standard cubic feet per minute (SCFM) at 40 PSI or 0.5 SCFM at 90 PSI.  Note, I am just going to write SCFM for the compressor because Ryobi says the above is a SCFM rating.  CFM is different and click here if you want a pretty good explanation.

Once the tank is pressurized, you’ll have enough air to run a brad nailer, finish nailer or stapler.  The question becomes how many nails can you drive before the compressor will need to kick on and refill the tank.  The answer unfortunately is “it depends” because of the requirements of the tool.  It will never put out enough air for tools that require a lot of air like ratchets, impact hammers, sanders, spray painters, etc.  Don’t even consider it for those tools that say they require over 2 CFM.  The Ryobi simply was not designed for those use cases and never claimed to be.

This little compressor will probably be great for 10-20 finish nails/staples and then need to run its compressor.  If you try to use the tool too fast when it is trying to recharge the tank, odds are you will draw more air than the tool can deliver and the pressure will continue to drop.  Remember – the compressor itself is small.  When the tank pressure drops and the compressor kicks on, it will need time to recover.

You’ll notice I didn’t mention a framing nailer or even a roofing nailer.  Odds are the compressor can do a few of those but it would never keep up.  Portable job site compressors for nailers can deliver 3-5 SCFM @ 90PSI and keep up with even several nailers running.  If you plan on some quick fix with just a few nails then sure, this would work.

What this little Ryobi brings to the table is portability.  It is only about 14 pounds before you add the battery and tools.  I use one of the big 4 amp hour Lithium Ion batteries on it and then keep a 25 foot Amflo line on it with Milton 1/4″ quick connect fittings.

I like the Amflo line as it is made from polyurethane and remains flexible even in cold weather plus it doesn’t leave scuff marks everywhere.  The old rubber and PVC air hoses are big, bulky and really get stiff. The challenge is keeping all the Amflo hose on the unit when moving it around. Velcro really helps. I started with an oddball strap that I had laying around. It helped but I needed two more to really secure it and used a cool double sided “Velcro” tape that is out now.

I use a hook and loop tape that rocks.  The brand name you know is “Velcro” but you will hear people generically refer to it as hook and loop.  At any rate, this stuff has the hook one one side and the loop on the other – you cut off the roll whatever length you need and it is simply fantastic for managing cables, or in this case, keeping that Amflo hose on the holder.  I use three pieces – on the two sides and one at the top – because most of the time I am using just a short section for topping off tires.

As mentioned in the past, I just use Milton fittings now.  Harbor Freight, Home Depot and other discount brands have let me down one too many times including excessive air leaks with wear and even breaking.

One last small tip, use good Teflon tape.  The stuff I am using right now is off Amazon and is way thicker than the cheapo stuff you often see.

I have a 16ga NuMax finish nailer and an 18ga Wen finish nailer that work just fine with this plus a Surebonder T-50 Stapler.  I have others but these are the ones that I have used with the Ryobi and am happy.  Again, I am not doing high volumes – more like small projects, repairs, etc.

It Rocks For Topping Off Tires

What I use the Ryobi for the most is to top off car and truck tires.  It really makes this chore easy.  Sure my big compressor is faster but to go around and add up to 5-10 PSI to a tire is easy with this.  To give you an idea of size, the next photo shows the unit next to one of my Landcruiser’s good sized 275/70R16 tires.

I used to lug around a portable five gallon tank but it weighs a ton, is cumbersome and I might need to refill it several times before I get done.  If I didn’t do that, I would have to pull the car around by my shop, hook up a line to reach it and then fill the tire – that can also be a headache unless the line is already hooked up.

What you see above is a Milton S-506 tire inflator that I keep on it.  I have another in the garage that is beat to death but still working.  It is so very, very handy to have the inflator and pressure gauge in one unit plus chuck heads at two angles for bikes, tractors, trailers, etc.

To give you an idea, I recently had to add about 2-4 PSI on each tire of my daughter’s 2002 Camry to get them up to 40 PSI.  The regulator was set at 90 PSI and it had a freshly charged battery,

Part way into the first tire the compressor turned on and continued running as I did all four tires on the car.  The battery’s LED charge indicator dropped one bar out of four.  The compressor turned off maybe two minutes after I topped off the last tire.

In summary, I’ve been using this compressor for over two months mainly for topping off tires and that really puts some stress on the little unit.  It seems to be holding up just fine.  It gets lugged around my shop, the drive way in the trunks of cars and no problems.  I can easily go out and check all our vehicle tires and top them off where they sit .

If you use Ryobi 18 volt tools, have the batteries and are in the market for a light duty portable compressor for the uses I outlined above, I’d recommend this one.  If you use another brand of 18-20 volt tool, I bet your vendor is making a portable compressor as well that you might want to research.

5/21/2019 Update:  This thing has been awesome.  I use it at least once a week to top off tires and has been great.  I’ve also used it a few times to run staplers and a finish nailer.  I really like it.  It definitely uses quite a bit of power so if you plan on using it a fair amount, I’d recommend at least 4.0Ah, or even better the new 9.0Ah, batteries you will be using the unit extensively.  I always have several batteries with me too.

1/31/20 Update: Still going strong. I can’t begin to guess how many times I have used this to fill tires and no real problems so far. The one tip I would tell you is to not leave a battery in the unit. The battery slowly drains for some reason – it always has and I am not sure why since it has a mechanical on/off rocker switch. It’s not a big deal – I just unplug the battery after each use and then the battery lasts far longer. This little compressor is so handy that I have no qualms recommending it.


If you find this post useful, please share the link on Facebook, with your friends, etc. Your support is much appreciated and if you have any feedback, please email me at in**@ro*********.com. Please note that for links to other websites, I may be paid via an affiliate program such as Avantlink, Impact, Amazon and eBay.