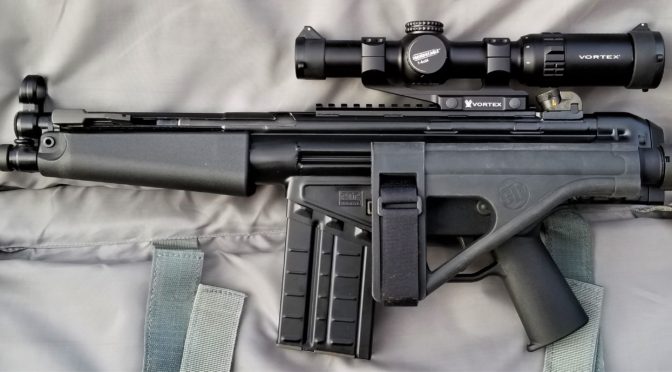
In the last blog post, I talked about the specifications and ordering the PTR PDWR. Even before it arrived, I knew I wanted to add a brace. My plan was to use PTR railed handguard and I had a “wait and see” attitude towards the brake.
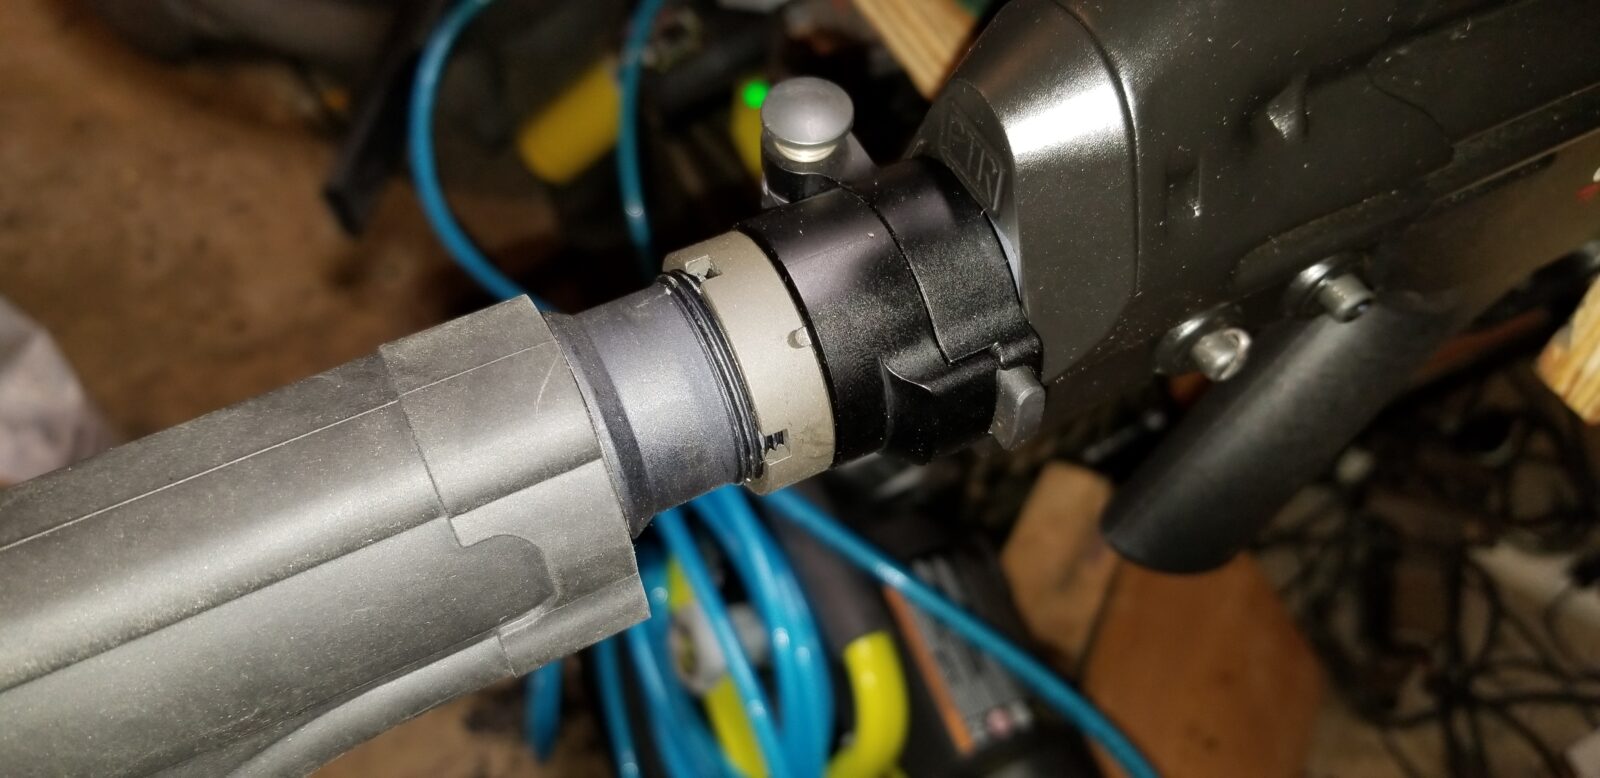
So, the first step was to remove the existing end cap. In HK-type weapons is is held in place by two push pins that are simply pushed back out. You’ll notice that one side is relatively flat:

The other side will be protruding and this is the side that you push on and will remove the pins from the other side:

You then wiggle the end cap and push it off the end of the stamped receiver. It will look like this:

I then secure the end cap assembly in a vise to make working on it easier.

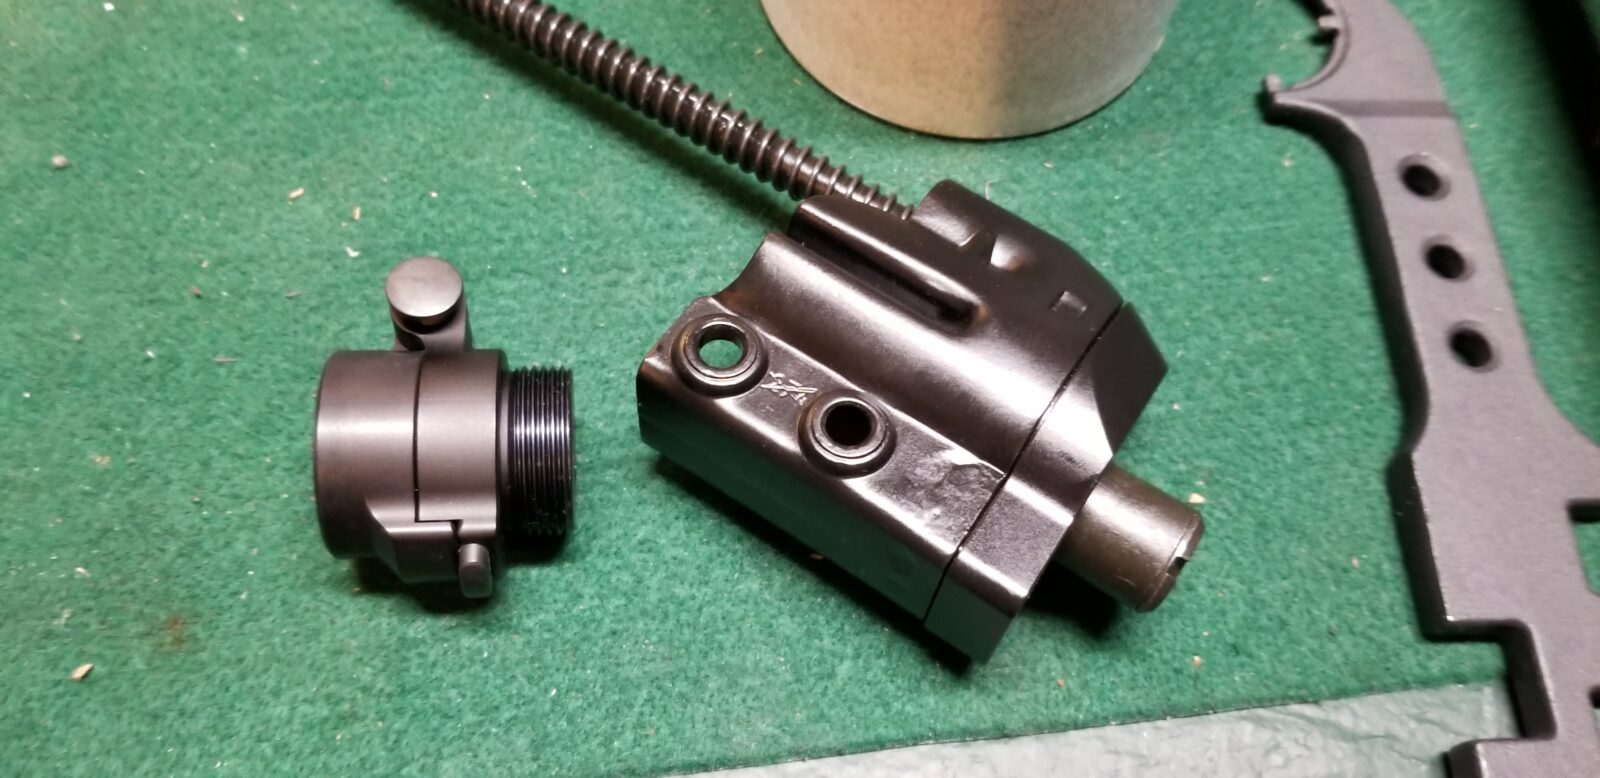
In the next photo you can see how the tube and sling really are like a small stub of an AR/M4 buffer tube complete with an indexed end plate to keep it from rotating and a castle nut. The swivel is separate from the tube and is threaded into place so unscrew and remove it first.
In the next photo, you can see the lighter grey castle nut on the black tube. The light grey surface you can see in the otherwise black cap is the plate you will need to fish out after you back off the castle nut.

To remove the tube itself, you do the exact something you would on an AR. Use a castle nut wrench to loosen the castle nut and then thread it back out of the way. Then pull the end plate out of the receiver so it can rotate and then turn the tube to remove the assembly.

In the next photo you see the castle nut wrench on the tube with the sling. I realized shortly after this was taken that I probably needed to get the sling off before I could back out the tube – that is why I said remove the sling first.

As written above, you will need to pull the end plate out of receiver to be able to turn the tube. With the plate pulled out from the receiver, the tube simple unscrews. If it does not want to unscrew, make sure your plate is out of the way. Also in the next photo, you can see the very secure mount that the sling screw threaded into. That was well thought out.

Next, I wanted a folding mechanism to be inline between the receiver cap and the buffer tube. SBTactical makes a very sturdy 6061 aluminum unit known as the “BTFA”. To install it meant the tower that the sling swivel screwed into needed to be removed. It adds about 1.1″ to the length when installed.
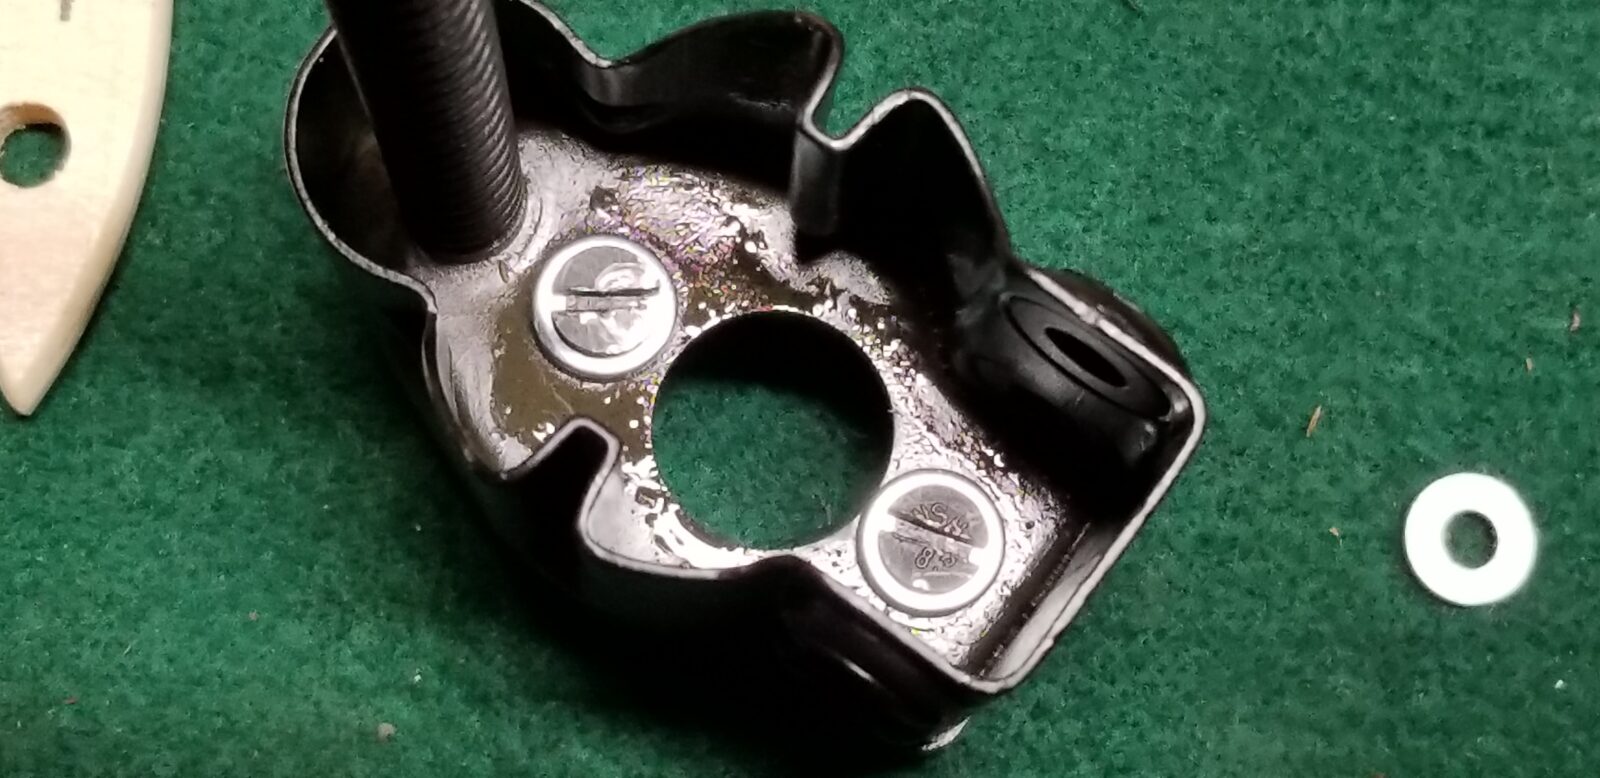
The tower is held in place by two screws inside the cap. Mine were beat half to death – the assembler at PTR must have figured nobody would ever notice. He/she was wrong and I was disappointed that they had installed the screws with an undersized blade screw driver and tore up the slots.
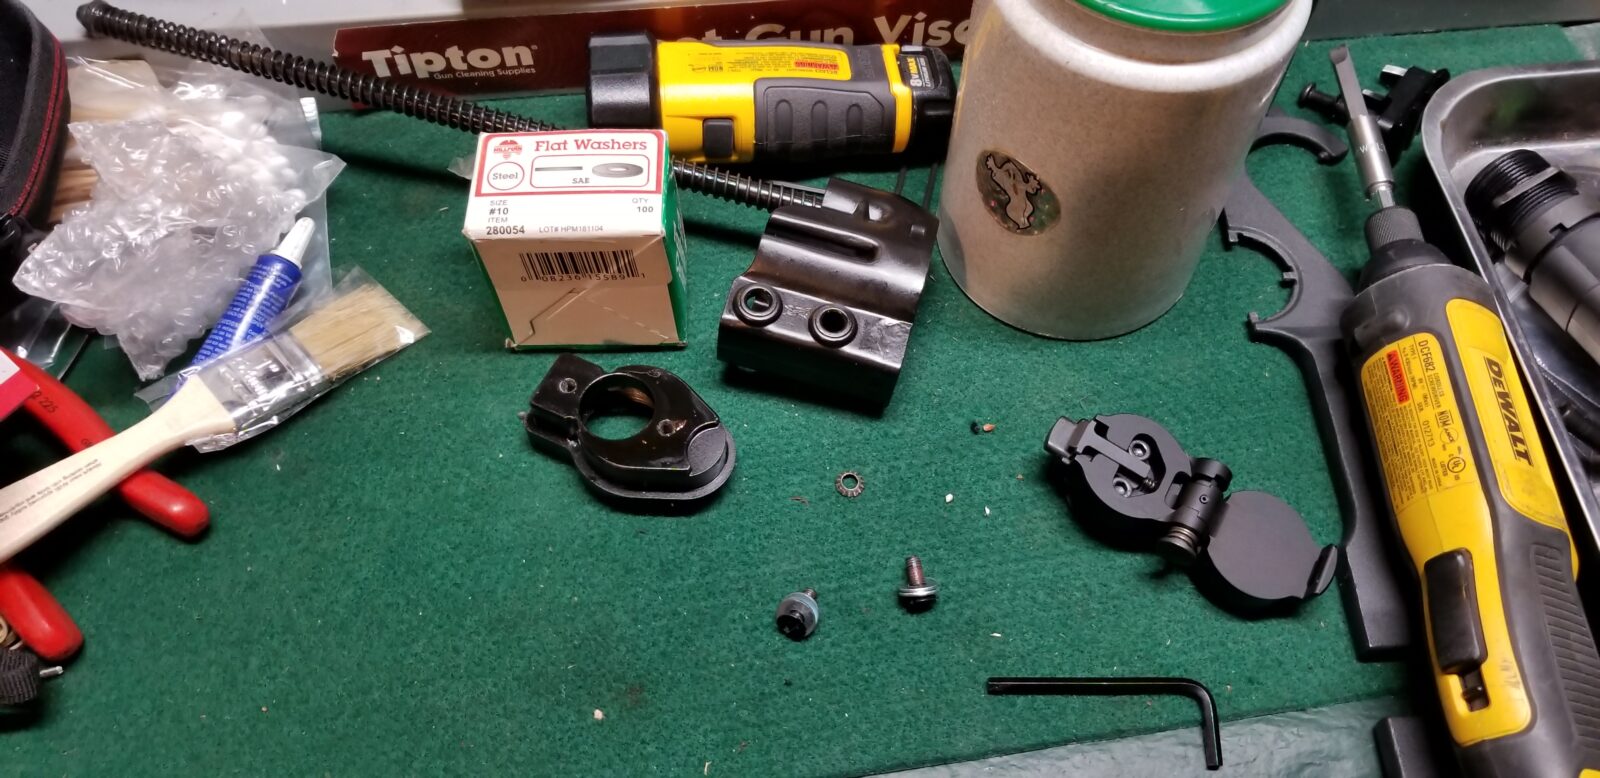
Once I removed the tower, I just inserted three #10 washers between each of the screws so the aluminum end cap and the sheet metal assembly would all come back together nice and snug. If I wanted to take the time, which I didn’t have, I should have found some of the correct size button head socket screws and replaced the beat up countersunk originals. So, what I had looked like this and the screws were a bear to get in (Yes, I did use the correct size screw driver to put them back in.)
Putting it Together
The BTFA install is very simply. Use the supplied allen wrench to loosen the disc assembly that is the threaded plug that goes into the receiver. Do not remove them all the way – you just want to loosen it up so you can screw in all the thread and adjust the folder to the direction you want. I wanted the stock to swing to the left to lock out of the way of the ejection port. You then tighten down the allen screws back down.

I installed an SB PDW tube and an SB SOB (love that acronym) brace. Now, to install the tube, I reused the PDWR’s end plate to and a new castle nut that came with the tube.

To install the buffer brace on the tube, I spray silicone on the tube so it can slide on way easier plus it makes it easier to true up the brace if it needs to move a little bit one way or the other.
One comment about the end result, it is a solid folder but the combination of tube and folder is long. I will investigate other options and post the results in the future.
The Handguard
Now, in terms of the handguard, I thought I was going to use the original PTR model you see in the photos above. It’s a little small left-to right in my hands so I actually wound up changing to a US made wide tropical forearm. It’s a tad looser than I would care for and will post updates about that later. I may stick with the existing wide tropical unit or move to a DTAC like I have on my POF-5.

12/17/18 Update: I’ve now tried three or four models of MP5 handguard and they all wiggle. I’m either going back to the PTR unit or a DTAC. The DTAC handguard on my POF-5 has been solid as a rock.
Next up is the optic.
If you find this post useful, please share the link on Facebook, with your friends, etc. Your support is much appreciated and if you have any feedback, please email me at in**@*********ps.com. Please note that for links to other websites, I may be paid via an affiliate program such as Avantlink, Impact, Amazon and eBay.