Do you have an old HK grip, or any other plastic item, you want to rejuvenate? Or maybe you bought one of the contract grips, washed it and now it’s a dull grey and all of the scratches stand out and you want to make it look better? It’s easier than you might think.
Clean the grip
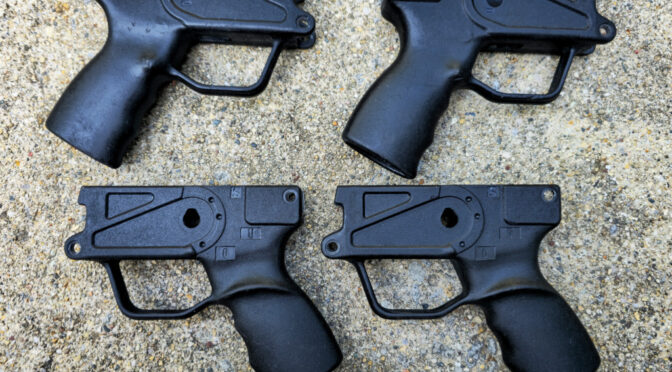
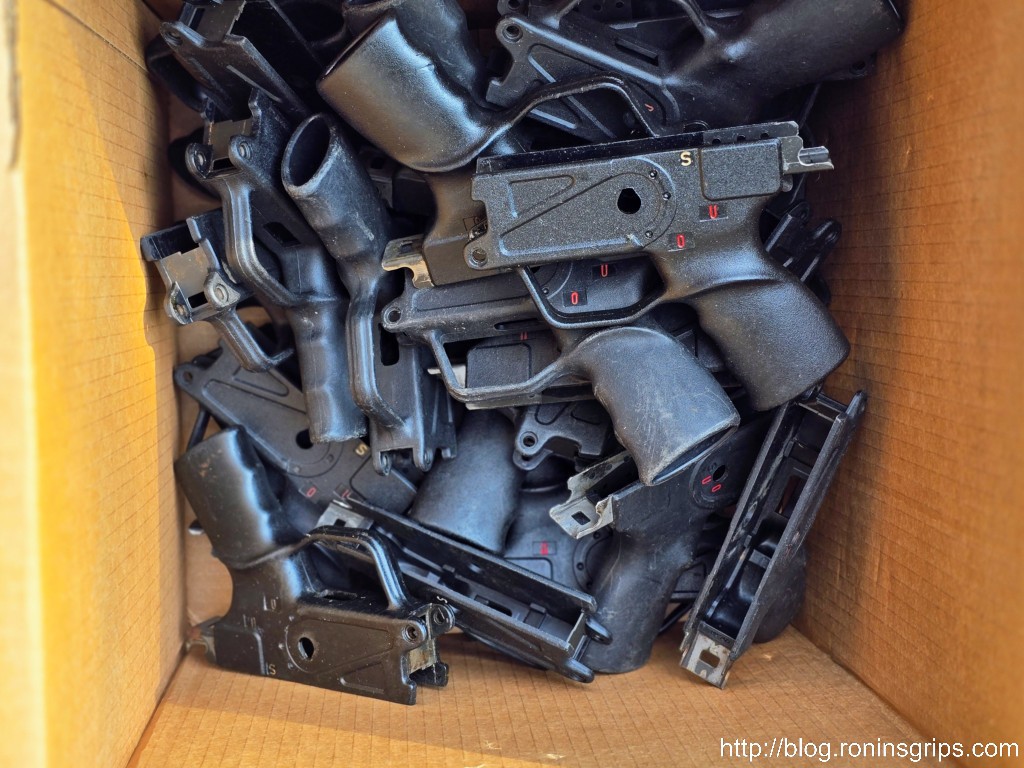
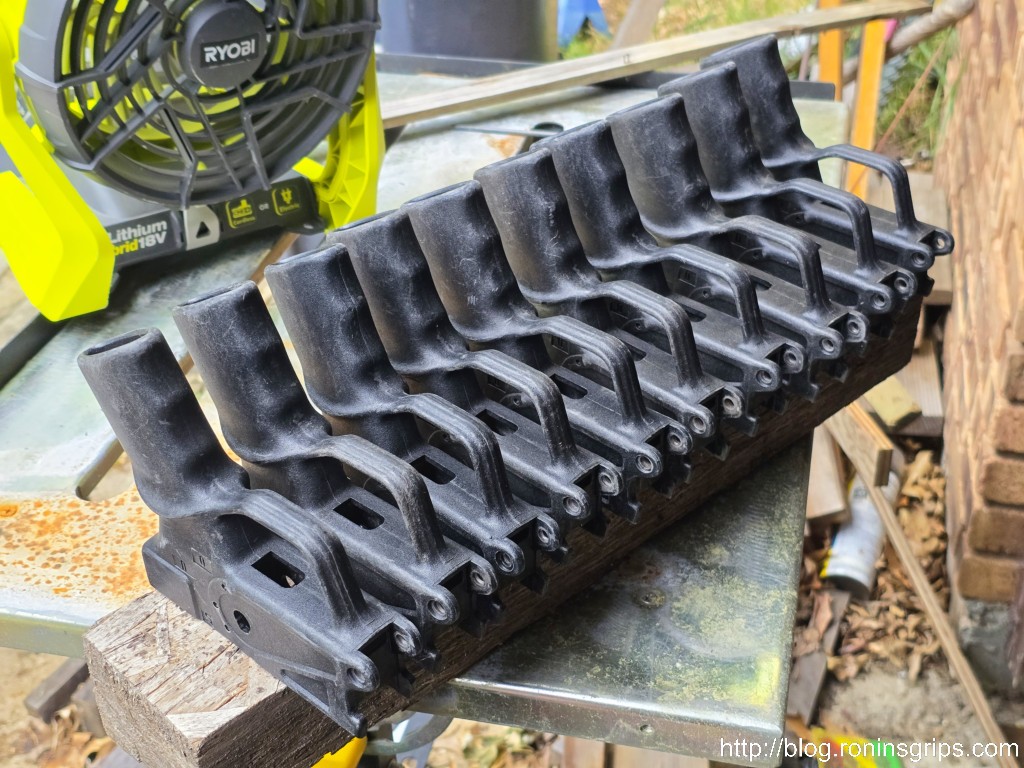
I recently boought a bunch of the the surplus HK33 “contract grips” that were made by SME Arms and Ordnance manufacturer, Malaysia under license from HK and most of them really needed cleaning – everything from cosmoline to brown masking tape with numbers were on them.
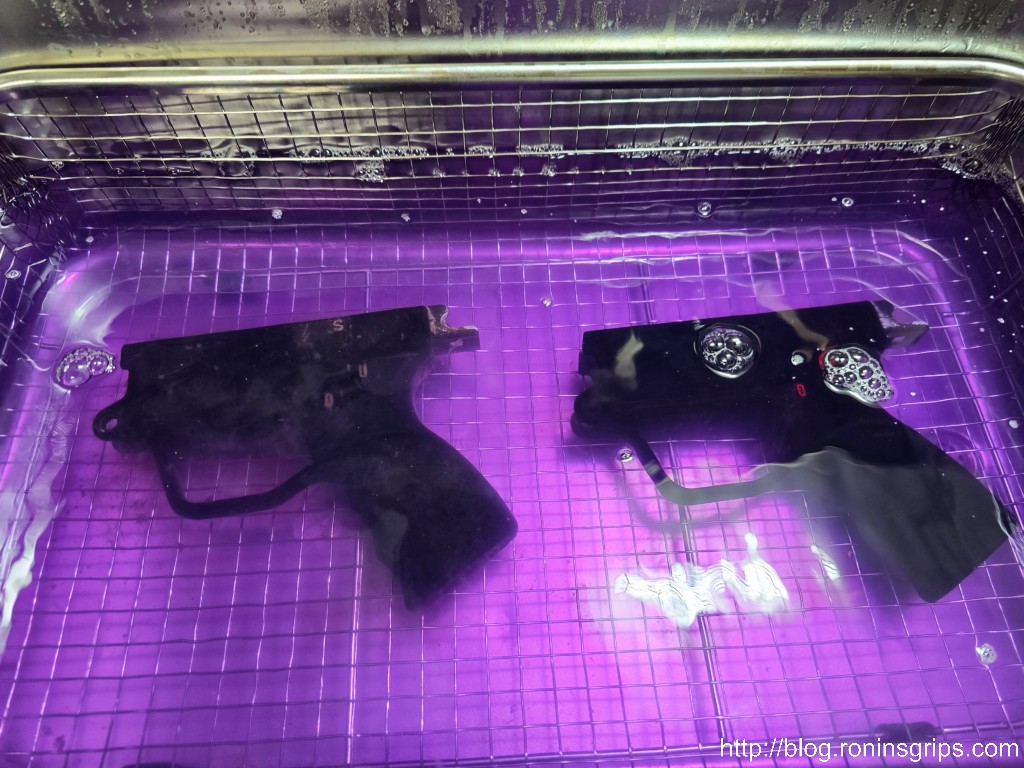
The first thing is to really clean the grip. I use a Vevor 30L ultrasonic cleaner[click here for a review I did on mine] with Simple Green HD and water in it but you can use any warm-to-hot soapy water and something to scrub with to clean it up. Use compressed air to blow it dry real quick before any exposed steel surfaces rust.
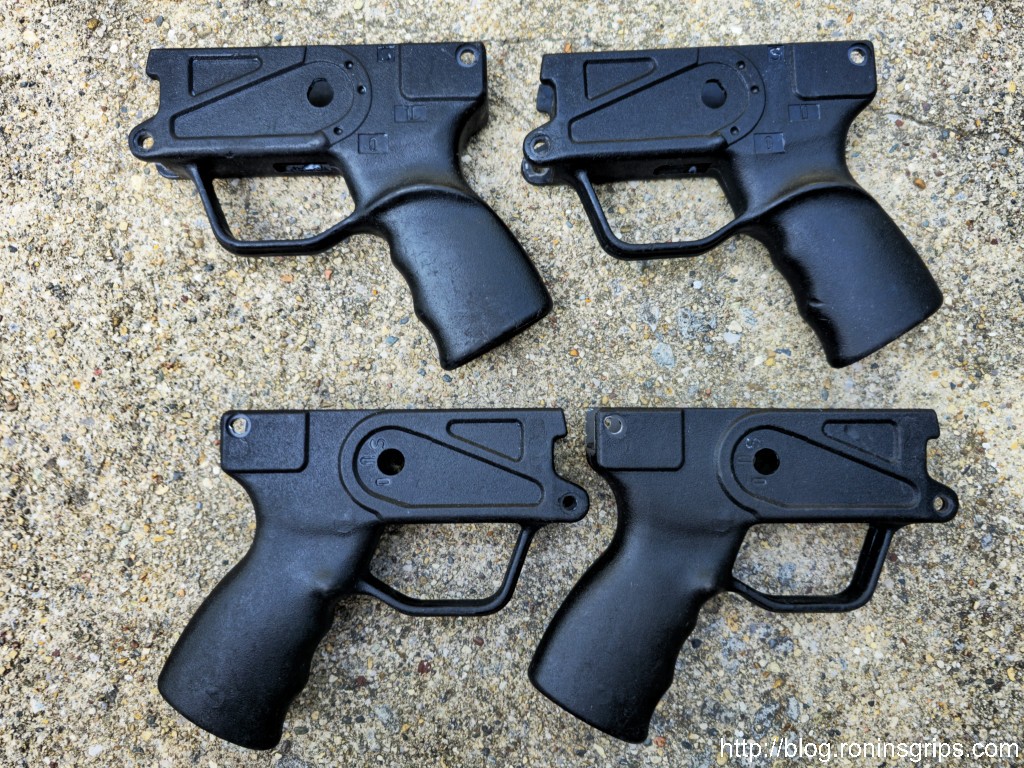
These HK33 grips are a mess. Most are beaten up to some extent. Many were covered in cosmoline – that grip on the top that is shiny is coated in it. Some even had old dry masking tape wrapped around the actual hand-grip portion.
If you aren’t interested in ultrasonic cleaners, you can also have very good luck with hot soapy water. I used to recommend brake cleaner but that has really lost its cleaning power as various regulations have really reduced its strength.
This is a 30 liter Vevor ultrasonic cleaner filled with Simple Green Pro HD heated to 158F (70C). It gets rid of pretty much everything in 15 minutes including most if not all of the paint in the lettering.
Dealing with scratches and small nicks
Major repairs can be a challenge. Filling them with black epoxy or black super glue creates visible repairs. Black super glue to close a clean crack works surprisingly well. Starbond makes a black super glue that is superb at closing cracks plus bonding clean surfaces together in general – click here to see it at Amazon
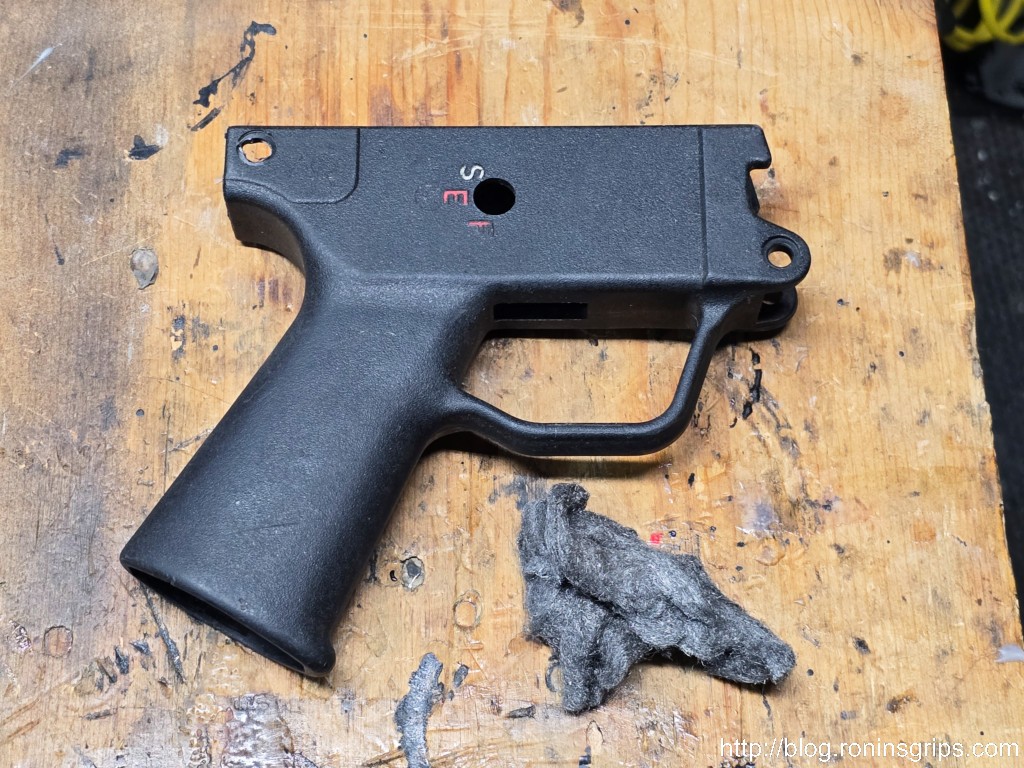
For minor scrapes and scratches, the best approach I have found is to use 0000 (sometimes called “quadruple ought” or super fine) steel wool and vigorously rub down surfaces to get rid of scratches and any plastic sticking up from getting nicked. The benefit I have found with it vs. sandpaper is that it doesn’t destroy the surface finish as easily.
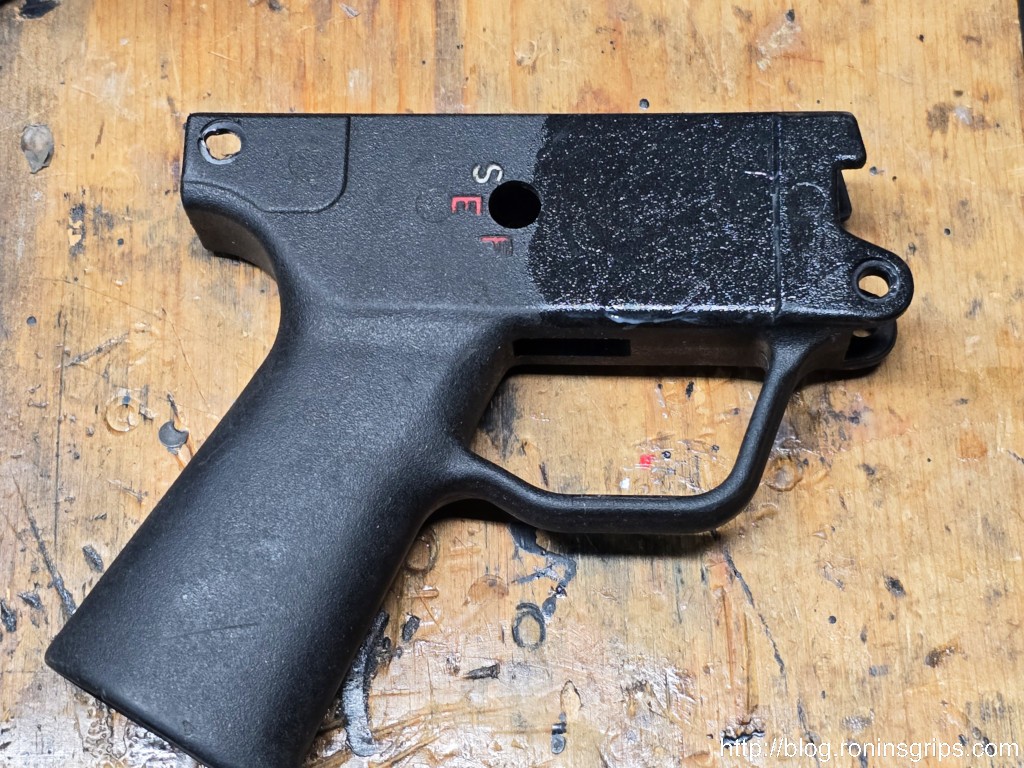
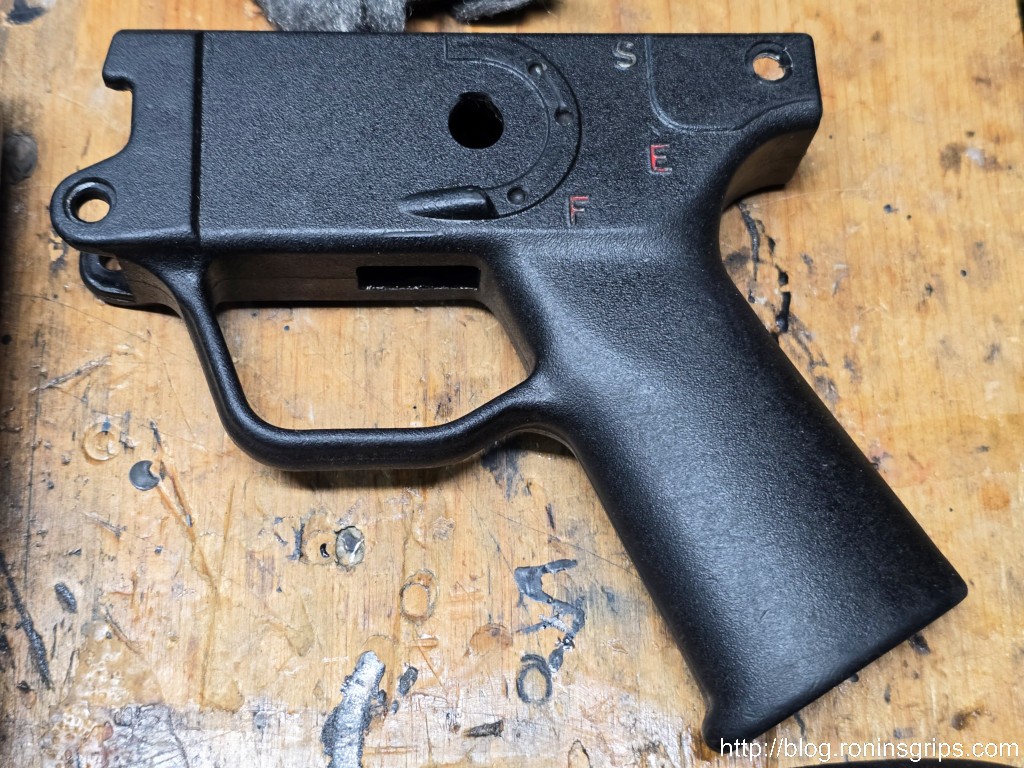
This is an actual HK German SEF grip converted for use on an MP5K. I used 0000 steel wool to knock over any sticking out plastic and reduce minor scratches. I find careful use of steel wool helps me improve the surface some without destroying the pebbled finish on the plastic.
Restoring the black color
Black plastic fades as the surface layer loses its oil/moisturizers. The trick to try and replace those lost chemicals and bring the color back.
Black plastic that has been ultrasonically cleaned is greyish and you can see all of the scratches. If you don’t know it’s coming you can have a “what just happened” moment.
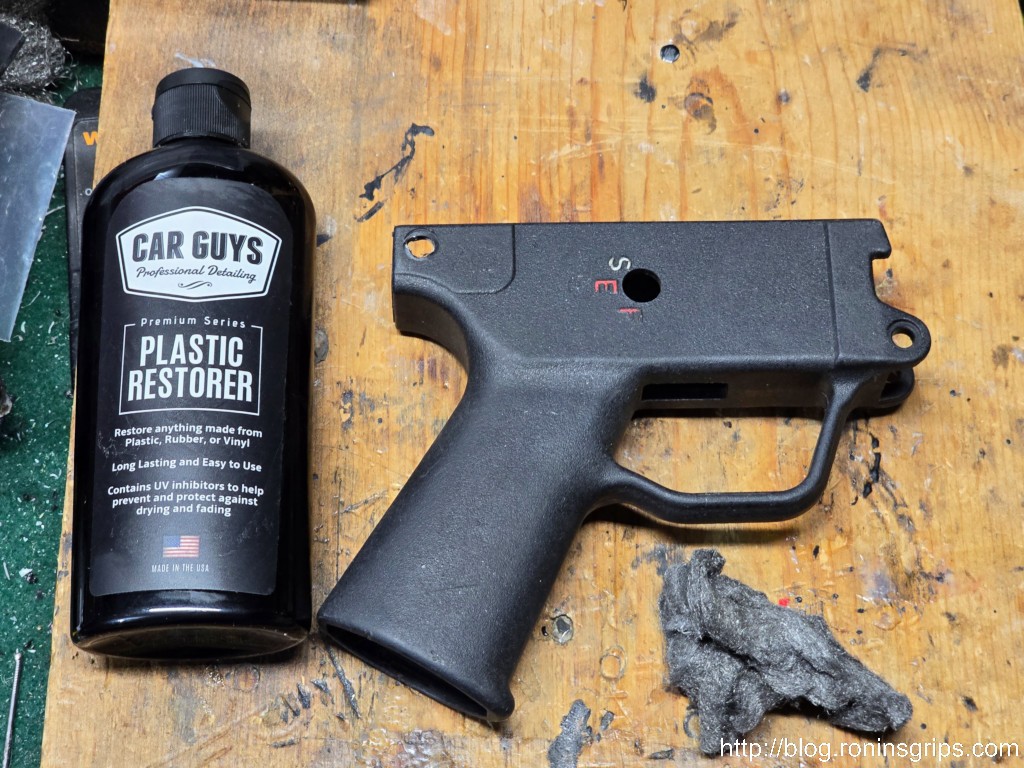
The treatment I use is made by Car Guys and is called “Plastic Restorer”. Again, make sure the grip is clean and then rub this stuff in. I use nitrile gloves and work it in. You want a thin film there. I let the stuff sit overnight and buff it off with a shop towel the next day. It does a nice job and will last for sometime. I’m not exactly sure how long – I’ve been using it for almost six months and nothing has faded yet.
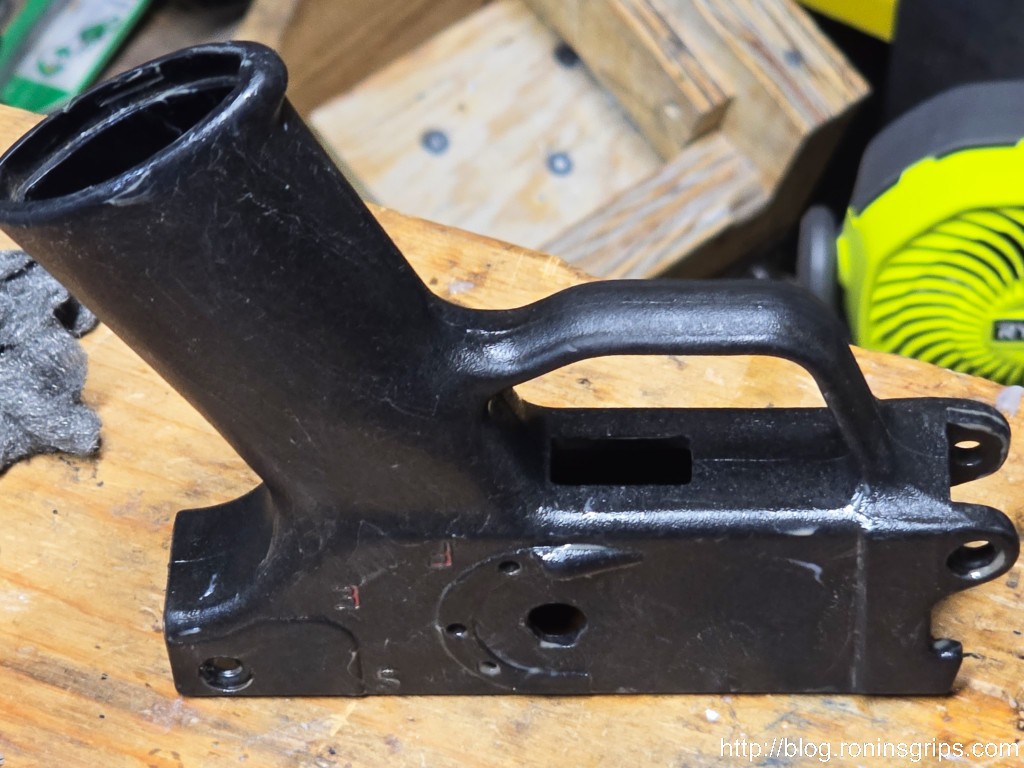
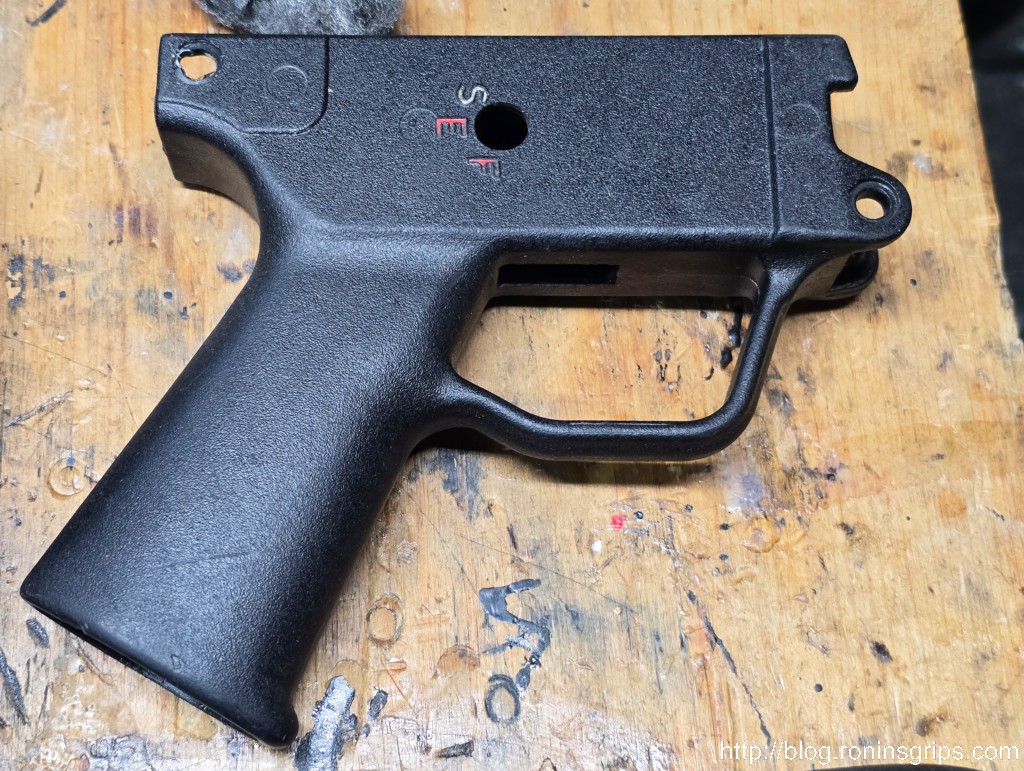
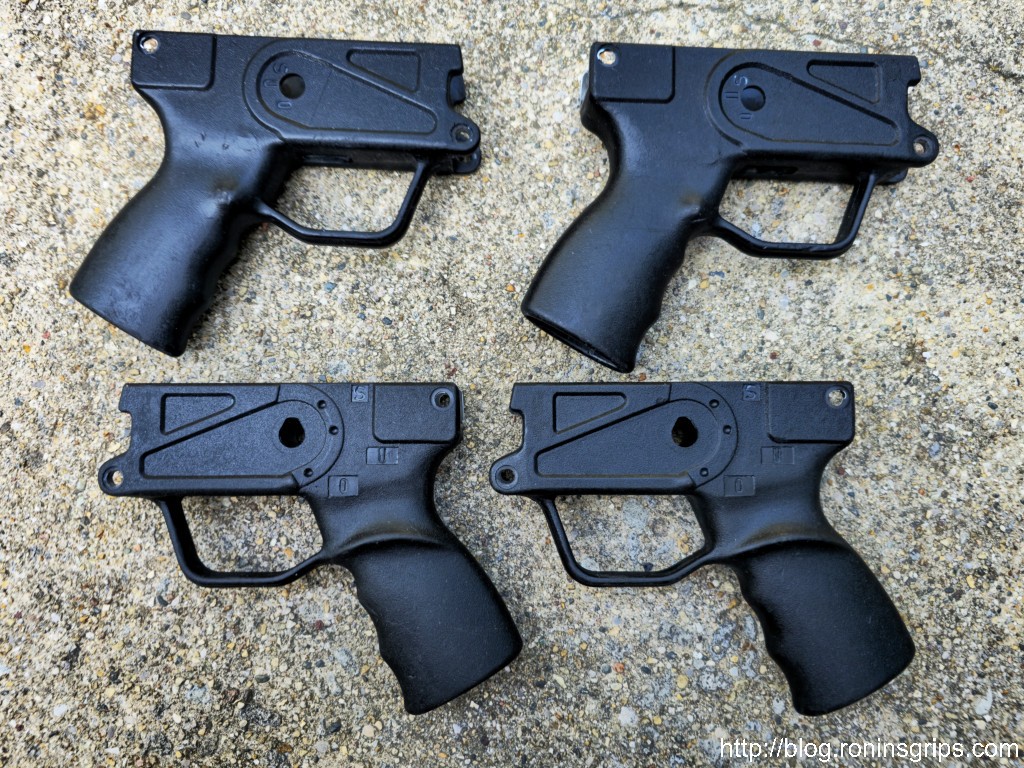
On this HK SEF grip, it’s been cleaned and I used steel wool to knock down any rough spots. Next up is applying Car Guys Plastic Restorer.The actual cream that comes out is an odd blue grey color. I wear nitrile gloves, put the cream in my glove and then apply enough to leave a film. It does need to have a light film – not super thick but something like this. It has to sit to work, I try to let it sit overnight if I can. They say at least 10 minutes but I find the longer the better. You then wipe it down and remove any residue on the surface,This is the same grip. It sat overnight and then I wiped it down the following day.Same grip – other side.These are four of the grey ashen grips shows above after following this process.Same grips – the other side.
Summary
I did not know why black colored platics fade with time. Now I do and the Car Guys Plastic Restorer works on more colors than just black. Click here for it on Amazon – there’s a reason there are over 31,000 reviews and a score of 4.4. It’s that good. So, whether it’s plastic on firearms, cars or something else, this stuff might really help you bring the color back.
One perk is that it does seal and provide UV protection after it is applied. I’ve been using it for six months and nothing has faded yet but then again, no finish lasts forever so I would bet that some day I will need to touch things up.
Note: This stuff isn’t for headlights and it doesn’t fix physically damaged plastic when there is a thick crust of oxidation or scratches. It’s meant to bring the color back is all.
I hope this helps you out.
Note, I have to buy all of my parts – nothing here was paid for by sponsors, etc. I do make a small amount if you click on an ad and buy something but that is it. You’re getting my real opinion on stuff.
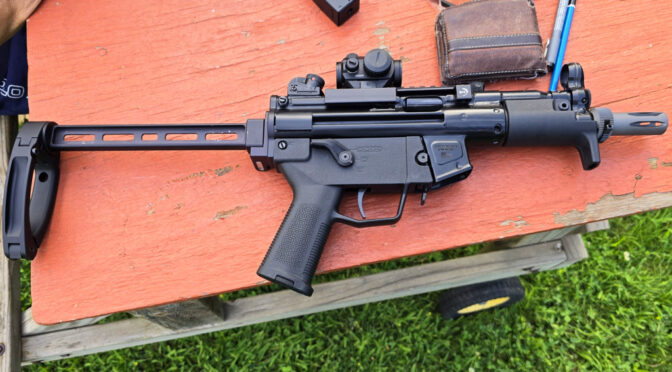
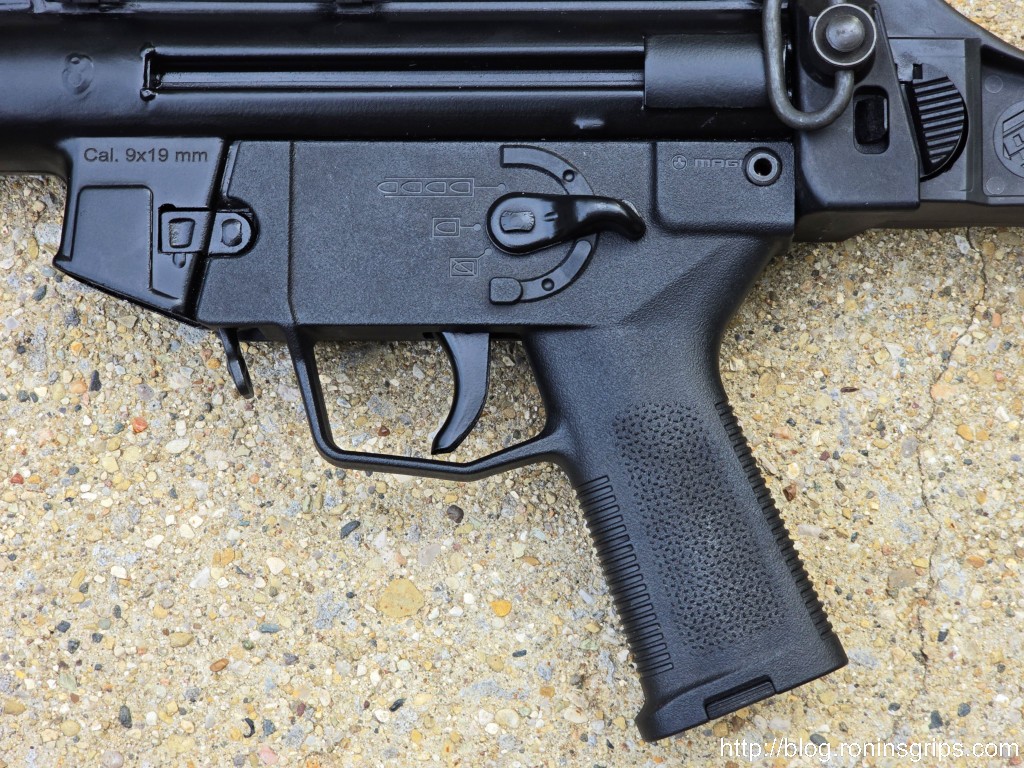
There are some things I like on MP5Ks and some things I don’t. I usually dislike the triggers but my MKE AP5-P has a fairly decent trigger as MP5 and MP5Ks go. My MKE also had a factory contoured grip. Of all the HK grips out there, the contoured is the one I like best but there is one I like even more – the “Magpul SL Grip for HK94, HK93, 91 and Semi Shelf Clones”. That one heck of a long product name – just remember the model – MAG1070-BLK.
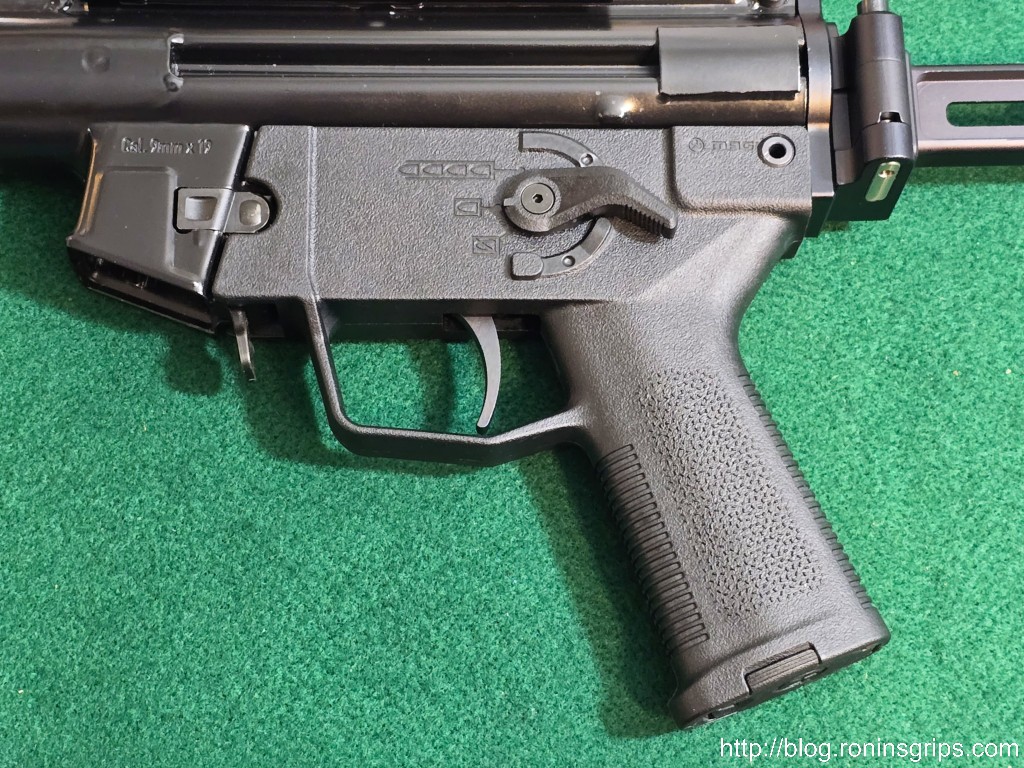
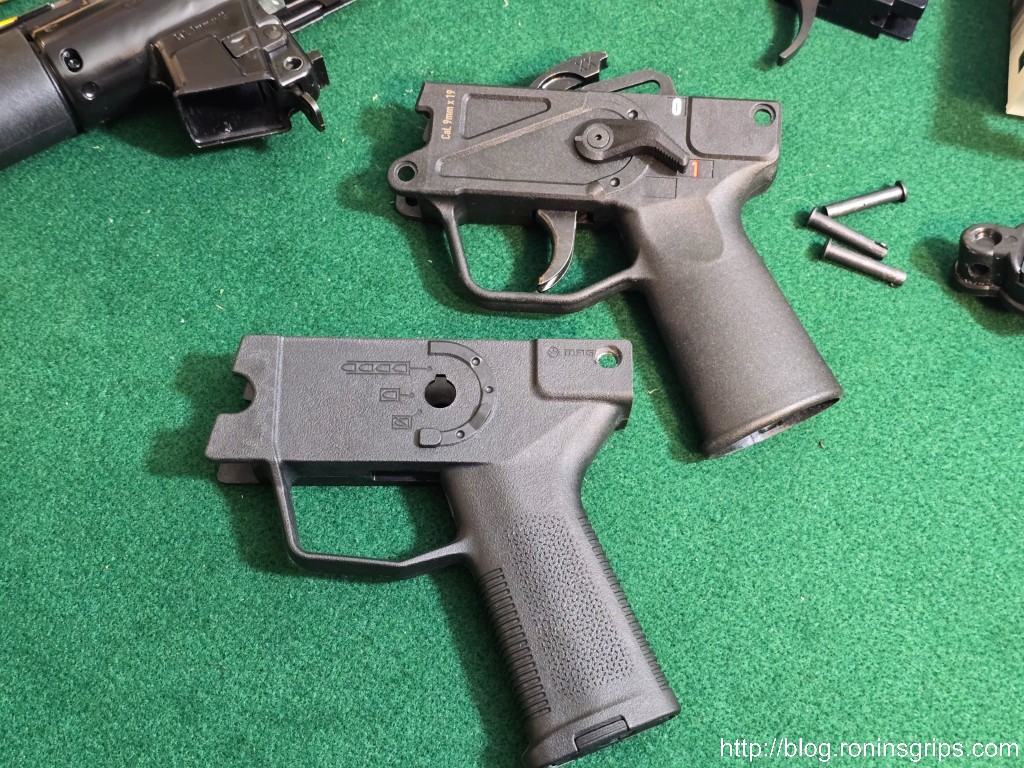
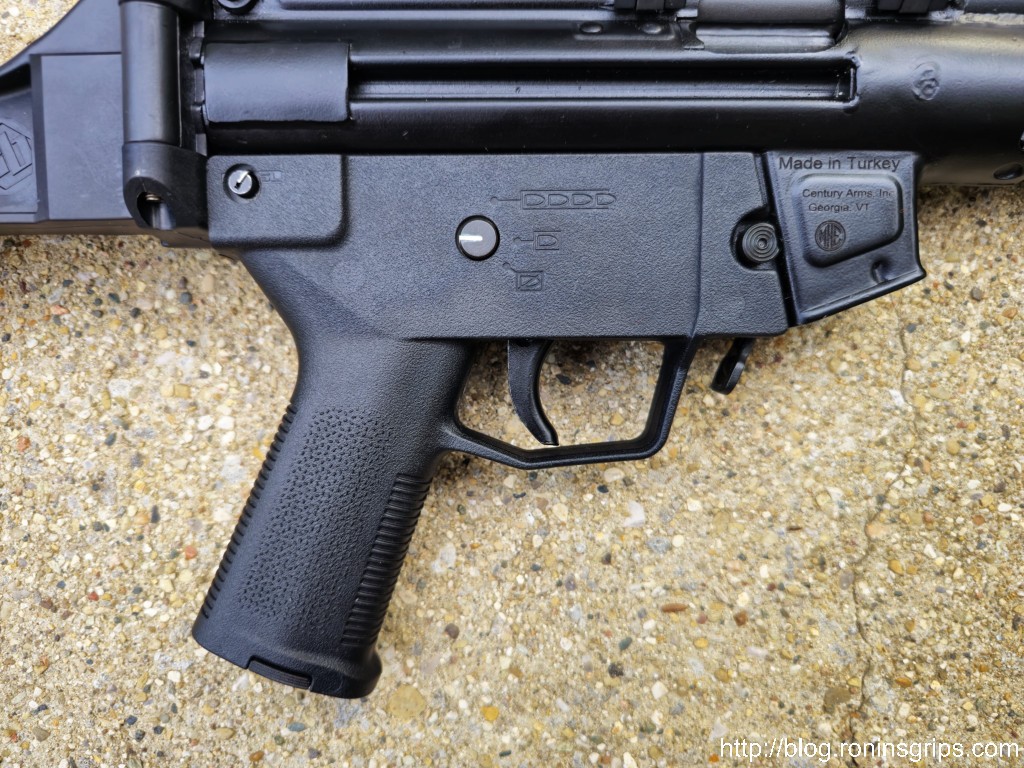
This is the Magpul “SL Grip Module for HK94/93/91/MP5 & Semi Shelf HK Clones” – Model MAG1070-BLKZenith ZF5-P. Very nicely made pistol. Relatively bland grip.Century Imports’ MKE AP5-P. It’s excellent. I like the contour grip more but that’s a personal preference.
A few months ago, I installed one on my Zenith ZF5-P and really liked it. Whereas the MKE has a contoured grip, the Zenith has a basic straight grip that is only slightly more ergonomic than a rounded rectangle. I’d read a few posts about guys converting over the Magpul grip, so I did the same. You know what? I realy like it.
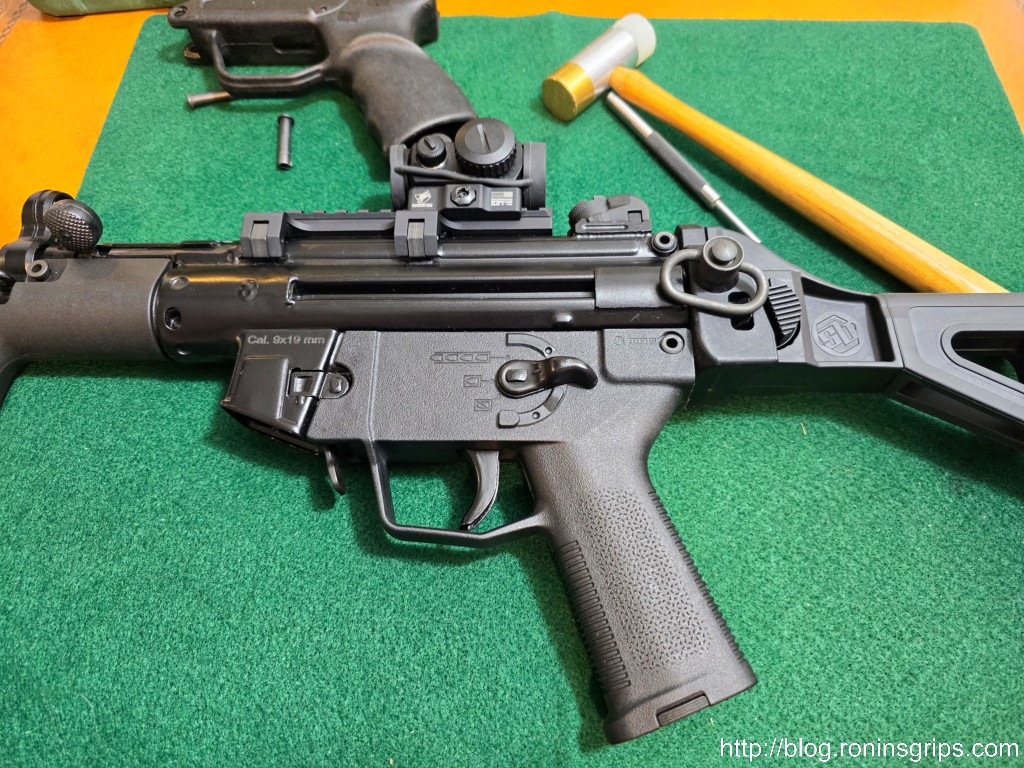
Here it is on the Zenith. By the way, that is Magpul’s cool ESK Extended Selector Lever. I have links to them at the bottom of the post.Here’s the second one on my MKE AP5-P.
Doing the Conversion
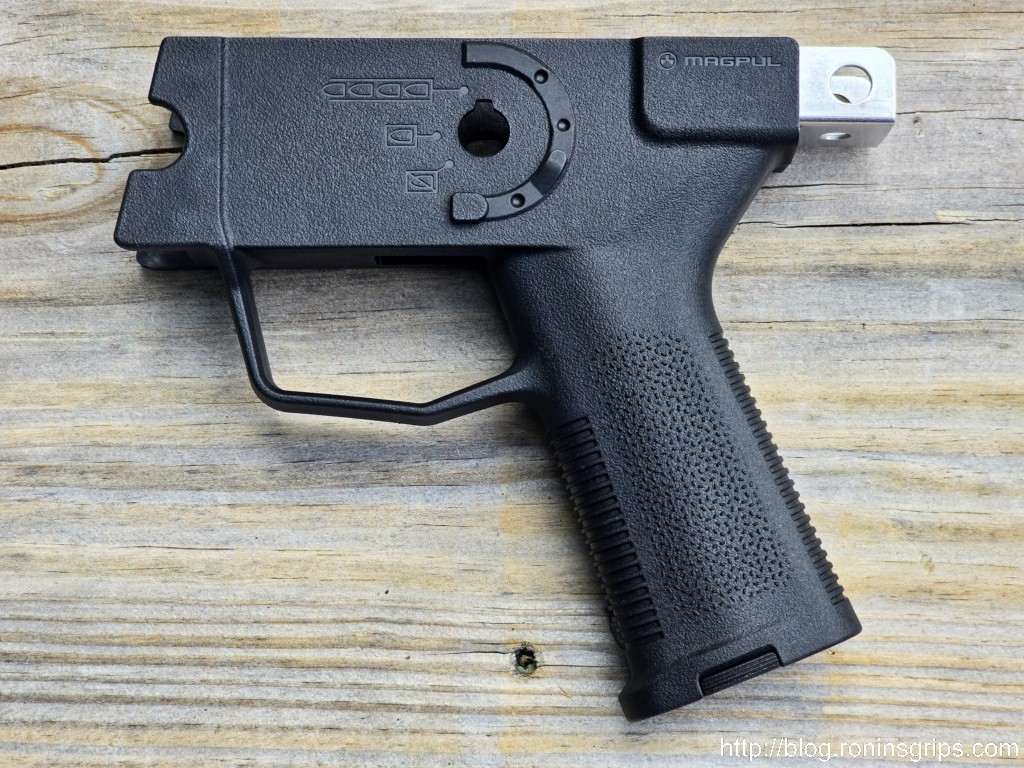
The Magpul SL grip wasn’t designed for use on a MP5K but what you need to do is pretty straight forward if you have the tools and at least some basic knowledge of locating holes to be drilled.
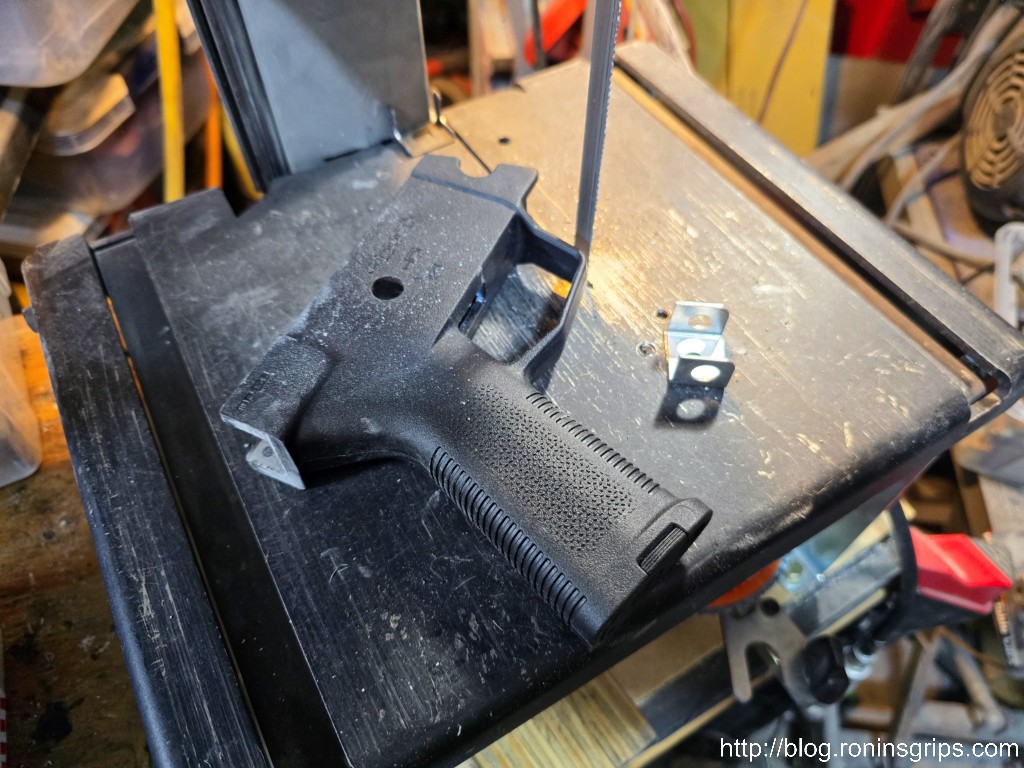
Let’s go over some basics – first off, the steel “tail” that sticks out of the Magpul will need to be cut off. I’d recommend using something like a hacksaw, reciprocating saw or a bandsaw. I have a metal cutting bandsaw so I used that. Please notice I did not list a Dremel or similar rotary tool with an abrasive wheel. They risk making the steel so hot that the plastic could be damaged.
The first step was to cut off the tail. I did it flush with the end of the plastic and cleaned it up with a belt sander.
Next, sand the tail end smooth. Take off as little material as possible as it will help you get a solid lockup.
Take off as little material as you can until the grip fits and the end cap, brace or stock can fully seat. By the way, I should have cleaned up a bit more before this photo – the dust you see if from me sanding Hungarian Grey-Blue AMD grips that we make. The dust is not from the Magpul grip – it will be black flecks of plastic and a bit of metal from the steel reinforcing channel inside the rear.
As you may have noticed, many MP5K-type weapons, such as those from MKE and Zenith, use two small pins to retain the grip assembly – one in the front at the bottom and one in the top rear. With the semi shelf and a snug fit, you just need the single rear pin to hold the grip’s rear end up and in place.
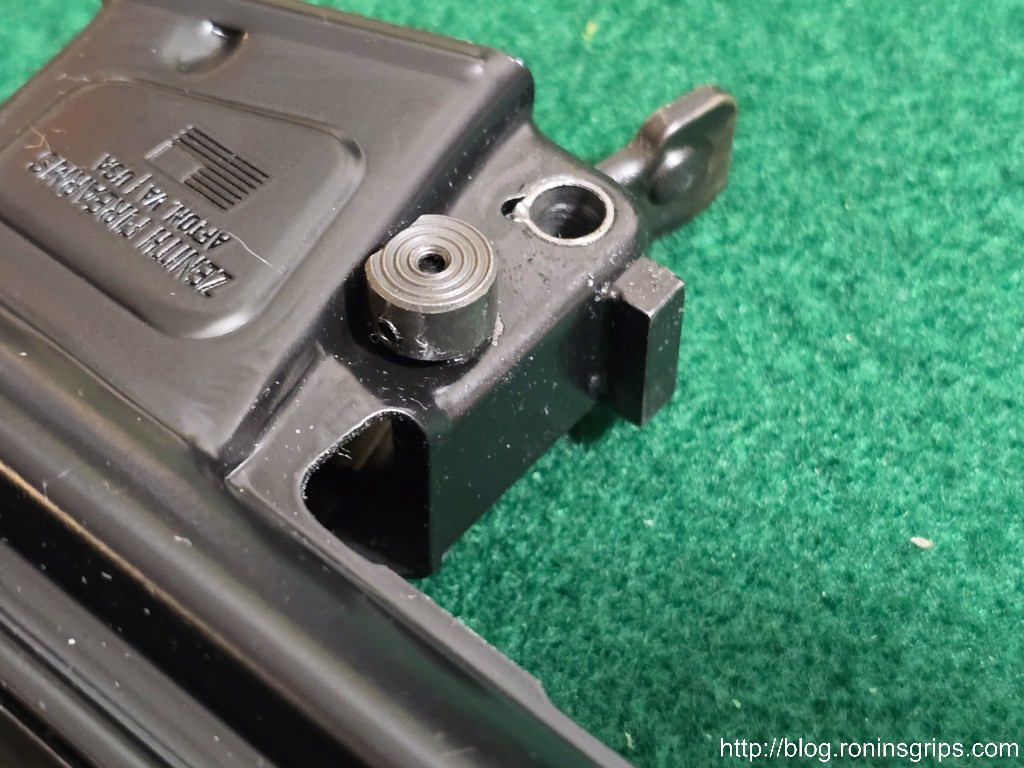
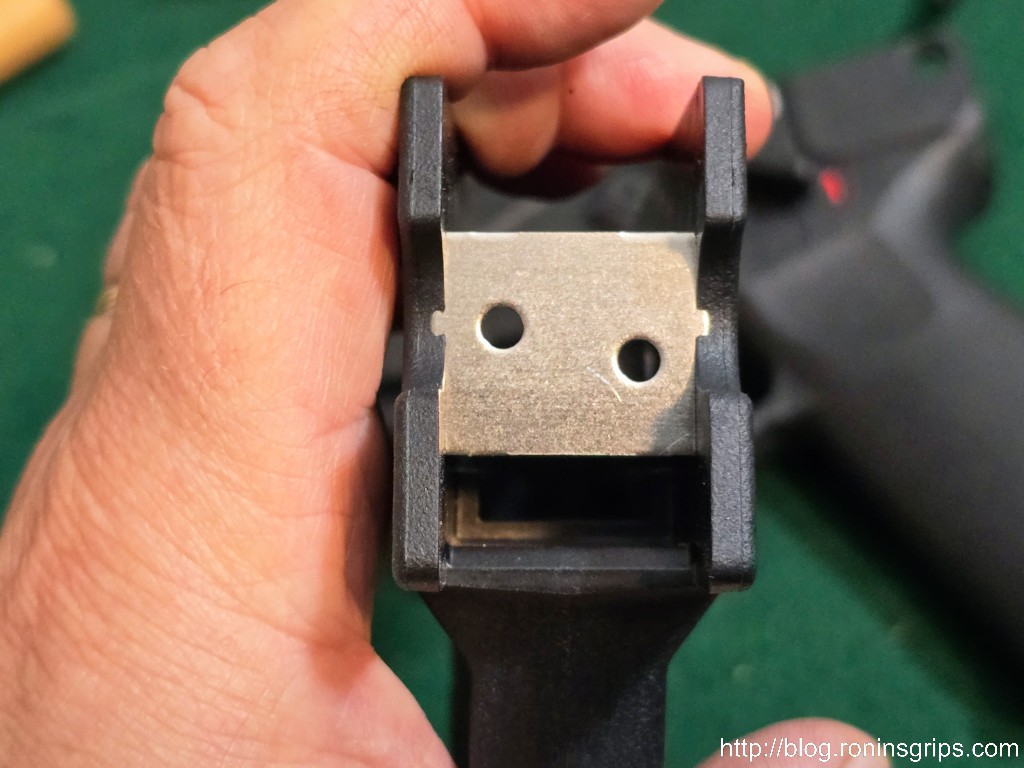
The front of the grip has a plate that interfaces with the semi shelf on your MP5K. Magpul includes instructions for SP5 owners that they may need to remove a little material for a good fit and I would assume this extends to the SP5K but I don’t know this for sure. With both my MKE and Zenith, no adustment was needed.
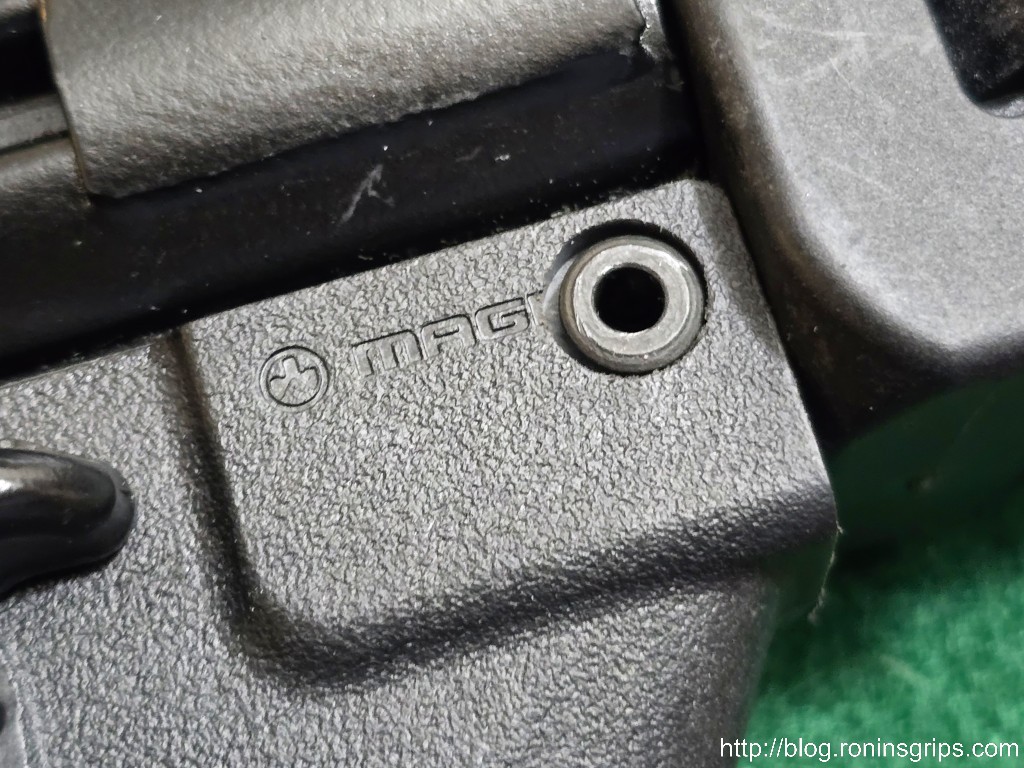
That little rectangle welded just to the right of the front grip pin hole is the semi shelf.This is the locking plate for the grip that interfaces with the semi shelf at the bottom slot in the photo (if the weapon were held upside down, it would be the slot at the top .)
In terms of locating the hole, take your current grip and measure backwards from the front locking plate to the center of the hole. Then, measure down from the top of the grip. Use these two measures to locate where you need to do your cutting and then setup your mill accordingly or at least a good drill press because all you are doing is plunge cuts.
Measure the hole from the locking plate to where the center of the hole is on your existing grip – this is the horizontal measure. I’d recommend using calipers to do this. You then need to do the vertical location by measuring from the top of the grip to the center of the existing hole. The more precise you can be, the better your results will be.
Cutting the rear hole.
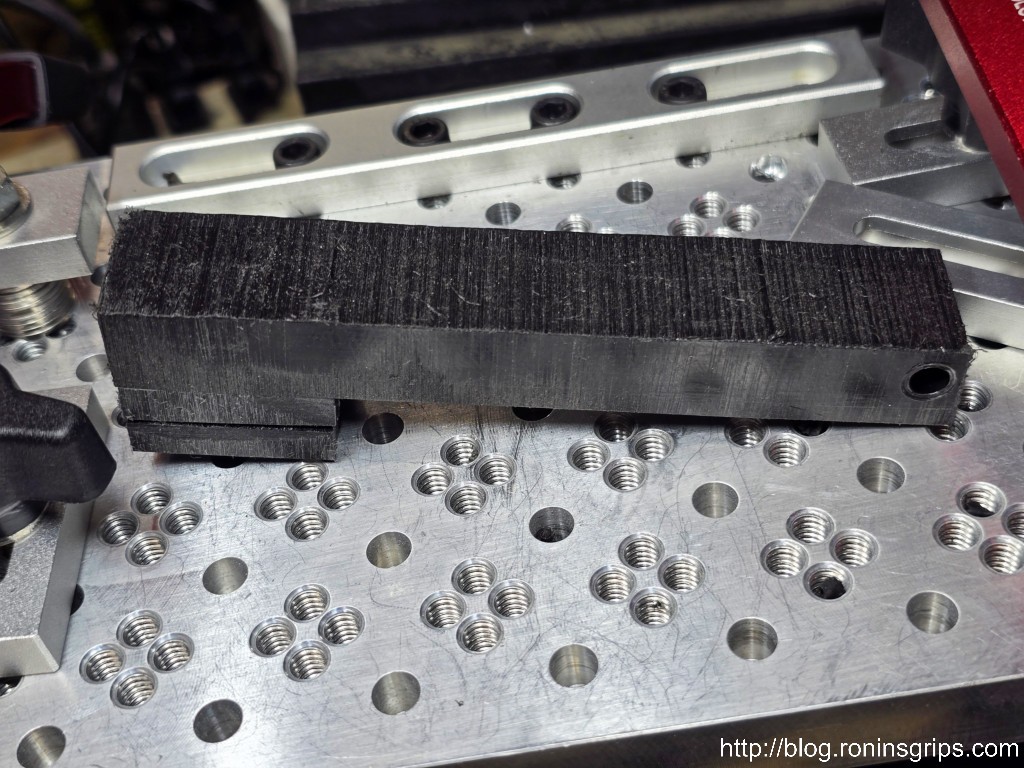
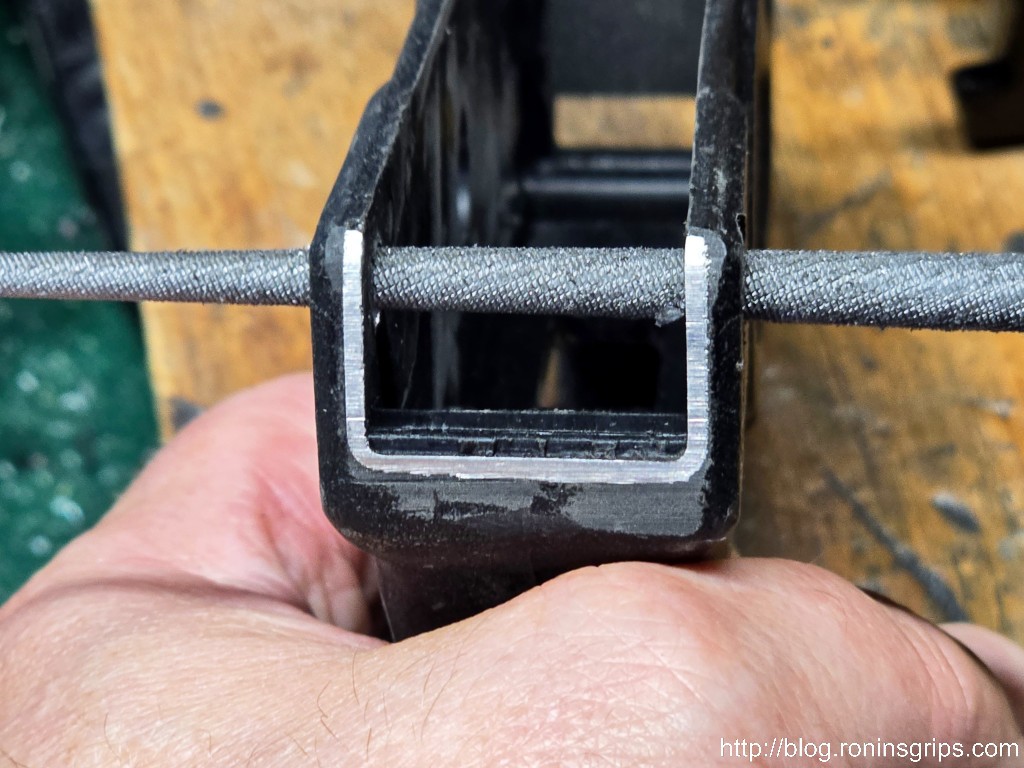
Critical: You must make an insert from hard wood, plastic, or aluminum. If you don’t, the walls of the grip will flex and your holes are going to be a mess. I learned this the hard way. The width left to right is about 7/8″ and then you can decide how you want to handle the vertical. I’d recommend surrounding the area where you want to make the cut. I run my insert the whole length of the inside top to provide a firm support both for the clamps and the plunge cuts. You don’t wany anything to flex.
If you don’t have an insert to keep the grip open, they will flex as you attempt to cut them and you’ll make a mess. This is 7/8″ left to right. I then made it the length I wanted. The “leg” on the left bottom is to help it stay in position in the grip. The hole on the right shows you where the 6mm end mill plunges into it.
The first step is to cut the reliefs where the pin goes. The head of the takedown pin is about 9-9.1mm wide. A 9.5mm cut doesn’t give you much room to adjust. 10mm is just a tad wider and gives you more room to adjust your cuts later with a circular file and not have the head unable to sit down in the recess. The reliefs need to be cut about 3mm deep.
That is a 10mm end mill and I just finished a 3mm deep cut. A 9.5mm head would give you a tighter fit around the head of the pin but 10mm gives you some adjustment room.
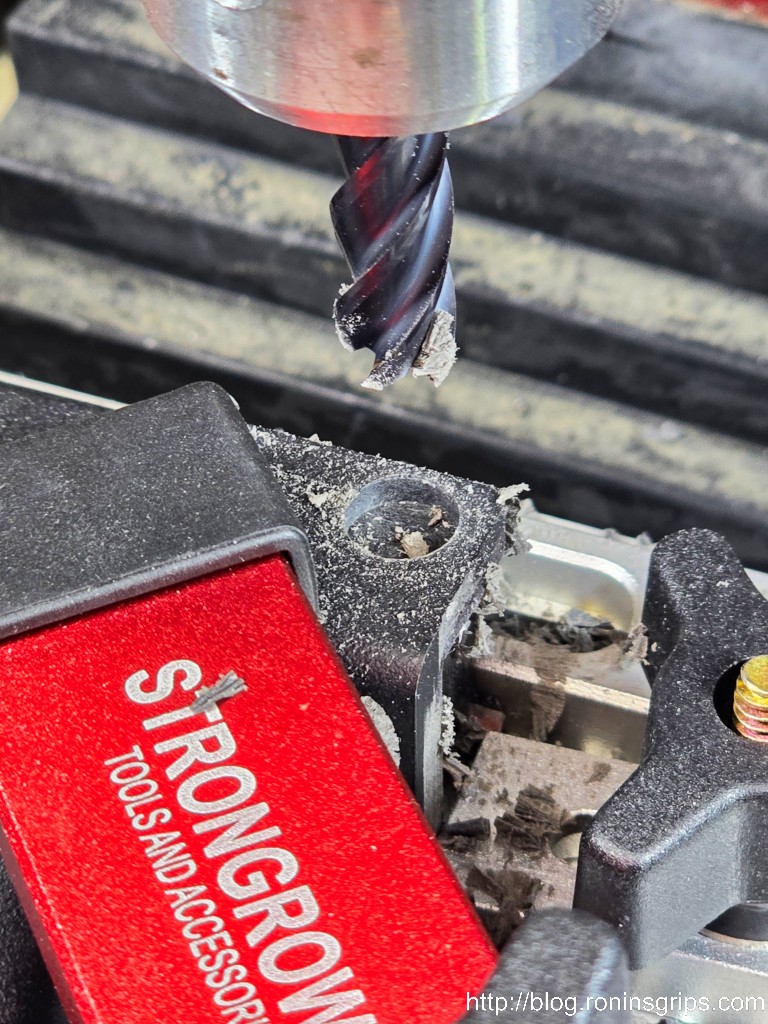
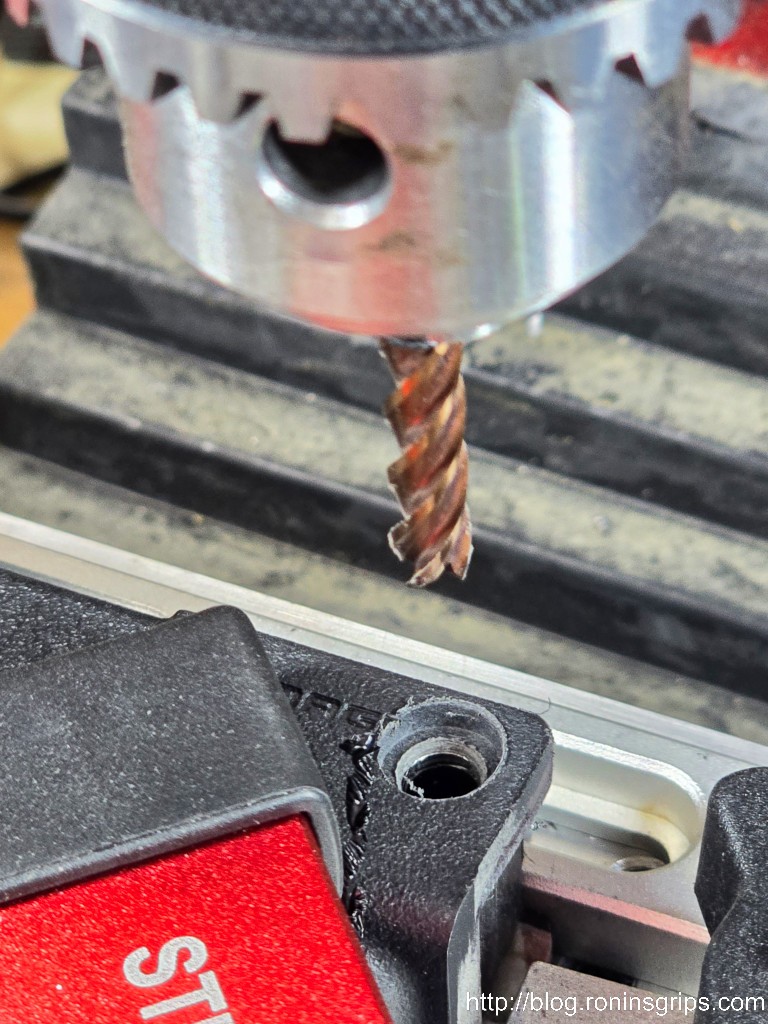
Next is to cut the 6mm holes for the pins. I’d recommend against a drill bit as it might get squirrely on you – both in terms of deflection or the bit getting caught on one of the holes in the steel reinforcement. Get a 6mm carbide end mill, make sure your grip is held securely and do a plunge cut.
A 6mm end mill was used to plunge cut the center hole for the pin.Here is the MKE Pin with an OD head diameter of 9.1mm. The countersink was cut 10mm wide and 3mm deep. This gives a bit more room for adjustments.
If you do use a drill press, check your runout. If you have more than 0.5mm on one side, you risk cutting to big of a hole. You want to be somewhere between 6.0 and 6.1mm. If you go too wide, the retaining wire may not get a good enough hold to keep the pin in place.
Cleaning Up
Use a fine file or diamond abrasive stick to remove all material left over from cutting inside the grip so you have a smooth surface.
It’s time to test fit the grip. It may go in great all by itself or you may need to adjust it just a tad with a circular file. I’d recommend a 6mm tapered circular file so you have a lot of control.
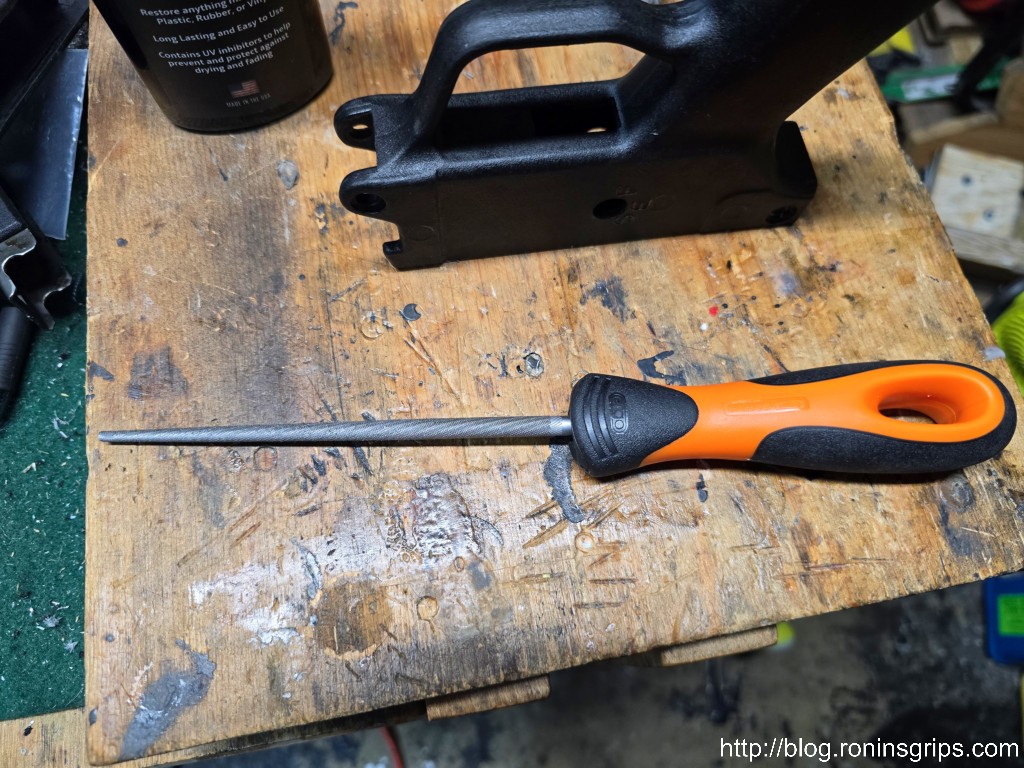
This 6mm tapered Bahco file is great for adjusting holes. Click here to see it on Amazon.Use a circular file to adjust the grip until it fits. Don’t rush – take off a bit and test, take off a bit and test until it fits. That is the Bahco 6mm file I mentioned earlier. It’s great for this kind of work.
Note, test fitting the grip by itself is one thing. Doing it with the stock, brace or endcap in place is another. You may find further adjustments with the circular file are required. Also, you can make things fit sometimes by moving or tapping the grip or whatever is on the end around. The sheet metal of the receiver can flex and sometimes it gives you just enough alignment to push the pin on through. I often tap (not bang) them in with a small hammer with a non-marring head.
You want everything to be snug. You’ll find the front pin doesn’t matter if everything is tight. If you really want a front pin, you would need to make a custom pin given the width of the Magul’s front lower “ears”. It would also only be cosmetic because you would be inserting a steel pin into soft plastic that does not have a reinforcing plate.
The moral of the story is to keep the front-to-back length of the grip long so it is snug – again, don’t cut or sand off more of the black plastic than you must. Also, try to be as close as you can with the pin holes at least vertically. Because of how the grip is sandwiched between the mag well and whatever is on the rear, it’s not going anywhere. The rear pin is the final part to limit movement.
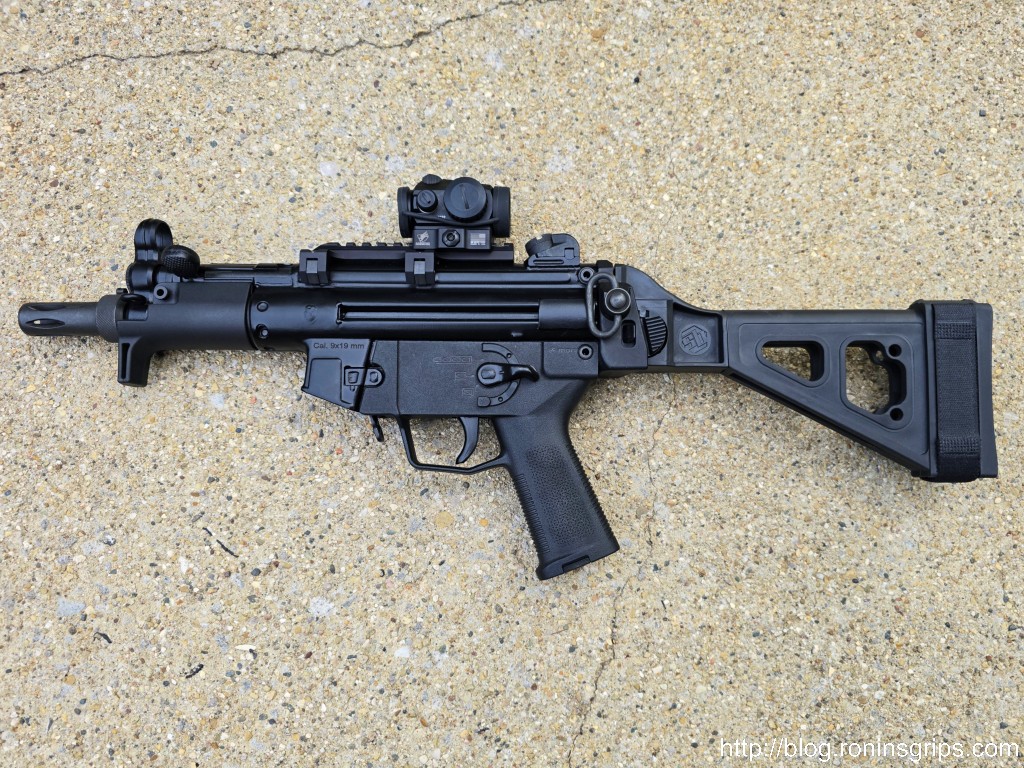
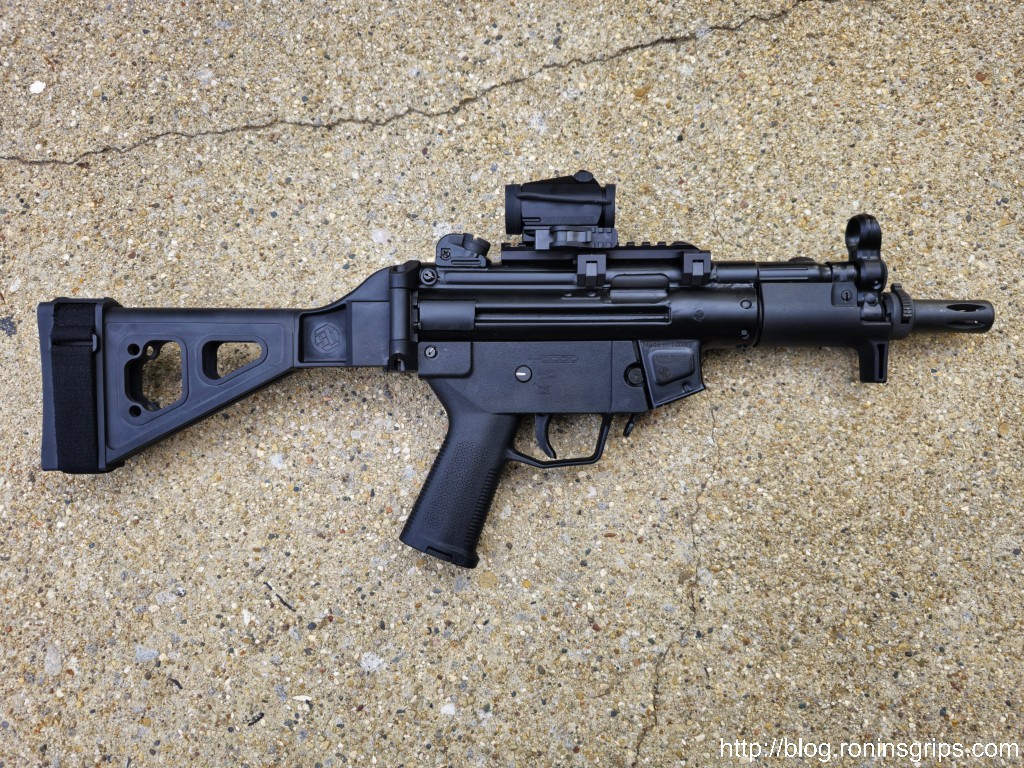
I used the file to slot the hole backward just a bit. Note how tight the grip is up against my SB Tactical brace. It’s not going to wiggle.
The Results
The MKE feels great. I will upgrade the selector the Magpul ESK but even with the stock MKE selector I like the feel more.
Summary
I hope this helps you out if you want to do this yourself. For folks who just want to do the final filing adjustments, we will converted Magpul grips for sale. Please click here to go to our store.
Here are the original Magpul grips in case you are looking for them:
Production Grip Comment
For our production grips. the holes are based on a new unissued German MP5K grip. Depending on a bunch of factors, the exact holes in the grip you get will vary a bit. Fitting will be required – front to back and the hole locations.
I hate bad triggers and the worst triggers I have ever used were on HK MP5 and MP5K weapons. I have no idea of the design intent – maybe a real strong emphasis on avoiding an accidental discharge by having a long spongy pull and then a break somewhere around eight pounds. For someone who likes crisp triggers and a lighter pull, the HK triggers in general can be a rude awakening.
I recently picked up Zenith Firearms ZF5-P, which is a MP5K clone. Zenith Firearms is based in Afton, VA, and make their various rifles and pistols there. They used to import MKE clones from Turkey but severed ties and are actually making them here in the US.
I bought the ZF5-P for a few reasons – First, I got a good deal on it. That always helps. Second, I no longer had any form of an MP5 and kind of wanted to get back in. Third, and the subject of this story, I knew Timney made a well-regarded trigger pack for the MP5/MP5K. Fourth, I had an urge to tinker and needed a test platform.
Now Zenith makes a big deal that they machine their cartridge walls vs. bending sheet metal resulting in a better trigger. I was kind of curious to check that out as well.
For the rest of the article, I’ll just refer to the trigger as an MP5 trigger because the MP5 and MP5K share the same trigger pack. It’s the grip that differs.
The Zenith’s Original Trigger
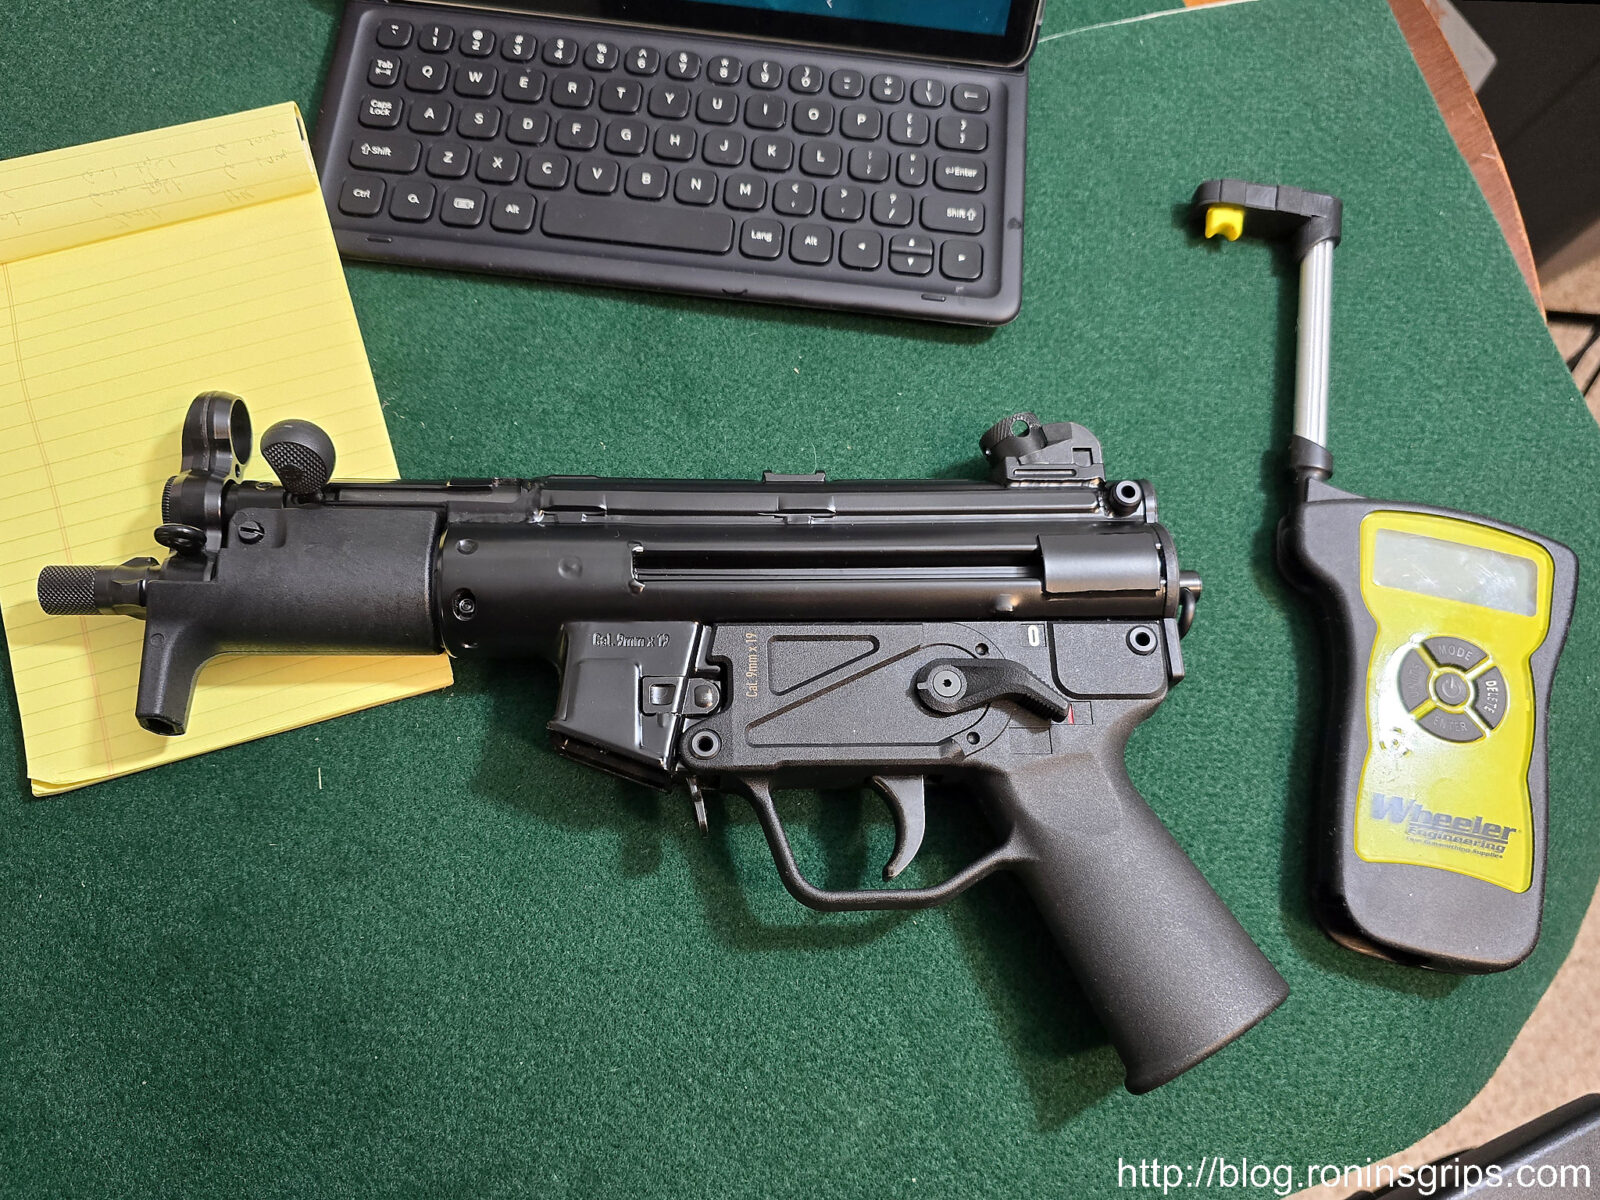
Well, I was hoping for a good trigger out of the box because of Zenith machining the walls of their trigger pack but to be honest, it was just another MP5 trigger. I bought a new Century MKE AP5-P and its trigger was better than the Zenith’s also. It’s not that the Zenith’s trigger is bad – my point is that the unit I received was no better than any other MP5 trigger I’ve used.
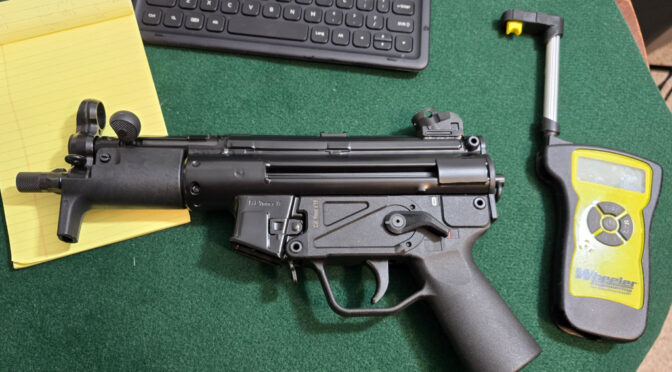
I used a Wheeler “Professional Digital Trigger Pull Gauge” and did 10 pulls of the trigger after lubrication plus I had pulled the trigger maybe two dozen times since I bought it so there was a tad bit of wear in before testing. At any rate, the lightest pull was 7 pounds 5.9oz. The heaviest was 7 pounds 13.5 ounces and the average came in at 7 pounds 11.3 ounces. So, just shy of 7.75 or seven and three quarter pounds. Still long, creepy, spongy … pick the bad discriptor you like.
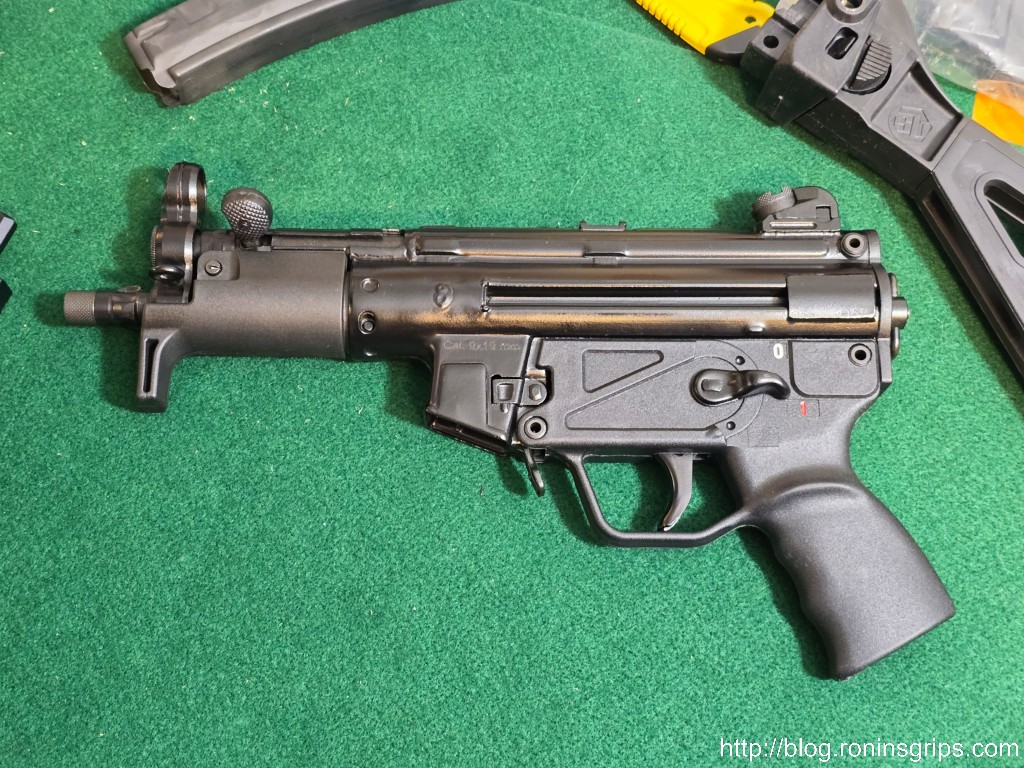
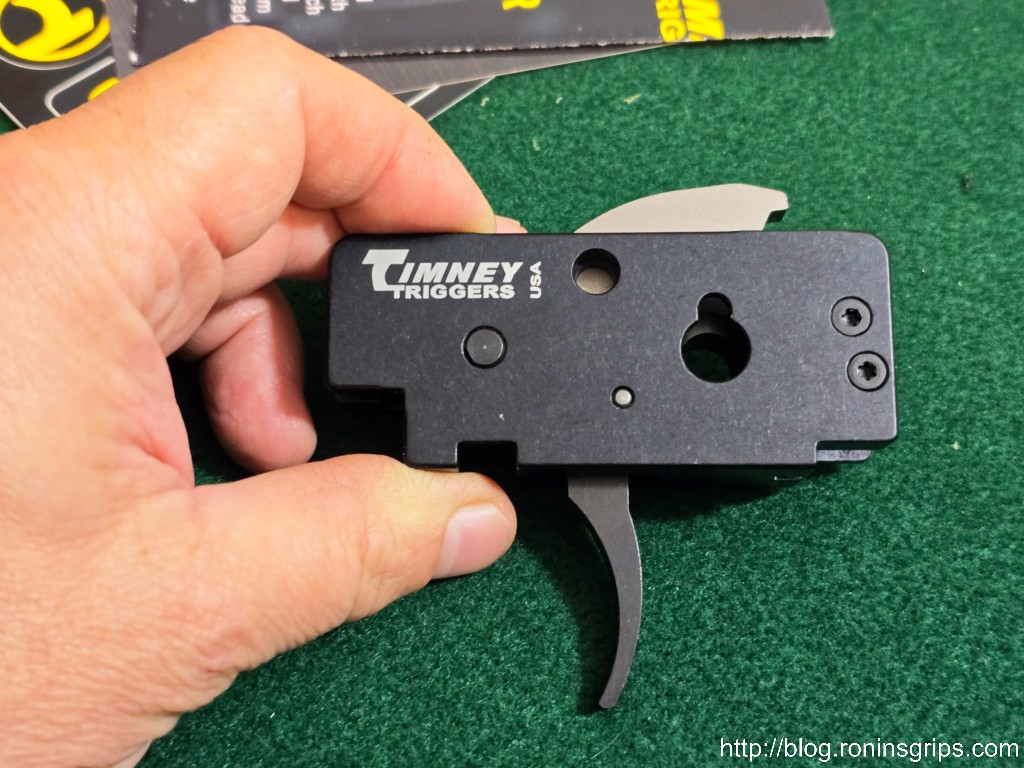
The Timney MP5 2-Stage Trigger
It’s nicely machined and ready to go. You just need to move the ejector, ejector axle and ejector spring from your old trigger to this one. It’s easy to do.
These triggers are compatible with SEF/ Semi-Auto trigger packs and their style of safety selector levers.
These triggers are NOT compatible with Ambi/Navy/FBI trigger packs or .22 clones, as they are different internally.
Timney provides clear installation instructions in the package plus they have the following video to help with the install.
Folks, that trigger is amazing. Here are pull test results: Minimum pull weight was 3 pounds 2.7 oz. Maximum was 4 pounds 0.1 ounce. The average was 3 pounds 10.3 oz.
I’d call it crisp and clean. Night and day better than the original Zenith trigger.
Range Time
My brother-in-law, nephew and I took the Zenith ZF5-P and a Century MKE AP5-P to the range. For an MP5, the MKE’s trigger is fairly decent but was seriously beaten by the Timney.
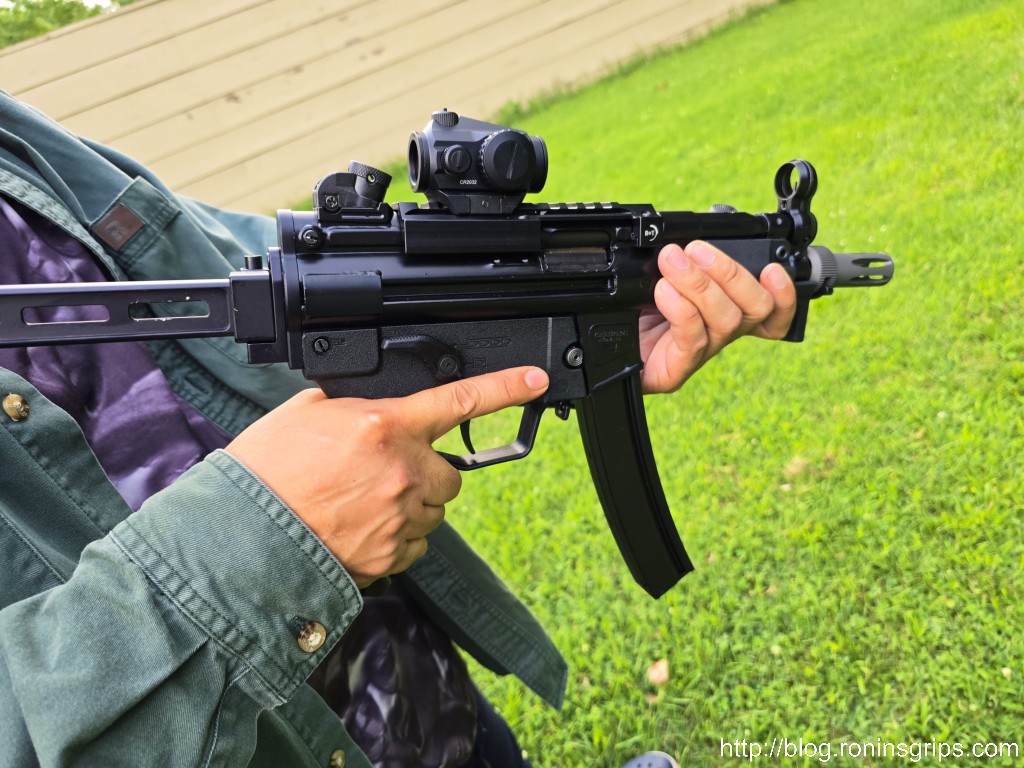
My nephew really liked the Timney trigger – we all did. By the way, one thing I really like is that a B&T low profile optics mount enables you to cowitness a Vortex Crossfire red dot with the iron sights.
Summary
I have never hid my dislike of MP5 triggers – I genuinely don’t like them and the only good things I can say are that they are reliable and you’ll probably never have an accidental discharge.
The Timney trigger ranks as one of the best upgrades I have done to a firearm. If you want a better trigger for your MP5/MP5K, or a clone of them, then get the Timney trigger.
Note, I have to buy all of my parts – nothing here was paid for by sponsors, etc. I do make a small amount if you click on an ad and buy something but that is it. You’re getting my real opinion on stuff.