Tag Archives: truck

These are the Correct Weatherstripping Clips for 1996 Toyota Landcruisers (80-series)

I did some bodywork on my 1996 Landcruiser (an 80-series Landcruiser) this past summer and had to replace the weatherstripping clips on the bottom of the driver side door. I did some digging and found that these clips are the correct size (5mm with a 15mm head) and they worked great for me. The one guy complains that these are green so he only scored it three stars. My originals were a pinkish color so green didn’t matter to me at all plus once installed, you can’t see them.

I popped the remaining originals out with a removal tool. If you don’t have one, they make a world of difference in the removal of clips. In a truck this old, I try to replace old plastic clips when I can as often find them to be brittle and either break during removal or re-insertion.

Here is a clip removal tool. The green clips under it are the brand new replacement units.

The tool you see in the above photo came with the following replacement Toyota Trim Clips package that has helped me out a number of times such as securing drooping engine bay plastic shields on a 2002 Toyota Camry.

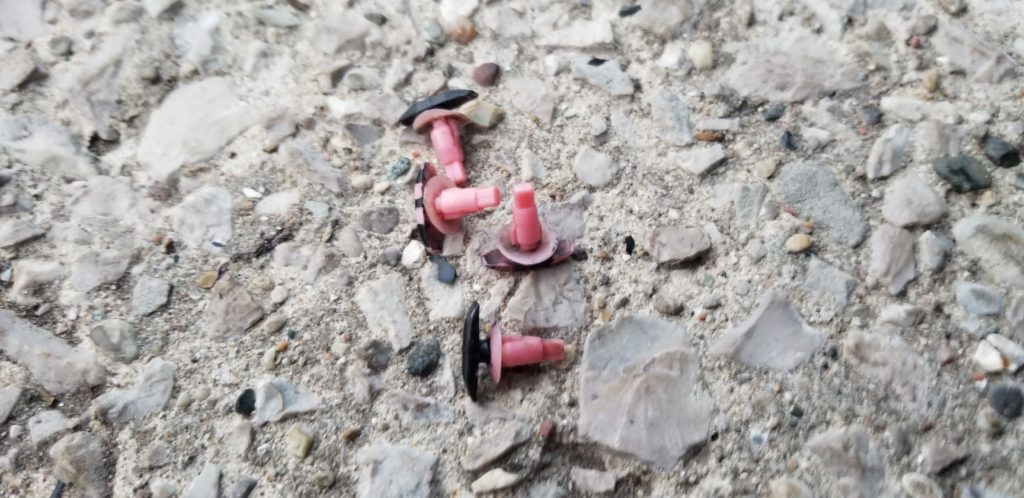
Here were the remaining original clips. Note the lovely pink-ish color thus I really didn’t mind what colors the originals were as long as they worked.

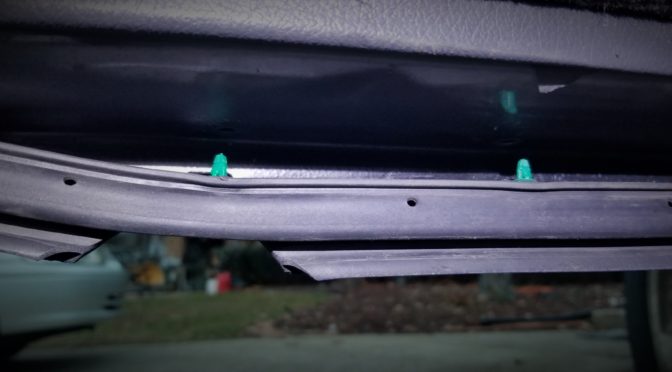
Here is the end result – I worked the clips into each hole in the weather stripping and then simply pushed them into the body holes. I think I installed a total of five to six clips. The drooping problem was solved.

The heads securely fit in the holes in the weather stripping and into the body.
No more drooping weatherstripping!

In Summary

These clips worked great. I just did this post to try and save anyone trying to find clips specifically for an 80 series Landcruiser.


If you find this post useful, please share the link on Facebook, with your friends, etc. Your support is much appreciated and if you have any feedback, please email me at in**@ro*********.com . Please note that for links to other websites, I may be paid via an affiliate program such as Avantlink, Impact, Amazon and eBay.


Getting Unstuck With Traction Mats

Well, I parked our full size Ford Transit van at the end of the driveway on the grass to get it out of the way.  Of course, given the recent snow melt the ground turned out to be too muddy and soft to support the van’s weight – but I didn’t notice that because it took a while to slowly sink.  Yeah, I didn’t notice anything – my wife did we she went to use it!  Oh crud.  So she called my cell phone and was none too happy.  I didn’t really worry about it because my truck could pull it out – or so I thought.
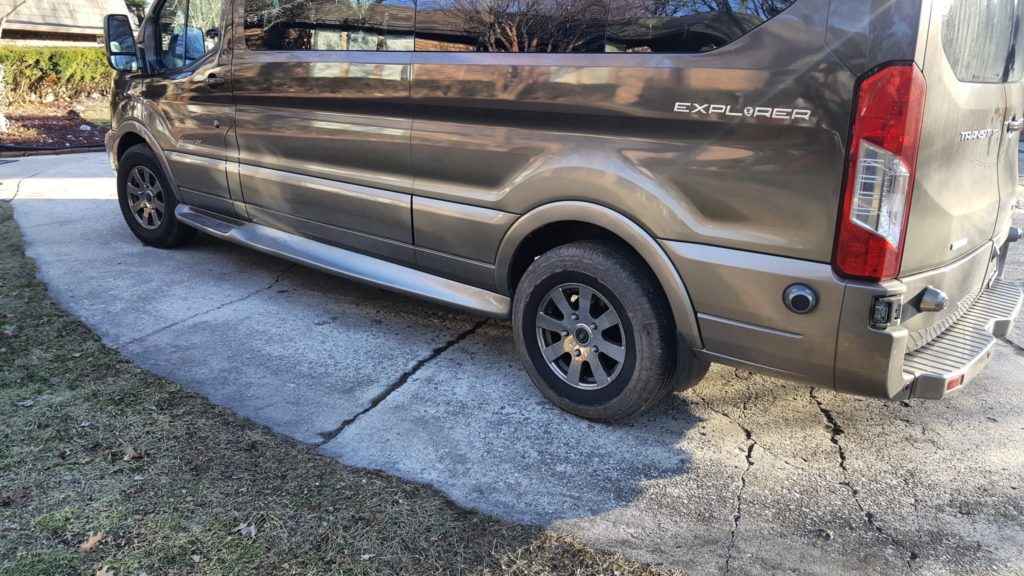
I drove to the house, cockily pulled my trusty old 96 Landcruiser up in front of the van and got out one of my big tow straps and walked up to the van.   Should have been easy, right?  Wrong.  Nothing, nada to hook on to.  Ford, in their infinite wisdom does not put a tow hook, eye or anything up near the bumper!  Crap, crap, crap.  [Note, near the bottom of this blog post I added in what I found after researching how to recover a full size Transit.  I’m still irked at Ford.]

Did I mention my wife was standing their fuming?  Yeah, she was.  I should have known better than to park the heavy full size van on soft ground.  Point taken – I didn’t realize it was that soft.

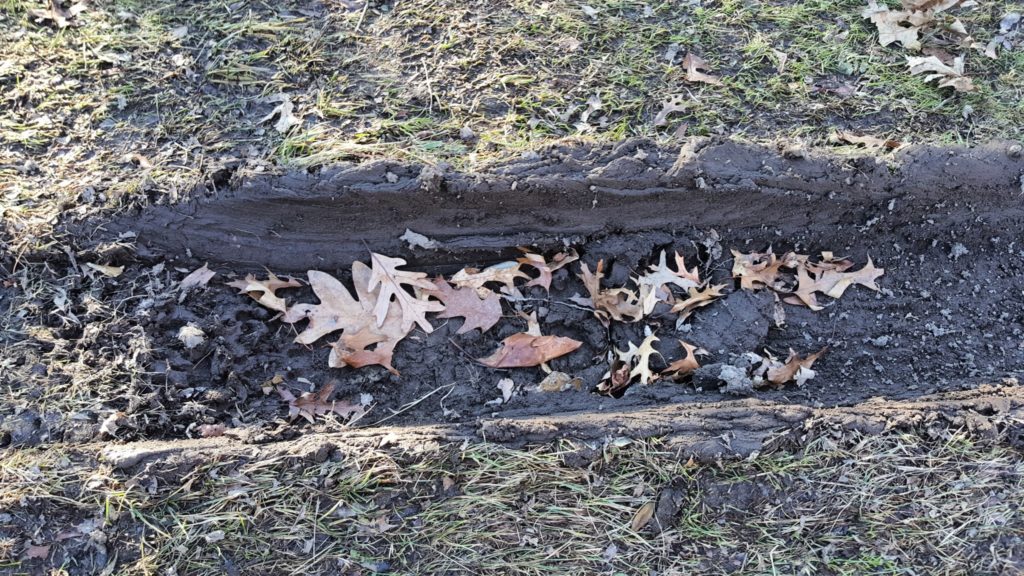
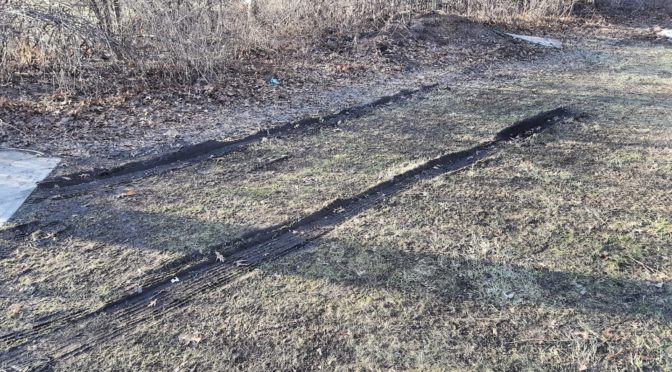
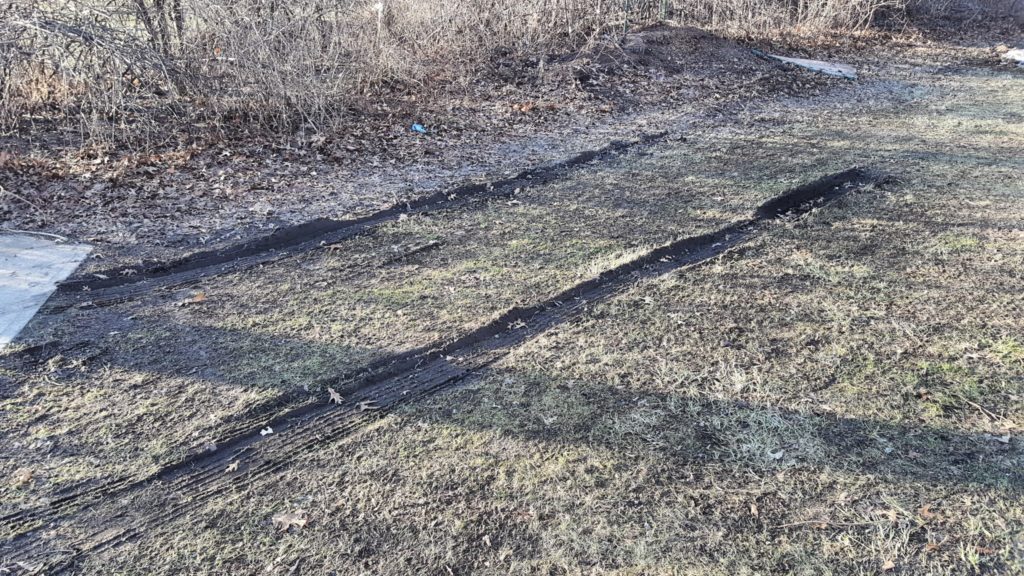
At any rate, I went back and looked at the 5″ deep rut the driver’s side rear tire had dug for itself.  By the way, these photos are after removal.
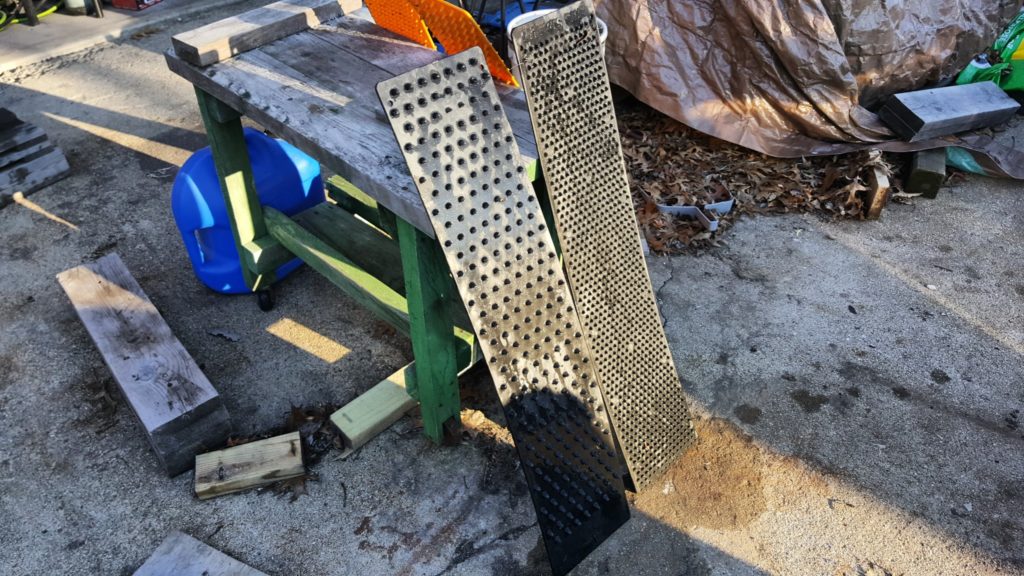
I needed something long to fill the ruts and give traction.  Luckily, back in 2010 and then in 2014 I bought these things called “traction mats” from a company called OTW Enterprises who touted them as portable tow trucks.  In 2010 I bought the black ones after getting my truck stuck on ice with the plow blade buried in a snow mound.  In 2014. I bought an orange set to put in my wife’s car in case she got stuck.  Here they are after I hosed all the mud off.
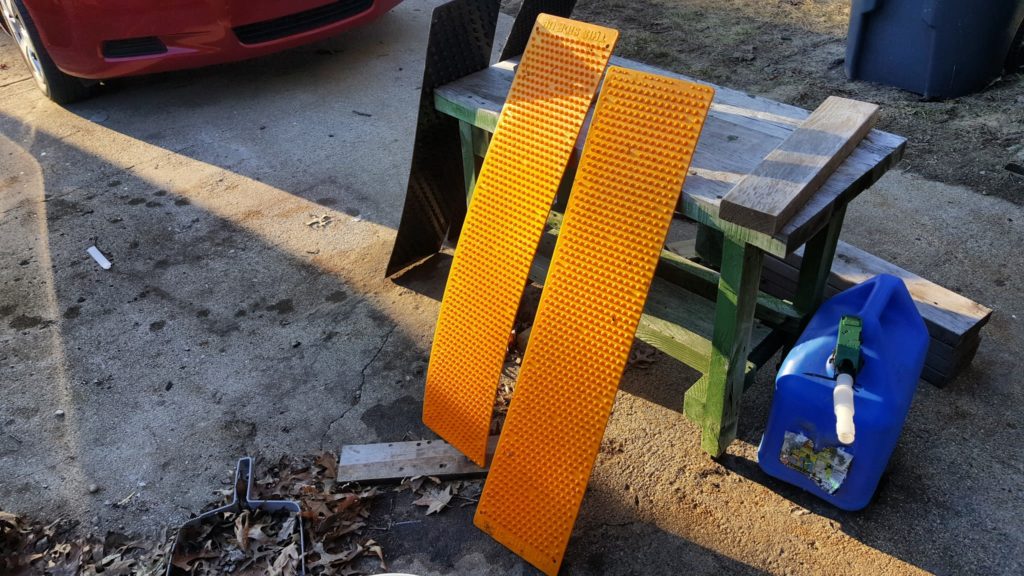
Well, they bounced around in the trunks for a while and did bail me out a couple of times over the years but were actually leaning on the outside wall of my shop.  They don’t fold and while they fit in the trunk you have the little plastic spikes catching stuff so I tool them out at some point and leaned them against the wall of the shop.  At any rate,  I walked over and they were exactly what I needed.  Each mat measures 36″ long and 8″ wide.  Since I had four, I butted on up against the front of each tire and placed a second one in front of it to help the tire get up and out of the rut.  The sides are labeled by the way – the relative few long spikes go down and the side with many spikes goes up.

I got in and rolled the the van back a bit and then forward to get up on the mats.  I then slowly gave it more gas (not much) and the van up and forward onto the mat and got out of ditch and I kept moving forward onto the pavement.  I don’t have any action photos – things were stressful at the time and I really wasn’t thinking about a blog post 🙂

Well, I was pretty pleased with the outcome.  Wreckers charge at least $65 to come out to our house so avoiding that charge is always a good thing.  My wife was relatively happy but gave me a hard time for causing the problem in the first place.

Are these mats perfect?  No.  They will fly out from under your car if you don’t go slow and make sure you have the correct side down.  Even then they sometimes do so I would never have someone stand behind the car.  My recommendation is to go slow – avoid your spinning tires and rock the vehicle onto the mat if need be – don’t spin your tires onto them.

My wife is so impressed she wants them back in the cars.  I just wish they had a carry case but I do recommend them as another tool to keep in your bag of tricks.

I hope this helps you out.


Comment about Ford and Their Oversight on Towing

By the way, I looked up the tow/winch location up for future reference  so if you are surfing the web trying to figure out how to tow a full size 2016 Ford Transit, here is the reference link at Ford – click here.

Look just behind the tires at the frame and you’ll see the eye rings that are part of the frame.  You can’t make this stuff up — Thanks Ford.  It drives me nuts when you look at decisions made in ivory engineering towers vs. real world needs.  Sure, let’s bury it under the van, make it hard to get to and pretty much ensure damage will occur if you actually use this to pull the van for whatever reason.
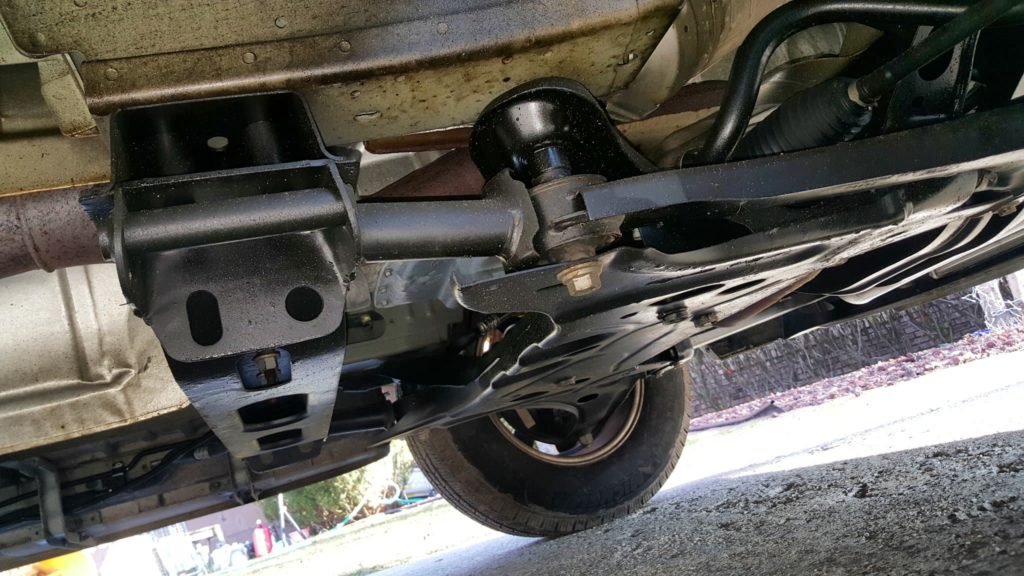
Now look how their factory winch attachment point lines right up with hitting the front radiator.  If you pull this at just about any angle where the recovery vehicle is higher than the van then the cable/strap is going to cut right into the aluminum radiator at the front.   In the next photo, you can see the silver aluminum radiator just above the lip of the bumper molding.
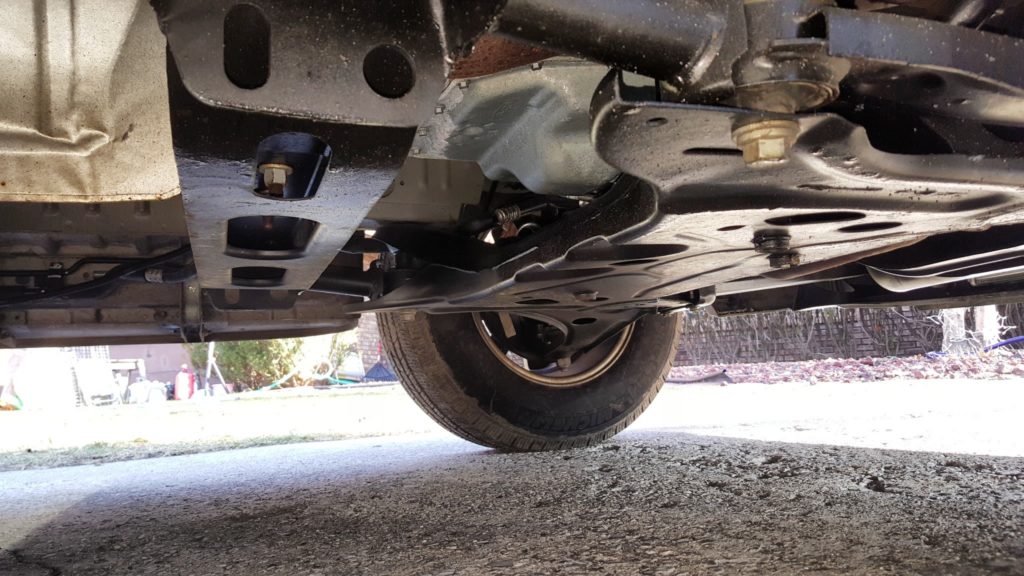
If you wanted to protect that radiator, you’d actually need a harness with something to push the attached cable lower to the ground – or fabricate another attachment method.   Maybe my 4″ drop hitch in my rear class IV receiver would be low enough to tie onto vs. my truck’s winch or front recovery hooks.  … Something for another day.  I didn’t buy a new van to have to worry about something people in rural areas need regularly in the winter.   They should have been in the front.


2/11/2018 Update:  The traction mats bailed me out again when I got the van stuck on ice in our yard while turning around.  I’ve come to realize the van does a fair job on the road but the tires are damn near useless on uneven icy surface,  With this van, it’s really handy to have four.  With only two handy, I could move the van forward and then get stuck, move the mats, move forward again, get stuck, etc.  I had to do the cycle about three times.  I think if I had all four handy it would have done the trick in one shot because I could have built up some forward momentum.  I now have all four stored together,  We’re nearing the end of Winter finally and I think I will keep all four in the van next year and need to find some kind of carrier bag to store them in.

Have an older car or truck with slow power windows? This simple fix will speed them up

My truck is a 1996 Toyota Landcruiser that is showing its age and I’m always finding ways to keep it going.  One problem I had was that the power windows were very slow to go up and down because the rubber around the glass was oxidizing and not as soft.  This was especially a problem in the winter when plowing as I would sometimes have to use my hand to help the window go back up.  I had been using silicone spray but it’s benefits were pretty short lived.  A friend told me to use silicone grease and WOW what a difference.

Please note to use silicone grease and not petroleum grease. The petroleum grease can cause the rubber to break down or at least make quite a mess.  Silicone grease was designed intentionally to lubricate and protect rubber parts such as seals.
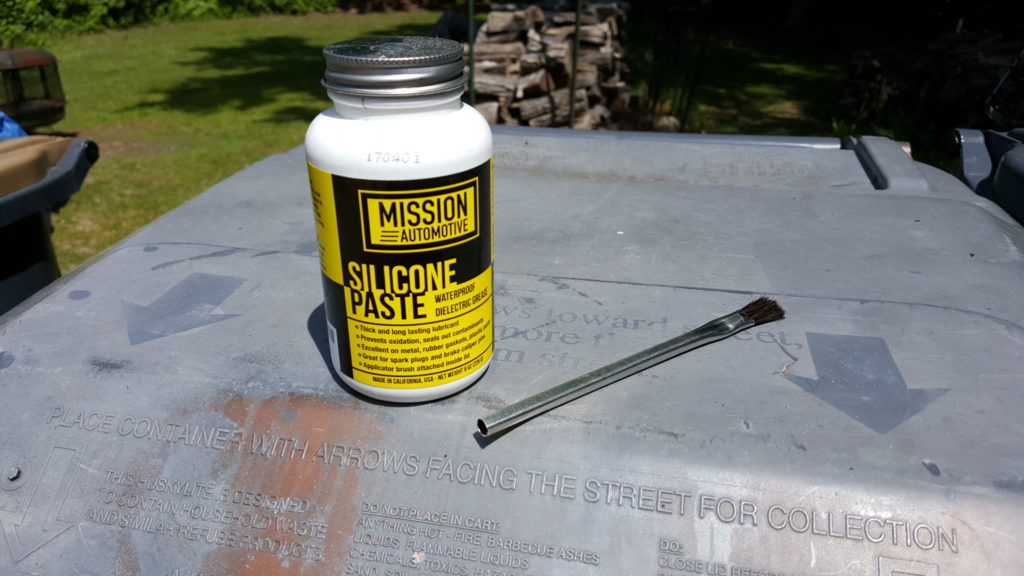
Mission Automotive’s Silicone Paste works great and is very affordable. It’s what I use on old window seals to help with lubrication. I apply it with an acid brush to get into the channel where the window contacts the old stiff rubber.
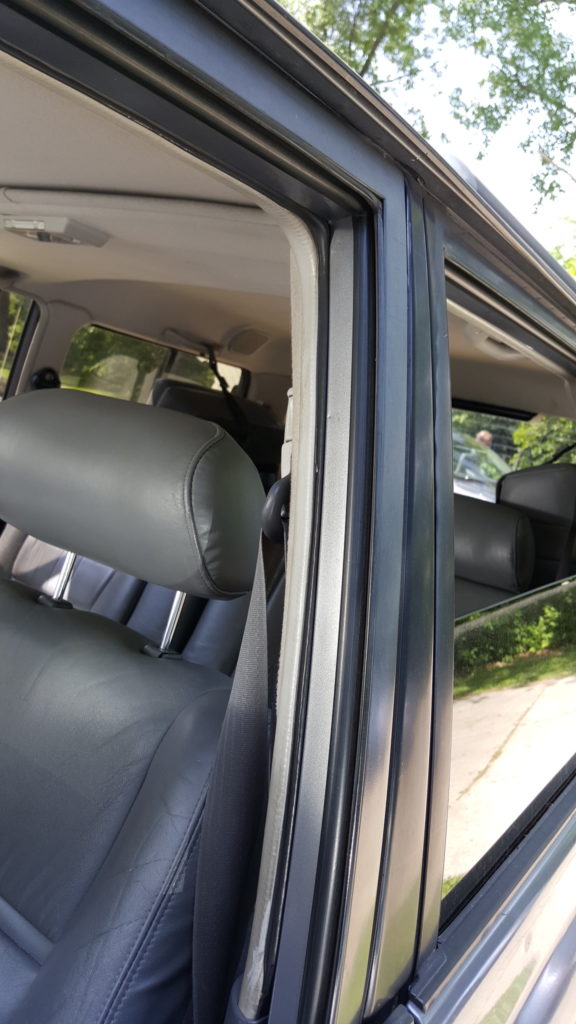
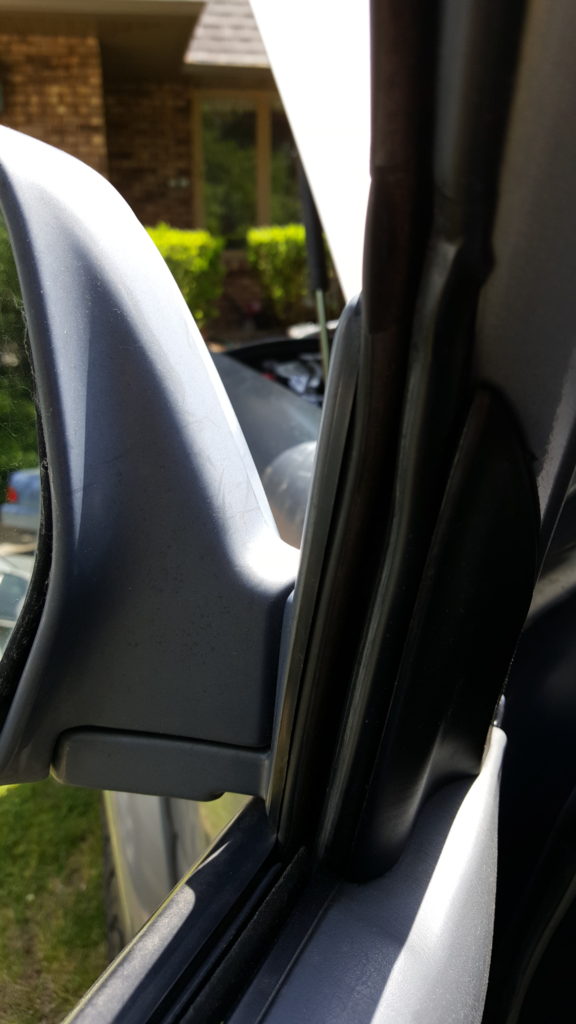
Old stiff weatherstripping on the windows.


Now, one tip, get a flux brush or some disposable brush with relative small stiff bristles so you can wipe down all the rubber window channels where the glass slides.  Your brush is going to get old rubber and other debris on it.  If you put it back in your silcone grease container, you will have a mess – guess how I know this? 🙂  Instead, put some grease on a paper plate or something as an intermediary to dip your brush in.  This will not take much – maybe a tablespoon or two at most.  I can do all four power windows on my truck with probably right around a tablespoon or just over.  You aren’t looking to leave gobs and gobs of the stuff – just a good coating.

So, a warm day helps.  Put all the windows down and apply it.  Then run each window up and down a few times to get a good coating on everything.  You will see a remarkable improvement with the 2nd or 3rd cycling of the windows as everything gets coated.  Then just wipe off any residue on the window frames (I leave it on the glass edge myself).

That’s it.

By the way, this might be a great example of being able to save quite a bit by purchasing the silicone grease online.  The price of an 8oz bottle of Mission Automotive’s Silicone Paste (grease by a different name) is far cheaper on Amazon than what I can find in local stores.


If you find this post useful, please share the link on Facebook, with your friends, etc. Your support is much appreciated and if you have any feedback, please email me at in**@ro*********.com . Please note that for links to other websites, I may be paid via an affiliate program such as Avantlink, Impact, Amazon and eBay.


How to read engine codes Via the OBD II Port with your smart phone – welcome to the new age

Guys, I remember tuning a car by ear with a timing light, vacuum gauge, feeling things out literally with my hands and so forth.  Boy has the world changed.  As the vehicles got smarter and smarter, someone decided to add On-Board Diagnostics (OBD) in the early 1980s first with the idiot “check engine” light and then it got more and more involved.  Modern cars and trucks in the US have an OBD II jack where you can plug in, read and clear fault codes, access real-time information and so forth.

Back in 2013 I saved my pennies and finally bought my own Autel Autolink Scanner for $102.  Wow – I thought was so cool.  I used it whenever fault codes popped up to figure out what it was but I had to lug the thing around and it wasn’t something you could readily update, etc.

A friend of mine came over about a year back to check on one of our cars.  He pulled a little black rectangle out of his jacket, plugged it into the car and then started looking at his phone.  I asked him what he was doing and he showed me that he was accessing the codes.  I was floored.

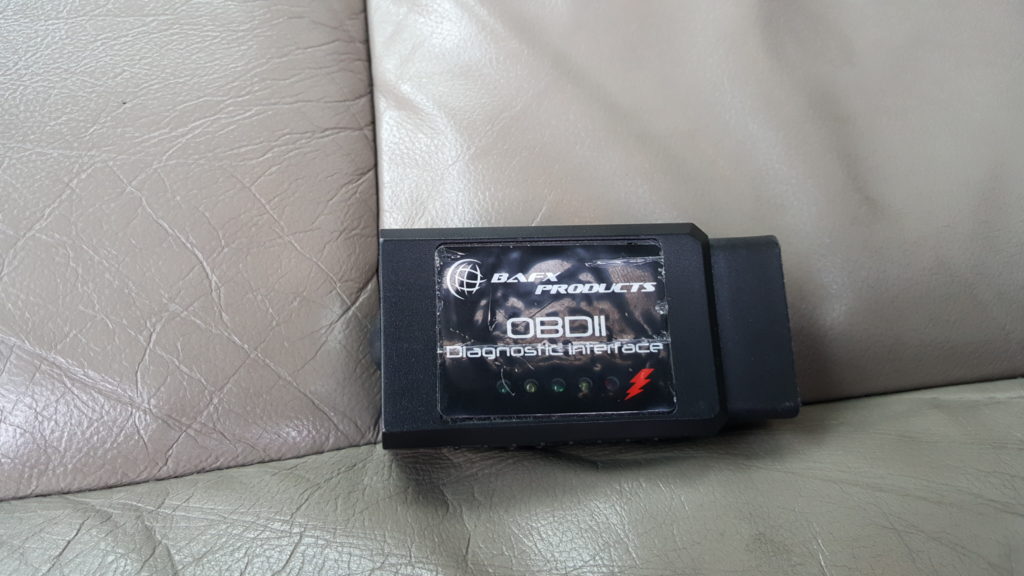
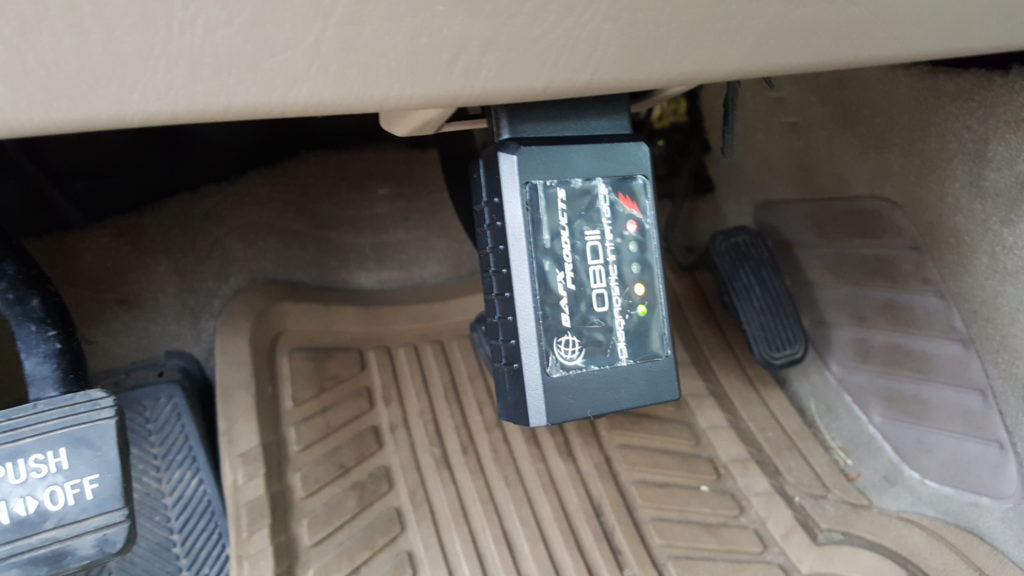
In June 2016, I decided to go the phone route to have a current scanner and a better interface.  After digging, I bought a BAFX Products 34t5 Bluetooth OBDII adapter for Android phones (about $22)  and I got the Torque software for my Samsung Note Android phone off the Google Play store for free.  What a difference.  The BAFX adapter was easy to carry around, I could customize the gauges I was looking at, and so forth.  For me this combo rocks.  It does all I need.  I really like it being cordless – you can walk around and so forth and still see the data.

By the way, installation is simple.  You follow the instructions to pair the scanner to your phone just like you would any other Bluetooth Device.  I downloaded Torque from the Google Play store on my phone in a matter of minutes and it is pretty much good to go.  You can create profiles for different vehicles in the software, change gauges you want to watch, their style, how they are grouped and so forth.

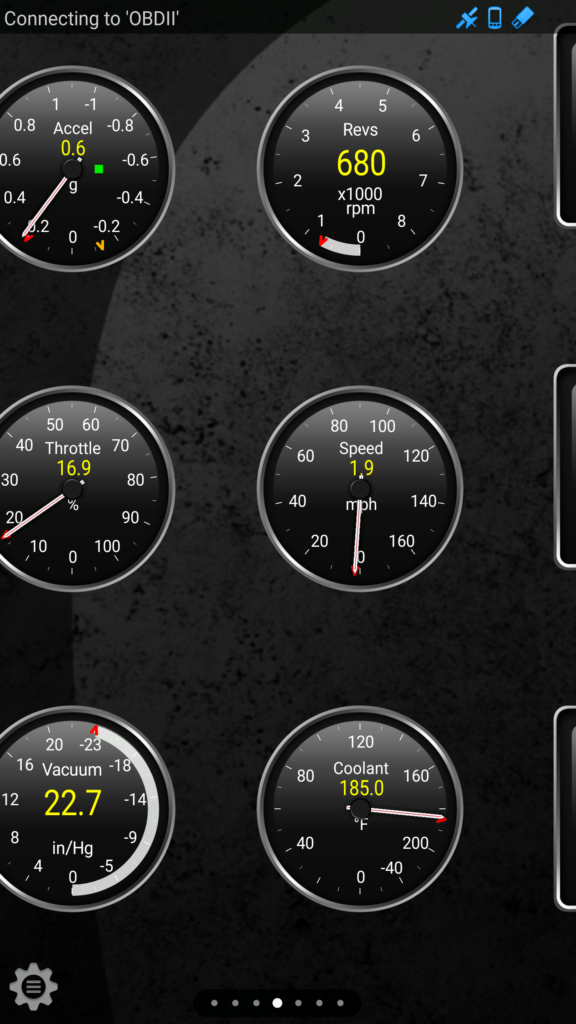
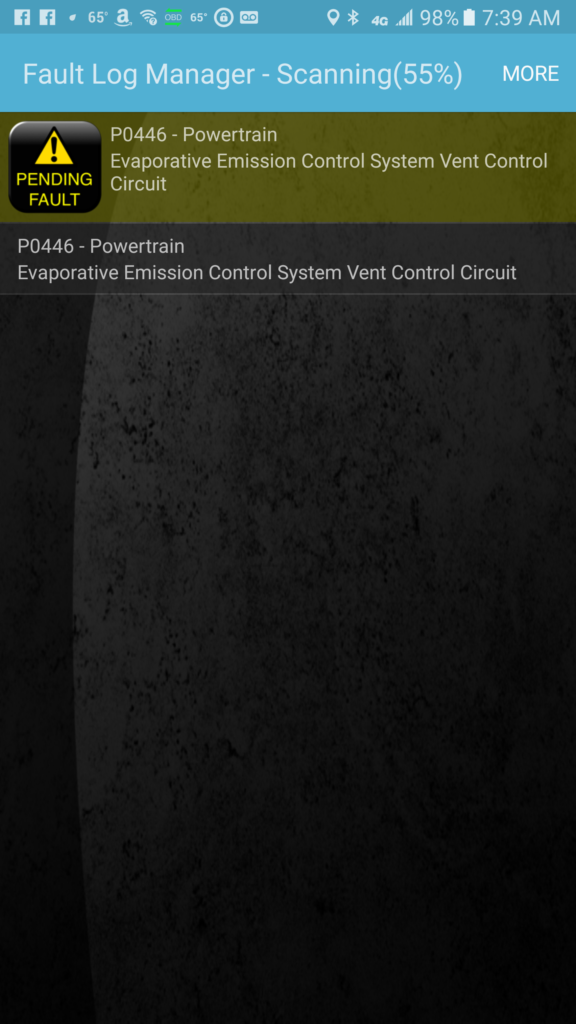
The following are screenshots from my phone plus you can see the little adapter that is a bit smaller than a cigarette box.

I use Torque to read and reset the ODB2 codes as needed. I really like it.
The Torque app lets you set up different gauges or even go in and look at the data.


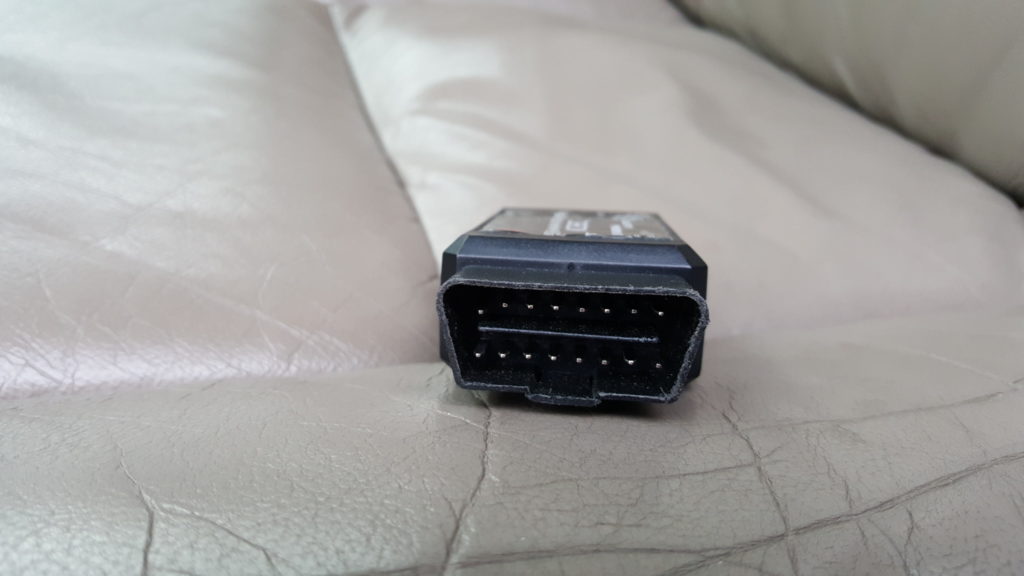
This plugs into the ODB2 port

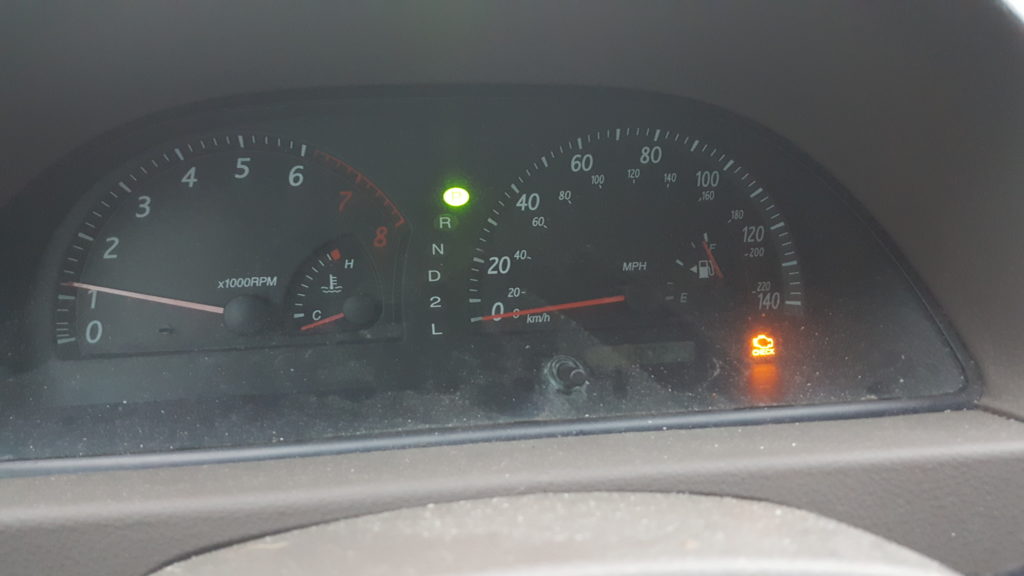
For example, my 2002 Camry’s check engine light is on and I could use the BAFX adapter and Torque to find out what the code was and then search using Google to decide what to do:

Yeah, you have to love that check engine light.


I really like the combination and recommend them.  In general, I am amazed by all the functionality that is showing up where the smart phone provides the brain and display thus dropping costs dramatically.  My recent GiraffeCam endoscope is another example.

By the way, I am so happy with this combination of BAFX scanner and Torque software that I sold my Autel scanner on eBay.

9/.29/21 Update: I still have the original two. They have saved my bacon many times and I always take one with us on trips. I highly recommend them. They have bounced around in the glove box, in the console, baked in the summer heat and frozen in subzero weather and they still work.

2/27/20 Update:  I now have a couple of them and use them all the time with Torque.


If you find this post useful, please share the link on Facebook, with your friends, etc. Your support is much appreciated and if you have any feedback, please email me at in**@ro*********.com . Please note that for links to other websites, I may be paid via an affiliate program such as Avantlink, Impact, Amazon and eBay.