Tag Archives: H&K

We Now Have Contour, Navy SEF and Magpul SL Grips For HK MP5K Weapons and Clones

It’s taken a while to work out the processes and tooling but now we have a variety of grips converted for HK MP5K weapons and their clones including:

  • Century / MKE AP5-P and AP5-M pistols
  • HK MP5K, SP5K – for the SP5K, slight trimming of the front locking plate on the grip will be required
  • POF 5PK
  • PTR 9KT
  • Zenith ZF5-P, ZF5-T, and ZF5-K

There are three required features for these to fit:

  1. It must be an MP5K pattern weapon and not an MP5 or other variety of roller lock.
  2. It must have an HK MP5K patterned top rear hole.
  3. It must have a front shelf that the grip’s front locking plate rests on.

Technically, our Contract Contour and Navy SEF grips do support the front lower pin that some MP5Ks use. However, our converted Magpul SL grip does not have a front lower pin and does not need it because it is pushed forward against the weapon’s shelf and can’t slide out of position.

How They Are Made

Interestingly enough HK33, HK91/G3, HK93, HK94, MP5, and MP5K grips all have the same size polymer core grip albeit with different metal “tails” sticking out of the rear to accomodate whatever weapon they are meant for. Now there may be other models out there as well – but those are the ones that I know of so far.
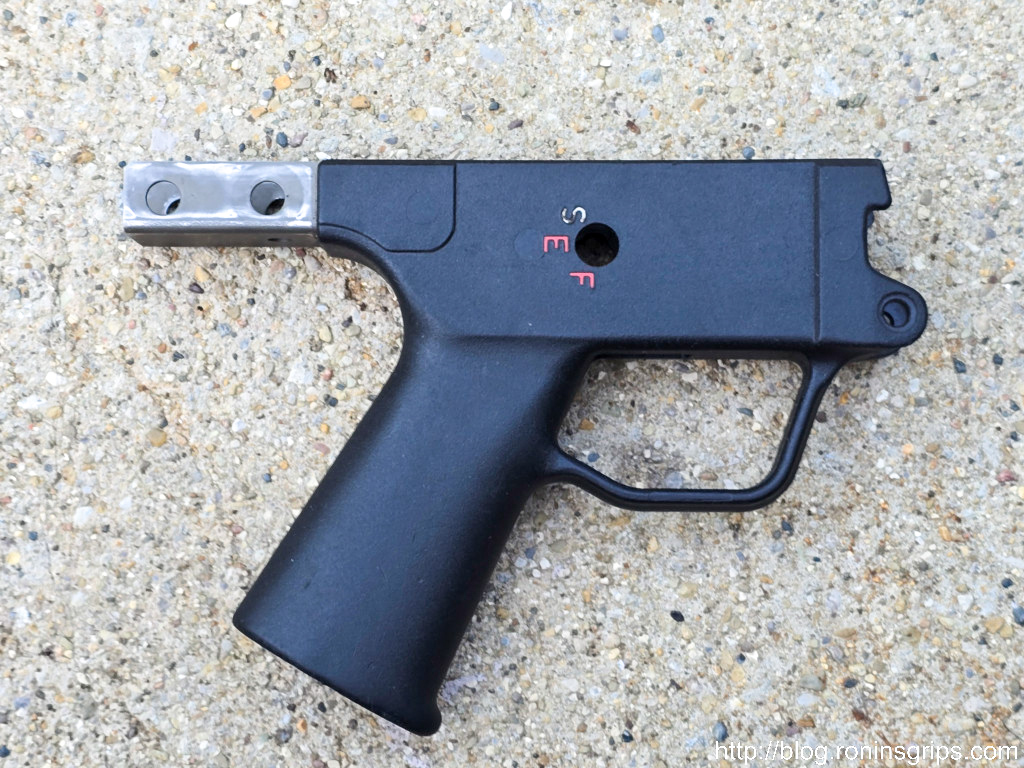
This is a used HK G3/91 Navy SEF grip. The core black polymer shape is the same size as what we need for an MP5K.

The first step if you have one of these model grips is to removed the “tail” so the length will be correct for a MP5K, I would recommend cutting off the tail and then deburring it. Do not remove any polymer so you can get a firm fit when you install whatever stock, brace or end cap you plan to use.
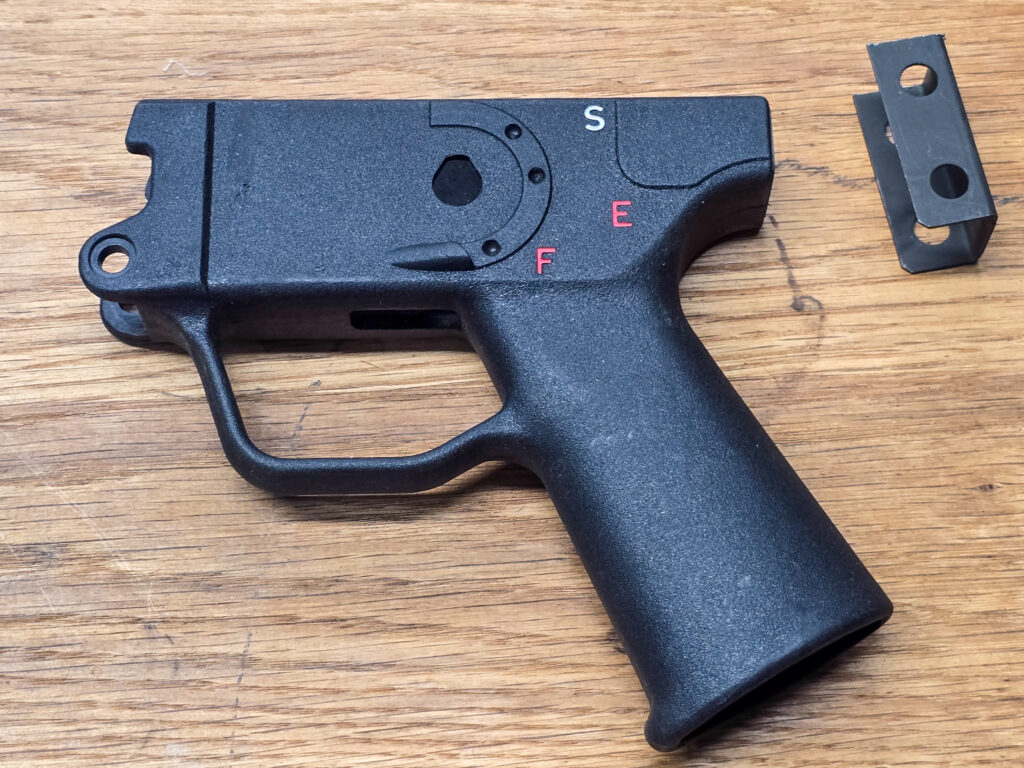
This is a new HK 91/G3 Navy SEF grip with the tail cut off. I use a bandsaw to cut them with a fine tooth blade.

Measure the Existing Rear Hole Centers and Countersink Depths

To cut the rear holes is a bit more involved. First, you need to locate the centers of your existing MP5K grip’s rear holes. I’d recommend using quality calipers but you can do whatever you are comfortable with as long as the method is relatively accurate.

I would also recommend you measure from the front of the steel plate inside the front of the grip back to the center of the hole on your existing grip. That gives you the horizontal distance. To get the vertical distance, measure down from the top.
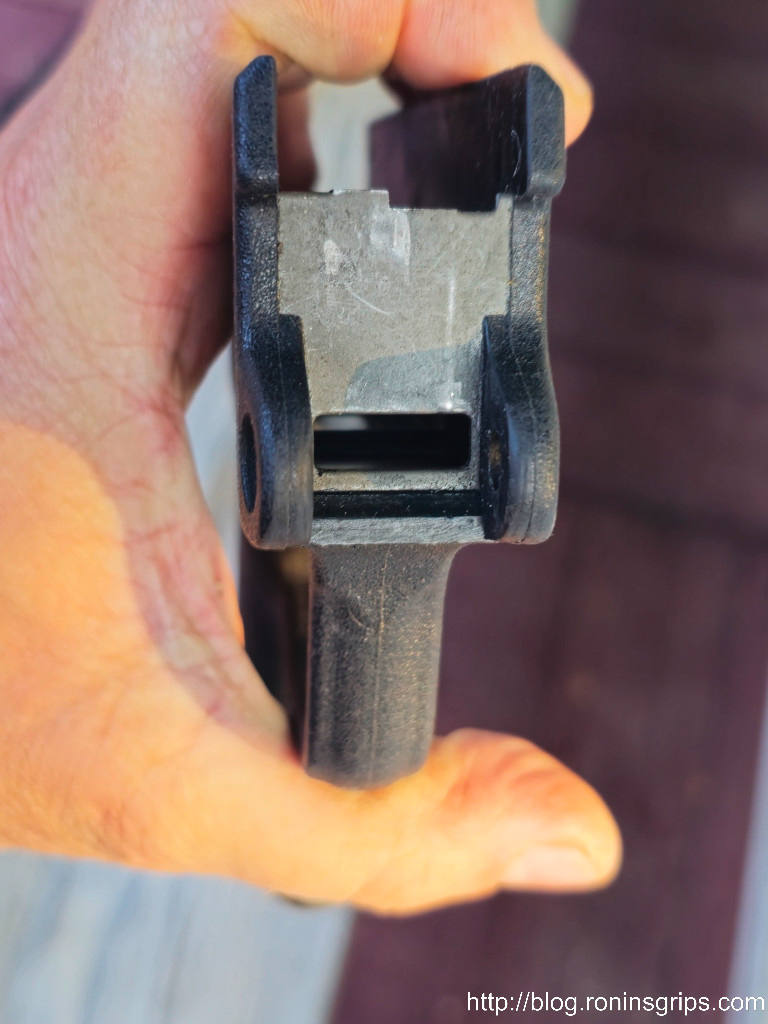
Measure from the front of this plate (the surface facing you in this photo) back to the center of the hole.

You should measure this on both sides of the grip. You may find they are not exactly the same. Regardless, double and triple check the horizontal and vertical measures on both sides.

The other measurement you need to find out is how deep to drill the countersink hole – the recession in the grip where the head sits on the left side (looking down) and the end with the wire retainer protrudes on the right. You may well find that the two measures are different again.

What you need to ensure is that the rear takedown pin’s working distance can span from the left side to the right side. The working distance of a takedown pin is the measured length from just under the head to just before the retaining wire comes out of it. The pin that sticks out of the other end of your calpers is for measuring depth. There are also far more accurate tools purpose-built for measuring depth also.

When you do you plan your countersinks, you need the distance the pin spans to look something like this:

Minimum depth of countersink = outside grip dimension – takedown pin working length

Now how you make that happen is up to you. For example, if you need to remove 3mm and want to split it to 1.5-1.6mm per side – that’s fine. Ideally, you want the pin to stick out far enough on the right side so the wire retainer can pop up and help hold the pin in place.

Milling the Countersink & Pin Holes

These operations require end mills that can make plunge cuts – meaning the end mil has cutting surfaces at the bottom and not just the sides. These are sometimes called “center cutting” end mills also. I would also recommend four flutes for a smooth finish.

The actual countersink diameter is 9.5mm but if you don’t have access to that, a 10mm end mill will work also. The takedown pin hole is 6mm. How much you want to spend on the quality of the mills is up to you. The polymer will not wear the 9.5-10mm bit much but the 6mm bit will need to keep its edge long enought to cut through the steel reinforcement on both sides. I’d recommend the6mm be either cobalt or carbide and not just high speed steel – or at least not cheap high speed steel.
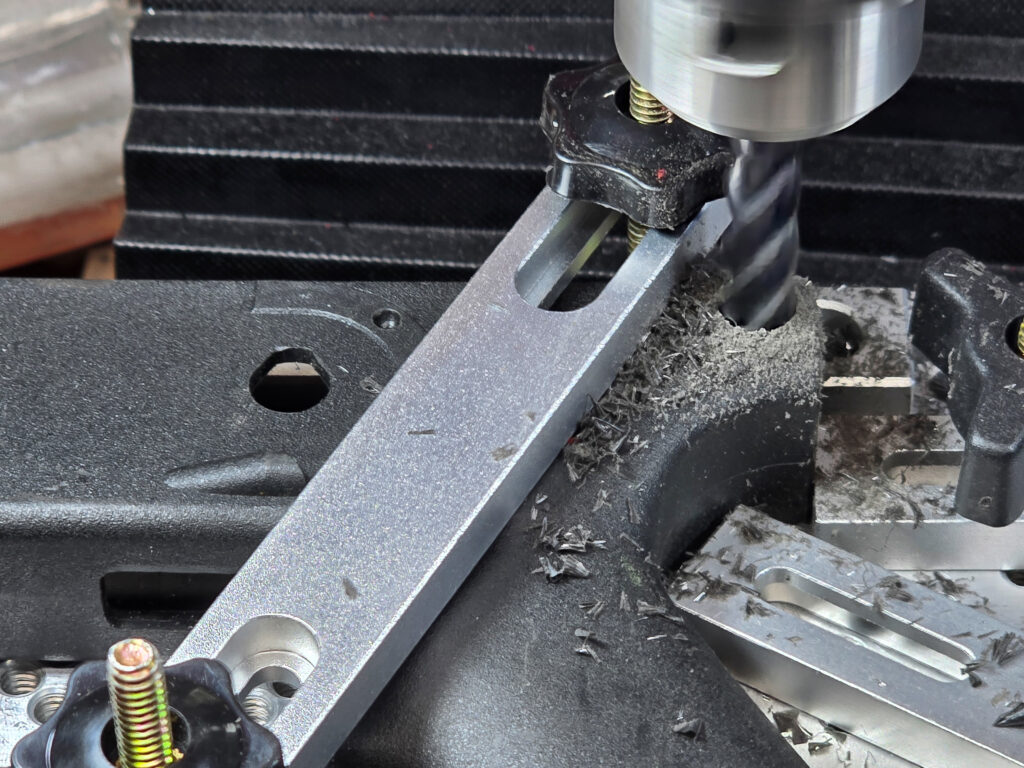
Milling the 10mm countersink. My mill has a Digital Read Out (DRO) so I know how deep to go.

If you are wondering why not use a 6mm drill bit, it is because you will likely encounter a hole in the reinforcing plate that was cast into the grip during injection molding. A drill bit will hit that hole and want to yank the workpiece upwards as the edge of the opened hole rides up the flute and makes a mess. An end mill doing a plunge cut will not have this problem as it will cut off the open circle’s ends.
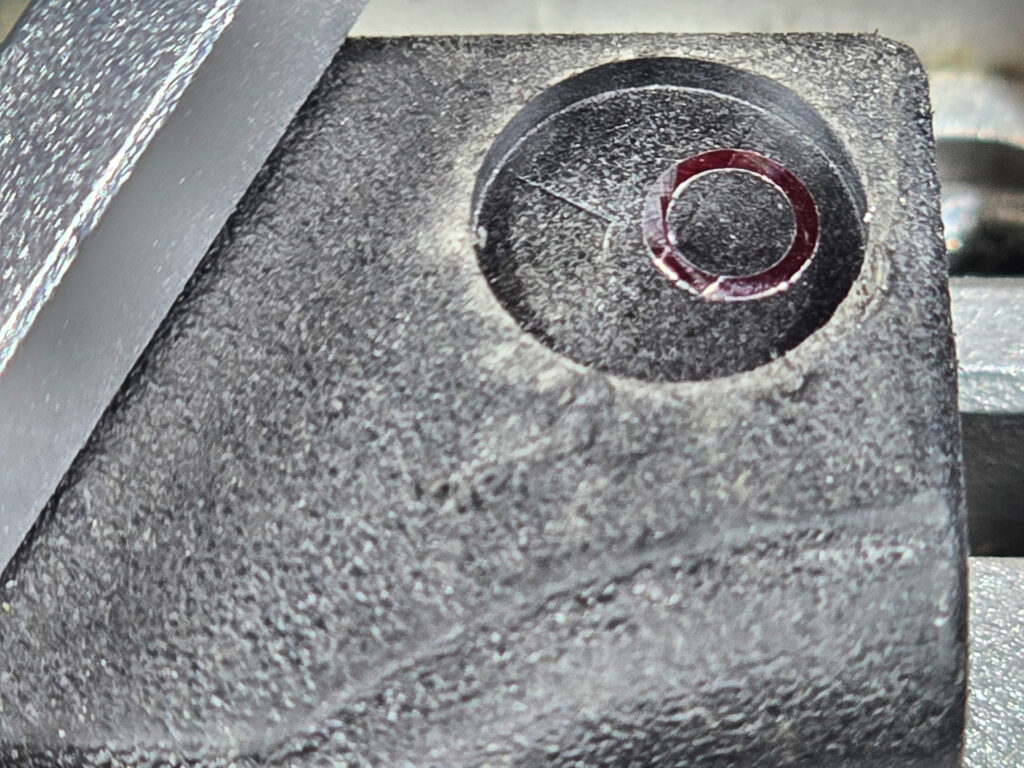
That slightly offset circle is exposed when you do the countersink. A drill bit will cut open the circle and then the grip will want to ridge the bit up.

So, yes, you can use a drill press but what is incredibly important is that you have the workpiece held firmly so you need to clamp it down.

Make a wood or plastic insert that you can put in the top of the grip to keep it from deforming when clamped and then milledd/drilled. If the grip moves at all, your new grip will be ruined.

Honestly, 99% of my challenge was figuring out how to securely hold the grips so they wouldn’t move and also not introduce angles/canting, etc. I’m still working on improving this as the overwhelming amount of my defects are caused by unintended workpiece movement.

You need to locate your new hole centers and then set up your milling machine or drill press to do the cuts. You need to figure out what works best for you. If you have digital read outs (DROs) then you probably didn’t need to read this blog post. If you are new to this, locate the hole center and mark the hole with a very fine point then use either a small drill bit or hole finder to center your machine on the hole.

To get the depth you need on the countersink, either use the features of your machine if it has some form of depth indicator or wrap a piece of tape at whatever limit you need and stop when you reach it.

I would highly recommend you do the countersink cut and then the hole cut on each side before you move on to the next. In other words, do a side at a time before you move the workpiece.

If you are wondering why I am not mentioning how to locate and cut the front pin holes, it’s because you don’t really need them if your weapon uses a shelf, which most current HK grips do. For example, the Magpul SL grip does not have the front holes. The way the polymer is formed, you would likely need a longer pin and it’s not going to give you a better connection. The front plate of the grip is shoved against the shelf by whatever you have on the end of the weapon and the top rear pin keeps the grip from swinging down – that’s really all that you need.
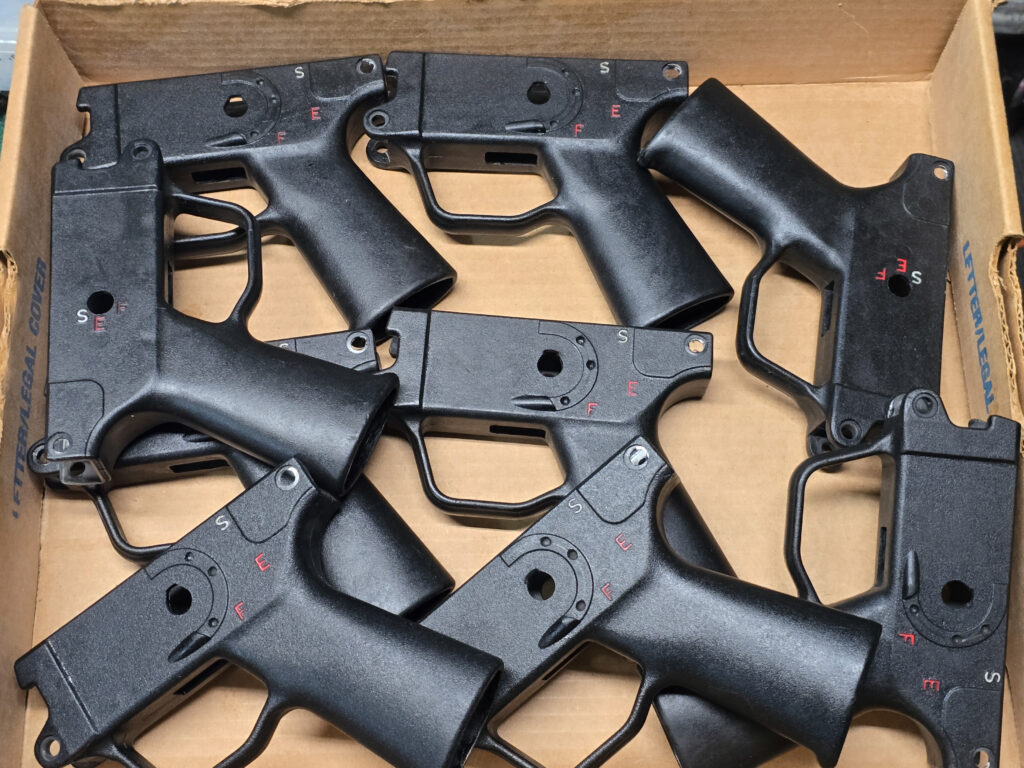
Here is a batch of converted “good condition” real HK Navy SEF grips getting ready to go to their new owners. We do repair any minor gouges and apply a restorative finish to make them look good. That’s the original HK paint by the way. Click here if you are interested.

Summary

You can do the conversion or buy our ready to go grips. You may need to do some final fitting but we’ve done the hard parts. If you’re interested, click here to go to our HK Grips page.

I hope this helps you out,


If you find this post useful, please share the link on Facebook, with your friends, etc. Your support is much appreciated and if you have any feedback, please email me at in**@ro*********.com. Please note that for links to other websites, I may be paid via an affiliate program such as Avantlink, Impact, Amazon and eBay.


Why grips converted for MP5Ks have a weirdly shaped rear pin hole

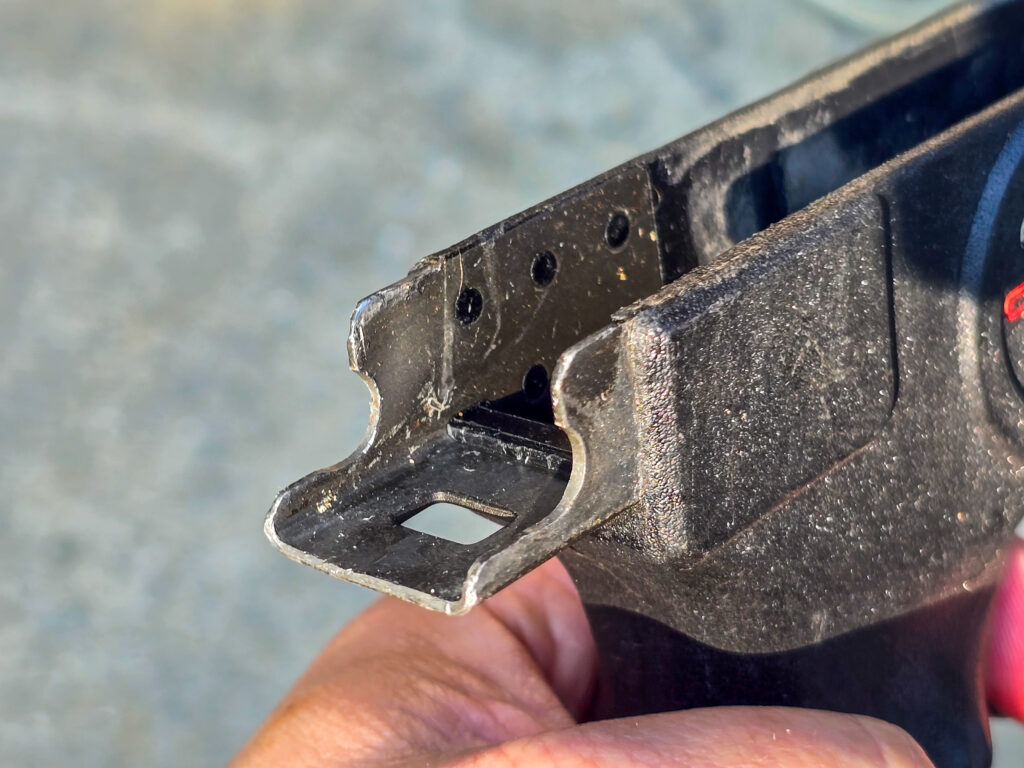
Grips for the MP5/HK33 and HK91/G3 rifles can be converted for use on MP5K-type weapons. As you can see in the photo above, a small circle appears at about 2:30 position on the larger hole for the pin when this is done. I used to wonder why and since I started offering converted grips for sale, I’ve had a few guys also ask me why this is the case.
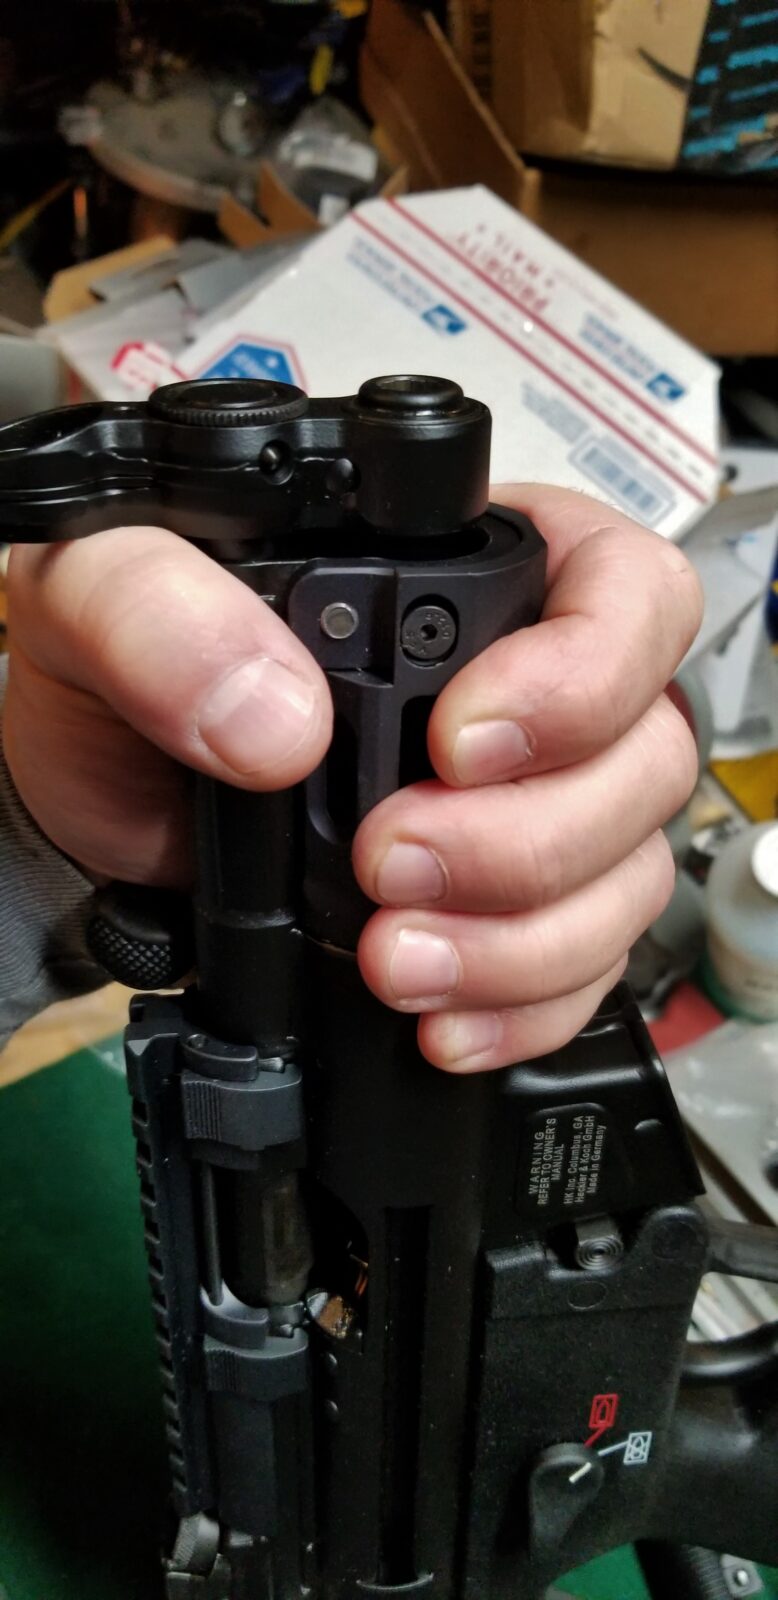
Well, the short answer is that the steel reinforcing that is cast into the rear of the grip has different holes when an MP5K grip is made vs. the others. This allows the hole for the pin and the countersink for the head to not encounter another hole.

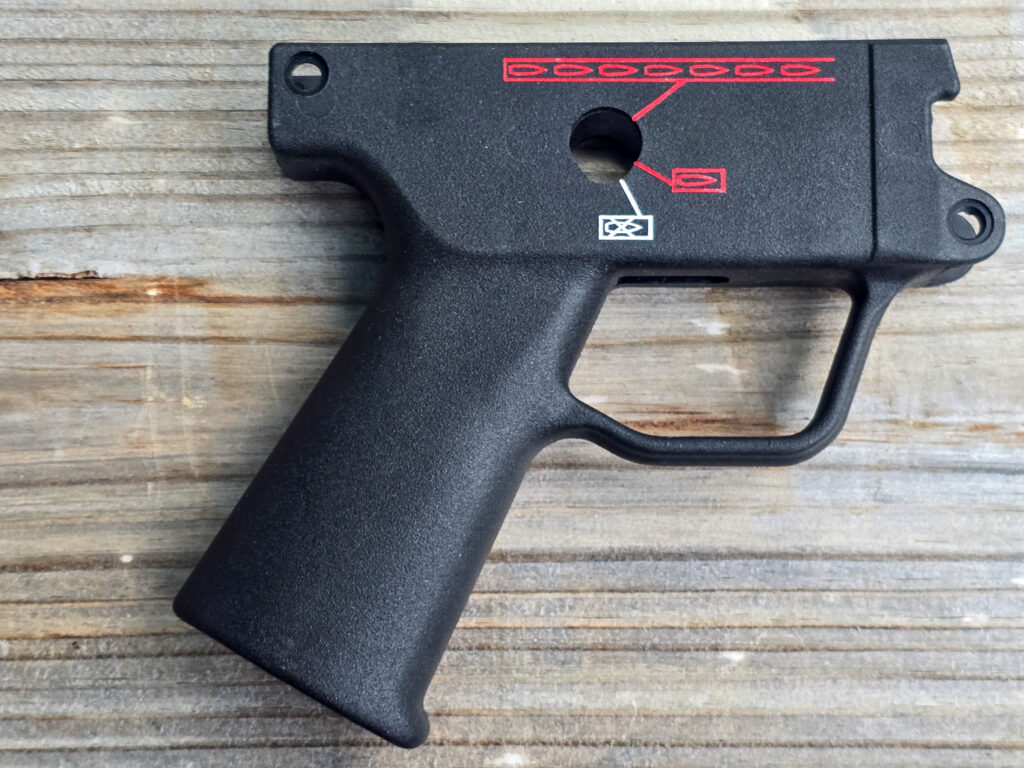
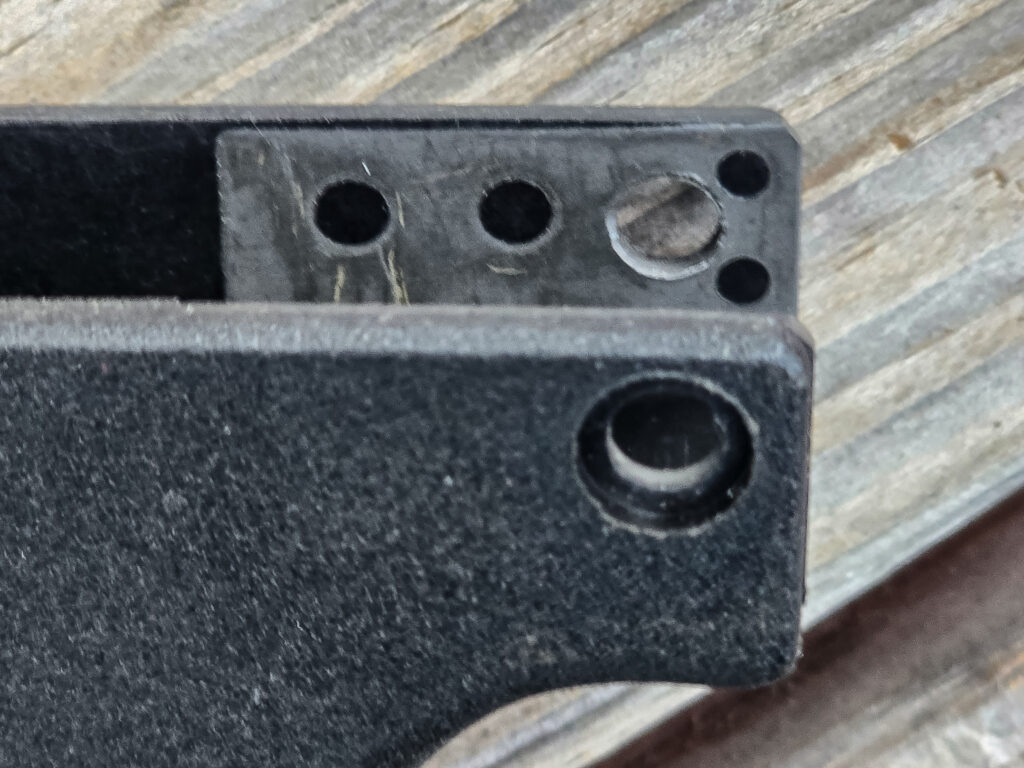
This is a real German H&K MP5K grip. The top rear hole doesn’t have that telltale circle of conversion because it was purpose built to be mounted on a MP5K.
Not one of my better photos but you can see the pin hole on the far side. The anchor holes to secure the metal strap are to the left and right of it are filled in with plastic during injection molding. Notably at the rear right there are two anchor holes to help compensate and secure the strap.

With the MP5/HK33 and HK91/G3 grips, the designers never planned for a hole to be made in that location and as a result, the newly drilled hole runs right into an anchor hole they have in the metal to allow the injection molding to adequate bond to it.

If you try to drill into one of these grips, the smaller hole will get cut open and then ride the flute of the drill upwards and make a mess. To compensate for this, an end mill must be used to do a plunge cut straight down. There must be careful workholding fixtures to keep the grip from moving. Trust me, I’ve trashed a bunch of grips by not making sure the grip was completely secure.

This HK33 contract grip has anchor holes that go evenly across. There isn’t enough spacing between those holes for a new 6mm pin hole and 9.5mm countersink to be milled without hitting the rear anchor hole.
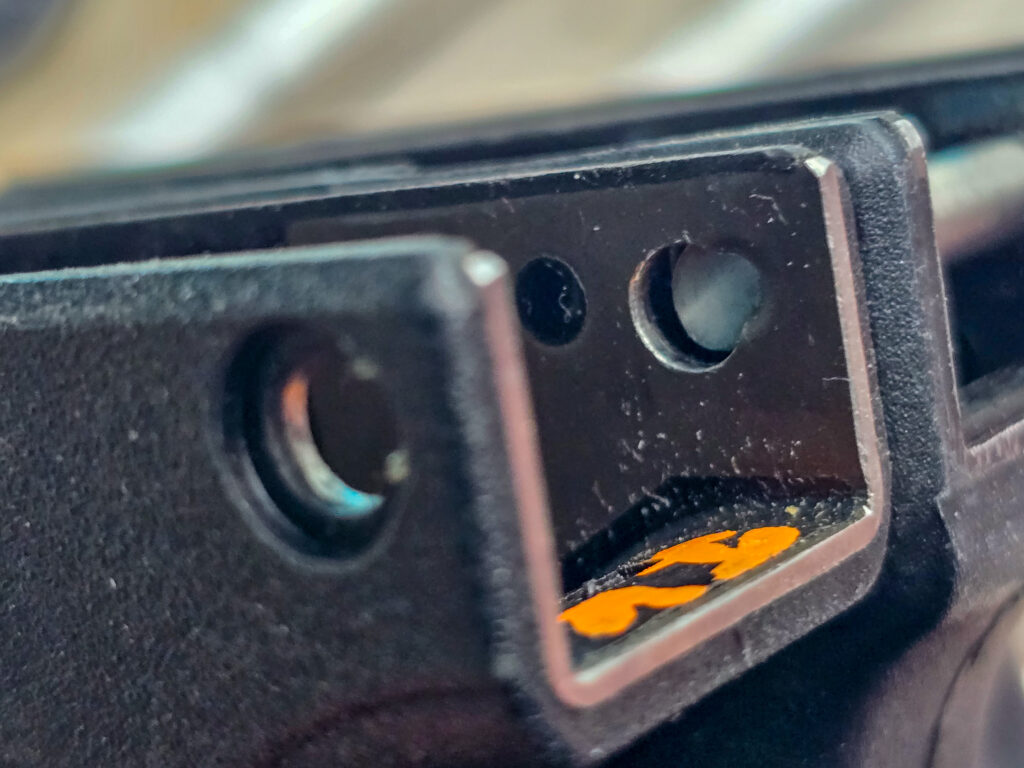
This is a Malaysian contract grip has the rear steel “tail” has been cut off. Both pin holes and countersinks have been drilled. Look at the hole on the right. The pin hole ran right into the anchor hole and tore out the plastic that would have filled it. By the way, the orange paint was from me tracking early prototypes. It’s not something someone would normally see.

Despite those rear anchor holes being removed, the steel reinforcing is still held in place. While theoretically weaker, I have not heard of any real world cases where the the steel (it’s folded sheet metal really) has come lose due to separation from the surrounding polymer.

For people using converted grips, just insert your rear pin such that the retaining wire is on the shoulder and not in the hole. That’s really the only difference. Of course, like most grips, some final fitting may be required – by using a circular file to adjust the rear hole, filing the front locking plate or removing a bit of material off the back with a file or by sanding.

Summary

In short, purpose built MP5K grips have enough spacing between the rear metal strap’s anchor holes for the 6mm pin hole and 9.5mm countersink to be drilled. Other HK models do not use that same spacing so the tell tale partial hole appears at the 2:30 position. It’s purely cosmetic and just requires the user to insert the rear pin such that the locking wire rests on the normal shoulder of the hole and not the newly formed void.

I hope this helps you out.

If you are interested, our online store has a number of HK grips available – both converted and not. Click here.

If you find this post useful, please share the link on Facebook, with your friends, etc. Your support is much appreciated and if you have any feedback, please email me at in**@ro*********.com. Please note that for links to other websites, I may be paid via an affiliate program such as Avantlink, Impact, Amazon and eBay.


Two Great Videos Explaining How Roller Delayed Blow Back Actions Work

I’m a fan of the Roller Delayed Blow Back firearms for a while and have had opportunities to own and shoot ones from HK, POF, and PTR. I knew the rollers were locking the bolt head in place but never really understood the details of the action. I’ve tracked down two great videos to help show you what is going on.

This is a PTR PDWR in .308 – basically a cut down HK-91 style pistol with a SB Tactical SOB Brace and a Vortex Optic.

Forgotten Weapons

In this short video, Ian @ Forgotten Weapons does a great job explaining just how this system works.

MouseGunner

This is one of MouseGunner’s cool x-ray renderings where he shows the MP5’s action at work. He’s done this for other weapons as well and watching the weapon operate really helps.


I hope this helps you out. Be sure to subscribe to both guys’ channels – Forgotten Weapons and MouseGunner.


If you find this post useful, please share the link on Facebook, with your friends, etc. Your support is much appreciated and if you have any feedback, please email me at in**@ro*********.com. Please note that for links to other websites, I may be paid via an affiliate program such as Avantlink, Impact, Amazon and eBay.


HK SP5K Photo Shoot In The Leaves

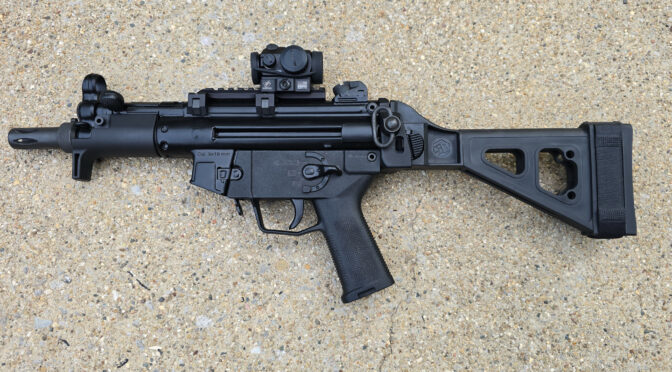
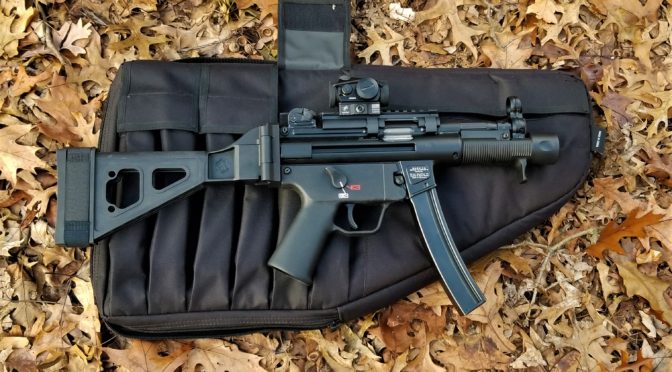
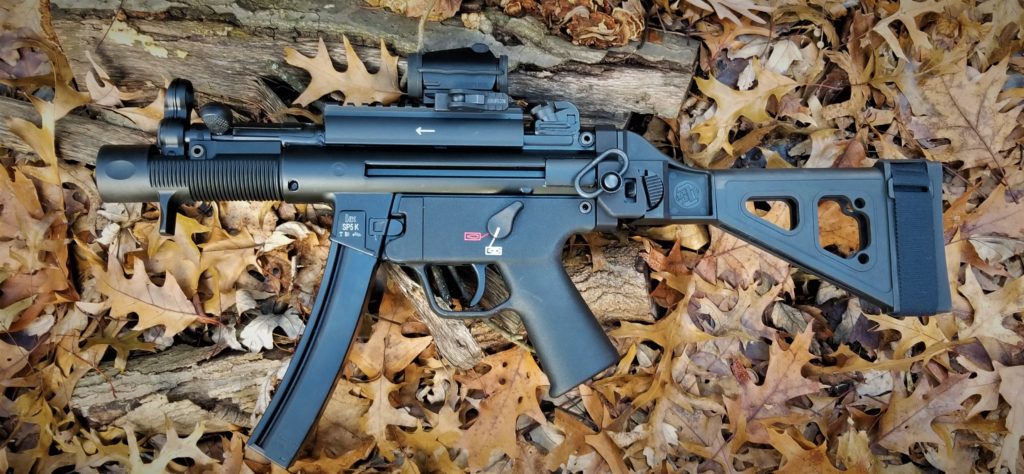
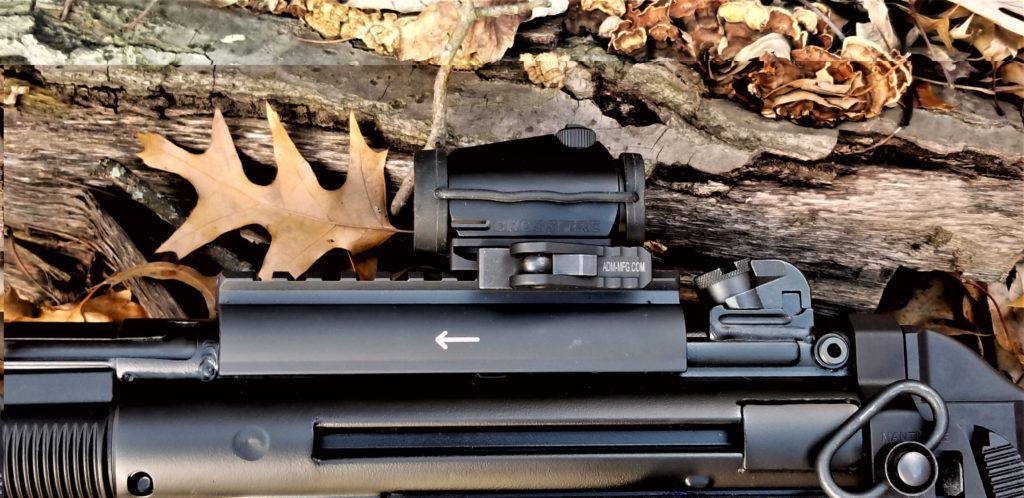
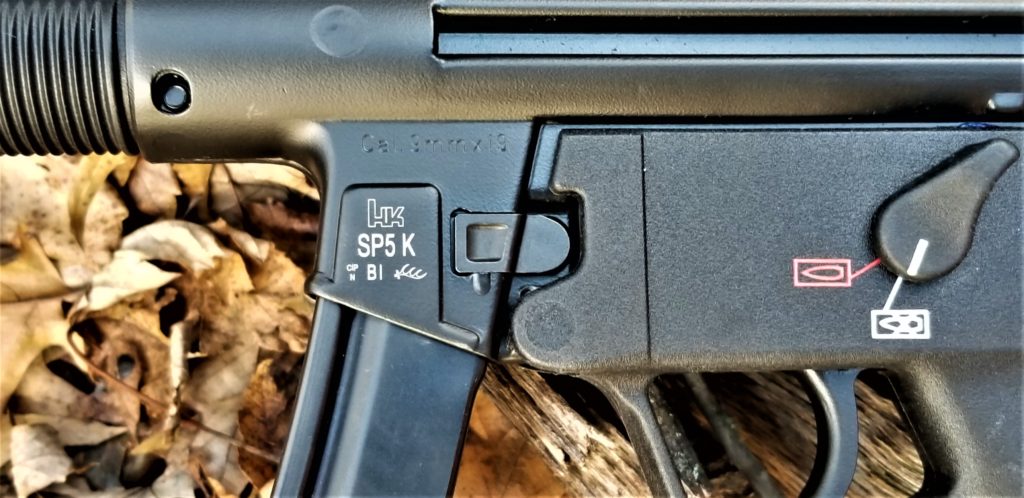
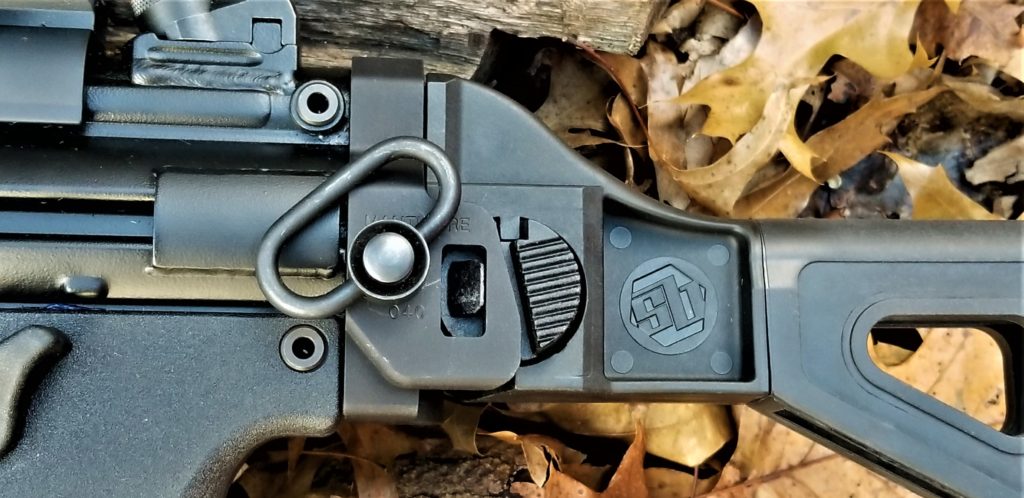
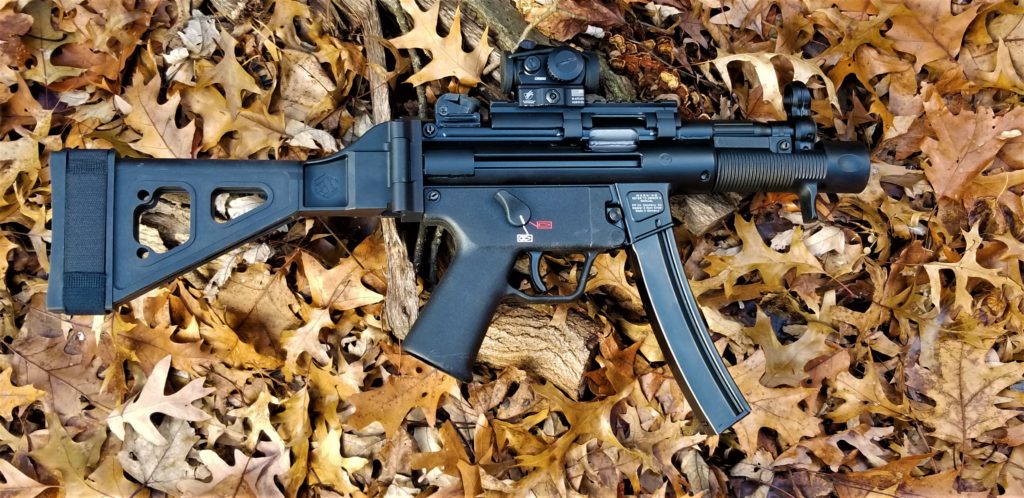
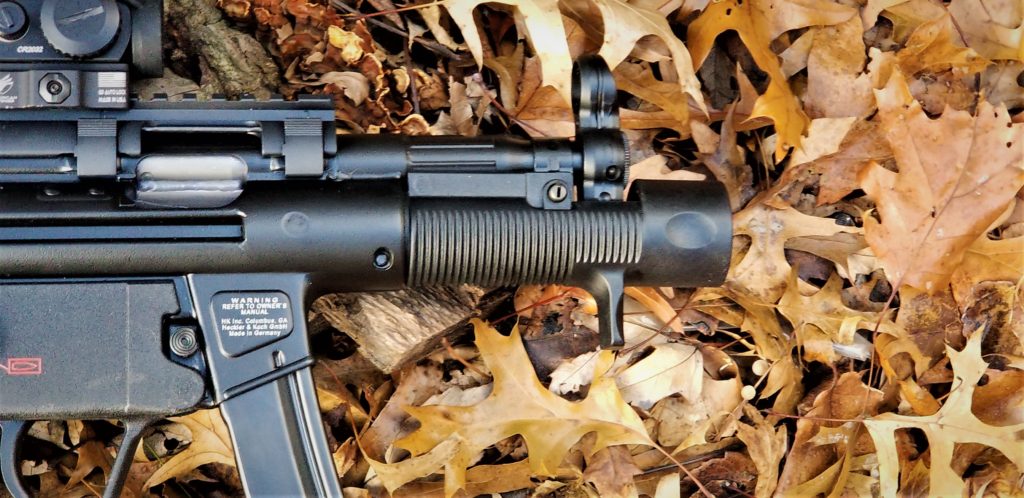
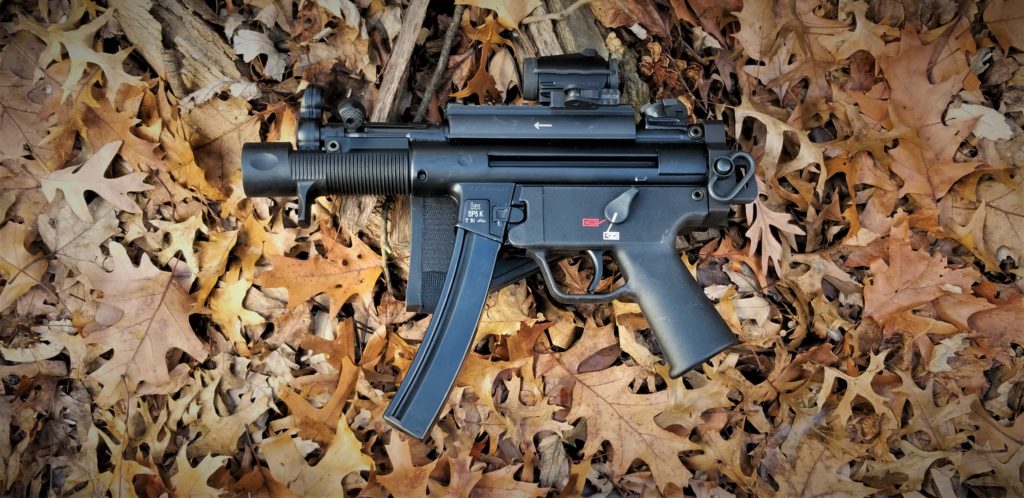
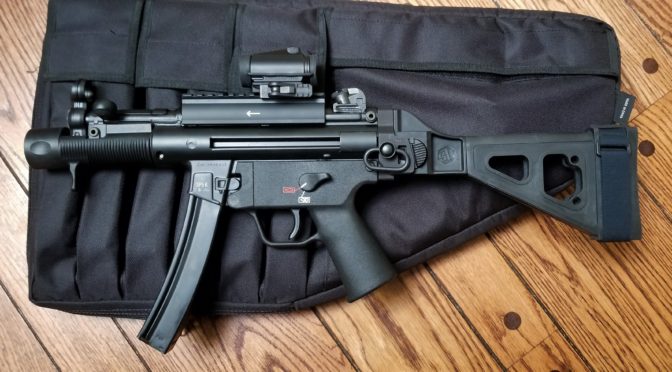
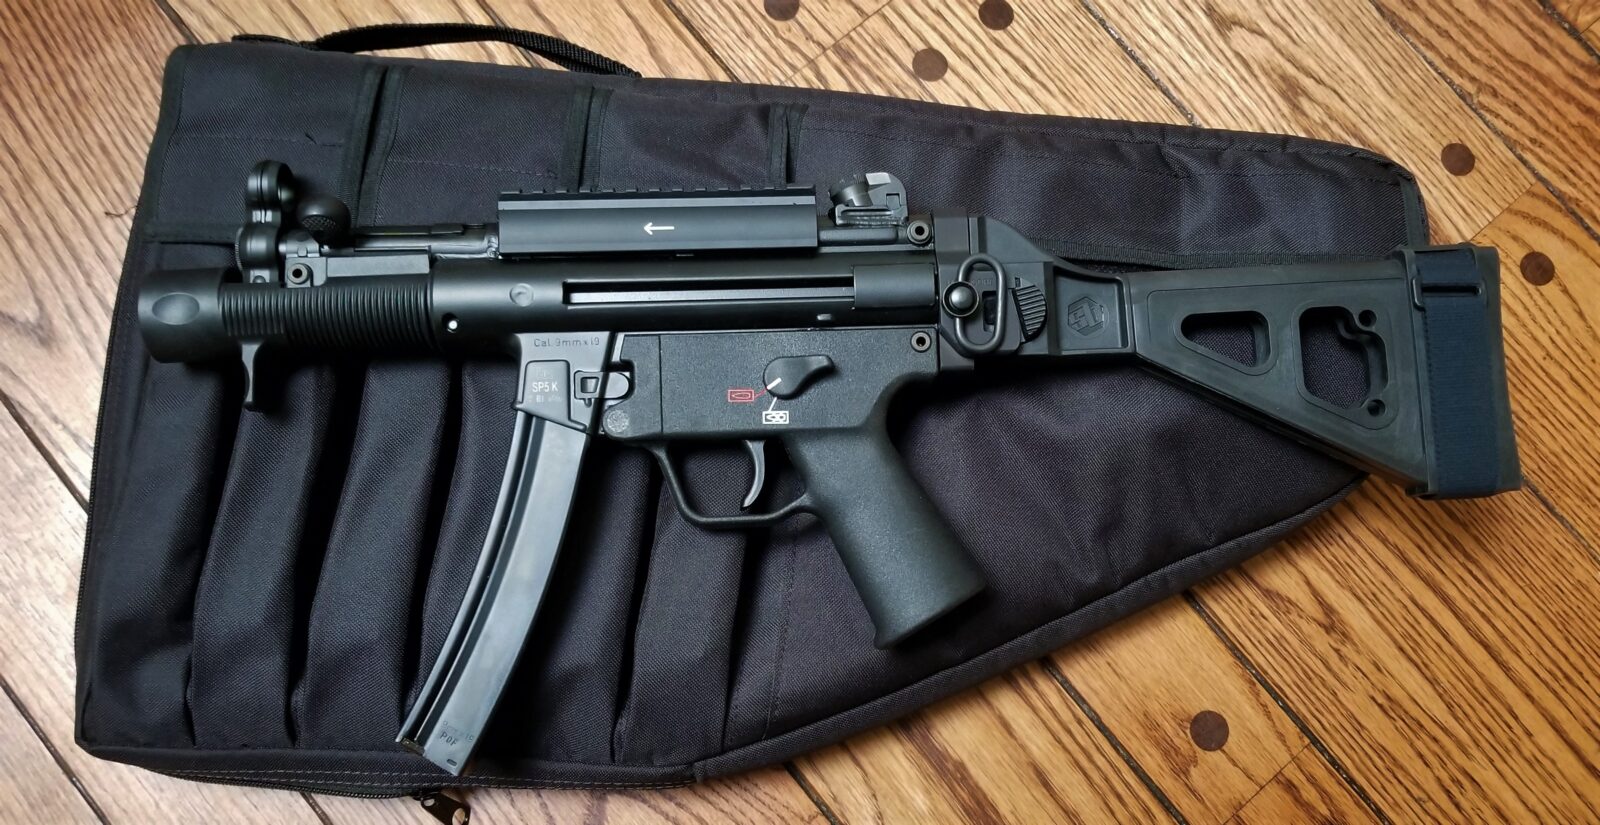
Okay, I liked the leaves, the lighting and thought it would be a great chance to get some photos of the HK SP5K pistol with the SB Tactical SBTK5A brace and the Vortex Optics Crossfire red dot that is on an American Defense AD-T1-L STD quick release mount.  As you can see above, I’m still using the Uncle Mike’s case.

So those are a few from the batch.  Looking forward to taking it to the range some day.


If you find this post useful, please share the link on Facebook, with your friends, etc. Your support is much appreciated and if you have any feedback, please email me at in**@ro*********.com. Please note that for links to other websites, I may be paid via an affiliate program such as Avantlink, Impact, Amazon and eBay.


Basic SubGun Case for HK SP5K with Brace

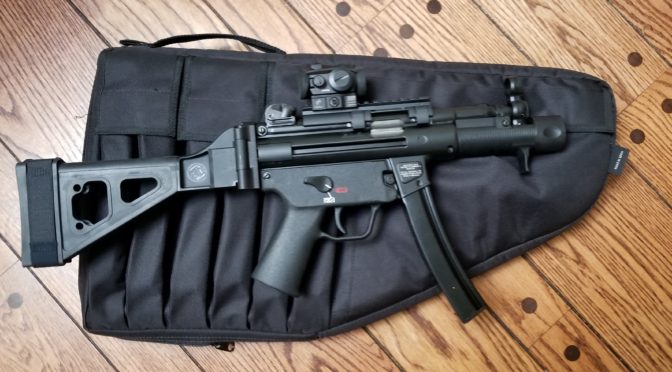
As I wrapped up my changes on the SP5K, I realized I needed a case to put it in.  It just so happened that I had an Uncle Mike’s “Tactical Submachine Gun Case” that I had never used and it turns out the SP5K with the SB Tactical SB5KA brace and Vortex Crossfire red dot could slide right in without the magazine installed.

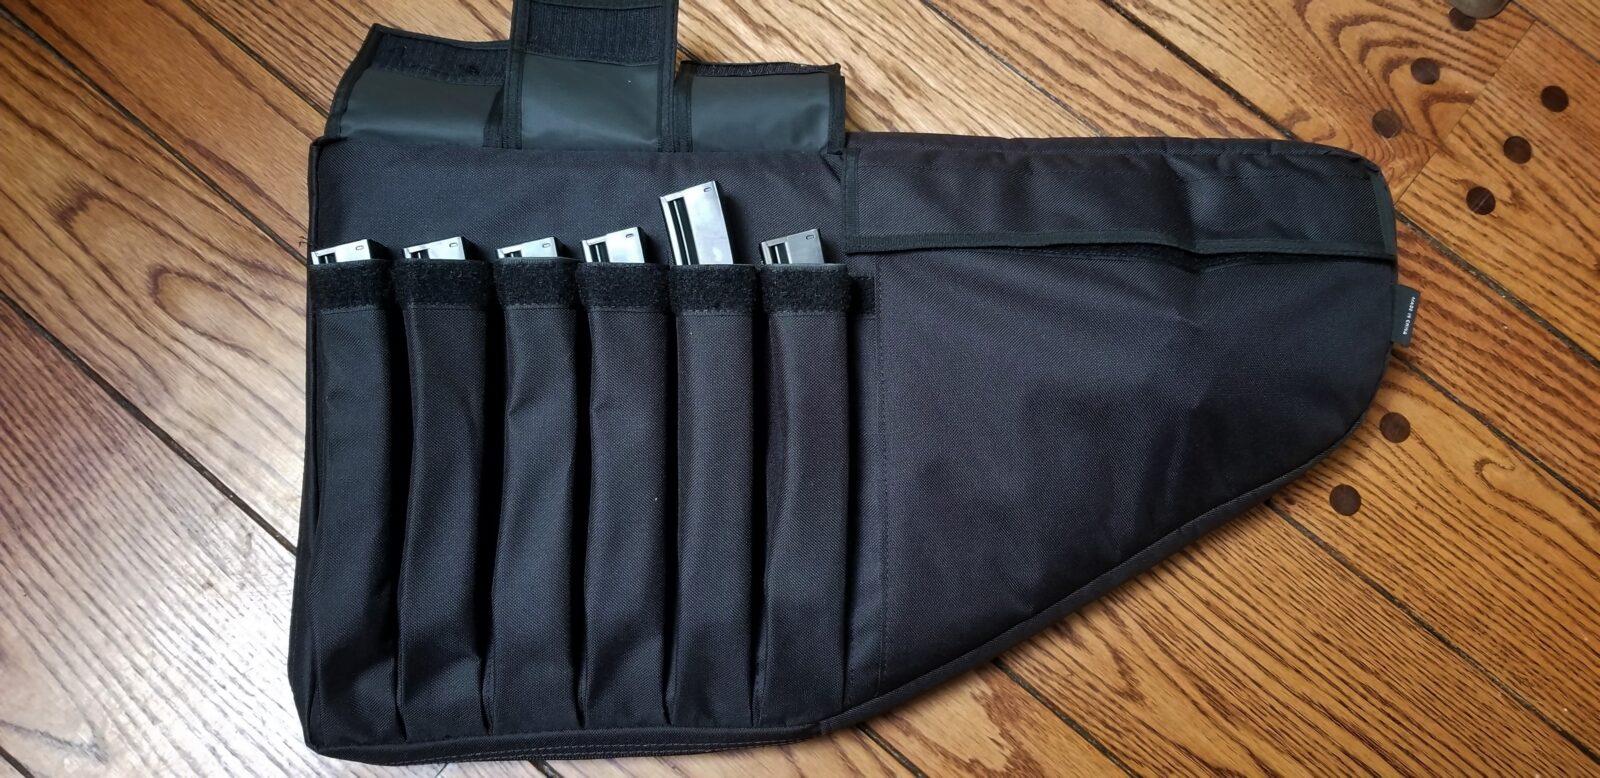
This is the front of the bag – six magazine pouches, one large flat pouch to the front and the rear mounted carry handle is visible.
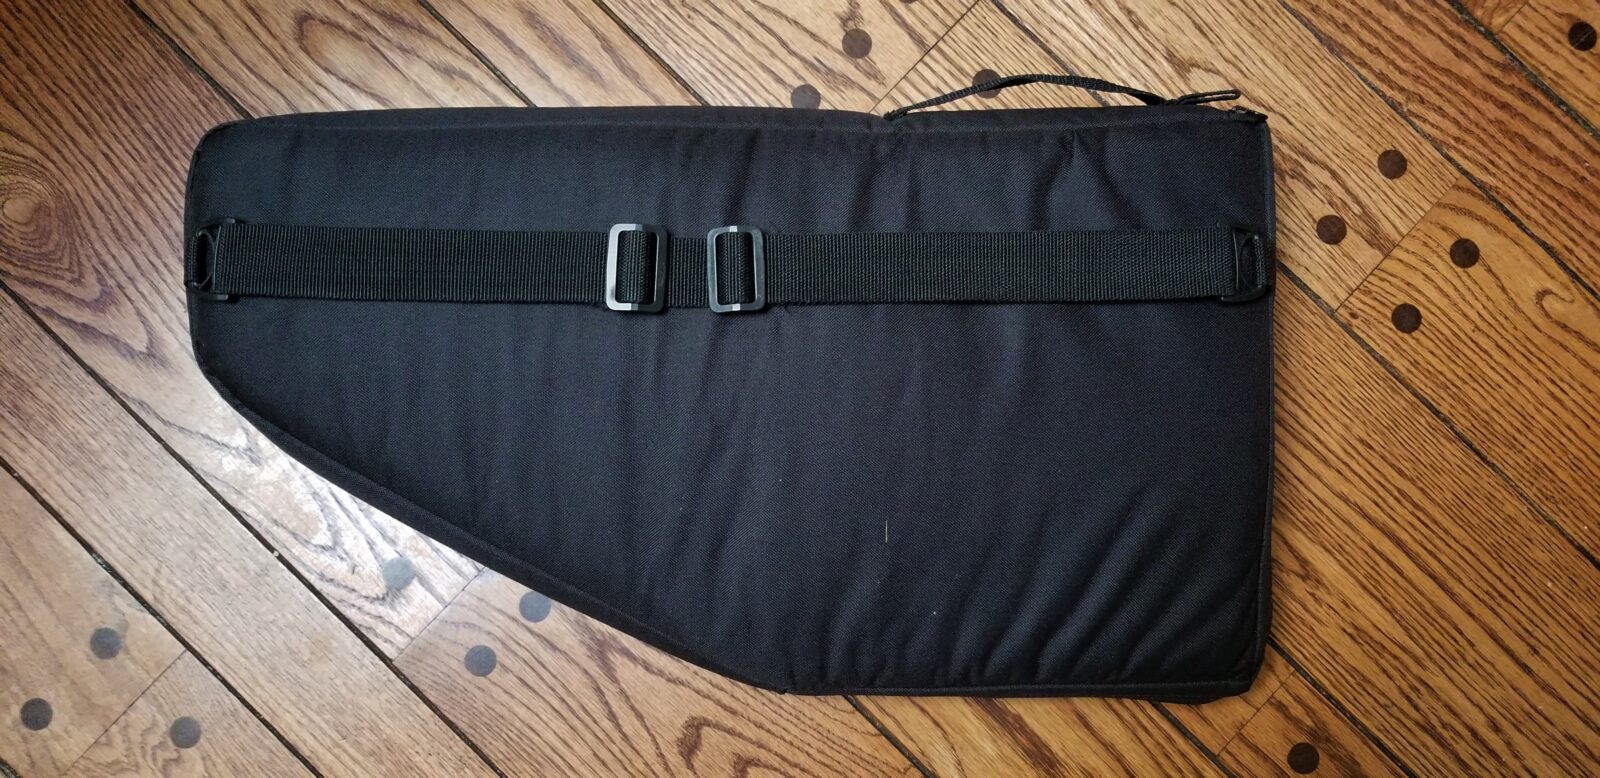
This is the back – you can see the shoulder strap and the carry handle at the top.

The case has a zipper at the rear of the bag and the SP5K simply slides in.  This is one thing I dislike – it does not open and lie flat.  Some folks may find this a plus but I prefer bags that open.

The exterior dimensions are 24.5x14x2 and I’d knock off about half and inch all the way around for the interior dimensions.  It does have some padding but not a ton.

Another dislike I have is the way it holds the MP5 magazines.  They slide down in the little pouches and I can’t pull them out.  I need to push at the bottom to get them to slide up.

I pushed the magazines up so you can see them in this photo.  Notice where the bulges indicating the actual lower part of the magazine in each pouch.  In practice, the mags slide all the way down and are hard to get out.  You have to press from the bottom.

On the topic of pouches, the front pouch just forward of the magazines is very tight.  The bulge you see sticking out is a Mag Lula loader.  While it can hold the loader, it’s really better suited for thinner items.

Okay, rounding out my complaints, the carry handle at the rear makes for an odd front-loaded unbalanced load.  I don’t know why they didn’t center it.

Summary

It’s a decent entry bag and you can get it on Amazon [click here to see it].  Sure there are things I don’t like about it but does the job.   I will be investigating other cases but this case is a solid performer at the price.


If you find this post useful, please share the link on Facebook, with your friends, etc. Your support is much appreciated and if you have any feedback, please email me at in**@ro*********.com. Please note that for links to other websites, I may be paid via an affiliate program such as Avantlink, Impact, Amazon and eBay.


Picking an Optic for HK SP5K

In past posts, I have written about buying the SP5K, selecting a brace and the forearm.  Next up is the optic.  It should come as no surprise that my go to brand is Vortex Optics.

I’m a creature of habit.  Vortex products are solid and have a no-nonsense – “if it breaks we will fix it” – warranty.  Vortex does not sponsor me so I have no reason to stick with them other than they deliver.

I knew right way this was going to be a close-in weapon with distances being typically 25 yards or less but maybe stretching out to 50 yards.  It is hard to beat a red dot at those distances for rapid target acquisition.  That narrowed my options down quite a bit.

A second big deal for me is to have a wide field of view but also a relatively small dot size.  This combination rules out a lot of the micro dots that are out there as they are both tiny and have a 4 MOA dot size – that means the red dot will cover 4″ and 100 yards or about 2″ at 50.  The micro dots are okay and I rather like them on pistols but I wanted something a tad finer on this more controllable and accurate weapon.

The Vortex Crossfire Red Dot

All paths lead me to the current Vortex Optics Crossfire red dot. It has a 2 MOA dot size, is only 2.5″ long and only weighs 5.2oz.  It also has a battery life of 7,000 hours at an output setting of 5.  Note the optic has 11 levels so when you have it turned up for bright light settings, you will drain the battery faster – always keep a spare battery in the case.  I’ve had a couple of range sessions get messed up to do dead/dying batteries and no spares.

American Defense AD-T1-L STD Mount

The only shortcoming, if I can even call it that, with the Crossfire is its base.  Vortex did their homework and include both a short base and base that can lower 1/3 co-witness with AR iron sights.  The problem is that they are screwed onto the picatinny rail.  If you need to get the optic off fast, that’s not going to happen as you will need a torx driver.

I do have good news – the Crossfire has the same base geometry as the Aimpoint T-1/H-1 optics.  That’s the key right there – there are a lot of mounting options out there and after some digging, I have been using mounts from American Defense for over a year and they are rock solid.

By the way, make sure you get the right mount – American Defense makes there base for a variety of optics.  I am using the AD-T1-L STD.

Assembling the Optic on the Mount

The good news is that this is really easy.  Undo the four screws on the bottom of the Crossfire to remove the Vortex mount.  Put the American Defense mount underneath it, add a bit of Blue Loc-Tite thread locker and reinstall the screws.

Use the small Torx wrench that Vortex supplies with the Crossfire to remove the four screws so you can the swap the bases.
Here you can see the bottom of the Crossfire and how the American Defense mount will align.
You can see the Blue Loc-Tite and the installed screws.  I like to put the Loc-Tite in the holes and then install the screws.  I wiped the residue away with a paper towel after I took this photo.

The Result

The result turned out really nice.  The optic is just the right height that it is relatively close to the bore and I can get a good consistent cheek weld.


If you find this post useful, please share the link on Facebook, with your friends, etc. Your support is much appreciated and if you have any feedback, please email me at in**@ro*********.com. Please note that for links to other websites, I may be paid via an affiliate program such as Avantlink, Impact, Amazon and eBay.


Deciding on the Forearm for my HK SP5K

In my last post, I went over the options I considered for the brace on my HK SP5K.  In this post, I’ll review the three handguards I looked at – the original forearm, a US-made polymer unit with an integral hand stop and a low-profile aluminum unit.

I really have two places I shop for HK and related parts – HKparts.net and RobertRTG.  So I went and checked out what they had plus I did google searches on “SP5K photos” and “MP5K photos” to see what others were using.  I’m a visual guy and can scan a ton of photos very fast and then click to read the articles.

Removing the handguard is pretty much like all other HKs – pop the pin and pull down.  You can see just how short that barrel is due to HK having to comply with German export laws for the pistol to be deemed “sporting purpose.”  This also means you need to carefully think how to keep your fingers, notably your thumb, out of the way.  You could argue training and holding the mag well but… there is a risk no matter what.

After researching for a bit, I got it down to the following three options that I could afford to try out:

Option 1:  The Original Forearm

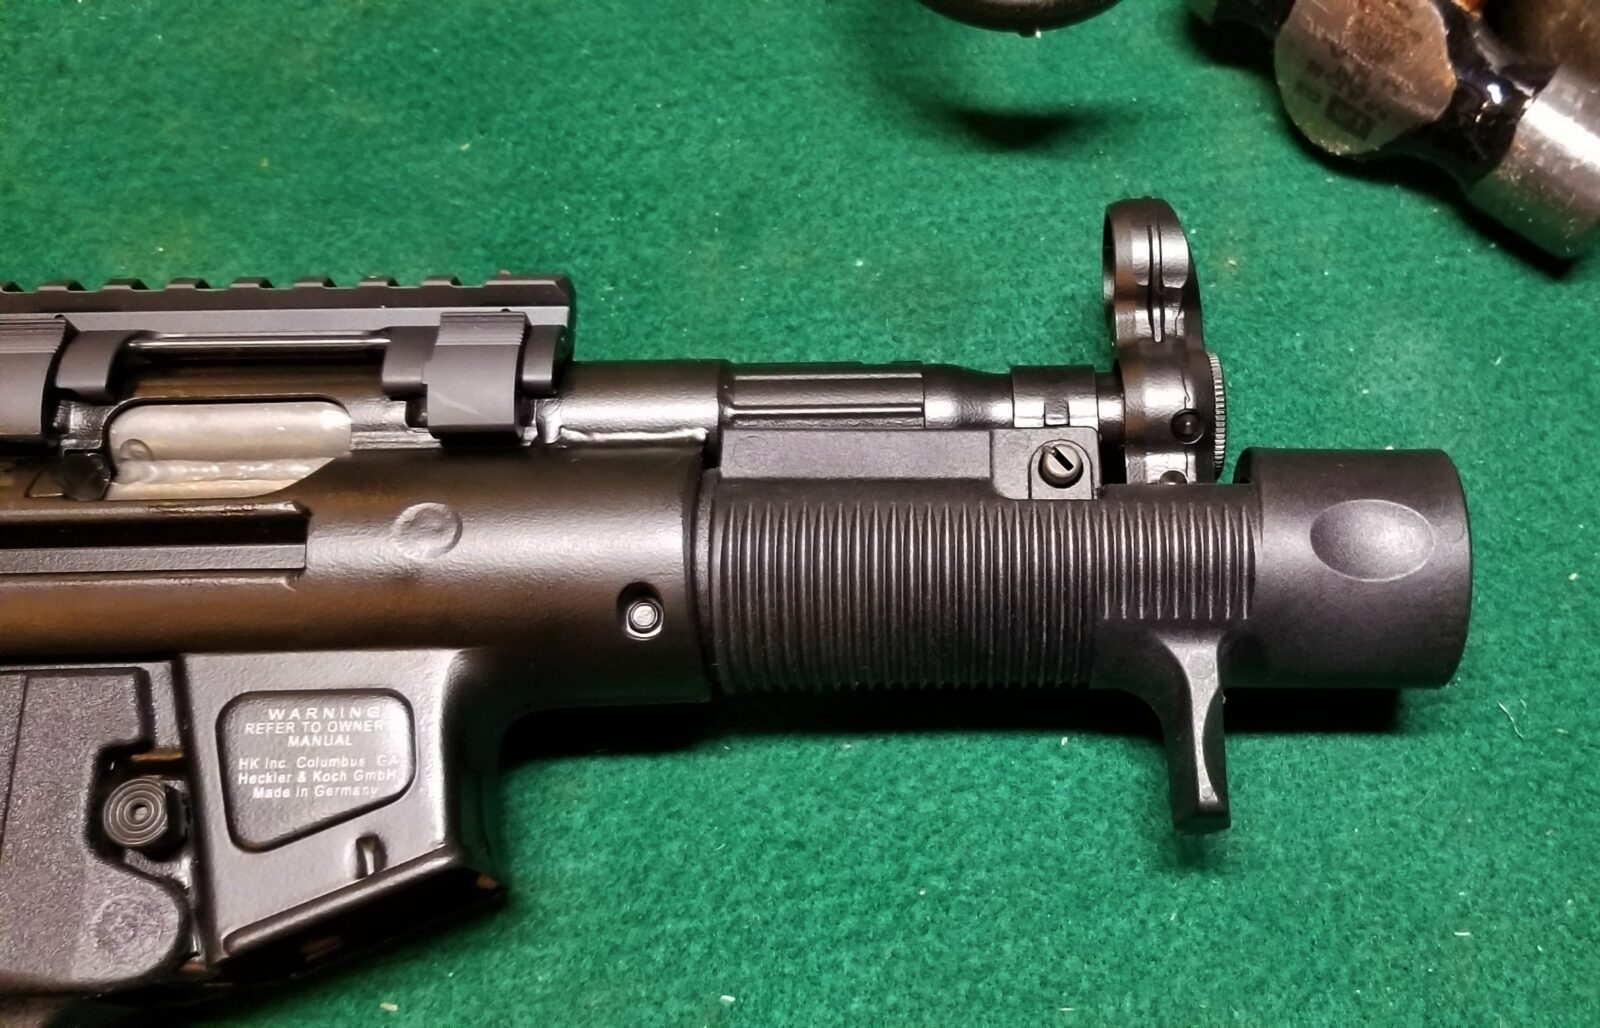
The unit that comes with the SP5K has two things going for it – the hand stop and the muzzle guard.  The little indentations you see on the sides are actually thumb rests.  From a safety perspective, this seemed like the best but I wasn’t sure about how the muzzle protector would hold up over time.

Note the thumb rest of the muzzle guard area of the original SP5K handguard.  The hand stop is well forward giving you plenty of grip options also.
See, the actual end of the muzzle is located way down in the guard.  I can’t help but wonder how the polymer will hold up over time.  I’m betting HK thought about that is why they made the guard so much wider than the muzzle to allow most of the blast cone to pass by without contacting the polymer.  I haven’t heard of folks having problems so HK must have designed it correctly.

Option 2:  A US-made Polymer Handguard Sold by HKParts.net

The second option I decided to try was a US made “Reverse stretch forearm with hand stop” that was made for HKparts.net.  It was very well, fit my SP5K great and had great room for my hand but the problem was my thumb.  It wanted to go in front of the muzzle.


To be clear, it is an excellent handguard.  I blame the German politicians for the abrupt barrel.  If I had a muzzle device out front, this would have made an excellent forearm.

Option 3:  HKParts.net’s Own Low-Profile M-Lok Unit

So this brings us to the last option.  I tend to like the flexibility that rails bring and decided to try another HKParts.net model – their Low Profile Forearm M-LOK.  I ordered an Ergo hand stop/barricade stop to mount on it as well. 


I removed all of the screws to install the unit just in case some wiggling was needed. I think it could have fit without my doing this but I was trying to save the finish.
I knew I was in trouble.  It was going to be way too short and the Ergo hand stop was going to be pushed back into a slot and not going to be able to protrude without some machining.
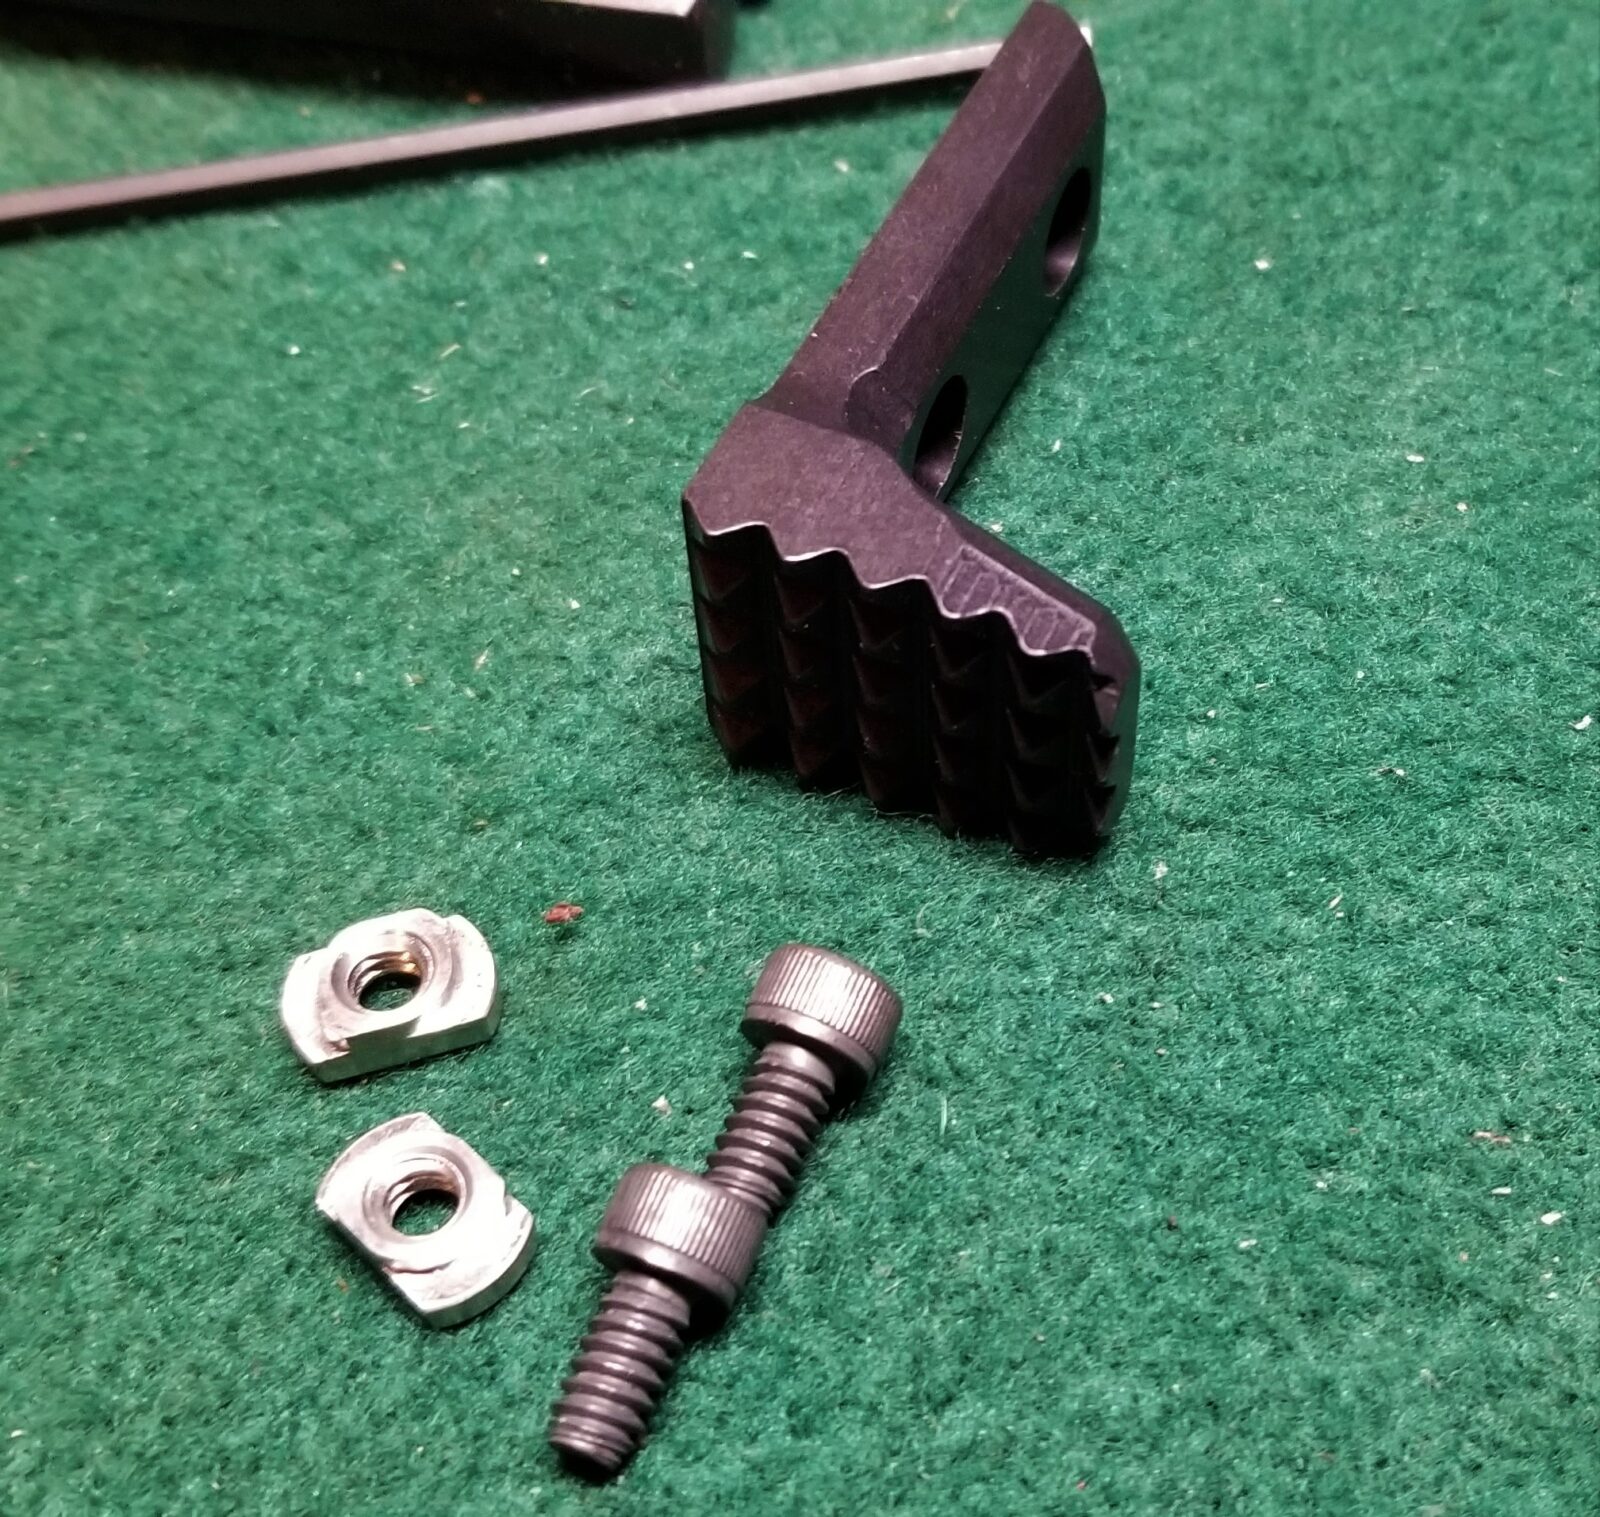
The Ergo hand stop / barricade stop was well made.  No complaints at all with that part.  It installed just like any M-LOK component does.
Here you can see that the Ergo’s position is constrained by the M-LOK design.
Houston, we have a problem.  I wear XL-sized gloves found the resulting set up way too awkward.  I thought about drilling and tapping the handguard to move the Ergo forward but then I would still have my thumb flopping around.

Bottom line, this just was not going to work as much as I wanted it to.  Blasted politicians.

So What Did I Do?

After trying all three out, I decided to actually stay with the original forearm.  Some day in the future, I will spend the money to have a B&T barrel installed with a tri-lug adapter.  I really like the B&T brake that I run on my POF-5 and will then decide on which of the handguards I want to use.  So, the brace and handguard were both selected, in the next blog post, I’ll discuss the optic I went with and why.

Here she is for the moment.  Note I added a QD Swivel to the mounting point on the brace. 

If you find this post useful, please share the link on Facebook, with your friends, etc. Your support is much appreciated and if you have any feedback, please email me at in**@ro*********.com. Please note that for links to other websites, I may be paid via an affiliate program such as Avantlink, Impact, Amazon and eBay.


Brace Options for the HK SP5K

In the last post, I told you I bought an HK SP5K.  It’s relatively heavy and begging for a brace.  I don’t really feel the need to spend the money and wait to register it to be a Short Barreled Rifle (SBR) and there are actually a ton of arm brace options out there. 

Option 1:  The SBT5KA Brace

I have a SB Tactical SBT5A Brace on my POF-5 and really like it.    I knew they made a version for the SP5K known as the SBT5KA but I was hoping for something different. Please note they are two different models of braces reflecting the different receiver end caps.

Option 2:  The SOB Brace

Every time I write this product name – the “SOB” – down, I smile.  SB Tactical has a ton of braces for the AR/M4 weapons family and they have evolved a ton away from the ugly original.  The SOB has clean lines and I run one on my PTR PDWR.  I think it looks good and has handled the .308 rounds from the PDWR just fine and feels solid too.

Option 3:  The SBPDW

I thought I had found just what I wanted with the SBPDW – a collapsing stock that looked really slick and it would be easy enough to add an M4 adapter to the SP5K.  So, I ordered a very well made adapter and the expensive SBPDW stock and guess what?  It would not fit.

Needless to say, I was bummed.  I had it completely installed only to find out that the guide rods on the SBPDW run right into the sides of the SP5K.  Crud.  I didn’t feel like figuring out all the changes that would be needed.

Purely for reference, here’s the same PDW brace now installed on a 10.5″ AR Pistol but that is a story for another day. It is a rock solid brace.

The Winner?  The SBT5KA

Well, I was bumming from the strike out with the SBPDW so I went with my second pick – the SBT5KA.  I felt it was most true to the lines of the MP5K and ordered one. As with their other braces, SB Tactical did a great job.

Installation was a breeze.  Pull out the two small pins at the back, swap the old end-cap for the brace, push them together and reinsert the pins.  I did make sure the recoil rod lined up and nothing was binding as I reassembled the unit.

I Did Clean and Lube The Internals

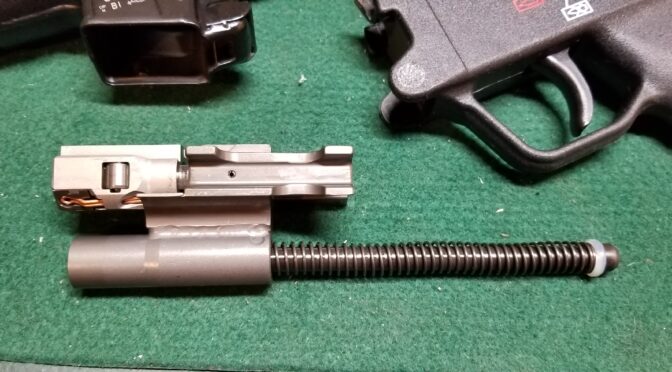
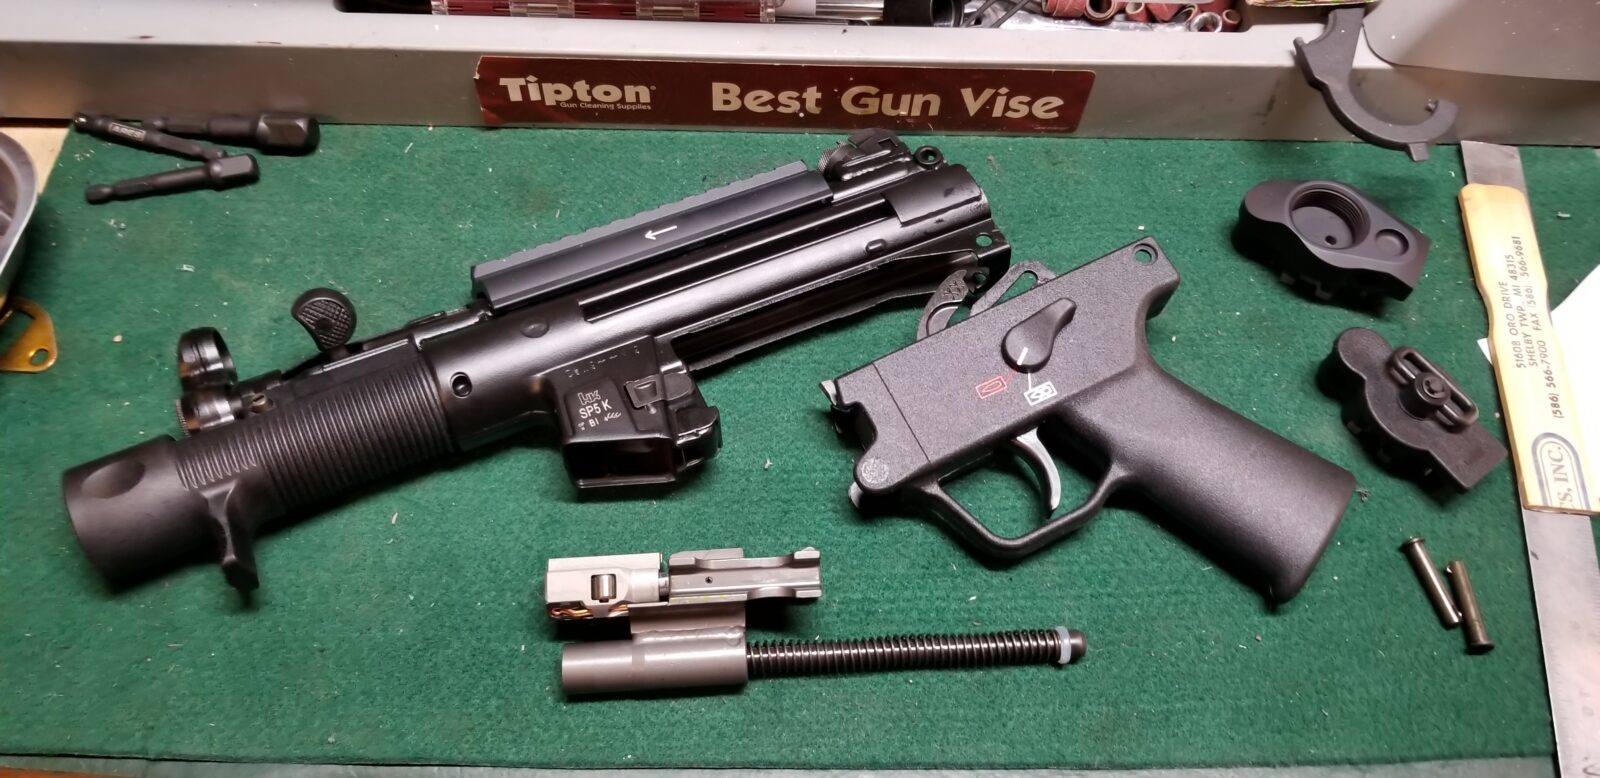
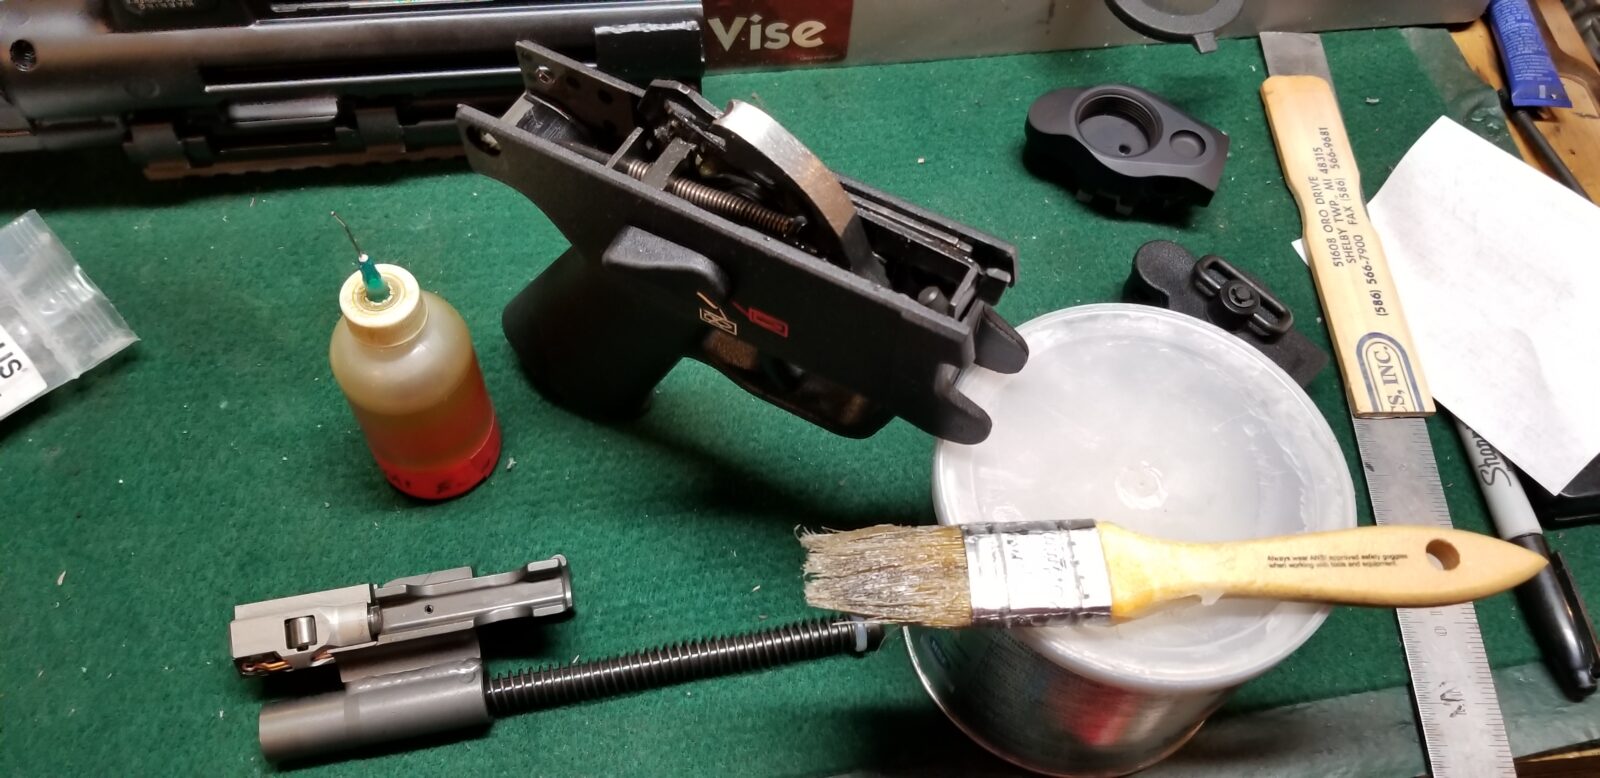
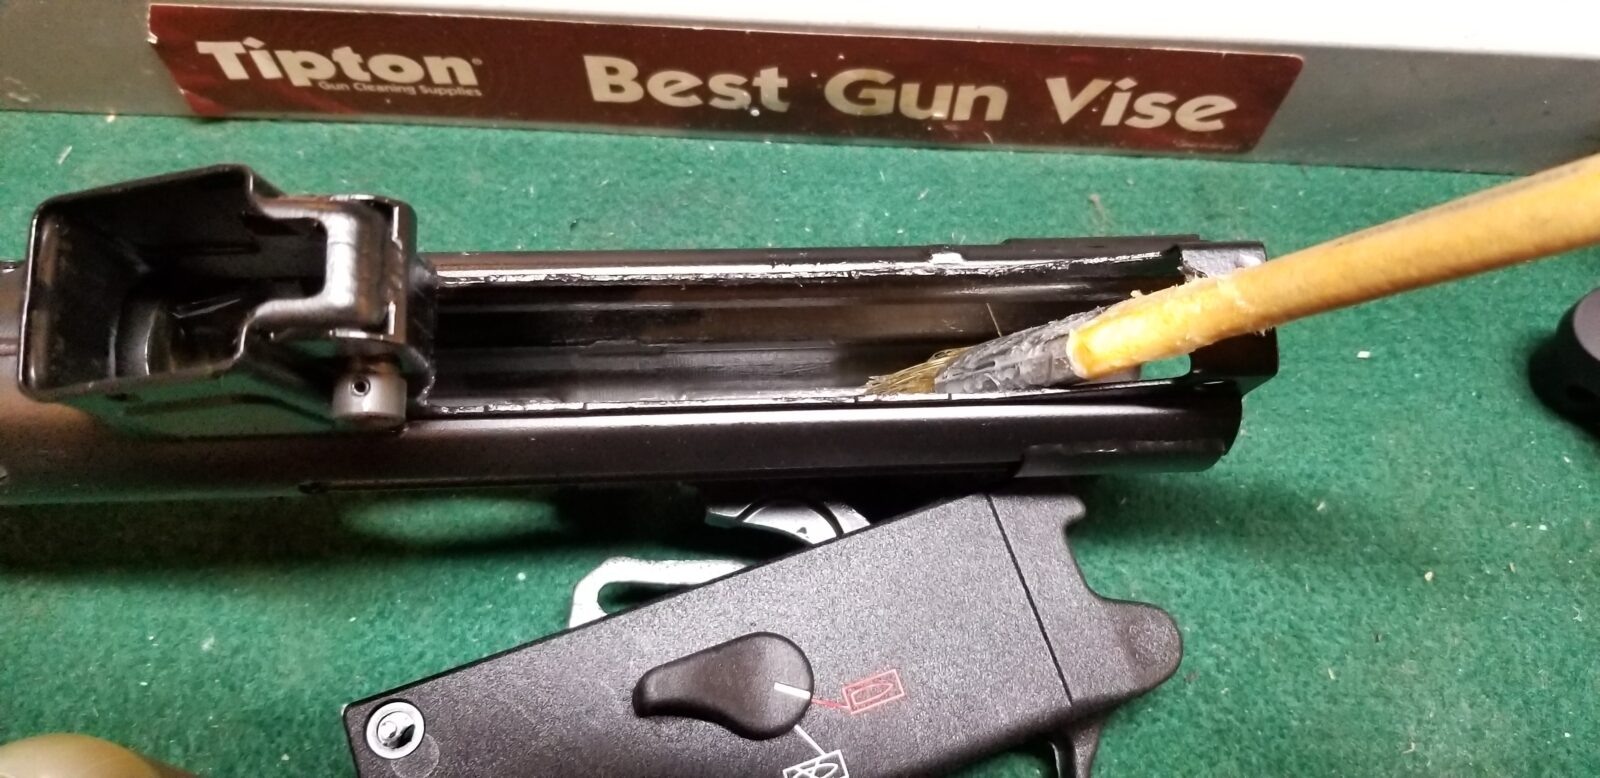
I should point out that when I removed the end cap, I went ahead and slid out the bolt group and lubricated everything.  I applied Super Lube grease to the bolt body and Mobil 1 Synthetic 10w30 via a precision oiler to the rollers of the bolt and rotating surfaces.  I also oiled the pins on the trigger pack while greasing the hammer face with Super Lube.

Summary

So you see I went with the SBT5KA brace.  In the next post I will discuss handguards.


Note, I have to buy all of my parts – nothing here was paid for by sponsors, etc. I do make a small amount if you click on an ad and buy something but that is it. You’re getting my real opinion on stuff.

If you find this post useful, please share the link on Facebook, with your friends, etc. Your support is much appreciated and if you have any feedback, please email me at in**@ro*********.com. Please note that for links to other websites, I may be paid via an affiliate program such as Avantlink, Impact, Amazon and eBay.