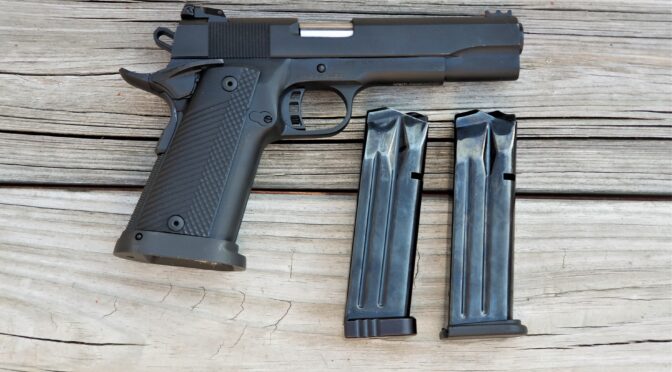
In the first post, I outlined the problem that high cap Rock Island Armory 10mm magazines (OEMP164015B) are next to impossible to find right and and shared some of the research I did. I also let the cat out of the bag that I figured out a way to successfully convert Mec-Gar Para P16 magazines (MGP164015B) for use in the RIA pistols.
Safety Comment – Use Dummy Cartridges / Snap Caps
I said this in the first post and it is so important that I want to reinforce the message – I knew I was going to need to do a ton of cycling of rounds. Using live ammo is risky because you have the very real risk of a negligent discharge. To avoid this, order yourself in a bunch of dummy cartridges. There are sellers on eBay that will sell you 10+ at time. Order yourself in 10-20 rounds. You are going to smash the crap out of them due to the heavy recoil spring a 10mm uses. I trashed at least 10-15 of them. Most were due to the bullet being smashed back into the case, one dented the case pretty bad and one deformed the case right at the mouth.
I can’t even guess how many cycles I did – especially starting out. I’m going to hazard a guess and say I averaged about three cycles per dummy before something failed on the dummy as I worked out the kinks and I would load three rounds per magazine to do the testing.
I can’t stress it enough – get dummies to tune your magazines.
Comparing the RIA and Para Mags
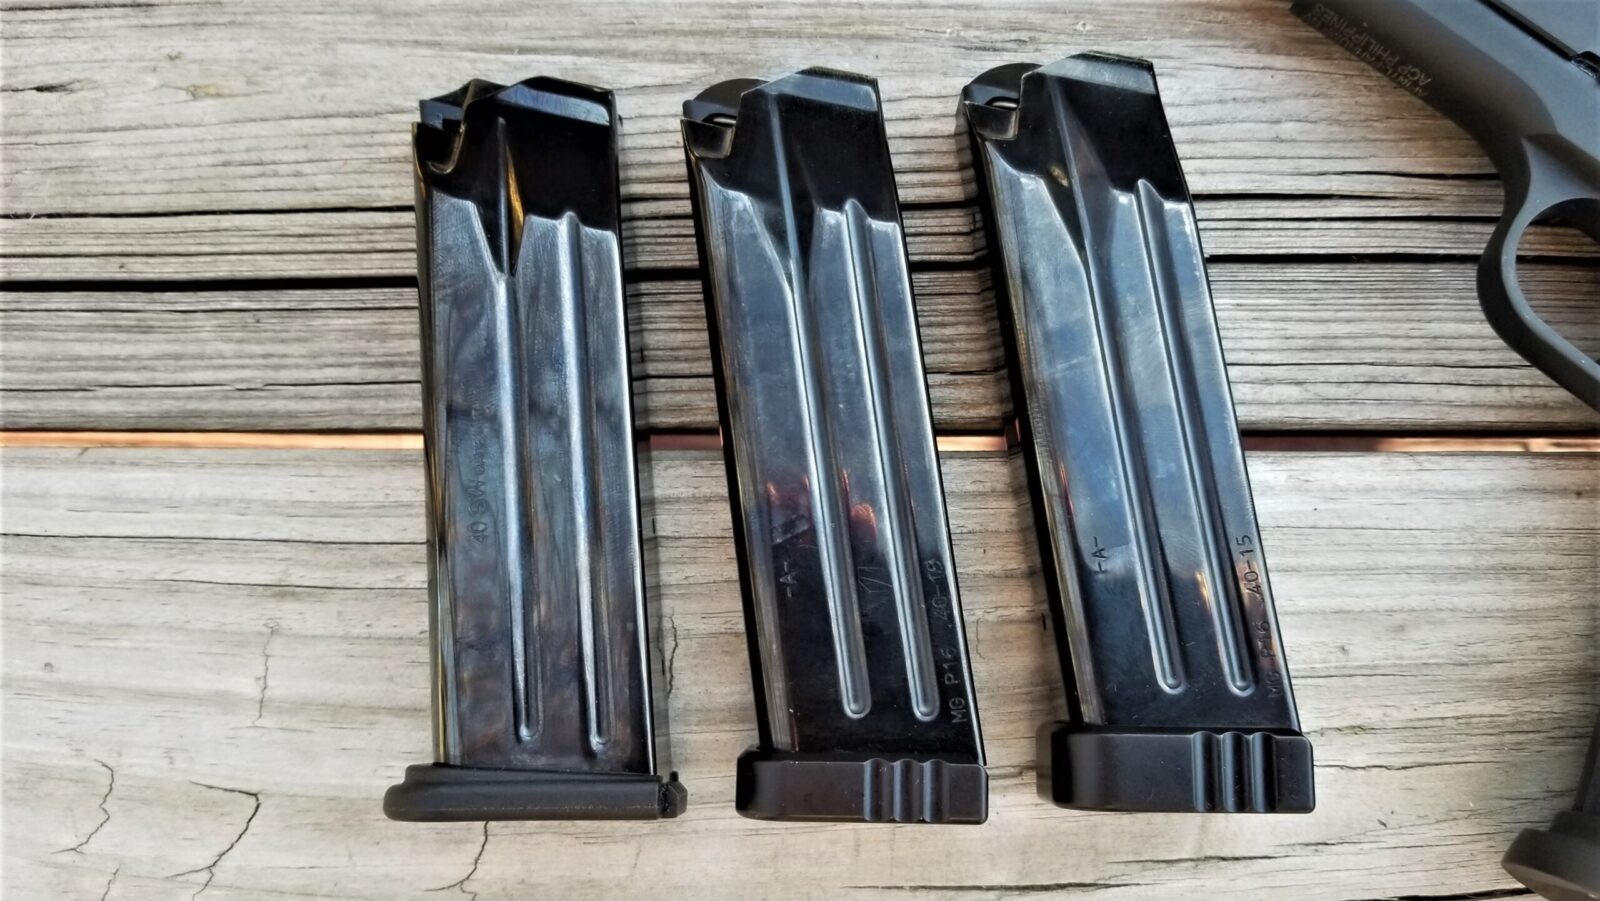
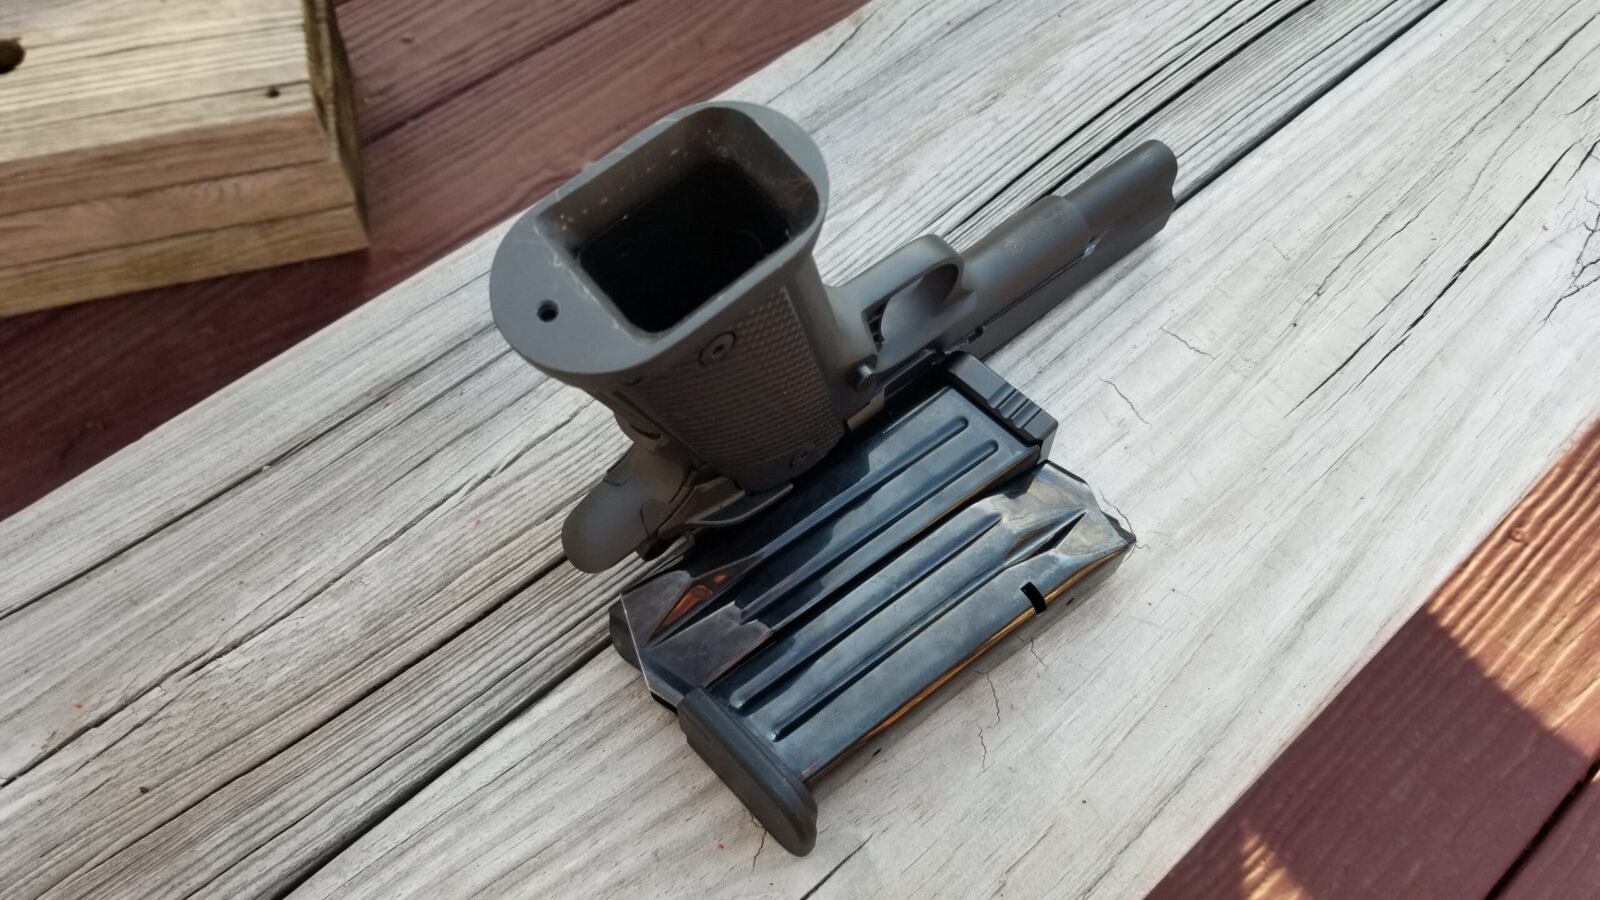
Per the first post, Armscor’s RIA mags are actually made my ACT-Mag. Since my pistol did not come with a mag, the seller was able to get Armscor to send me a OEM mag so I had a baseline to compare to. I definitely made sure it function tested properly before doing anything else. Never assume something works until you test it – I can’t stress that enough.
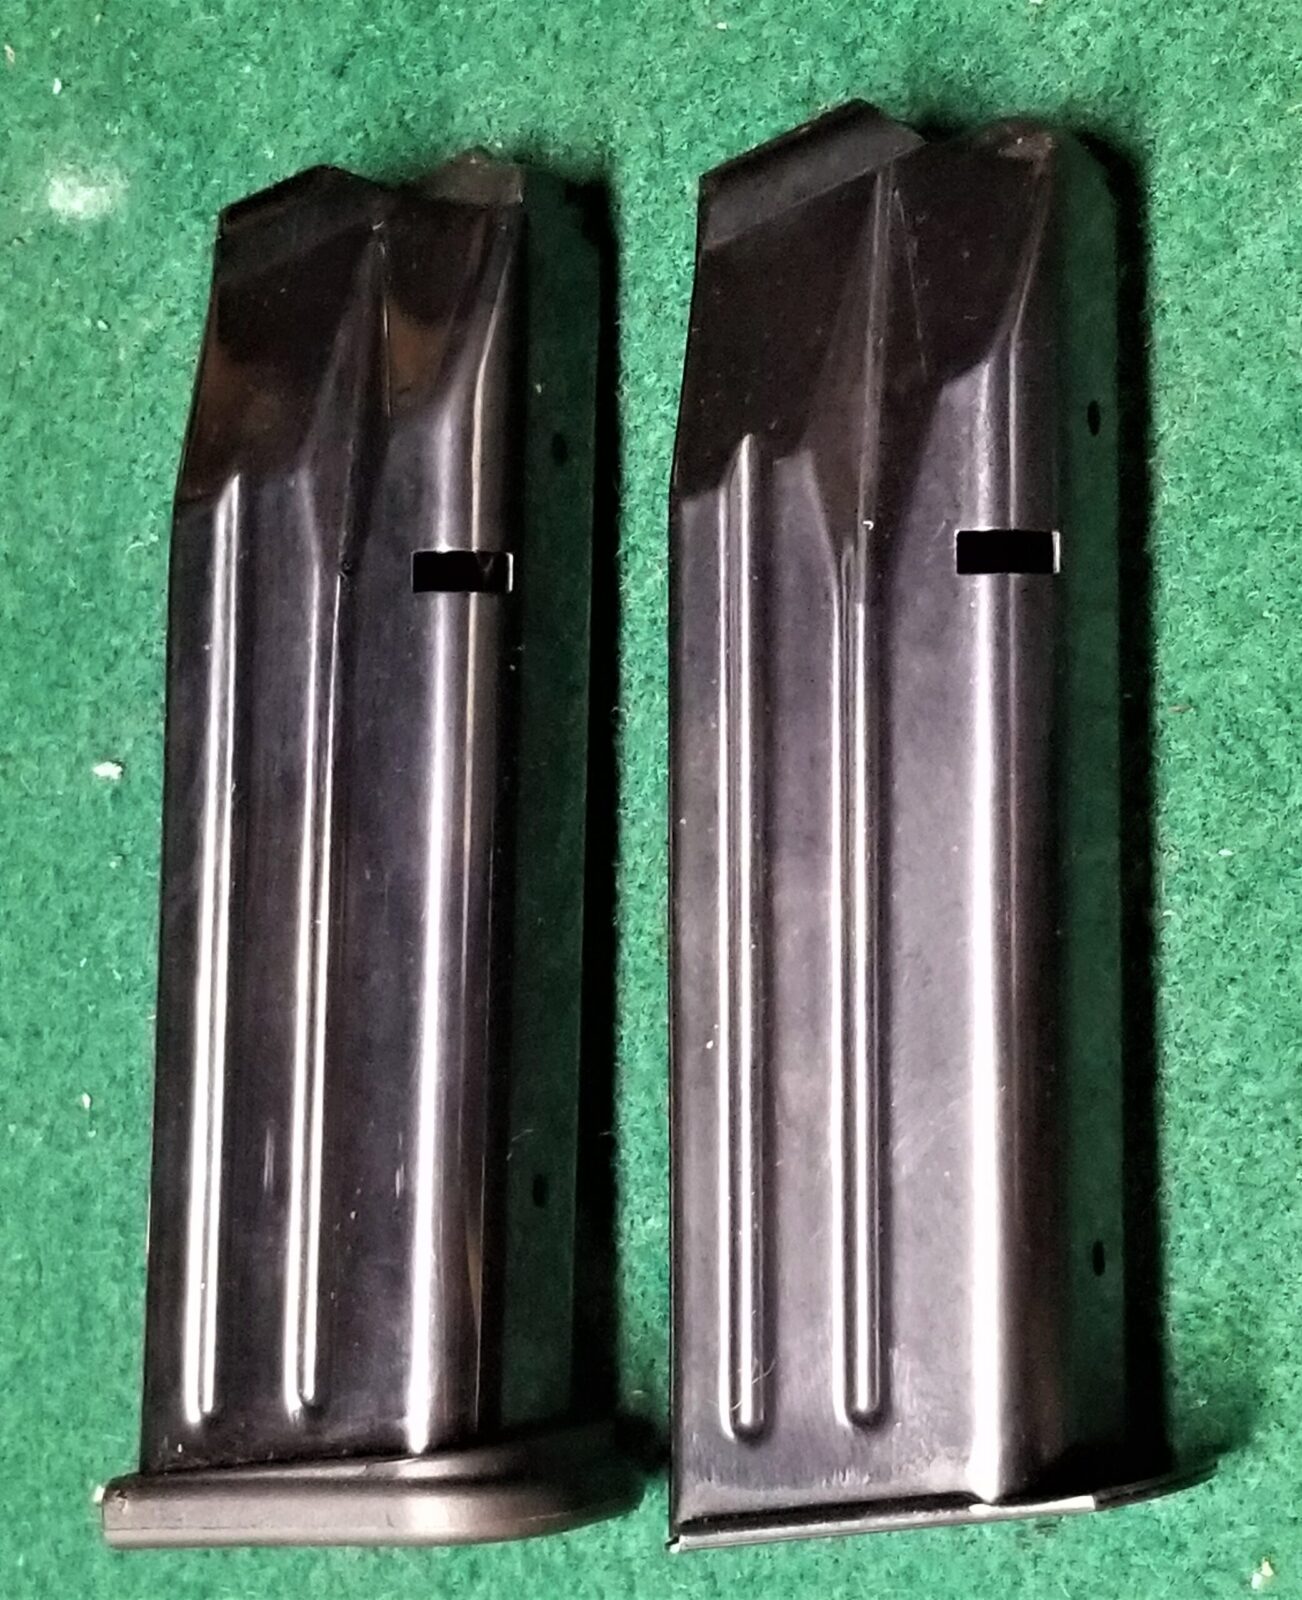
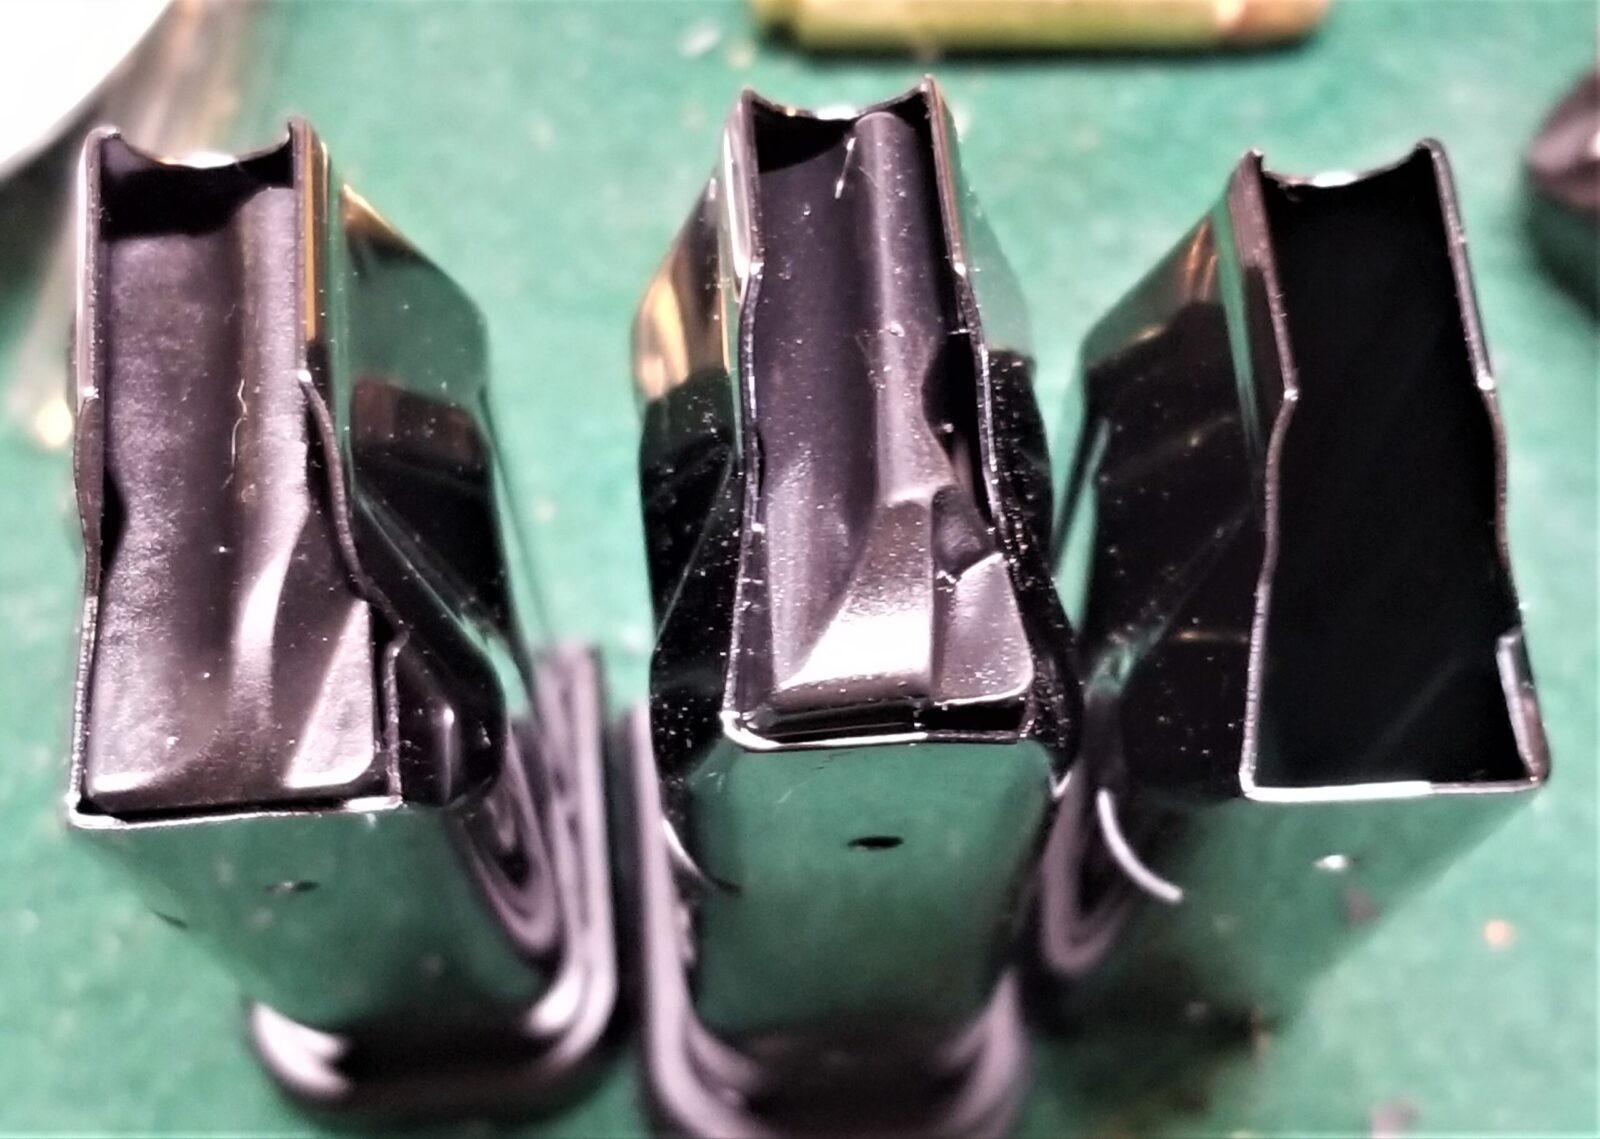
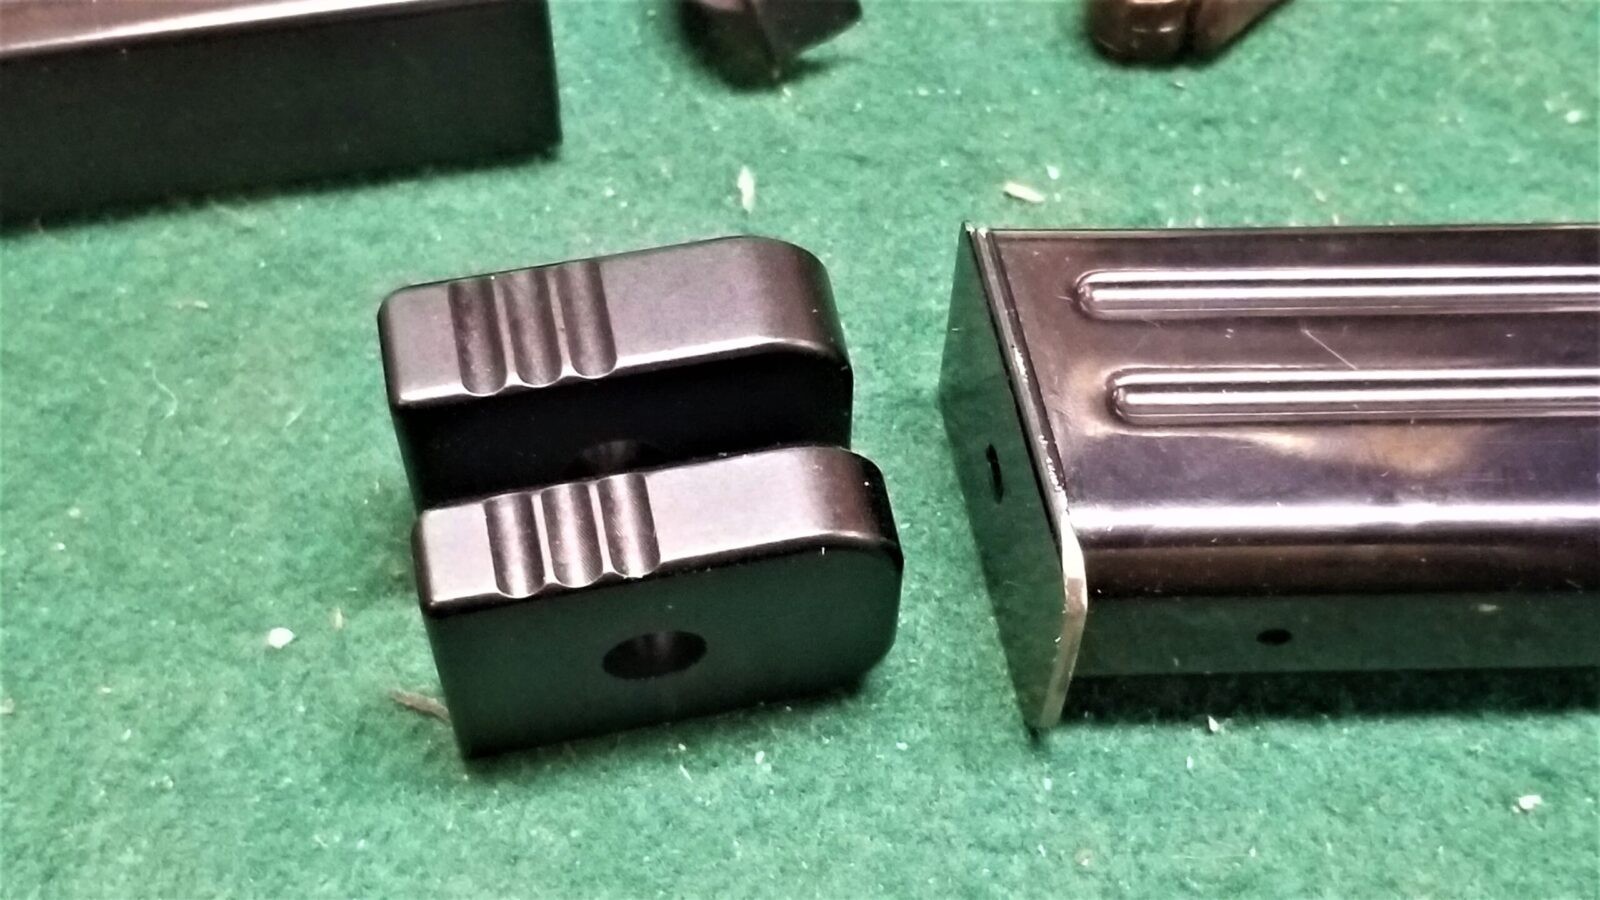
To let you see the differences, here are photos with comments in teh captions of the two mags:.

What Needed To Change?
There were two things that needed to change for sure and one maybe:
- The feed lips on the Para were too long thus preventing the round from pivoting up to align with the chamber. Fortunately the Para lips need to be trimmed. It would be far harder, if not impossible, to lengthen the lips if they were too short.
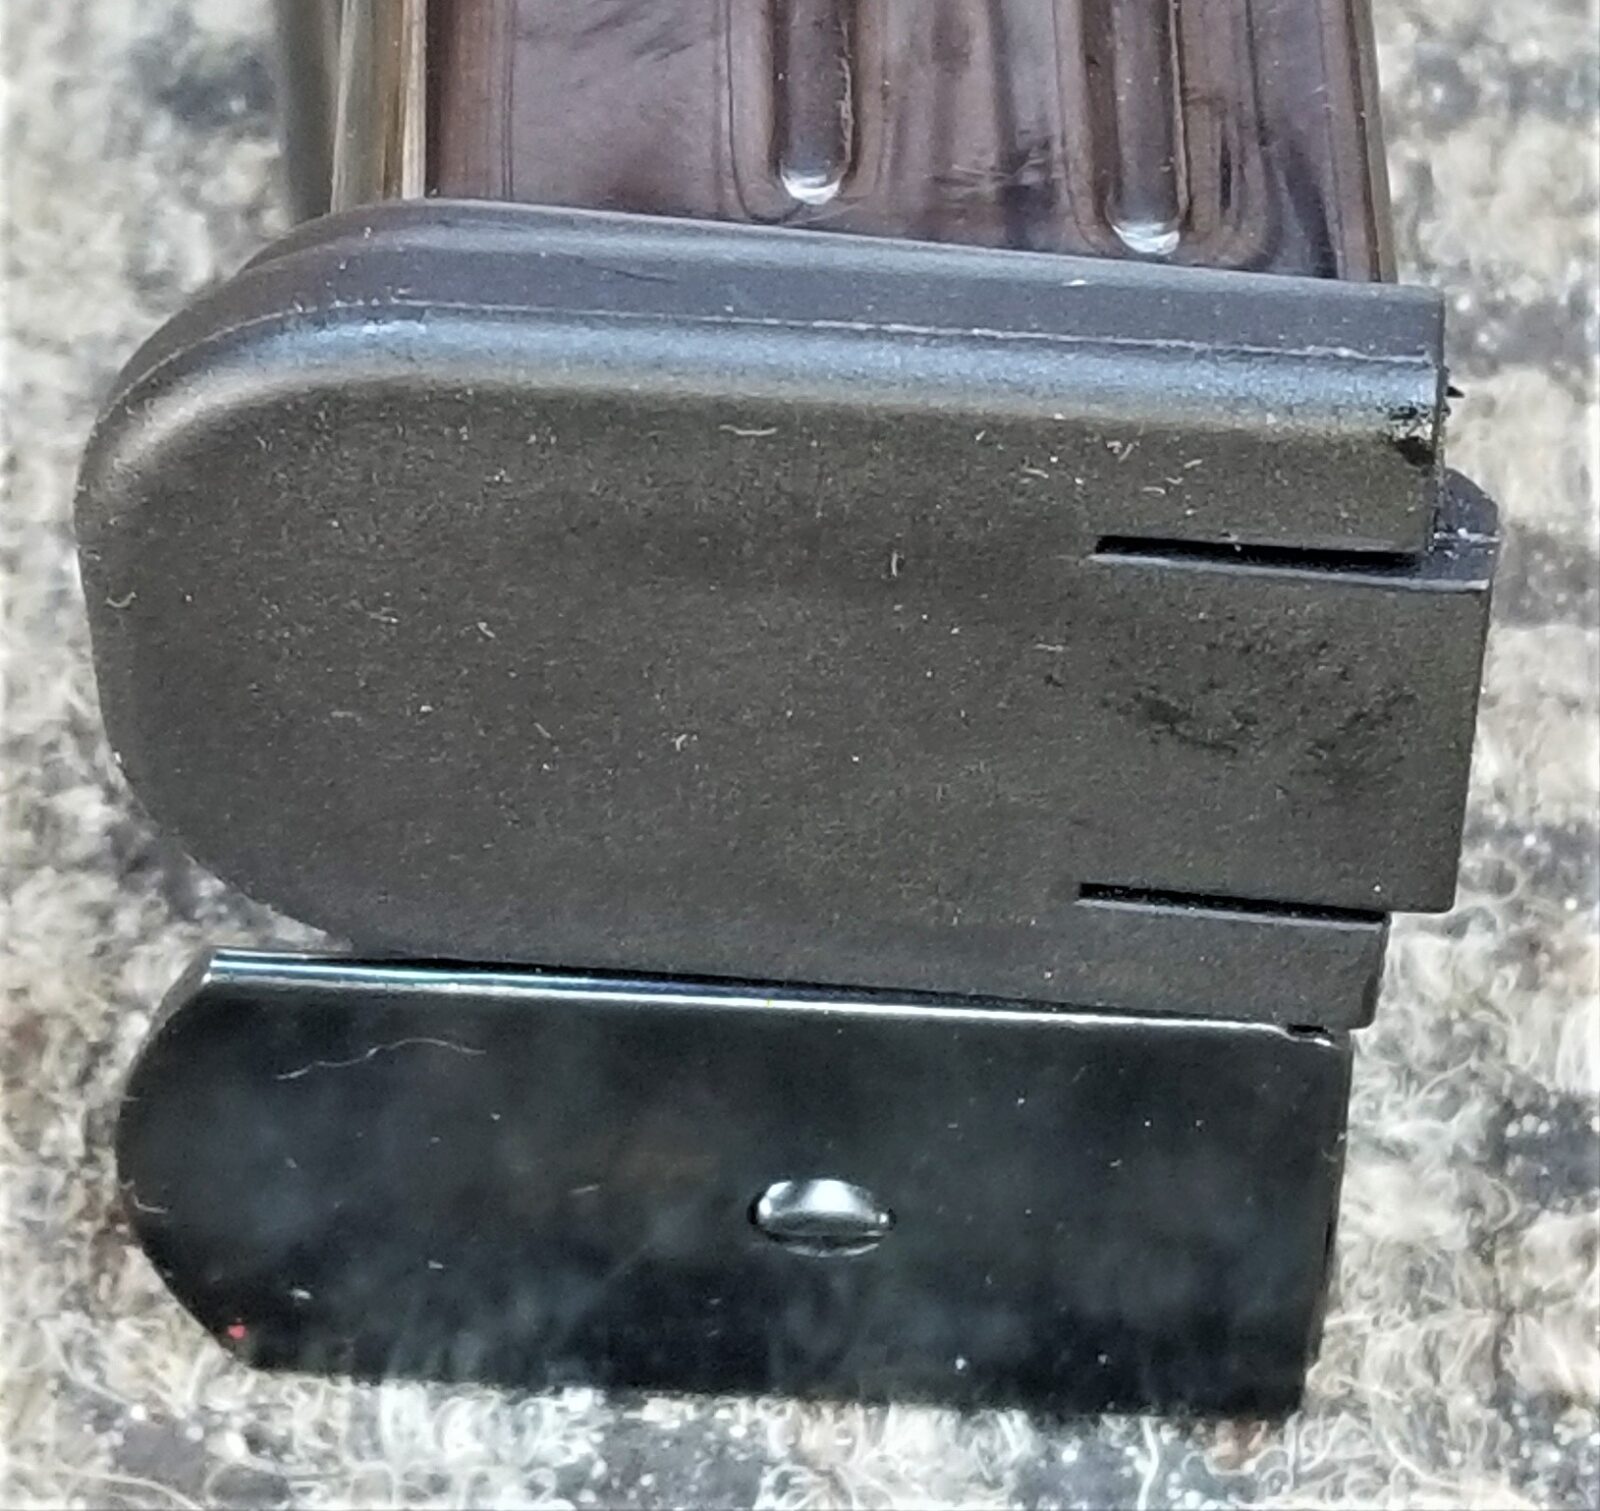
- The base plate needed to either be trimmed or replaced to fit in the mag well funnel
- This was the “maybe”: The followers were slightly different and I didn’t know if the original Para follower would work or not. I figured that I would address the first two points and then decide the next steps. Let’s start with the easy one – what to do with the base plate.
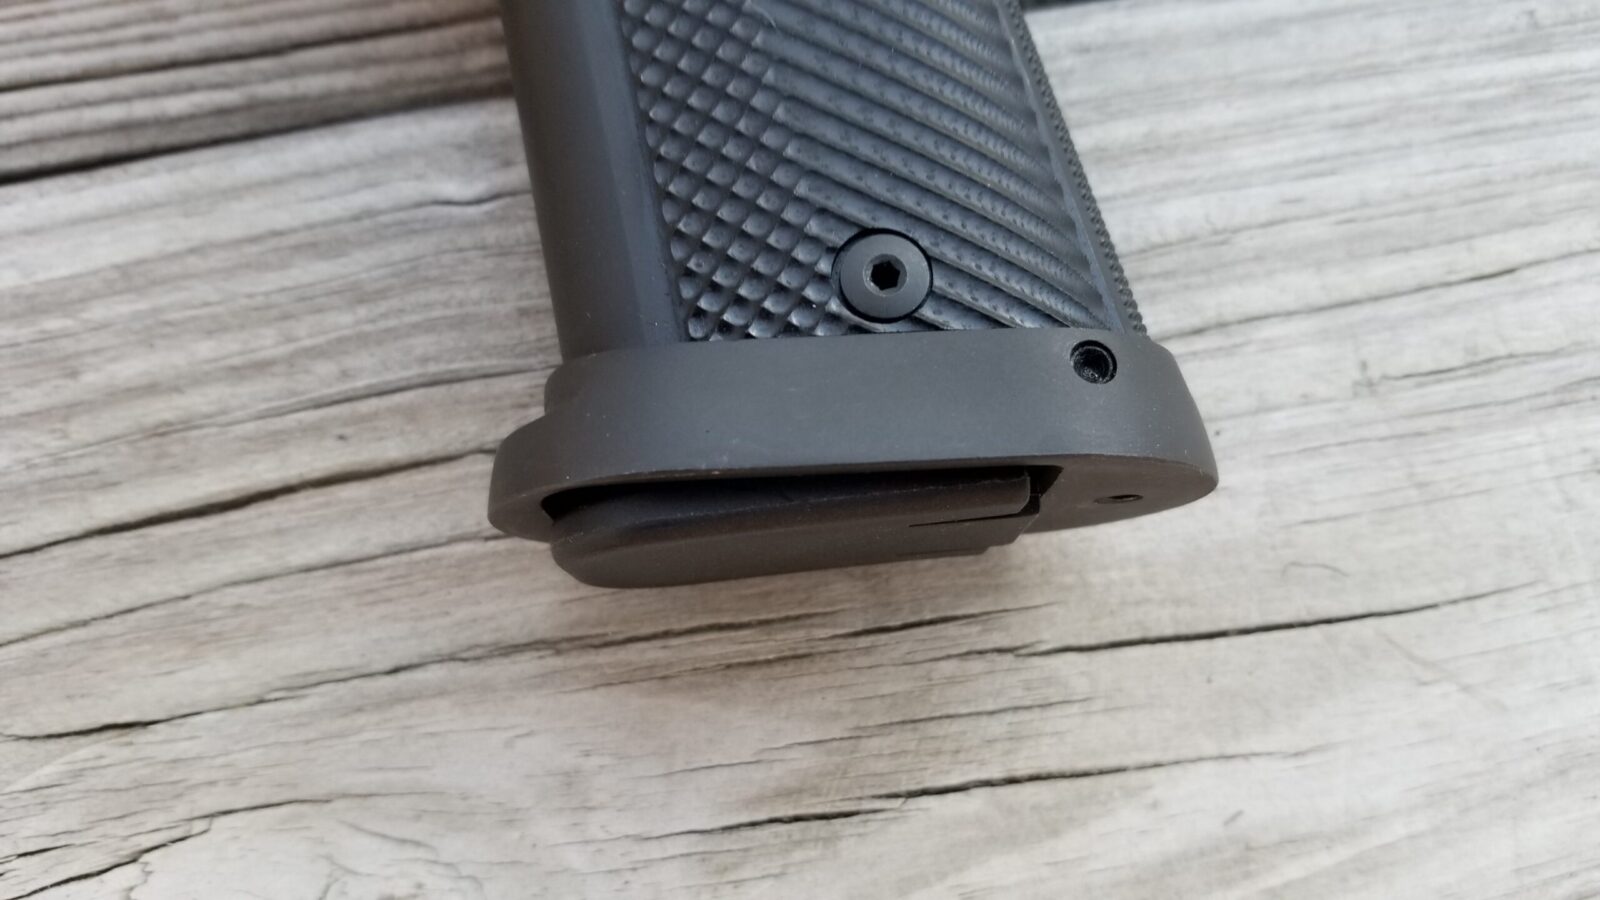
Changing The Base Plate
You have two options here and either one works – it’s up to you. When you remove the Para base plate you will notice that the tube of the magazine’s body rests in a cup. You can remove that front tab off just shy of the depression. I left about a 1/4″ in front. This serves to stop the plate and located it properly on the plate. Seriously – just file, sand, or otherwise cut the extra material off. I used my big 2×72 Esteem grinder to remove the extra material and round the edges.

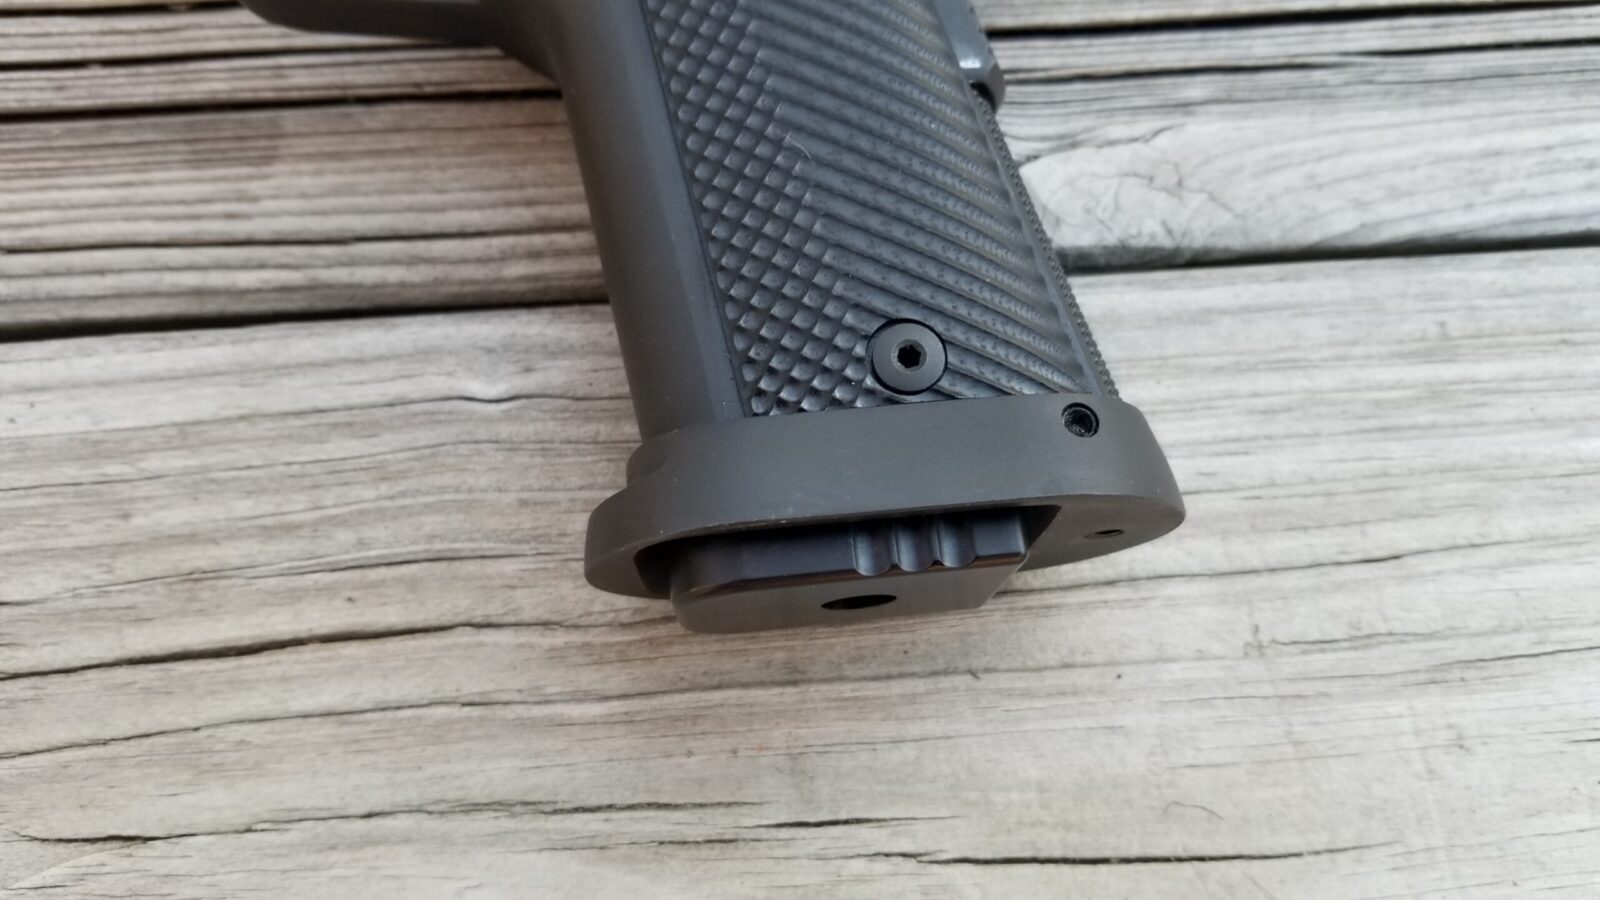
The pro of the above is that it is fast, easy and cheap to do. The con is that the bottom of the magazine sits further into the mag well than I would like. You could easily add .100-.200 of material on the bottom using somethign like Kydex or G10 and some quality epoxy or a stiff rubber with an adhesive tape. In all cases be sure to drill or punh the hole out so you can remove the plate in the future – I had that mistake many year ago and learned a lesson – it is way easier to make the hole before you install it and need to remove the baseplate!
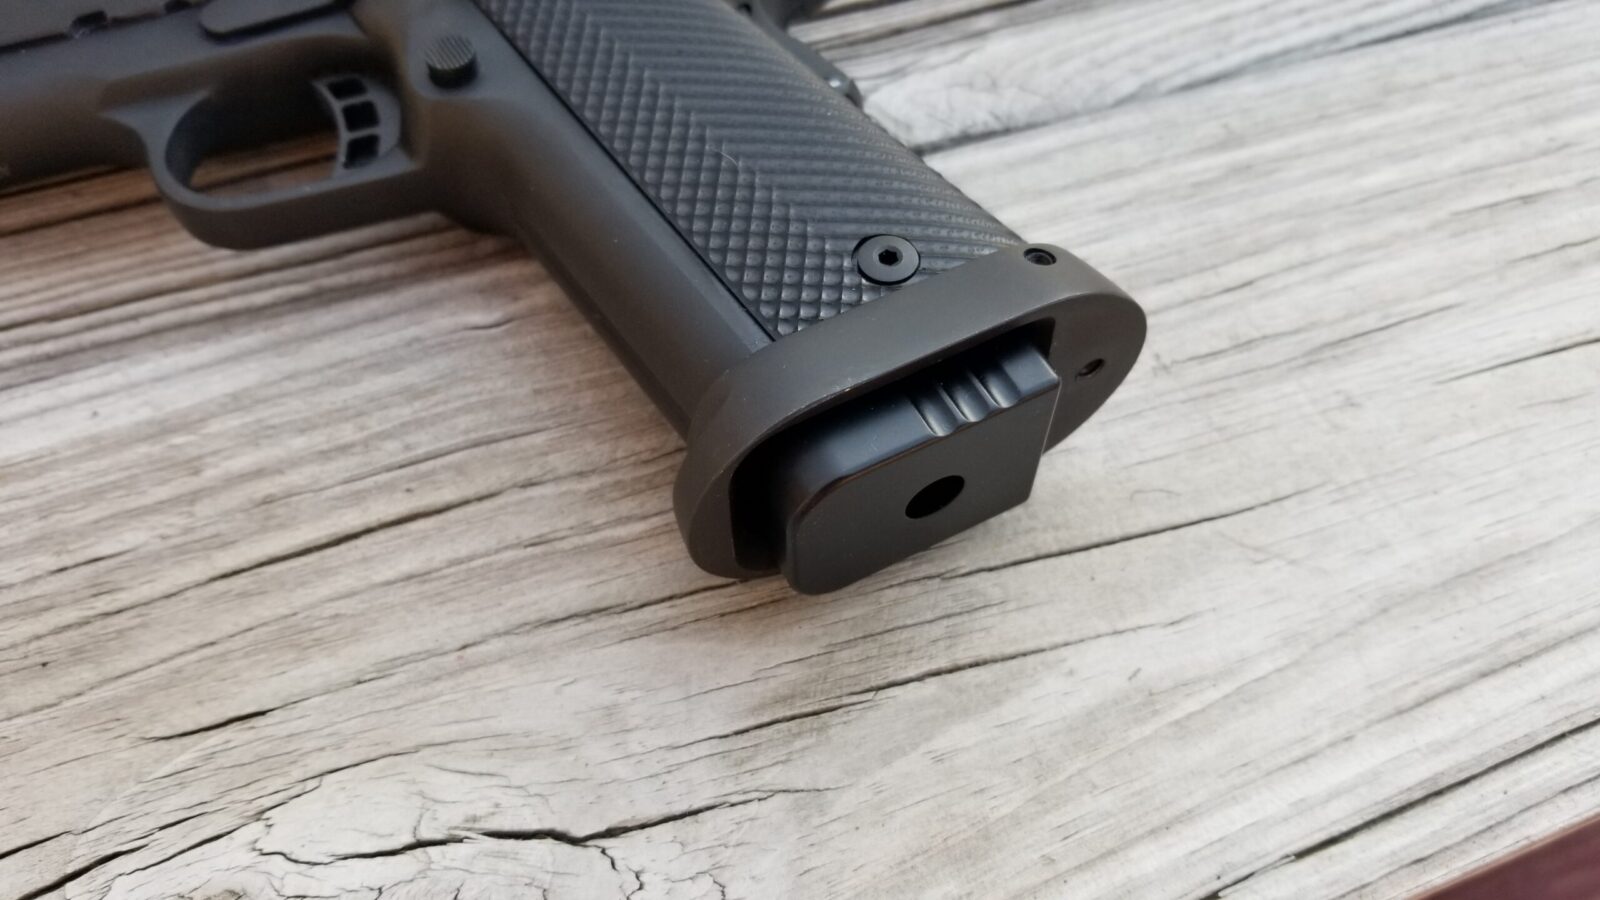
Your second option is to buy an aftermarket base plate. I bought some plates from Dawson Precision that I really like. Their +100 plates sit flush with the mag well, the +200 extends just below/outside of the mag well and the +300 sits further yet. All three work and it comes down to preference.
Changing The Feed Lips
This step is slightly more involved than the baseplate. In this step we need to shorten the longer Para feed lips. Again, I was really happy they just needed to be shortened. I was expecting to need to change the angle but shortening them isn’t as bad as you may think.
This is where having an original RIA mag to compare to the Para mag was invaluable. I needed to remove the same amount of material from the front of both feed lips. After watching the pistol load the mag and feed dummy rounds as closely as I could, I decided to use my grinder to remove material in a straight line from the front top edge to where I wanted the new front of the feed lips to be.
Rather than measure and transcribe, I used a steel divider (compass) that was my grandfather’s. I like doing stuff like that when the occasion suits. A divider wants to spring open and a small thumbscrew allows you to adjust the gap between the two points. In the case of the feed lips, I could use it to duplicate the length of the feed lips to each new magazine I needed to cut down using the back of the feed lips as the reference point.
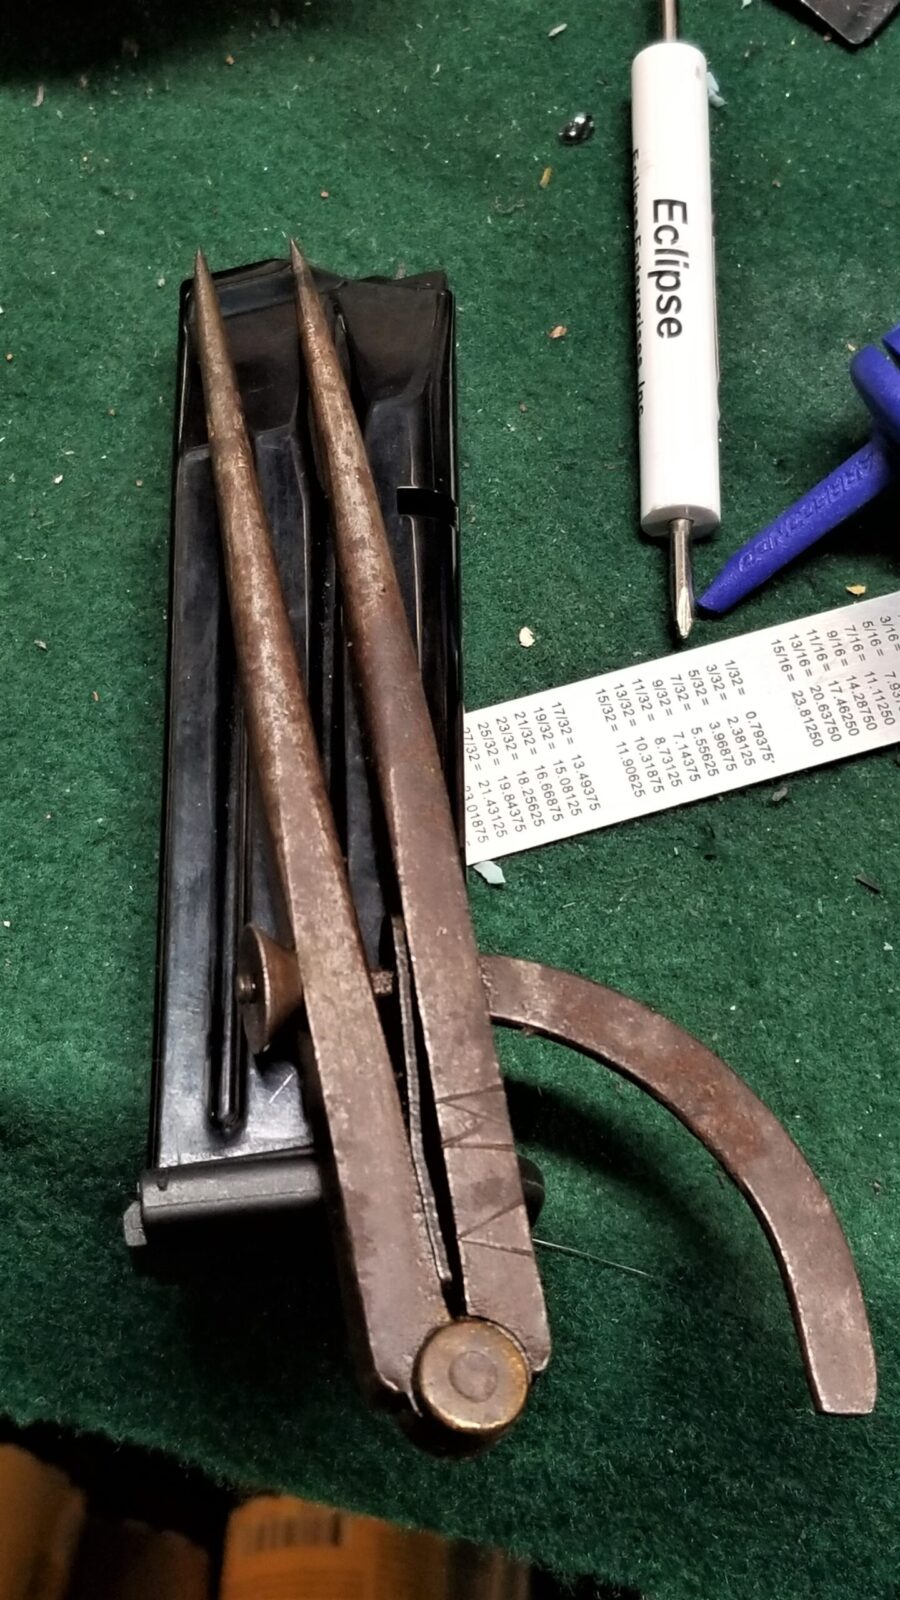
I would then use a scribe with a carbide tip to etch the distance and a small steel rule served as a straight edge from which I scribed a line at an angle from the front top edge of the magazine tube back to the length I just scribed.
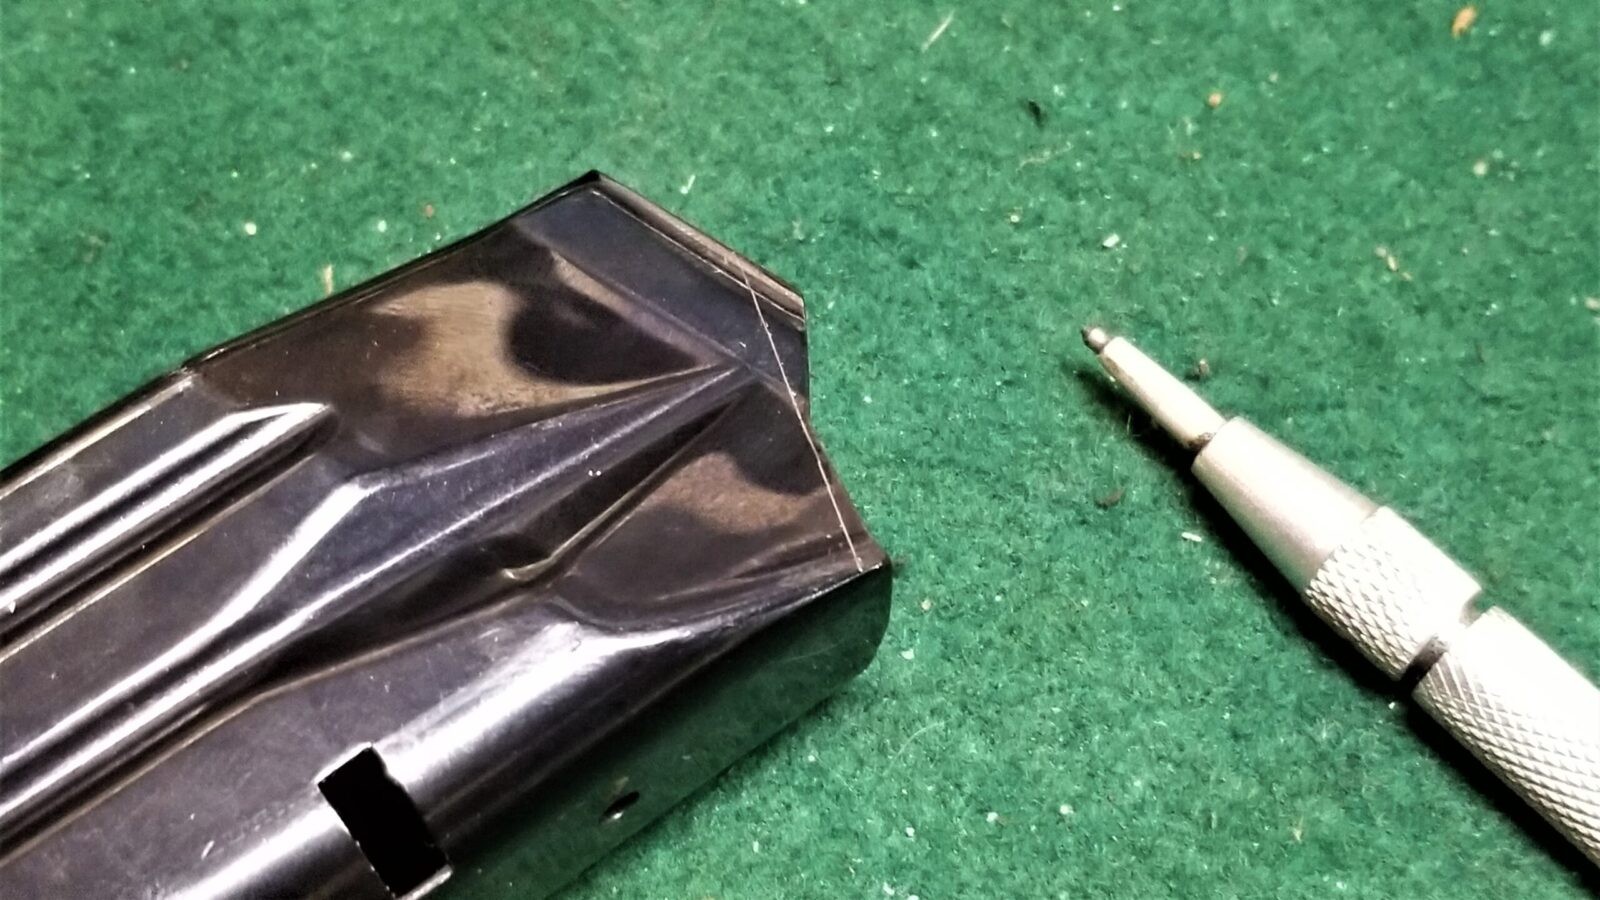
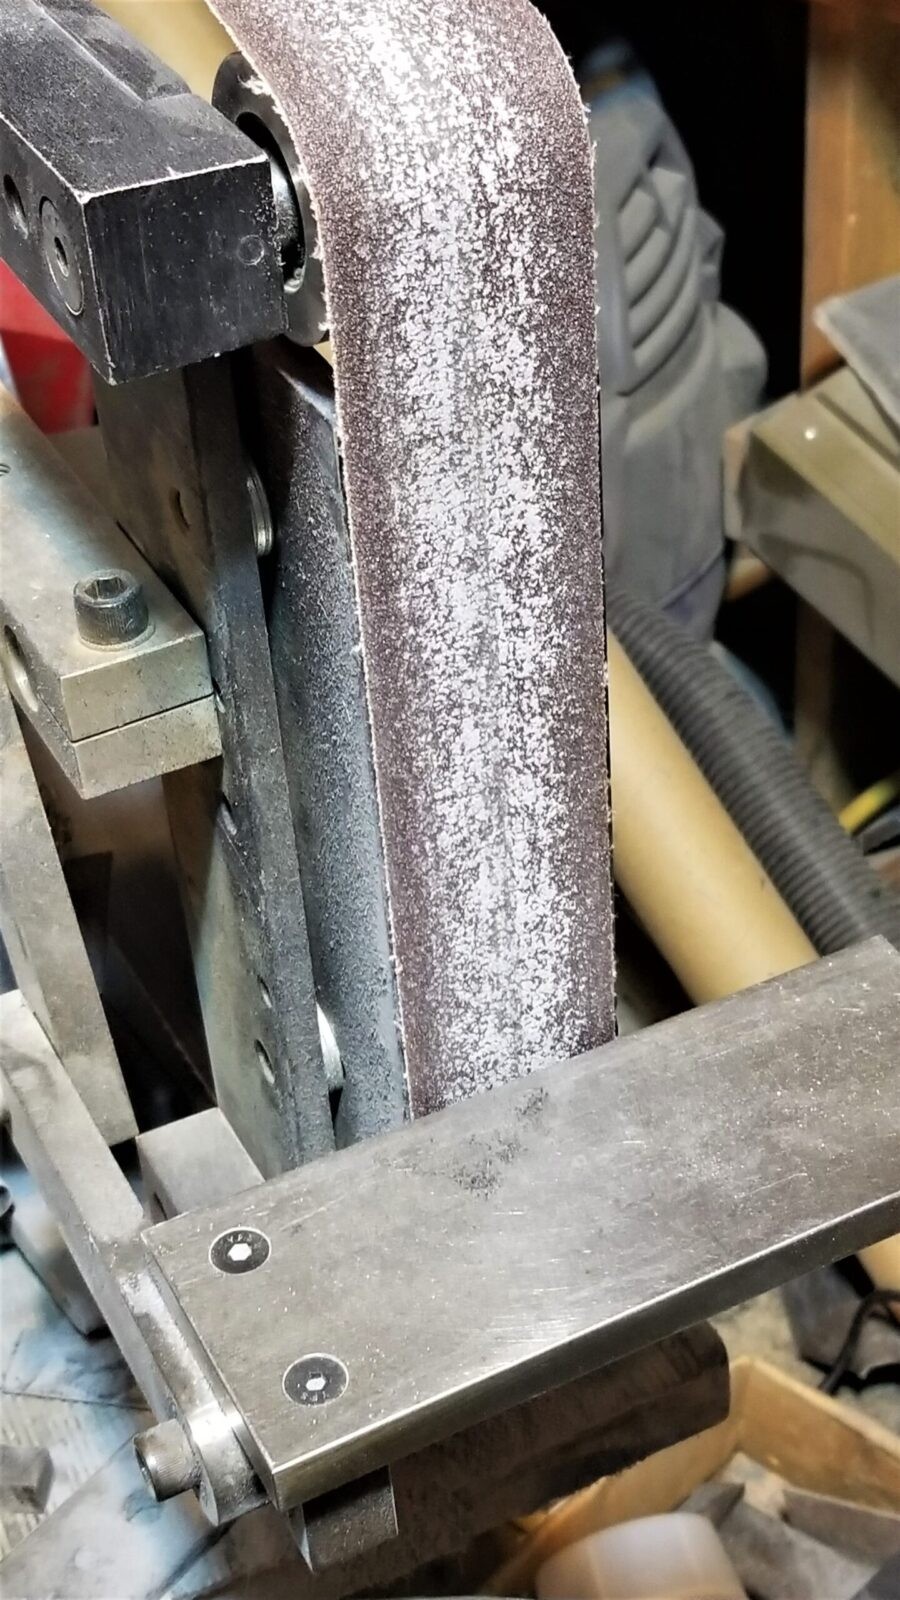
Everything above that line needed to be removed. Again, I used my big 2×72 belt sander, or “grinder” as knife makers call them. I squared my work table to the belt, used a 80 grit belt and removed the offending steel by carefully pushing my scribed line towards the belt in a parallel manner. In English, I sanded off the metal above the scribed line 😉 Any kind of sander would make short work of this but it will be way easier if it has a flat table that will enable to you feed the magazine towards the sanding belt or sanding disc in a controlled manner. I would not do it free hand – same goes with a file but I’ve also seen guys wield a pile of files to do work I only thought could be done by a mill so to each their own. By the way, take care not to overheat the lips when sanding.
Slow down removing material as you get close to the line. Double check all of your measures and scribed lines. It is way easier to take more metal off than to remove too much.
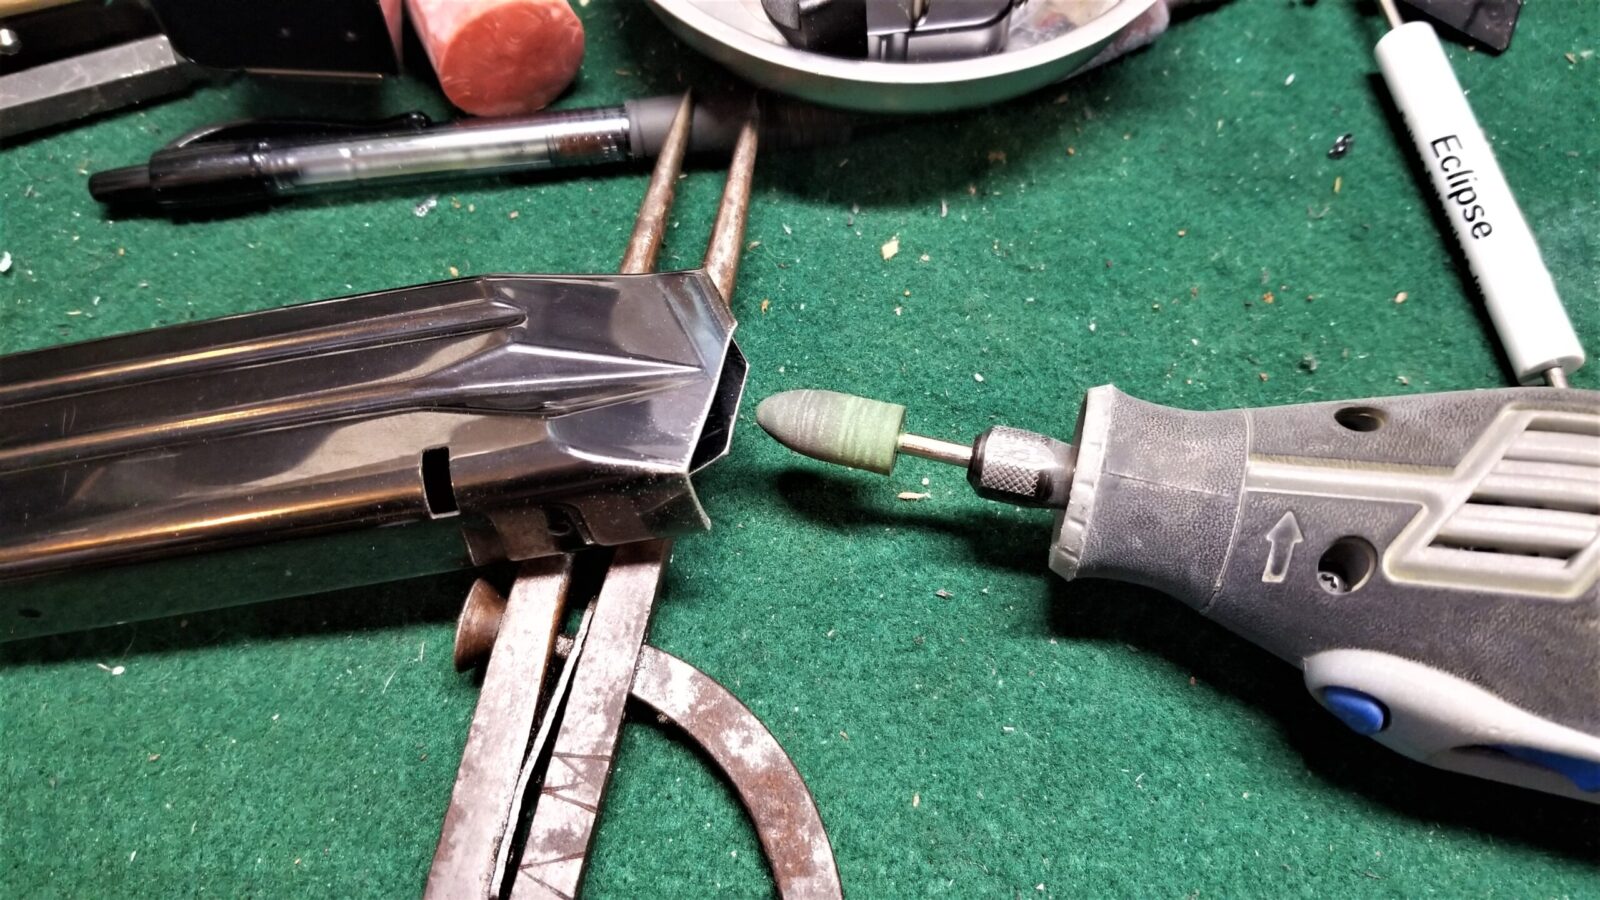
With the coarse cut made, you need to go in and remove all of the burrs and round the sharp steel edges over. I used a specialty flap sander known as a “sanding mop” at 180 grit and then a rubber polishing cone in my Dremel.
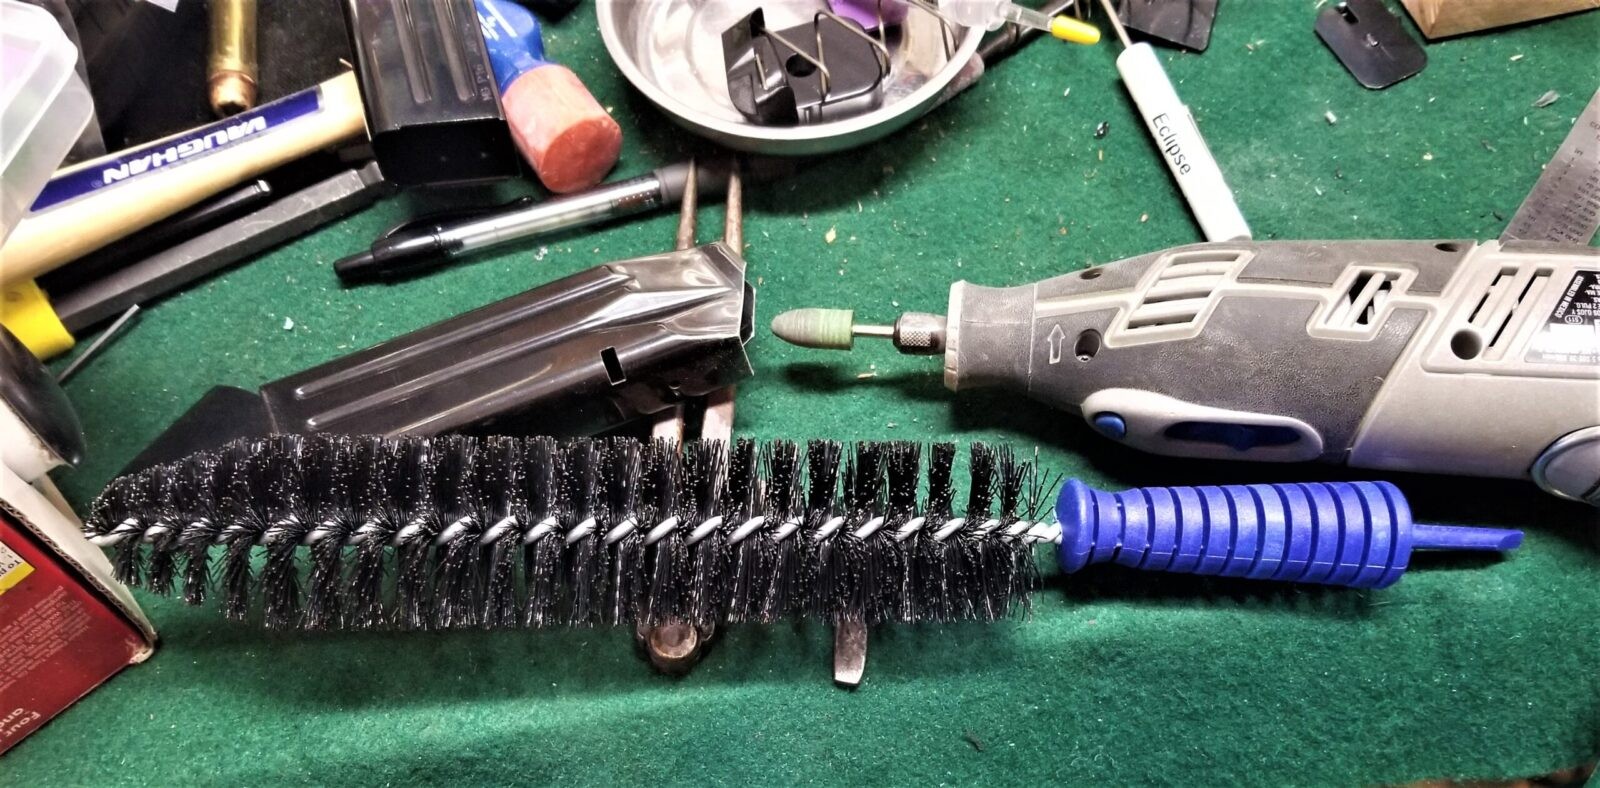
Last, blow out the tub, wipe it out and clean the body too. You don’t want abrasive materials jamming up the magazine or the pistol. After that, reassemble the magazine and check the action of the follower and that everything seems ok.
Las step was to function test the magazine with at least three dummy rounds. Four would be even better because you will test feed from both directions as the follower pushes the rounds up from the bottom of the magazine.
Feed Lip Measures
I measured the first few magazines I converted and they were fine so I stopped checking every mag unless I ran into a problem during function testing.
| Feed Lip | RIA Mag | MGP164015B | Modified |
| Length | 0.482″ | 0.599″ | 0.436-.438″ |
| Front Gap | 0.356″ | 0.354″ | 0.362-0.364″ |
| Back Gap | 0.340″ | 0.364″ | 0.336-0.370″ |
Fine Tuning
Trimming the lips gets you in the ballpark but more work needs to be done. Every magazine was deburred and had all top surfaces deburred and polished. The inside of the magazine was treated with Dupont Teflon. The feed lips were adjusted until four rounds fed reliably into my RIA 52009 10mm pistol. The final round was tested four times.
To tune the feed lips, use snap ring pliers or chandelier chain pliers to open the feed lips ever so slightly and test. In general, it does not take much. Your goal is to get the bullet pointed towards the chamber as much as possible. Go slow and test – it really does not take much to spread the lips and change the angle.
This fine tuning gets you in the ballpark – you then need to actually go to the range and shoot them to see if any final tuning is needed and then brings us up to the last topic – you need to number your mags so you can keep track of what mags are having problems so you can work on them.
Note: I purposefully fit the mags to use the supplied Mec-Gar followers that can lock the slide open. There are aftermarket Arredondo followers that are really nice and are angled to point the round more at the chamber. The downside is that they don’t lock the slide open – while a person in competition doesn’t need that, I do like to know when I fired the last round.
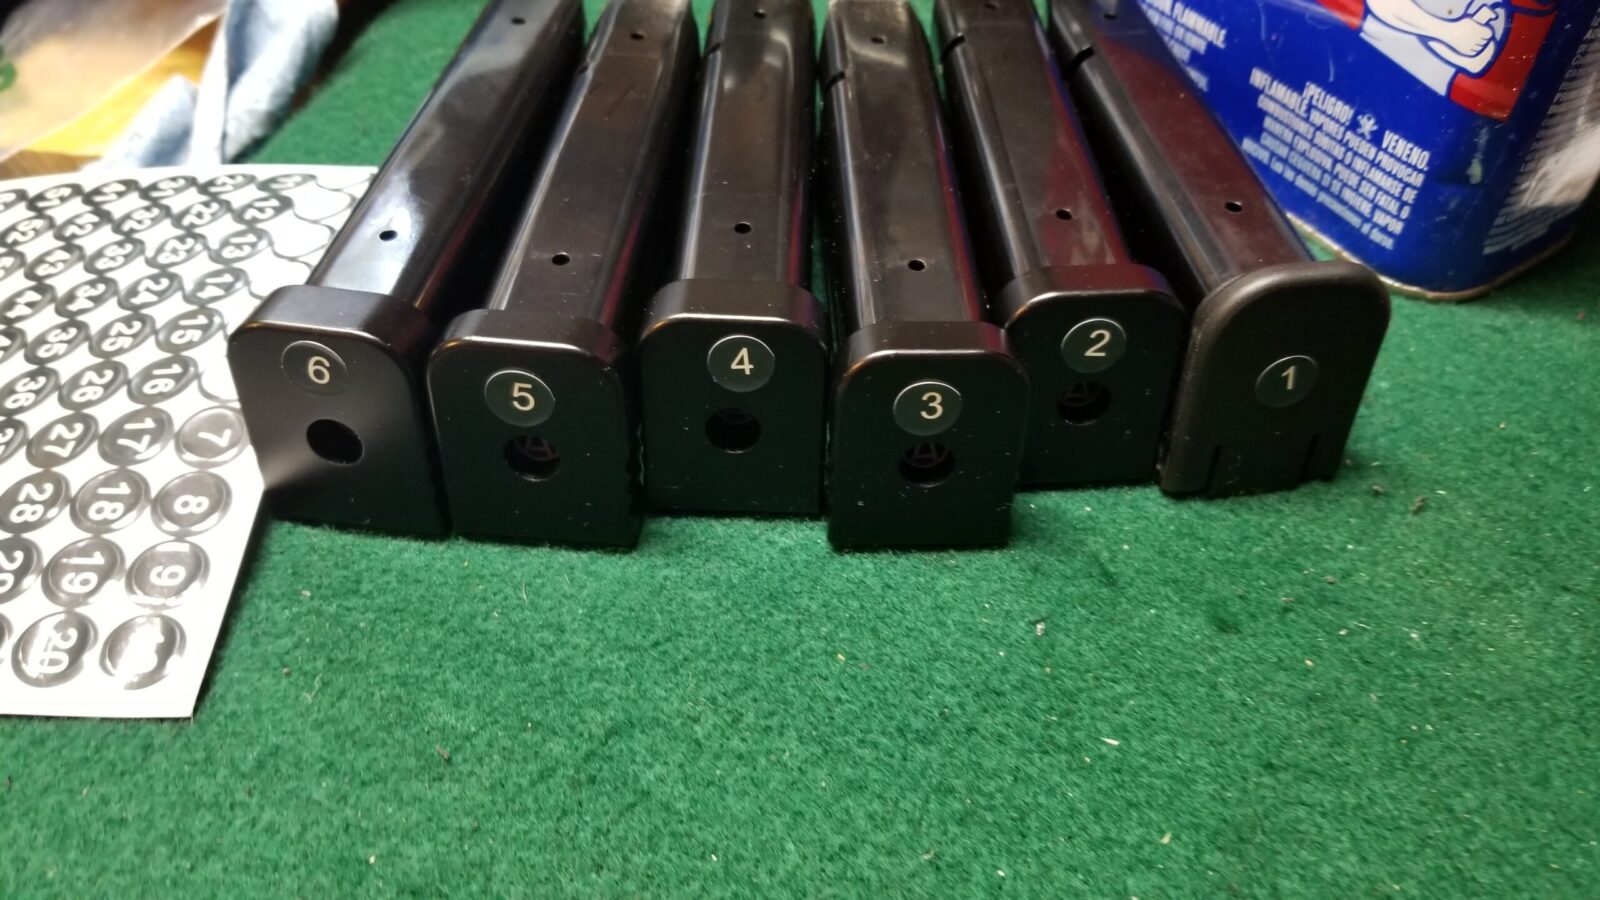
Number Your Mags
A lot of feeding problems are actually caused by the magazine – notably the feed angle and that is controlled by the feed lips and the follower. The feed lips can get bent when they are dropped, sat on, or whatever. The follower is plastic and will wear over time – not fast, but it will wear.
You need to put a unique number on each magazine so you can track the ones that are having problems and need some tweaking. I’ve seen guys use engravers, paint pins and stickers. What you use is up to you. I’m currently using waterproof stickers on my mags.
Conclusion
I now have my original RIA magazines and a nice back up selection of mags for hunting, going to the range, bear protection, etc. How did they turn out? So far, so good at the bench. I expect most will do really well at the range as well and I am waiting for a chance to go.
I figure there must be guys like me who have one of the RIA high cap .40 or 10mm pistols who want spare mags and hope this will help them out.
6/29/2021 Update: Folks, I have converted a ton of mags now so if you order, I want you to know I have the process working smoothly. My biggest problem right now is finding mags – everyone and their brother is sold out of mags – it’s crazy.
4/1/2021 Update: Added dimensions for the modified mags and info on fine tuning.
3/22/2021 Update: I took them to the range and they worked great with both Ammo Inc 180gr TMC ammo and a variety of Underwood HPs.
Note, I have to buy all of my parts – nothing here was paid for by sponsors, etc. I do make a small amount if you click on an ad and buy something but that is it. You’re getting my real opinion on stuff.
If you find this post useful, please share the link on Facebook, with your friends, etc. Your support is much appreciated and if you have any feedback, please email me at in**@*********ps.com. Please note that for links to other websites, I may be paid via an affiliate program such as Avantlink, Impact, Amazon and eBay.