As mentioned in the last post [click here] – building a Beowulf is pretty much like building any other AR15-class rifle. I put it that way because the AR10s are different and the Beowulf uses the AR15 platform with the notable exception of an enlarged ejection port. The modular capabilities of the AR platform are what make it versatile.
Lower Build Comments
First, I’d like to point out I ran into one small snag with the Spike’s lower. The detent spring and pivot pin hole had some kind of debris in it or maybe a bur. I had to chase it to clean it out. Other than that, it went great.

My second comment is about the Magpul PRS Gen 3 stock. Wow. It is really cool. First, I went with the rifle buffer tube because I assumed the Gen 3 needed it – in fact, it does not. When you look at the Gen 3, it has a modular front nose that comes apart just behind the front swivel hole. It comes from Magpul all set to use a carbine buffer tube! Now it is a fixed stock and will not adjust but you do not need to change tubes. Had I known that, I would have used a carbine tube to avail of all the different buffers that are out there.
| 12/28/2020: I am tinkering with the combination of buffer and buffer spring. Click here for a post about them. |
By the way, the PRS is an expensive stock and it pays to watch for sales. Also, this is specifically then third generation model – you will see older stocks pop up on eBay, etc. The older ones will not have the really thick recoil pad or the ability to use a carbine tube. Here it is for sale at PSA.


By the way, I took the time to torque down everything including the rifle buffer tube in this case. The Magpul wrench makes it real easy to bring the nut down to the torque spec of 35-39 ft lbs.


I think I will stick with the basics going forward. In other words, I’ve tried extended head pins, bolt catches with giant heads, ambidextrous selectors and in the end, I find I really don’t need them. The takedown pins and controls are all mil-spec in this build.
Upper Build Parts
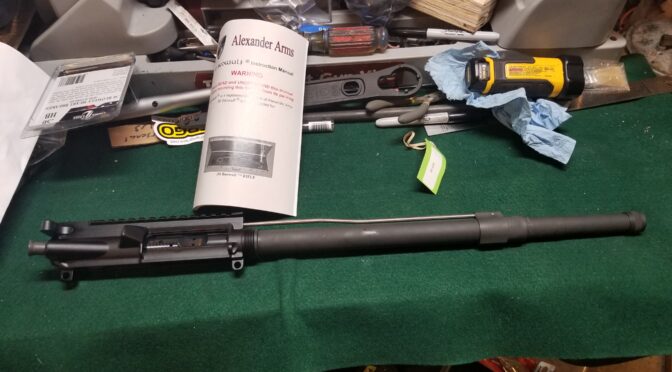
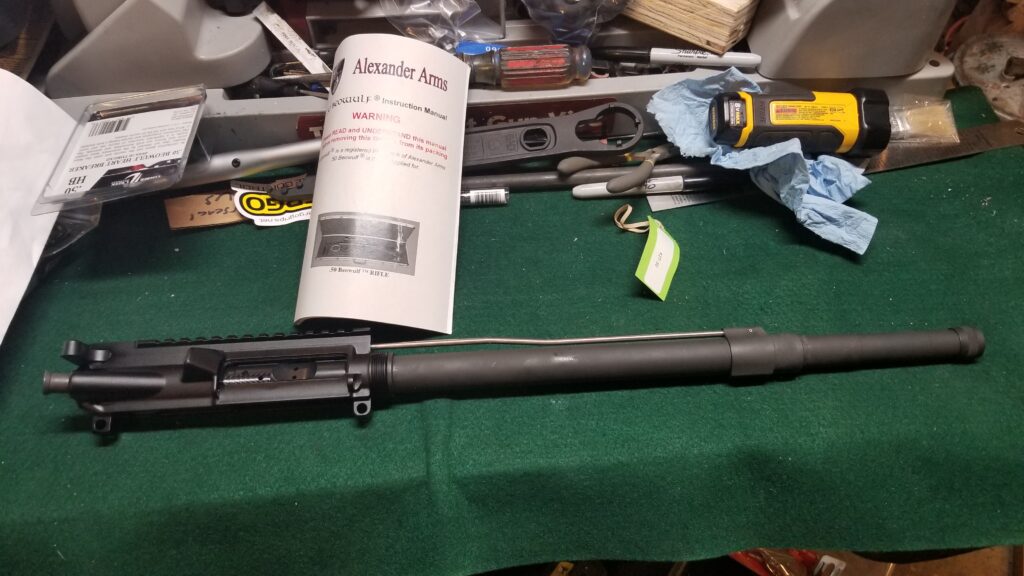
The upper is the actual DIY (Do It Yourself) upper from Alexander Arms and they do all the engineering and machining for you. I also need to point out that it is really well done. I have zero complaints on the fit or the finish.
The DIY kit includes the upper receiver, bolt, carrier, charging handle, barrel, and the gas tube has already been installed in the lowe-profile gas block. The unit arrives assembled including their already divoting the barrel for the two gas block set screws. What you will need to do is to add your own barrel nut and handguard plus whatever you want to do for a muzzle brake. The DIY comes will a thread protector for the 49/64-20 right hand (RH) threads.

Folks will tell you I am either particular or eccentric (maybe both) when it comes to my builds. I knew there were some parts I wanted to use on this upper:
- MI Combat 15: M-LOK handguard. These are very nicely done with all edges beveled plus I like the barrel nut they use. It simplifies aligning the handguard and receiver rails. Also, I really like having the flexibility to add rails or accessories where needed while having a slim profile where I don’t. Keymod has pretty much died out and M-LOK seems to be the lead attachment method now.
- BCM Mod 3 charging handle greatly simplifies working around optics to charge the rifle.
- Timber Creek Heart Breaker muzzle brake. This is an excellent choice for taming the Wulf. I was so impressed by it on my first rifle that it was my automatic choice for this second rifle.
Upper Build Instructions
A Beowulf upper is very much like any other AR with the exceptions of no ejection port cover and a screw on gas tube block.
Here are some third party resources on assemblign AR uppers in case you are interested:
- https://www.pewpewtactical.com/build-ar-15-upper-receiver/
- https://www.midwayusa.com/how-to-guides/how-to-build-ar-15-rifle
- https://gunnewsdaily.com/building-ar-15-upper-receiver/
- USMC TM 05538/10012-IN Which is the repair manual for the M16A2, M16A4, M4 and M4A1 that was published in 2008. Click here to load a PDF copy we host in a new tab.
Here Are Some Videos For Building Uppers
I always like to combine stuff I read, like the above, with videos I can watch. I always pick stuff up both ways and think the two perspectives are very valuable. With that said, here are some build videos.
Brownells also has a ton of training videos online that cover building the AR-15 overall. If you click here, you can then select whatever videos you want to watch.
Closing This Second Post
Hopefully this post gave you some insights into what I actually did with the lower and thoughts on the upper. In the next post, I’ll share some of my observations from when I actually installed the handguard, brake and ortex Strike Eagle Optic.
Please share the link on Facebook, Forums, with colleagues, etc. Your support is much appreciated and if you have any feedback, please email us in**@*********ps.com. If you’d like to request a report or order a reprint, please click here for the corresponding page to open in new tab.