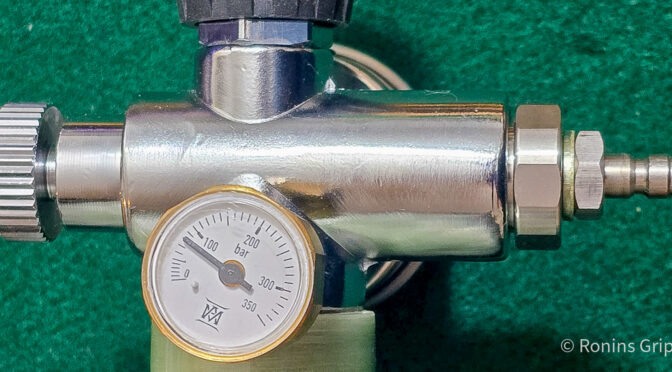
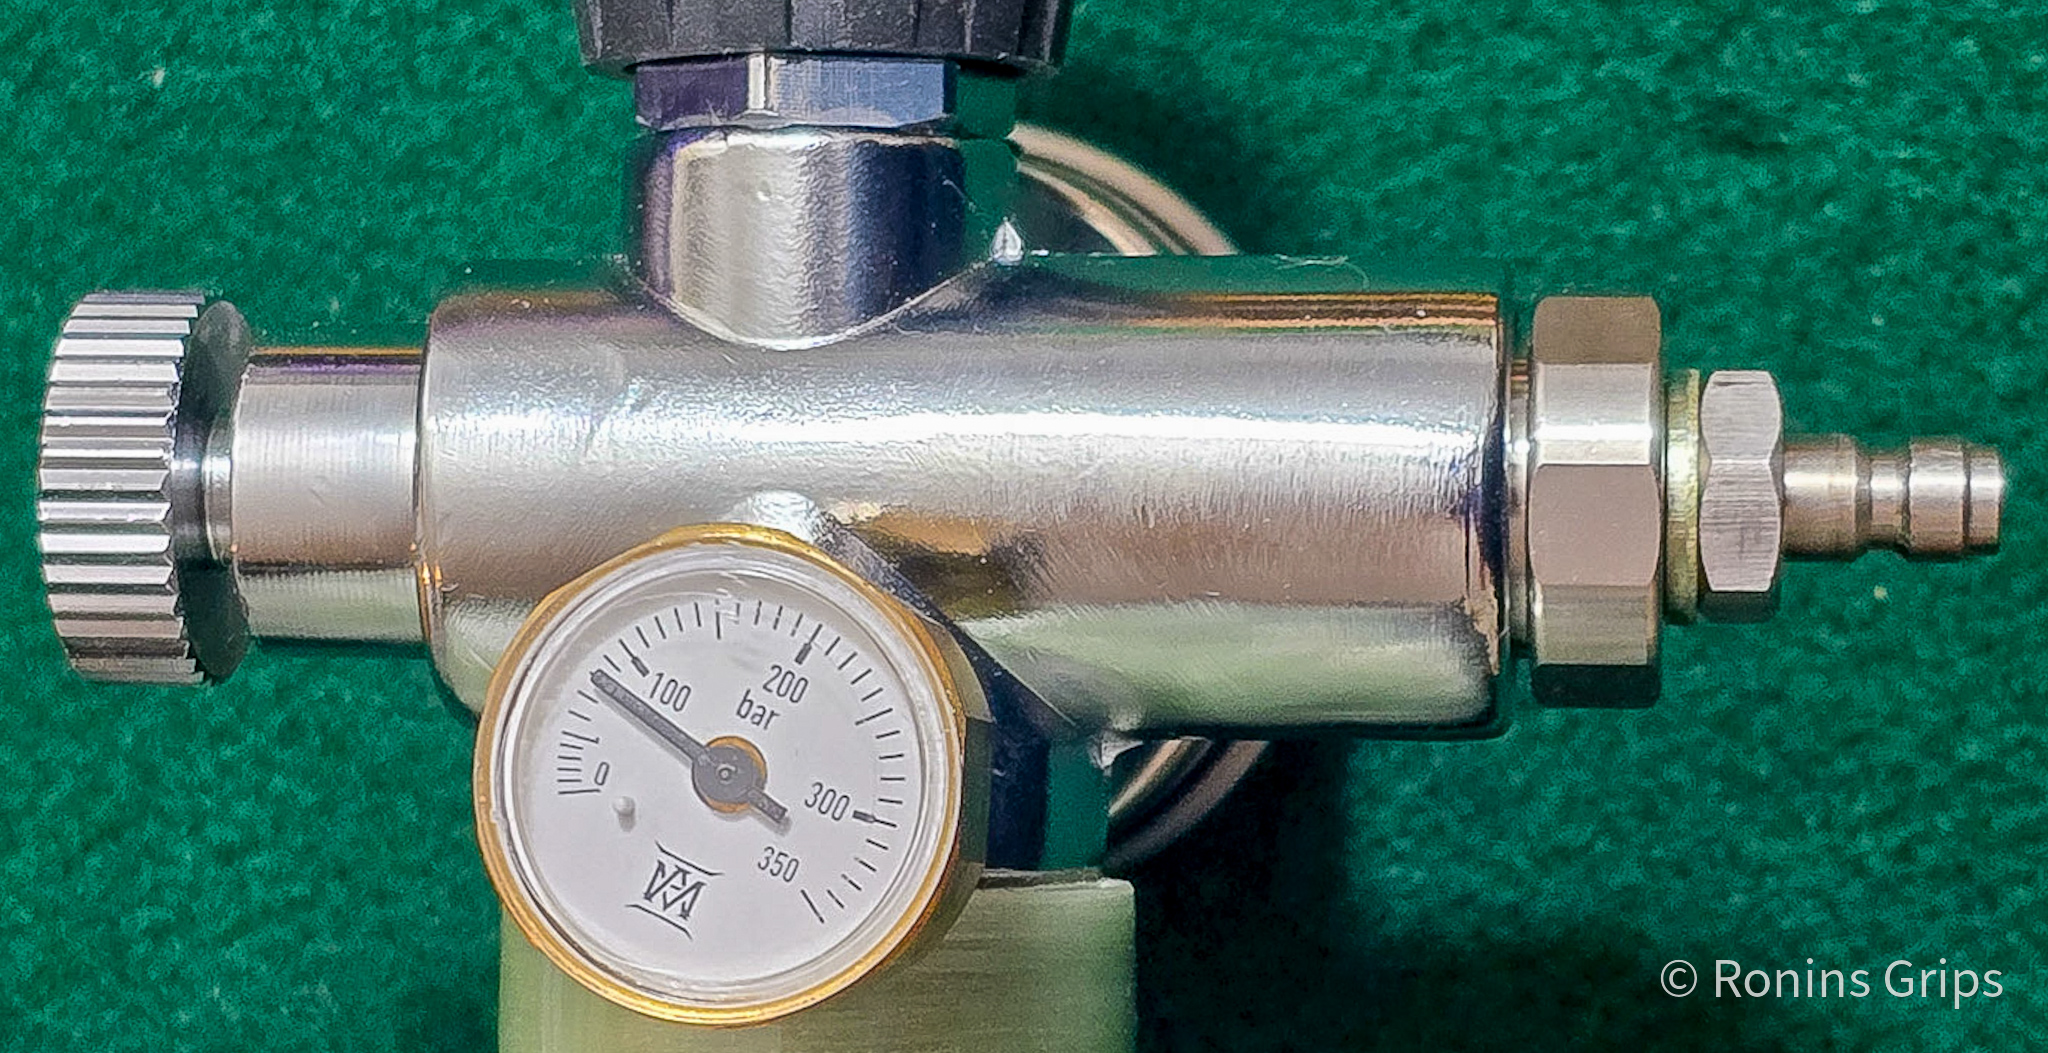
My 6.8L 300 bar/4,351 PSI Air Marksman tank had a slow leak. How slow? It would lose a few hundred PSI per month so real small and slow. I used the CRC Aerosol Leak detector to track it down. The seal between the 7/8ths inch valve stem and the tank/bottle is accomplished via an O-Ring and it needed to be replaced.
This how-to works in general but the o-ring size will change if your valve neck has a different diameter. Not all brands and tank volumes use the same diameter valve stem.
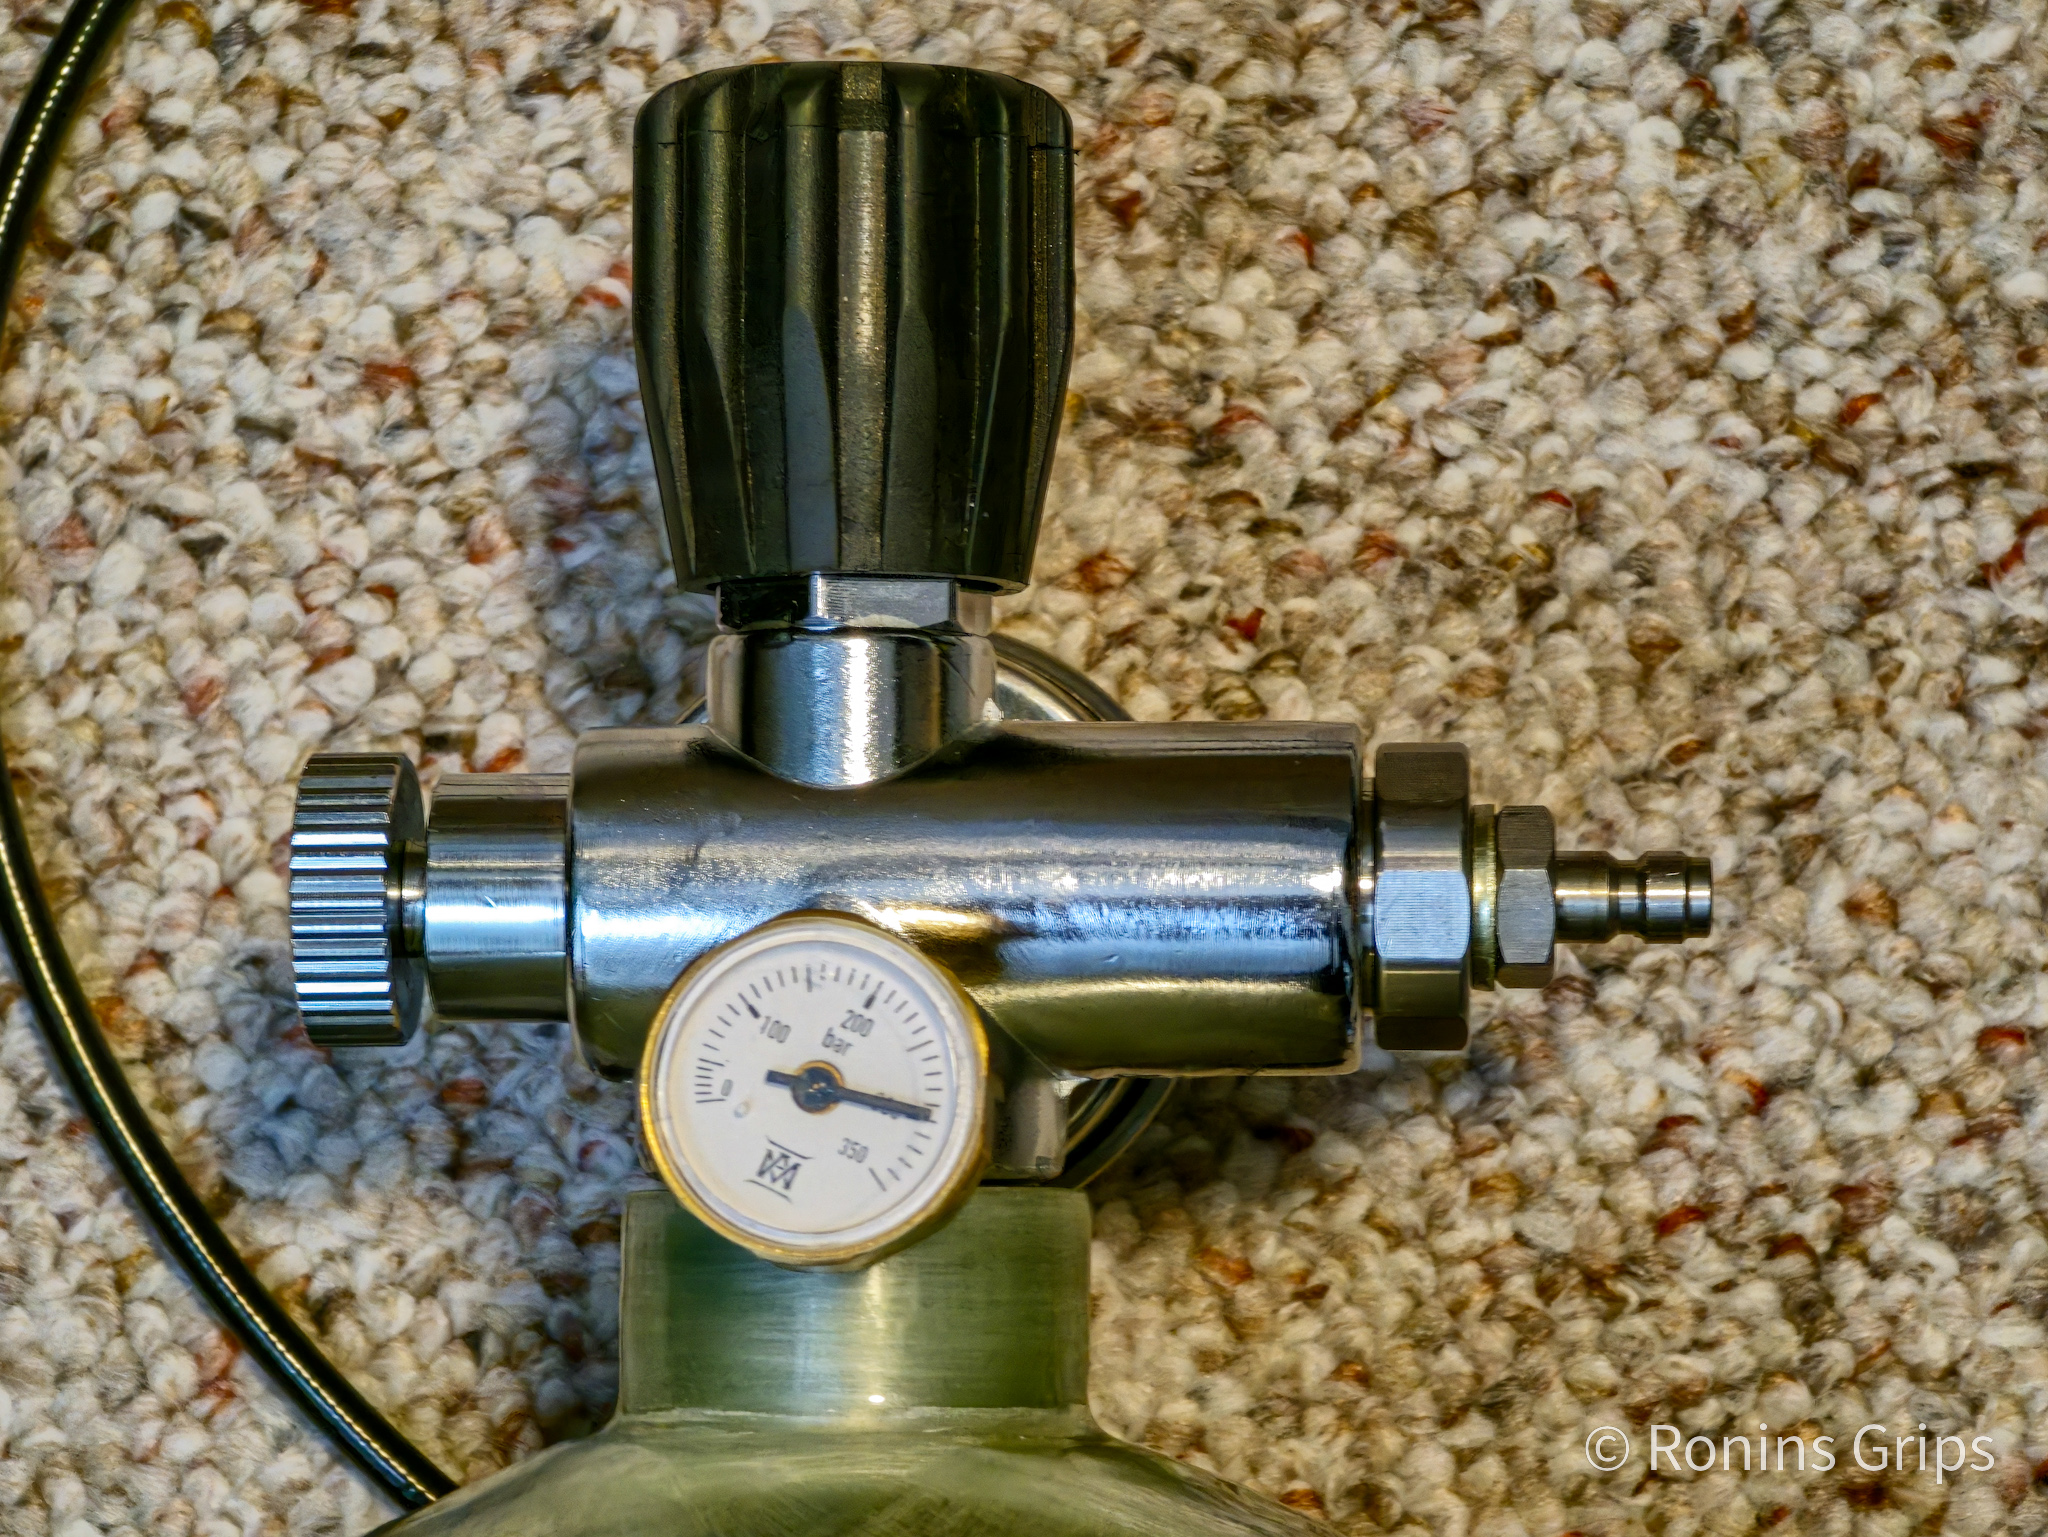
Removing the valve from the tank
| The first step is absolutely the most important – open the valve and make sure the tank is competely empty. Before you go any further, open the valve and leave it open. This is your safety check that it is empty. I can’t stress this enough – make sure it is empty!! |
The valve and tank are 7/8ths inch right hand thread. That means you turn left (counter clockwise) to loosen it and right (clockwise) to tighten the valve on the tank.
To remove the valve, you can first see if it will unscrew by hand but usually they are a bit “stuck”. I use a non-marring dead blow hammer to hit the valve and smack it loose. Hit a part of the valve body that sticks out like a lever arm and not knobs or gauges.
It should not take very much force to get it to come loose. It’s the “whack” that knocks it loose more than just pure brute force. Think of it this was – the sudden jolt on the valve body knocks it loose while inertia is relatively holding the tank body in place. It’s actually way easier than trying to hold the body and apply a wrench or strap to the valve body.
If it isn’t budging, make sure all air is out of the tank before you try more force.
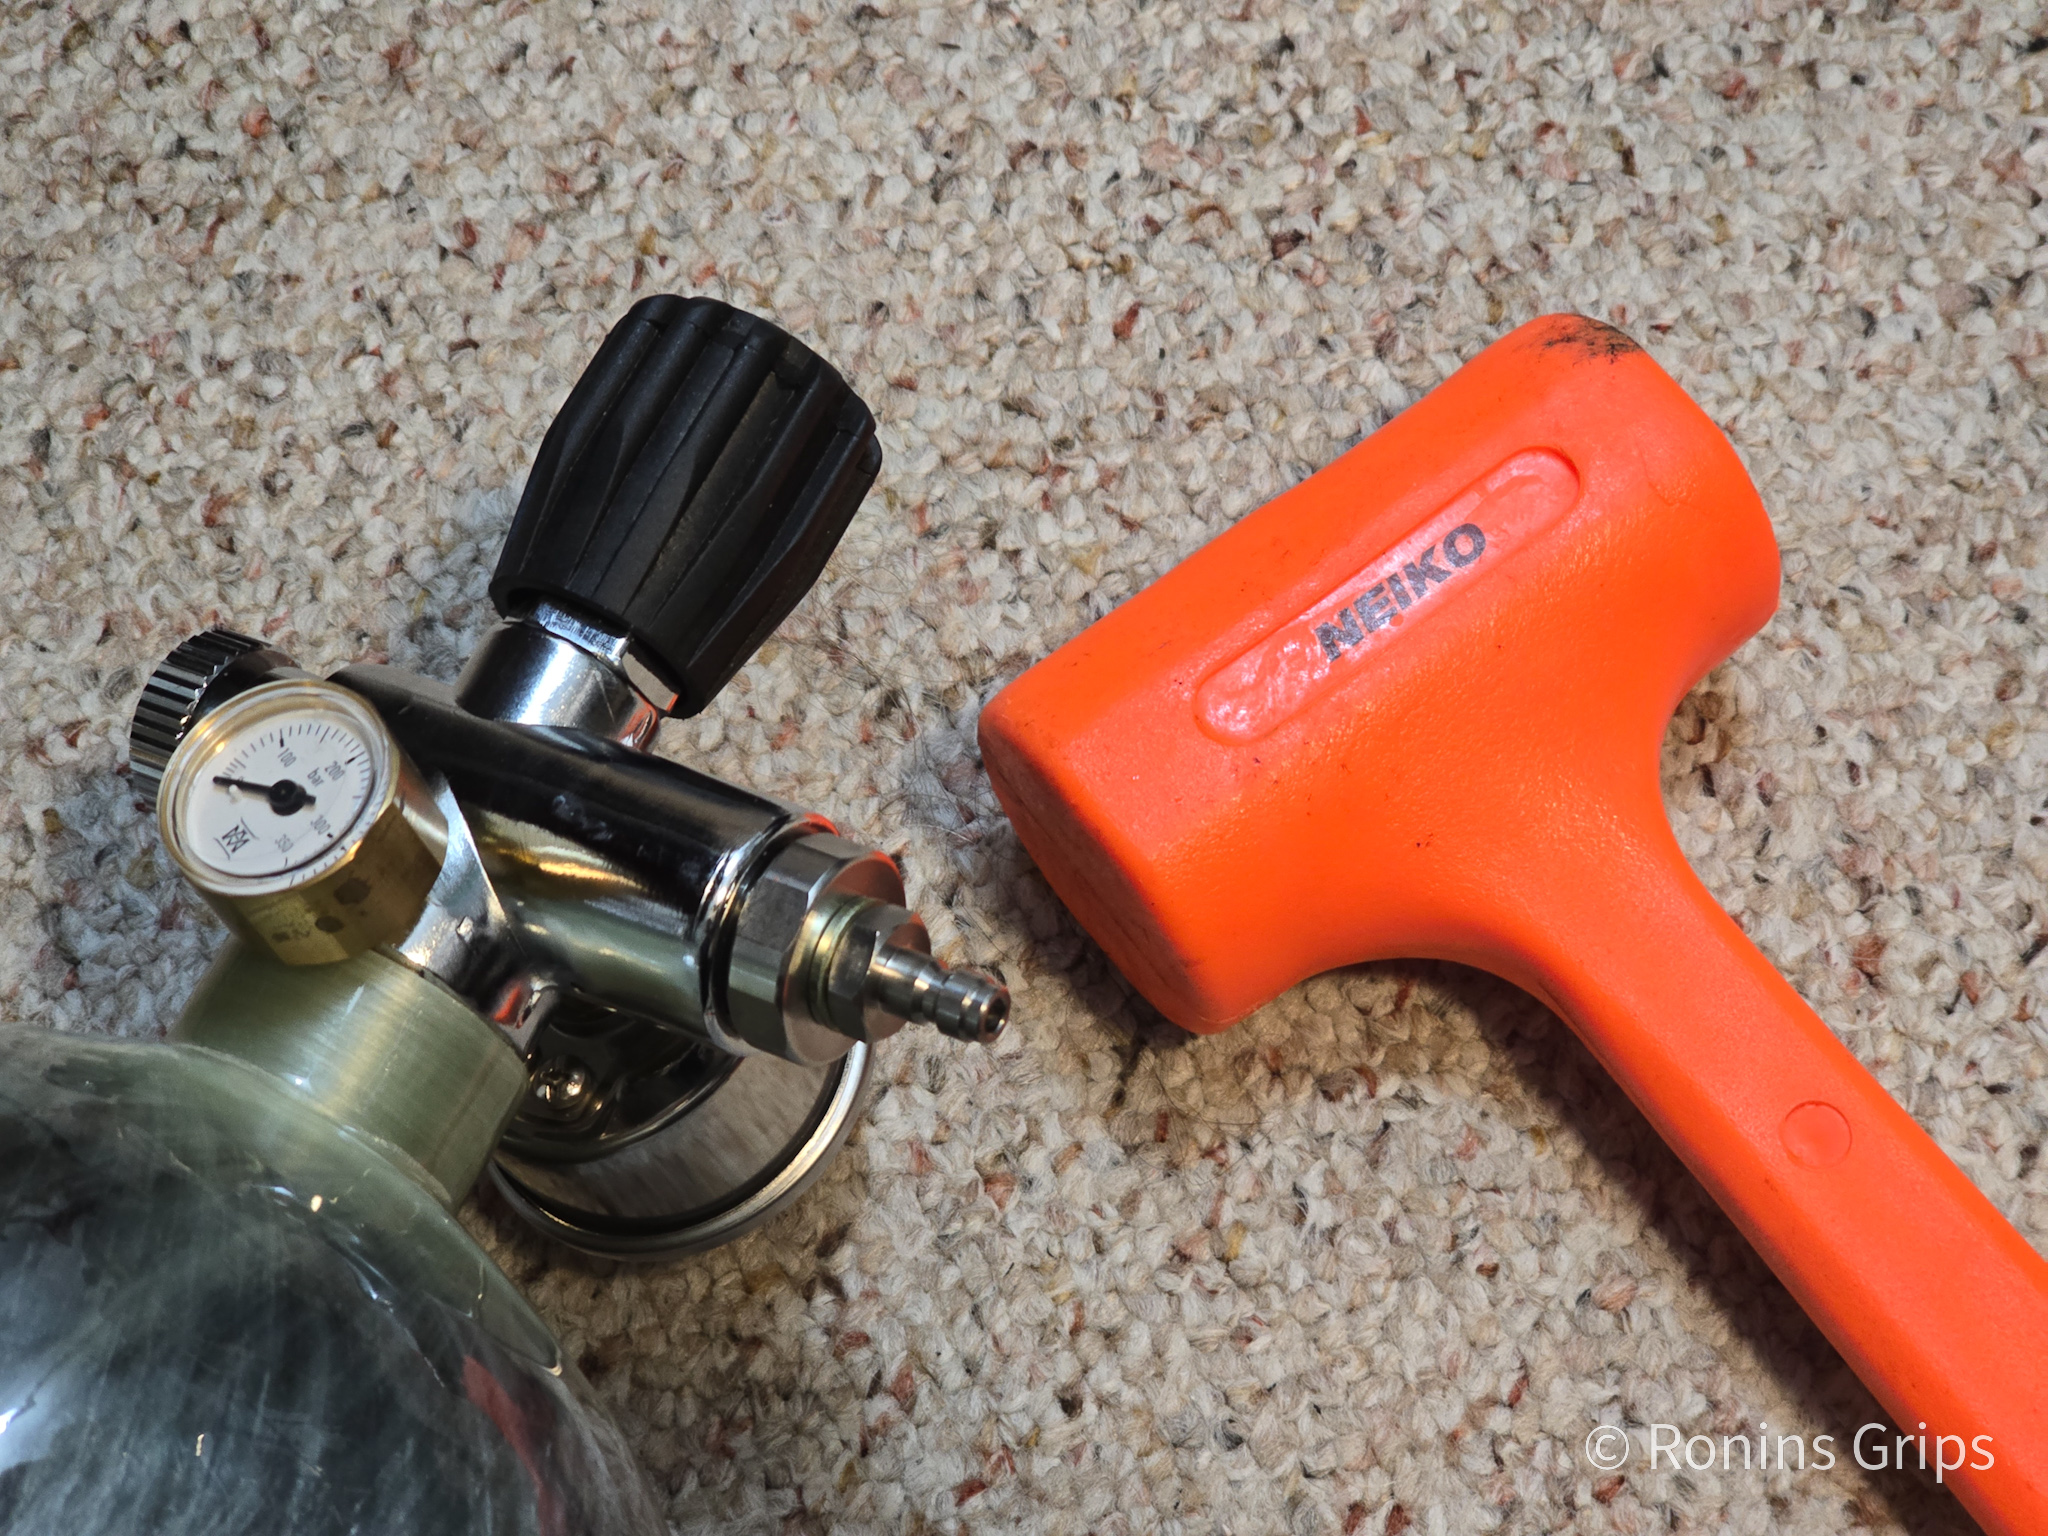
The Neiko dead blow hammer knocked it lose very easily. I then unscrewed it the rest of the way by hand.
What size was the o-ring?
Searching on the WWW said to use a size 212 o-ring on a 7/8ths inch valve stem. What you’ll notice in the next photos is that the 212 size o-ring is an approximation of the original. Odds are the Chinese manufacturer of the Air Marksman tank used a different specification but the SAE 212 o-ring will work.
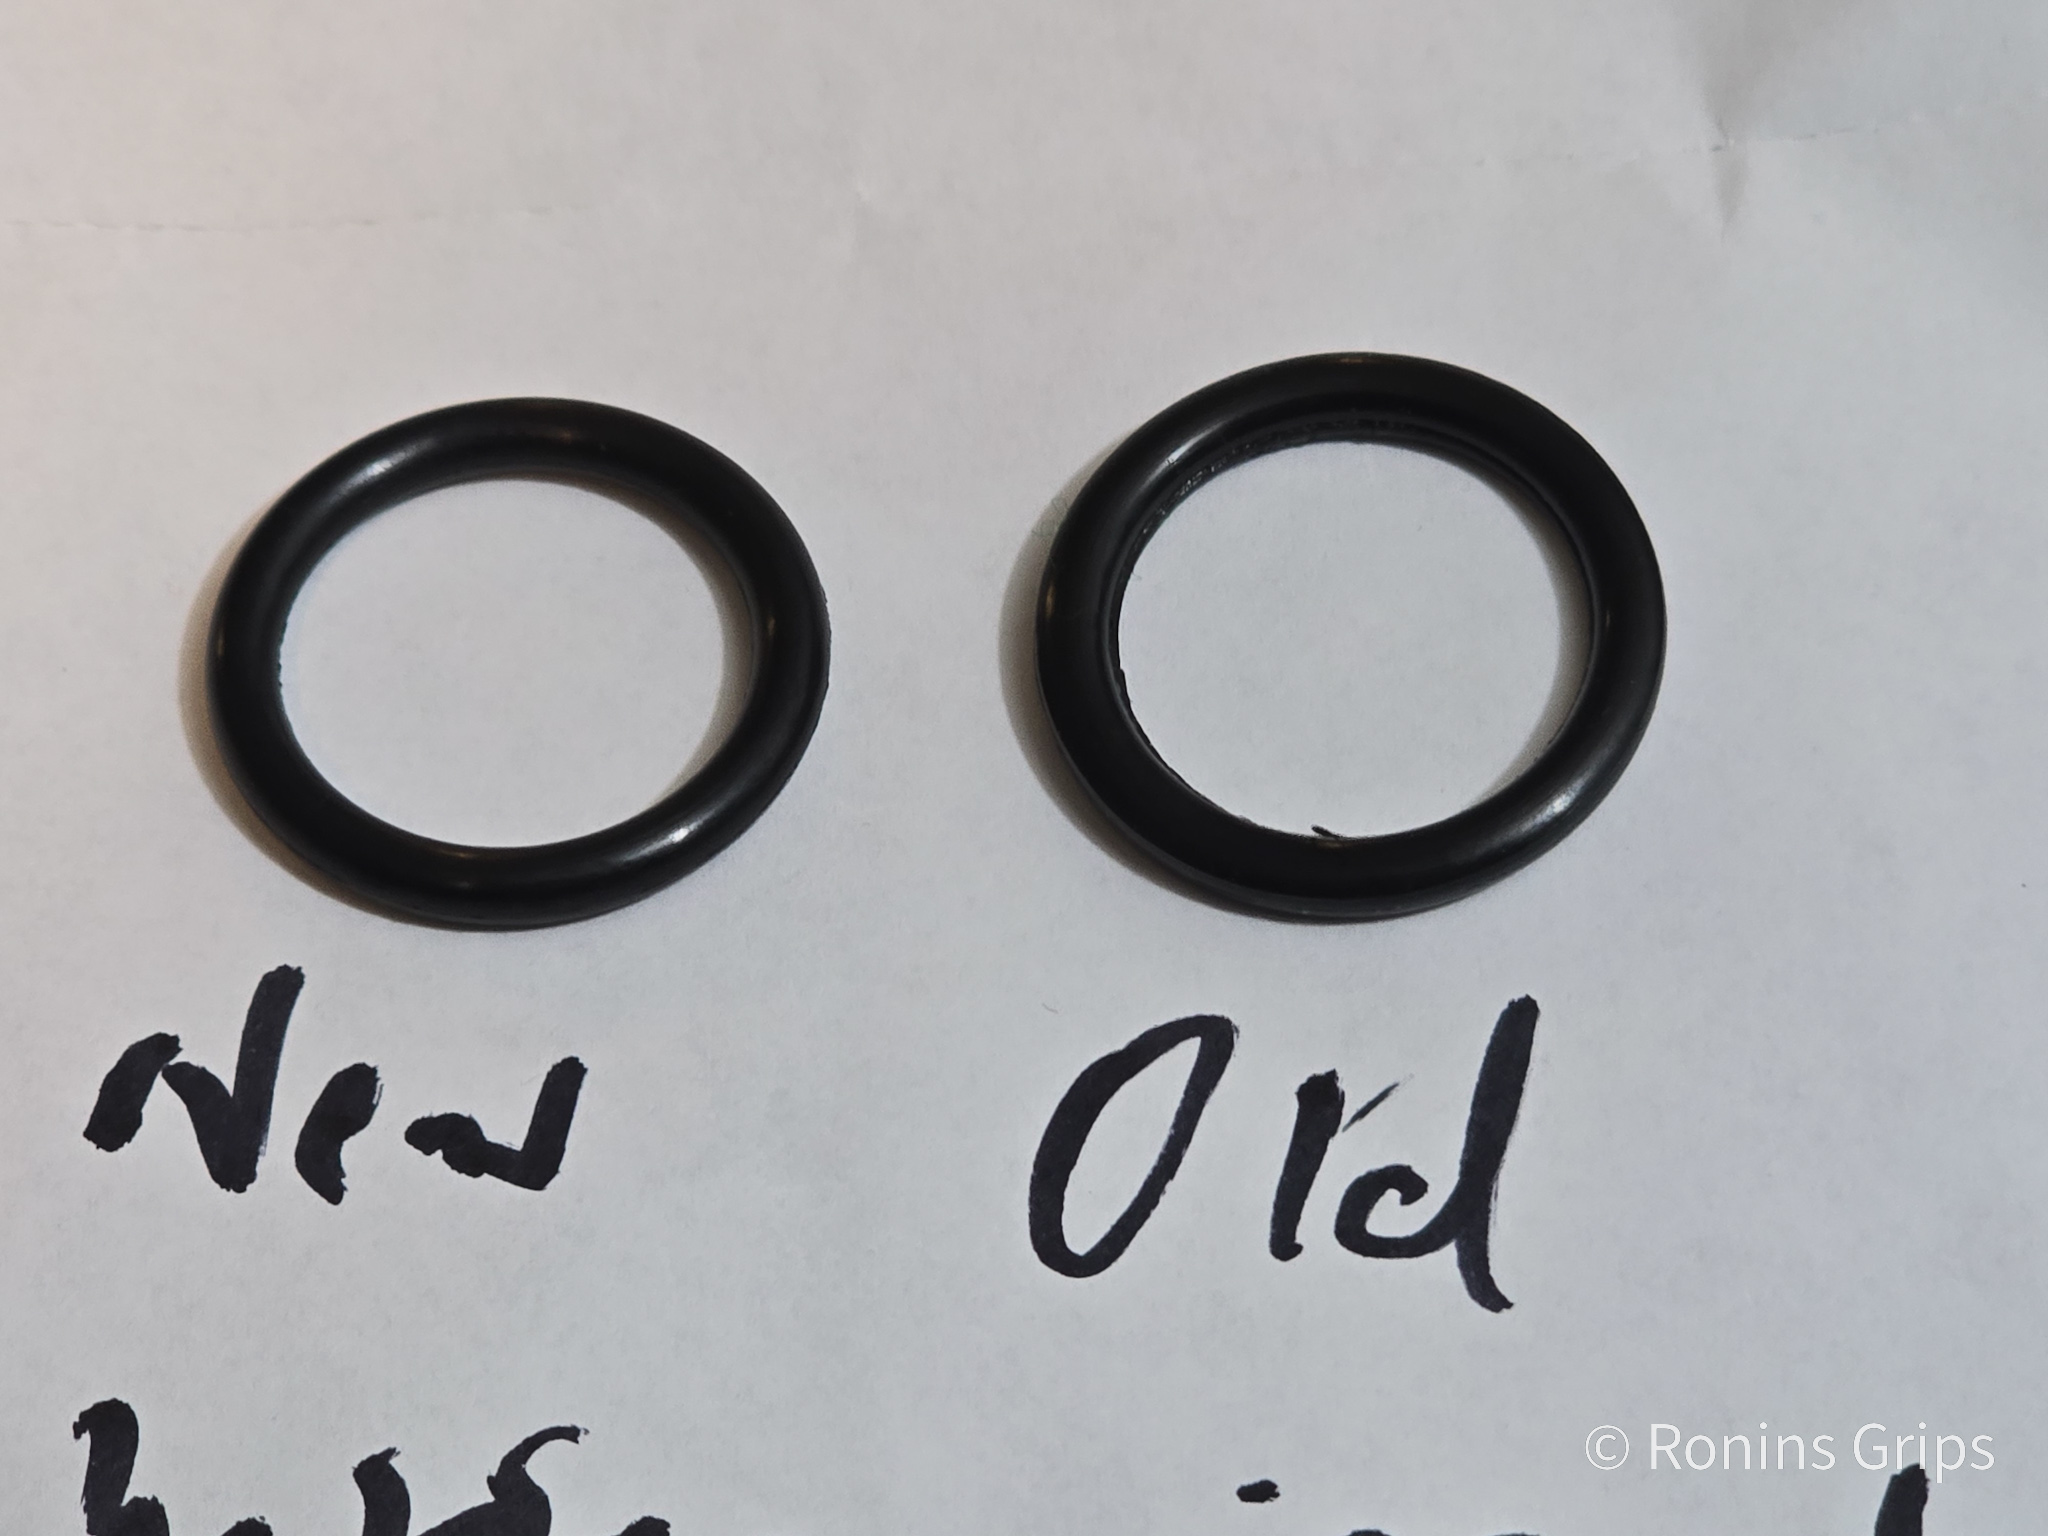
When I removed the o-ring I noticed the o-ring had a number of filaments left over from manufacturing. In theory these remnants from manufacturing an cause imperfect seals.

It took some digging to find out the size and specification I needed:
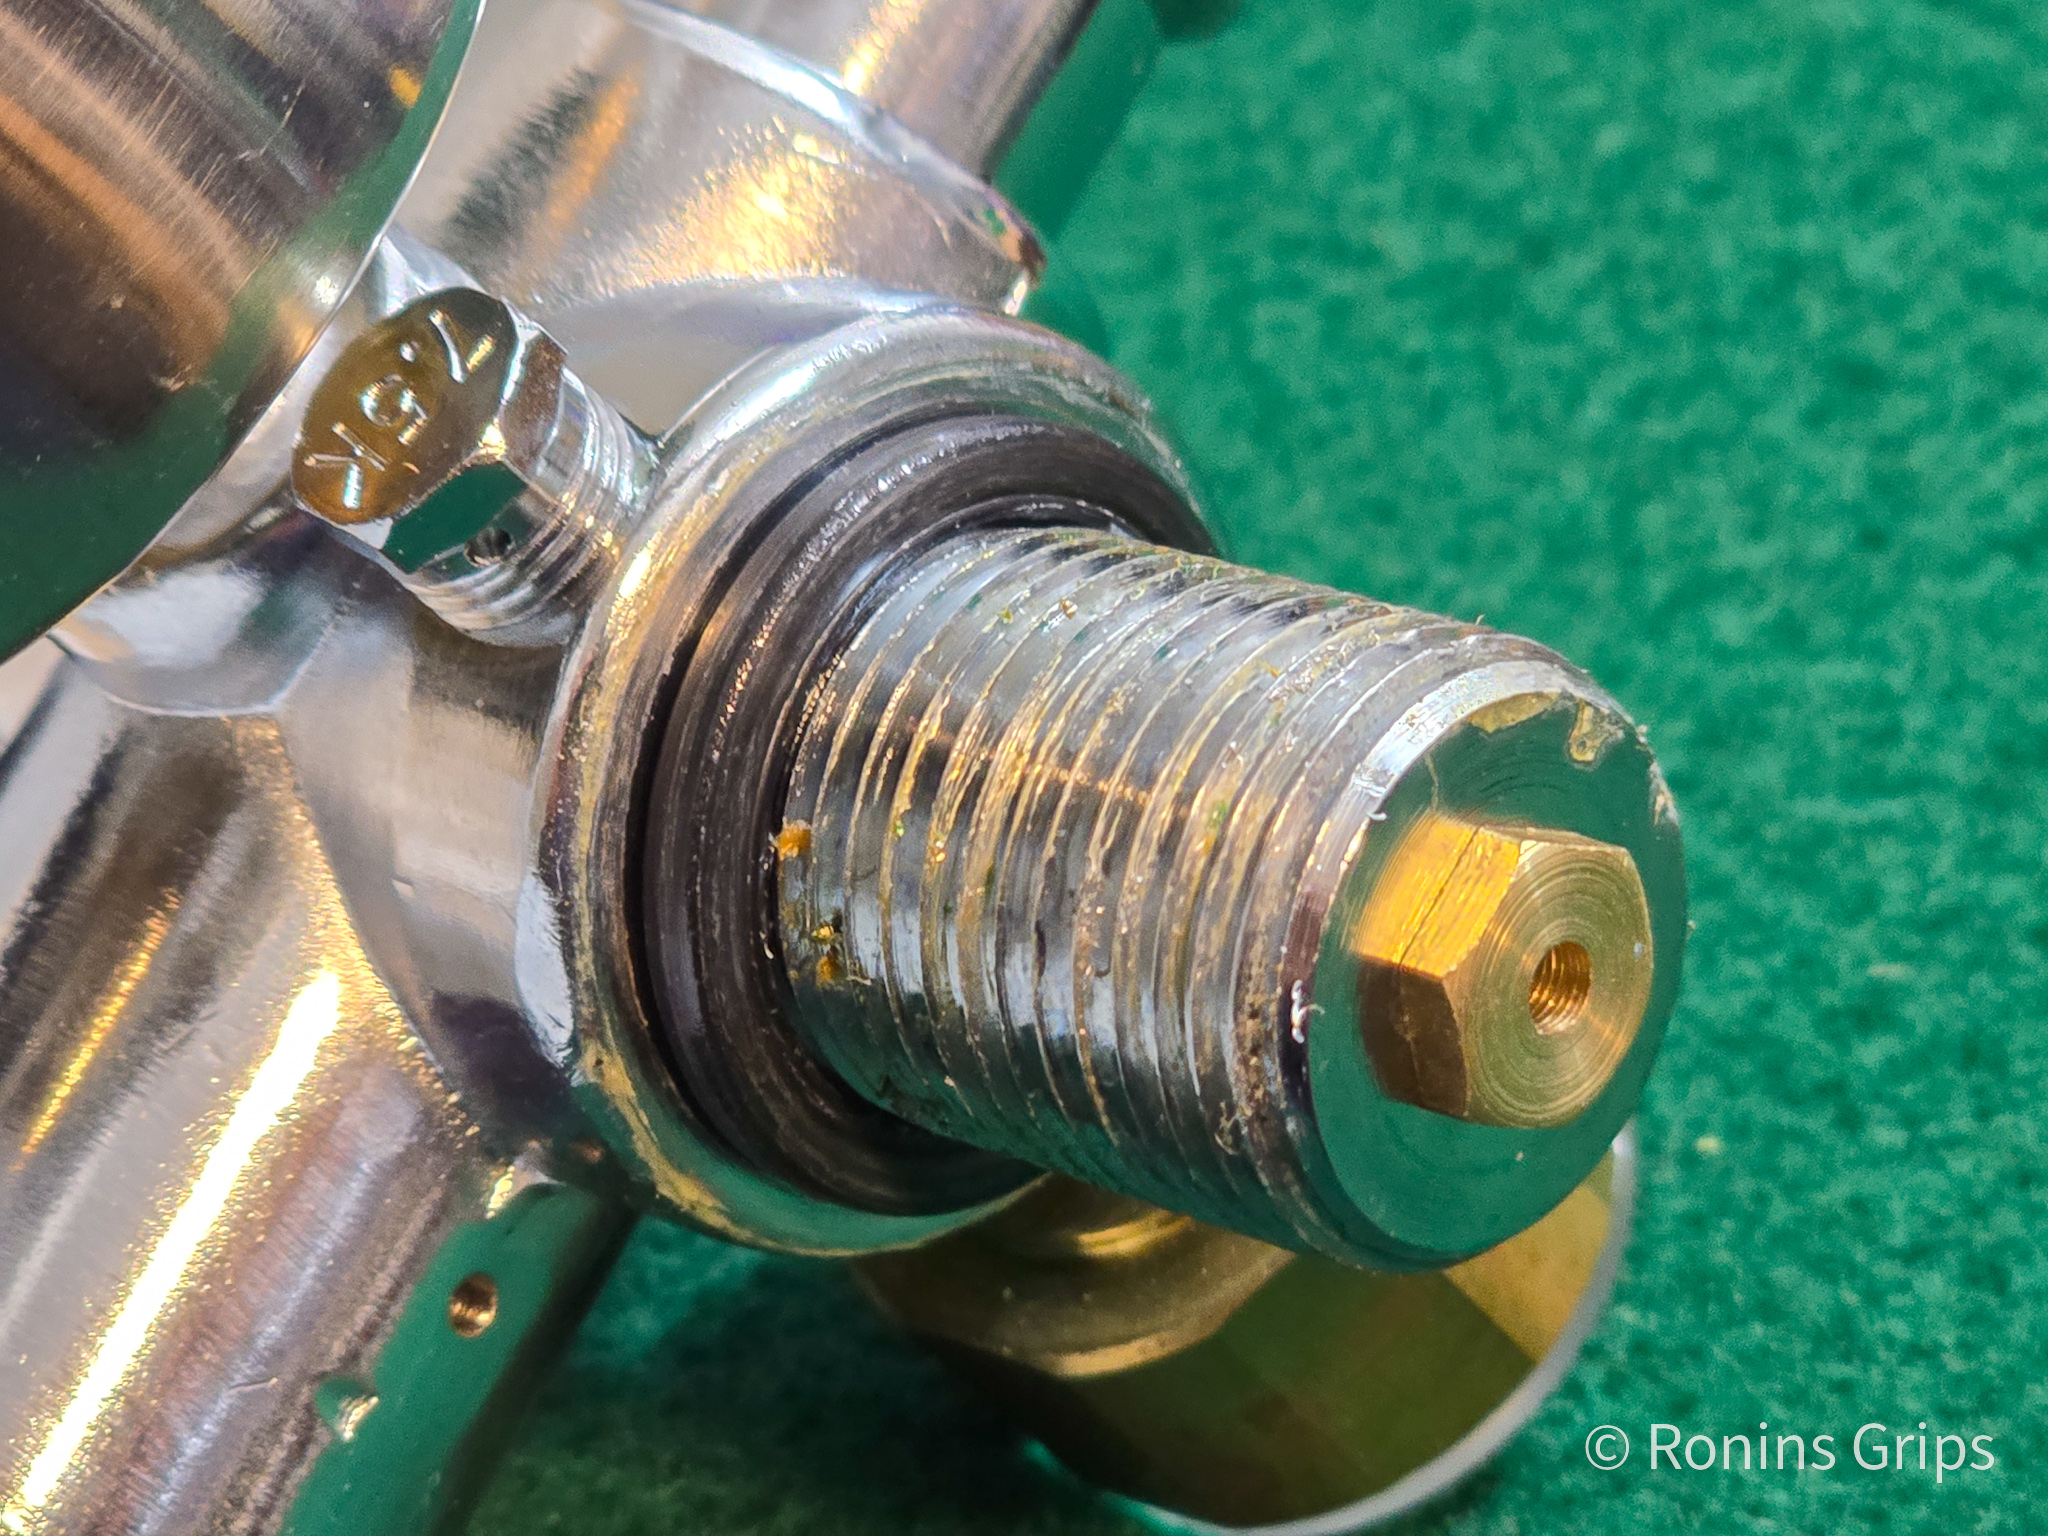
- Material: Buna-N — need a resistance to chemicals
- Inside Diameter (ID): 7/8″Nominal and 0.859″ Actual – the 7/8ths inch (ID) matches with the valve stem’s outer diamter (OD)
- Outside Diameter: 1-1/8″ Nominal and 1.149″ Actual – this needs to fit in the pocket the o-ring sits in and the tank has pletty of room for this.
- Thickness: 1/8″ Nominal and 0.139″ Actual — this is diameter of the o-ring’s rubber.
- Hardness: 90A — it needs to be firm enough that the high-pressure air doesn’t litterally push it out of position. 90A is hard enough to stay put.
- O-Ring Number Designator: 212 — these numbers are defined by Aerospace Standard AS568B, Aerospace Size Standard for O-rings and is published by the Society of Automotive Engineers (SAE). This is an American standard and other countries and the ISO have other specifications.
We dos sell the above o-ring on our site if you are interested – click here.
Reassembly
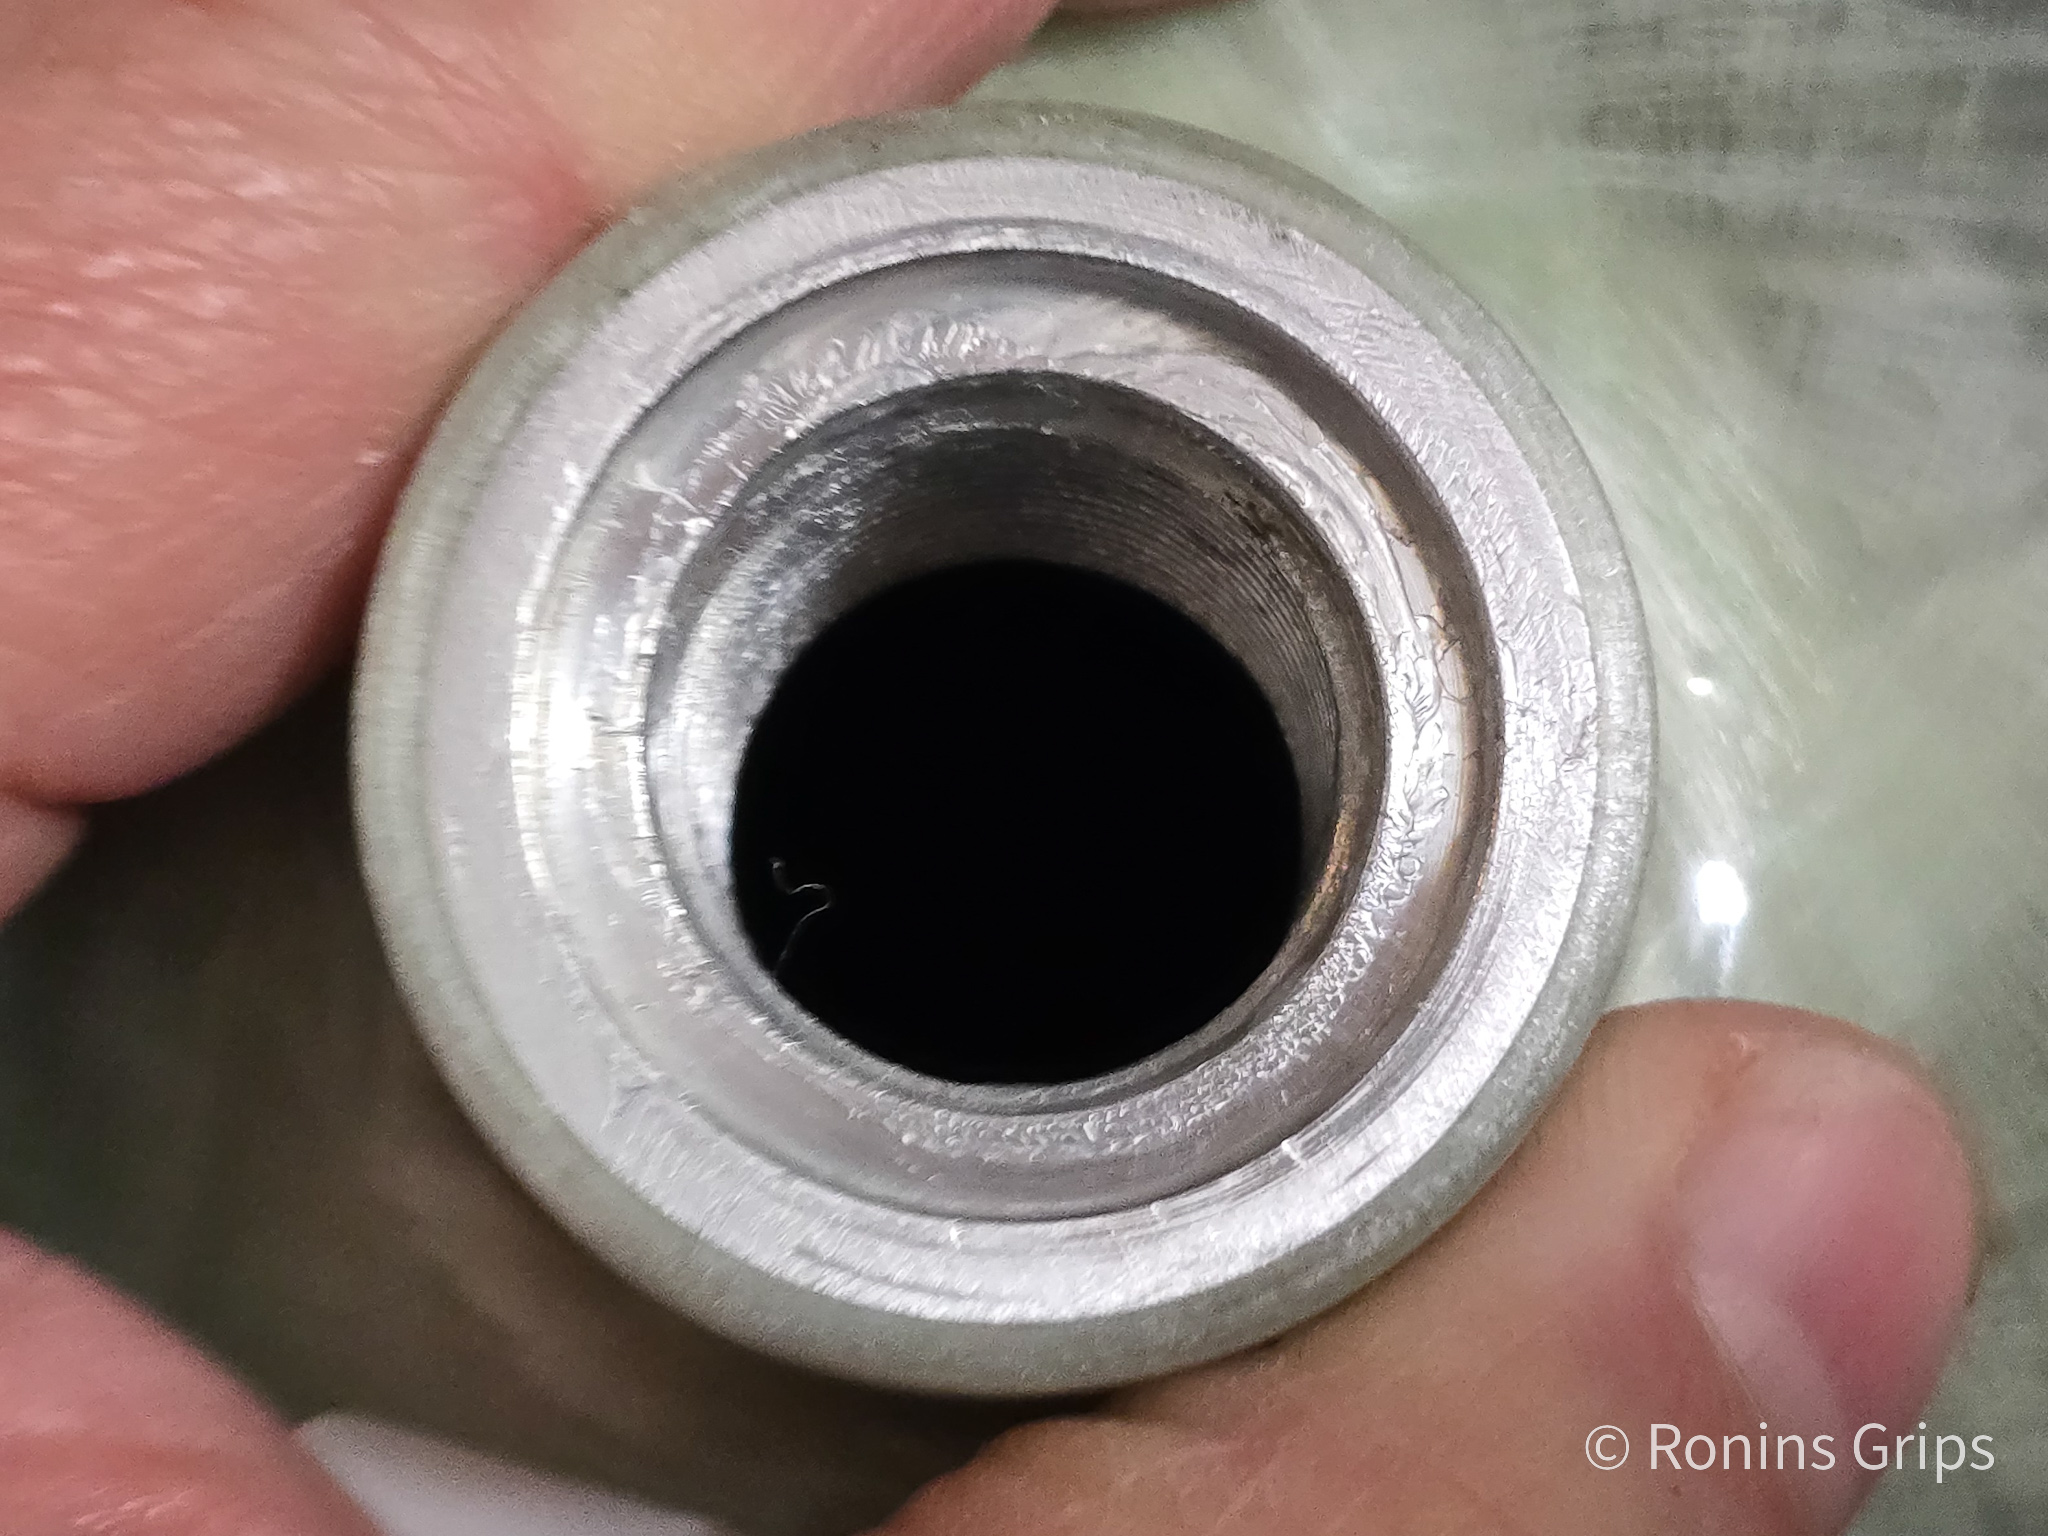
I wish I had taken a before and after photo of the pocket where the oring sits. It was filthy and I wiped it down with a paper towel before I took this next photo.
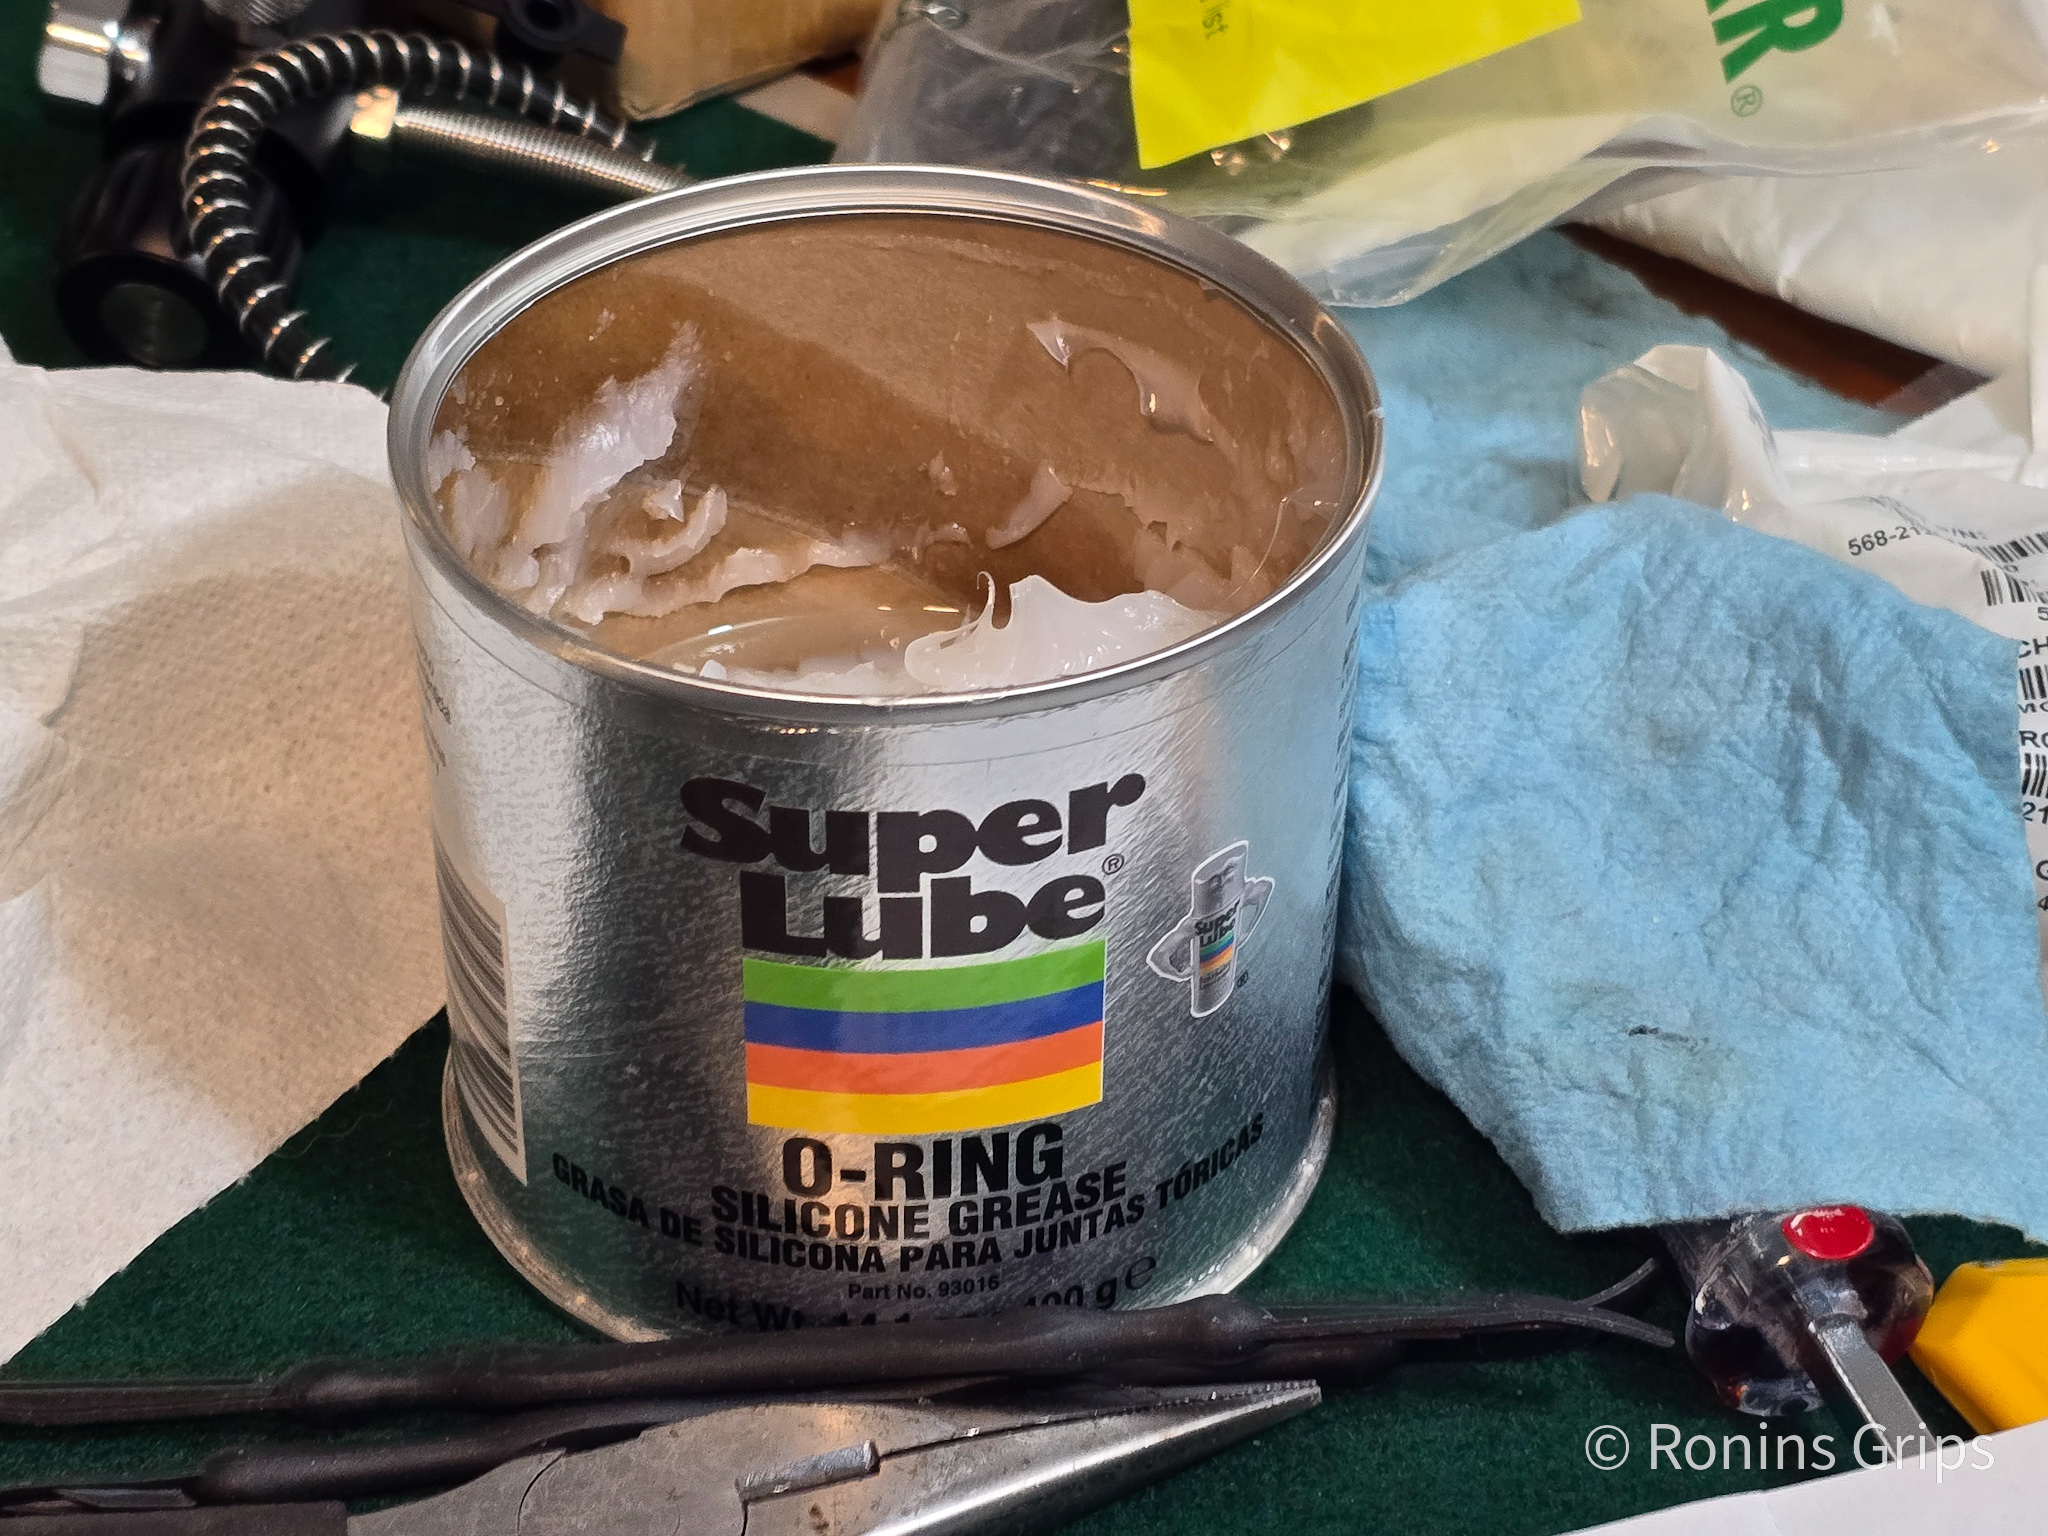
Speaking of o-ring grease, absolutely use a quality silicone based grease and I would recommend one formulated for o-rings. I use Super Lube’s o-ring grease and it works great. The grease lubricates the o-ring so the parts slide around it during reassembly and it doesn’t tear. A film on the threads helps prevent seizing and corrosion.
Note: NEVER use petroleum grease or the high pressure air can cause it to ignite like in a diesel engine.
I carefully threaded the valve stem back into the tank and it turned very easily. I brought it down snug by hand and added a about an eigth to a quarter turn with the dead blow hammer. If it feels like it is firm then stop – you don’t need excessive force.
In theory, it is ready to fill but we want to test that. I like to add a 100 bar, stop and watch the pressure gauge for an hour. Why? Well, it takes a long time with a home compressor like my GX CS4 unit to fill a 6.8 liter tank. I’d rather fill it part way and watch vs. wasting extra time on the pump just to find out the leak was still there.
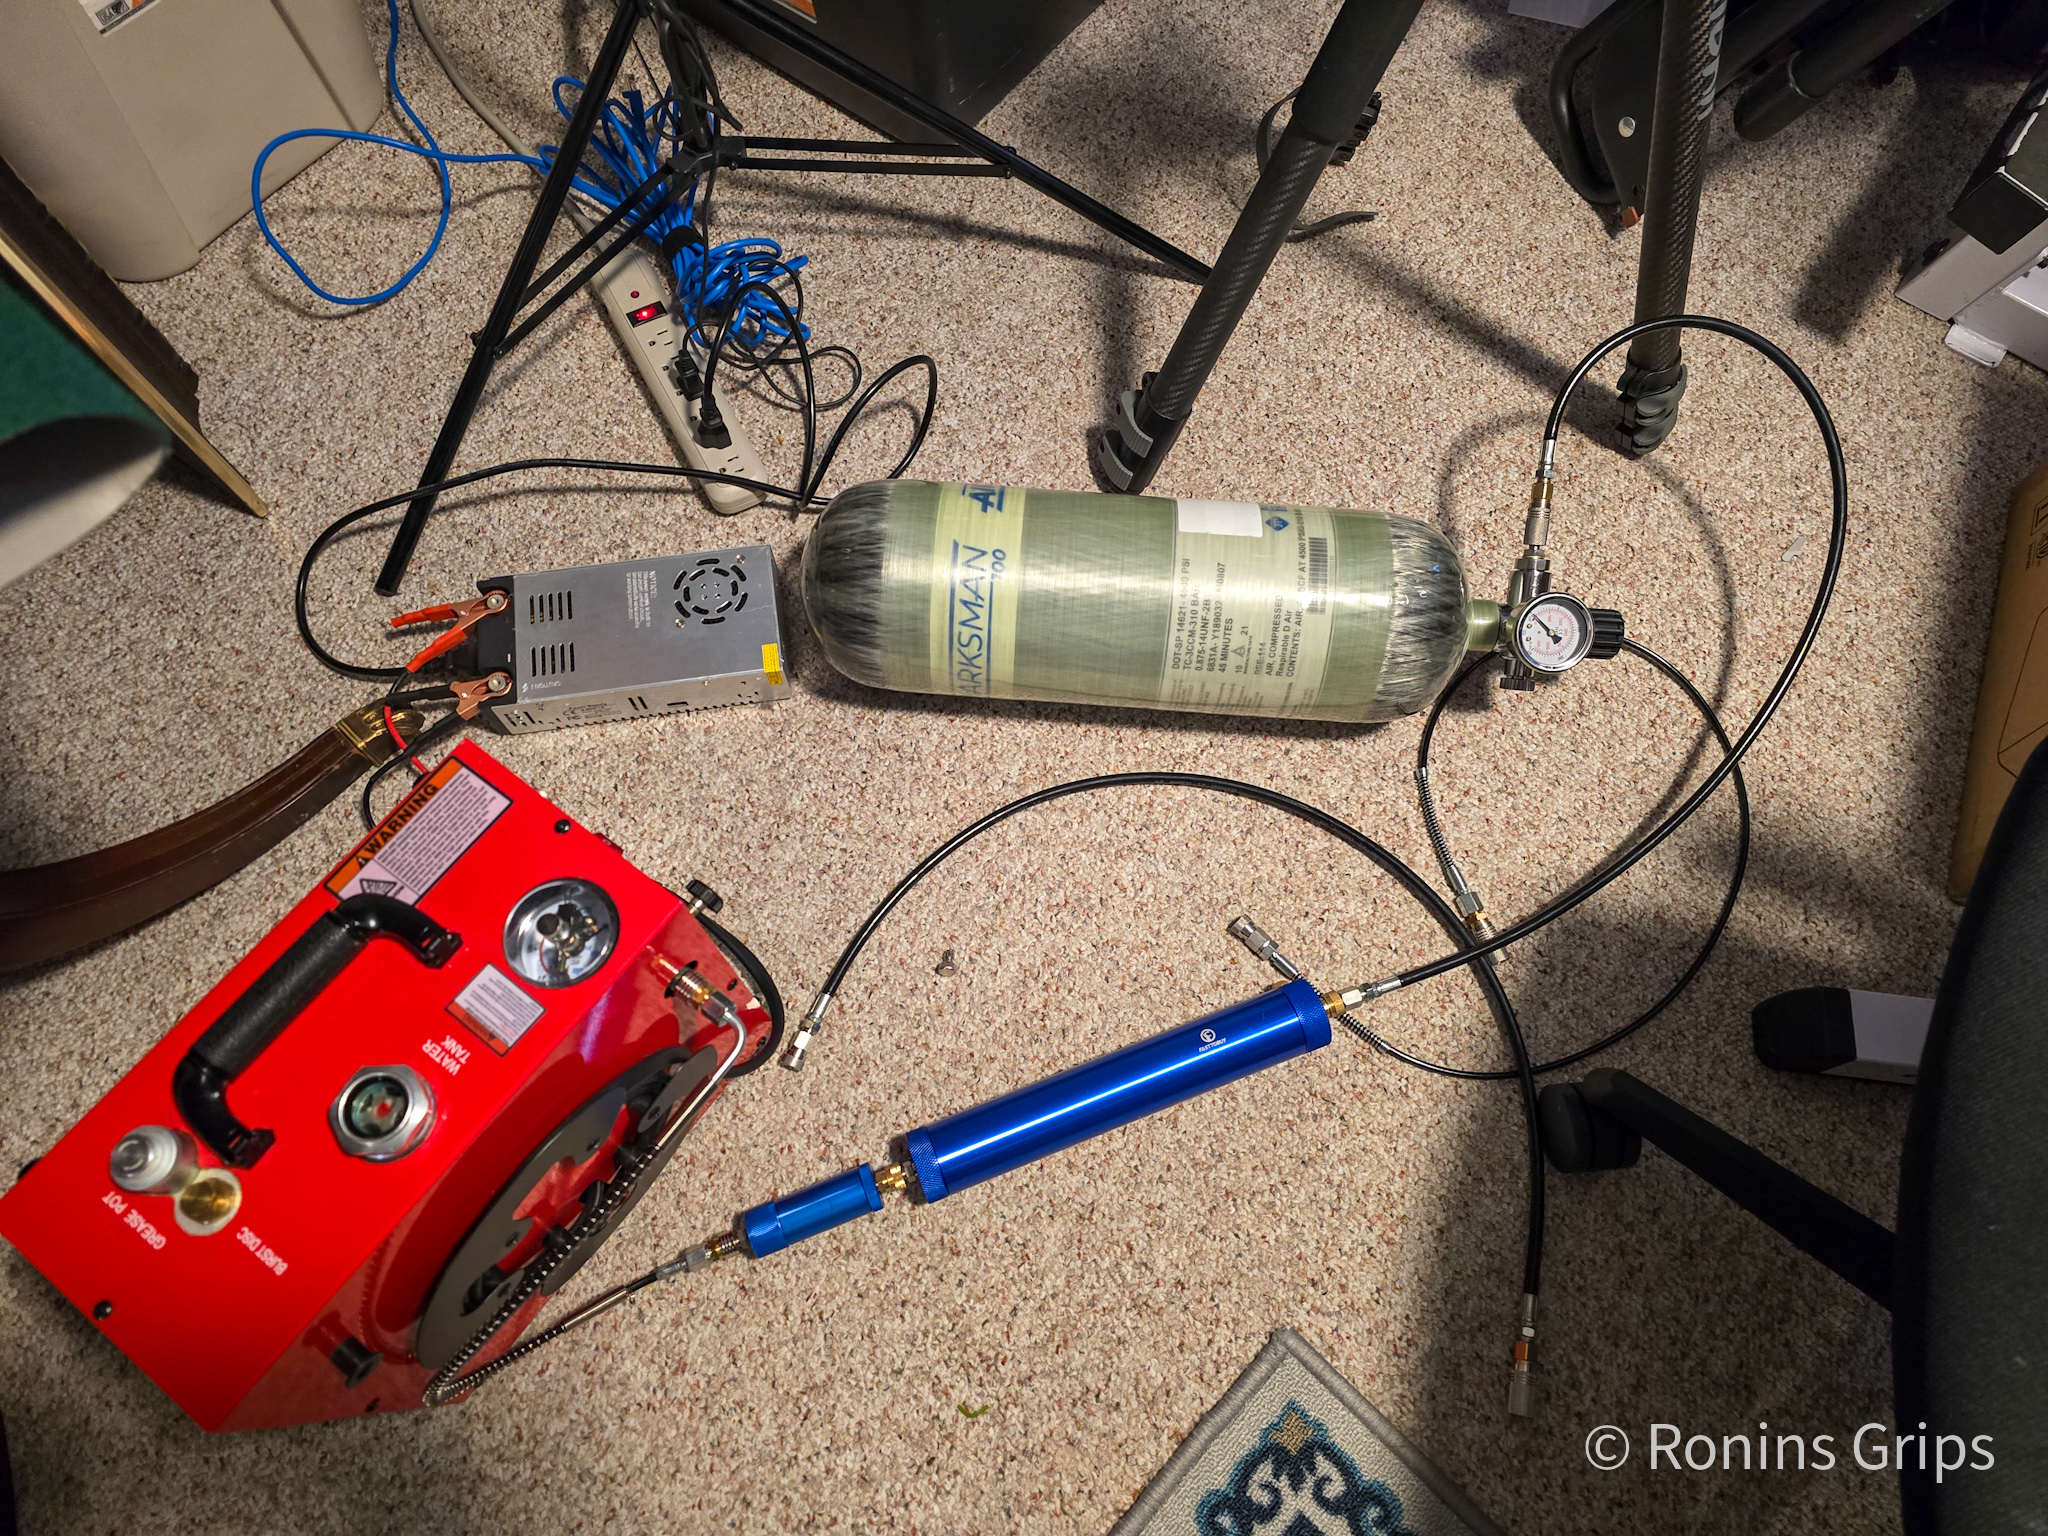
So, I filled to 100, watched and everything was okay. I then went to 200 and watched. Finally I went to 300 and watched. None of my gauges agree with each other so I get at or close to 300 bar on the highest-reading gauge and call it done. To explain that, I have gauges on my pump, on the fill port side of the valve and one on the tank side. Whichever hits 300 first I stop at just to be safe. Yes, the tank should be able to handle way past its working rated pressure of 300 bar / 4,351 PSI but I don’t see any point in pushing it and finding out from a safety perspective.
The link appears to be gone but I can’t tell you for sure if it was the o-ring with its filaments causing imperfect seals or the dirty condition of the pocket where the o-ring sits on the tank – or maybe even a combination – but it’s not leaking.
Summary
My Air Marksman tank was leaking around the valve stem through some combination of defective o-ring and debrise/dirt during assembly. I cleaned all the surfaces, applied a light film of o-ring grease on the surfaces including on the new o-ring and re-installed the valve on the tank. Problem solved.
Note: We do sell the o-rings in our store if you are interested. Click here.