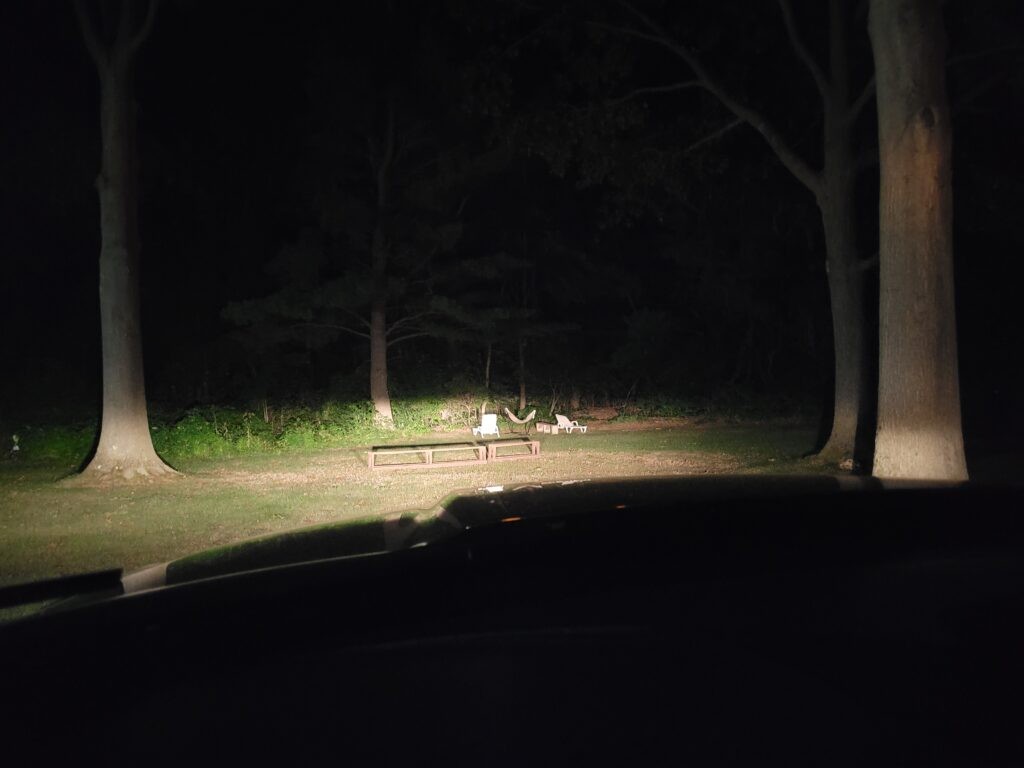
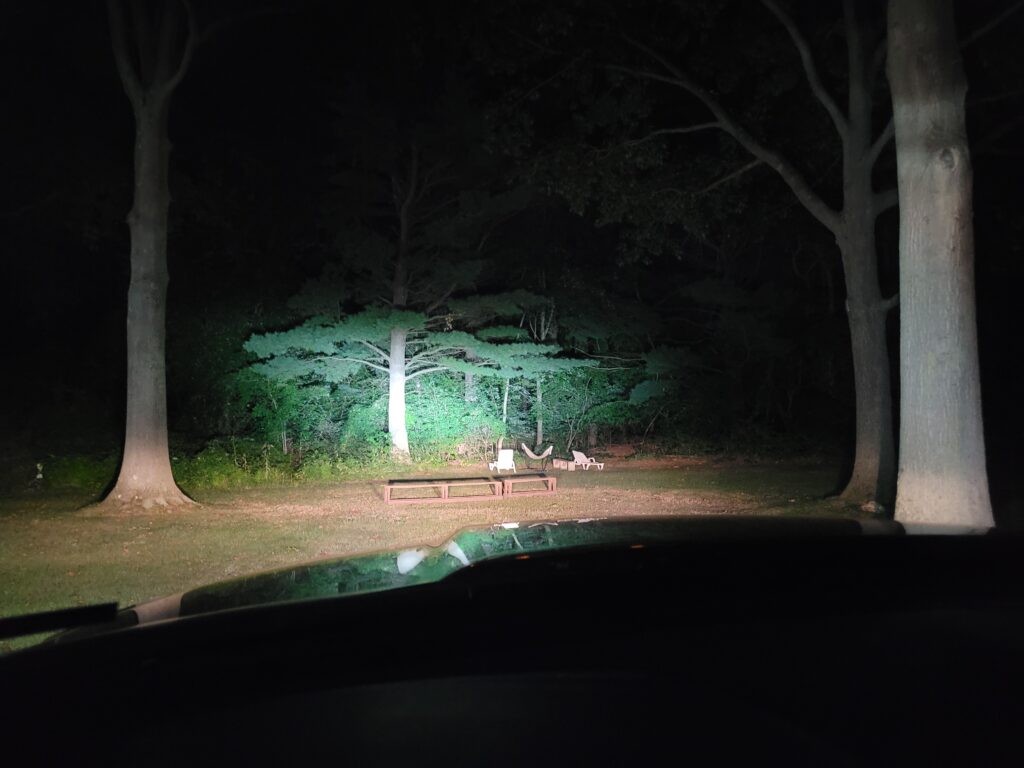
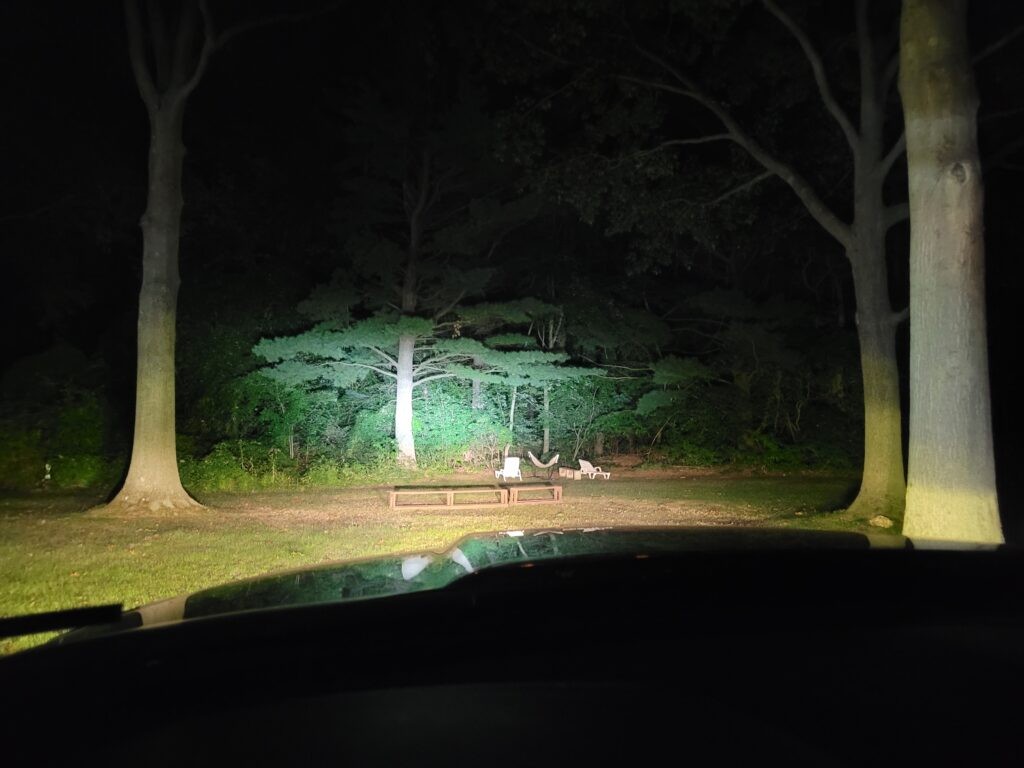
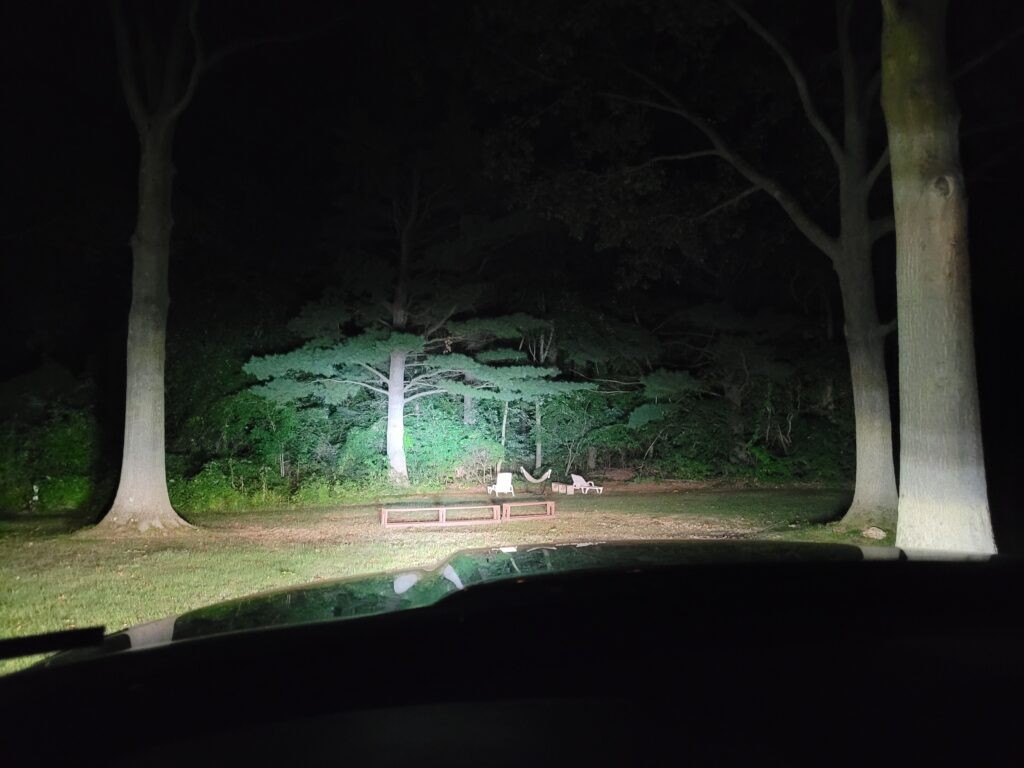
The U.S. market for small arm weapon-mounted lights (WMLs) is a mature and intensely competitive sector, characterized by rapid technological advancement and deeply entrenched brand loyalties. The market is broadly bifurcated, serving a demanding professional/duty-use segment and a burgeoning, highly engaged civilian prosumer segment. Analysis of consumer sentiment across high-traffic online communities reveals a sophisticated user base that prioritizes not only raw performance but also durability, ergonomic efficiency, and ecosystem compatibility.
This report finds that the market is clearly stratified into three distinct tiers. Tier 1 (Duty-Grade) is dominated by a fierce innovation race between Cloud Defensive, Modlite, and the incumbent SureFire. These brands command premium prices by offering maximum performance and durability, setting the technological trends for the entire industry. Tier 2 (Professional Standard) is almost singularly defined by Streamlight, which has established an unassailable position by offering products with proven reliability and near-Tier 1 performance at a fraction of the cost. Streamlight products represent the de facto standard for a vast number of law enforcement agencies and discerning civilian users. Tier 3 (Value/Entry-Level) is a more fragmented space where brands like Olight, Inforce, and Holosun compete on price and niche features, though they often face skepticism from enthusiast communities regarding long-term durability.
Several key market trends have emerged from this analysis. The most significant is the “candela wars,” a market-wide pivot from prioritizing raw lumen output to focusing on candela, the key metric for beam intensity and effective target identification distance.1 This trend, initiated by innovators like Modlite and Cloud Defensive, has forced legacy manufacturers to respond with high-candela “Turbo” product lines.
Secondly, the user interface—specifically switching—has become a primary battleground. The “SureFire pattern” for remote switches and tailcaps has become the industry standard, and a product’s compatibility with this ecosystem is a critical purchasing factor.4 Proprietary switches are a significant source of negative user sentiment, while poor switch quality is the most cited weakness for even the most popular value-oriented models.
Finally, the market is defined by intense brand tribalism, where consumers exhibit powerful loyalty that can both insulate established brands and create significant backlash when products fail to meet the community’s high expectations.6
The following summary table provides a comprehensive, data-driven snapshot of the competitive landscape, ranking the top 20 WMLs based on their prominence in online discussions and the aggregate sentiment expressed by end-users.
Key Table: Top 20 Weapon-Mounted Lights – Market Sentiment Analysis
| Rank | Model | Primary Application | Key Metrics (Lumens/Candela) | Total Mention Index | % Positive Sentiment | % Negative Sentiment | Key Positive Themes | Key Negative Themes |
| 1 | Cloud Defensive REIN 3.0 | Rifle | 1,250 / 100,000 | 98 | 72% | 28% | Extreme candela/throw, durable body, good beam color | Proprietary switch, flickering/reliability issues, poor customer service |
| 2 | SureFire X300T-B (Turbo) | Pistol | 650 / 66,000 | 95 | 92% | 8% | “King” of candela, industry-standard durability, massive holster compatibility | Stiff/unintuitive switches, high price, focused beam has less spill |
| 3 | Modlite PLHv2 | Rifle | 1,350 / 54,000 | 92 | 88% | 12% | Excellent balance of throw and spill, modular (SureFire ecosystem), lightweight | High cost, reports of flickering/battery issues, cooler beam color |
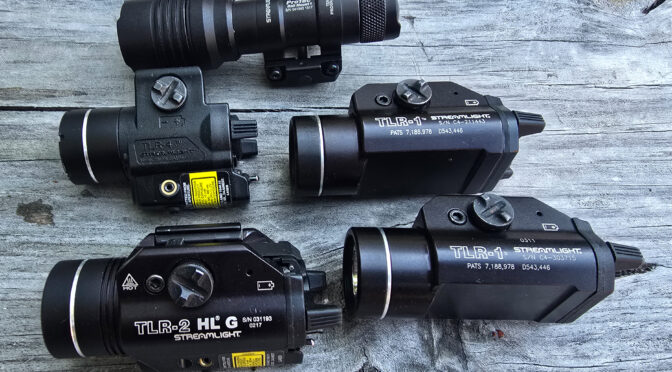
| 4 | Streamlight TLR-1 HL | Pistol | 1,000 / 20,000 | 100 | 94% | 6% | Exceptional value, proven reliability, great switches, vast holster support | Outclassed in candela by newer models, reports of flickering under recoil |
| 5 | SureFire M640DFT Pro (Turbo) | Rifle | 700 / 100,000 | 89 | 91% | 9% | Incredible throw, excellent runtime, innovative swivel mount, dual-fuel | High price point, reports of initial dimming/flickering issues |
| 6 | SureFire X300U-B (Ultra) | Pistol | 1,000 / 11,300 | 96 | 85% | 15% | “Gold standard” durability, excellent flood/spill for CQB, holster support | Stiff switches, low candela for its price point, mounting issues on polymer frames |
| 7 | Streamlight ProTac Rail Mount HL-X | Rifle | 1,000 / 50,000 | 97 | 95% | 5% | Unbeatable value, great performance for the price, dual-fuel | Included tape switch is notoriously unreliable and prone to failure |
| 8 | Streamlight TLR-7A | Pistol | 500 / 5,000 | 90 | 96% | 4% | Perfect compact size, excellent ergonomics/switches, great value | Lower output compared to full-size lights, limited throw |
| 9 | Modlite OKW | Rifle | 680 / 69,000 | 85 | 86% | 14% | Extreme throw for long-range PID, modular, lightweight | Very tight hotspot with minimal spill, not ideal for CQB |
| 10 | Arisaka 600 Series (w/ Malkoff E2XTL) | Rifle | 500 / 55,000 | 75 | 98% | 2% | Excellent performance, fully potted durability, modular, great value | Lower lumen output, requires user to “build” their own setup |
| 11 | Cloud Defensive OWL | Rifle | 1,250 / 50,000 | 68 | 89% | 11% | Extremely durable integrated design, no external wires, powerful beam | Heavy and bulky, not modular, incompatible with IR lasers |
| 12 | SureFire M340DFT Pro (Turbo) | Rifle | 650 / 95,000 | 65 | 93% | 7% | Very high candela in a compact package, dual-fuel, swivel mount | High price for its size, bulky for an 18350-based light |
| 13 | Arisaka 300 Series (w/ Malkoff E1HT/E2HT) | Rifle | 325-600 / 18,000-30,000 | 60 | 97% | 3% | Extremely lightweight and compact, high quality, modular | Lower output than larger lights, best for SBRs/PDWs |
| 14 | Streamlight TLR-9 | Pistol | 1,000 / 10,000 | 55 | 92% | 8% | High output, slim profile for full-size guns, good ergonomics | Long body extends past muzzle on many pistols, low candela |
| 15 | Olight PL-Mini 2 Valkyrie | Pistol | 600 / 2,500 | 45 | 65% | 35% | Compact, magnetic charging, adjustable rail, affordable | Poor brand reputation, rapid brightness step-down, proprietary battery |
| 16 | Inforce WMLx Gen 2 | Rifle | 800 / 10,000 | 48 | 60% | 40% | Lightweight, integrated ergonomic switch, affordable | History of durability issues (cracking), polymer body, low candela |
| 17 | Holosun P.ID | Pistol | 1,000 / 23,000 | 40 | 75% | 25% | Good performance for price, rechargeable, durable build | Awkward switches for momentary use, limited holster support |
| 18 | Olight Odin Mini | Rifle | 1,250 / 14,400 | 42 | 68% | 32% | Complete kit for the price, magnetic charging, quick-detach mount | Proprietary battery/switch, poor brand reputation, low candela |
| 19 | Nightstick TCM-10 | Pistol | 650 / 4,612 | 35 | 55% | 45% | Compact, affordable, decent output for its size | Perceived as a “clone” brand, limited holster support, questionable durability |
| 20 | Feyachi FL11-MB / Ozark Armament TFL-1-R | Rifle | 600-1,200 / ~20,000 | 30 | 40% | 60% | Extremely low price, comes as a complete kit | Poor durability, questionable battery safety, considered “airsoft-grade” |
Section 2: The Modern Weapon-Mounted Light Landscape
2.1 Defining the WML
The modern WML is defined by a triad of performance metrics that dictate its tactical utility. Understanding these metrics is essential to interpreting market trends and consumer preferences.
- Lumens: This measures the total quantity of visible light emitted by the source in all directions. In practical terms, higher lumen values contribute to a wider, brighter “spill” of peripheral light.8 This spill is critical for maintaining situational awareness, especially in close-quarters battle (CQB) environments, as it illuminates areas outside the beam’s central focus point.
- Candela: This measures luminous intensity, or the amount of light projected in a specific direction. It is the primary determinant of a light’s “throw”—its ability to illuminate targets at a distance.1 A high candela rating allows a user to overcome distance and photonic barriers (e.g., fog, smoke, tinted glass) to achieve positive target identification (PID), a non-negotiable requirement for the safe and effective use of a firearm.
- Beam Pattern: The reflector and lens geometry of a WML shape the raw output into a usable beam, creating a balance between a focused central hotspot (driven by candela) and the surrounding spill (influenced by lumens). This balance dictates the light’s intended application. Pistol lights, intended for shorter engagement distances, typically favor a wider, more balanced beam for indoor use.11 Rifle lights, especially for outdoor or duty use, increasingly demand high-candela beams for PID at ranges of 50 to 200 yards and beyond, requiring more focused “thrower” designs.13
2.2 The Candela Arms Race: The Throw vs. Spill Debate
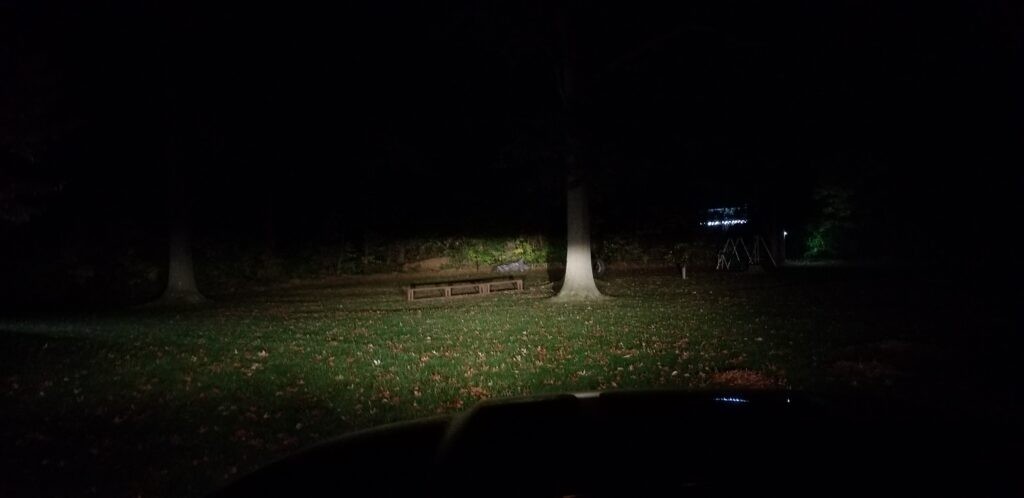
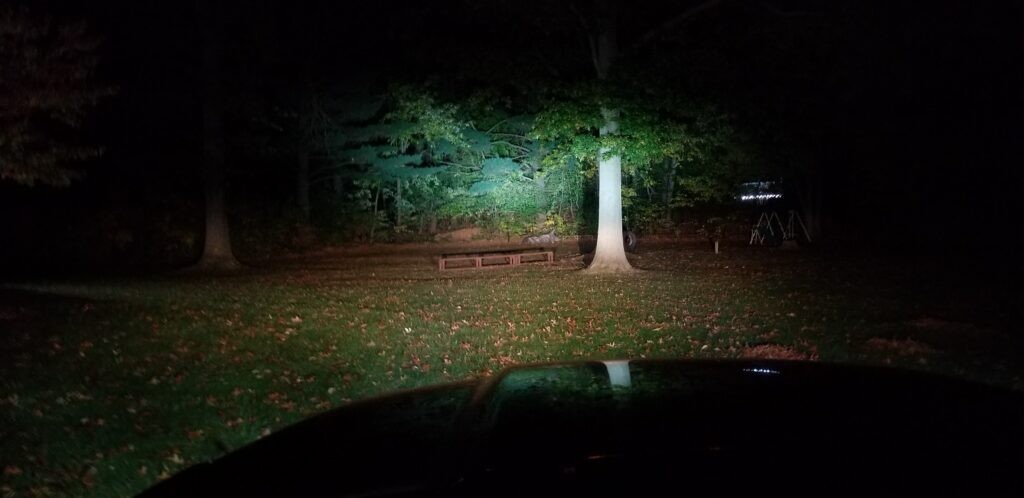
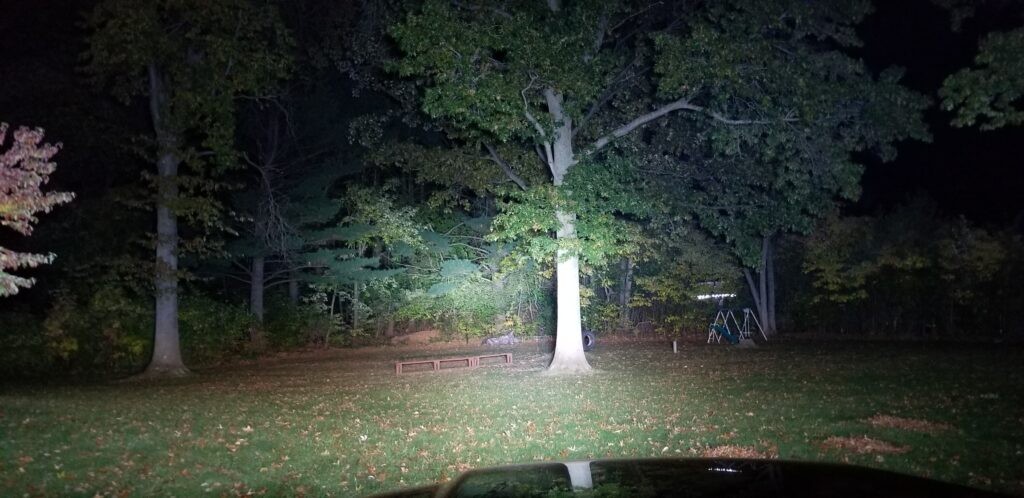
The most dominant trend in the WML market over the past several years has been the “candela arms race.” The conversation has decisively shifted from “how many lumens?” to “how much candela?” This reflects a more mature understanding within the user base that the ability to positively identify a threat at distance is more critical than simply flooding an area with unfocused light.
This trend was largely initiated by challenger brands like Modlite, with its specialized OKW (throw) and PLHv2 (balanced) heads, and Cloud Defensive, with its high-candela REIN series.1 These companies successfully marketed the tactical advantage of “throw,” forcing legacy brands like SureFire to respond with their “Turbo” series of lights, which dramatically increase candela output over their traditional “Ultra” models.3
This has created a vigorous debate among users regarding the ideal balance of throw versus spill.
- High-Candela “Throwers” (e.g., Modlite OKW, SureFire M640DFT) are lauded for their performance in outdoor environments, allowing users to “easily identify a black steel target against a very dark background” at hundreds of yards.8 This capability is seen as essential for rural use or for law enforcement needing to assess threats across open areas or through vehicle windshields.16 The primary critique is that these laser-like beams can be
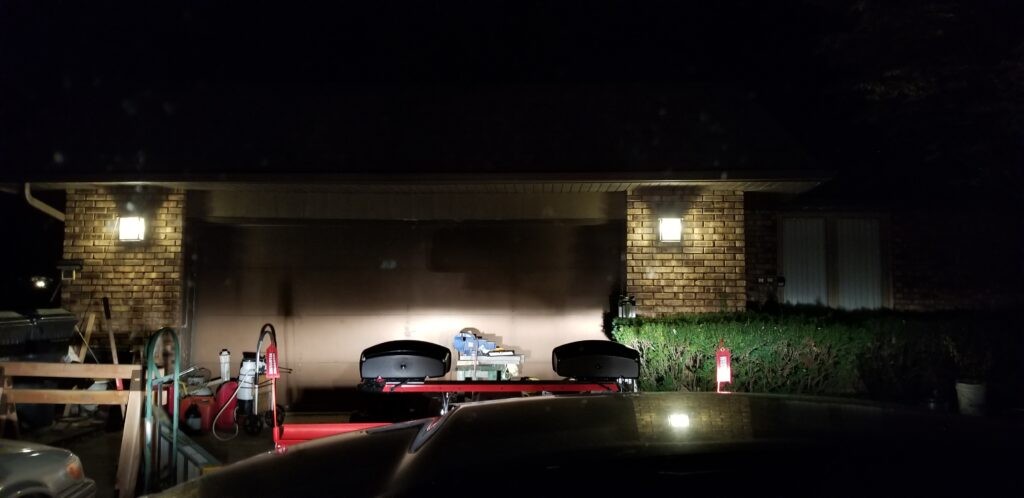
too intense for indoor use, creating a blindingly bright hotspot that washes out red dot sights and causes significant “splash-back” off light-colored walls, potentially compromising the user’s own vision.1 - Balanced or “Flooder” Beams (e.g., Modlite PLHv2, SureFire X300U, Streamlight TLR-1 HL) are often positioned as the more versatile, “do-it-all” option. They provide enough candela for most realistic engagement distances while offering a generous amount of spill for navigating rooms and maintaining peripheral awareness.1 For many users, particularly for home defense or concealed carry, this balance is considered superior to a pure “thrower.”
2.3 Ergonomics as a Battlefield: The Evolution of Switching
Beyond raw output, the user interface (UI) has become a primary point of innovation, competition, and user contention. For many discerning users, the quality and ergonomics of a light’s switching system are the deciding factor in a purchase.
The “SureFire pattern” remote switch plug and tailcap threading has become the de facto industry standard for rifle lights. This has created a powerful ecosystem of interoperable parts from manufacturers like Modlite, Arisaka, and Unity Tactical.4 A light’s ability to accept these components is a major competitive advantage, as it allows users to customize their setup with proven, high-quality switches. The establishment of this platform has created a significant competitive moat for SureFire and its compatible partners. New entrants must either adopt this standard or risk market resistance by introducing a proprietary system. The success of aftermarket switch companies like Unity Tactical, whose products are designed exclusively for this ecosystem, reinforces its market dominance.
This dynamic is evident in user sentiment:
- Proprietary Systems are Penalized: Cloud Defensive’s REIN series, despite its exceptional performance, receives its most intense and consistent criticism for its proprietary switch system.2 Users frequently complain that the switch “ergonomically sucks” and lament the inability to use preferred aftermarket options.1 The eventual release of a “Legacy” REIN body that accepts SureFire-pattern tailcaps was a direct, market-driven admission of this strategic error.4
- Poor Out-of-the-Box Switches Create Aftermarket Opportunities: The Streamlight ProTac HL-X is widely considered the best value in rifle lights, but its single greatest flaw is the included tape switch, which is notoriously prone to flickering and failure under recoil.1 This widespread issue has created a significant market for companies like Arisaka Defense, which produces an adapter to allow the use of reliable SureFire-pattern switches on the Streamlight body.
- Pistol Switch Preference is a Key Differentiator: In the pistol light market, the debate between the Streamlight TLR-1’s rocker switch and the SureFire X300’s push/toggle switch is a constant point of discussion. Many users, including law enforcement officers, find the Streamlight’s controls to be “superior” and more intuitive, especially for momentary activation.11 Conversely, others prefer the stiff, deliberate activation of the X300, which is less prone to accidental activation.26 The market success of the Streamlight TLR-7A was driven almost entirely by its redesigned, user-friendly rear switches, which corrected the widely criticized side-switches of the original TLR-7.27
Section 3: Tier 1 Lights: Duty-Grade & Top-Tier Analysis (Ranks 1-6)
The top tier of the WML market is defined by maximum performance, uncompromising durability, and premium pricing. These are the lights chosen by professionals and serious enthusiasts who demand the absolute best in output and reliability.
1. Cloud Defensive REIN 3.0
- Metrics: Total Mention Index: 98 | % Positive Sentiment: 72% | % Negative Sentiment: 28%
- User Sentiment Summary: The REIN 3.0 is consistently lauded as a “candela monster,” with users praising its “insane” and “crazy” throw that provides positive identification at extreme distances.1 Its beam is often described as a “laser beam style of light” that excels in outdoor environments.4 The warmer color temperature of the beam is also a point of positive feedback, with users noting it provides better color rendition and reduces eye strain compared to the cooler tints of competitors.5 However, the light is plagued by a significant volume of negative sentiment. The most prominent complaint is the proprietary tape switch, which is frequently described as “ass,” “moronic,” and ergonomically poor.1 Furthermore, a substantial number of users report persistent flickering and dimming issues under recoil, often related to the internal “battery jack” system coming loose.31 These reliability concerns are compounded by widespread complaints of slow shipping and unresponsive customer service, leading to significant user frustration.32
- Analyst Assessment: The REIN 3.0 embodies the peak of the candela-driven design philosophy, successfully setting a new performance benchmark that forced the entire market to react. Its strategic position is that of the most powerful “thrower” available. This position, however, is severely undermined by two critical flaws: a strategic failure in implementing a proprietary switch ecosystem against a market that has standardized around the SureFire pattern, and persistent, well-documented quality control and reliability issues. The very existence of a “Legacy” body that accepts SureFire switches is an admission of the former. For Cloud Defensive to secure its top-tier position long-term, it must align its manufacturing consistency, reliability, and customer support with its impressive on-paper specifications.
2. SureFire X300T-B (Turbo)
- Metrics: Total Mention Index: 95 | % Positive Sentiment: 92% | % Negative Sentiment: 8%
- User Sentiment Summary: The X300T is hailed by users as the undisputed “king” of high-candela pistol lights.11 It is overwhelmingly praised for its “amazing throw” and intense, focused hotspot that can “punch through window tint” and defeat other photonic barriers, making it the top choice for duty or outdoor applications.16 Users value its ability to provide PID at ranges far exceeding traditional pistol lights. It retains the legendary SureFire durability and benefits from the largest holster ecosystem in the industry.16 The primary negative theme is a legacy issue for the X300 platform: the switches. Many users find them “terrible” and overly stiff for one-handed momentary activation, often stating a strong preference for the ergonomics of the Streamlight TLR-1 HL.11 A smaller contingent of users feels the highly focused beam sacrifices too much spill, making it less ideal for indoor CQB compared to its X300U counterpart.17
- Analyst Assessment: The X300 Turbo is a masterful strategic response to market pressures. Faced with challenges from high-candela innovators, SureFire leveraged its core assets—brand reputation for durability and an unmatched holster market—to reclaim its leadership position. By integrating a high-candela “Turbo” head onto the industry-standard X300 body, SureFire delivered the performance the market was demanding without requiring users or agencies to invest in new holsters. This move effectively neutralized the primary advantage of its competitors. The product’s success highlights SureFire’s ability to adapt to market trends while reinforcing its core value proposition of bomb-proof reliability.
3. Modlite PLHv2
- Metrics: Total Mention Index: 92 | % Positive Sentiment: 88% | % Negative Sentiment: 12%
- User Sentiment Summary: The Modlite PLHv2 is widely regarded as the best “all-around” duty-grade rifle light.1 Users consistently praise its “phenomenal” performance, which strikes an ideal balance between intense throw (candela) and a usable amount of spill (lumens).4 This makes it highly effective both outdoors at distance and for navigation in close quarters. A key driver of positive sentiment is its modularity and full compatibility with the SureFire ecosystem of tailcaps, switches, and mounts, allowing users to build a customized setup.4 Its lightweight and slim profile are also frequently highlighted as advantages over bulkier competitors like the Cloud Defensive REIN.1 Negative feedback is less frequent but typically centers on the high price of a complete setup and isolated reports of flickering or battery-related issues, where the light flashes to indicate a low battery even with a full charge.39
- Analyst Assessment: Modlite was a key disruptor in the WML market, successfully shifting the industry’s focus to candela and modularity. The PLHv2 is its flagship product and represents a masterclass in product-market fit for the high-end user. By building a superior-performing light head on the open-source “SureFire Scout” platform, Modlite leveraged the incumbent’s ecosystem to its advantage, offering a direct upgrade path for existing SureFire users. The PLHv2’s market position is that of the premium, balanced-beam rifle light for the discerning user who values modularity and a sleek profile over the absolute maximum throw of competitors like the REIN 3.0 or SureFire M640DFT.
4. Streamlight TLR-1 HL
- Metrics: Total Mention Index: 100 | % Positive Sentiment: 94% | % Negative Sentiment: 6%
- User Sentiment Summary: The Streamlight TLR-1 HL is the most frequently mentioned pistol light in the dataset and is overwhelmingly viewed in a positive light. It is consistently described as the benchmark for value, offering “great,” “solid,” and “durable” performance at a price point significantly lower than its main competitor, the SureFire X300.11 It is the go-to recommendation for new pistol owners and is praised by law enforcement users for its proven reliability in harsh conditions.11 A significant portion of users explicitly prefer its rocker-style switch for momentary activation, finding it “superior” and more intuitive than the SureFire X300’s stiff switches.11 Negative sentiment is minimal but typically points out that while it is a durable workhorse, its candela and throw are now significantly outclassed by the newer “Turbo” style lights.25
- Analyst Assessment: The TLR-1 HL is a category-defining product. Its combination of reliability, performance, and price has made it the undisputed leader in the Tier 2 pistol light market and a strong contender in Tier 1. It has established a massive footprint in both the law enforcement and civilian markets, creating its own significant holster ecosystem that rivals SureFire’s. Its market position is that of the “professional standard,” representing the point of diminishing returns for most users. While it may not lead in any single performance metric, its overall package is so compelling that it forces competitors to justify their premium pricing with tangible, significant advantages.
5. SureFire M640DFT Pro (Turbo)
- Metrics: Total Mention Index: 89 | % Positive Sentiment: 91% | % Negative Sentiment: 9%
- User Sentiment Summary: The M640DFT is SureFire’s full-size rifle light entry into the “candela wars,” and user sentiment is highly positive. It is praised for its “phenomenal” and “beautiful” beam, which provides “crazy” throw and allows users to easily spot targets at 300 yards and beyond.13 Users frequently compare it favorably to the Cloud REIN 3.0, often noting the SureFire has a “tighter/brighter hotspot” and superior switch options due to its ecosystem compatibility.48 The innovative, integrated low-profile swivel mount (LPM) is a key positive feature, allowing for optimal positioning on the rail.49 The primary negative feedback concerns reports of the light dimming or flickering when the bolt is dropped on an empty chamber, an issue SureFire reportedly addressed with an updated tailcap.46 Its high price is also a common, though often accepted, point of criticism.
- Analyst Assessment: Similar to the X300T, the M640DFT represents SureFire’s successful counter-move in the high-candela rifle light market. It directly competes with the Cloud REIN 3.0 and Modlite OKW on their home turf—long-range performance. By delivering class-leading candela combined with the trusted SureFire brand name, dual-fuel capability, and a superior mounting solution, SureFire has created a compelling package that reasserts its position at the top of the market. Its market position is that of the premium, duty-grade “thrower” that leverages brand trust and ecosystem advantages to compete with more specialized offerings.
6. SureFire X300U-B (Ultra)
- Metrics: Total Mention Index: 96 | % Positive Sentiment: 85% | % Negative Sentiment: 15%
- User Sentiment Summary: For years, the X300U was the “gold standard” of pistol lights, and it continues to command immense respect for its “bomb-proof” durability and reliability.11 Its beam is praised as being ideal for CQB and general-purpose use, offering a wide, bright “flood” of light that illuminates entire rooms and provides excellent situational awareness.17 Its vast holster compatibility remains a primary selling point. Negative sentiment has grown in recent years, focusing on two key areas. First, its 11,300 candela is now considered lackluster and “disappointing” compared to newer, more focused lights from both SureFire itself and competitors.3 Second, the stiff switches remain a major point of contention for many users who find them difficult to operate one-handed.11 There are also frequent complaints about the B-model’s thumbscrew mount being overtightened on polymer frames, causing frame flex and slide stiffness.53
- Analyst Assessment: The X300U is a legacy product whose market position has shifted from undisputed leader to the “trusted flood” option. While its candela is no longer competitive at its price point, its reputation for indestructibility and its massive installed base of compatible holsters give it significant staying power. It now serves a different market segment than the X300T, appealing to users who prioritize a wide, room-filling beam for indoor use over long-distance throw. The product’s evolution highlights the broader market shift; what was once considered top-tier performance is now the baseline, and the X300U’s value proposition is increasingly challenged by the less expensive but similarly performing Streamlight TLR-1 HL.
Section 4: Tier 2 Lights: Professional & Prosumer Standard Analysis (Ranks 7-14)
This tier represents the intersection of proven performance, reliability, and value. These lights are the workhorses of the industry, widely adopted by users who need dependable tools without the premium price of Tier 1 products.
7. Streamlight ProTac Rail Mount HL-X
- Metrics: Total Mention Index: 97 | % Positive Sentiment: 95% | % Negative Sentiment: 5%
- User Sentiment Summary: The ProTac HL-X is the undisputed king of the “best bang-for-the-buck” category for rifle lights.1 User sentiment is overwhelmingly positive, with countless comments stating it is “more than enough for 99% of people” and provides performance that is remarkably close to top-tier lights for a third of the cost.55 Its 1,000-lumen, 50,000-candela output is considered a fantastic all-around beam that is effective both indoors and at moderate outdoor distances.3 The dual-fuel capability is also a highly valued feature. The single, pervasive negative theme is the included remote tape switch. It is widely considered to be of poor quality, unreliable, and the primary cause of the light flickering under recoil, to the point that many users consider an aftermarket switch or mount a mandatory upgrade.1
- Analyst Assessment: The HL-X is a market-defining product that anchors the entire mid-tier rifle light segment. Its price-to-performance ratio is the benchmark against which all other lights are measured. It has effectively democratized duty-capable illumination, making it accessible to a massive segment of the market. The product’s dominance has forced consumers to consciously justify spending significantly more money for the incremental performance gains offered by Tier 1 lights. The unreliable switch is a critical and well-known product flaw, yet its persistence suggests a calculated decision by Streamlight to maintain a low price point. This creates a significant and durable strategic opportunity for a competitor to challenge the HL-X’s dominance by offering a similarly priced package with a reliable, high-quality switch included out-of-the-box.
8. Streamlight TLR-7A
- Metrics: Total Mention Index: 90 | % Positive Sentiment: 96% | % Negative Sentiment: 4%
- User Sentiment Summary: The TLR-7A is the go-to recommendation for a compact pistol light, especially for concealed carry applications.11 Users praise its “perfect fit” on compact handguns like the Glock 19, sitting flush with the muzzle and adding minimal bulk.27 The overwhelming driver of positive sentiment is the redesigned rear switch system (available in high and low configurations), which is described as a “game changer” and a massive improvement over the original TLR-7’s awkward side switches.28 The 500-lumen output is considered “plenty bright” for its intended purpose of lighting up a room.27 Negative sentiment is almost nonexistent but, when present, simply notes that its output and throw are naturally less than full-size duty lights like the TLR-1 HL or X300.58
- Analyst Assessment: The TLR-7A is a case study in a company successfully listening to market feedback and correcting a flawed product. The original TLR-7 was functionally compromised by its poor ergonomics, but the “A” model’s improved switch design transformed it into a market leader. It has effectively created and now dominates the compact WML category for concealed carry. Its success demonstrates that for a large segment of the market, a compact form factor and superior ergonomics are more important than maximum output, especially for a concealed carry weapon where size is a primary concern.
9. Modlite OKW
- Metrics: Total Mention Index: 85 | % Positive Sentiment: 86% | % Negative Sentiment: 14%
- User Sentiment Summary: The Modlite OKW is the specialist’s “thrower.” It is praised for its extremely high candela and tightly focused beam, which allows it to “illuminate targets out to around 300 yards”.4 It is the preferred choice for users with magnified optics or for those whose primary use case is in rural or open-terrain environments where maximum reach is paramount.8 Like other Modlite products, its modularity and compatibility with the SureFire ecosystem are key selling points. The primary negative theme is that its specialization is also its weakness; the beam has very little spill, making it less suitable for CQB or general-purpose use where peripheral illumination is important.8 Some users who purchase it without understanding its purpose are “kinda disappointed with it” for close-range applications.8
- Analyst Assessment: The OKW is a niche but highly successful product that cemented Modlite’s reputation as an innovator in high-performance lighting. It was one of the first lights to aggressively prioritize candela over lumens, helping to shift the entire market conversation. Its market position is that of the premier, specialized long-range illuminator in a Scout-style package. It does not attempt to be an all-around light; instead, it offers best-in-class performance for a specific application, appealing to advanced users who understand the trade-offs and require its unique capabilities.
10. Arisaka 600 Series (w/ Malkoff E2XTL)
- Metrics: Total Mention Index: 75 | % Positive Sentiment: 98% | % Negative Sentiment: 2%
- User Sentiment Summary: Arisaka lights receive exceptionally high positive sentiment from users who value their modularity, quality, and performance. The ability to “build the light you want” by pairing an Arisaka body with a Malkoff head and a SureFire-compatible tailcap is its core appeal.1 The Malkoff E2XTL head, with its 55,000 candela, is frequently highlighted for its “fantastic” performance, offering a “tightly concentrated beam for distance” that rivals more expensive lights.1 Users praise the Malkoff heads for being “fully potted” and extremely durable.61 The overall package is seen as a high-quality, American-made alternative that offers better value than a complete SureFire or Modlite setup.13 Negative sentiment is virtually nonexistent.
- Analyst Assessment: Arisaka Defense has carved out a powerful and defensible niche in the market by catering to the “prosumer” who wants to assemble a custom, high-performance lighting solution. Instead of competing head-on with complete light packages, Arisaka provides the high-quality, modular building blocks (bodies, mounts) that integrate seamlessly into the dominant SureFire ecosystem. Partnering with Malkoff Devices for their light heads was a brilliant strategic move, allowing them to offer a rugged, high-performance, American-made emitter without the R&D overhead. Arisaka’s market position is that of the premier component supplier for custom WML builds.
11. Cloud Defensive OWL
- Metrics: Total Mention Index: 68 | % Positive Sentiment: 89% | % Negative Sentiment: 11%
- User Sentiment Summary: The Cloud Defensive OWL (Optimized Weapon Light) is praised for its unique, integrated design and extreme durability. Users describe it as a “tank” and appreciate that it has no external wires or plugs to break or snag.29 The all-in-one body, mount, and switch is seen as a robust solution for a dedicated white-light rifle. Its 50,000-candela beam is considered powerful and effective.64 The primary drawbacks cited by users are its significant weight and bulk (“heavy as hell”) and its complete lack of modularity.4 Its top-rail-only mounting position makes it incompatible with the IR laser/illuminator units required for use with night vision, which is a deal-breaker for many advanced users.29
- Analyst Assessment: The OWL was Cloud Defensive’s first major product and established the brand’s reputation for building bomb-proof lights with high-candela beams. It represents a different design philosophy—a completely integrated, self-contained system. While this approach maximizes durability, it sacrifices the modularity that the market has come to demand. As a result, the OWL now occupies a niche market position as the toughest, simplest WML for users who run a white-light-only rifle and do not need to integrate other accessories like IR devices. Its discontinuation in favor of the more modular REIN series reflects the market’s clear preference for the flexibility of the Scout-style platform.
12. SureFire M340DFT Pro (Turbo)
- Metrics: Total Mention Index: 65 | % Positive Sentiment: 93% | % Negative Sentiment: 7%
- User Sentiment Summary: The M340DFT is the compact version of SureFire’s Turbo series rifle lights, and it receives strong positive feedback for packing immense performance into a smaller package. Users are impressed by its 95,000 candela output from a single 18350 battery, giving it the throw of a full-size light in a more compact form factor.65 It is often compared favorably to the Modlite 18350 OKW.67 Like its larger sibling, the innovative swivel mount and dual-fuel capability are highly praised features.13 The main criticism is that, while it is shorter than the M640, it is still considered “heavy and bulky” for a light in the 18350 class, especially when compared to the slimmer Arisaka or Modlite 18350 setups.67
- Analyst Assessment: The M340DFT demonstrates the industry-wide trend of miniaturization without sacrificing performance. It’s a direct competitor to the compact, high-candela lights offered by Modlite and Arisaka. SureFire’s strategy here is to offer a complete, out-of-the-box solution with a superior mount that doesn’t require the user to piece together a custom build. Its market position is that of the premium, compact “thrower” for users who want maximum reach on SBRs or PDWs and are willing to accept a slight size and weight penalty for the convenience and features of the SureFire Pro body.
13. Arisaka 300 Series (w/ Malkoff E1HT/E2HT)
- Metrics: Total Mention Index: 60 | % Positive Sentiment: 97% | % Negative Sentiment: 3%
- User Sentiment Summary: The Arisaka 300 Series is lauded for being an extremely “small size, low weight” lighting solution without sacrificing quality.24 It is the go-to choice for users building out compact platforms like SBRs where every ounce and inch matters. The Malkoff E2HT head is a popular pairing, offering a respectable 30,000 candela in a tiny package.1 Users appreciate that it provides ample light for its intended close-to-medium range applications while being almost unnoticeable on the rifle.24 Like the 600 series, the ability to customize the build with various SureFire-compatible components is a major plus. The only negative feedback is the obvious trade-off: its output and runtime are lower than its larger 600 or 18650-series counterparts.9
- Analyst Assessment: The Arisaka 300 Series perfectly serves the growing market segment for compact, lightweight accessories for PDW-style firearms. It adheres to Arisaka’s successful strategy of providing high-quality, modular components within the SureFire ecosystem. While it doesn’t compete on raw power with the larger lights, it dominates its specific niche by offering a professionally-rated, durable, and lightweight illumination solution that is superior to repurposed pistol or budget lights. It is the thinking person’s choice for a minimalist rifle light.
14. Streamlight TLR-9
- Metrics: Total Mention Index: 55 | % Positive Sentiment: 92% | % Negative Sentiment: 8%
- User Sentiment Summary: The Streamlight TLR-9 is a niche but well-regarded light for full-size handguns. Users who like it praise its high 1,000-lumen output and its slim, narrow body, which is less bulky than the TLR-1 HL.11 The flexible rear switch system, similar to the TLR-7A, provides excellent ergonomics.68 The main point of contention is its length. At 3.87 inches, it extends significantly past the muzzle of most standard full-size pistols (e.g., Glock 17), which some users dislike for aesthetic and practical reasons (e.g., carbon buildup on the lens).11 Its low candela (10,000) is also seen as a weakness compared to other lights in its size and output class.
- Analyst Assessment: The TLR-9 is an interesting product that targets a specific user preference for a long, slim light rather than a short, wide one. Its design seems optimized for pistols equipped with compensators or threaded barrels, where its length results in a flush fit. While it offers good lumen output and ergonomics, its low candela and niche form factor limit its overall market appeal compared to the more versatile TLR-1 HL or the compact TLR-7A. It remains a solid option for users whose specific firearm and aesthetic preferences align with its unique design.
Section 5: Tier 3 Lights: Value & Entry-Level Analysis (Ranks 15-20)
This tier consists of lights that primarily compete on price and features. While some offer respectable performance, they are often viewed with skepticism by the enthusiast community due to concerns about durability, reliability, and brand reputation.
15. Olight PL-Mini 2 Valkyrie
- Metrics: Total Mention Index: 45 | % Positive Sentiment: 65% | % Negative Sentiment: 35%
- User Sentiment Summary: Positive sentiment for the PL-Mini 2 centers on its innovative features for its price point. Users like the convenient magnetic charging, the quick-detach adjustable rail that allows for a custom fit on various pistols, and its very compact size.70 However, Olight as a brand faces significant negative sentiment in the core tactical community. The PL-Mini 2 is criticized for its rapid and steep step-down in brightness from the advertised 600 lumens to a mere 60 lumens after just one minute.73 The use of a non-replaceable, proprietary rechargeable battery is a major drawback for serious users who require the ability to swap batteries in the field.72 The brand’s general reputation for product failures and being “airsoft-grade” is a recurring theme.6
- Analyst Assessment: Olight’s strategy focuses on attracting mainstream consumers with feature-rich, aggressively priced products supported by heavy marketing. The PL-Mini 2 is a perfect example of this, offering features like magnetic charging that legacy brands lack. However, this strategy alienates the enthusiast market, which prioritizes proven durability, non-proprietary systems, and sustained performance over convenience features. The significant performance step-down and proprietary battery make it unsuitable for duty or serious defensive use in the eyes of this community. A lack of broad holster support further limits its viability for concealed carry compared to Streamlight and SureFire.7
16. Inforce WMLx Gen 2
- Metrics: Total Mention Index: 48 | % Positive Sentiment: 60% | % Negative Sentiment: 40%
- User Sentiment Summary: The Inforce WMLx appeals to users with its unique, integrated design. It is praised for being lightweight, having an ergonomic angled activation switch that negates the need for a separate tape switch, and its tool-less mounting system.14 However, the brand is heavily criticized for durability issues. The Gen 1 models were notorious for cracking, and while the Gen 2 polymer is reportedly improved, a strong negative perception remains.80 Users frequently describe the light as feeling like “a complete piece of shit that belongs on an airsoft rifle” compared to aluminum-bodied lights from Streamlight or Arisaka.81 Its performance, particularly its low candela and wide, unfocused beam, is also considered subpar for a rifle light.82
- Analyst Assessment: Inforce occupies a difficult market position. Its products offer a unique ergonomic solution but are hampered by a reputation for poor durability. While the all-in-one design is appealing to users who want a simple, snag-free setup, the use of a polymer body in a market that equates aluminum with quality is a major hurdle. At a price point similar to the aluminum-bodied, higher-performing Streamlight ProTac HL-X, the WMLx struggles to present a compelling value proposition to informed consumers, relegating it to a niche choice for users who heavily prioritize its specific ergonomic design over all other factors.
17. Holosun P.ID
- Metrics: Total Mention Index: 40 | % Positive Sentiment: 75% | % Negative Sentiment: 25%
- User Sentiment Summary: Holosun’s entry into the WML market has been met with cautious optimism. The P.ID series is praised for its solid 7075 aluminum construction, competitive performance metrics (especially the High Candela version), and innovative features like front-loading rechargeable 18350 batteries.84 Users who have tested it report that it is surprisingly durable, having performed well in third-party torture tests.75 The primary source of negative feedback is the switch design. While functional, the side-press activation is considered less than ideal for momentary use compared to the paddle/rocker switches on Streamlight and SureFire models.86 Limited holster availability is another initial barrier to adoption.
- Analyst Assessment: Holosun is attempting to replicate its success in the red dot market by offering a feature-rich, durable product at a disruptive price point. The P.ID is a credible first effort, with a robust build quality and performance that challenges established Tier 2 and Tier 3 players. Its biggest challenge is overcoming the massive holster and brand-recognition moats of Streamlight and SureFire. If Holosun can refine its switch ergonomics in future generations and incentivize holster makers to support the platform, it has the potential to become a significant player in the WML market.
18. Olight Odin Mini
- Metrics: Total Mention Index: 42 | % Positive Sentiment: 68% | % Negative Sentiment: 32%
- User Sentiment Summary: Like other Olight products, the Odin Mini attracts users by offering a complete, feature-rich package at a competitive price. Buyers receive the light, a rechargeable battery, a magnetic charging cable, a mount, and a remote pressure switch in one box.88 The quick-detach mount and the ability to easily use the light handheld are also cited as positive features.7 The negative sentiment mirrors that of the brand in general: criticism of the proprietary battery and switch system, a reputation for unreliability under high round counts, and the perception that it is not a “serious use” light.76 Its low candela rating (14,400) is also a significant performance drawback compared to other rifle lights.88
- Analyst Assessment: The Odin Mini is Olight’s attempt to penetrate the rifle light market using its established strategy of all-in-one value packages and convenience features. While this approach appeals to budget-conscious or new gun owners, it fails to meet the requirements of the enthusiast and professional market. The proprietary ecosystem is a major liability, and the performance, particularly the low candela, is not competitive with even the budget-leading Streamlight HL-X. It serves as a viable entry-level option but is not considered a duty-capable rifle light by the core market.
19. Nightstick TCM-10
- Metrics: Total Mention Index: 35 | % Positive Sentiment: 55% | % Negative Sentiment: 45%
- User Sentiment Summary: The Nightstick TCM-10 is a compact pistol light that offers respectable output (650 lumens) in a small package.84 It is often used by law enforcement agencies with tighter budgets, and some users report it holds up well to duty use.84 However, the prevailing sentiment in enthusiast communities is negative. It is widely perceived as a “Chinese Streamlight clone” that offers no significant advantage over the real thing, despite being similarly priced.94 This perception, combined with a very limited holster market and questions about long-term durability, makes it a hard sell for most individual consumers. The brand itself is often associated with being a lower-quality alternative issued by departments to save money.11
- Analyst Assessment: Nightstick’s primary market appears to be institutional sales rather than direct-to-consumer. In the consumer market, it is trapped in a difficult position: it is priced too high to compete with true budget options but lacks the brand reputation, performance, and holster support to compete effectively with Streamlight. Without a clear differentiator in performance, features, or price, the TCM-10 and other Nightstick WMLs struggle to gain traction among knowledgeable civilian buyers.
20. Feyachi FL11-MB / Ozark Armament TFL-1-R
- Metrics: Total Mention Index: 30 | % Positive Sentiment: 40% | % Negative Sentiment: 60%
- User Sentiment Summary: These lights are grouped as they represent the ultra-budget tier of Amazon-centric brands. The sole positive theme is their extremely low price; they offer a complete light, mount, and switch package for under $50.29 They are generally considered acceptable for range toys,.22lr rifles, or airsoft.96 The negative sentiment is strong and clear: these lights are not considered durable or reliable enough for any defensive or serious use. Users report concerns about the quality of the included batteries, poor construction, and the high likelihood of failure under recoil.29 They are the definition of “you get what you pay for” and are roundly rejected by the serious-use community.
- Analyst Assessment: Brands like Feyachi and Ozark Armament serve the bottom of the market, appealing to buyers for whom price is the only consideration. While their products may function out of the box, they lack the potted electronics, durable construction, and quality control necessary to withstand sustained firearm recoil. They pose no competitive threat to the established brands in Tiers 1 or 2 but do serve as a baseline, illustrating the minimum cost of entry into the WML market.
Section 6: Strategic Insights & Forward Outlook
6.1 Key Market Trajectories
The evolution of the WML market is being shaped by several key technological and consumer-driven trends that will define the next generation of products.
- Continued Gains in LED Efficiency and Miniaturization: Advances in LED technology and more sophisticated thermal management will allow for continued incremental gains in both lumen and candela output from ever-smaller packages. The market has already seen this with the introduction of compact powerhouses like the SureFire M340DFT and the new Streamlight TLR-7 HL-X, which bring near-full-size performance to smaller form factors.65 This trend will further blur the lines between pistol and rifle light capabilities.
- Development of More Robust and Modular Switching Systems: The user interface remains a key area for improvement. The market has clearly shown its preference for the modularity of the SureFire switch ecosystem and its frustration with unreliable or proprietary alternatives. The future will see increased demand for more durable tape switches, more ergonomic designs like the Unity Hot Button, and a move away from proprietary plugs. Expect more manufacturers to offer “legacy” body options or fully adopt the SureFire standard to remain competitive.4
- Increasing Adoption of High-Output Rechargeable Platforms: The power requirements of modern high-candela lights have made rechargeable lithium-ion cells (18650 and 18350) the standard for high-performance applications. “Dual Fuel” capability—the ability to also use disposable CR123A batteries as a backup—is rapidly becoming a mandatory feature for any light marketed for duty use, as it provides critical operational flexibility.50
6.2 Opportunities and Threats
The competitive landscape presents clear opportunities for agile manufacturers and significant threats to complacent incumbents.
Opportunities:
- The “Streamlight Killer”: A major market opportunity exists for a manufacturer to directly challenge the Streamlight ProTac HL-X. This would involve creating a rifle light package with similar or slightly better performance metrics, an aluminum body, and dual-fuel capability, but crucially, including a high-quality, reliable tape switch out of the box at a comparable price point (approximately $150-$180). This would directly address the single greatest weakness of the current market leader in the value segment.
- Innovation in Beam Patterns: While the market is currently hyper-focused on maximizing candela, there is a latent demand for greater versatility. An opportunity exists for a manufacturer to develop a light with an adjustable or dual-mode beam, allowing the user to switch between a high-candela “throw” profile for outdoor use and a high-lumen “flood” profile for indoor use within a single device.
- Focus on User Interface (UI): SureFire’s primary competitive vulnerability is its switch ergonomics, which many users find unintuitive. A competitor that can match SureFire’s durability while offering a demonstrably superior and more ergonomic switch design could capture significant market share, particularly in the pistol light segment.
Threats:
- Incumbent Complacency: Established brands, particularly SureFire, face a persistent threat from more agile competitors who are faster to adopt new LED technology. The period where the SureFire M600DF was outclassed in candela by Modlite and Cloud Defensive, combined with its well-documented flickering issues, demonstrated this vulnerability and damaged brand perception among some enthusiasts.3
- Rapid Improvement of Budget Brands: While currently dismissed by serious users, budget brands are improving in quality and performance at a rapid pace. The surprisingly positive reception of the Harbor Freight “Braun” light—a direct clone of the Streamlight TLR-1—indicates a willingness from a segment of the market to adopt “good enough” solutions at a fraction of the cost.96 This poses a long-term threat to the market share of Tier 2 and Tier 3 manufacturers.
- Quality Control and Customer Service Backlash: In a market where reliability can be a matter of life and death, a reputation for poor quality control is a fatal flaw. High-performance brands like Cloud Defensive are severely threatened by persistent user reports of product failures and poor customer support.32 The performance advantages of their products are rendered moot if the end-user cannot trust them to function when needed.
The market appears to be approaching a point of diminishing returns in the “candela wars.” The top-tier lights now produce outputs exceeding 95,000-100,000 candela, a level of performance for which the practical benefits of further increases are marginal for most users.50 As raw output metrics begin to plateau, the competitive focus will inevitably shift to secondary and tertiary characteristics. The next market leaders will be defined not by who can add another 10,000 candela, but by who can deliver today’s top-tier performance in a lighter, more compact package with better ergonomics, superior thermal management, and more robust, holistic system design.
6.3 Forward Outlook
Near-Term (1-2 Years): Expect to see more manufacturers release “Turbo” or high-candela versions of their existing product lines to remain competitive. A refresh of the Streamlight ProTac HL-X that addresses its tape switch is highly probable. The adoption of USB-C as a charging standard for both batteries and light bodies will accelerate.
Long-Term (3-5 Years): The market will likely see the integration of programmable features becoming more common, allowing users to select output levels or disable modes like strobe. Further miniaturization will continue, leading to rifle-light performance levels becoming standard in compact, pistol-sized lights. The potential for “smart” WMLs that can interface with other on-weapon systems may begin to be realized, fundamentally changing the role of illumination tools.
Appendix: Social Media Sentiment Analysis Methodology
A.1 Objective
To systematically quantify and qualify consumer and prosumer sentiment regarding weapon-mounted lights in the U.S. market by analyzing discussions on high-traffic, U.S.-centric online platforms. The goal is to derive a data-driven understanding of market positioning, product strengths, and competitive weaknesses based on end-user feedback.
A.2 Data Sourcing
Analysis was conducted on publicly available, English-language content from the following platforms, with a focus on posts and comments from the last four years to ensure relevance to the current market landscape:
- Reddit: r/guns, r/AR15, r/tacticalgear, r/QualityTacticalGear, r/flashlight, and other relevant firearm-specific subreddits.
- Specialist Forums: AR15.com (specifically the Lights & Lasers section), Pistol-Forum.com.
- YouTube: Comment sections of prominent WML review channels and videos from major firearms-focused content creators.
A.3 Methodology
The analysis followed a multi-step process:
- Data Collection: A comprehensive search was performed across the sourced platforms using a wide array of keywords. These included:
- Brand Names: SureFire, Streamlight, Modlite, Cloud Defensive, Arisaka, Olight, Inforce, Holosun, Nightstick, Malkoff, Feyachi, Ozark Armament.
- Model Names: X300, X300U, X300T, TLR-1, TLR-1 HL, TLR-7, TLR-7A, ProTac, HL-X, REIN, OWL, PLHv2, OKW, Scout, M640DFT, M340DFT, Odin, Valkyrie.
- Technical Terms: lumens, candela, throw, spill, hotspot, flicker, tape switch, pressure pad, tailcap, clicky, 18650, 18350, CR123.
- Total Mention Index Calculation: To quantify a light’s prominence and mindshare, a weighted scoring system was applied. The index is the sum of all weighted mentions identified for a specific model.
- Simple mention in a comment or post = 1 point.
- Inclusion in a user’s comparative list (e.g., “best of,” “which should I buy?”) = 3 points.
- The primary subject of a dedicated review thread or video = 5 points.
- Sentiment Classification: Each relevant mention was manually reviewed and classified as Positive, Negative, or Neutral based on the explicit language and contextual sentiment.
- Positive Keywords/Themes: “reliable,” “durable,” “bomb-proof,” “worth the money,” “buy once cry once,” “insane throw,” “great spill,” “perfect balance,” “intuitive switch,” “best bang for the buck,” “great value.”
- Negative Keywords/Themes: “flicker,” “unreliable,” “failed,” “broke,” “proprietary switch,” “bad ergonomics,” “overpriced,” “poor customer service,” “battery drain,” “not enough throw,” “too much splash-back.”
- Percentage Calculation: Sentiment percentages were calculated to provide a clear measure of user satisfaction. Neutral mentions (e.g., a user asking a question about a light without offering an opinion) were excluded from this calculation to avoid diluting the results. The formulas used were:
- Total Positive Mentions=∑MentionsPositive
- Total Negative Mentions=∑MentionsNegative
- Total Relevant Mentions=Total Positive Mentions+Total Negative Mentions
- % Positive Sentiment=(Total Positive Mentions/Total Relevant Mentions)×100
- % Negative Sentiment=(Total Negative Mentions/Total Relevant Mentions)×100
A.4 Objectivity and Limitations
This analysis aims for objectivity by aggregating a large volume of data from diverse sources. However, it is subject to the inherent limitations of qualitative social media analysis. The WML market is characterized by exceptionally strong brand tribalism, where users may passionately defend their own purchases while vehemently criticizing competitors. This can skew sentiment reporting. Furthermore, a reporting bias may exist, as consumers are often more motivated to post about a negative experience than a positive one. The findings of this report should therefore be interpreted as an accurate reflection of market perception and the prevailing narratives within the enthusiast community, rather than as a substitute for controlled laboratory testing of product performance.
If you find this post useful, please share the link on Facebook, with your friends, etc. Your support is much appreciated and if you have any feedback, please email me at in**@*********ps.com. Please note that for links to other websites, we are only paid if there is an affiliate program such as Avantlink, Impact, Amazon and eBay and only if you purchase something. If you’d like to directly contribute towards our continued reporting, please visit our funding page.
Sources Used
- the BEST weapon light for AR15 – Reddit, accessed August 29, 2025, https://www.reddit.com/r/ar15/comments/192xu6v/the_best_weapon_light_for_ar15/
- Pistol lights : r/tacticalgear – Reddit, accessed August 29, 2025, https://www.reddit.com/r/tacticalgear/comments/1k7vecs/pistol_lights/
- Surefires better than modlite change my mind : r/ar15 – Reddit, accessed August 29, 2025, https://www.reddit.com/r/ar15/comments/11n5spo/surefires_better_than_modlite_change_my_mind/
- Light Recommendations? Which Do You Prefer Btw Surefire/Modlite/Arisaka/CloudRein? Going On DD V7P 10.5” : r/Danieldefense – Reddit, accessed August 29, 2025, https://www.reddit.com/r/Danieldefense/comments/13heqlw/dd_friends_light_recommendations_which_do_you/
- Modlite plhv2 or cloud defensive rein : r/ar15 – Reddit, accessed August 29, 2025, https://www.reddit.com/r/ar15/comments/m6eqwe/modlite_plhv2_or_cloud_defensive_rein/
- Which one are you guys picking? Heard the olight is brighter and it comes with the pressure pad vs an extra 100+ for the Surefire pad, mainly just want something for my home defense set up : r/ar15 – Reddit, accessed August 29, 2025, https://www.reddit.com/r/ar15/comments/1lp9rpn/which_one_are_you_guys_picking_heard_the_olight/
- How do you feel about the hate for Olight rifle and pistol lights? : r/Olightflashlights – Reddit, accessed August 29, 2025, https://www.reddit.com/r/Olightflashlights/comments/1fhbxli/how_do_you_feel_about_the_hate_for_olight_rifle/
- OKW or PLH V2? : r/ar15 – Reddit, accessed August 29, 2025, https://www.reddit.com/r/ar15/comments/1lv46n3/okw_or_plh_v2/
- Anyone have experience with Arisaka lights ? Thinking of a 300 for my 10.3 build. I’m stuck between that and a cloud reign micro. : r/ar15 – Reddit, accessed August 29, 2025, https://www.reddit.com/r/ar15/comments/p8ydxu/anyone_have_experience_with_arisaka_lights/
- Cloud Defensive REIN 3.0: Third Step In Lineage – High Ground Media, LLC, accessed August 29, 2025, https://highgroundshooter.com/testimonial/cloud-defensive-rein-3-0-third-step-in-lineage/
- Best/Worst Pistol Light : r/AskLE – Reddit, accessed August 29, 2025, https://www.reddit.com/r/AskLE/comments/18hn87l/bestworst_pistol_light/
- The 5 Best Pistol Lights of 2024 – Field & Stream, accessed August 29, 2025, https://www.fieldandstream.com/outdoor-gear/guns/handguns/best-pistol-lights
- Good weapon light for rifle? : r/QualityTacticalGear – Reddit, accessed August 29, 2025, https://www.reddit.com/r/QualityTacticalGear/comments/1ih72kt/good_weapon_light_for_rifle/
- Best AR-15 Flashlights [Real Views] – Pew Pew Tactical, accessed August 29, 2025, https://www.pewpewtactical.com/best-ar15-flashlights/
- Cloud Defensive vs SureFire vs Modlite – Modulus Arms, accessed August 29, 2025, https://www.modulusarms.com/news/cloud-defensive-vs-surefire-vs-modlite/
- Surefire X300 Turbo – Firearms Insider, accessed August 29, 2025, https://www.firearmsinsider.tv/gun-gear-reviews/2022/9/10/surefire-x300-turbo
- X300U vs X300T : r/tacticalgear – Reddit, accessed August 29, 2025, https://www.reddit.com/r/tacticalgear/comments/wky83e/x300u_vs_x300t/
- Modlite okw vs plhv2 : r/tacticalgear – Reddit, accessed August 29, 2025, https://www.reddit.com/r/tacticalgear/comments/1fh0iv7/modlite_okw_vs_plhv2/
- Modlite PLHv2 vs Surefire Dual Fuel Comparison – YouTube, accessed August 29, 2025, https://www.youtube.com/watch?v=pUktx2GUE-s
- Help me choose a light! – Arisaka, accessed August 29, 2025, https://arisakadefense.com/help-me-choose-a-light/
- Arisaka 600 Series Light Body for Surefire Scout M600, accessed August 29, 2025, https://arisakadefense.com/600-series-light-body/
- Cloud rein 3.0 gtg? : r/ar15 – Reddit, accessed August 29, 2025, https://www.reddit.com/r/ar15/comments/1bnv26s/cloud_rein_30_gtg/
- Cloud Rein 3.0 : r/ar15 – Reddit, accessed August 29, 2025, https://www.reddit.com/r/ar15/comments/zfn4gp/cloud_rein_30/
- What’s the deal with Arisaka lights? : r/ar15 – Reddit, accessed August 29, 2025, https://www.reddit.com/r/ar15/comments/13tmtr4/whats_the_deal_with_arisaka_lights/
- Surefire X300 Turbo vs TLR 1 HL? : r/guns – Reddit, accessed August 29, 2025, https://www.reddit.com/r/guns/comments/15wv100/surefire_x300_turbo_vs_tlr_1_hl/
- I want to not hate it so bad. Got a surefire x-300u today. The light is awesome and I love the pattern but the switch is terrible. It’s so damn stiff. I end up pushing it so hard to turn it off it ends up going all the way down or up. : r/tacticalgear – Reddit, accessed August 29, 2025, https://www.reddit.com/r/tacticalgear/comments/tlzv8z/i_want_to_not_hate_it_so_bad_got_a_surefire_x300u/
- what are your thoughts, opinions, and Experiences with the streamlight tlr7? – Reddit, accessed August 29, 2025, https://www.reddit.com/r/CCW/comments/bz3zuq/what_are_your_thoughts_opinions_and_experiences/
- Streamlight TLR-7A (Still Sucks or Best Concealed Carry Light?) – YouTube, accessed August 29, 2025, https://www.youtube.com/watch?v=ZP1Z7u7oRzo
- The 9 Best AR-15 Flashlights [2025] – Hands-On Tested – CAT Outdoors, accessed August 29, 2025, https://catoutdoors.com/best-ar-15-flashlights/
- What’s everyone’s go to weapon light? : r/ar15 – Reddit, accessed August 29, 2025, https://www.reddit.com/r/ar15/comments/1fz981j/whats_everyones_go_to_weapon_light/
- Flickering issues with Rein 3.0 lights : r/tacticalgear – Reddit, accessed August 29, 2025, https://www.reddit.com/r/tacticalgear/comments/15okwdt/flickering_issues_with_rein_30_lights/
- Cloud defense rein 3.0 issues : r/flashlight – Reddit, accessed August 29, 2025, https://www.reddit.com/r/flashlight/comments/151bd0f/cloud_defense_rein_30_issues/
- Cloud defense Rein 3 issues : r/ar15 – Reddit, accessed August 29, 2025, https://www.reddit.com/r/ar15/comments/1dnferj/cloud_defense_rein_3_issues/
- Rein 3.0 low high mode? : r/ar15 – Reddit, accessed August 29, 2025, https://www.reddit.com/r/ar15/comments/1cxqho9/rein_30_low_high_mode/
- What’s going on with Cloud Defensive? : r/ar15 – Reddit, accessed August 29, 2025, https://www.reddit.com/r/ar15/comments/1arya0h/whats_going_on_with_cloud_defensive/
- Cloud defensive not being good : r/QualityTacticalGear – Reddit, accessed August 29, 2025, https://www.reddit.com/r/QualityTacticalGear/comments/1i2ps3a/cloud_defensive_not_being_good/
- Surefire x300, the gold standard, or outdated? : r/Glocks – Reddit, accessed August 29, 2025, https://www.reddit.com/r/Glocks/comments/1hje6sm/surefire_x300_the_gold_standard_or_outdated/
- Any reason for a Surefire? : r/Glocks – Reddit, accessed August 29, 2025, https://www.reddit.com/r/Glocks/comments/166febr/any_reason_for_a_surefire/
- Modlite PLHv2 : r/tacticalgear – Reddit, accessed August 29, 2025, https://www.reddit.com/r/tacticalgear/comments/1imlcys/modlite_plhv2/
- Modlite PLHv2 Head Issues : r/flashlight – Reddit, accessed August 29, 2025, https://www.reddit.com/r/flashlight/comments/1kb8958/modlite_plhv2_head_issues/
- Modlite PLHv2 : r/flashlight – Reddit, accessed August 29, 2025, https://www.reddit.com/r/flashlight/comments/1imgk8p/modlite_plhv2/
- Pistol WML recommendations | Page 2 | Primary & Secondary Forum, accessed August 29, 2025, https://primaryandsecondary.com/forum/index.php?threads/pistol-wml-recommendations.6918/page-2
- Pistol WML recommendations | Primary & Secondary Forum, accessed August 29, 2025, https://primaryandsecondary.com/forum/index.php?threads/pistol-wml-recommendations.6918/
- 3 Best Pistol Lights for Home Defense [2024 Expert Review], accessed August 29, 2025, https://pistolwizard.com/guides/pistol-lights-for-carry-home-defense
- Surefire vs Streamlight: Battle of the X300 Ultra and TLR-1HL – – GunMag Warehouse, accessed August 29, 2025, https://gunmagwarehouse.com/blog/surefire-vs-streamlight-battle-of-the-x300-ultra-and-tlr-1hl/
- Surefire m640dft : r/ar15 – Reddit, accessed August 29, 2025, https://www.reddit.com/r/ar15/comments/17vgghk/surefire_m640dft/
- Surefire M640 Dual Fuel Turbo Scoutlight Pro Weapon Light | M640DF – Rooftop Defense, accessed August 29, 2025, https://www.rooftopdefense.com/product/surefire-m640-dual-fuel-turbo-scoutlight-pro-weapon-light-m640df/
- Cloud Rein 3.0 : r/ar15 – Reddit, accessed August 29, 2025, https://www.reddit.com/r/ar15/comments/1cn8g03/cloud_rein_30/
- Any Surefire M640DFT vs Modlight PLH-V2 comparison videos? : r/tacticalgear – Reddit, accessed August 29, 2025, https://www.reddit.com/r/tacticalgear/comments/1aqocou/any_surefire_m640dft_vs_modlight_plhv2_comparison/
- SureFire M640DFT TURBO Dual Fuel Scout Light® Pro – SRS Tactical, accessed August 29, 2025, https://srstactical.com/surefire-m640dft-turbo-dual-fuel-scout-light-pro.html
- M640DF vs plhv2, close quarters build? : r/ar15 – Reddit, accessed August 29, 2025, https://www.reddit.com/r/ar15/comments/144lls5/m640df_vs_plhv2_close_quarters_build/
- I tested the $50 Harbor Freight pistol light against a $300 Surefire… : r/harborfreight – Reddit, accessed August 29, 2025, https://www.reddit.com/r/harborfreight/comments/1n15gh8/i_tested_the_50_harbor_freight_pistol_light/
- X300 on 19x problems : r/Glocks – Reddit, accessed August 29, 2025, https://www.reddit.com/r/Glocks/comments/1j3pnv9/x300_on_19x_problems/
- Ar15 light 150$ or less with high candela , decent lumens , durable and preferably longer run time. : r/flashlight – Reddit, accessed August 29, 2025, https://www.reddit.com/r/flashlight/comments/1ihq604/ar15_light_150_or_less_with_high_candela_decent/
- Best weapons light and why? : r/ar15 – Reddit, accessed August 29, 2025, https://www.reddit.com/r/ar15/comments/ovb6hh/best_weapons_light_and_why/
- Can’t decide between a tlr7a or a tlr1 on my 19x. I want the tlr1 but am worried about being uncomfortable aiwb : r/CCW – Reddit, accessed August 29, 2025, https://www.reddit.com/r/CCW/comments/196mkwg/cant_decide_between_a_tlr7a_or_a_tlr1_on_my_19x_i/
- Got my TLR-7A. Finally have my perfect CCW. : r/SigSauer – Reddit, accessed August 29, 2025, https://www.reddit.com/r/SigSauer/comments/erp60m/got_my_tlr7a_finally_have_my_perfect_ccw/
- Glock 19/17 conceal carry Streamlight TLR7 vs Surefire X300 and pistol advice for EDC : r/CCW – Reddit, accessed August 29, 2025, https://www.reddit.com/r/CCW/comments/u0bboy/glock_1917_conceal_carry_streamlight_tlr7_vs/
- Malkoff Scout Light Head – Arisaka, accessed August 29, 2025, https://arisakadefense.com/malkoff-scout-light-head/
- Arisaka Light Kit 18650 Series Light Body with Malkoff E2XTL Head – No Tailcap, accessed August 29, 2025, https://www.primaryarms.com/arisaka-light-kit-18650-series-light-body-with-malkoff-e2xtl-head-no-tailcap
- Looking for a new light, Surefire vs Arisaka? : r/guns – Reddit, accessed August 29, 2025, https://www.reddit.com/r/guns/comments/c25bdq/looking_for_a_new_light_surefire_vs_arisaka/
- Arisaka 600 series with a Malkoff is the way to go. : r/ar15 – Reddit, accessed August 29, 2025, https://www.reddit.com/r/ar15/comments/13r5cq5/arisaka_600_series_with_a_malkoff_is_the_way_to_go/
- OWL – Eagle Armory STL, accessed August 29, 2025, https://eaglearmorystl.com/product/owl/
- Cloud Defensive OWL – An Overview – AR Build Junkie, accessed August 29, 2025, https://www.arbuildjunkie.com/cloud-defensive-owl-optimized-weapon-light-overview/
- Surefire M340DFT Mini Scoutlight Pro Turbo Weapon Light Picatinny Rail – MidwayUSA, accessed August 29, 2025, https://www.midwayusa.com/product/1025291079
- SureFire M340-Pro Dual Fuel Scout Light w/Picatinny Rail/M-LOK Swivel Mount M340DFT-BK-PRO For Sale | SHIPS FREE – EuroOptic, accessed August 29, 2025, https://www.eurooptic.com/surefire-m340-pro-dual-fuel-scout-light-w-picatinny-rail-m-lok-swivel-mount-m340
- Modlite vs surefire : r/QualityTacticalGear – Reddit, accessed August 29, 2025, https://www.reddit.com/r/QualityTacticalGear/comments/1ak16km/modlite_vs_surefire/
- Streamlight TLR 9 | 1000 Lumens Weapon Light – Atomic Defense, accessed August 29, 2025, https://www.atomicdefense.com/products/streamlight-tlr-9
- TLR-9® | Compact Gun Light | Streamlight®, accessed August 29, 2025, https://www.streamlight.com/products/detail/tlr-9
- Best AR 15 Lights Of 2025 [Hands-On] – Top Firearm Reviews, accessed August 29, 2025, https://www.topfirearmreviews.com/post/best-ar-15-flashlights
- Olight PL-Mini 2 Valkyrie Weapon Light (Black) – B&H Photo, accessed August 29, 2025, https://www.bhphotovideo.com/c/product/1483323-REG/olight_pl_mini2_valkyrie_pl_mini_2_valkyrie_rechargeable.html/specs
- O-Light PL Mini 2 Valkyrie Review – YouTube, accessed August 29, 2025, https://www.youtube.com/watch?v=yj2naqD5B_c
- A Mega Review of the Olight Mini 2 Valkyrie Weapon-Mounted Light – CrossBreed Holsters, accessed August 29, 2025, https://www.crossbreedholsters.com/blog/olight-mini-2-valkyrie-review/
- Any good firearm flashlights? – Reddit, accessed August 29, 2025, https://www.reddit.com/r/flashlight/comments/1bxhjyy/any_good_firearm_flashlights/
- Abuse of WML’s : r/tacticalgear – Reddit, accessed August 29, 2025, https://www.reddit.com/r/tacticalgear/comments/1ic9b2g/abuse_of_wmls/
- Olight? Anyone have experience with the Olivet Odin mini? Seems legit so far. – Reddit, accessed August 29, 2025, https://www.reddit.com/r/ar15/comments/ldxe5m/olight_anyone_have_experience_with_the_olivet/
- [review] OLIGHT PL-1 II Valkyrie weapon light : r/flashlight – Reddit, accessed August 29, 2025, https://www.reddit.com/r/flashlight/comments/5fncyo/review_olight_pl1_ii_valkyrie_weapon_light/
- Weapon Lights Thread? | The Armory Life Forum, accessed August 29, 2025, https://www.thearmorylife.com/forum/threads/weapon-lights-thread.16454/
- INFORCE WMLx Gen 2 White – LionHeart Alliance, accessed August 29, 2025, https://lhagear.com/products/inforce-wmlx-gen-2-white.html
- REVIEW: Inforce WMLx Gen 2 White/IR – The Reptile House, accessed August 29, 2025, https://thereptilehouseblog.com/2019/10/04/inforce-wmlx-gen-2-white-ir/
- All of you Inforce fanboys are completely high : r/czscorpion – Reddit, accessed August 29, 2025, https://www.reddit.com/r/czscorpion/comments/wlr714/all_of_you_inforce_fanboys_are_completely_high/
- INFORCE WMLX Gen2 Weapon Mounted White LED Tactical Light, 800 Lumens, accessed August 29, 2025, https://www.opticsplanet.com/inforce-wmlx-gen2-weapon-mounted-white-led-tactical-light-800-lumens.html
- InForce Gen 2 WML and WMLx Weapon Lights Review : r/flashlight – Reddit, accessed August 29, 2025, https://www.reddit.com/r/flashlight/comments/5cjtdn/inforce_gen_2_wml_and_wmlx_weapon_lights_review/
- Top 10 Handgun-Mounted Weapon-Lights – The Mag Life – GunMag Warehouse, accessed August 29, 2025, https://gunmagwarehouse.com/blog/top-10-handgun-mounted-weapon-lights/
- Holosun Laser HOLOSUN P. ID-PLUS Positive ID Pistol Light Green Laser | Green Laser Sight Holosun Pid, accessed August 29, 2025, https://jbfsociety.org/HOLOSUN-P-ID-PLUS-Positive-ID-Pistol-Light-Green-Laser-Green-j-399357
- Holosun P.ID HC review : r/CCW – Reddit, accessed August 29, 2025, https://www.reddit.com/r/CCW/comments/1jo7hu9/holosun_pid_hc_review/
- Thoughts on Holosun P.ID Light : r/Glocks – Reddit, accessed August 29, 2025, https://www.reddit.com/r/Glocks/comments/12jyxlw/thoughts_on_holosun_pid_light/
- Odin Mini Tactical Flashlight – Olight, accessed August 29, 2025, https://www.olight.com/store/odin-mini
- Olight – Odin Mini 1250 Lumen Rechargeable Rail Mount Flashlight – Military & Gov’t Discounts | GOVX, accessed August 29, 2025, https://www.govx.com/p/131703/odin-mini-1250-lumen-rechargeable-rail-mount-flashlight
- Just slapped a Olight Odin S flashlight on my sig. : r/ar15 – Reddit, accessed August 29, 2025, https://www.reddit.com/r/ar15/comments/1jusdjr/just_slapped_a_olight_odin_s_flashlight_on_my_sig/
- Nightstick TCM-10 Compact Weapon-Mounted Light (Black) – B&H, accessed August 29, 2025, https://www.bhphotovideo.com/c/product/1765953-REG/nightstick_tcm_10_compact_weaponlight_black.html
- TCM-10: Compact Weapon-Mounted Light – Nightstick, accessed August 29, 2025, https://www.nightstick.com/products/tcm-10
- Nightstick WML.. good ? Bad? : r/canik – Reddit, accessed August 29, 2025, https://www.reddit.com/r/canik/comments/tihbcj/nightstick_wml_good_bad/
- Reviews/feedback on Nightstick weapon lights? : r/guns – Reddit, accessed August 29, 2025, https://www.reddit.com/r/guns/comments/rtn7xb/reviewsfeedback_on_nightstick_weapon_lights/
- Rail Mount LED Rifle Light – Ozark Armament, accessed August 29, 2025, https://ozarkarmament.com/rail-mount-led-rifle-light/
- Harbor Freight Tools Braun Light side by side comparison. : r/tacticalgear – Reddit, accessed August 29, 2025, https://www.reddit.com/r/tacticalgear/comments/1lctzmk/harbor_freight_tools_braun_light_side_by_side/
- Feyachi flashlight good? : r/airsoft – Reddit, accessed August 29, 2025, https://www.reddit.com/r/airsoft/comments/yc1wip/feyachi_flashlight_good/
- I got a WML, TLR7 HL-X : r/CCW – Reddit, accessed August 29, 2025, https://www.reddit.com/r/CCW/comments/1ddflhj/i_got_a_wml_tlr7_hlx/
- Streamlight ProTac Rail Mount HL-X | 88066, 88071 – BrightGuy, accessed August 29, 2025, https://brightguy.com/product/streamlight-protac-rail-mount-hl-x/
- Why are these brands so popular here? : r/flashlight – Reddit, accessed August 29, 2025, https://www.reddit.com/r/flashlight/comments/1da7vvk/why_are_these_brands_so_popular_here/
- TLR1-HF : r/harborfreight – Reddit, accessed August 29, 2025, https://www.reddit.com/r/harborfreight/comments/1l5y2fd/tlr1hf/
- Harbor Freight TLR1 knockoff review : r/Glocks – Reddit, accessed August 29, 2025, https://www.reddit.com/r/Glocks/comments/1l88ct0/harbor_freight_tlr1_knockoff_review/
- Cloud Defensive REIN 3.0 – Marksmanship Training Center, accessed August 29, 2025, https://www.marksmanshiptrainingcenter.com/store/p113/REIN3.html
