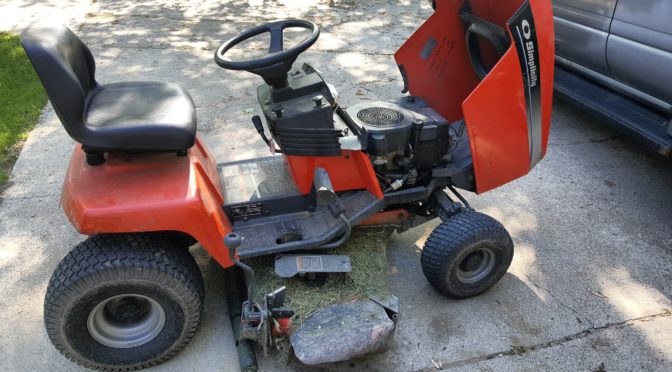
We bought this Simplicity Broadmor 16HP lawn tractor back around 1999-ish and it has served us well. In the years since, I’ve had to replace a few parts and figure things out as the dealer went out of business. Luckily, finding parts is pretty straight forward given the WWW and Amazon.
At some point last summer, the tractor began to develop intermittent problems with starting when it was hot. It didn’t happen all the time and was a bear to try and find – sometimes you’d turn the starter switch and nothing would happen. Well, I just assumed it was the solenoid given similar problems with cars over the years. I did some digging and bought both a solenoid and starter off of Amazon. In the Simplicity, and many tractors for that matter, they are two separate parts mounted away from each other. The solenoid is up under the dash held in place by two screws and the starter is held in place by two screws and a collar.
I ordered a Caltric Starter for the Kohler CV16 engine and it mounted up just fine.
I ordered a Stens 435-099 starter solenoid and it went in just fine as well.
Well, I thought I was set but the problem got worse. In a ways, that was a good thing. Because when the problem happens readily, you can sort out what is wrong.
This spring, when we got the tractor out, every time it would get hot it would not re-start. I put my multimeter on the starter power cable and it was dead. I did not hear any clicking from the solenoid either. If I wiggled the switch then it might start but not always so the switch made me suspicious. If I used jumper cables and went right to the starter, it would start and run no problem with the key one. Okay, time to replace the switch.
I did some digging and the replacement switch was a Briggs and Stratton 1686734SM unit. I got that on order from Amazon and waited for it to show up.
Now there is just a bit of a twist here that I want to share with folks to save you some time. It turns out the tractor was built using an all plastic switch (groan) part number 1718305 that requires you to change the wiring in the connector.
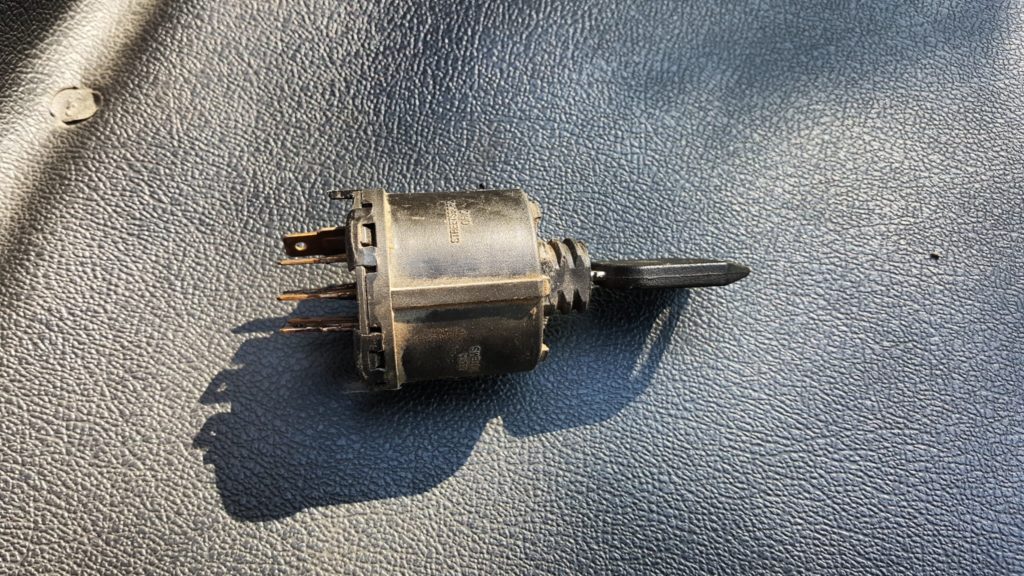
Note the letters next to the male spades – this is how you confirm it is the 1718305 switch – the layout of the pins:
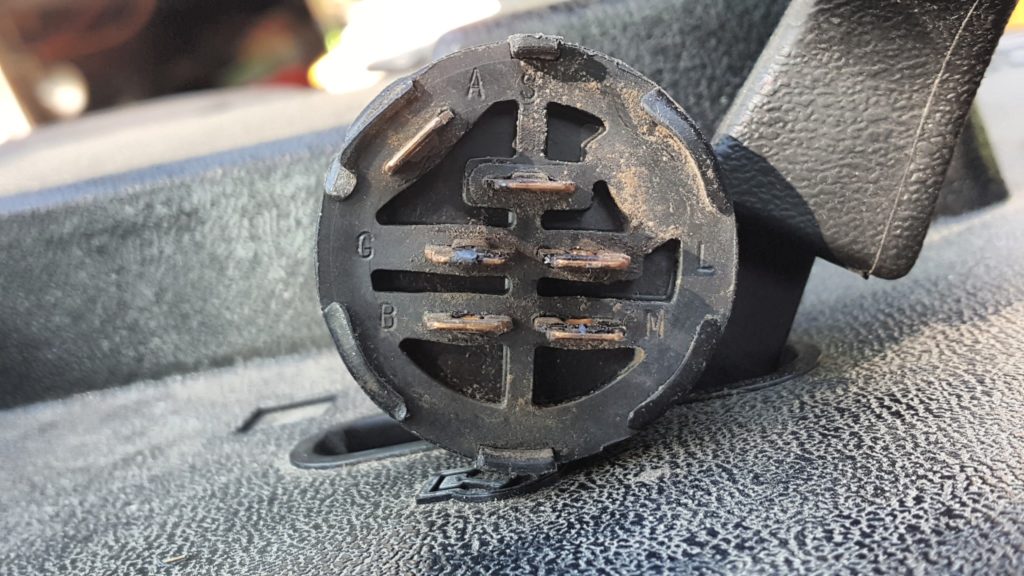
It just so happens that to use the replacement 1686734SM unit, you need to diagonally swap the four lower wires – upper left to lower right and upper right to lower left. They recommend you label the wires before you do the swap – I just jotted down the color codes.
The following photo is from the instruction sheet that came with the switch — it’s actually well done and helped me figure this out:
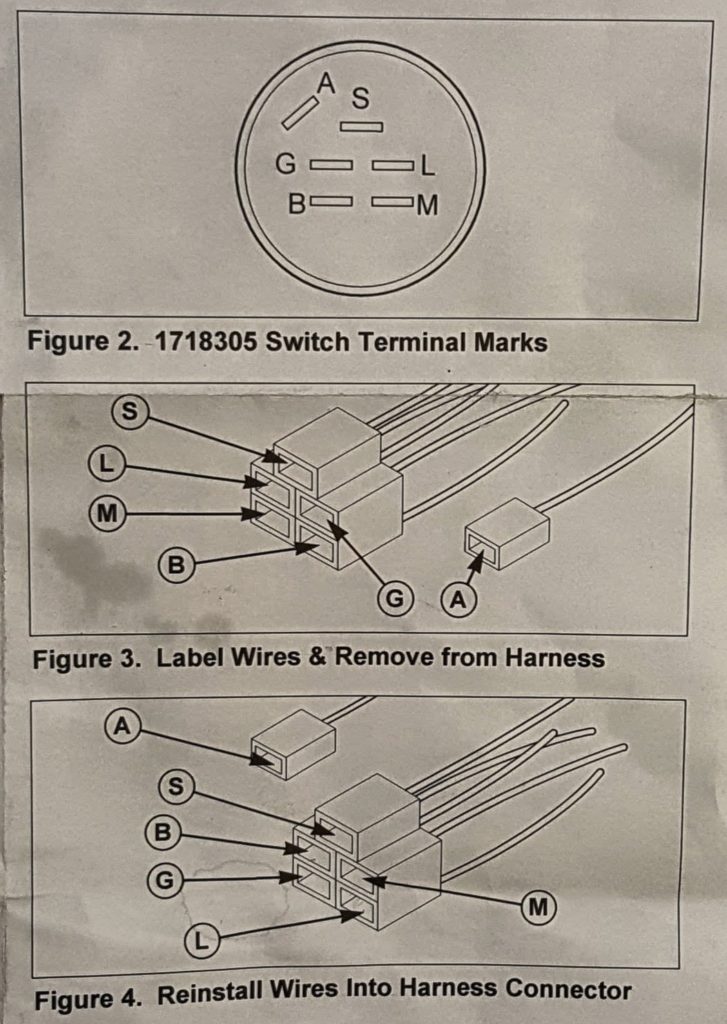
Figure 2 shows the identifying marks for the plastic 1718305 switch and exactly matched what I had.
Figure 3 shows the pin out of the original connector
Figure 4 shows the new lay out.
In case you lose track of the wires for whatever reason, here are the color codes that are in my Broadmor by labeled connector pin:
- A. Red / White (meaning primarily red with a white stripe)
- B. Red — this is from the battery so make sure your battery is disconnected
- G. Black
- L. Red/Black
- M. Purple/White
- S. Blue/White
First, disconnect the negative cable from the battery or you risk some fireworks when you change the red/hot wire.
To change the wires around, I moved them a pair at a time – just the lower four are changing — I ran a small blade screw driver in and loosened the female spade fitting inside the connector and pulled it back out gently with a pair of needle nose pliers. I then swapped the location and pushed each connector into the new location.
To seal the connections, I applied a layer of silicone grease on the female connector openings so that when the male spades pushed in, they would be coated with the grease. I have a jar of Mission Automotive brand Silicone grease that I use all the time.
I then confirmed the layout one last time, sat on the tractor, made sure the engine was clear and started it. Everything worked on the first try – a good sign.
The switch fit nicely inside the OEM hole. It comes with extra parts for mounting and I just did what Simplicity did – I installed the switch, used the supplied hex nut to secure it on the front and pressed on the switch cover. I then tested again just to be safe.
By the way, here are photos of the back of the installed switch:
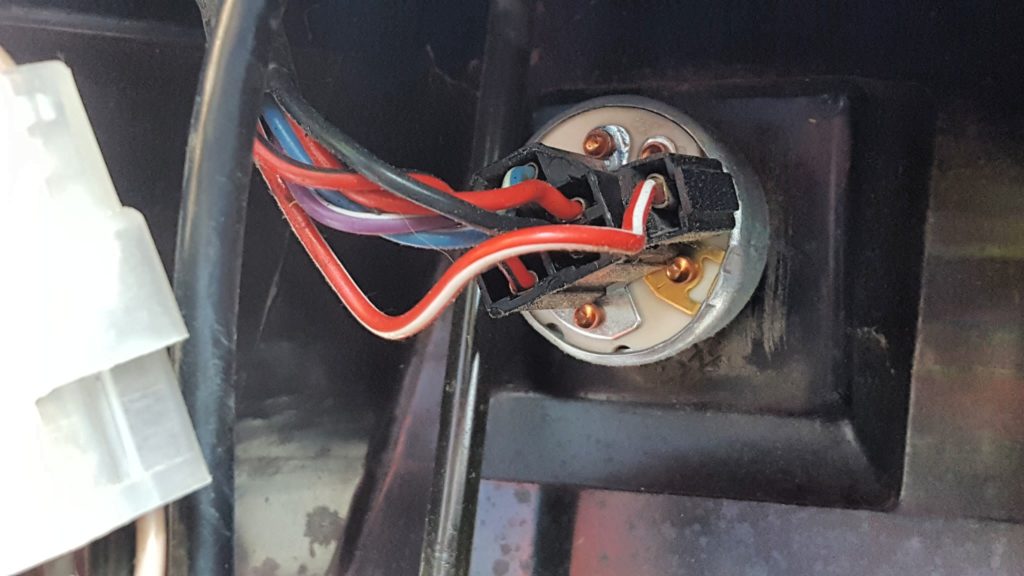
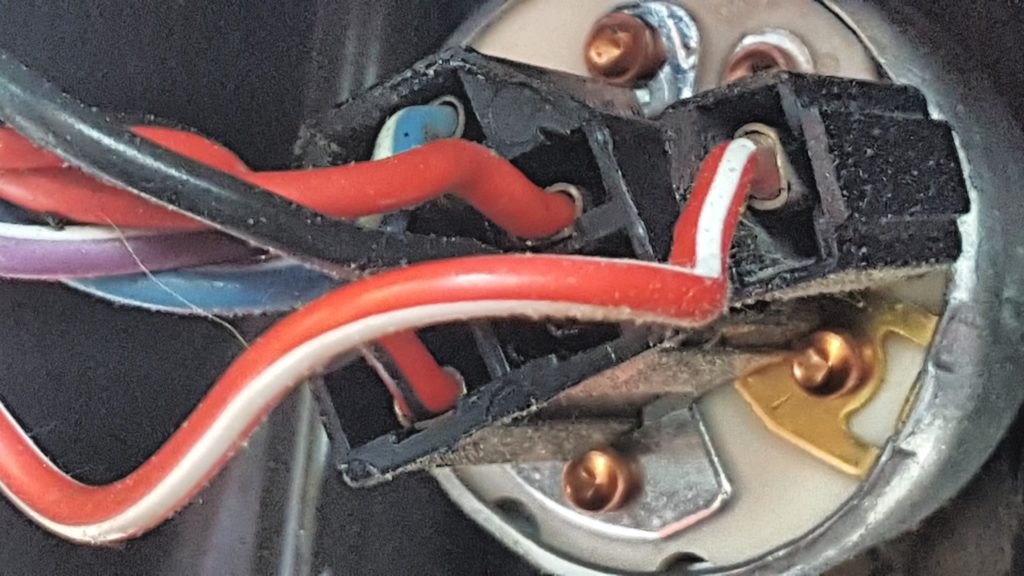
I then mowed part of the lawn for 10-15 minutes and when the tractor was good and hot, I turned it off and back on several times. I then let the tractor idle for about 10-15 minutes and again could turn it off and on with no problem.
I think the problem is solved as the tractor is still working just fine. I wanted to post this in case you needed to know what to get from Amazon or see the wire colors and hope it helps you out.
7/20/19 Update: I did the above in June 2018 and the tractor is still running just fine. All of the above have held up without any problems.
5/23/20 Update: Still holding up just fine. I’ve mowed the yard two times this year. No problems.
If you find this post useful, please share the link on Facebook, with your friends, etc. Your support is much appreciated and if you have any feedback, please email me at in**@*********ps.com. Please note that for links to other websites, we are only paid if there is an affiliate program such as Avantlink, Impact, Amazon and eBay and only if you purchase something. If you’d like to directly contribute towards our continued reporting, please visit our funding page.
