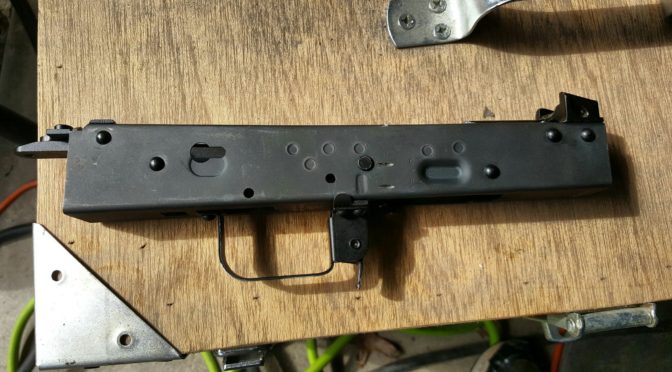
As I mentioned in an earlier post, riveting the trunnions to the sheet metal receiver is the proven method. As such, I’ll use rivets in this build but there is a fun thing to point out – there are tons and tons of ways to do the rivets. I’ve known guys who:
- Would fashion some type of bucking bar and hammer the rivets directly not really caring what they looked like
- Modified hand punches by cutting then down and drilling or milling an inverted dome into the end to create their own rivet sets for use with a hammer
- Modified the jaws of 24″ Harbor Freight bolt cutters to make rivet squishers
- Bought pneumatic rivet squishers like they use in the aerospace industry
- Purchased purpose built rivet tools from makers such as AK-Builder
I got into building rather late in the game in 2006. Fortunately for me, guys had worked out the building methods so I could learn from others. I also decided to buy the AK-Builder rivet jig that I still use today. It works great for setting the front and rear trunnion rivets. I do plan on trying the bolt cutter method some day and will just buy one of the pre-built jaw sets for the front trunnion rivets. I’m curious mainly for reducing the set up time.
Click here to go to the AK-Builder jig page.
Rivet Selection
The AKMs are assembled using soft steel rivets that deform under pressure. No heat is needed. The sizes can vary depending on the type of build you are doing. The easiest way to get the rivets of the right type, size and length is to buy them from AK-Builder.com. They take all the guess work out of it and it makes for an easy way to go plus they give you a discount if you bought their jig. Hint: Buy two packages for a given build. For an AKM, you have 13 rivets and you can readily sort out what goes where:
- The shortest rivet goes to the rear for the trigger guard strap. This makes sense because you are just riveting two pieces of sheet metal together.
- You will then notice 10 rivets of the same size but two will be different – they will be what are called “swell neck” rivets and are intended for the rear lower front trunnion rivet positions that are countersunk. Four of the rivets that are flat under the dome will be used for the front trigger guard and four will be used for the foreward two positions on each side of the front trunnion.
- The last two are the longest and thickest – they go to the rear trunnion.
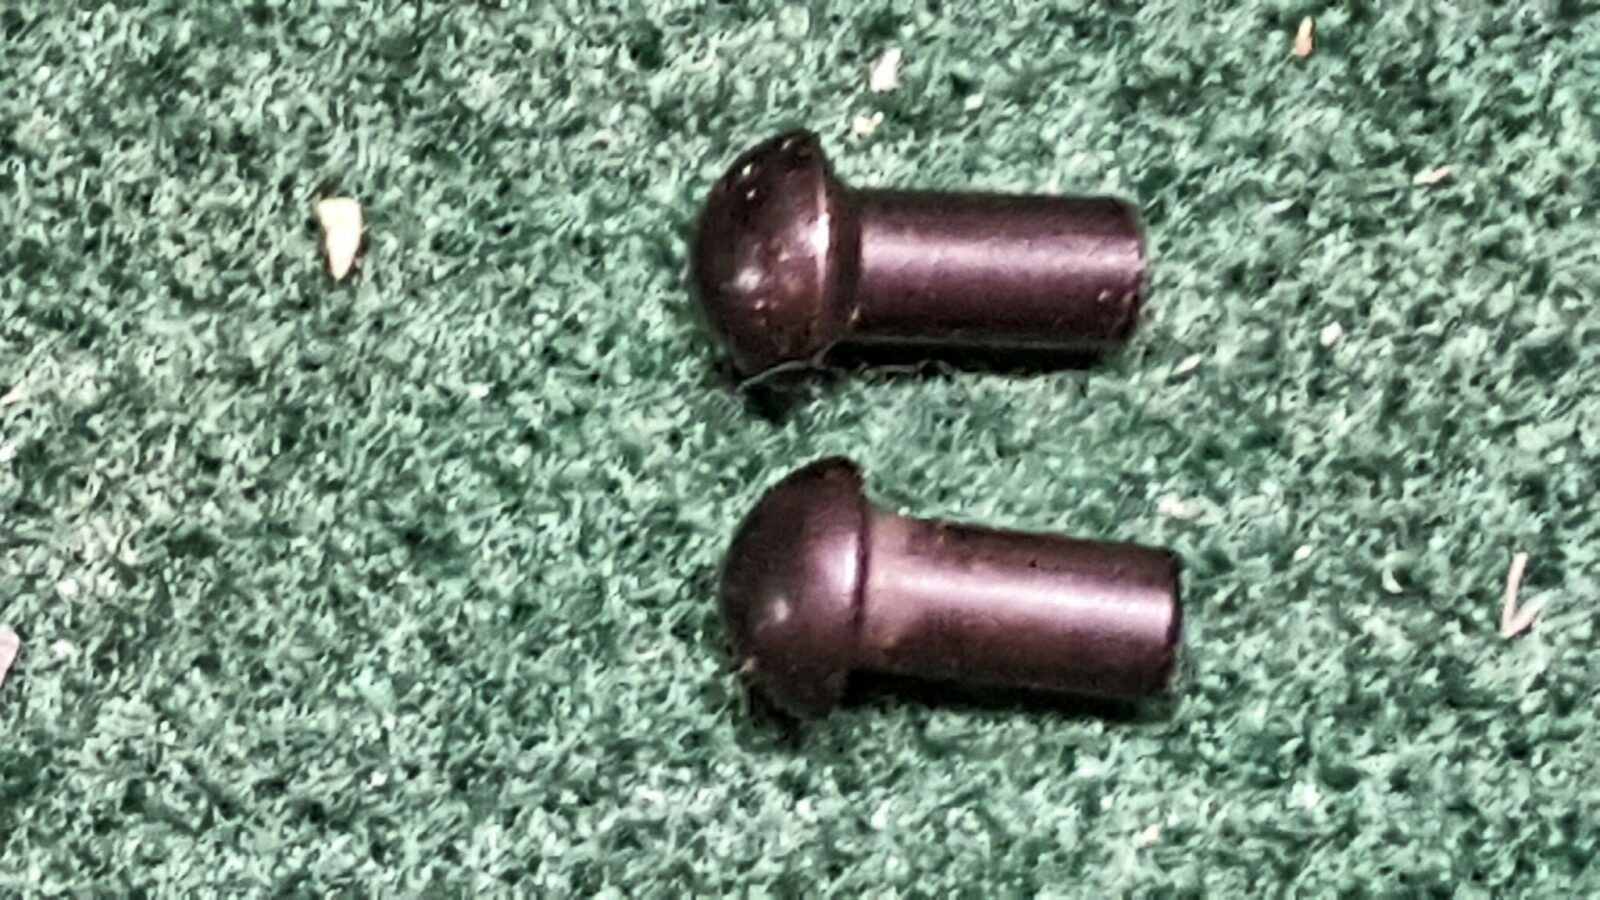
The following photo shows the two types of rivets you will use on the front trunnion. The top is the swell neck rivet that is used for the rear two countersunk holes on the front trunnon. The bottom one is a normal rivet and is what is used for the four front rivets to secure the selector stop and front trigger guard strap to the receiver as well as for front-most four (two on each side) rivets:
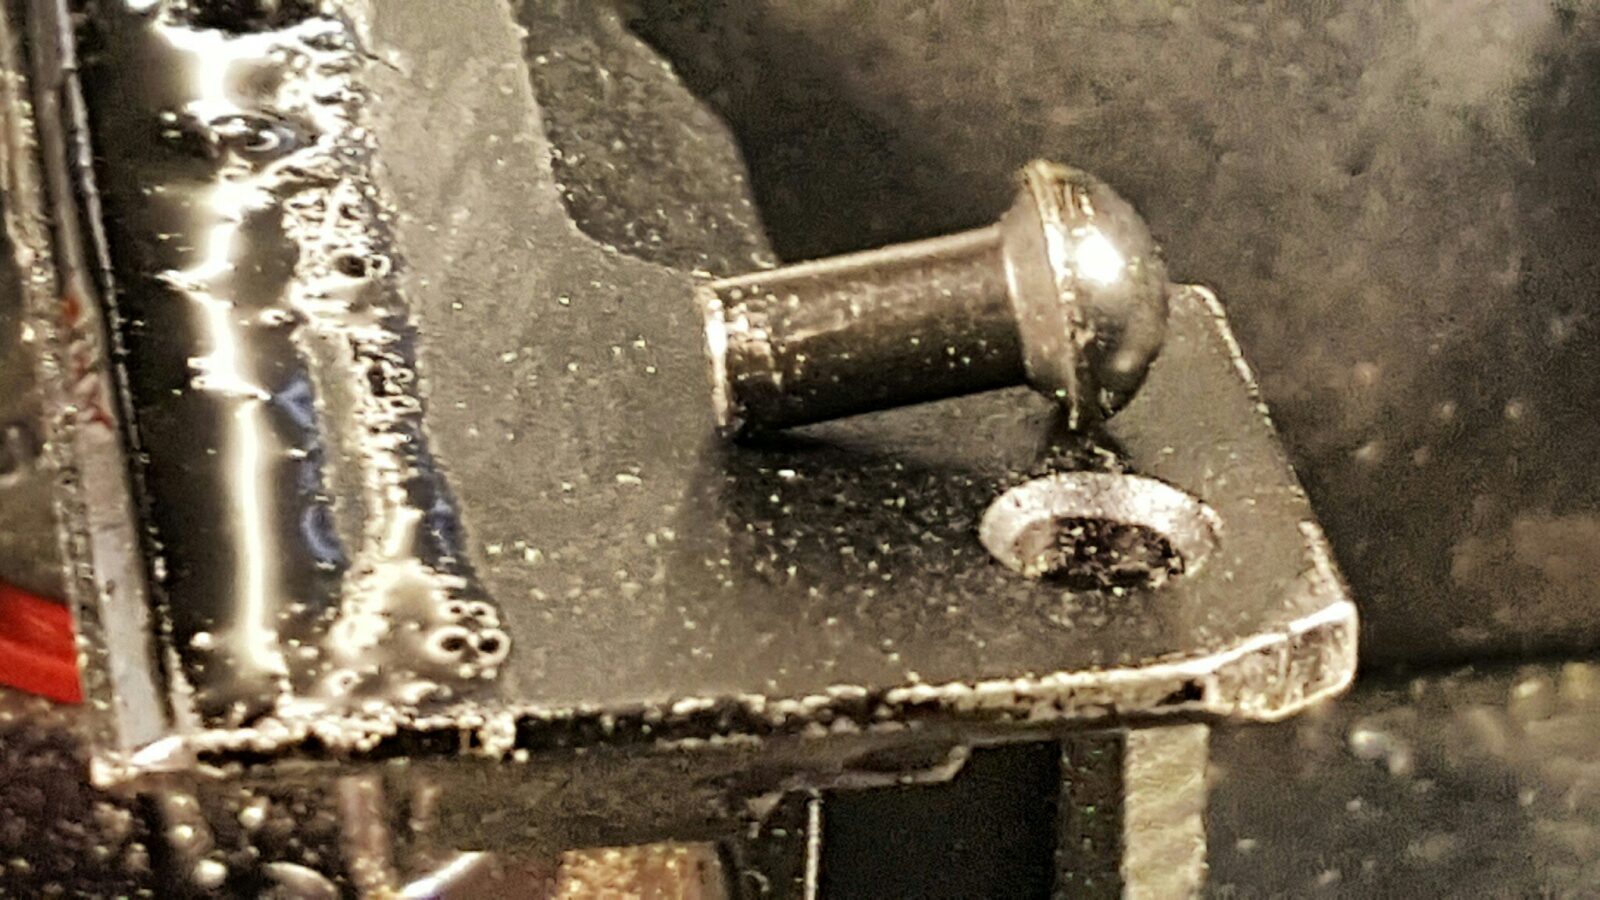
This next photo shows one of the swell neck rivets next to the counter sunk hole it will go in. They require a couple of extra steps to install in terms of crushing the receiver material into the recessed area first before setting the rivet and I’ll explain your options to do that later:
Last comment, you can buy rivets in bulk if you want to. McMaster has some and firms like Hanson Rivet have a huge variety. You basically need to know the dome type and diameter. You get rivets longer than you need and trim them using the formula that the rivet must stick out 1.5 x diameter to form properly. If it is too long you will have problems also. So, you measure the depth you need and then add that to the overall length.
AK-Builder now also sells their rivets in bulk if you are interested – click here.
If you were building from a receiver flat or a tube without a center support, you could consider that as a rivet too but you need to buy that separate as it usually comes with the center support tube it passes through as a set.
This post will be mainly me giving you an overview of what to do and tips based on my experience. AK-Builder has a nice set of instructions you can review by clicking here.
Setting the Front Rivets
In a previous post, I explained how I start with the trigger guard. Next up then is to install the front trunnion rivets.
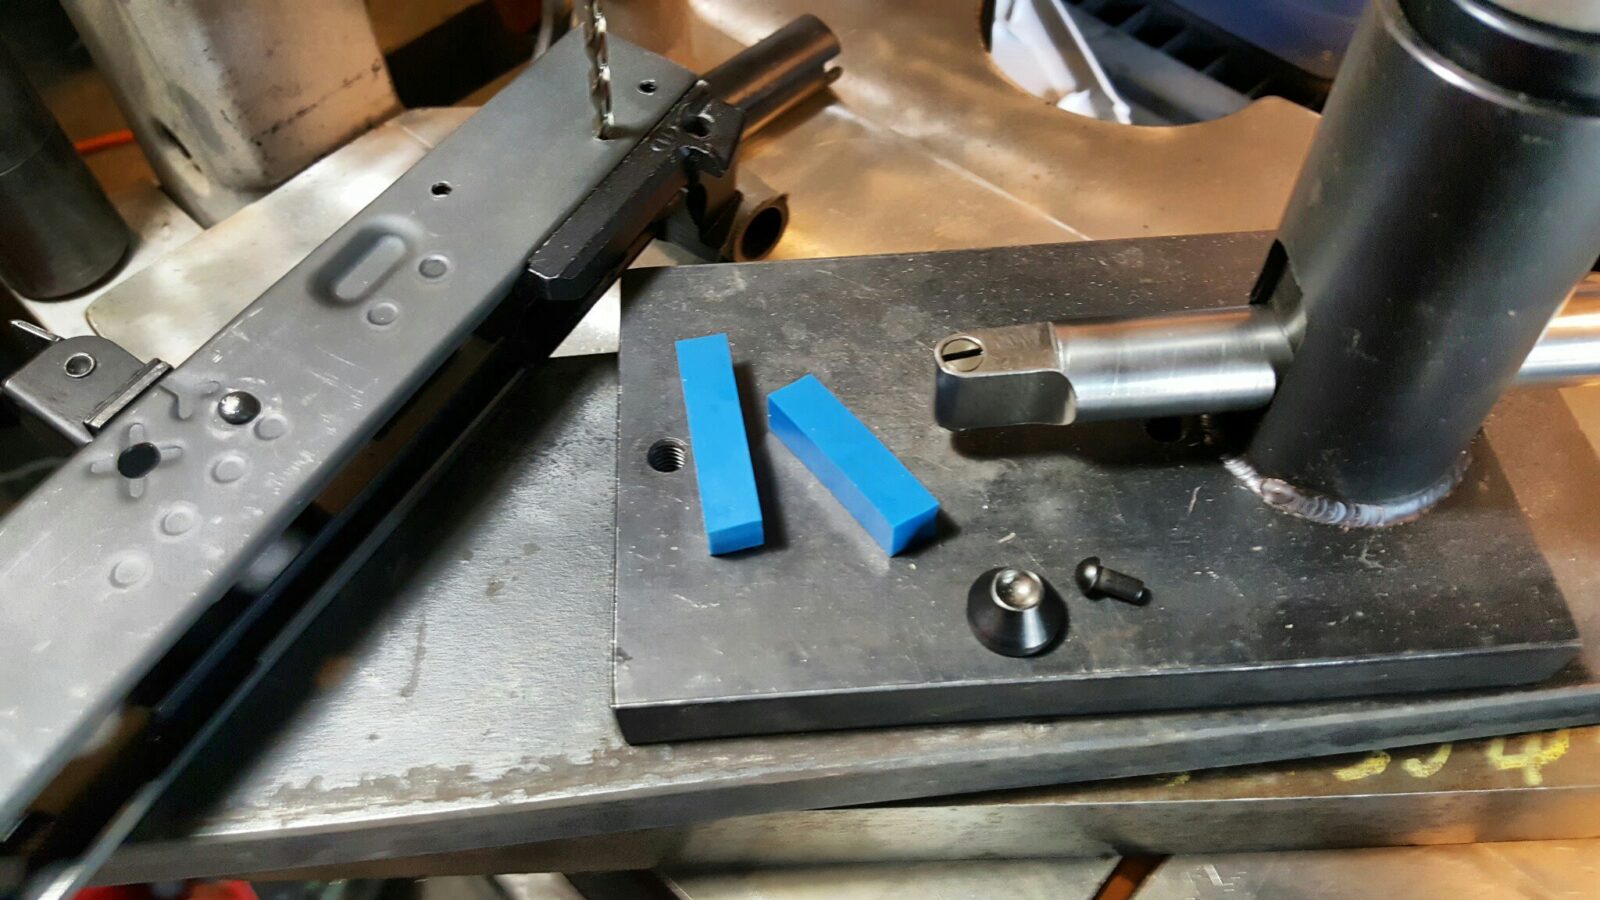
The AK-Builder rivet jig basically uses an arm to transfer downward force from the press to the rivet to squish it. The domed part of the rivet is held by a small cup and two pieces of thick high density rubber help you stabilize the receiver assembly during the operation. In the next photo you can see the parts plus that I have a 5/32″ drill to help keep everything aligned during squishing.
Now for some tips:
- Make sure the arm is as short as you can make it. The longer it is, the more likely it will bend. Note AK-Builder sells replacement arms and I am on #3.
- Make sure the little set screw anvil is out far enough to squish the rivet down far enough. These will deform over time and replacements are available from AK-Builder – there are replacement parts for everything from them except for the main body which is built like a tank anyways.
- Use the little blue rubber blocks to adequately support the receiver. You want the arm to push down straight. The domed rivet to be sitting squarely in the above cup and to be pushing straight down on the rivet. The little blocks can help support stuff so you can focus on alignment.
- When you are positioning the trunnion, make sure the arm isn’t going to press on part of the trunnion.
- If you have an air-over hydraulic press, only use the air to run the ram down to the jig. You will not hear a difference before stuff bends. By hand, it is nice and slow and you have time to hear, feel and adjust. I turned an arm into a deformed banana right after I got my air-over-hydraulic jack/bottle. They are a great time saver but know when to switch to the hand pump for the fine work.
- It does not take a ton of force to squish a rivet. If your rivet is not squishing make sure the arm is not sitting on part of the trunnion, that the set screw is down far enough and that the bottle’s release valve isn’t partly open.
- The last two rivets I do are the countersunk rear lower rivets on the front trunnion. For the countersunk holes that use the swell neck rivet, you can either use the conical stubby press tool from AK-Builder after drilling an 1/8″ starter hole and then 5/32″ as a final step to prepare for the rivet. Important: The little tool is sitting on the base of the jig and you are pushing the receiver down on it. I’m not a fan of this because I can’t see what is going on. Your second option is to do what I do – drill the 5/32″ hole, use a 1/4″ ball bearing and a C-Clamp (on the same side reaching in through the mag well) to push the receiver material into the countersink. This really adds strength and I would recommend you take the time to do this. After you have squished the material in, drill with the 5/32″ bit again to clean up any material blocking the hole.
- Last tip – when you are doing the counter sunk holes, do not use the long rear punch – that is just for the rear. The reason for this is that the rear trunnion is solid and you can safely do that. However, with the front trunnion – the counter sunk rivet holes are not connected by solid steel and, instead, the mag well is there. You need to pick a method wherein the trunnion is supported or you risk either bending or breaking the rear “ear” of the trunnion.
Note – you will only see replacement parts for your jig if you bought it direct from AK-Builder and are logged in. I bought mine ages ago and Lonnie had to look up my order and manually turn on the part of the website for me to order parts so just FYI.
The following photo shows me reaching in with the arm and squishing a rivet – the goal height is to squish the rivet body low enough that you can press the barrel back in and it not hit a rivet:
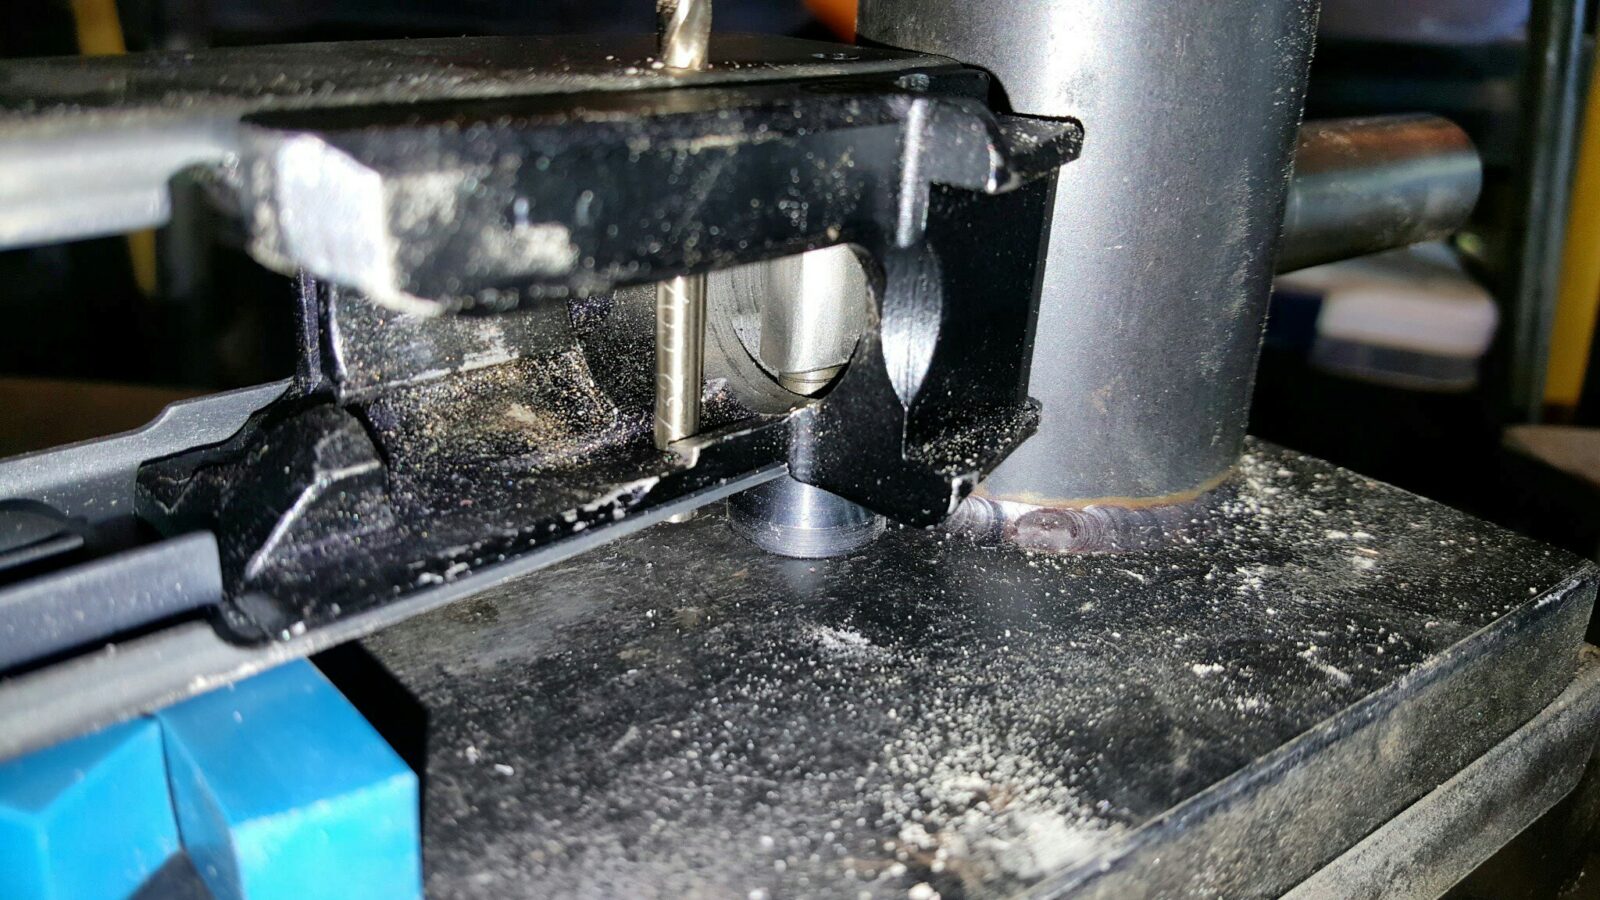
If all goes well, your rivets will look like the following or even better:
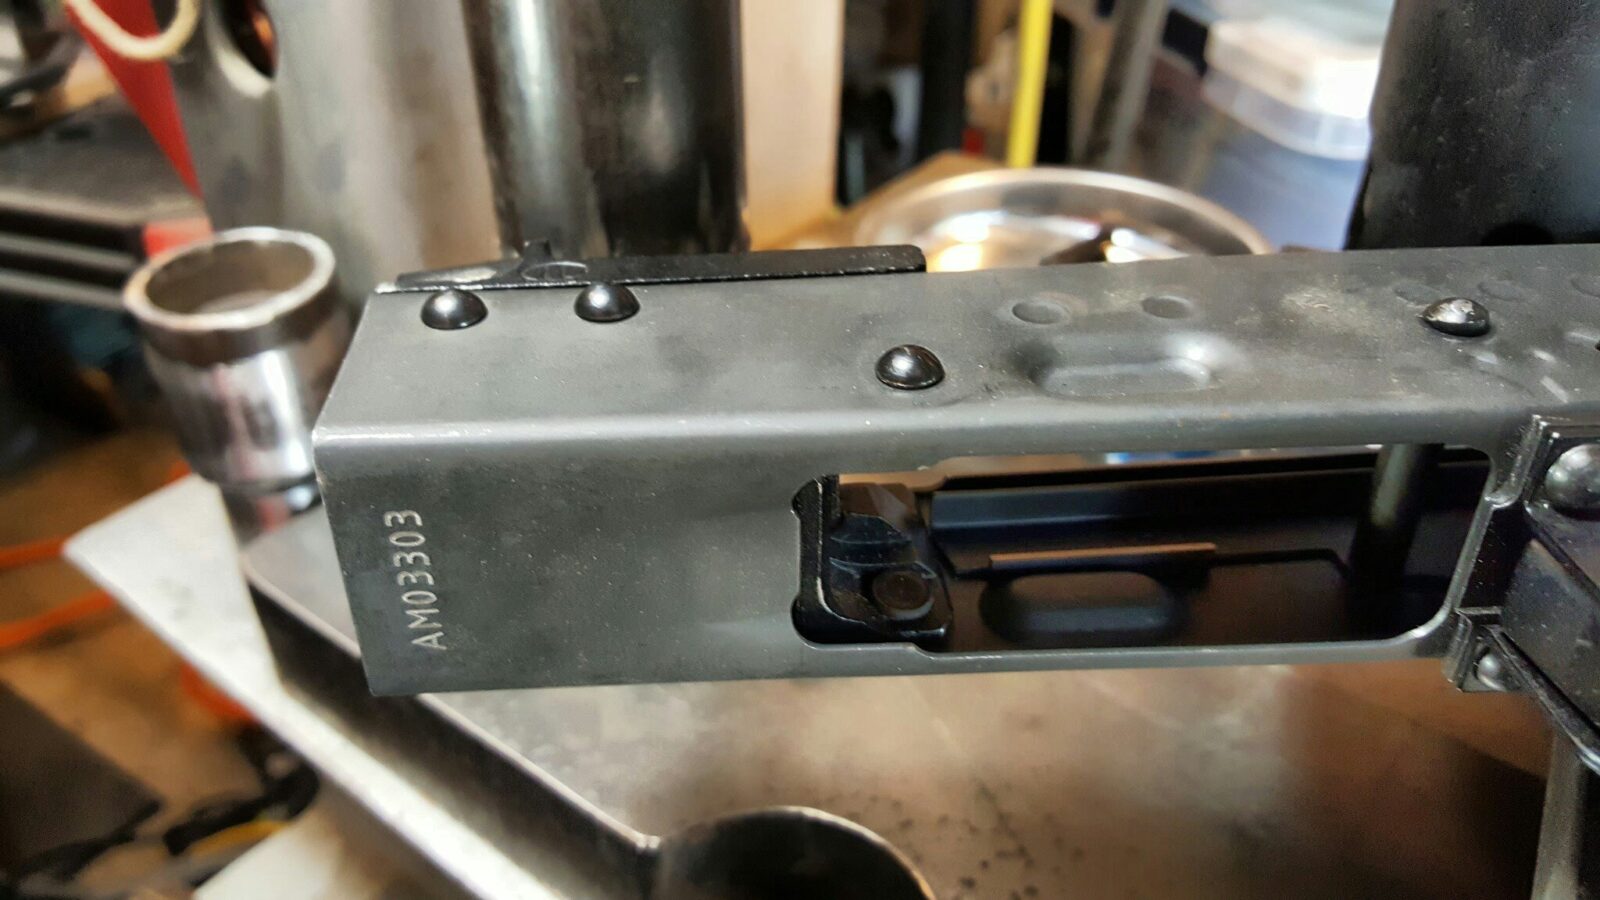
I am happy with rivets where the dome is firmly against the receiver. If I mess up, I will drill out the rivet and do it again. Note – The center support rivet was done by Childers and I cleaned that up a bit with my rear rivet set up of the AK-Builder jig.
Setting The Rear Rivets
Next up is to squish the rear rivets. This requires more careful positioning and also support. I have messed up a fair number of rear rivets over the years due to one of those things being wrong. The first thing to do is to remove the arm and install the rear trunnion rivet “bridge”. You will still use the little cup to cradle the rivet head and the rubber strips to help with positioning.
In this next photo you can see the jig set up for the rear rivet. In hindsight, I should not have taken this example photo yet because you first need to use the countersink tool at the bottom to press the receiver material into all four holes and then chase the holes with the drill press to clear any receiver material out of the way before you can install the rivet.
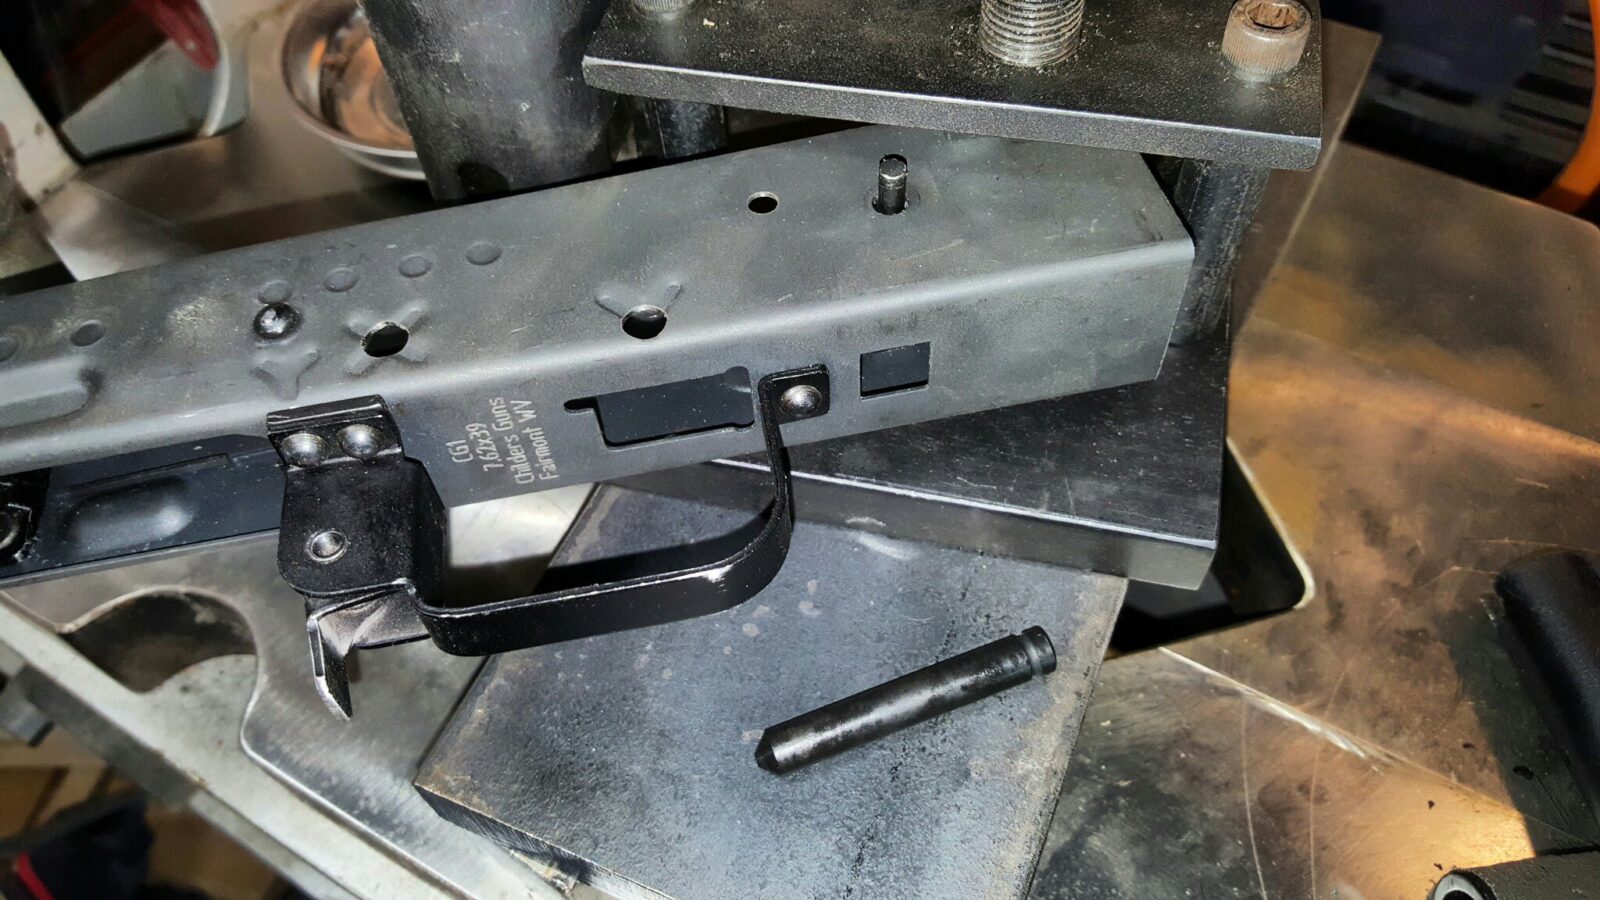
Here is an important tip, after you press the receiver material in, have cleaned up the holes and are getting ready to do a rivet, do some careful alignment and work holding. The piece of metal with a U-shaped cut out goes between the large screw body in the middle and the receiver. Bring that main screw down by hand because you next use the alignment tool – a punch with a hole in the middle to make sure the rivet forming tool (the one with a recessed dome in it) will come down square on the tool. Once it is aligned, use a wrench to bring the main body of the jig firmly down on that metal with the U-shaped slot and make sure nothing moves. Double-check it again with the alignment tool and ensure the rivet head is still squarely in the cup. In my experience you need to use a wrench to bring the body down – it requires more than being hand tight but not so much that you are deforming stuff. The words to think of are “securely aligned”.
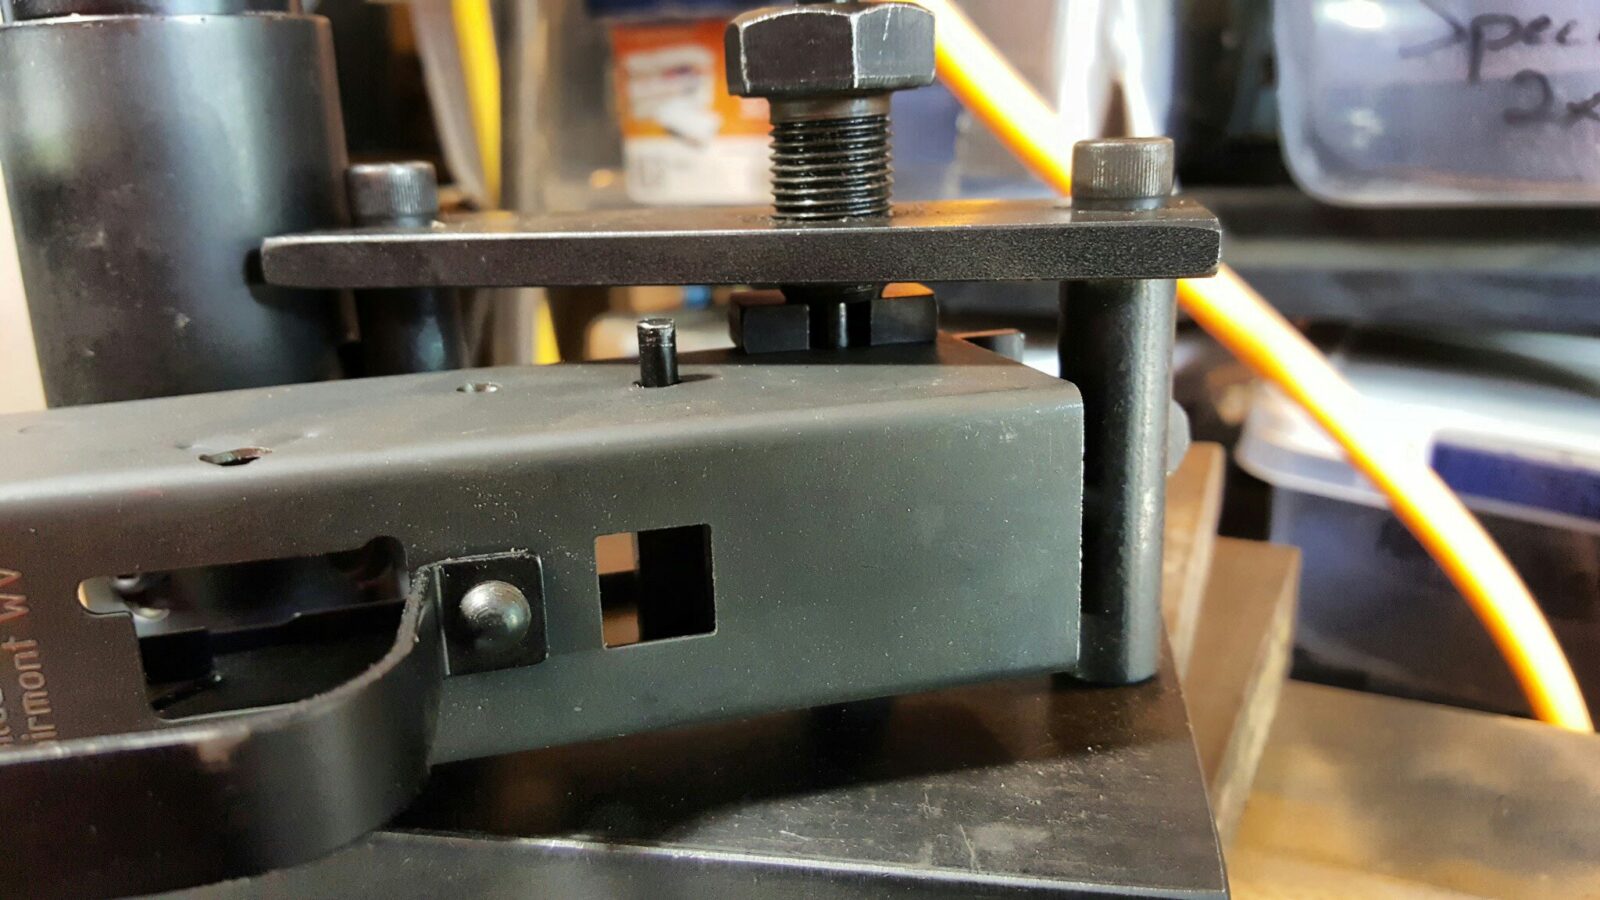
Now, use the punch / rivet set with the inverted dome to form the rivet head as you apply pressure from the press. When the tool gets even with the surface of the receiver, stop. If you keep going you will mar the receiver and leave some portion of a telltale dent around the receiver.
Done!
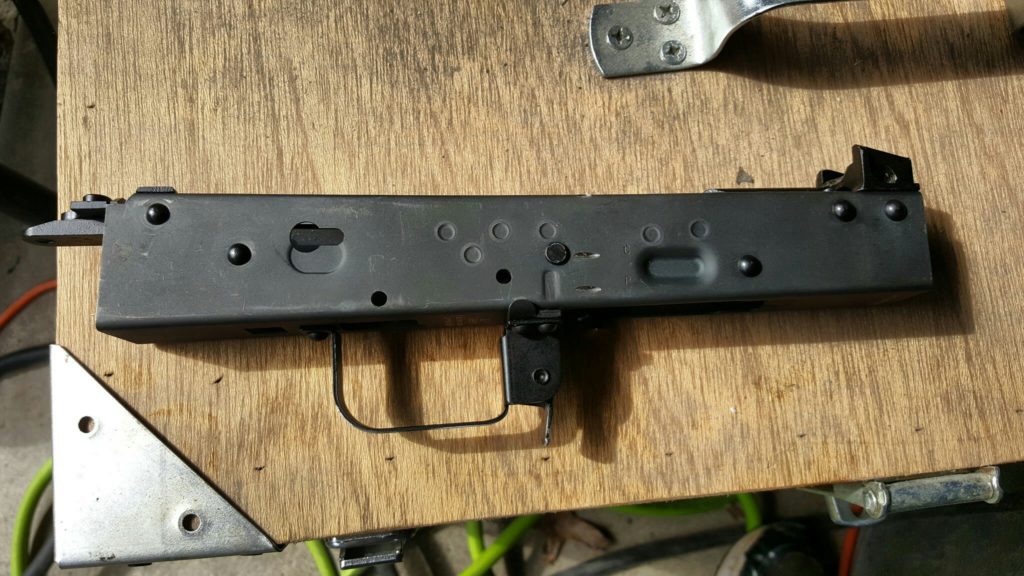
And with that, you should be done and ready to reinstall the barrel.
If you find this post useful, please share the link on Facebook, with your friends, etc. Your support is much appreciated and if you have any feedback, please email me at in**@*********ps.com. Please note that for links to other websites, we are only paid if there is an affiliate program such as Avantlink, Impact, Amazon and eBay and only if you purchase something. If you’d like to directly contribute towards our continued reporting, please visit our funding page.
