Tag Archives: catch

Assembling an AR Lower – Step 3 of 11: Installing the Bolt Catch Assembly

In this step, I’ll install the bolt catch.  This is the part that catches the bolt when the magazine is empty or the operator wants to lock the weapon open.  In terms of risk, this step has probably caused more blemished receivers than any other.  What I hope to show you is a method to minimize that.

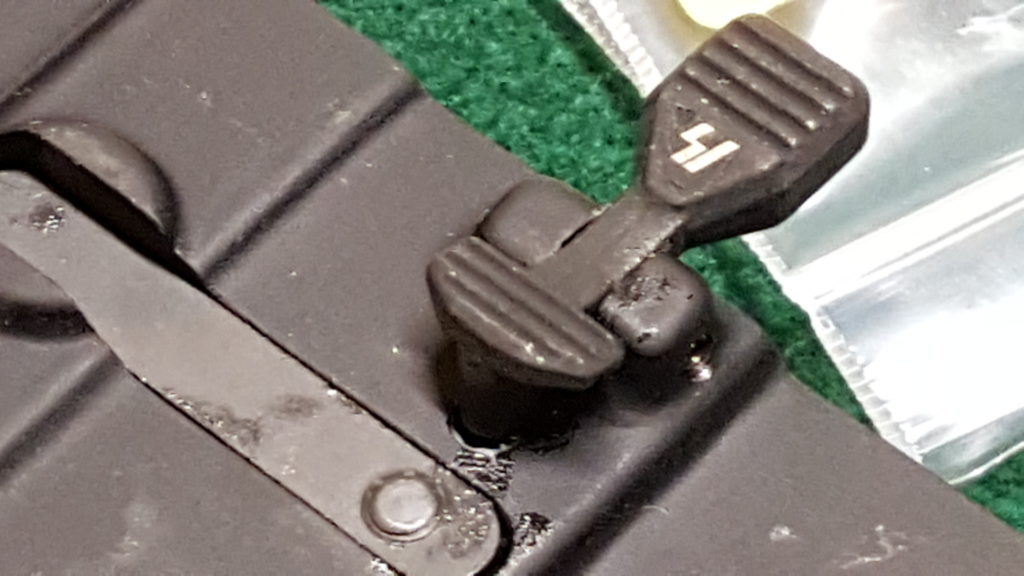
The assembly is made up of the catch itself, a cross pin that secures it in the receiver, a spring and the bolt catch buffer.  In this post, I am actually installing a Strike Industries bolt catch.  I like to have a slightly larger paddle to operate the catch and Strike model is a nice size.  If you ever want a giant paddle, Wilson makes one but it is just too big for my taste.

Here is the catch, it’s roll pin directly underneath and then the spring and detent to the right.


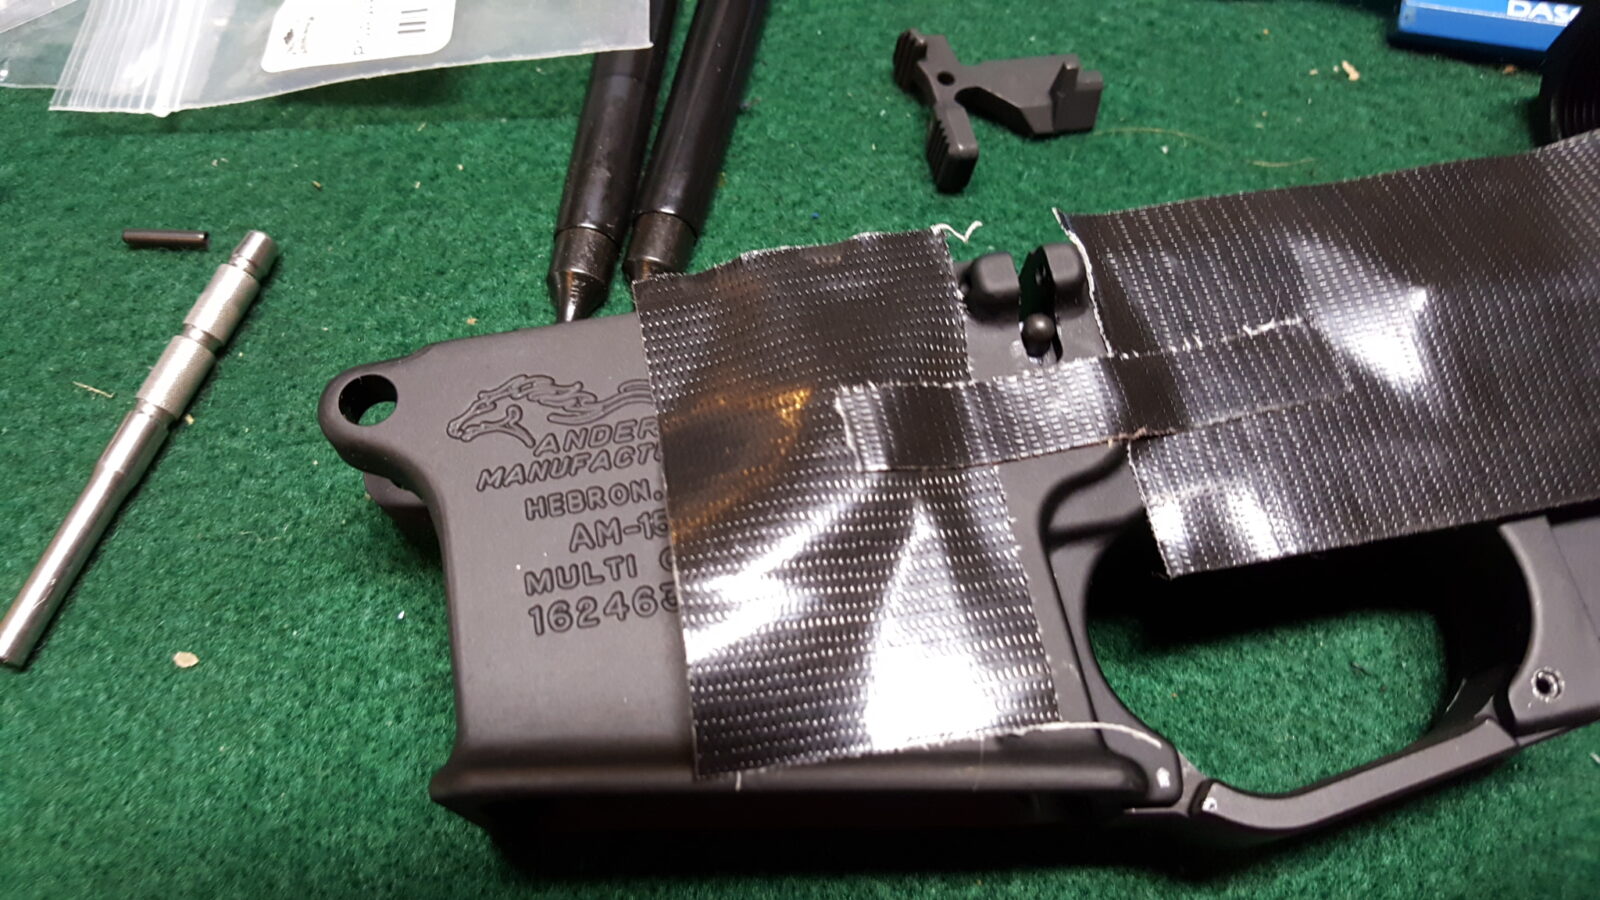
Where we are working on the receiver is right here – just above the mag catch:

The spring followed by the detent go down in the hole just above the magazine catch. The bolt catch is then inserted in the slot and the pin secures it. This is when you wonder if a third arm is needed 🙂

Now, this step is really risky.  One slip and you will mar your receiver so take a minute and put some duct tape on just in case.  I like duct tape because it is thick and sticks really well.  I’ve used other types of tape in the past and it really is just cheap insurance.  If you do this and what you use is up to you.  You are mainly worried about the receiver, to the right of the humps/lobes where the catch is going to be installed.

If you want to lower your risk of scratching your receiver, put a heavy tape around the assembly for protection. I’d recommend a duct tape – I’m using Gorilla Tape in this photo.

Now I use three punches for this.  I bought two rubber coated mag catch punches from Wheeler.  They work but I wish they were longer and you still need a third to make it easy.  Let me explain a bit more.  The Wheeler punches are half circle designs which gives you better clearance but I still use my long Astro Pneumatics 1/8″ punch to reach down and drive the pin the rest of the way in. Like I said though, you do need three punches for this.

The two black punches make up the Wheeler 710906 bolt catch tools and I literally use them with every build. Above them is a longer roll pin punch that I use to finish the install. I wish the Wheeler punches were about an inch longer and they would be perfect for me but note I do use them on every build.
The Wheeler punches are must haves for three reasons – they are flat on one side to let you get in closer to the receiver, they are rubber coated to protect the finish and you have both the 3/32″

Ok, so first take the roll pin starter punch and install the pin on the right side part way.  By getting it started you have less to try and mess with as the assembly comes together.  See how the punch is right next to the receiver?  You need to lightly tap this with a small hammer to drive it in while not hitting your receiver – this is why the tape is cheap insurance.

The Wheeler starter punch lets you easily begin the pin with zero drama and swearing.

I like to put a dab of grease in the hole to hold everything gently in place.  This is not a normal step and just something I do.  You then insert the spring first and the buffer on top.  You’ll notice with the AR design that a spring always has a detent or buffer between it and a moving surface to protect the spring.

I put a dab of grease in the hole to hold the spring and detent in place.

  Next, I use the roll pin punch from Wheeler to align bolt catch and hold it in place so the roll pin can be driven further in.  If you do not use something to align the catch holes for the pin you will drive yourself nuts.  Another option is to use a 3/32 drill bit’s smooth end to help line things up by inserting it through the front hump.

Use the pin punch to keep the catch properly positioned as you drive the roll pin through. Just short of bottoming out the starter punch, use a pin punch to drive the pin in the rest of the way.

Next, you need to use the roll pin punch and a small hammer to drive the pin the rest of the way in.  You can use the Wheeler block to hold the receiver or whatever works for you. Having a firm support makes it much easier.  My Astro Pneumatic roll ping punches are long.  My 1/8″ punch is 7″ long so I would recommend looking for something like that so you can clear the receiver when you are hammering the pin all the way in.  I don’t think the Astro set I have is made any longer because I could not find it on Google to share with you.  I use my Tekton punches.

See how much longer the Astro Pneumatics roll pin punch is? This lets me reach in and easily drive the roll pin in the final bit of the way. I can do the same with my Tekton gunsmith set’s punches.

With that you are done.  You can function test the unit by pushing on the top paddle.  You should feel the spring compress and release as you rock the catch back and forth.


If you find this post useful, please share the link on Facebook, with your friends, etc. Your support is much appreciated and if you have any feedback, please email me at in**@ro*********.com. Please note that for links to other websites, I may be paid via an affiliate program such as Avantlink, Impact, Amazon and eBay.


AR Parts Sources

There are a lot of reputable AR parts vendors online but beware of eBay and bargain basement dealers that sell airsoft parts and tell you they will stand up to firearm use – they will not. At any rate, here are my top sources of AR parts:


Assembling an AR Lower – Step 1 of 11: Installing the Magazine Catch Assembly

Just a quick note – when you get a bare receiver, you are literally getting a chunk of aluminum with nothing installed.  I really like Palmetto State Armory (PSA) lower build kits and they sell them with different types of components such as just the basics for rifles, for pistols, Magpul furniture, etc.  What I like is that the machining is very good and I think they have some of the best Mil-Spec basic triggers that aren’t gritty.  I’ve used Anderson and other brands of build kits and just think the PSA kits are superior.  Bear in mind that I say this as a customer – nobody paid me to tell you this.

With that said, let’s start building.  You’ll notice on any AR magazine on the right side there is a rectangular notch.  This is where the magazine catch engages to hold it in place.  Okay, so the first step is to install the magazine catch assembly.  It’s made up of the “L” shaped catch itself, the mag catch spring and the magazine button.

Now I grease everything that slides with Tetra Gun Grease.  Tetra has worked well for me but I also know guys who use all kinds of greases.  As a rule of thumb, if it slides, apply grease.  It it rotates  then apply oil.  So grease the shaft and insert it into the round hole on the right end of the recessed area for it on the right side of the receiver.  Note, be careful when installing the catch or you may scratch your receiver.

When you turn it over you will see the threaded end of the shaft and you put the spring down over it.

Next, you will screw the magazine button onto the threaded shaft.  Before you do, look at the button.  You should see that one end is smooth (that is the bottom) and the other has grooves (that is the top).  Carefully start screwing the button on but stop before you get near the receiver so you don’t scratch anything. Push the button in, and then turn the long lever arm to continue threading the shaft into the button.  Now stop before the lever arm scratches the receiver.

To screw the catch in the rest of the way you need to push the bullet button in all the way so the catch sticks out as far as it can on the other side so the lever arm can clear the parts of the receiver as the button is screwed on.  At this point, I use a small pusher tool made from plastic to push the button in even further so I can keep turning the lever arm until the screw is relatively flush with the top of the button.  Note, before I had the tool I would use a wood dowel.  Just use something non-metallic to protect the finish.  There is a model of the tool shaped just like the oval button but I don’t know where mine went so I used a takedown tool and got the job done 🙂

The catch is now installed.  To function test, push the magazine button.  You should feel spring resistance and see the magazine catch’s lever arm push out.  When you ease off the button, the lever arm should smoothly go back into place.


If you find this post useful, please share the link on Facebook, with your friends, etc. Your support is much appreciated and if you have any feedback, please email me at in**@ro*********.com. Please note that for links to other websites, I may be paid via an affiliate program such as Avantlink, Impact, Amazon and eBay.


AR Parts Sources

There are a lot of reputable AR parts vendors online but beware of eBay and bargain basement dealers that sell airsoft parts and tell you they will stand up to firearm use – they will not. At any rate, here are my top sources of AR parts: