Some folks have asked how I get the dull grey look on khukuris that I used to work on. The answer is simple – apple cider vinegar straight from the grocery. I’ve also experimented with various ratios of Prep-and-Etch, which contains Phosphoric Acid, and gotten a darker color but apple cider works remarkably well. Apple cider vinegar contains 5-10% acetic acid (CH3COOH) depending on how it is made. For example, I read that Heinz is about 5%. My local store carries Spartan brand, which is their store brand, and it works just fine – again, this is apple cider vinegar from the grocery store.
This process only works with steels that can rust. For example a mild steel or high carbon. It will not work on stainless, aluminum, etc.
Safety Notes:
I would recommend doing this outside or some place very well ventilated or else if the acetic acid condenses on metal surfaces in your shop/garage, it will cause rust.
Wear safety glasses and don’t goof around with the stuff. I’ve never had a problem but probably need to say some kind of warning here.
Process:
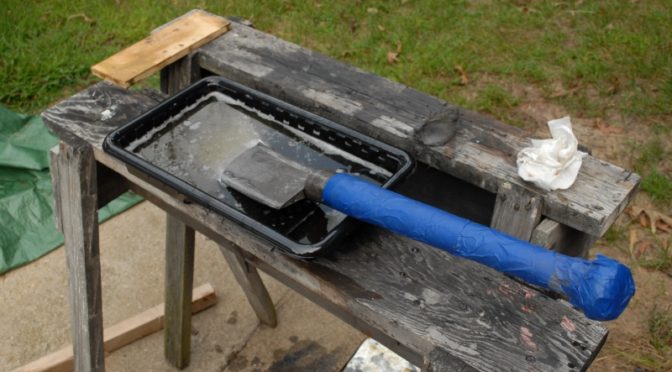
- Clean the part and remove all oil and grease. Either hose it down really well with brake cleaner or soak it in acetone. Any oil, even from your skin, will mess you up.
- Abrasive blast the part – I use “The Original Black Beauty” media that I get at my local farm supply store. It’s made from coal slag and is fairly environmentally friendly. It does break down quick so if you use your blast cabinet a lot, be prepared to clean it out and add new media when performance starts to suffer. Blasting will get you a really nice uniform surface color. I suppose you could try sanding or wire brushing but blasting has worked the best for me and is all I do now. My only recommendation is not to use sand because as it breaks down it creates a fine dust that will never come out of your lungs – read that as “bad”. I do use a blast cabinet with a vacuum to get rid of dust, you could do this outside with a hand blaster or tank blaster and dust mask if you needed to. I wear a hood when blasting outside as the media goes everywhere. Just protect yourself is the bottom line.
- Wear rubber gloves and clean the part again – the gloves are to keep oils from your skin from contaminating the part and preventing etching. Cleanliness is critical.
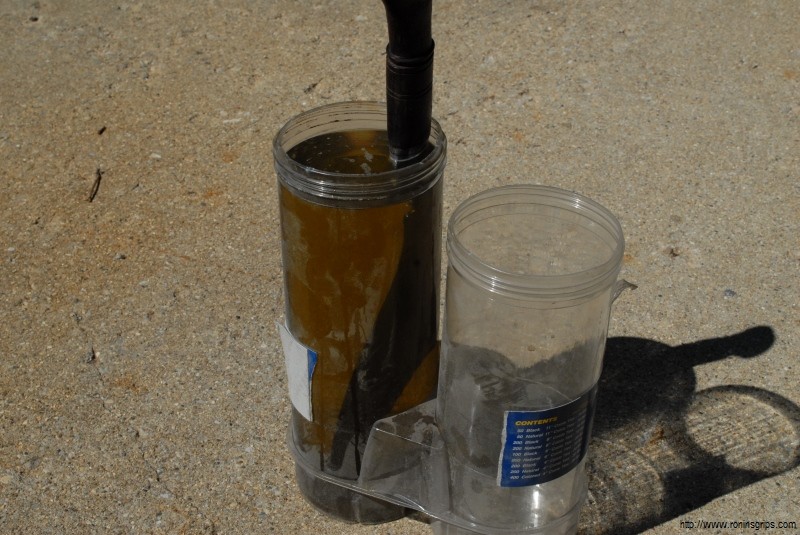
- Put the part in cider that is at least 70 degrees. I like 100-150. If it is too cold the reaction slows waaaaay down. I don’t like to get it super hot or boil it as you lose a ton of cider with no real benefit. I have done this in everything from stainless steel containers to plastic containers and even plastic trays used for wallpaper with halogen lights warming it up. In general the colder the cider the slower the etching and the hotter the cider the faster the etching bearing in mind you will have the cider evaporating faster.
Note: If you do not see bubbles coming off the part then either the solution is too cold (especially on cold days under 70F), the part is not clean or ready (so clean and blast it) or the cider too weak. I’ve never had an issue with weak cider – always the first two. - Submerge the part in the acid and let it sit for 15-30 minutes. It’s not a strong acid so there’s no rush. Just check the part and stop at the color you want. The warmer the water and the part, the faster the reaction and vice versa.
- Rinse with hot water
- Rub down with WD40 and steel wool to get the loose particles off
- Then I like to seal it with boiled linseed oil (BLO). Some of you may know BLO for woodworking but it is an old school rust inhibitor. If you don’t want BLO, then thoroughly oil your part.
I like the results. No real harmful chemicals are used, it’s cheap and looks great.
3/4/2020 Update: I recently did some blog posts on building a cost effective digitally controlled heat tank from PVC pipe that is perfect for acid etching – click here for that one. I’m also using a ferric chloride and apple cider etching solution now – click here for that one.
Photos:
The light brown solution is just apple cider. If it is darker, it was 25-50% Prep-and-Etch + the vinegar.


Abrasive Blasting
You can usually get a coal slag blast media very, very cheap from farm stores. Check there first because off Amazon you are paying a pretty penny for shipping whether they bury it in the item’s price or call it out separate. I think I pay $7-9 per 25# bag at Family Farm and Home.
This is the actual product I use: http://www.blackbeautyabrasives.com/products/black-beauty-original-abrasives.php
Now for the blasting, you have tons of options – hand blaster for small work, siphon blaster, pressurized tank or cabinets. It all depends on how much blasting you plan to do. I started out with a siphon blaster – dirt cheap but very slow. I then got a tank and it was very fast and portable but media went everywhere. I still have that for working on cars and big parts. However, for my grips, gun parts and knives, I use my blast cabinet. I have a Cyclone brand large bench unit and am relatively happy. If I had it to do over, I would have gotten a free standing unit with a bigger and deeper hopper so I’m not constantly hitting the side or moving media around by hand. I have a foot control pedal and that really helps plus it gets a the pneumatics out of the cabinet where they would normally be subject to abrasive dust and wear.
Cyclone Manufacturing
http://www.cycloneblasters.com/
My pressurized tank blaster is a Harbor Freight unit. It’s held up relatively fine other than my constantly wearing out valves and tips. The tank itself is just fine.
http://www.harborfreight.com/40-lb-pressurized-abrasive-blaster-68992.html
Summary
Acid etching is easy and rewarding. I like using BLO to seal things partly because of the color it imparts.
I hope this gives you some ideas!
Please share the link on Facebook, Forums, with colleagues, etc. Your support is much appreciated and if you have any feedback, please email us in**@*********ps.com. If you’d like to request a report or order a reprint, please click here for the corresponding page to open in new tab.