Uziel Gal considered a number of different stock designs until they settled on the final design in December 1950 and did the first production run in 1951. The wood stock evolved as they corrected breakage issues and you will see stocks with different profiles over the years. Purely FYI, The steel folding stock was added in 1956 due to Israeli paratroopers requesting a shorter weapon.
Legal Disclaimer – I tried to sort through how to permanently attach the wood stock to avoid creating a SBR. There aren’t any ATF letters specific to this method. My approach is based on a method documented on Uzi Talk and that approach has not been legally questioned since the forum posted it – click here to read their guidance. You will need to decide if this approach is acceptable to you. I am not a firearms attorney nor do I claim any regulatory expertise and you accept all responsibilities and liabilities for compliance with all federal and local laws that pertain to you.
The problem is that if you remove a quick detach stock from an Uzi with a 16″ barrel, then it falls under 26″ then it is a short barreled rifle (SBR). Thus, the Uzi’s wood stock must be permanently attached. Let me point out there is a ton of fear, uncertainty and doubt (FUD) in terms of the converting the quick detach wood stock to be considered permanently attached. The consensus of cooler heads seems to be that if you attach the stock to the Uzi such that it can only be removed with tools, then it is considered permanently attached by the ATF. If you think about it, most shotguns and rifles would be too short if their stocks were removed for maintenance and they all require tools to have their stocks removed and, thus, are no longer “quick”. The Uzi wood stock bracket is modified by having the rear receiver attachment point ground down and connected via a blind screw that can’t be accessed without first removing three external screws and pulling the wood stock off. Most of my long arms have the stock secured by one screw that may or may not be exposed. For example, a shotgun’s stock screw is typically located under the recoil pad. Many rifles have one or two exposed screws under the action. In short, the Uzi’s stock is now permanently attached following the same logic. This is a well trod path as many individuals have posted write ups and videos about the conversion plus JJ Custom actually sells brackets that have already been converted.
Preparing the wood stock for the Uzi may take you a bit depending on repairs and the finish you choose to use. I looked at the stocks in both of my Uzi kits and the first one was in the best shape so that is the one I used.
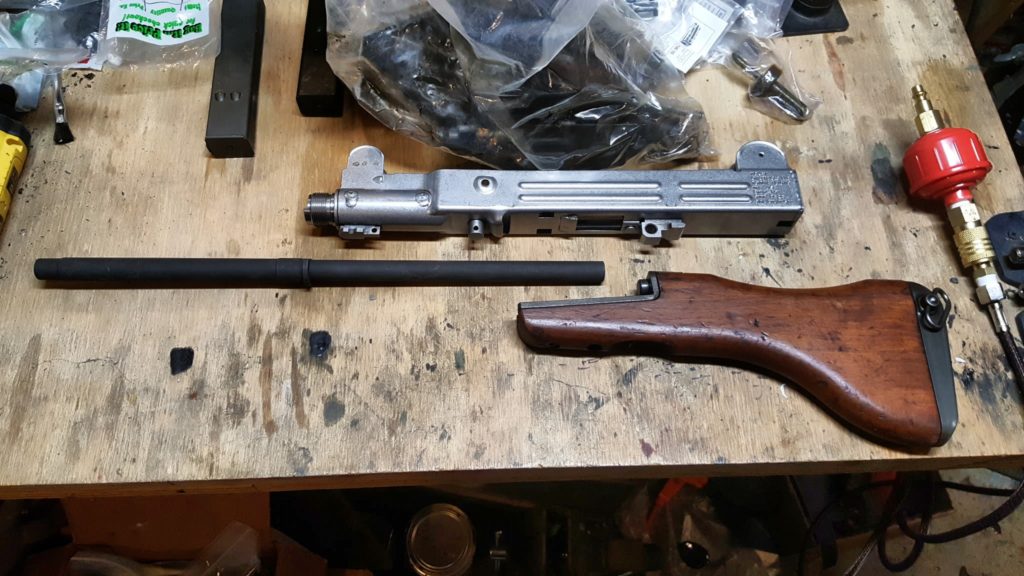
There are a number of things that must be done at this point. To reach the minimum 26″ overall length requirement, the stock must be permanently attached so I’ll talk about what I did for that plus the stock needed to be stripped, the gouges fixed and the wood refinished.
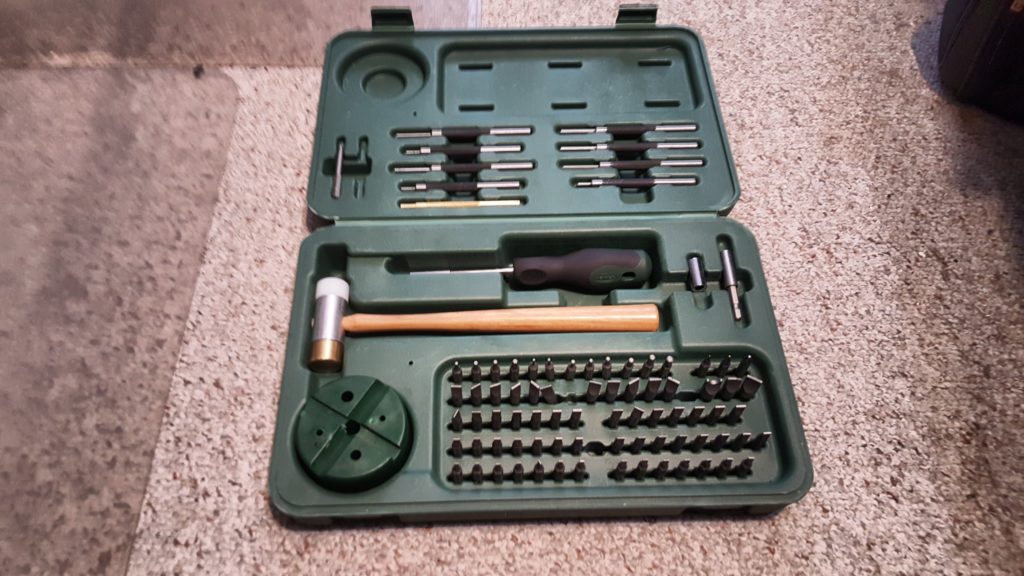
In my first kit, the screws were all in very good shape. In the second kit they were chewed up. I can’t stress this enough – use bits that fit the entire screw – this means both the length and width of the blade edge. By full supporting the slot, you can turn quite a bit. If you have an ill-fitting bit then you will tear up the metal. Here is the Weaver set that I use all the time – I may use the included screwdriver handle or put the bit in my Dewalt screwdriver to save my wrist – it just depends on what I am doing:
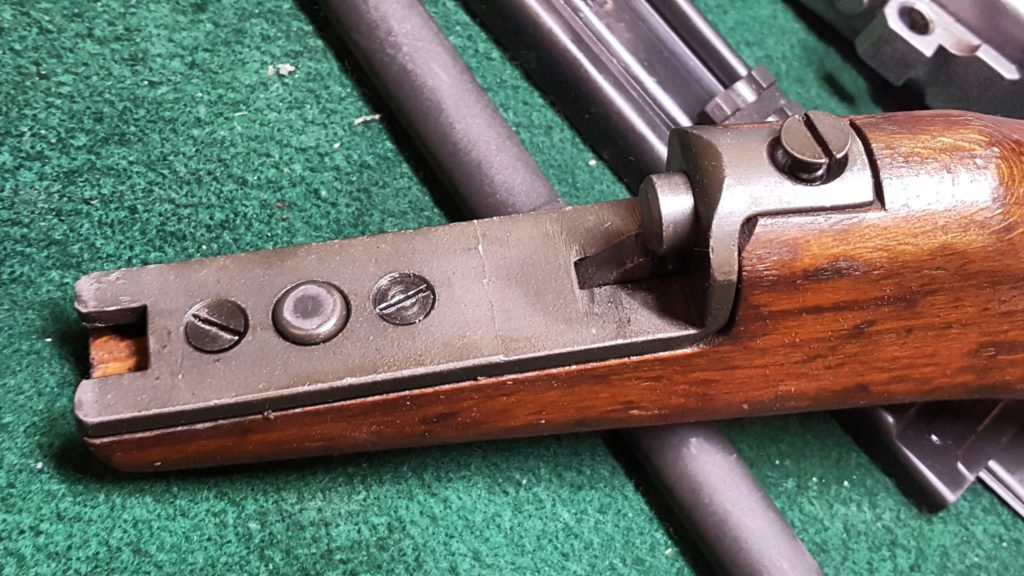
1] Remove the screws that attach the stock mounting bracket to the stock. You can see the big one at the rear and then the two screws towards the front. I used a big bit to get each screw moving – that is why they came out without damage. By the way, you can see how the old quick detach method worked – the front of the bracket slid into the grip lug, the pressure plate between the screws supplied tension with the rear cylindrical receiver attachment point slid into the receiver. The lower catch just locked the assembly in place. It was an elegant design really but one we need to eliminate.
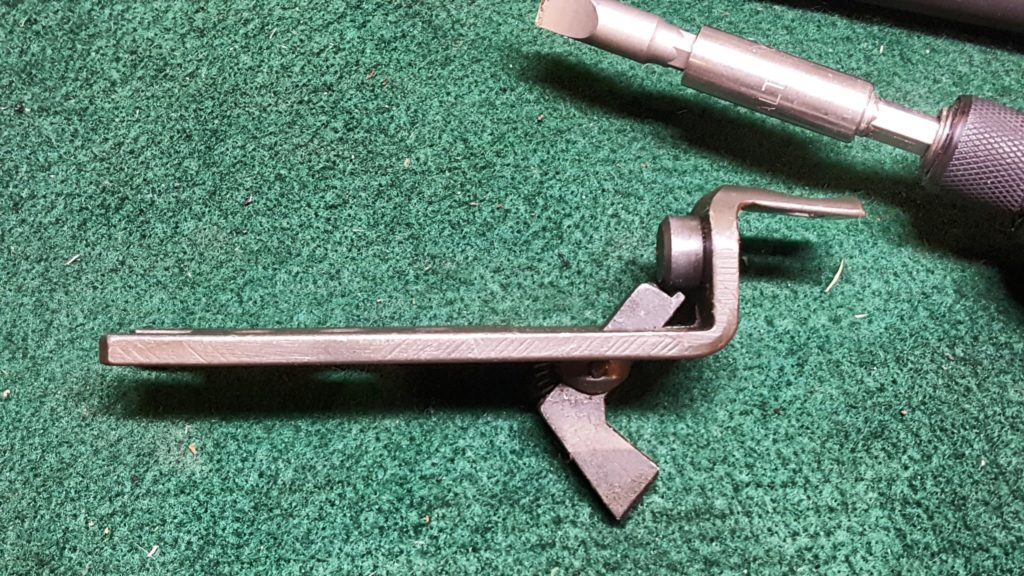
Here’s what the bracket looks like. By the way, you can see one of the big blade bits in my DeWalt power screwdriver. The quick release lever engages or releases the notch in the receiver and the cylinder pushes into the receiver to lock it in place. We’ll come back to the in a minute.
2] The next step is to strip the wood. Use your favorite wood stripper, such as BIX, or brake cleaner to get rid of the tons of oil that is in the wood. I used a ton of brake cleaner as it was snowing outside and I just wanted to get it done 🙂 If it were warm weather, I would have used Bix 2-3 times to get all the crud out.
3] I then mixed up a batch of Brownells Acra-Glas liquid epoxy, added black dye and glass fibers and then filled in all the gouges. The epoxy then sat overnight and cured. In cold weather, make sure you do something to keep the epoxy warm so it will cure properly. (Click here if you want tips on how to work with epoxy). Also, I added links to it at the end of this post.
Note, you can barely see two hairline cracks in the front of the stock to the left and right of the bracket. They were repaired with quality thin viscosity super glue — I like the Bob Smith brand personally and use his different formulations all the time. This stuff is very thin and readily runs into cracks. I just push the crack open, pour in the glue and then clamp the work for a minute while it cures.
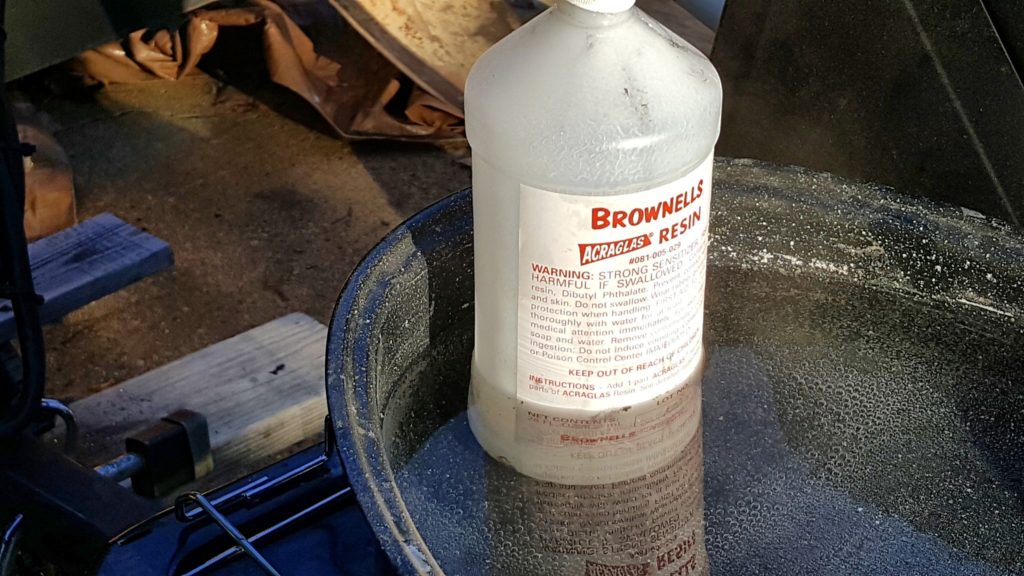
4] I then sanded the stock down starting with 100, 150, 220 and finally 400 grit sandpaper to get it smooth. I purposefully used black so they would look like repairs or burns. I figured this Uzi was older than me and ought to have some character marks to remind people of its age.
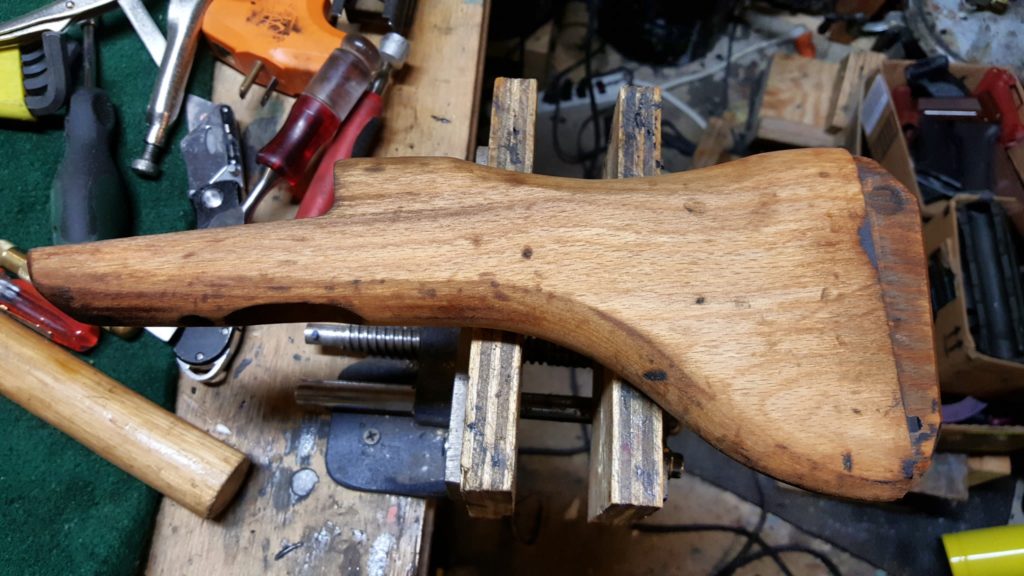
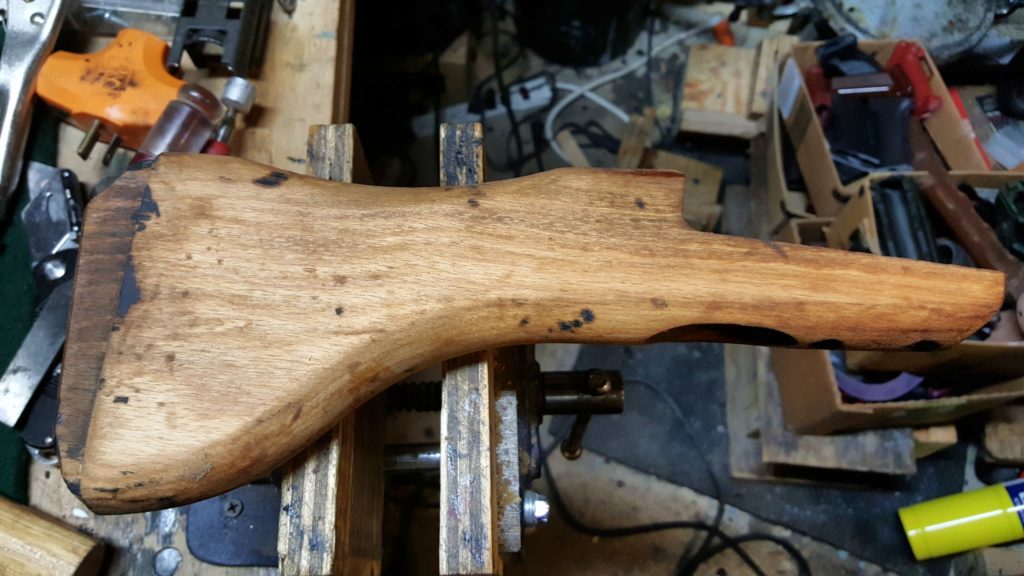
5] I rather liked the color of the wood in the parts kit so I used a 50/50 combination of boiled linseed oil (BLO) and black pine tar. Now this old school blend actually protects the wood and gives it a really nice slightly darker matte finish bringing out the color of the wood. So you can see we went from a yellowish color above to warmer orange-ish brown below. You apply the finish using a foam brush and chase it into the wood using a heat gun. Literally this stuff should be bubbling from the heat. You then wipe it down with a clean rag and repeat until you get the finish you want. I then go over with 0000 steel wool to make sure it is nice and smooth.
Note, properly dispose of BLO soaked rags as they may spontaneously combust from the heat of drying. The proper method is to lay them flat on a noncombustive surface and let them dry thoroughly. The length of time depends on many factors. I burn mine. Never ever just throw them in the trash.
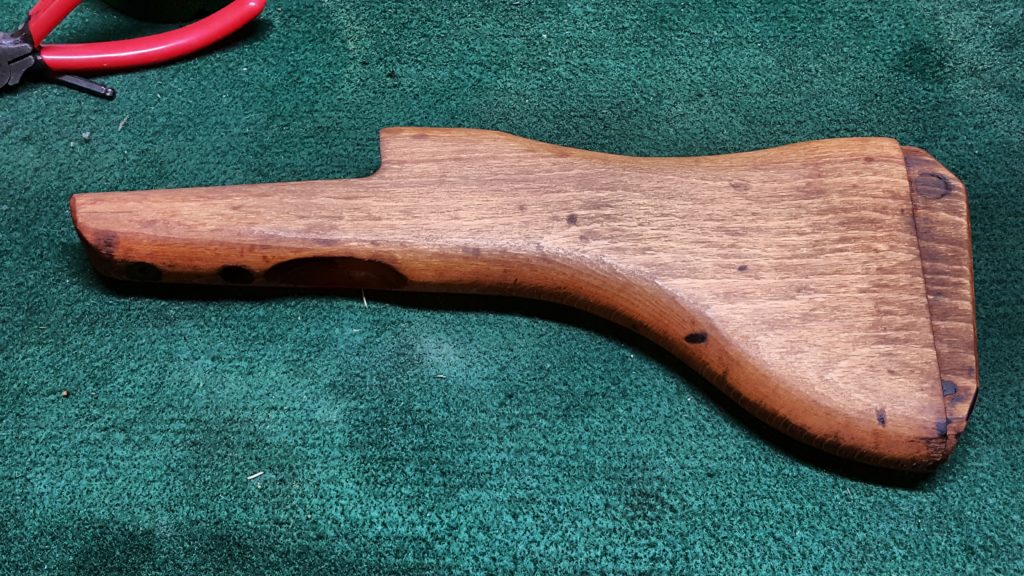
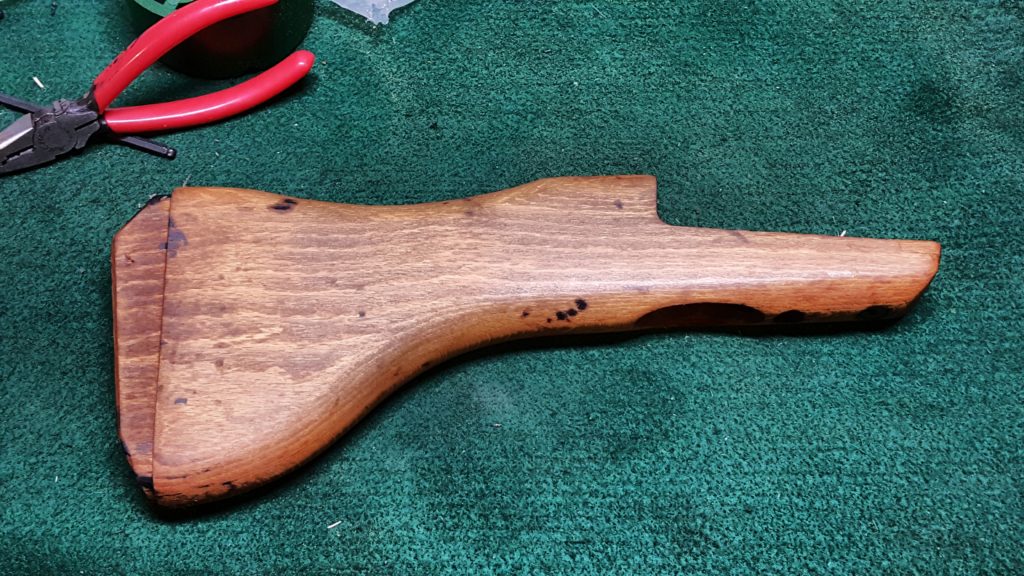
6] Next up we need to convert the stock bracket to be permanently attached – meaning it must screw into the receiver. I have seen several methods used and I’ll share with you what I did and you can decide how you wish to proceed. If you are uncomfortable with the machining required, a firm known as “JJ Custom” sells the brackets already converted.
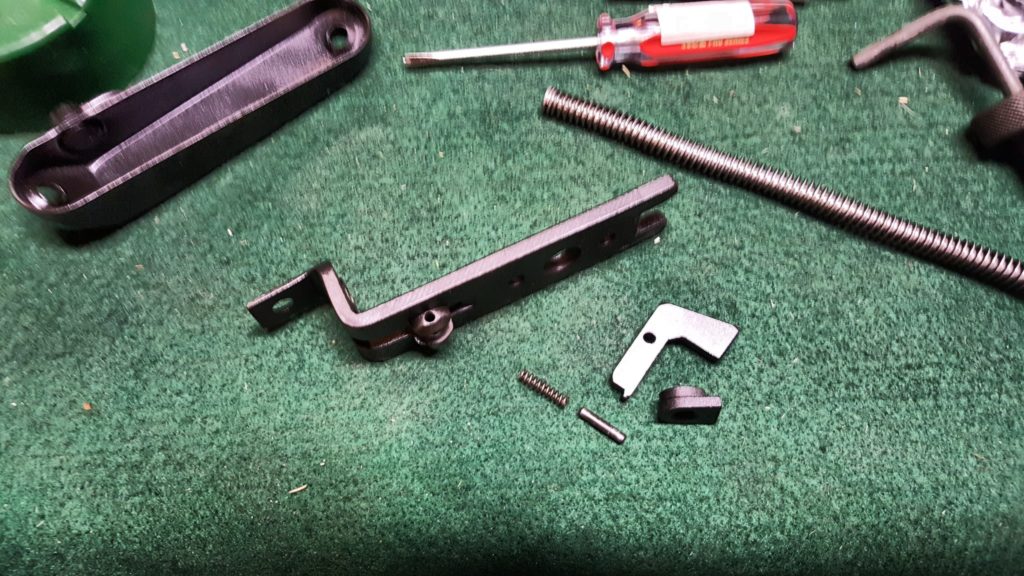
6.1] This is what the quick detach stock bracket looks like in the first picture and the cylindrical protrusion normally slides into the circular hole in the end of the receiver shown in the second photo.

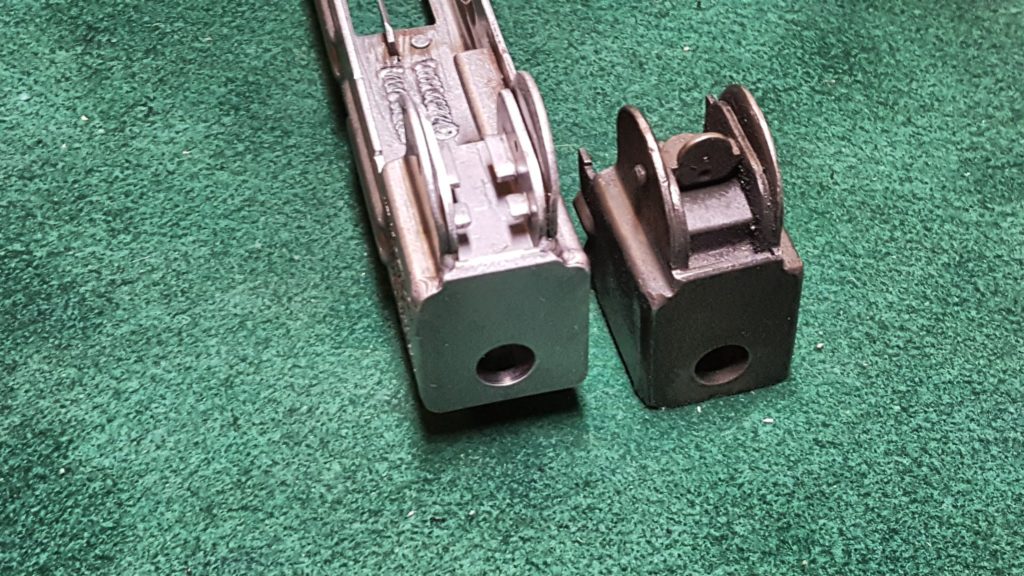
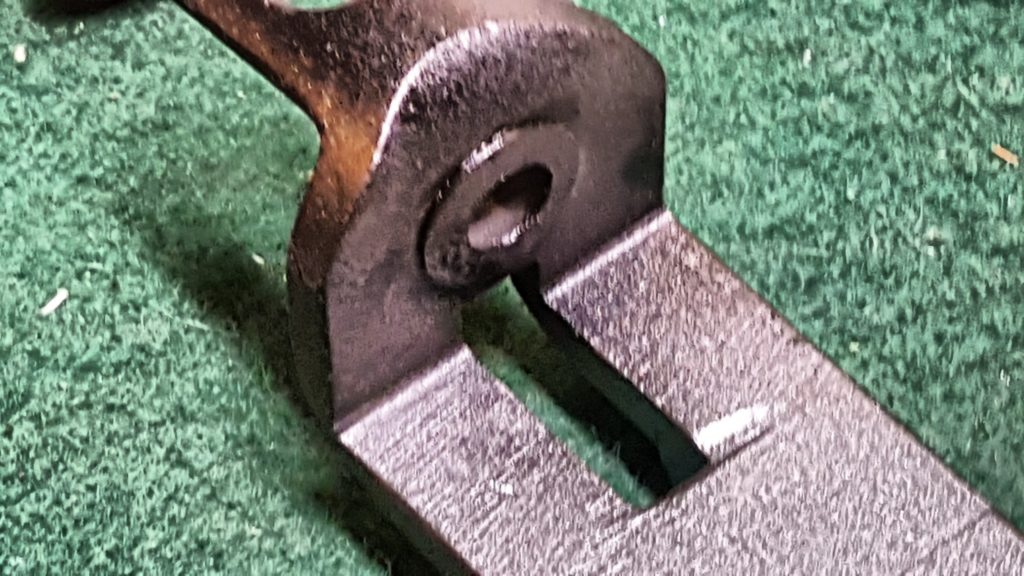
6.2] What we are going to do is to sand the cylinder almost completely away so it just barely goes into the hole to locate/position the assemby. Before that, I would recommend removing the catch from the bottom by pressing out the pin and removing the assembly. Be careful with the spring – mine launched into orbit and I never found it so I used a second one off my spare kit. Note, you can’t order this spring – you have to buy either an entire stock assembly or just the bracket if you can find it. I bought a third stock assembly and the moral of this story is to carefully catch that little spring vs. letting it launch. Note, the next photo shows it after I drilled and sprayed Molyresin on the part but I wanted to share a close up of the sanded down cylinder. I have a big 2×72 grinder (sander) that I use for knives that makes this work very quick. Just take your time and sand it square.
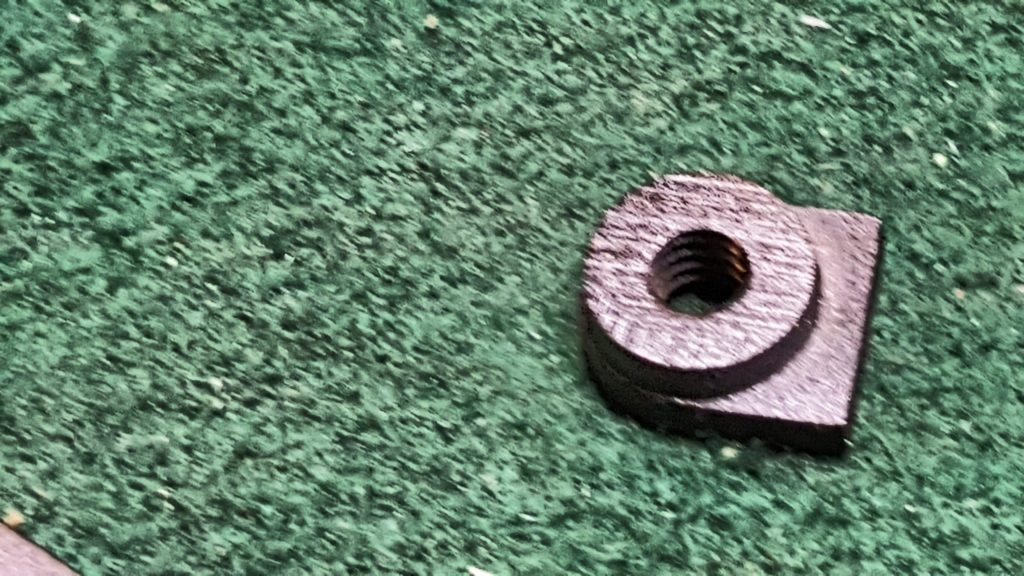
6.3] Next I took a folding stock mounting nut and ground it down until it just barely fit in the receiver hole from the inside. This nut is tapped for a 1/4-20 screw so this made sense to me. I carefully center punched the middle of the cylinder and drilled it with 9/32″ bit to give a bit of wiggle room to line up with the mounting nut. Again, the photos are after finishing. I went this route as the bolt buffer has a channel at the bottom that allows room for this nut and the dimensions had already been sorted out. I bought the folding stock nut from Robert RTG.
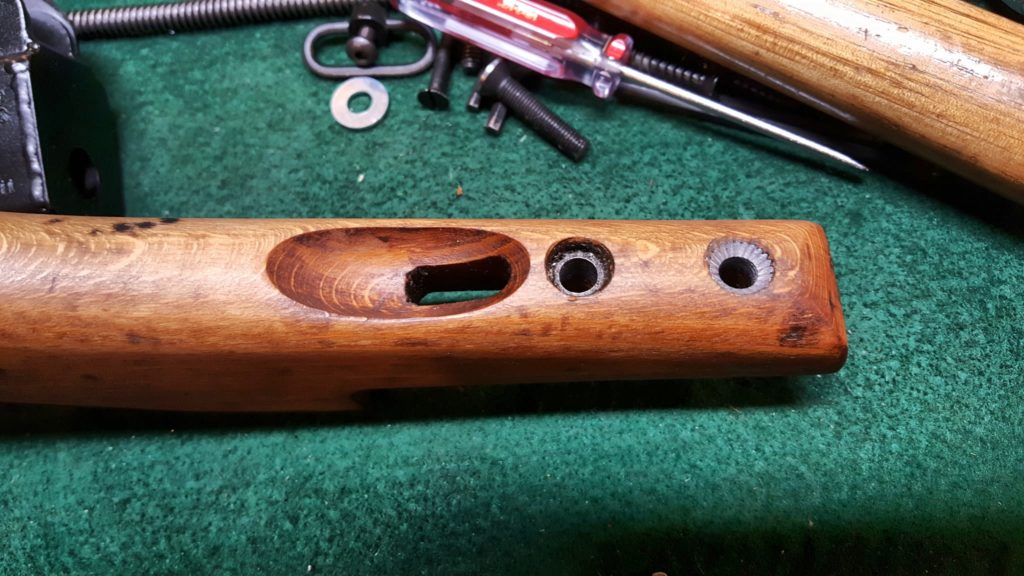
6.4] I have a lot of 1/4×20 button head screws so used one of them to attach the bracket and then drilled a recess in the stock to allow it to fit. I simply stuck the stock on the bracket and marked where to drill a 1/2″ recess. The intent is that the bracket can’t be removed without first removing the stock. A 1/4″ alloy bolt can handle a lot of sheer stress as can the thick receiver – that bracket is no longer quick anything. Also, it took a lot of filing and fitting to the the front of the stock bracket to slide under the grip frame lug on the receiver and I intentionally left the fit very tight to avoid slop. This was just a test fitting as I still needed to do the front screws on the stock.
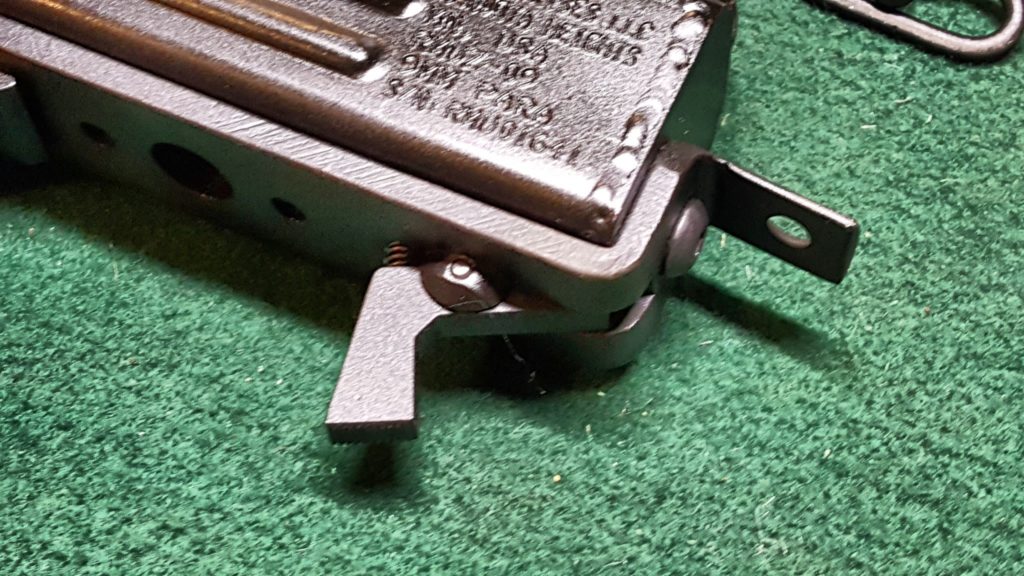
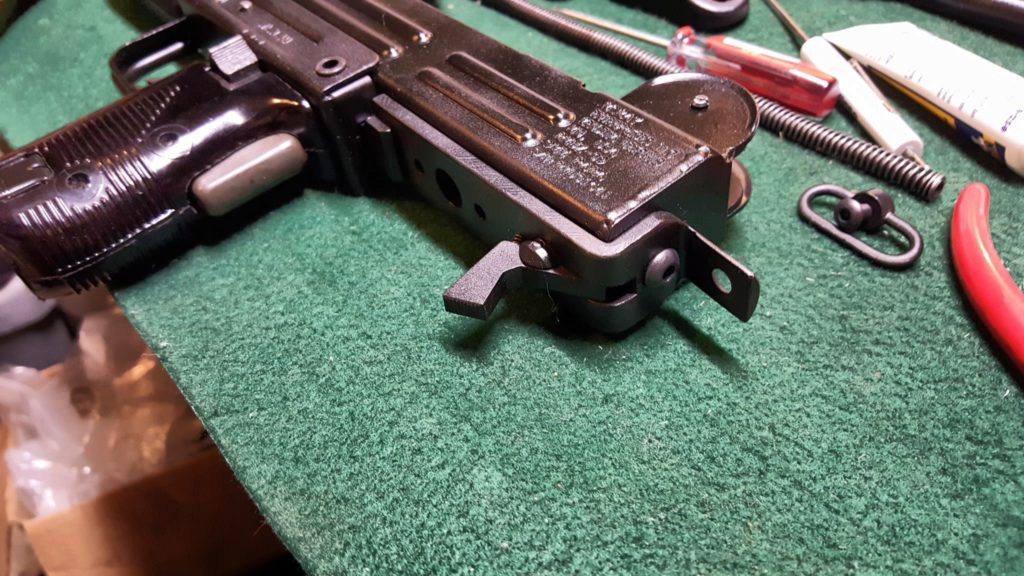
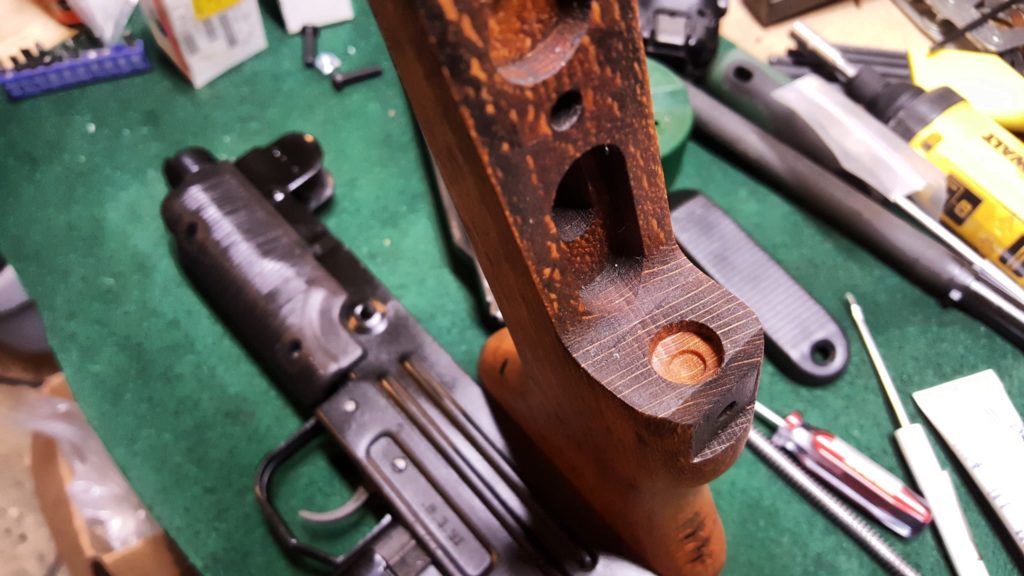
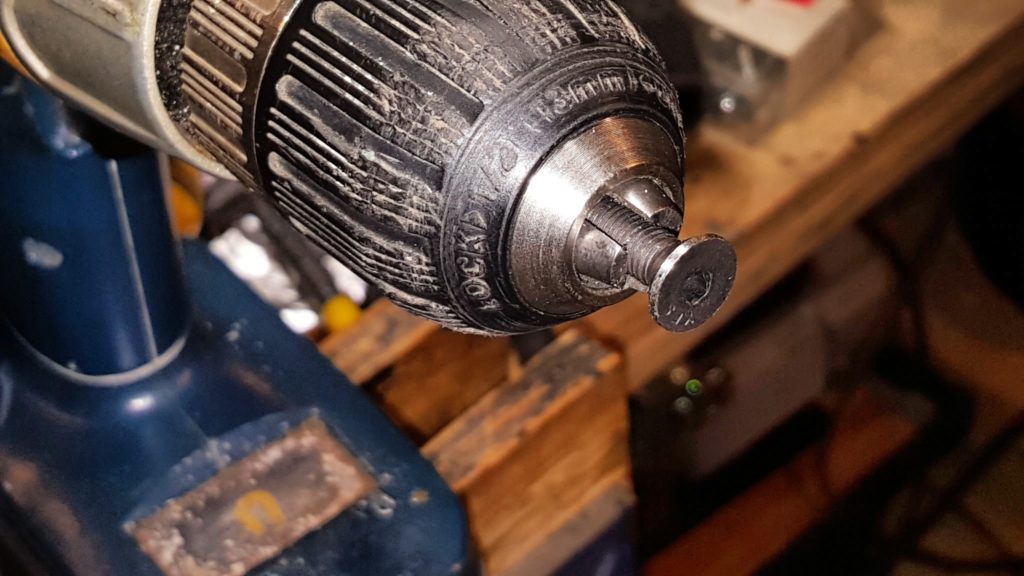
6.5] In looking at the stock and bracket, I decided to countersink the wood from the bottom and insert screws from the bottom. This is not a traditional look but I don’t think it messed the lines up too bad. The one point I did pause and think about was limited material to thread into on the bracket. Because the Israelis recessed the screw head holes, I had about an 1/8″ of material to thread so I debated welding the holes closed and then drilling and tapping new ones. I decided to skip welding for now and give it a go with bigger 1/4×28 NF flat head screws that I turned down the heads by chucking them in a hand drill and pressing the spinning screw head against my spinning sander. This trick works great by the way. I used a 1/2″ counter sink and a 9/32″ bit to open up the two stock holes. The holes in the bracket were opened up with a #3 cobalt bit and tapped with a quality 1/4-28 tap with cutting oil.
The second photo below shows the front hole opened up and then I did the same to the second one. The result seems very solid and I can always go back and weld the holes shut and start over if I have problems though I doubt I will. A 9mm doesn’t have much recoil, the Uzi is actually pretty hefty and the inertia will soak up the recoil plus I will be shooting this as a semi-automatic. I do not expect a ton of stress on those two screws and big top wood screw and recessed tang pushing into the surrounding wood will bear the brunt of it.
I then inserted the screws, tightened them down and used the sander to make them flush with the bracket. I then disassembled it so I could apply the Molyresin finish later.
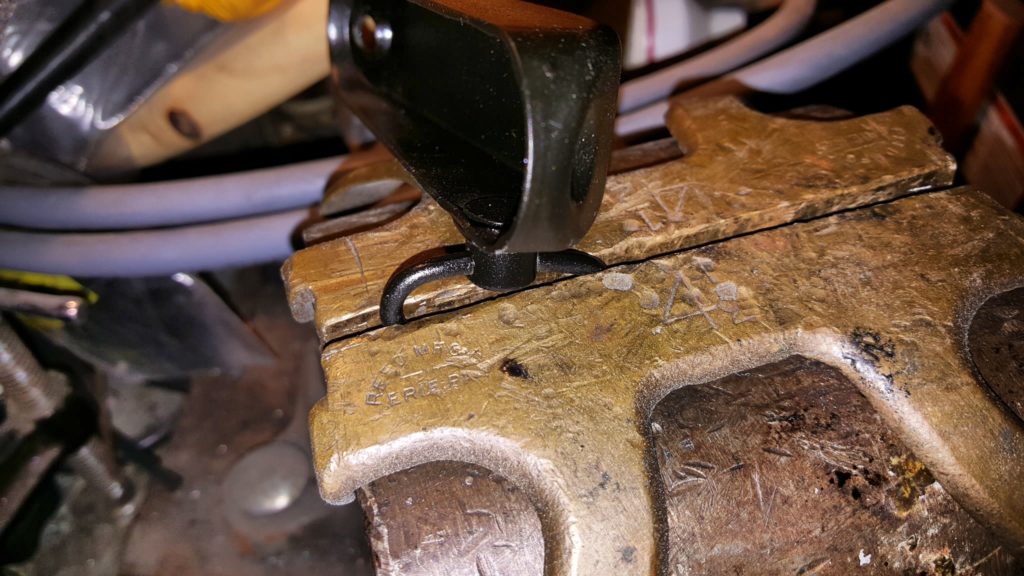
6.6] The stock was ready to go other than one minor detail – the sling swivel was a bit bent so I installed the brass protector plates on my vise’s jaws and then tightened them down on the wire loop to straighten it out.
So at this point, the stock was done. I had it in pieces waiting to apply the Molyresin finish that I will cover in post six.
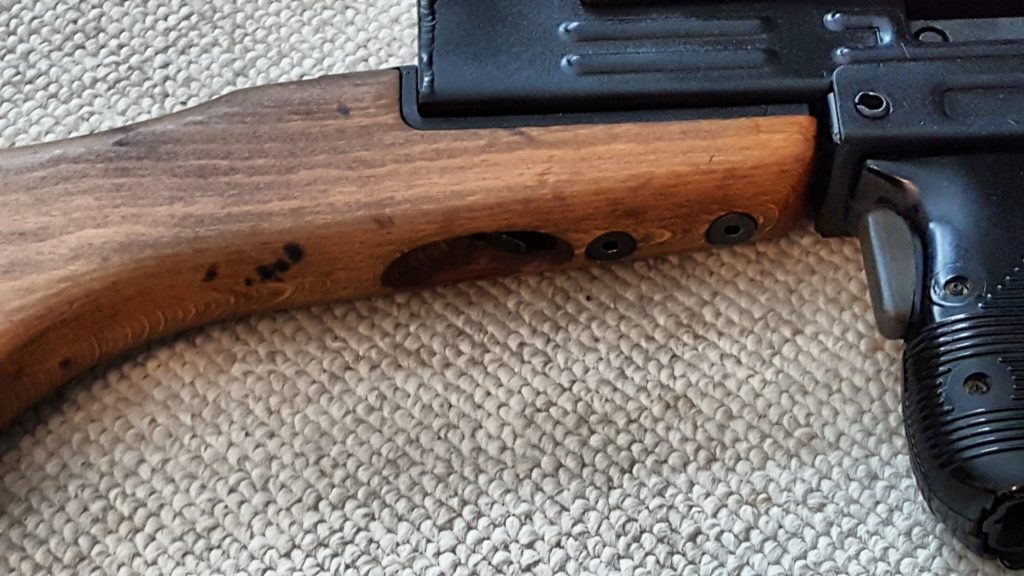
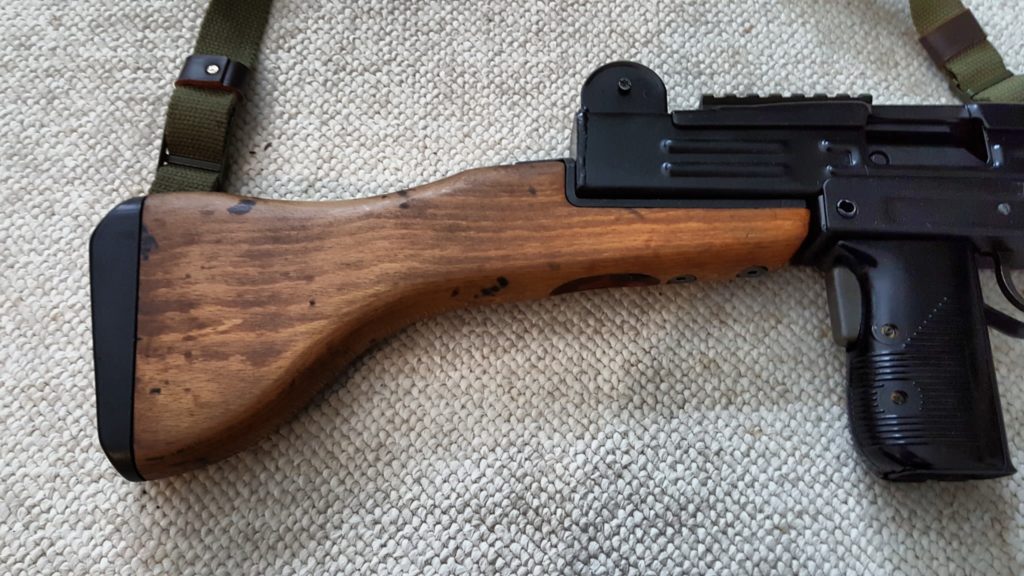
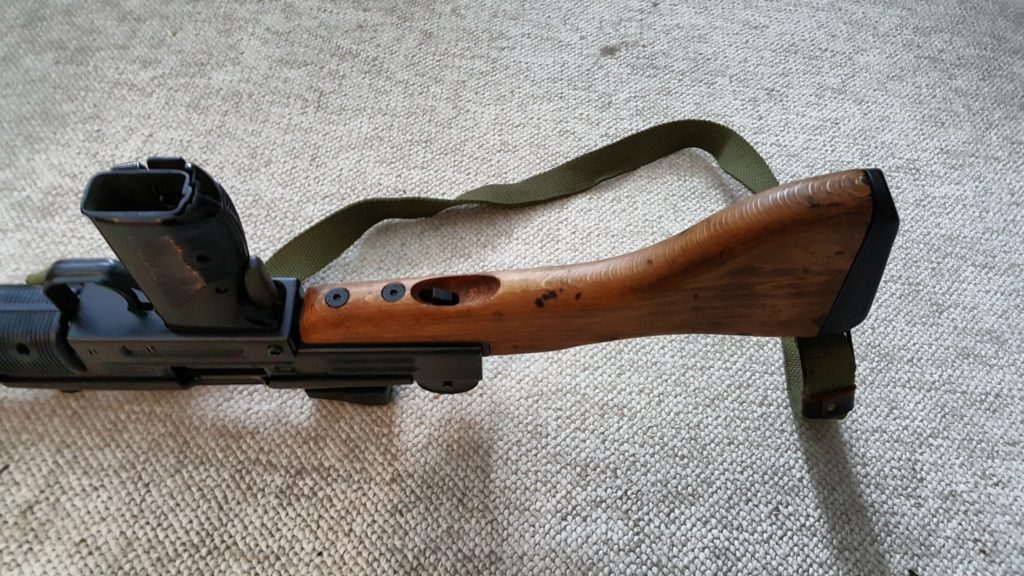
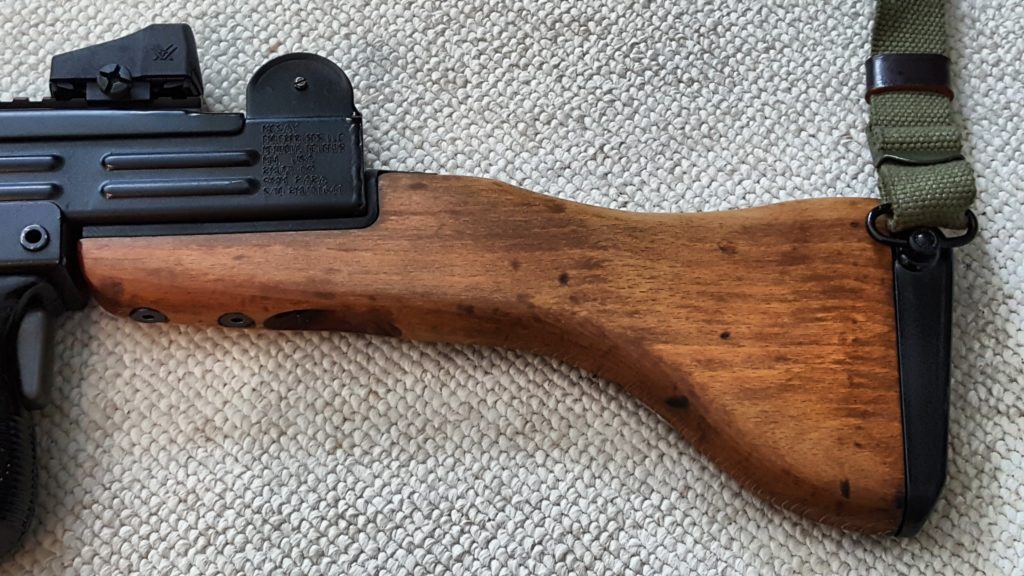
It’s a bit out of sequence but for folks just reading this post about the stock, here is the end result. With the new permanently attached stock, the overall length is a safe 31″. Here are some up close photos of the finished product so you can see how it turned out:
If you find this post useful, please share the link on Facebook, with your friends, etc. Your support is much appreciated and if you have any feedback, please email me at in**@*********ps.com. Please note that for links to other websites, we are only paid if there is an affiliate program such as Avantlink, Impact, Amazon and eBay and only if you purchase something. If you’d like to directly contribute towards our continued reporting, please visit our funding page.
