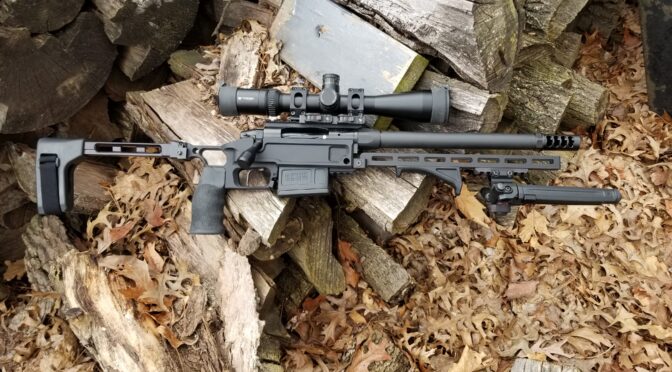
Okay, we’re coming into the last post. In the first post I covered all the parts that were used. The second covered installation of the barrel. The third post provided an overview of the trigger and chassis and now we’re almost done with the installation of the brake, optic, bipod and angled foregrip. Let’s dive in.
The Brake
The American Precision Arms Little Bastard brake is very interesting. It’s built for precision rifles and comes with a series of holes drilled in pairs on the top to allow you to dial in how you want it to vent the gasses. To start, I simply left the top exhaust holes empty.


You simply thread the brake onto the end of the barrel and then unscrew the nut from the end of the brake and jam it into the shoulder of the barrel to lock it in place. For folks new to this work, use a fixed wrench and not an adjustable wrench for stuff like this. Adjustable wrenches will slip and do nasty stuff to your parts. I only use fixed wrenches on firearms now after a number of mishaps. An adjustable wrench can change a quick job into a long job real quick.
Correctly Installing 1913 Rail Base On The Action
Okay, so this is when I found out the Picatinny rail base was a separate piece. Nothing went wrong but I sure said a prayer for nothing getting botched due to my stupidity. Big Horn installs one screw so you need to install the other three and with blue loctite applied and then remove the original screw and do the same. Short screws up front and long screws in the back. I lightly snugged all four down and then torqued them to 20 inch pounds.

The American Defense AD-RECON-SL Mount
This is a great scope mount and the one key tip I can give you is to remember that the rings are asymmetrical – the bottom of the rings is thinner than the tops so don’t flip them around or you will be wondering what is going on with the alignment of the screws.


The Magpul Angled Foregrip (AFG) and Bipod
The last three things I did was to add a small 7-section aluminum rail via MLOK out to the front and clamped the Magpul bipod to it. By the way, I really wasn’t sure if I would like the bipod because I’m a bit of an Atlas snob now but I really was impressed and will probably use them again but next time I will get one that is ready to go for an ARMS quick detach mount vs. the screw clamp model I bought. I also added the Magpul AFG because I wasn’t sure if I would like holding a bolt rifle with the relatively narrow FARend.
The Results Thus Far
Conclusion
I loved everything but that mile long FARend and the screw attachments for the Magpul bipod. I ordered the 8″ FARend and an American Defense adapter to remedy those issues and that will be the last post.
As a reminder, the first post has the links to all of the products used.
If you find this post useful, please share the link on Facebook, with your friends, etc. Your support is much appreciated and if you have any feedback, please email me at in**@*********ps.com. Please note that for links to other websites, we are only paid if there is an affiliate program such as Avantlink, Impact, Amazon and eBay and only if you purchase something. If you’d like to directly contribute towards our continued reporting, please visit our funding page.


