This is the third post in a three part series about customizing a Lynx 12 Shotgun. In the first post, I wrote about my “out of the box” observations and in the second post, I disassembled the Lynx and also recorded observations. In this final post, I’ll add in my planned customizations and explain my rationale for each.
| Palmetto State Armory has SDS Lynx 12 gauge shotguns for sale – click here to go to their order page. |
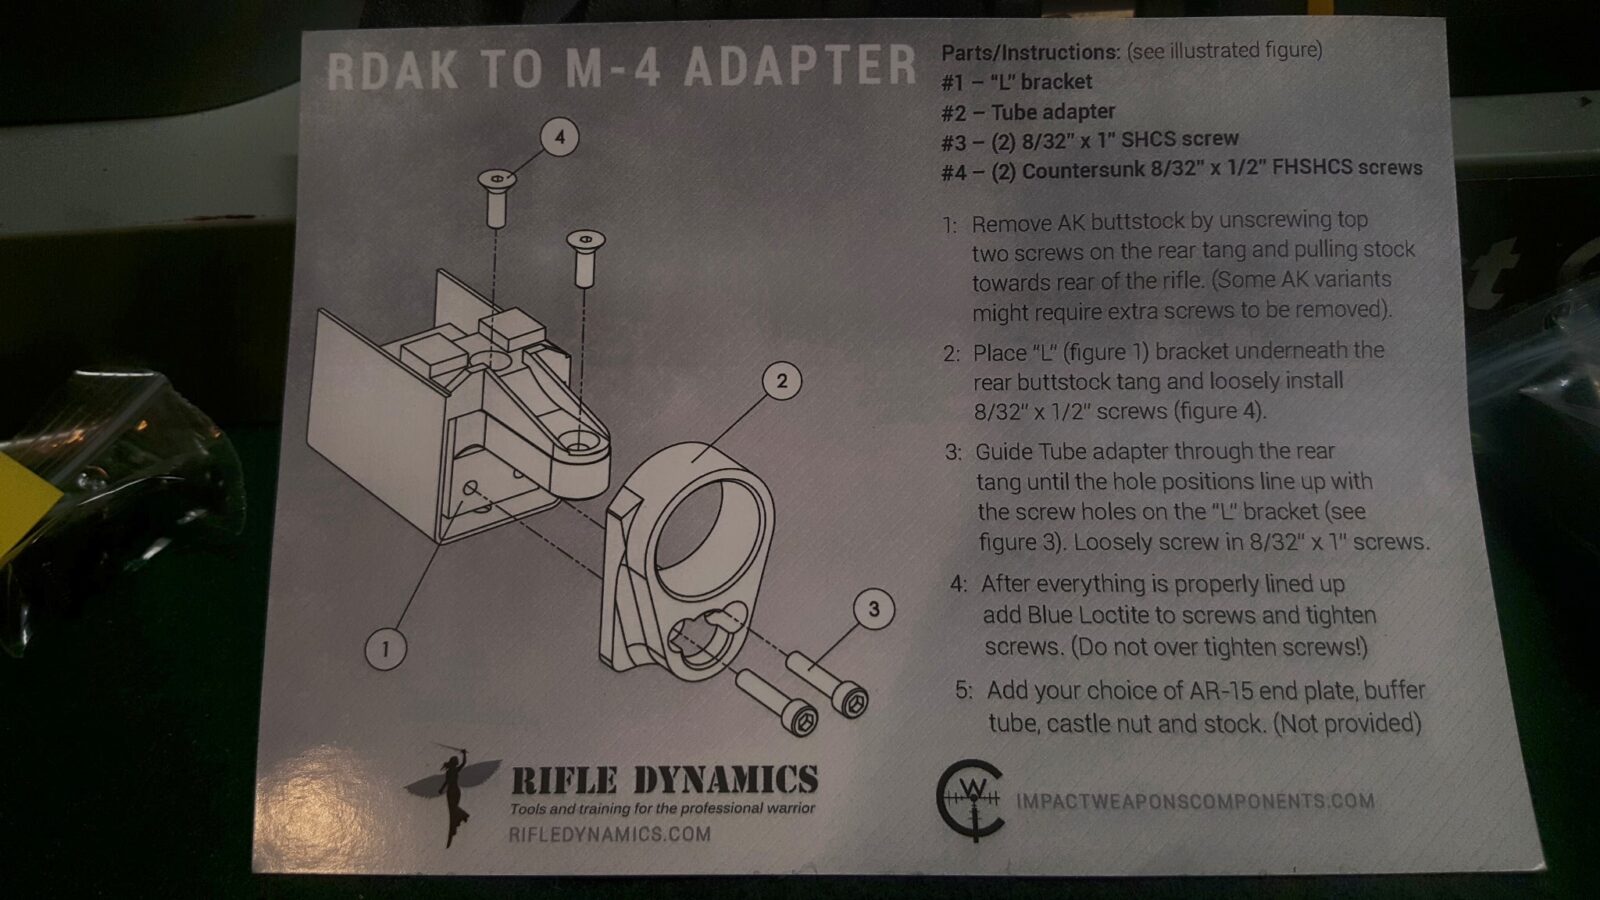
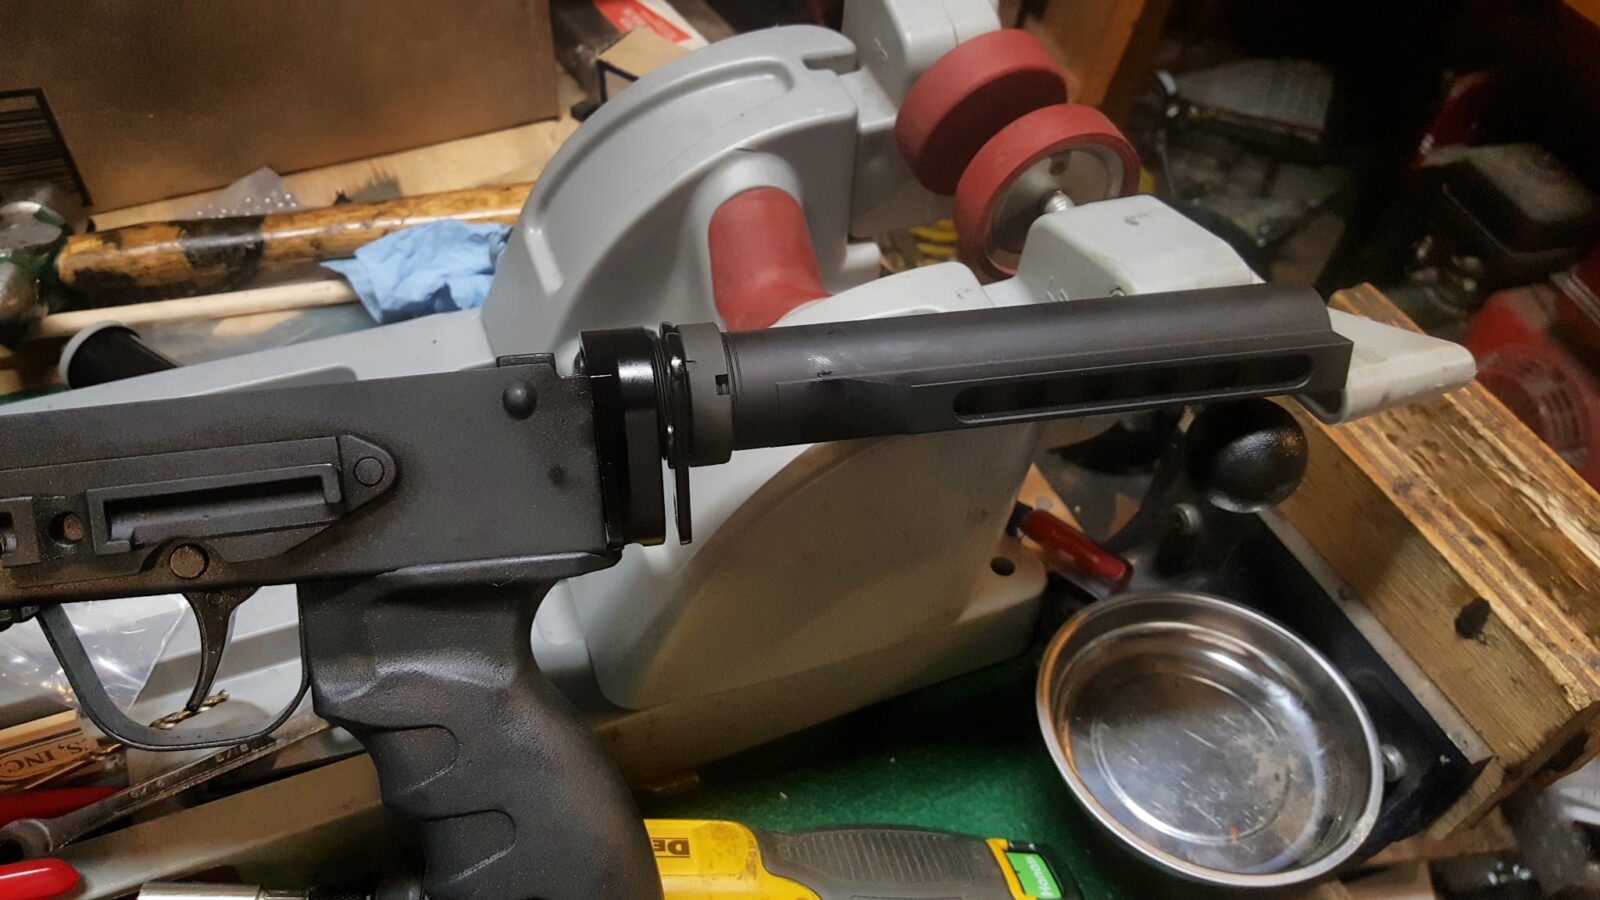
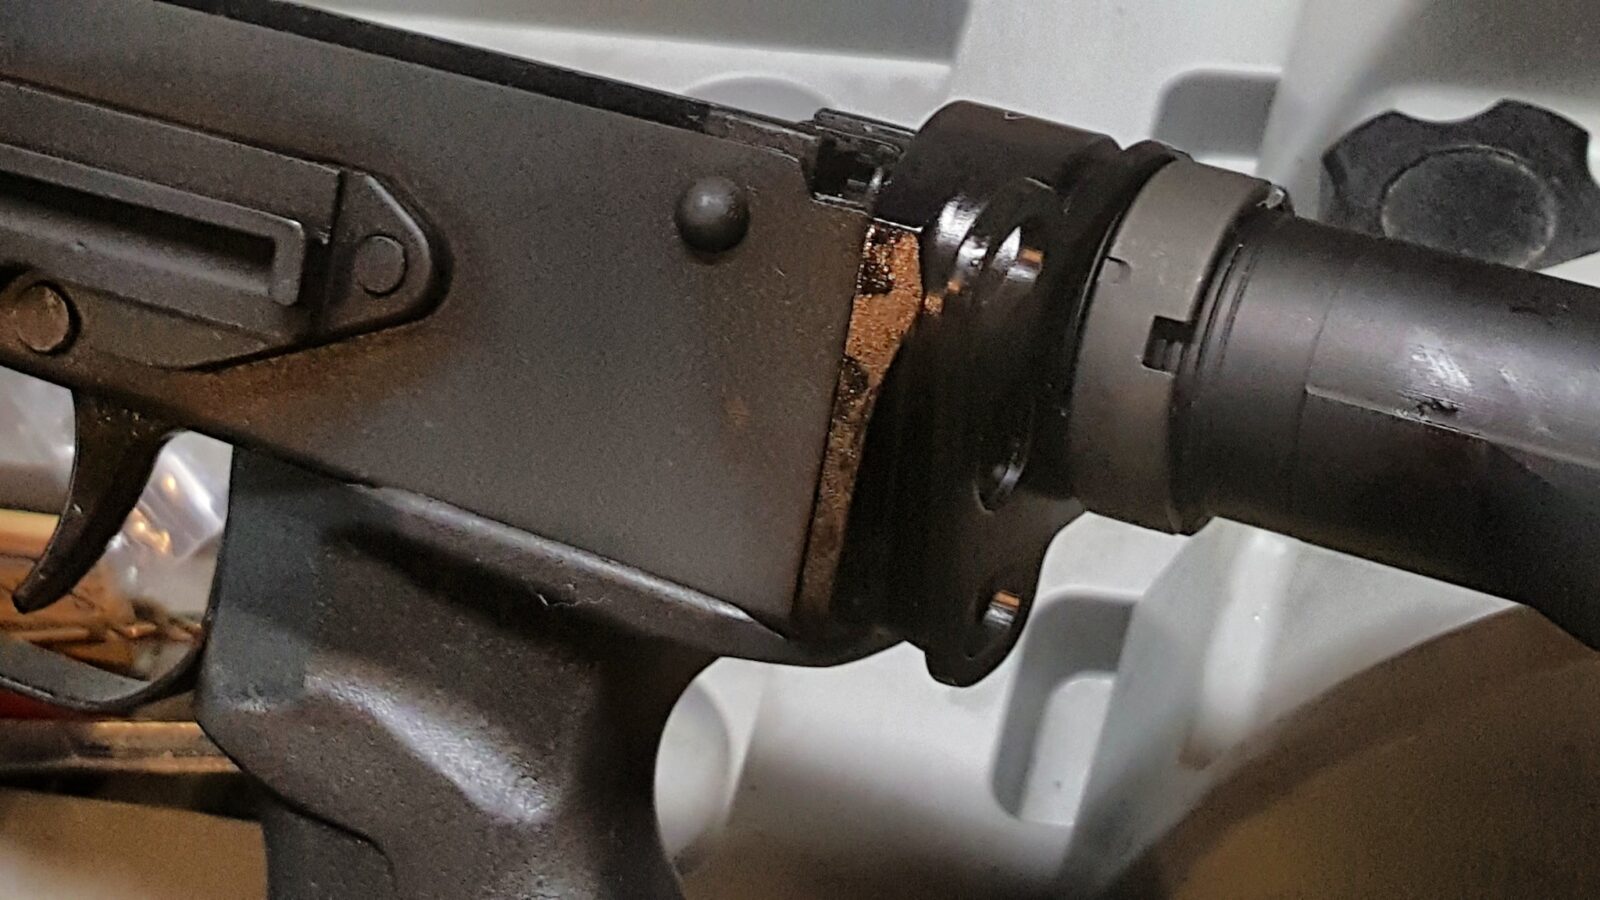
Installing the Rifle Dynamics AK to M4 Adapter
I like M4 stocks and did some digging around. In the past, I have used Ace/Double Star and other modular adapters. The problem with them is that unless you cut the tang off the rear trunnion, you have a rather long receiver block sticking out of your rifle and I wanted to avoid that.
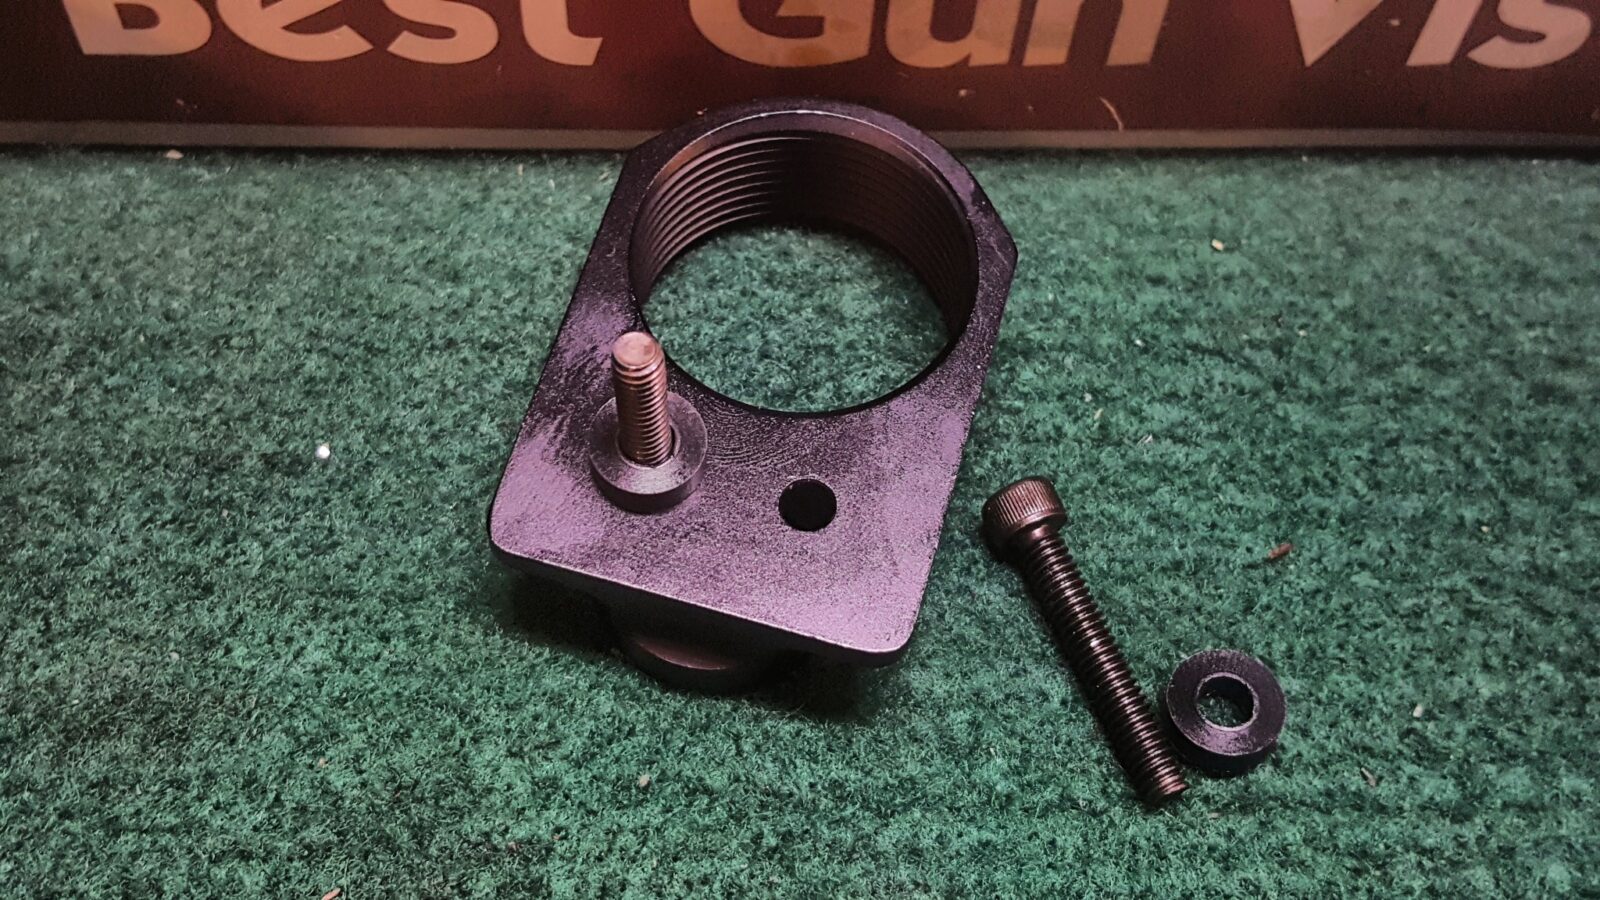
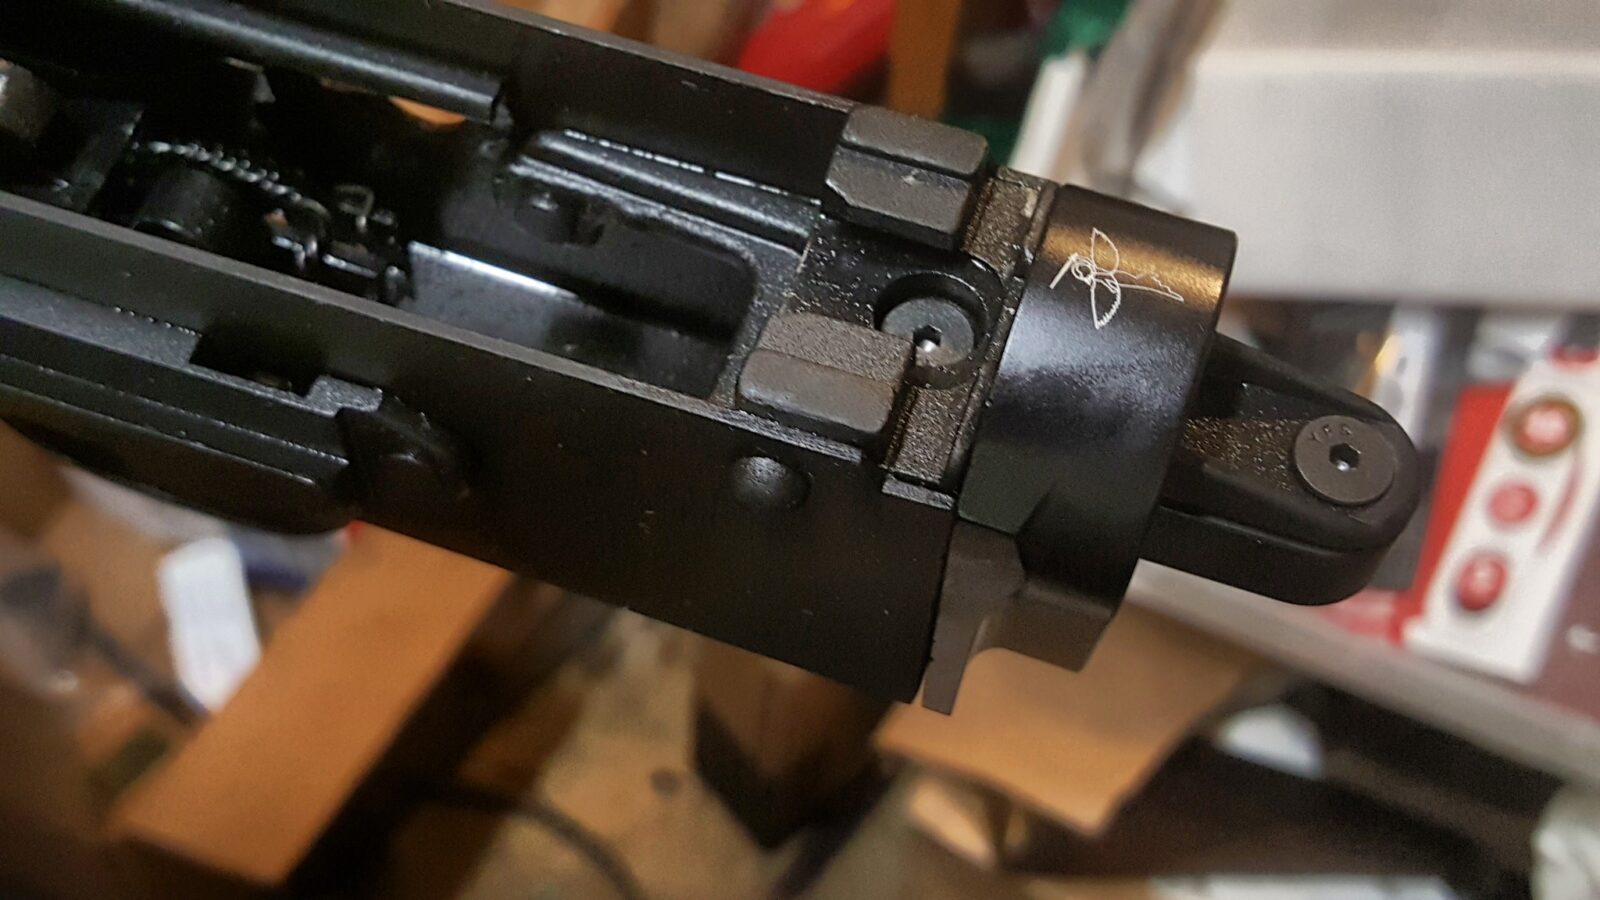
I do a lot of surfing and a new style of adapter had caught my eye made by Rifle Dynamics. They have an AK to M4 stock adapter that rides over the tang vs. behind it. This design gets rid of the receiver block sticking out or the need to alter the rifle. Brownells carries them. Note, the PSA adapter is almost identical.
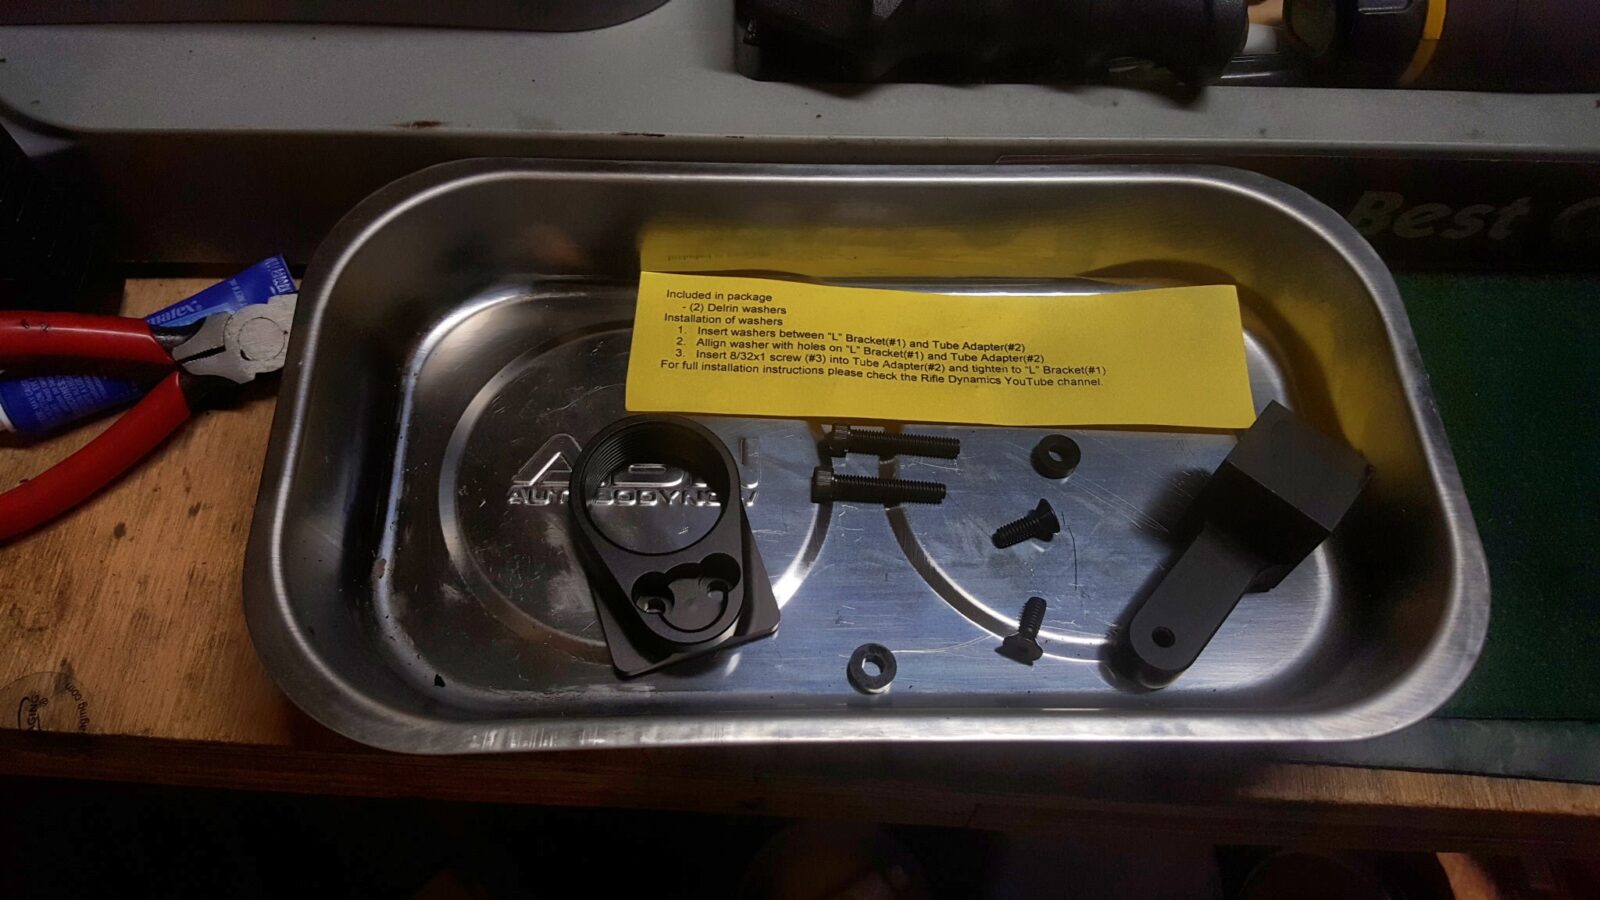
The unit comes with clear instructions but do read the little yellow supplement they include. After getting feedback about the angle the unit positions the buffer tube at, they added two small Delrin washers that need to be installed also.
Installation took about 10 minutes – in large part because I was snapping photos but also because I didn’t want to rush and make a mistake.
So the big L-Bracket just goes under the tang and is screwed into place. I put Blue Loc-Tite on both screws to prevent them from loosening up. Based on past experiences with stocks that loosened up using modular mounts, be sure to use some form of thread locker. I did not tighten the screws down yet because I wasn’t sure if I would need to wiggle the tube adapter into place or not.
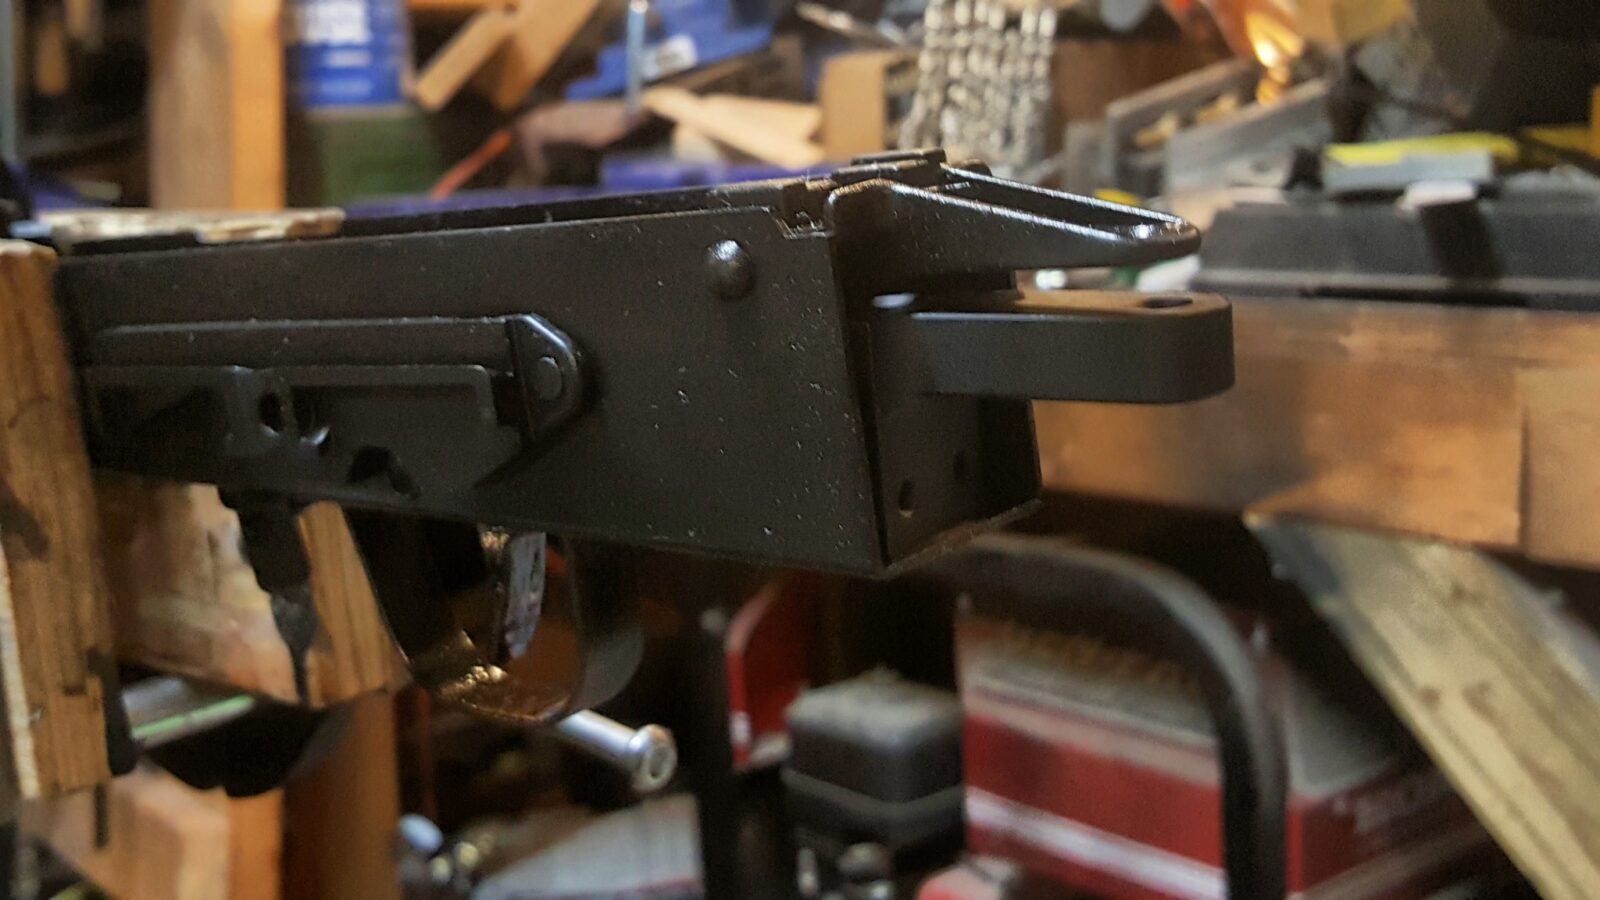
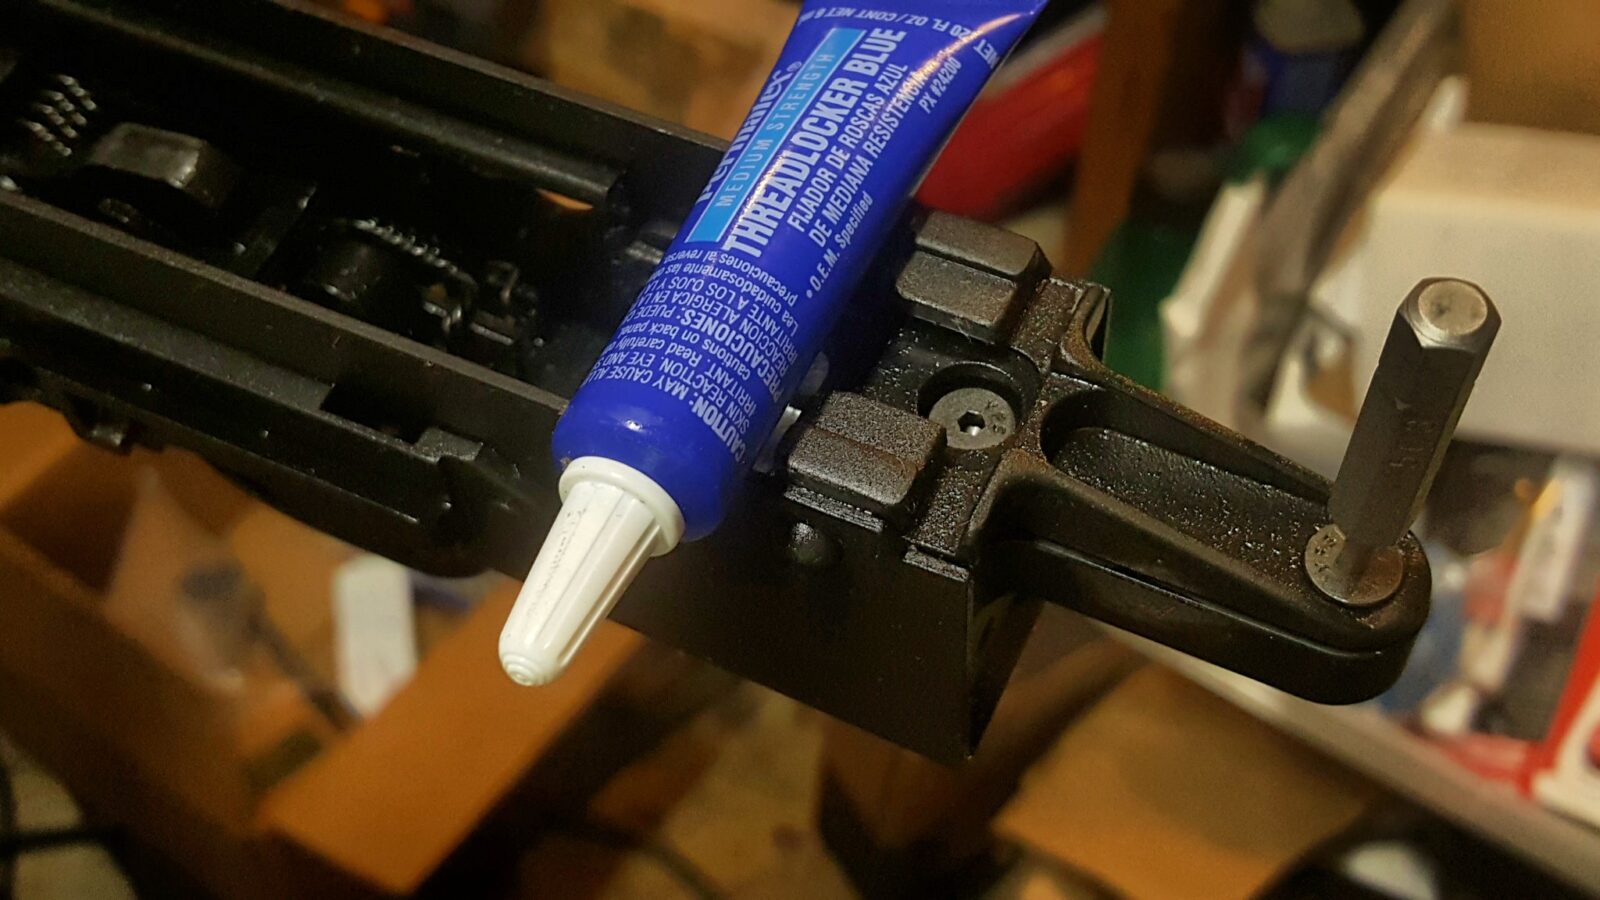
So with the L-Bracket in place, I then attached the Tube Adapter. The Delrin washers go between the Tube Adapter and the L-Bracket. I applied Blue Loc-Tite to these screws also.
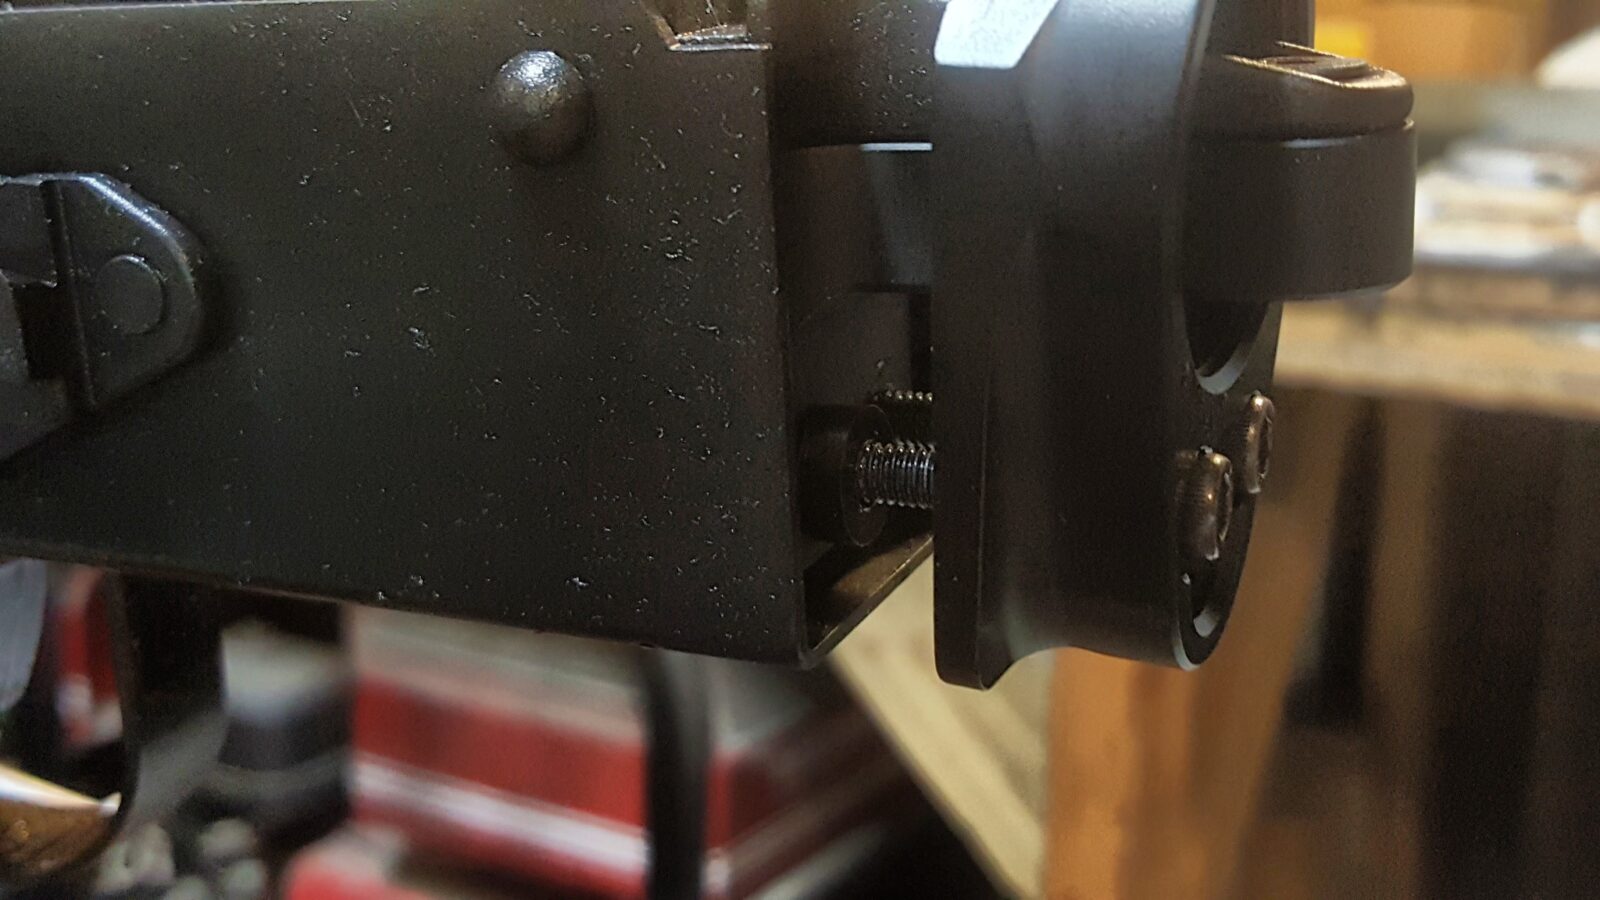
I then tightened down all the screws and that was it.
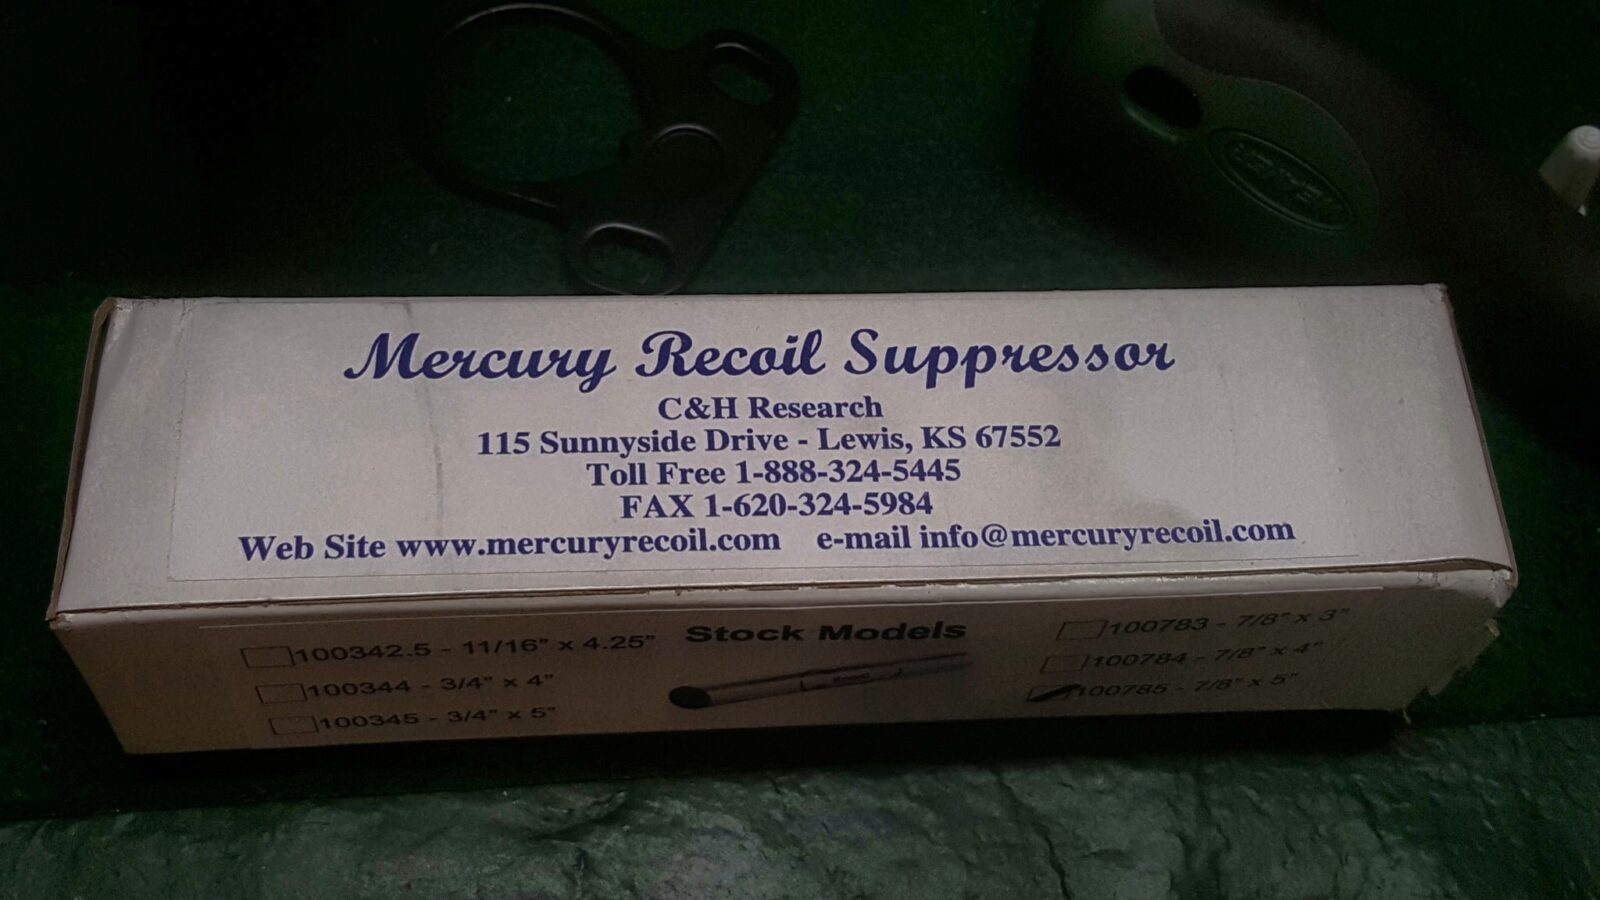
Adding a C&H Mercury Buffer to the M4 Buffer Tube
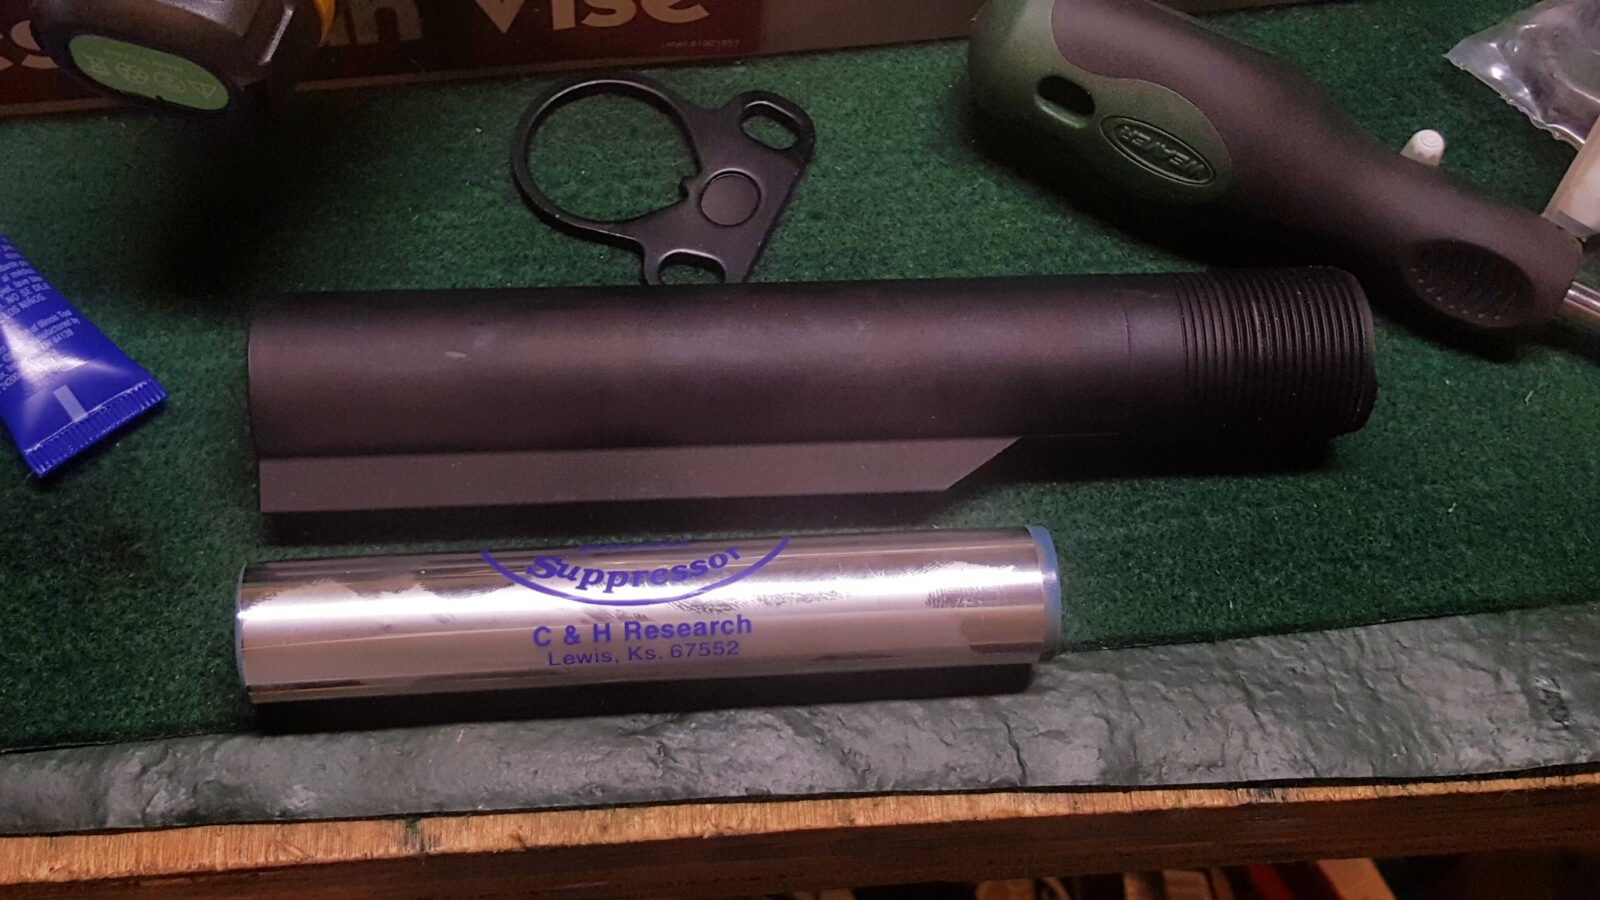
Based on past experience with other similar firearms, I knew the Lynx would be front heavy plus I knew 12 gauge shotguns in general have a fair amount of recoil. Both of these could be addressed by installing a C&H Mercury Recoil Suppressor. I use the model 100785 as I know it will slide down the buffer tube of an M4 given the suppressor measures 7/8″ x 5″. You wouldn’t use this in a normal AR because the buffer tube would have the buffer and spring inside. However, in our case, an AK does not use the buffer tube so that means we can do whatever we want. I ordered by unit from MPC Sports, where I have bought them in the past.
I’ve used these a number of times over the years in shotguns and rifles to add weight to the rear and to reduce the recoil. This last part is interesting. Basically you have a 7/8″ diameter heavy tube that is 5″ long that is hollow. Inside it is partially filled with liquid mercury and then very tightly sealed — there is no way it is coming out.
What happens is that when the firearm is fired and the rearward motion starts, the mercury liquid sloshes in the tube. The tube goes back and the mercury partially stays in place until it is hit by the front of the tube. This helps to split the recoil impulse into two parts – the initial impulse and then when the mercury hits.
If you can’t afford a mercury buffer you could always fill the rear 5-6″ with bird shot and then cap it with a thick layer of epoxy.
The Mil-Spec six position buffer tube is a straight forward unit made by Expo Arms and I bought it from Primary Arms. You will still need to get the castle nut and end plate of your choice. Primary Arms, Brownells and Palmetto are all good places to check. I really do not recall where I got the castle nut and end plate I used on this project – they were in a parts bin.
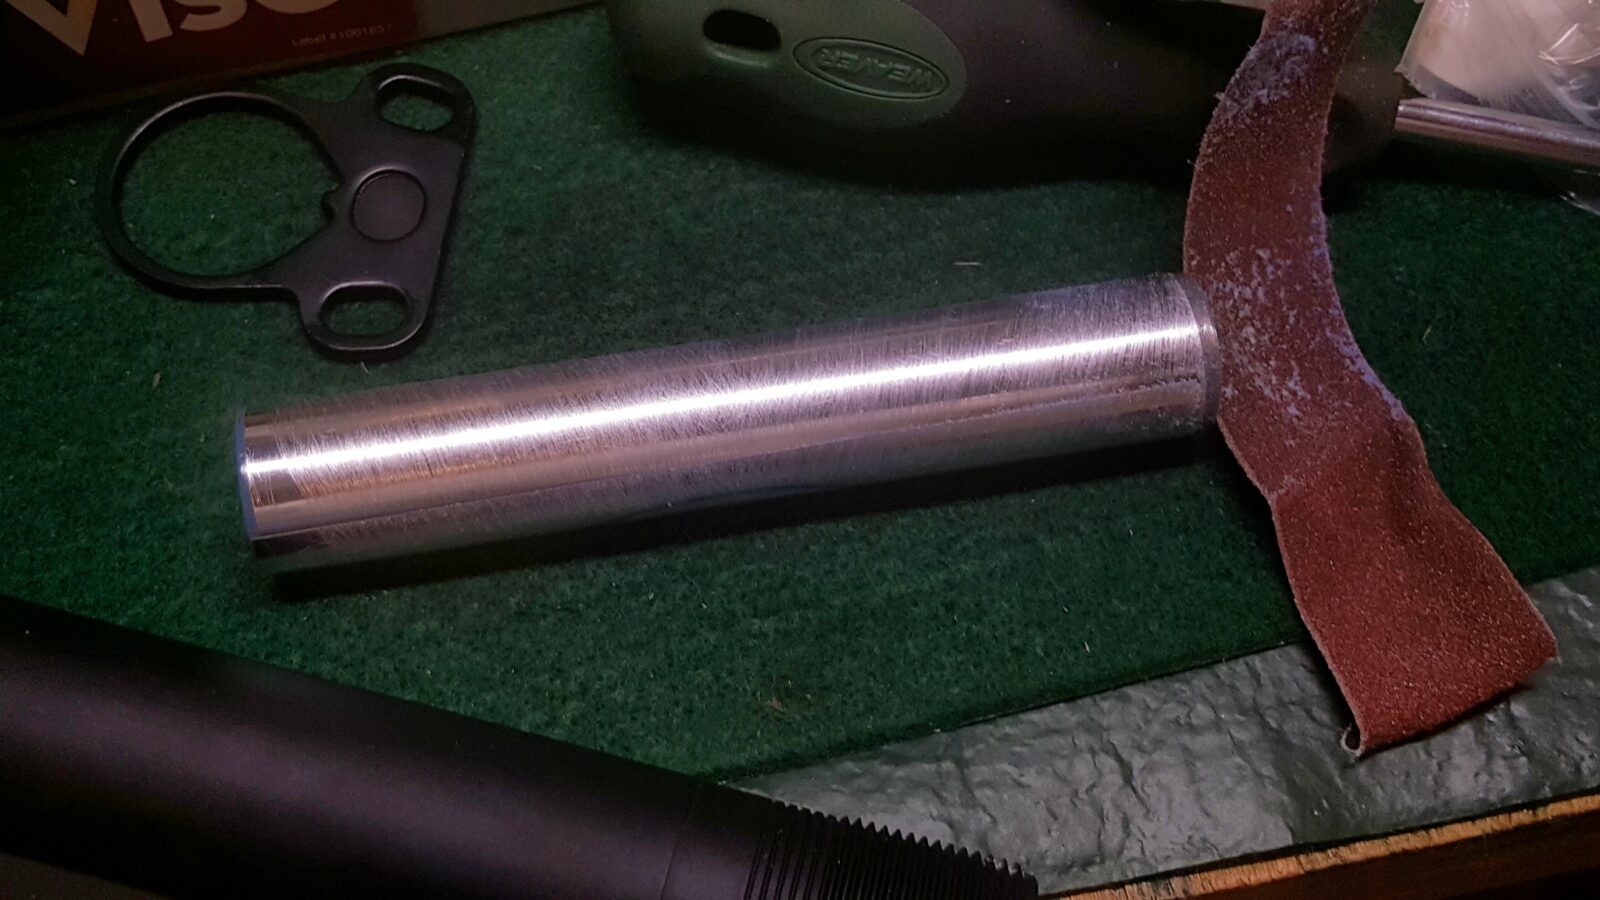
Installation is very simple because all you need to do is epoxy it into the buffer tube. I would recommend scuffing the tube with a bit of sand paper so the epoxy can stick well and then spray down the supressor and the inside of the buffer tube with brake cleaner.
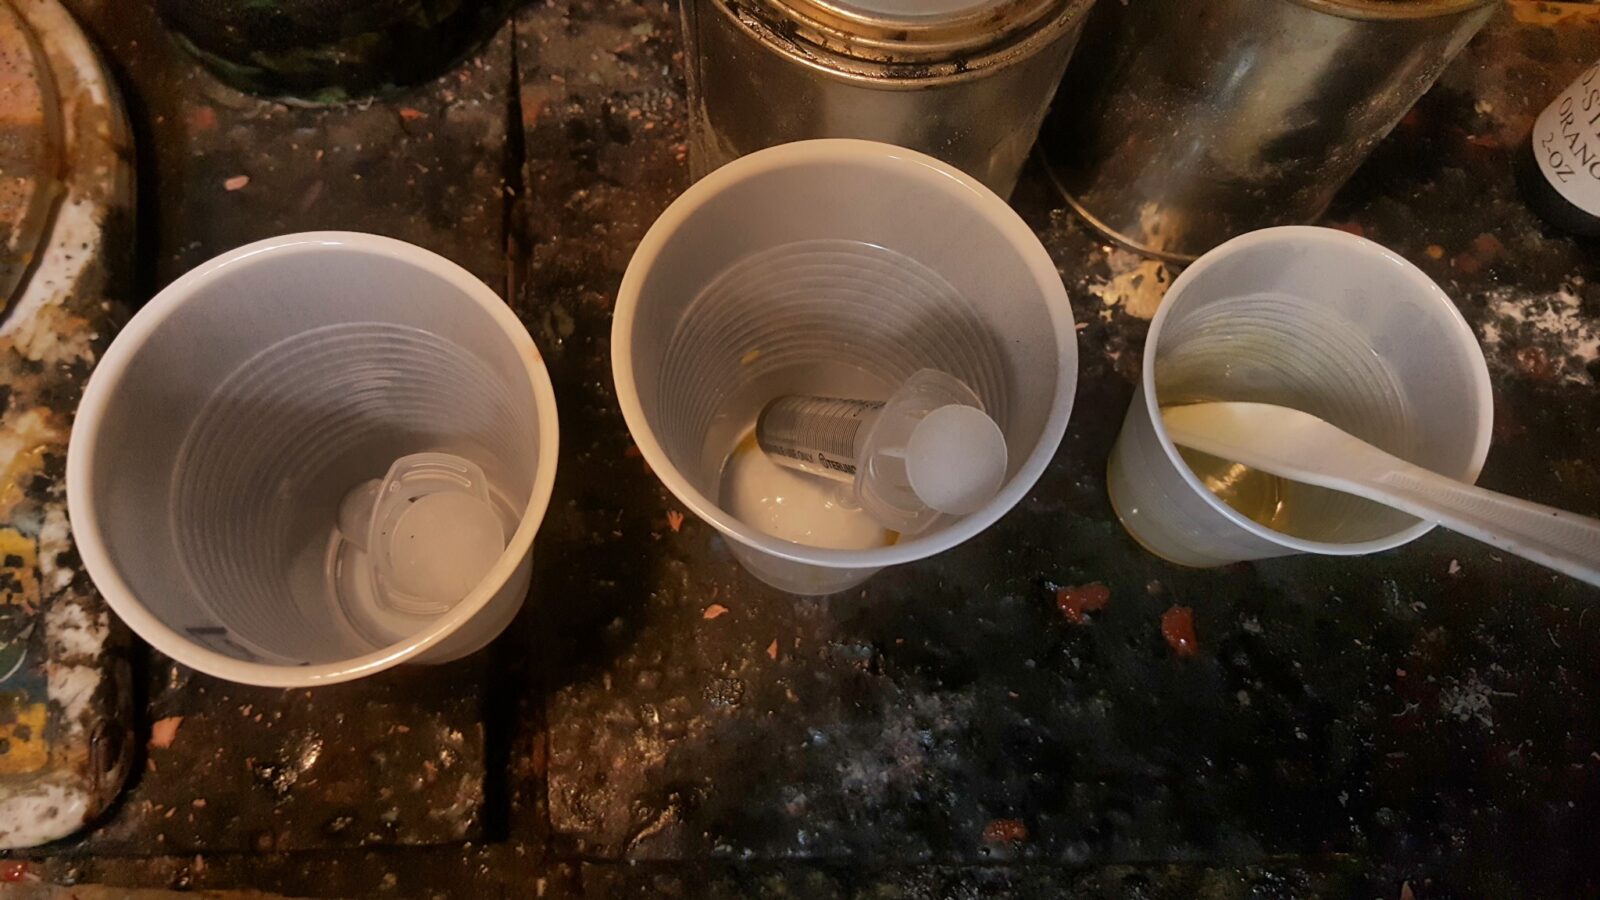
Not all epoxies are up to the task. I’d recommend Brownell’s Acra-Glas liquid epoxy for this (not their gel version). I use 10cc syringes to meter out 4 parts resin to 1 part hardener. I mixed up and used 4 batches so 16 cc of resin and 4 cc of hardener. Make sure you stir it completely. The stuff has a long pot like so really mix it well.
I secured the buffer tube in my vise and made sure it was vertical. Next, I poured a bit down in the tube first – just enough to put a thin layer at the bottom and inserted the suppressor into the tube and poured in the remaining epoxy. It will need to sit and cure for 2-4 hours before you can handle it. I keep an eye on the remnants in the mixing cup to see when it is hard enough to handle as the temperature will affect how long it takes. Note – it needs to cure 24 hours to reach full strength and you’d want that before firing the weapon and subjecting the epoxy to stress.
At any rate, after pouring, wipe off any epoxy you may get on the tube. Brake cleaner on a rag will help until it cures. After that, it would likely require sanding to remove so be sure it is clean before you walk away.

So with that done and curing I moved on to the grip.
Installing the Ronin’s Grips AK-12 Grip
The Lynx comes with a basic pistol grip but I wanted to use one of my AK-12 grips. These are very ergonomic and feel really good to me. I wear an XL-size glove and both the size and angle work for me.
I replaced the small 5mm bolt with one of our 6mm alloy bolts and also used a 6mm grip nut that I had in my parts bin to secure the grip in place.

In the same manner as other AKs, the grip nut sits in the square hole behind the trigger guard and then the grip sits on the other side and the bolt pulls them together with the receiver sandwiched in the middle.
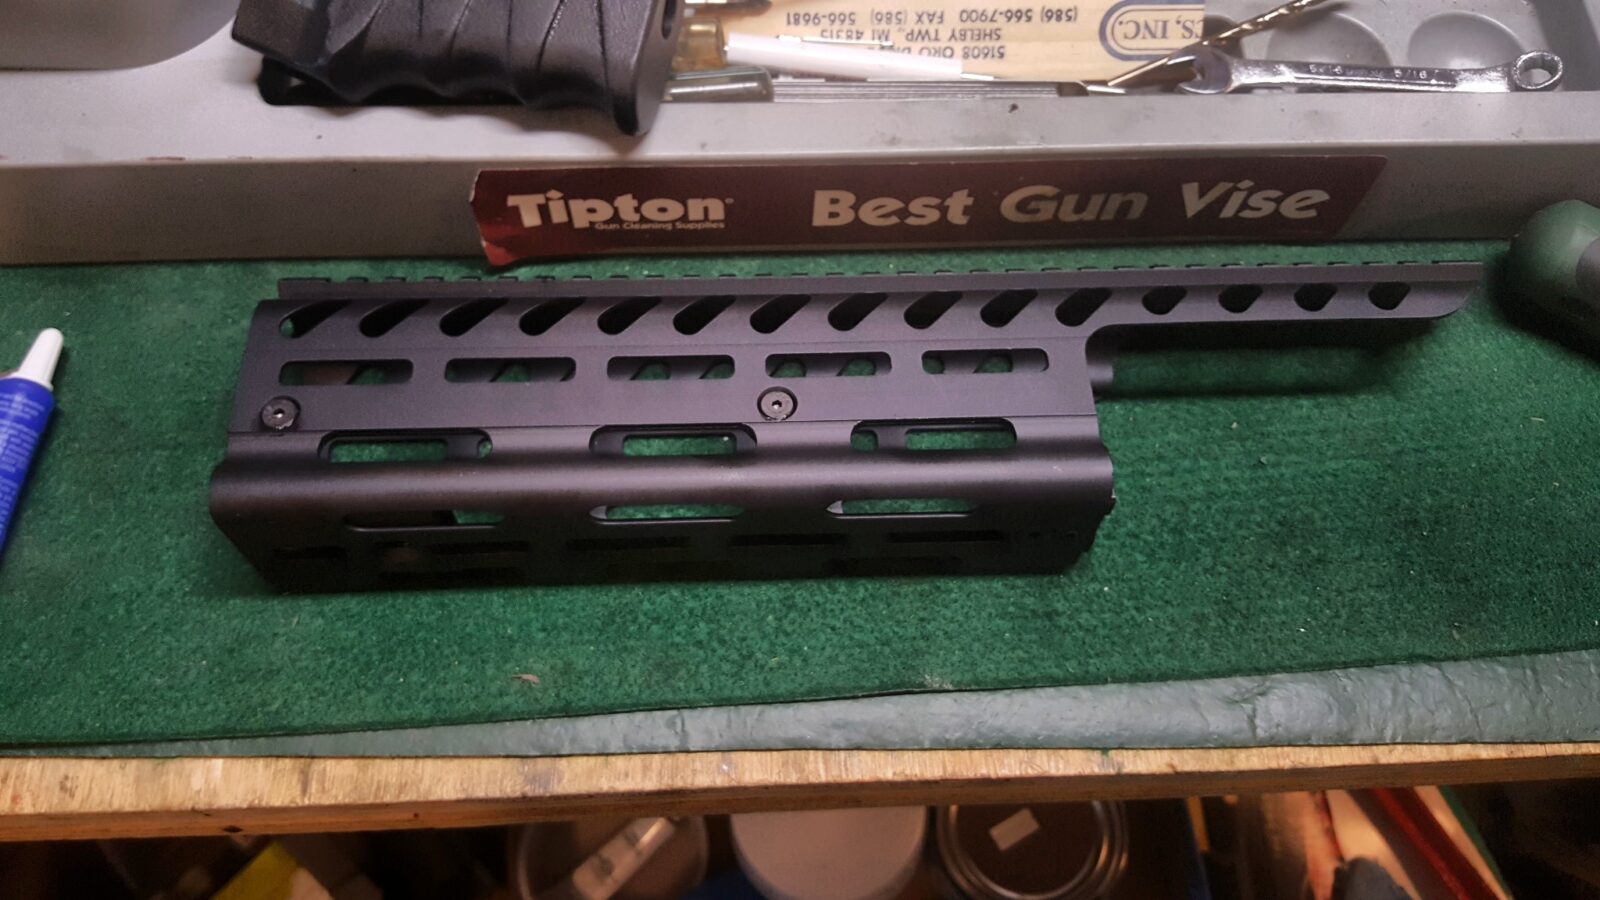
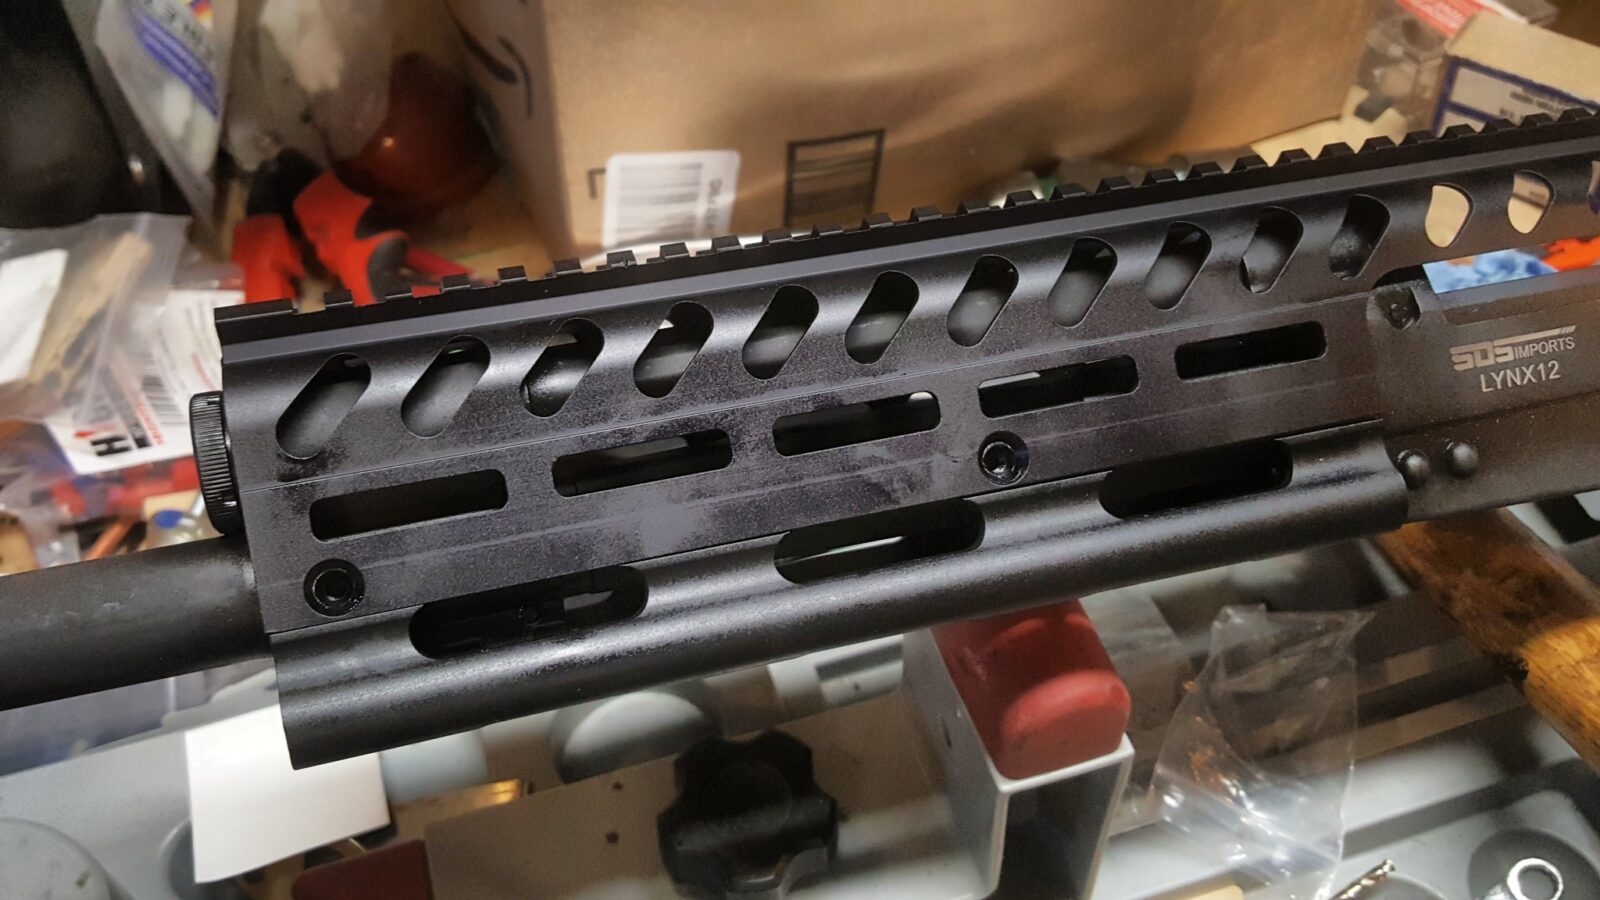
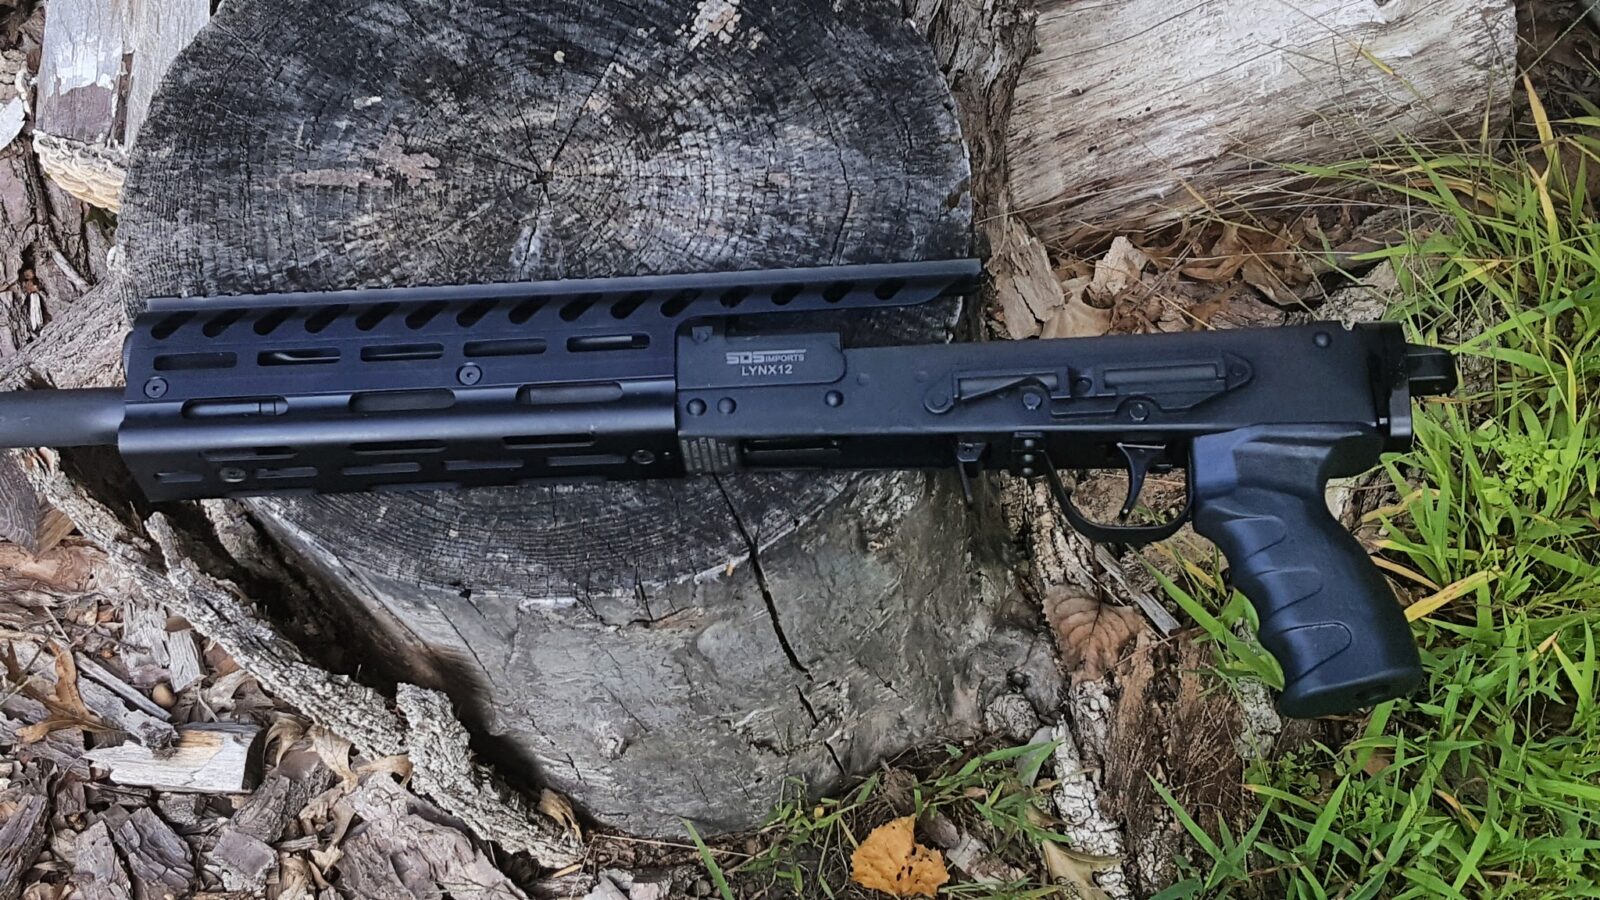
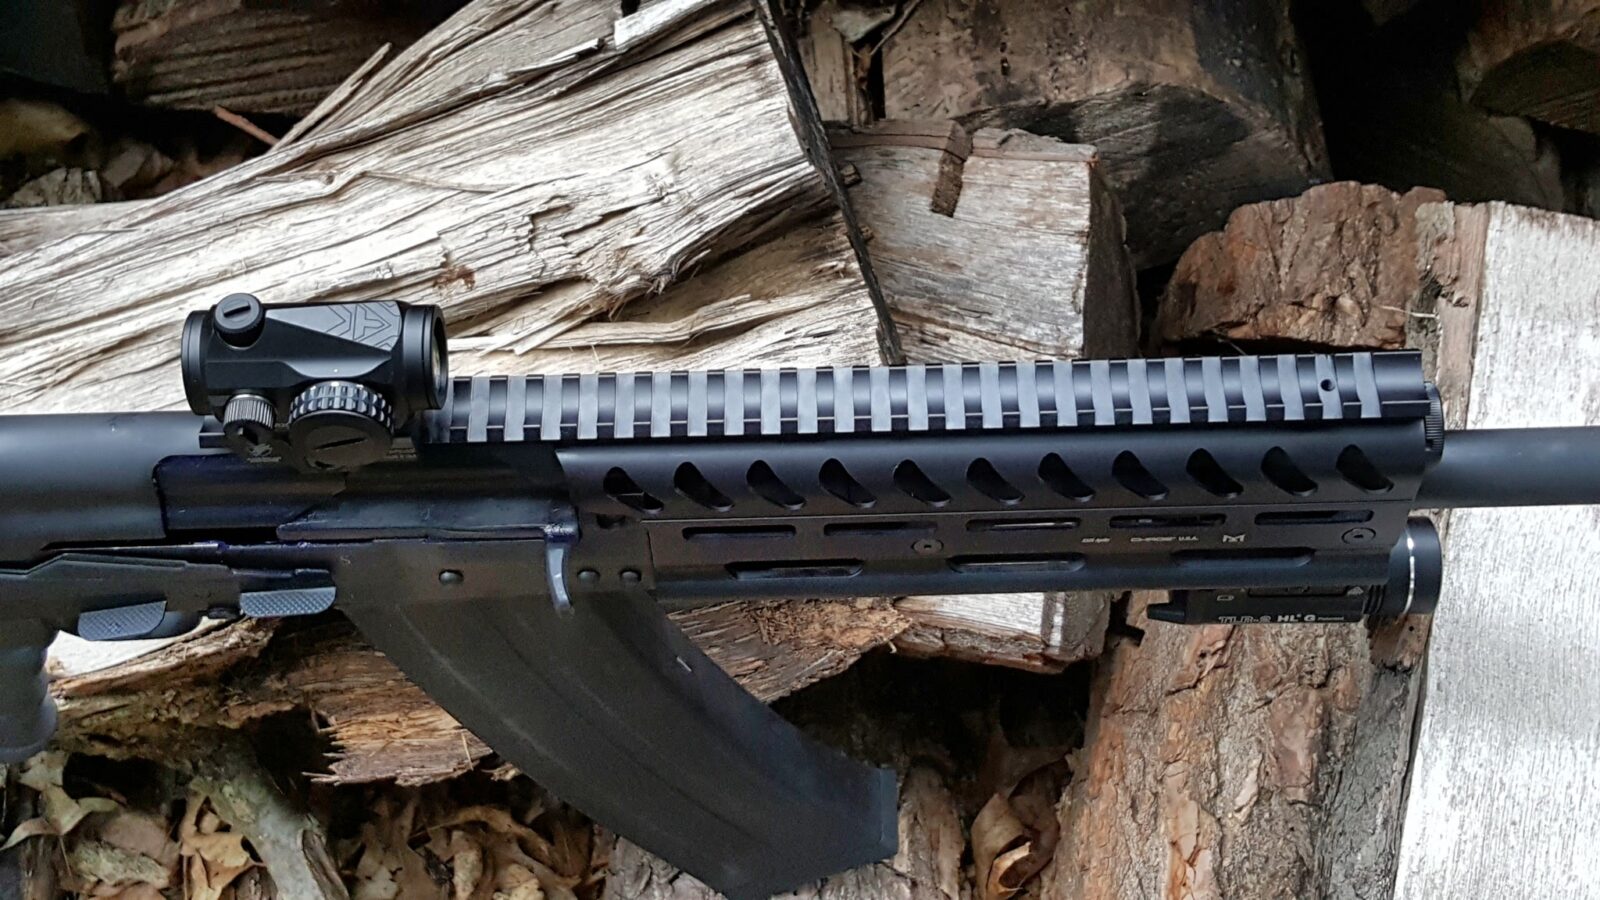
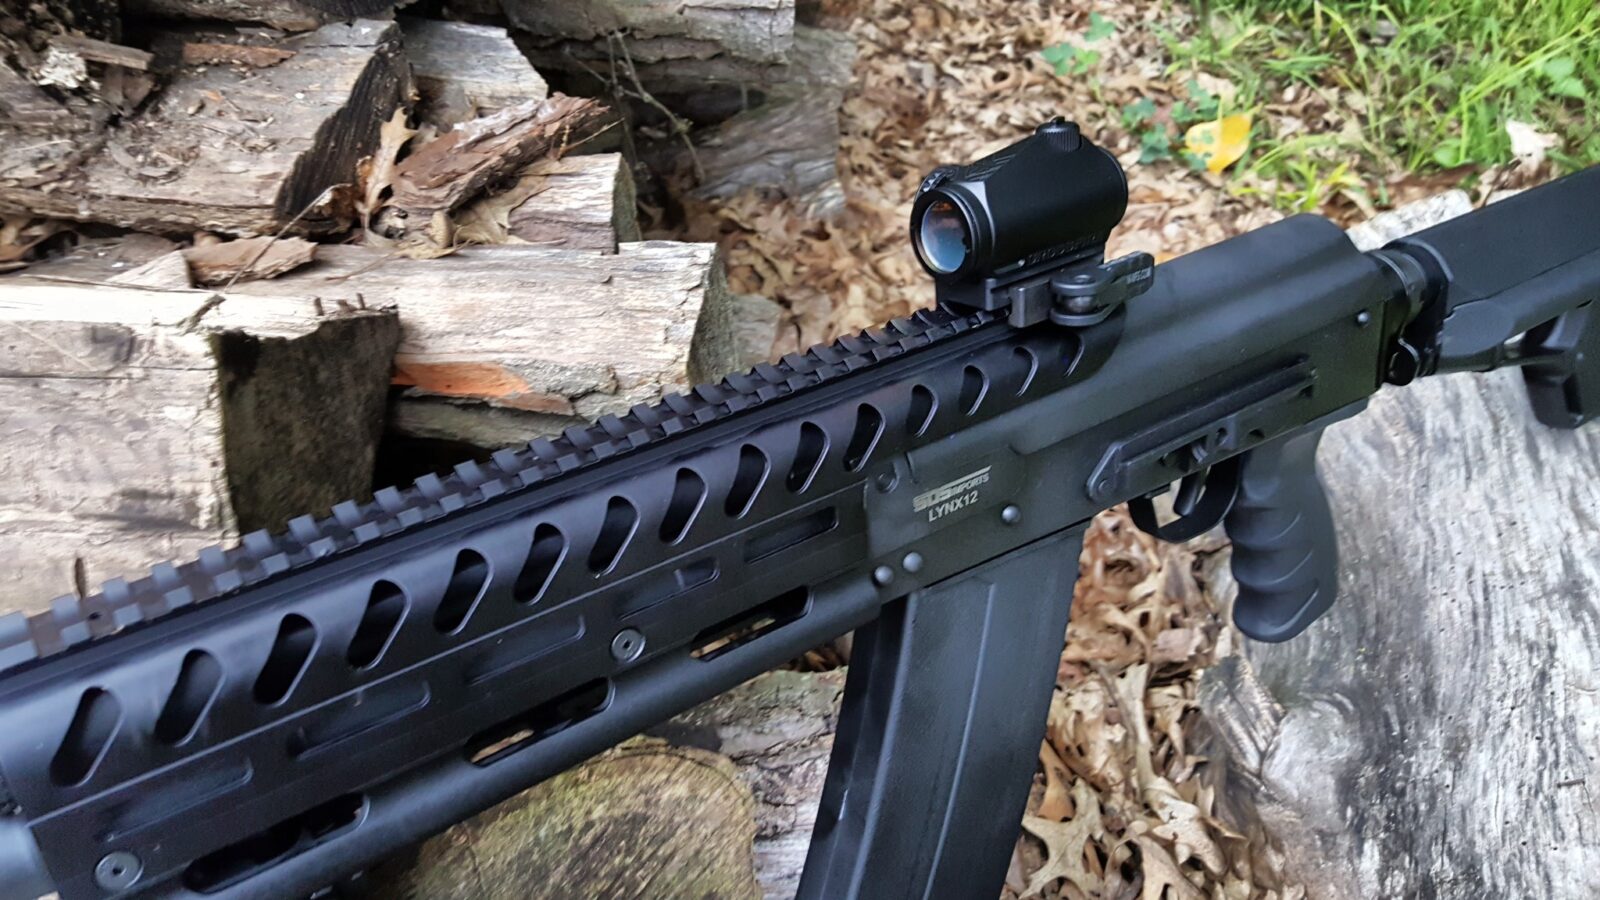
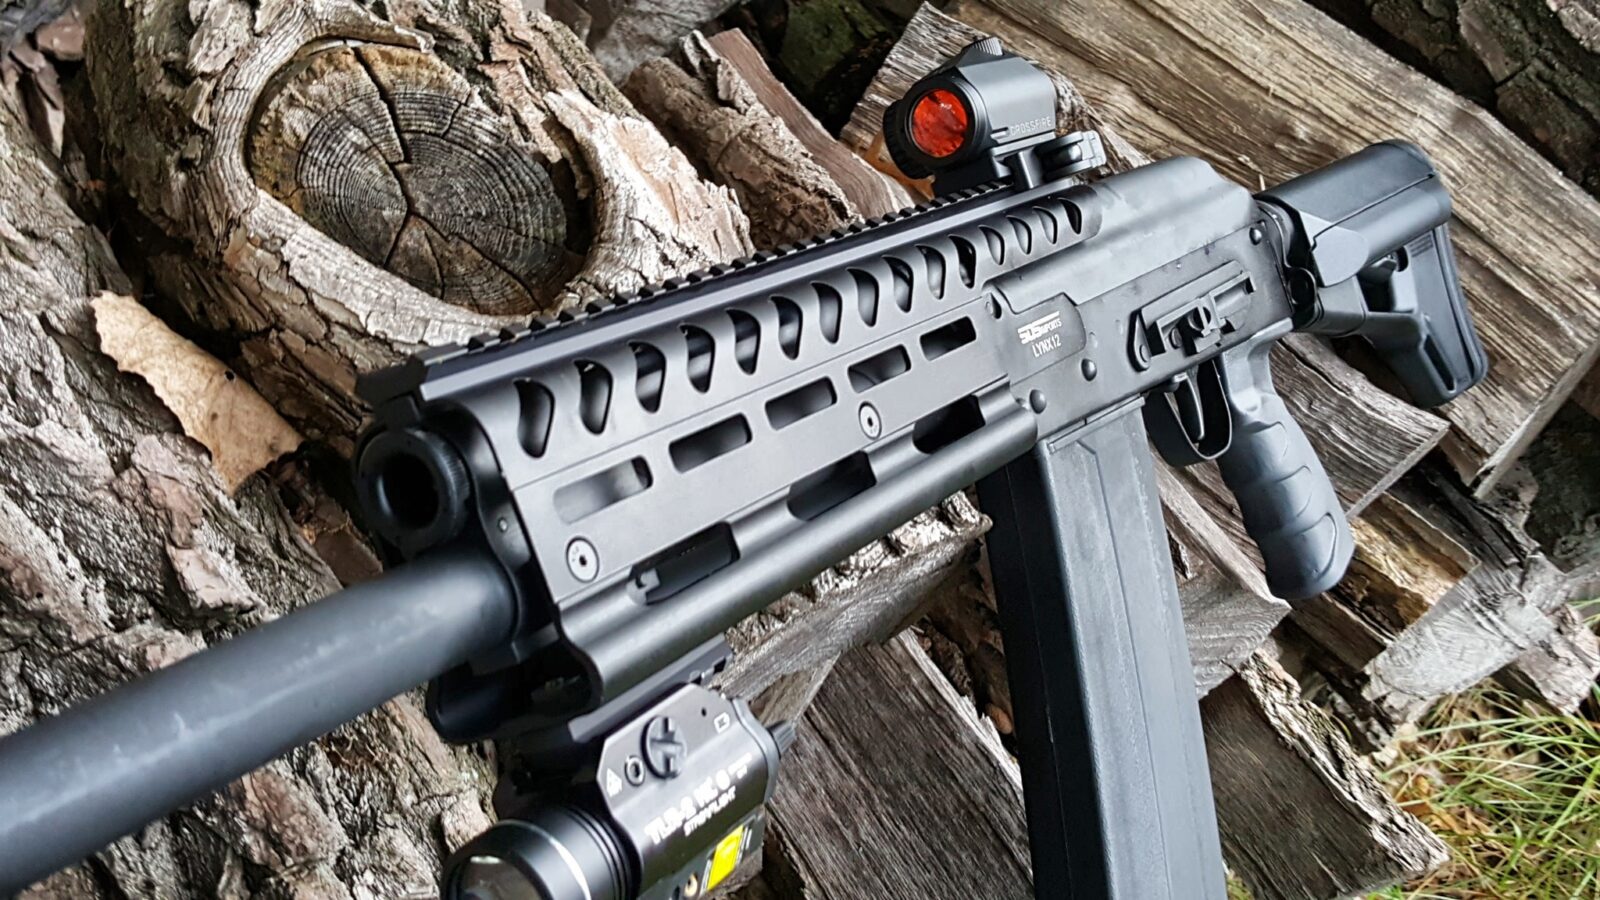
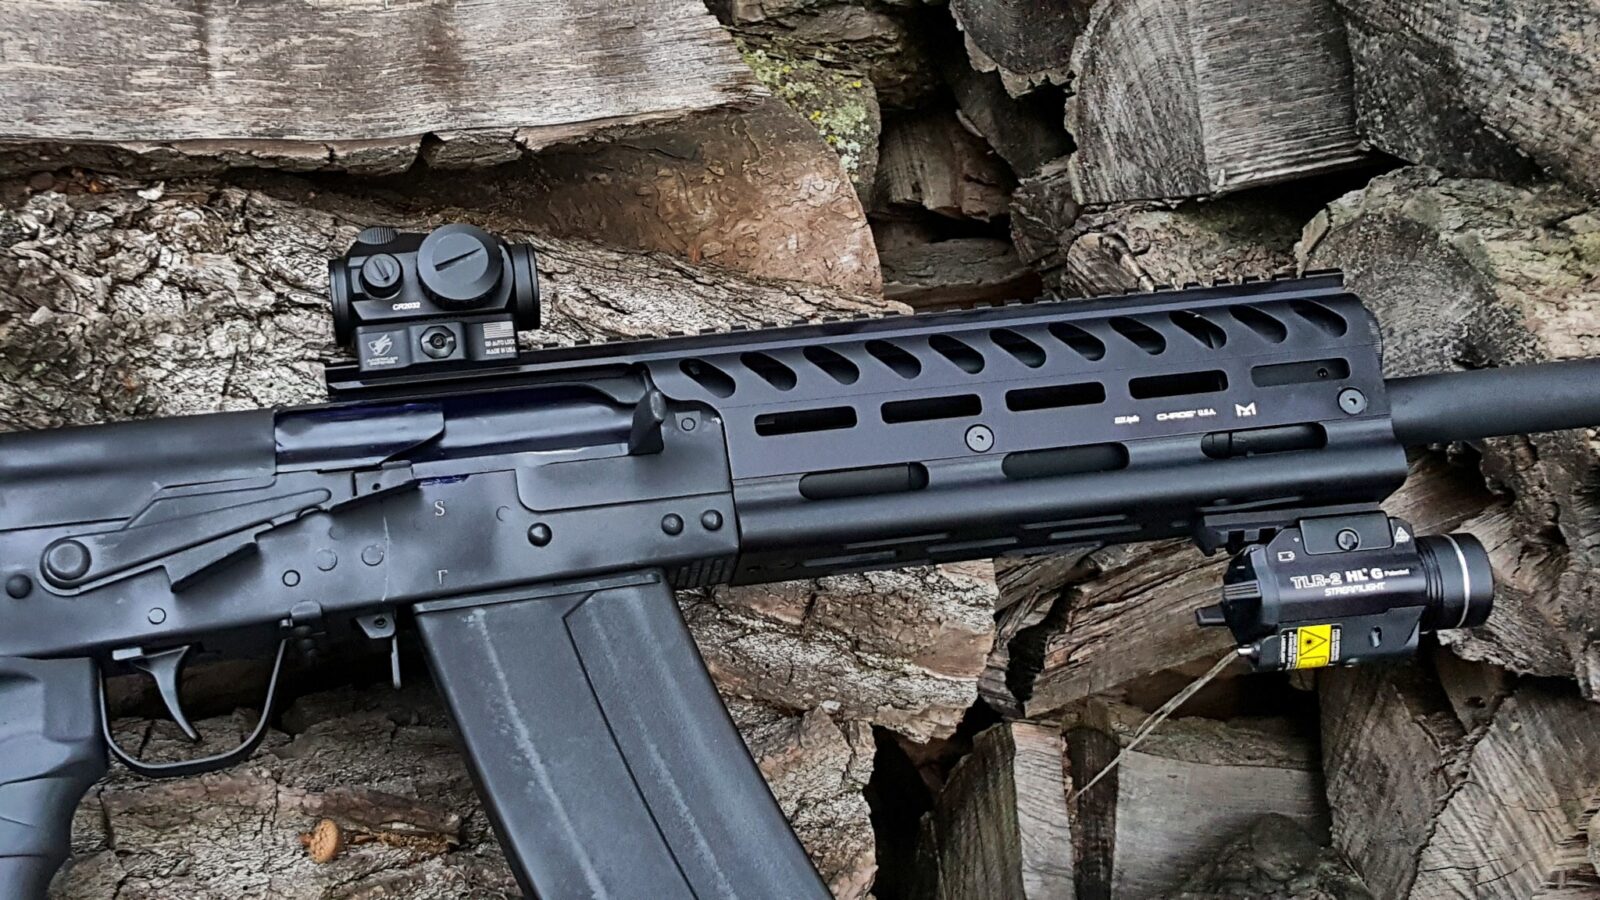
Adding a Chaos Saiga 12 Apollo 12 Extended Rail
The Lynx can use Saiga handguards so you have a lot of options. Note that I am using a Chaos rail and Chaos has since gone out business. The rail in question was their Apollo 12 Extended M-LOK Rail.
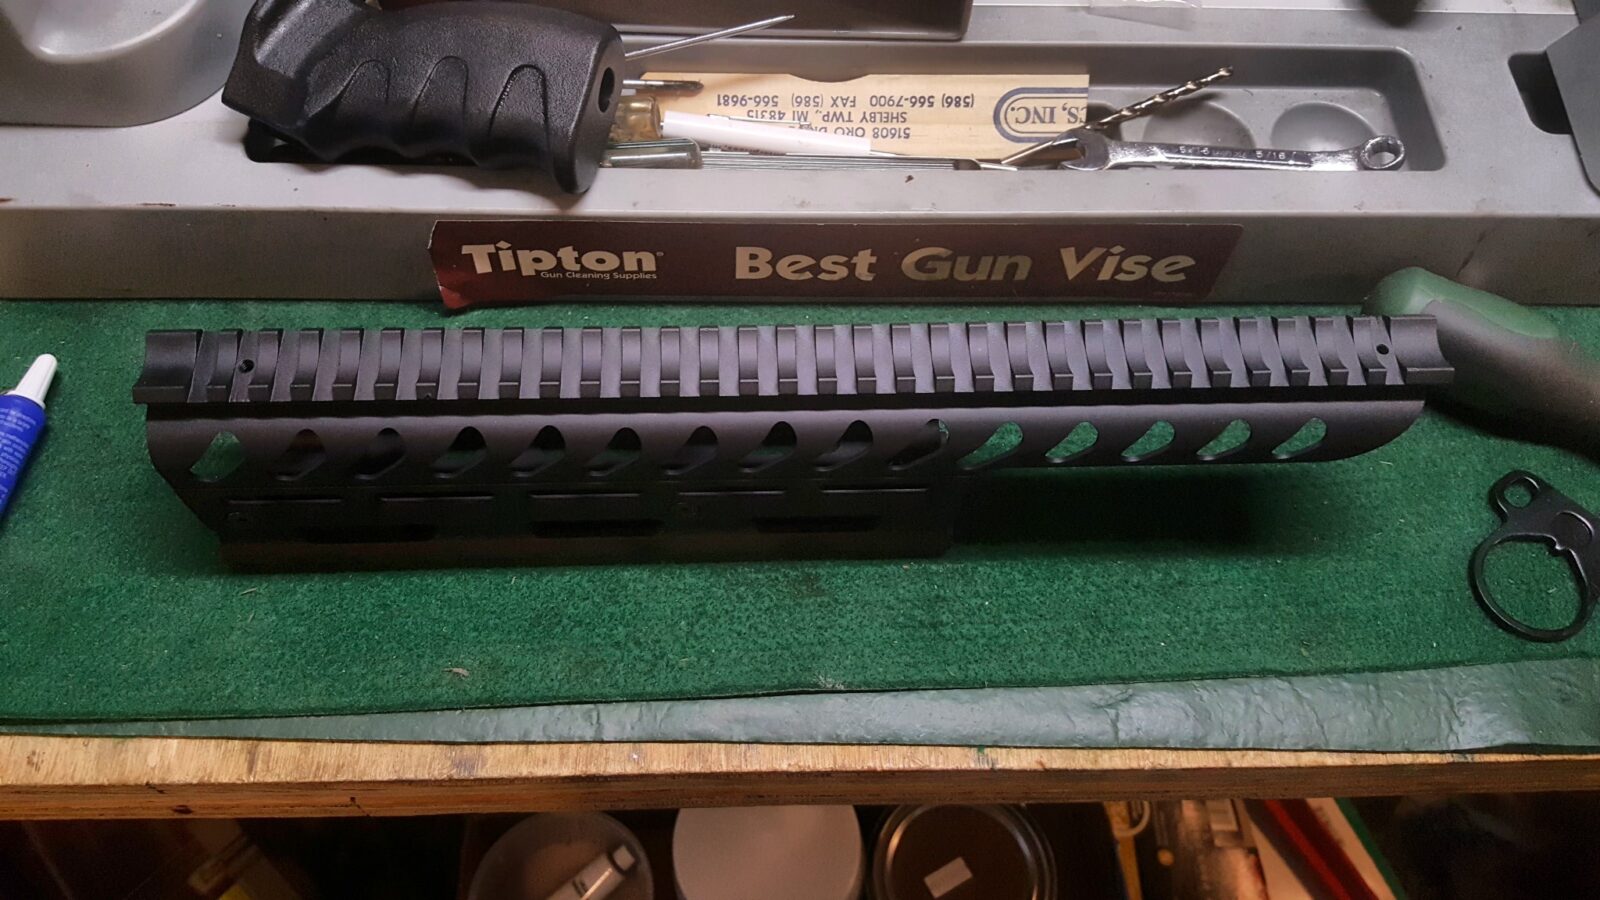
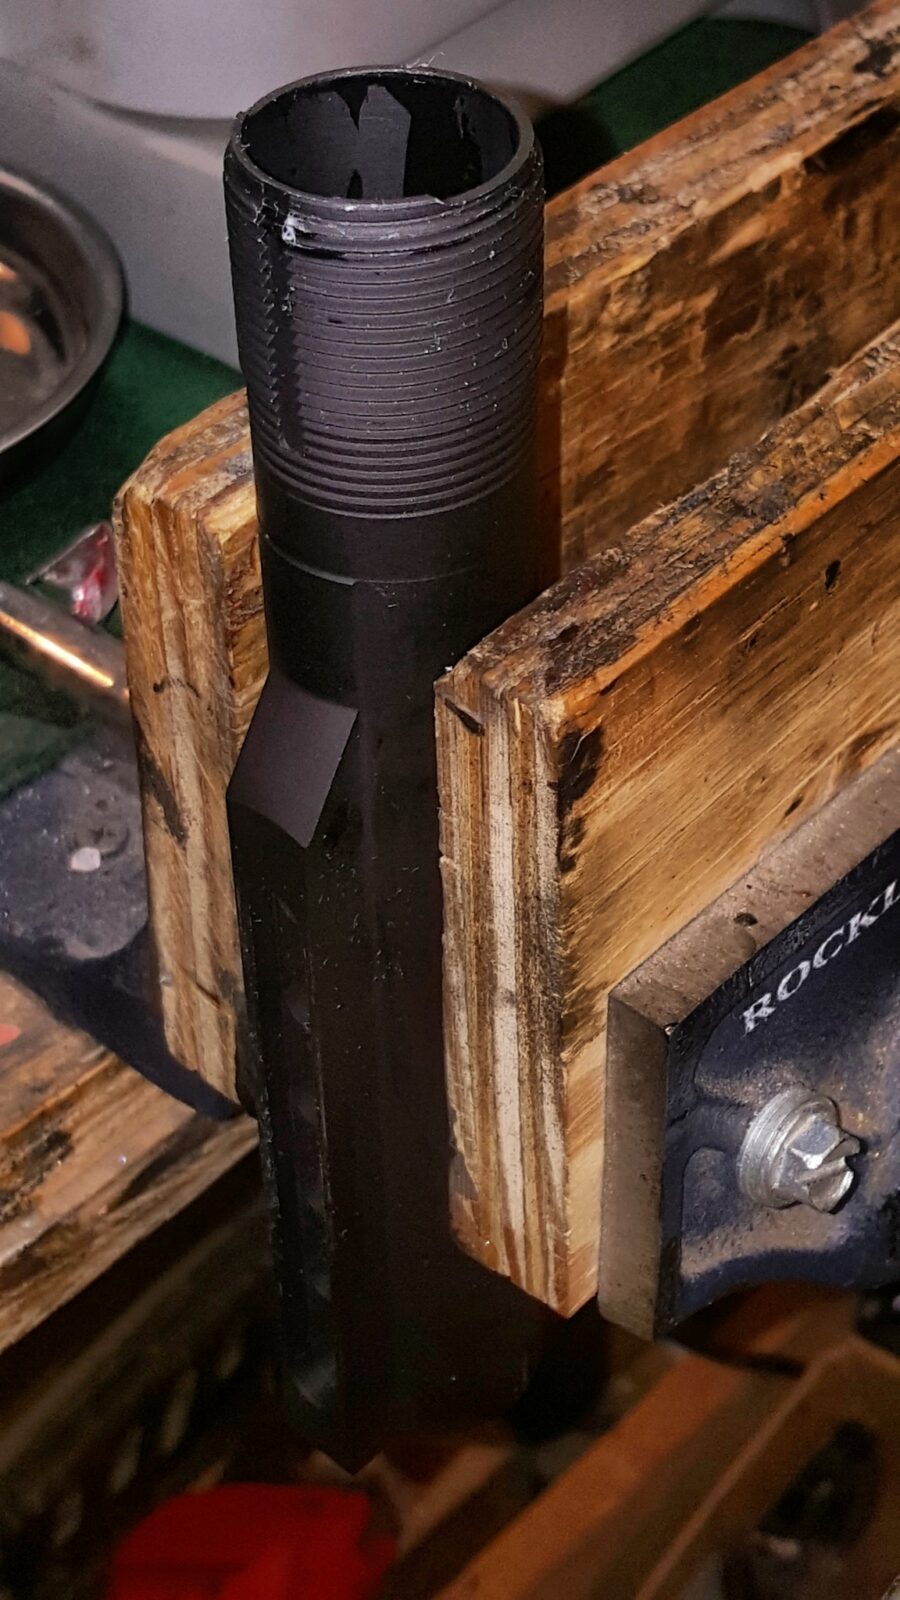
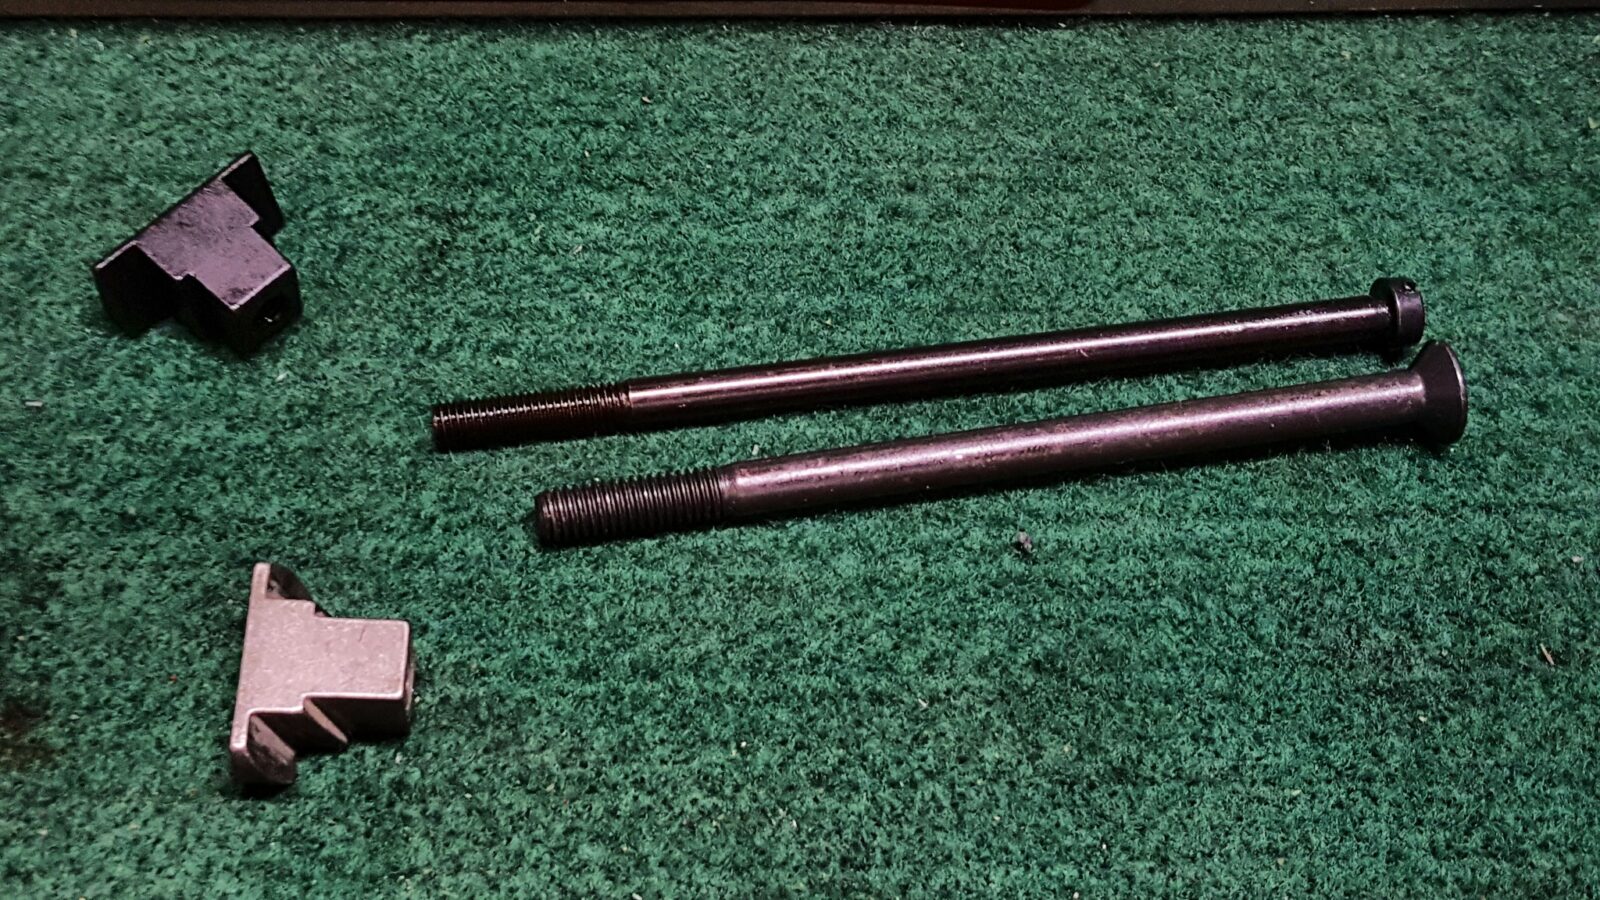
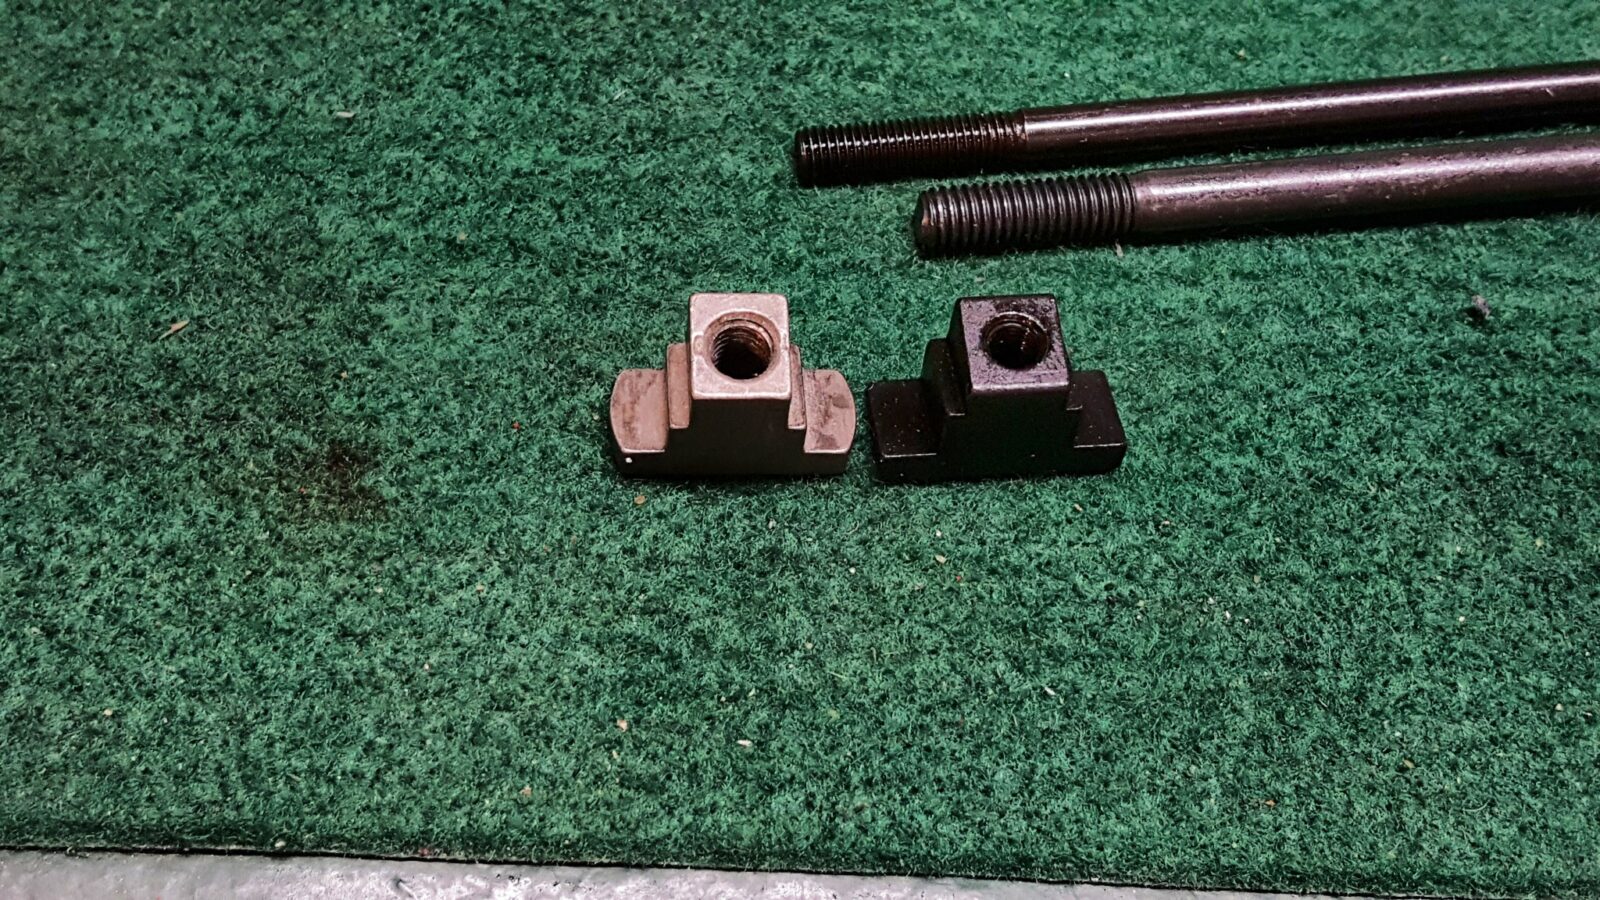
Installation is pretty easy. You will need to remove the original sights though. A small punch can be used to drift out the rear sight and either a small wrench or pliers can be used to unscrew and remove the front sight. I’d recommend having a Zip Loc bag or something to store these parts in just in case.
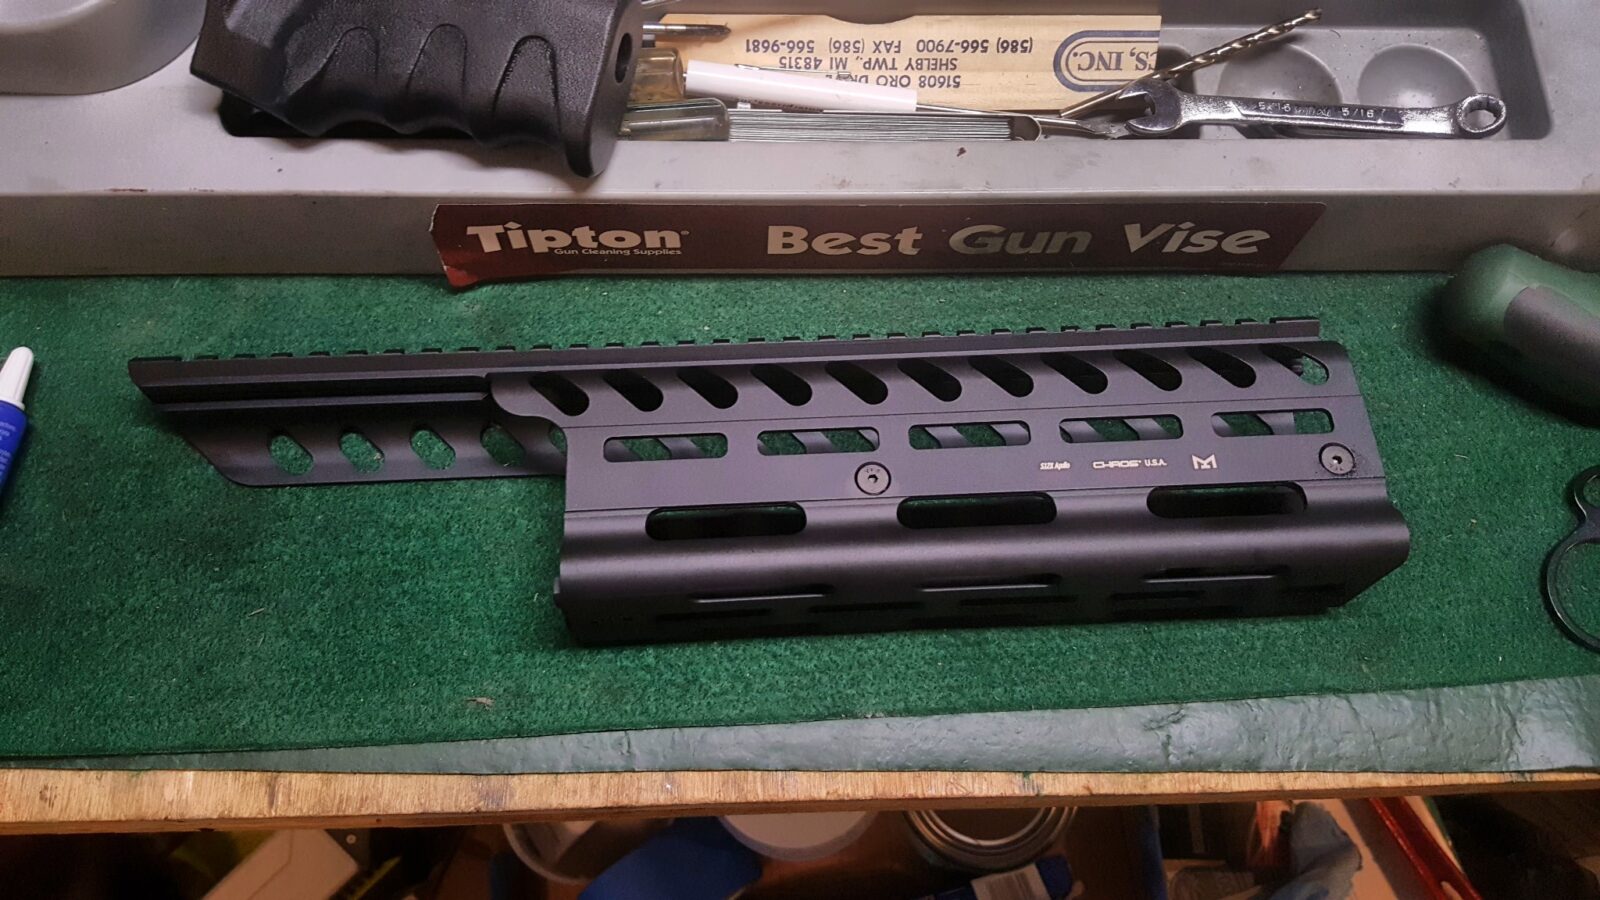
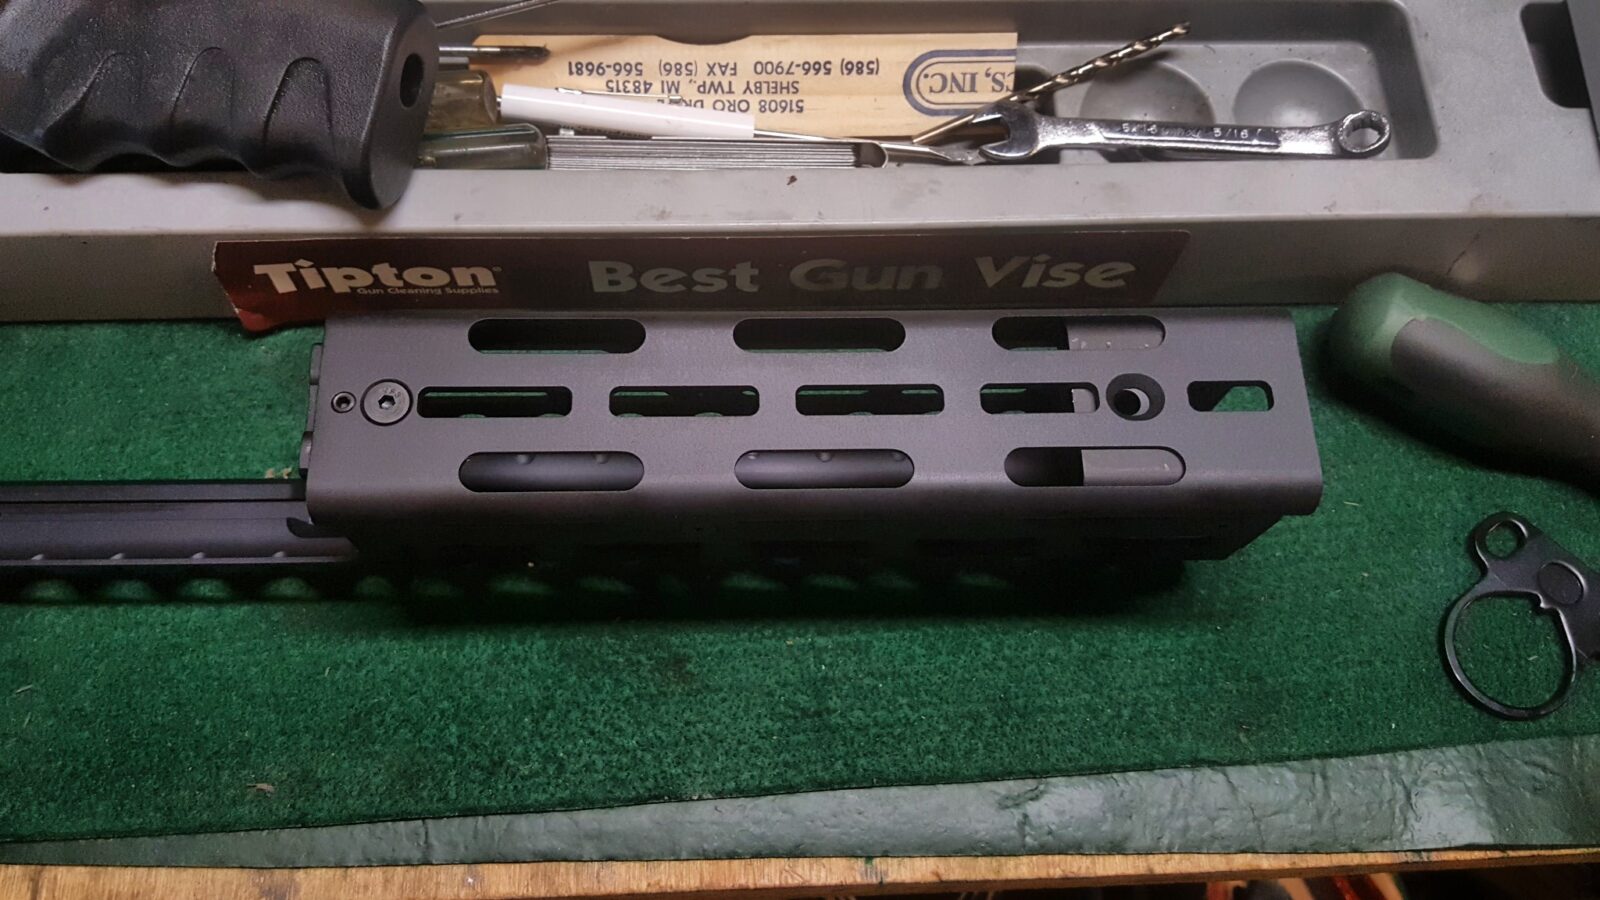
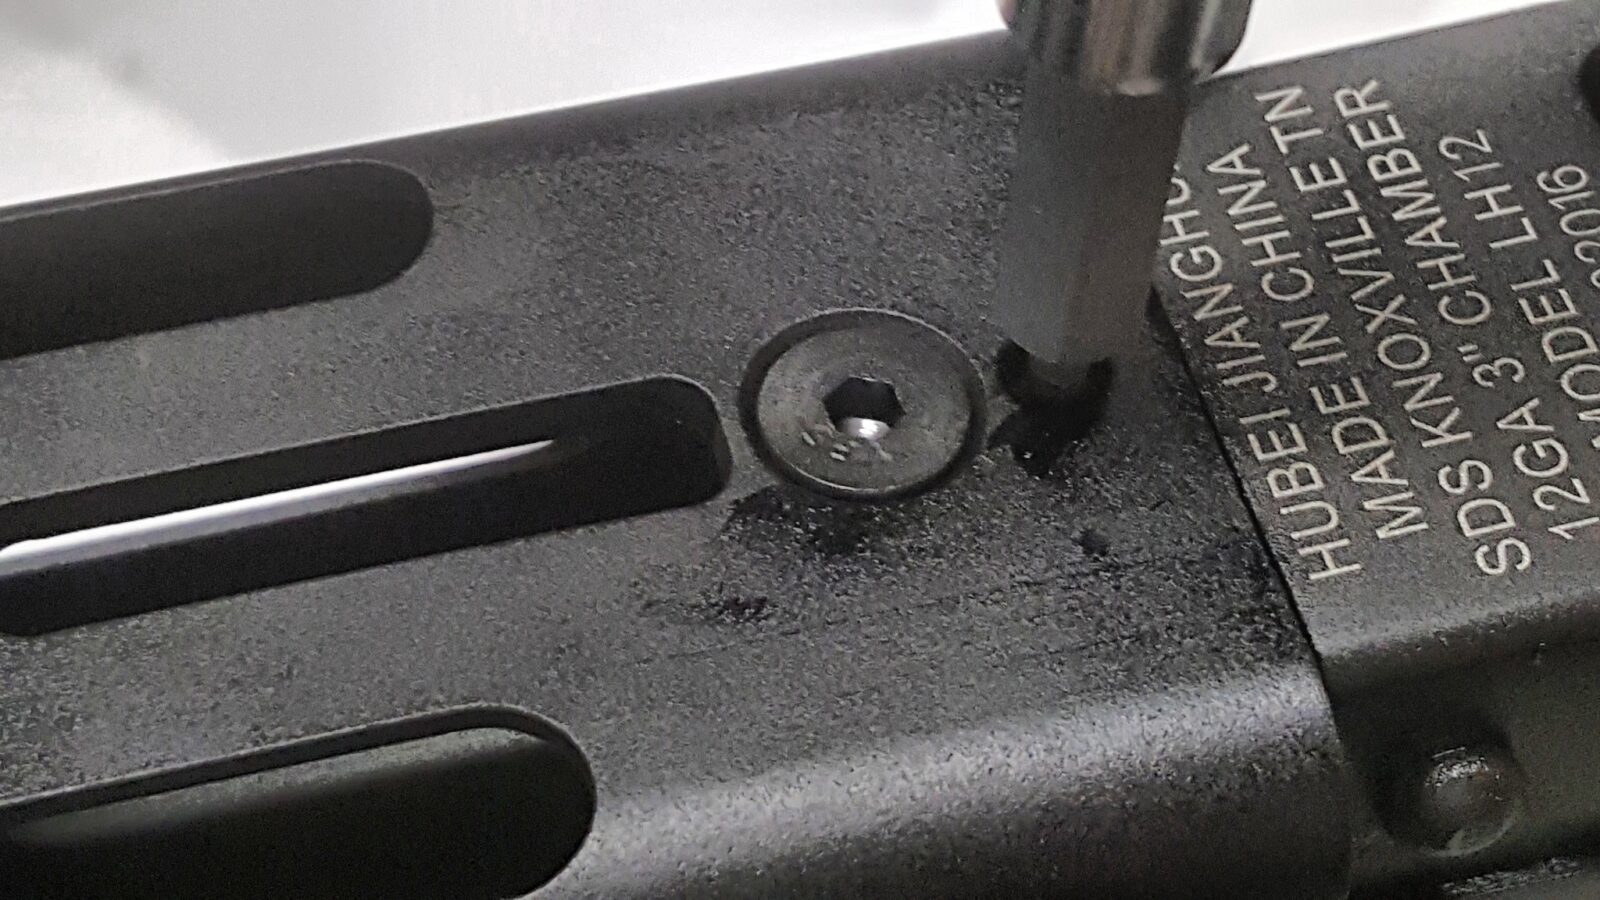
Unscrew the four screws on the sides to split the rail system into its two halves. The bottom slides into position. Use their screw to secure the front. Use Blue Loc-Tite on it too. In the rear by the receiver is a set screw. Back it out, apply Blue Loc-tite and then screw it down. It will push on the barrel lock the handguard into position so it will not wobble.
With the base secure you can install the top half when ready. Notice how I said that. What I found is that the bolt carrier must be installed and the dust cover installed before you install the top half. So, I went ahead lubricated the shotgun and closed it up before I installed the top rail. This also brings to light that the screws will need to be removed to gain access to inside the shotgun for cleaning. Time will tell how well that works out. If it drives me nuts, I’ll cut the rail off flush with the gas tube seat. Right now though, I sure like how it positions my red dot.
Lubricating the Lynx
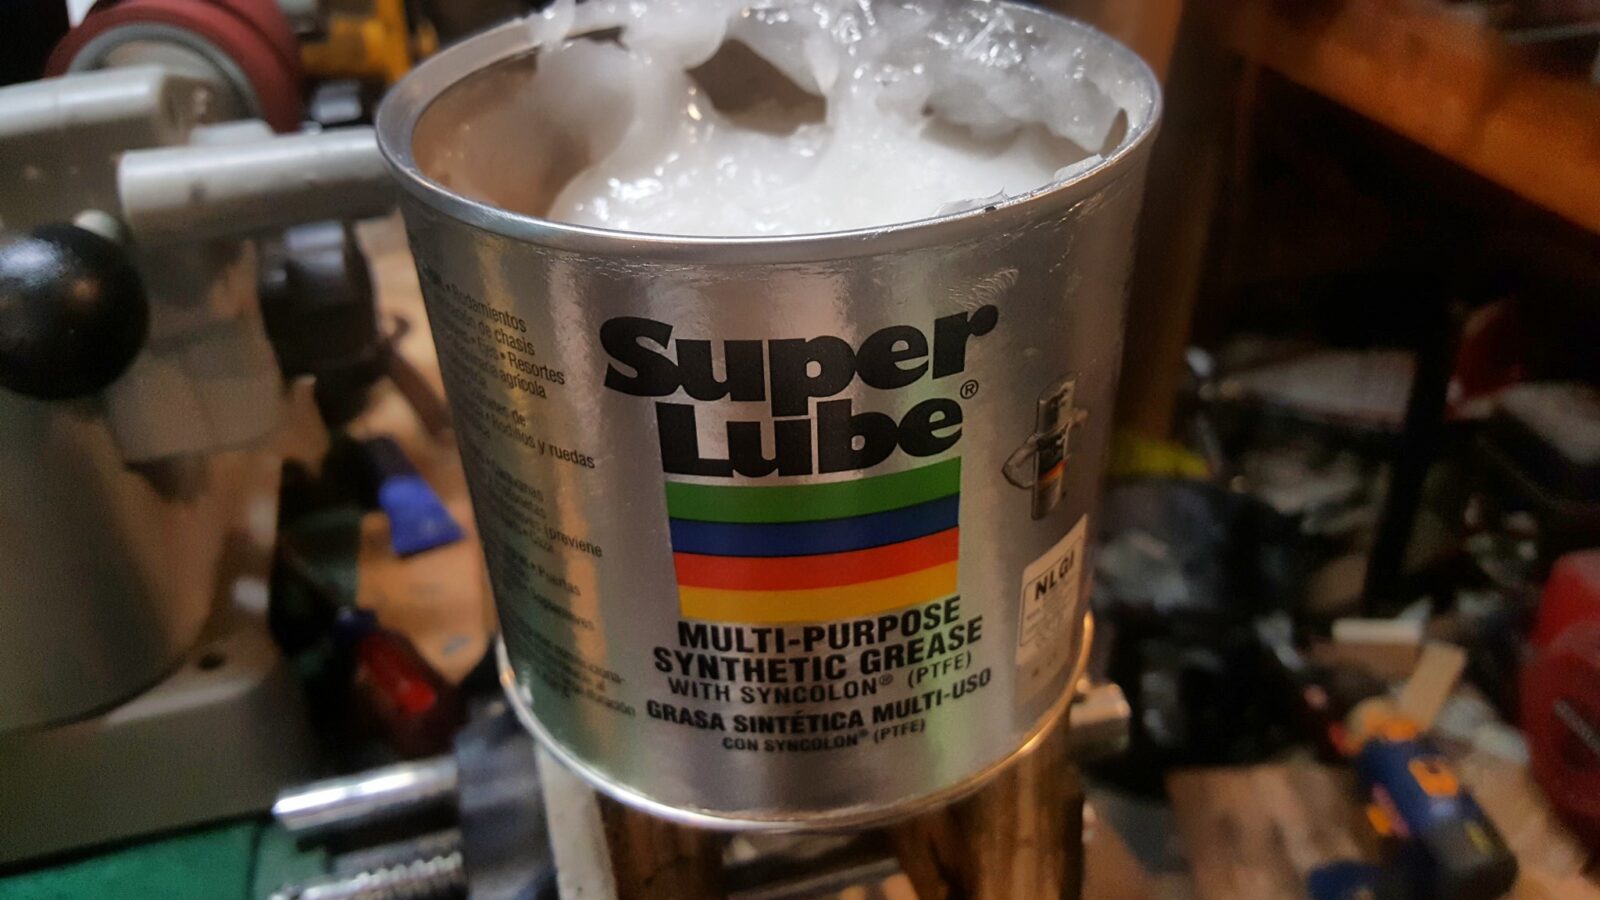
As mentioned above, I had to install the bolt carrier assembly and dust cover to then finalize the rail. I am doing something different with the Lynx. A month back I started using Super Lube synthetic grease on my Uzi and it worked great. With the Lynx having the heavy parkerization on everything, I used Superlube to grease the rails and all sliding surfaces. I used a precision oiler with Mobil 1 5w-30 full synthetic on all of the rotating parts. Boy did this combination make things operate smoothly!
Installing the M4 Mil-Spec Buffer Tube
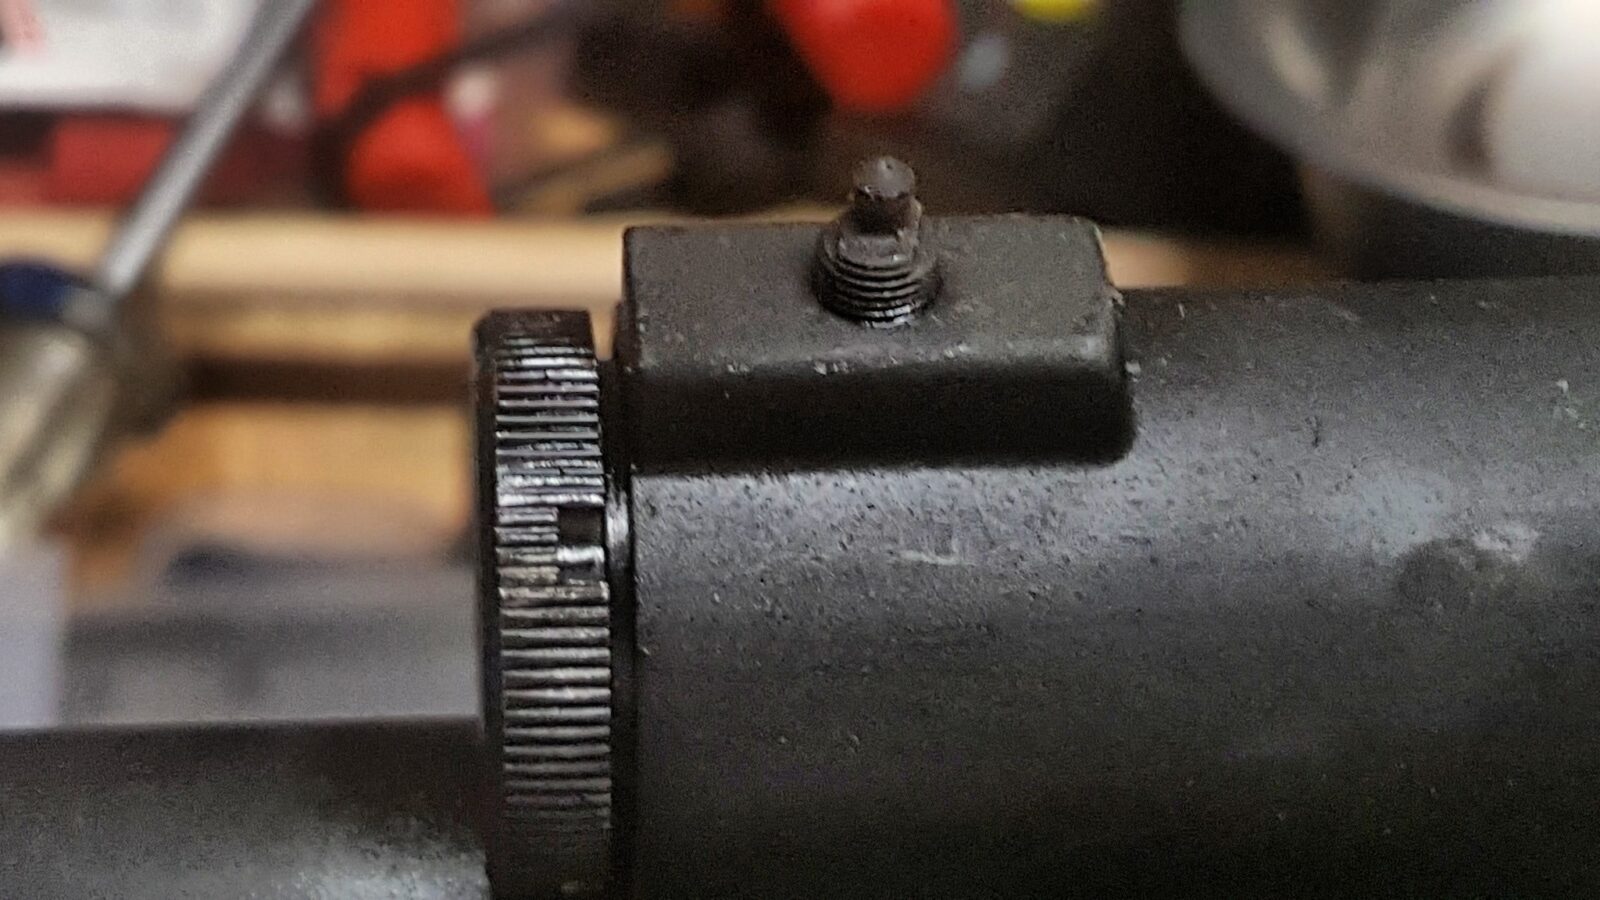
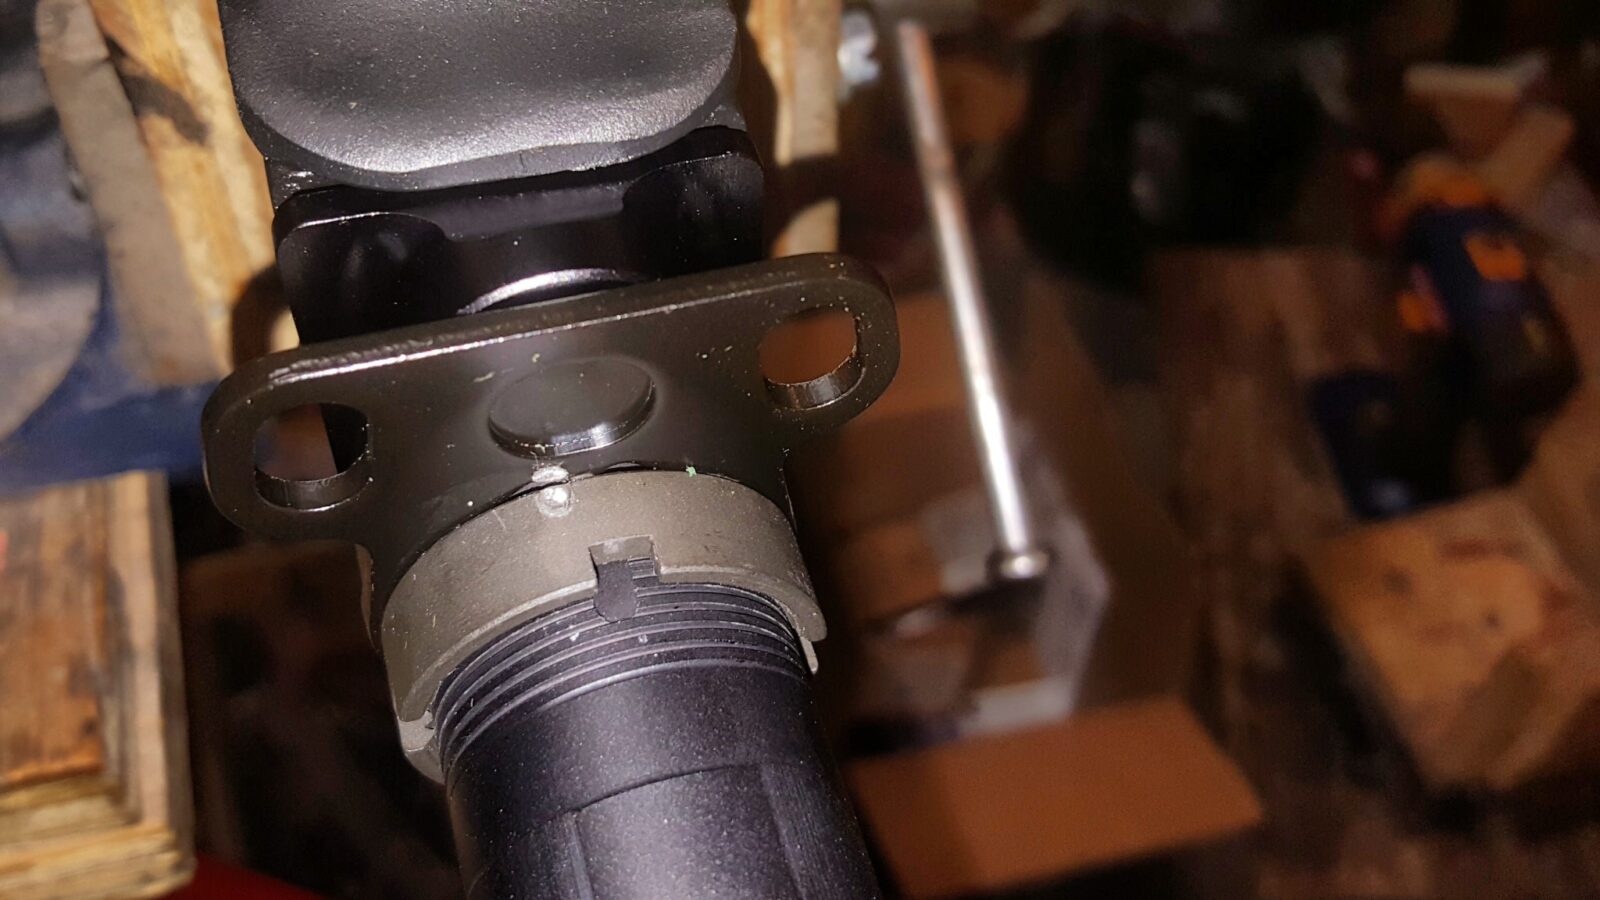
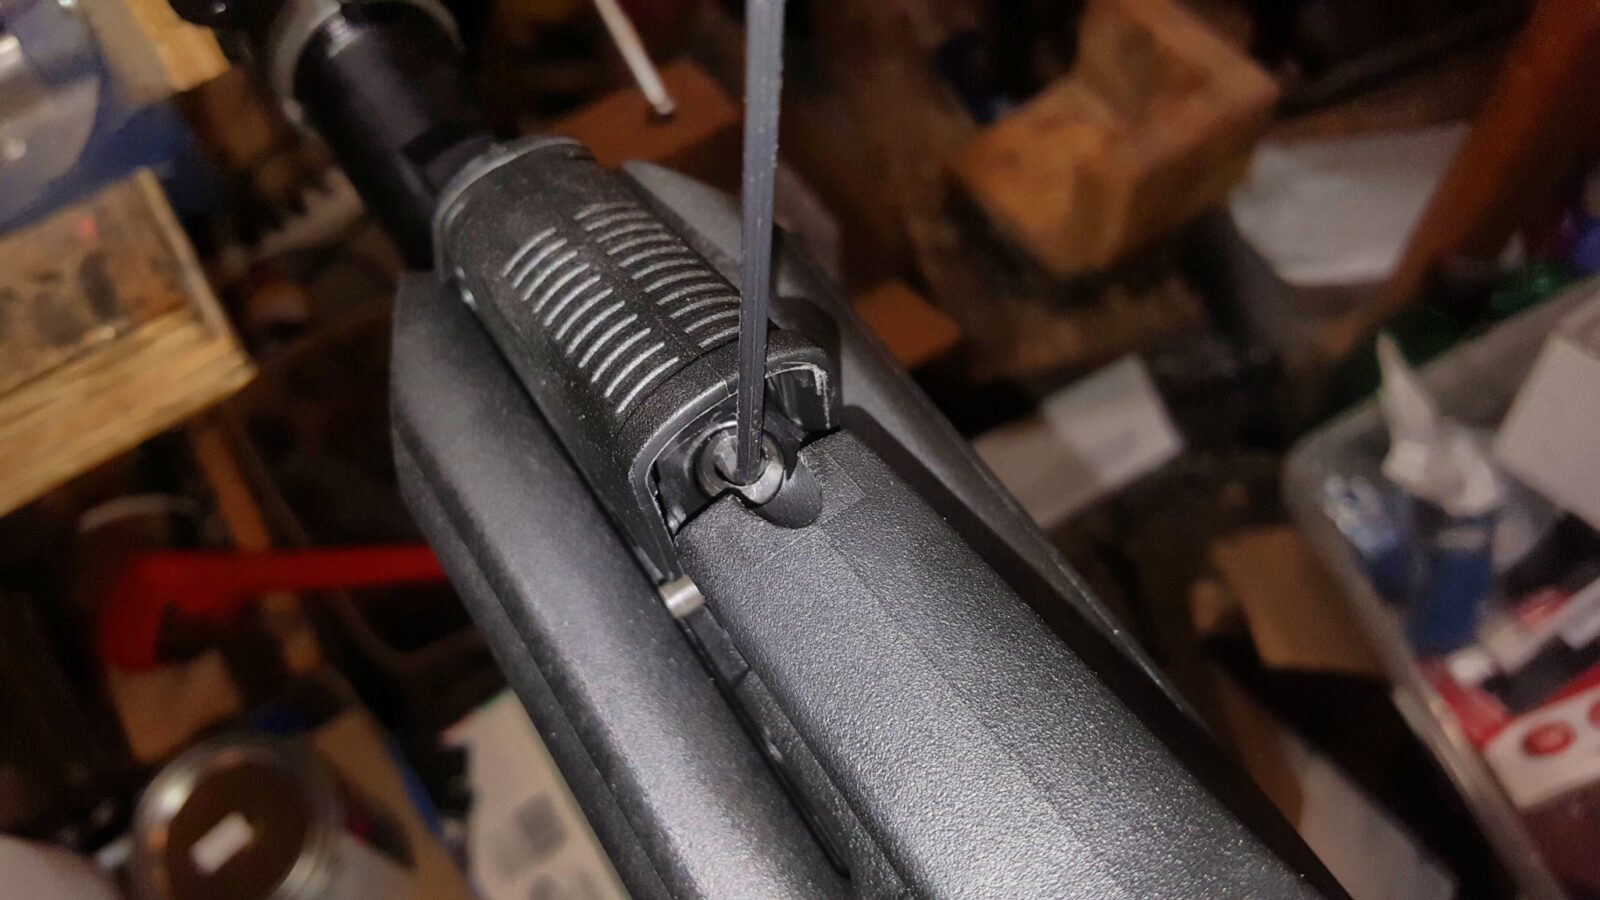
By now, the buffer tube with the mercury suppressor was cured enough to be safely installed. Basically, it is installed the same as on an AR but it is much heavier. Thread the castle nut all the way to the end of threads, install the end plate and then screw the tube into the Rifle Dynamics stock adapter. Note need to buy the end plate and the castle nut – they typically do not come with a buffer tube.
When you are almost out of space to screw the buffer tube because of the end plate riding in the groove, stop, push the end plate into the adapter and tighten the castle nut down using your favorite tool.

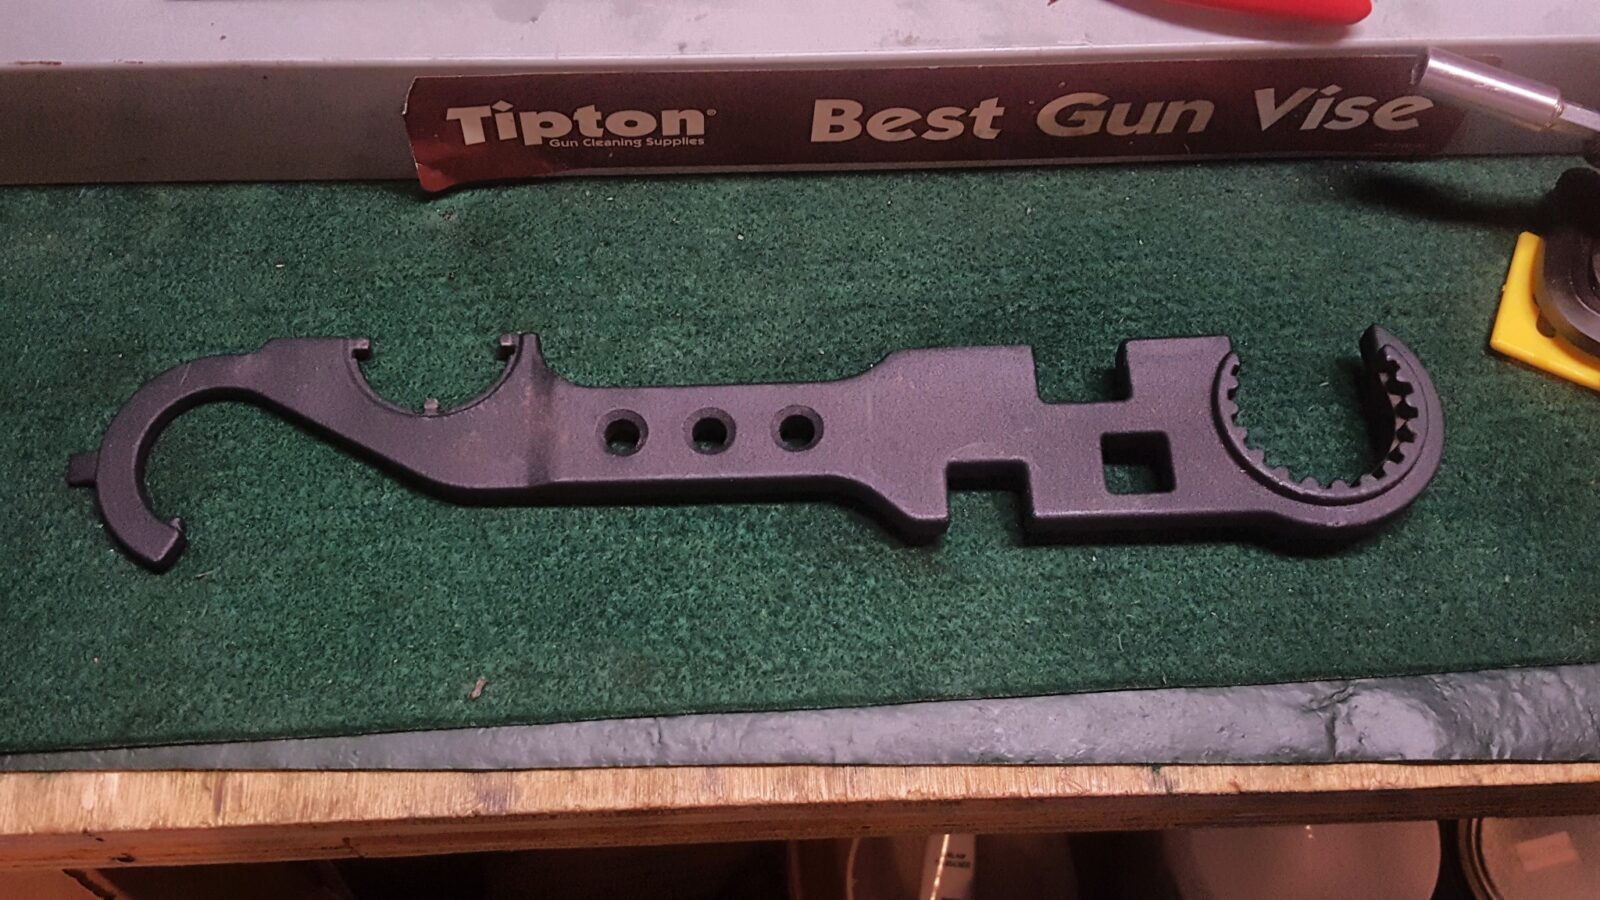
While I used the above pictured wrench, I’ve since switched to the Magpul wrench and swear by. It’s the best wrench I’ve found for stock work including castle nuts.
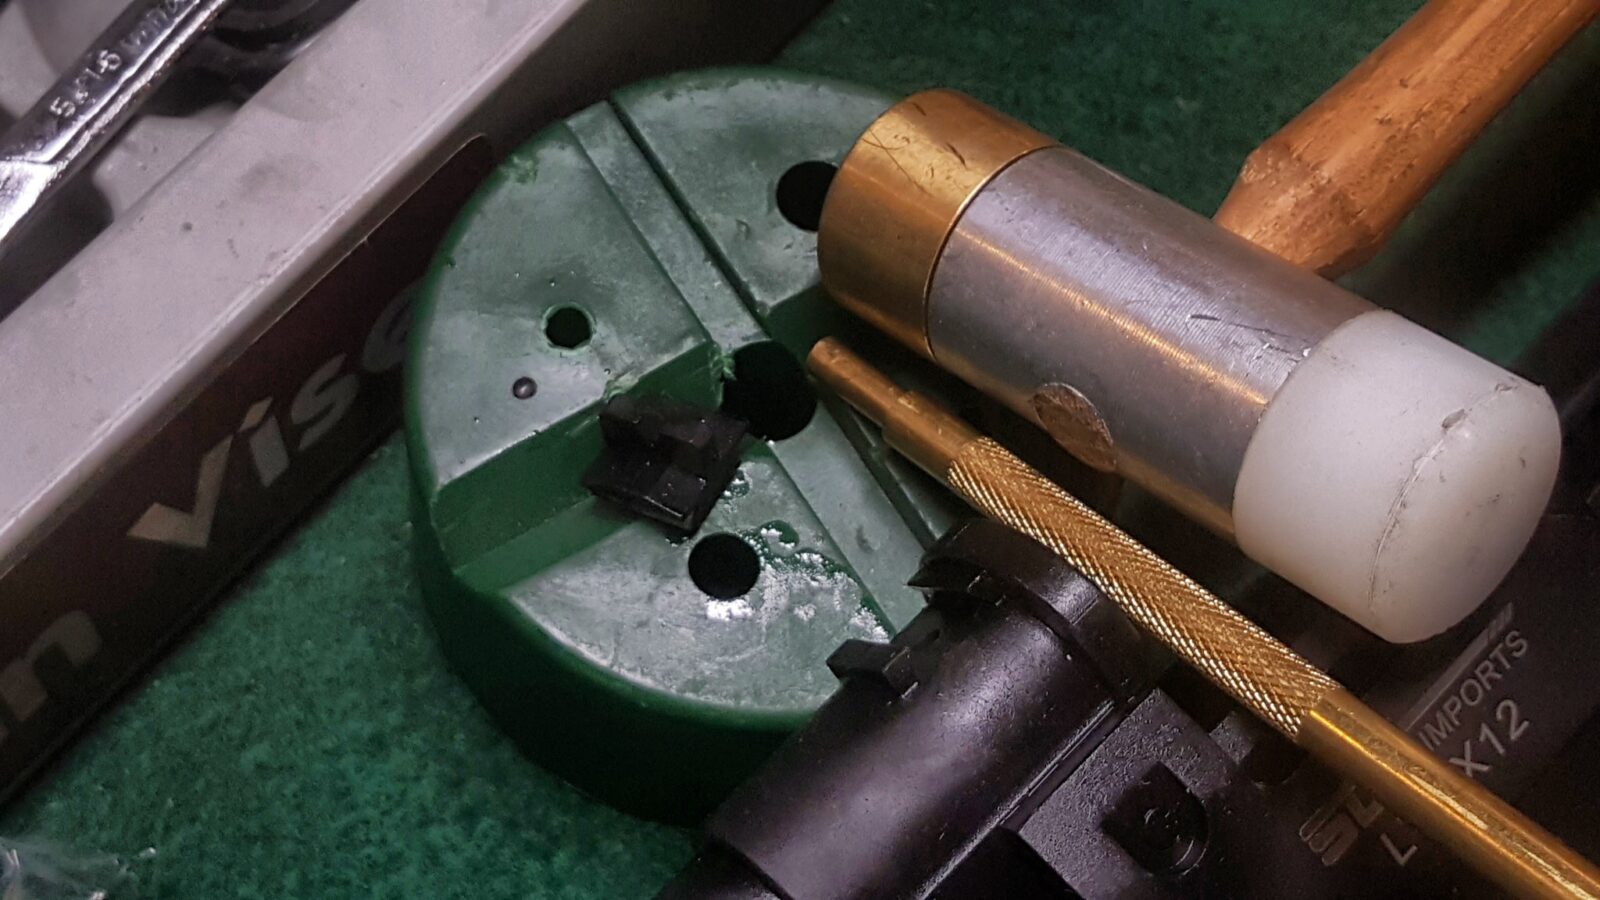
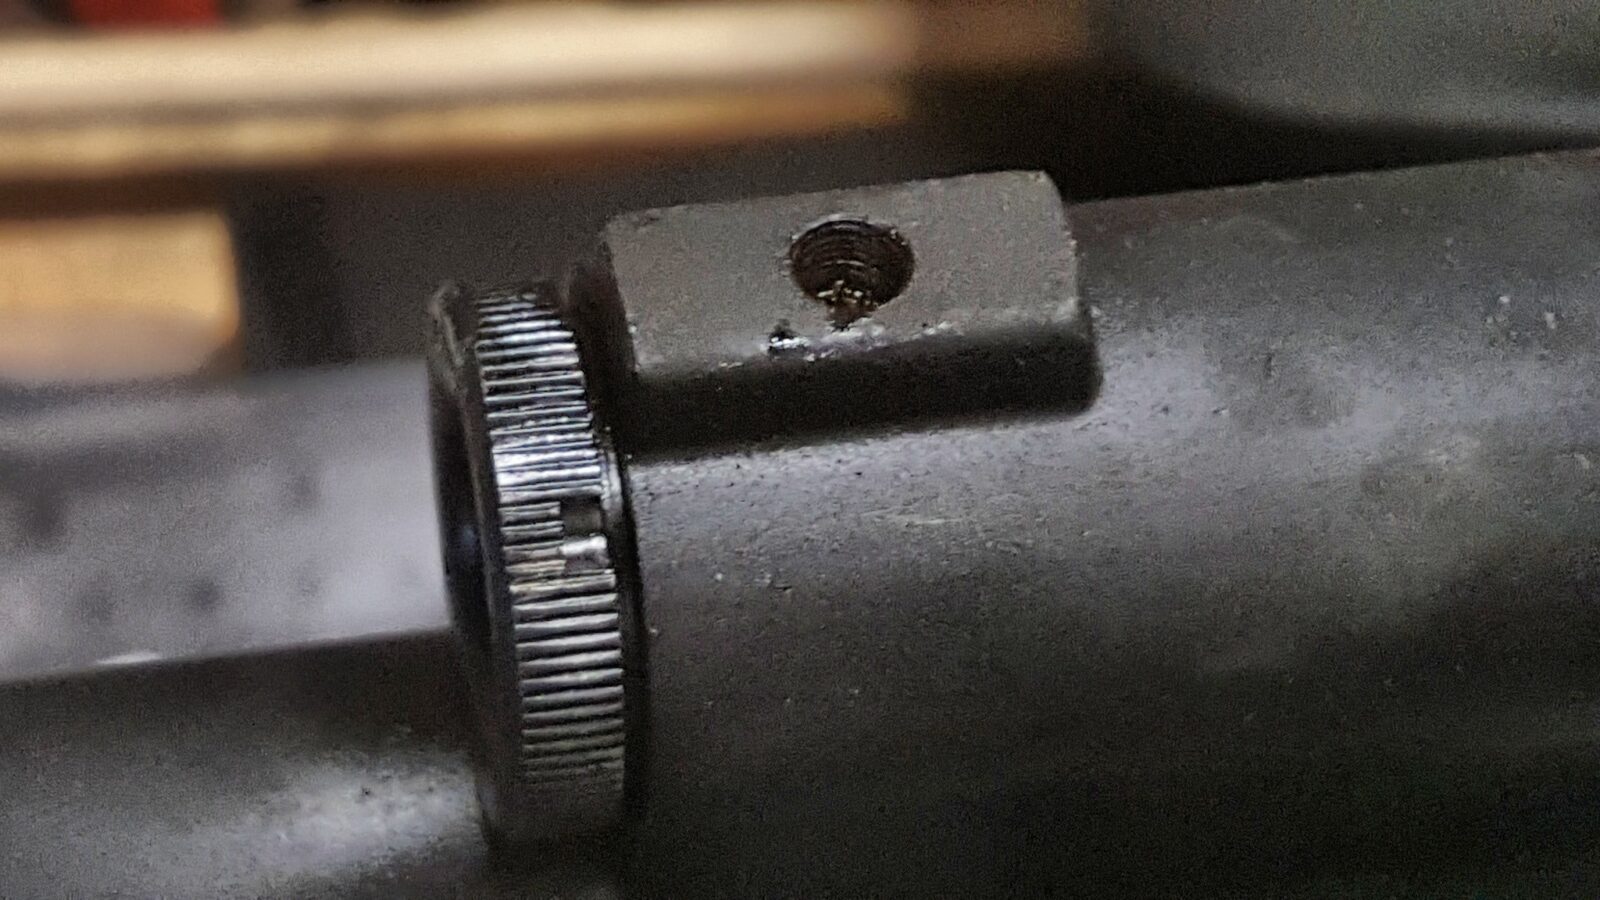
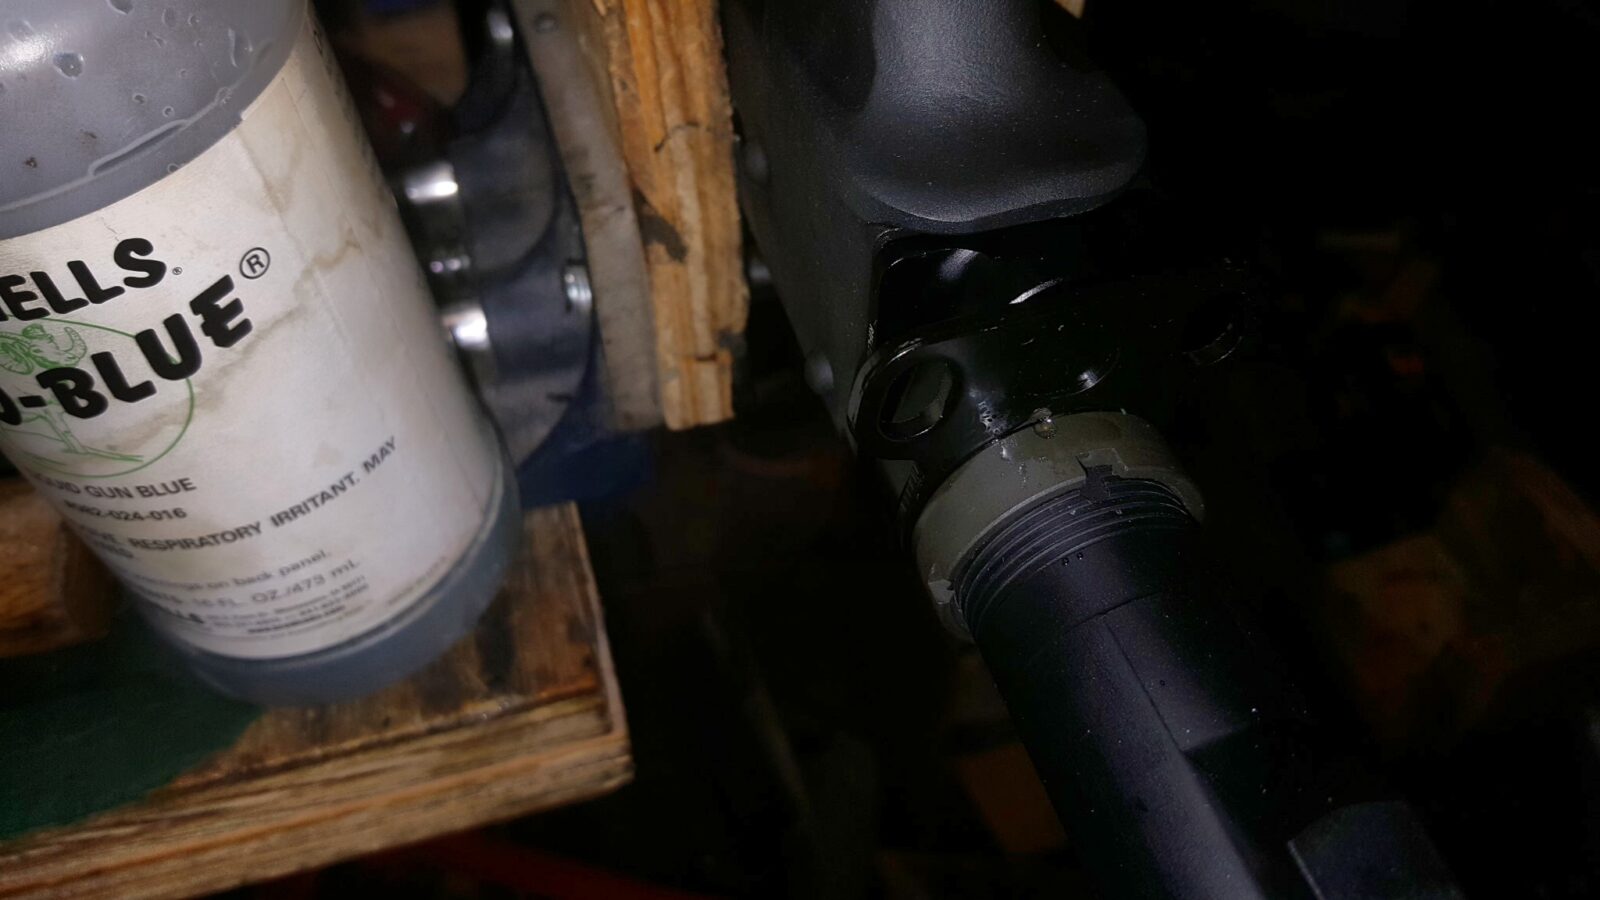
In the next photo you can see that I am using a end plate with sling loops plus you can see that I staked the castle nut. Because of the recoil of the 12 gauge, I created a small divot with a center punch – this is known as “staking”. It will mechanically lock the castle nut in place. I could have put Blue Loc-tite on the castle nut but I went old school.
I then used a cotton swab and some Brownells Oxpho-Blue to cold blue the bare metal to a black color and then wiped it down with WD-40.
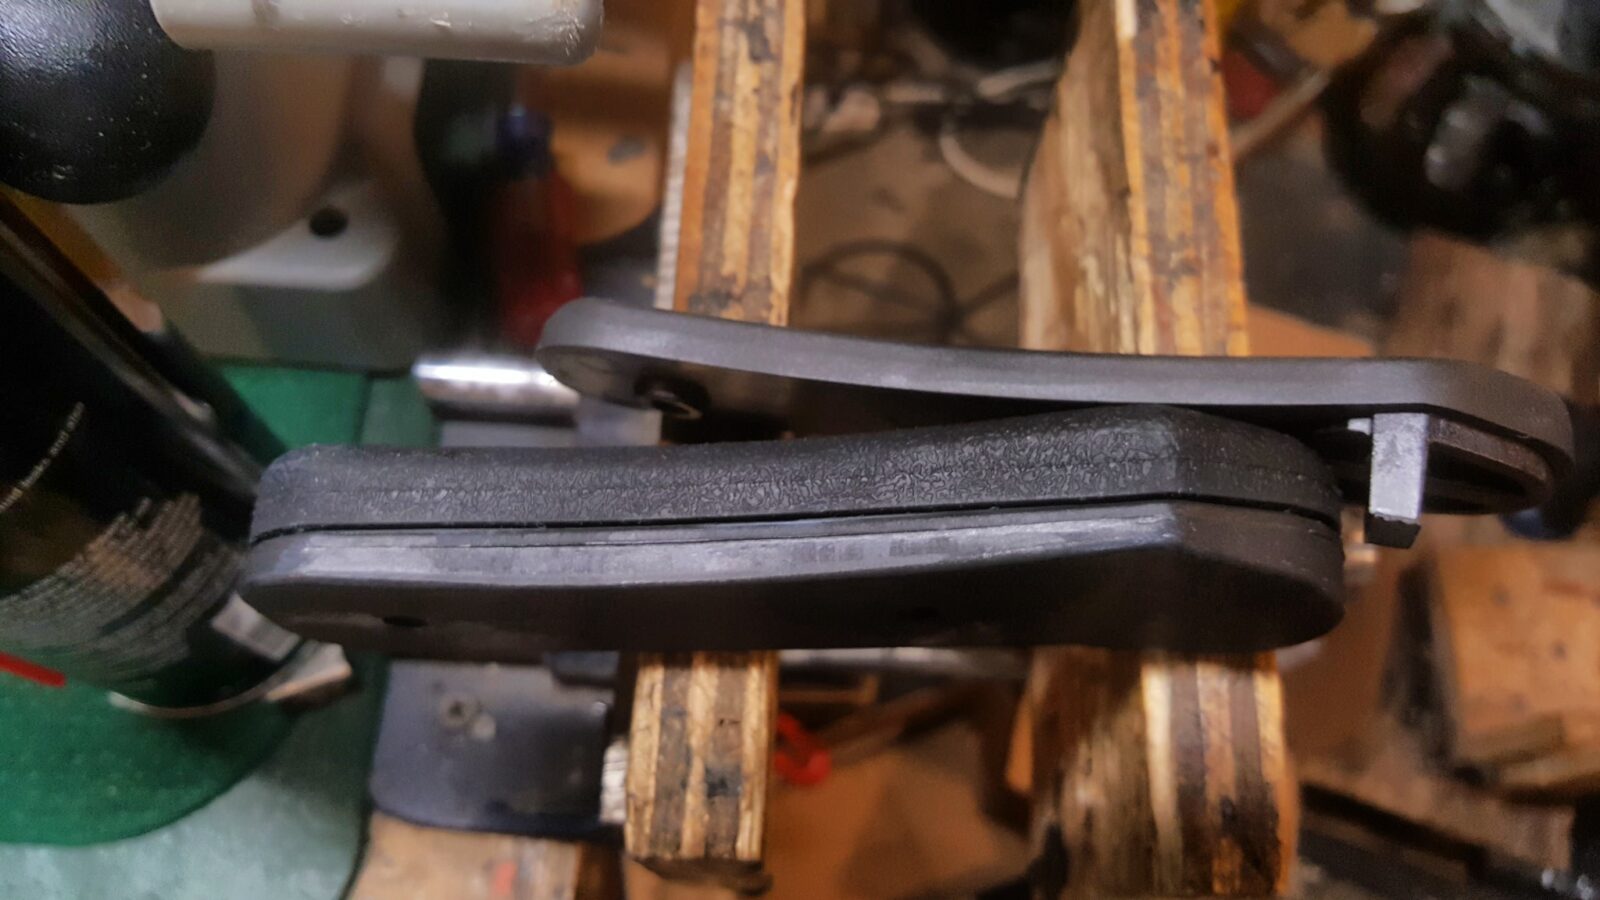
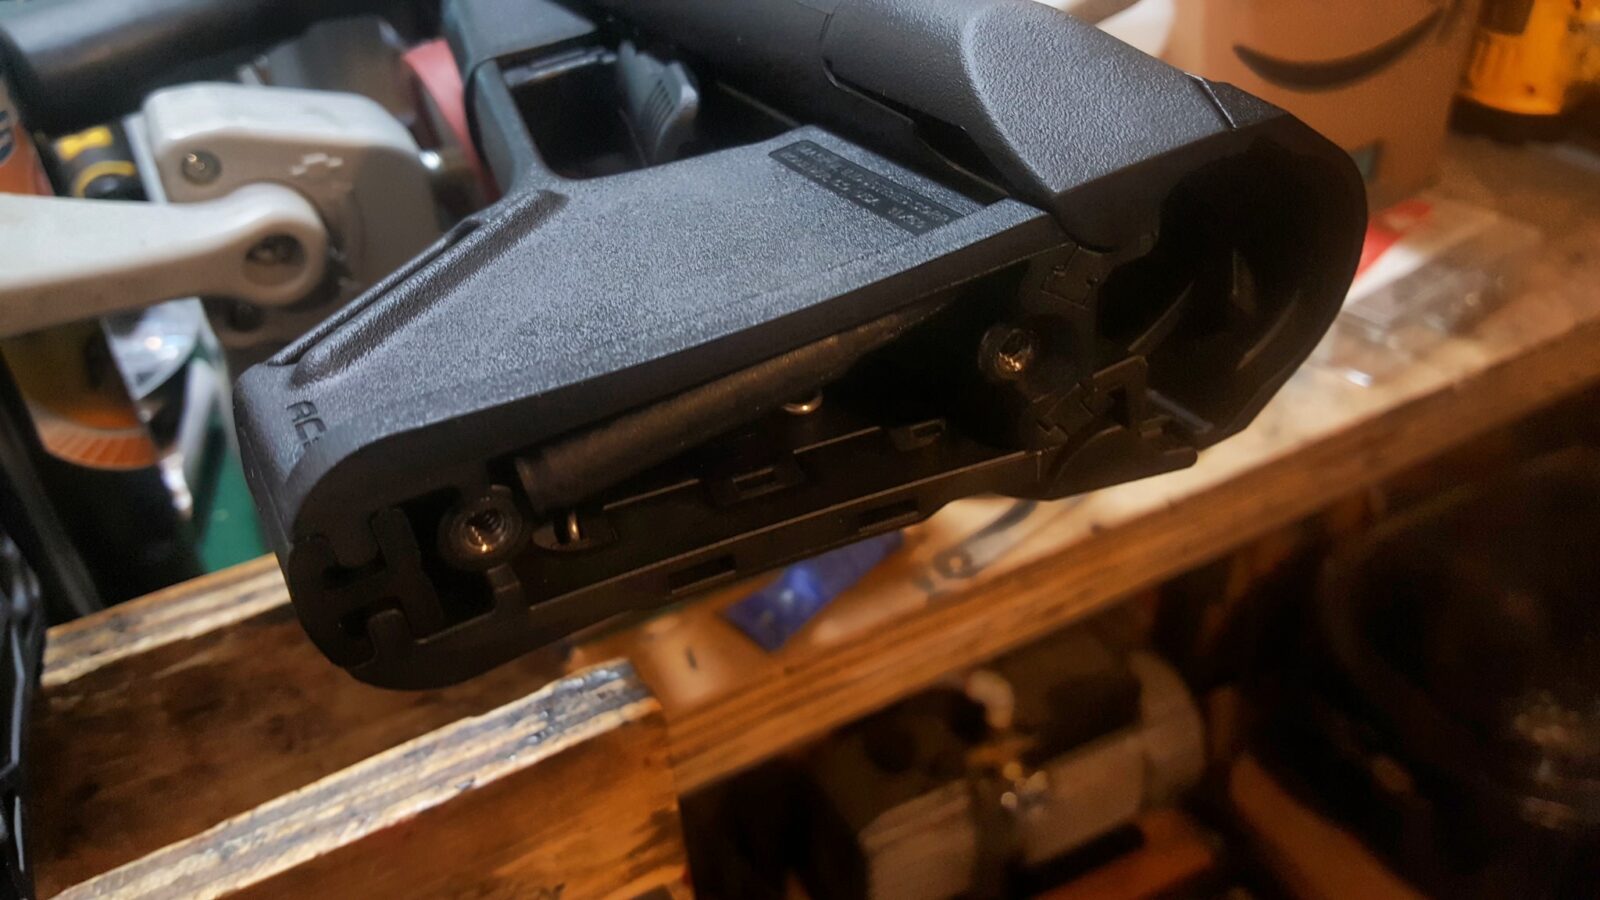
Installing the Magpul ACS Stock with Limbsaver Pad
I like the Magpul ACS stocks. They are comfortable, have a locking lever to keep them from wobbling and have storage compartments you can either really use for storage or fill with epoxy and bird shot to further adjust the weight and balance of a rifle.
As luck would have it, I don’t have a photo of the stock before installation but will tell you that the one challenge is to lift the locking pin. Magpul gives you a dummy cartridge to help with this but I made a tool to hook the pin and lift easy as can be.
Now one thing that is nice with hard recoiling firearms is a decent recoil pad. I’ve long been a fan of Limbsaver pads and they make a model specific for the Magpul ACS, ACS-L, CTR, MOE, STR and UBR. It’s nice and thick and provides a lot of cushion especially compared to the original pad it replaces.
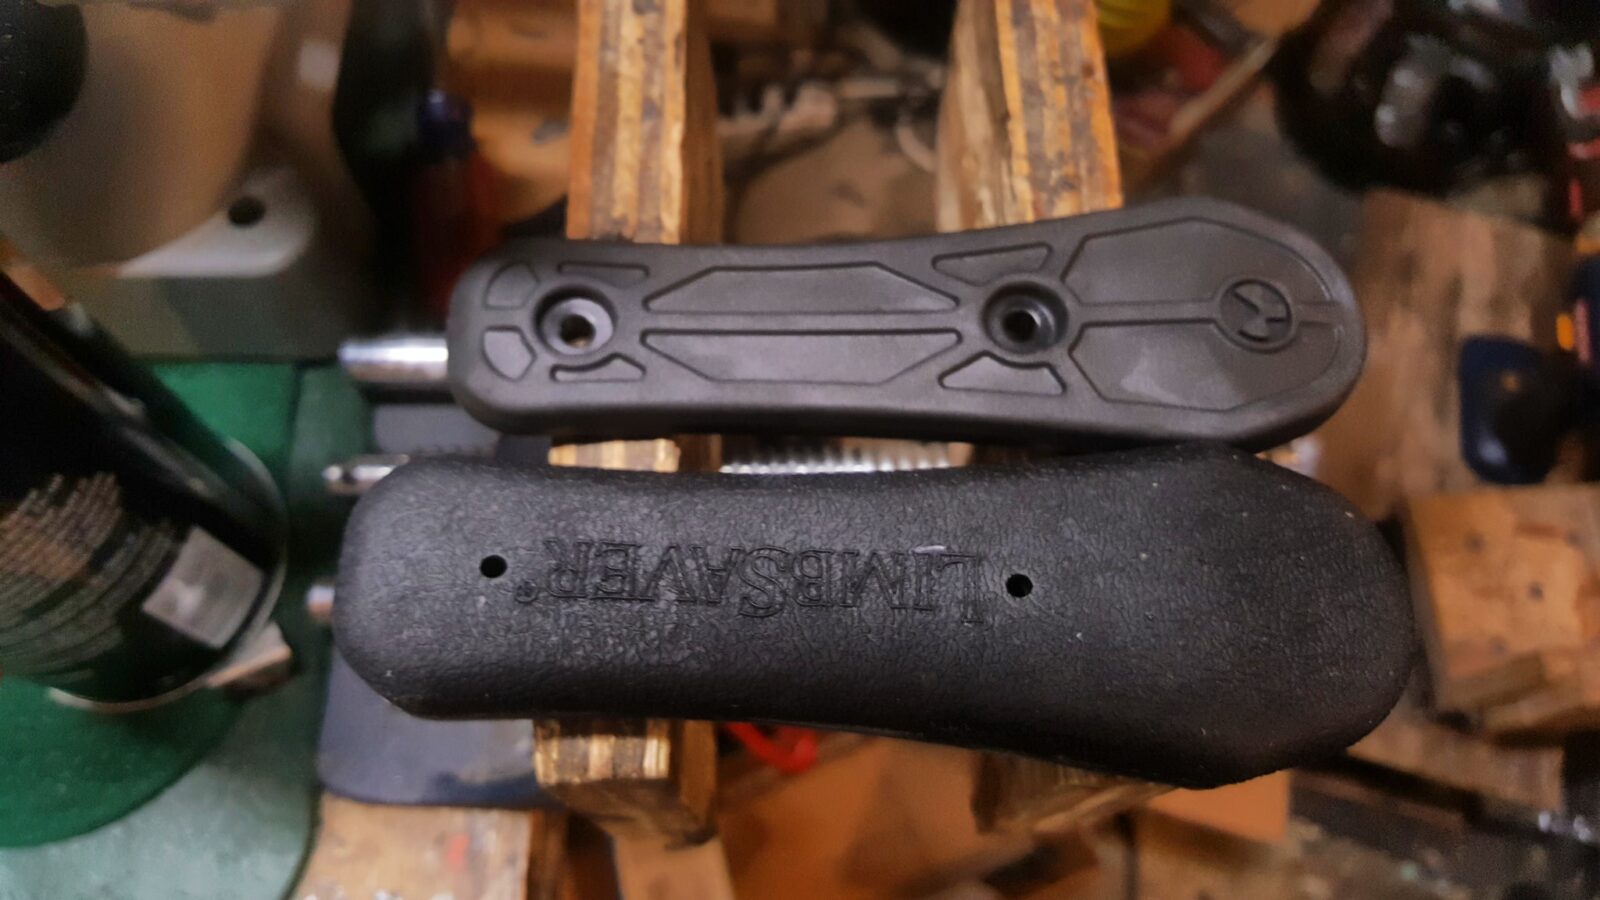
I purchased the Magpul ACS for Mil-Spec buffer tubes from Primary Arms and the recoil pad off Amazon.
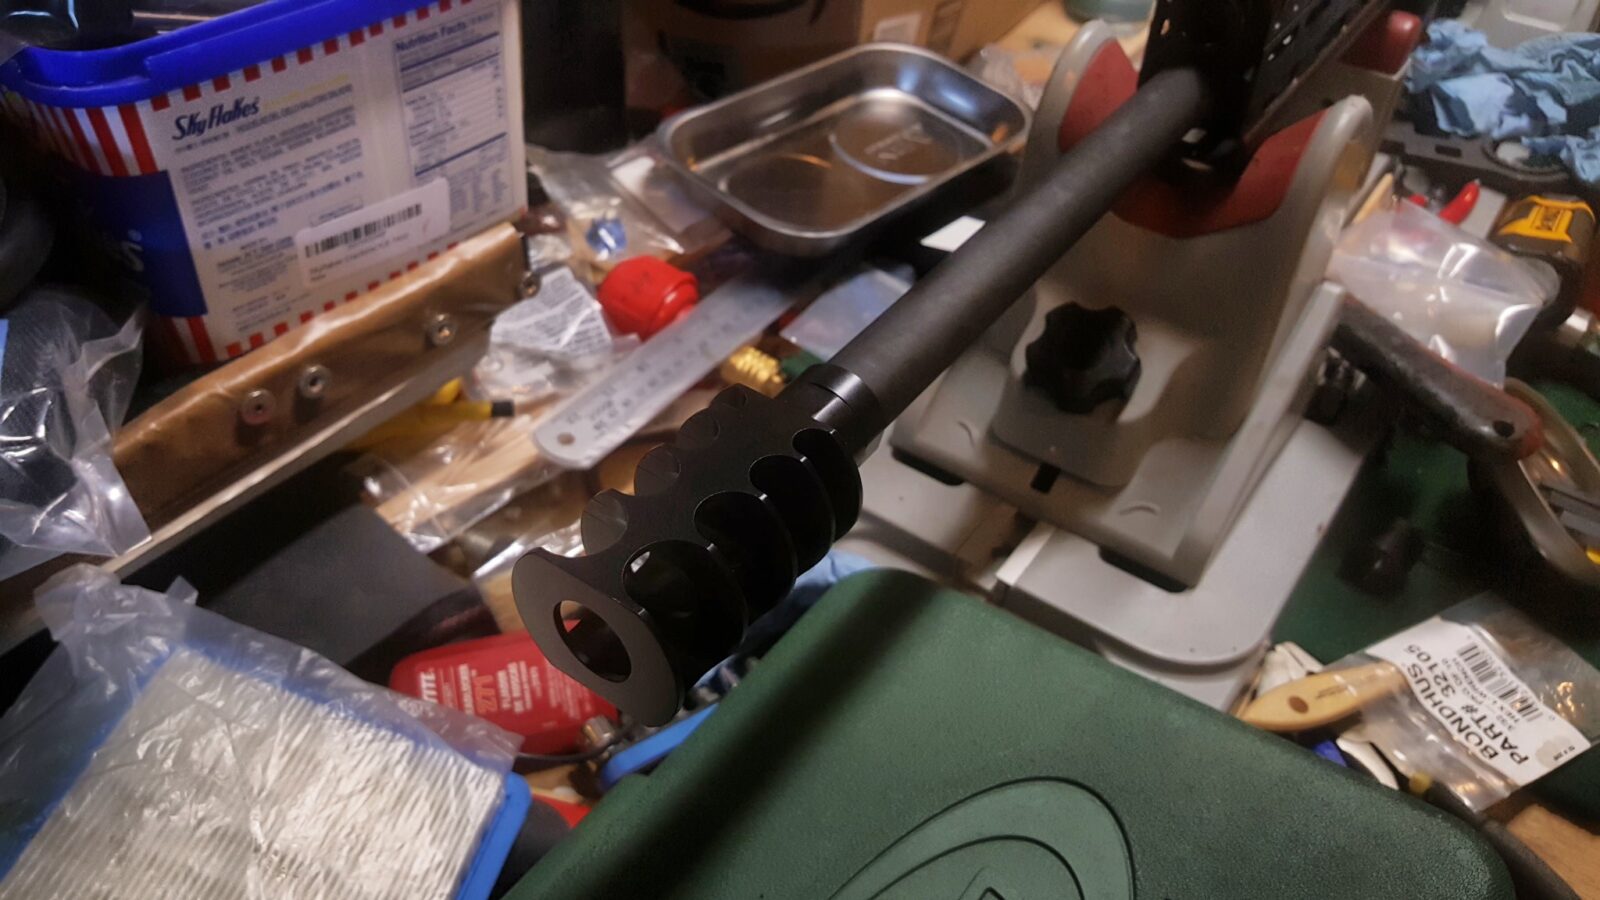
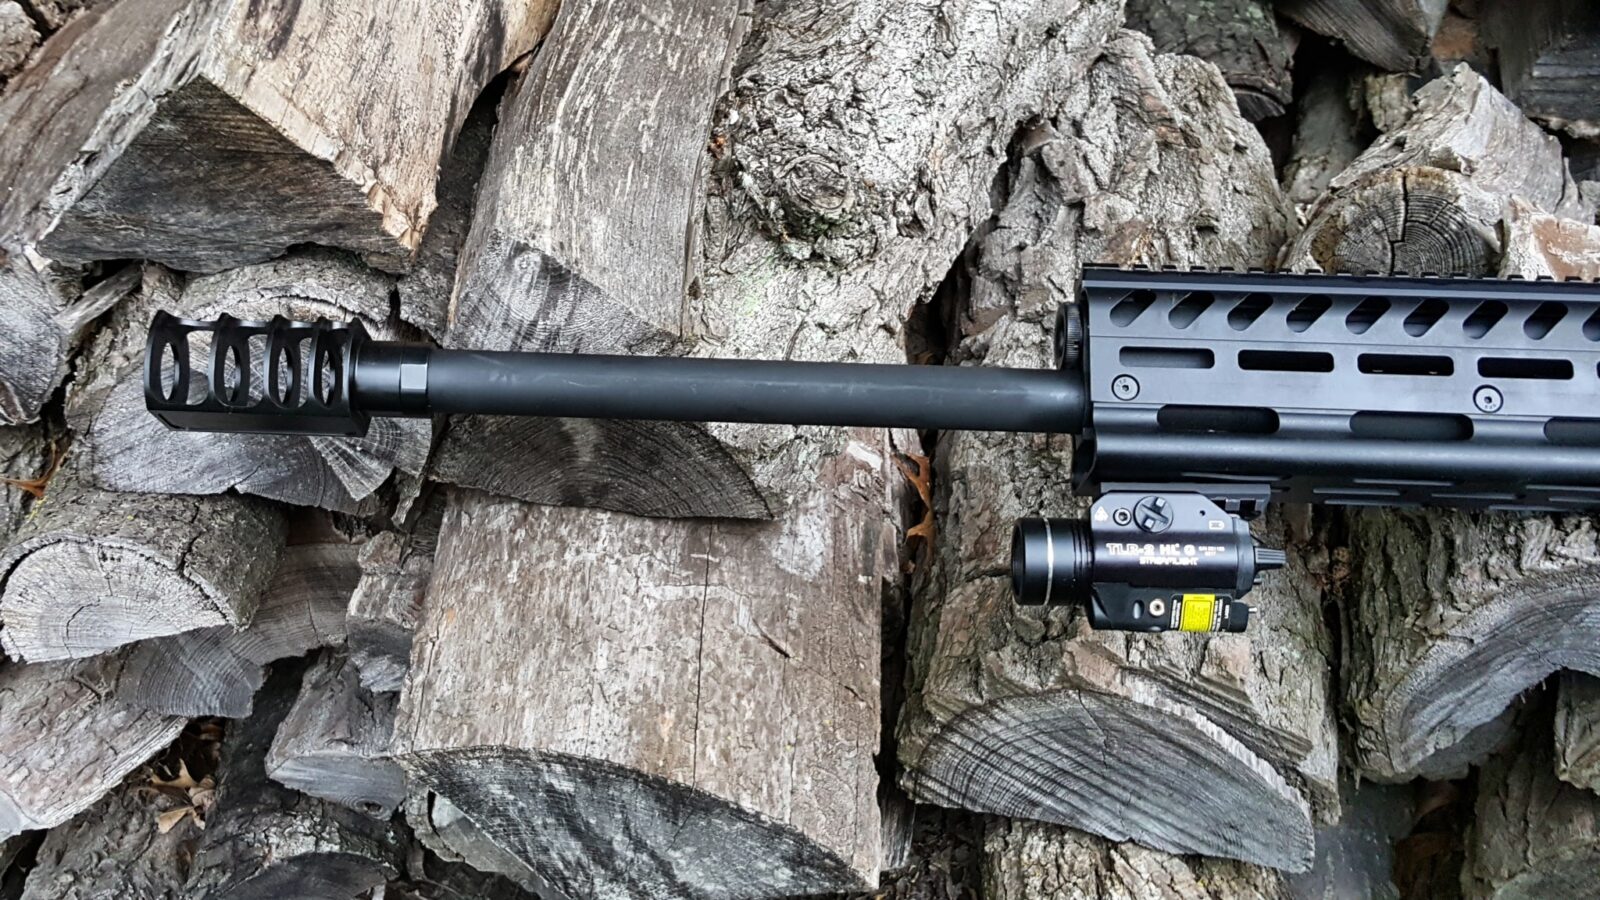
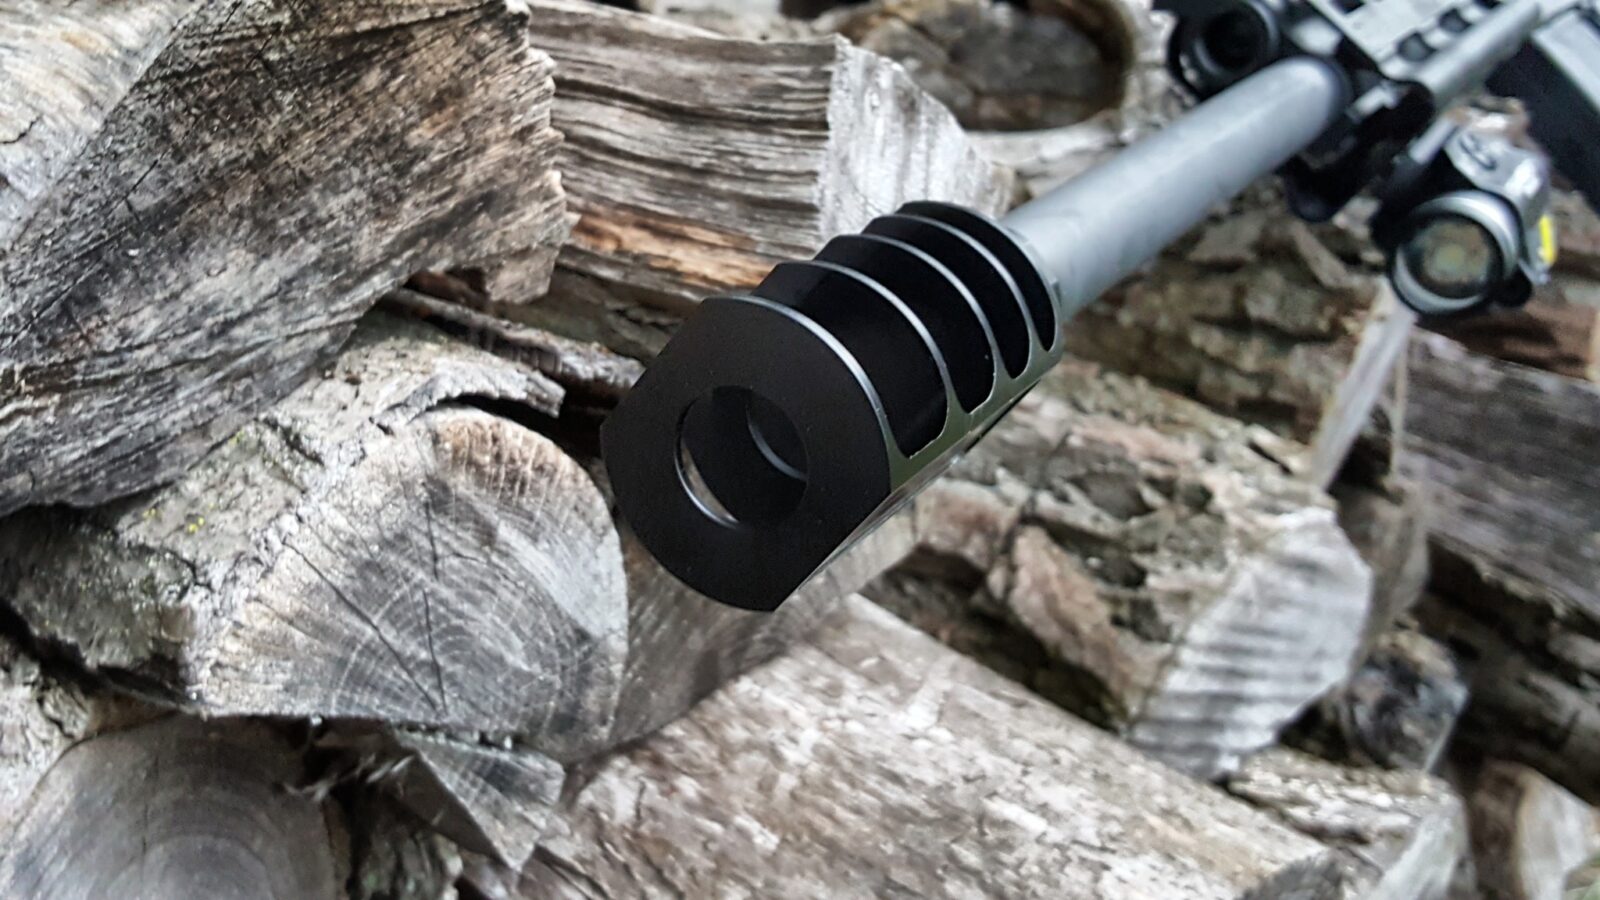
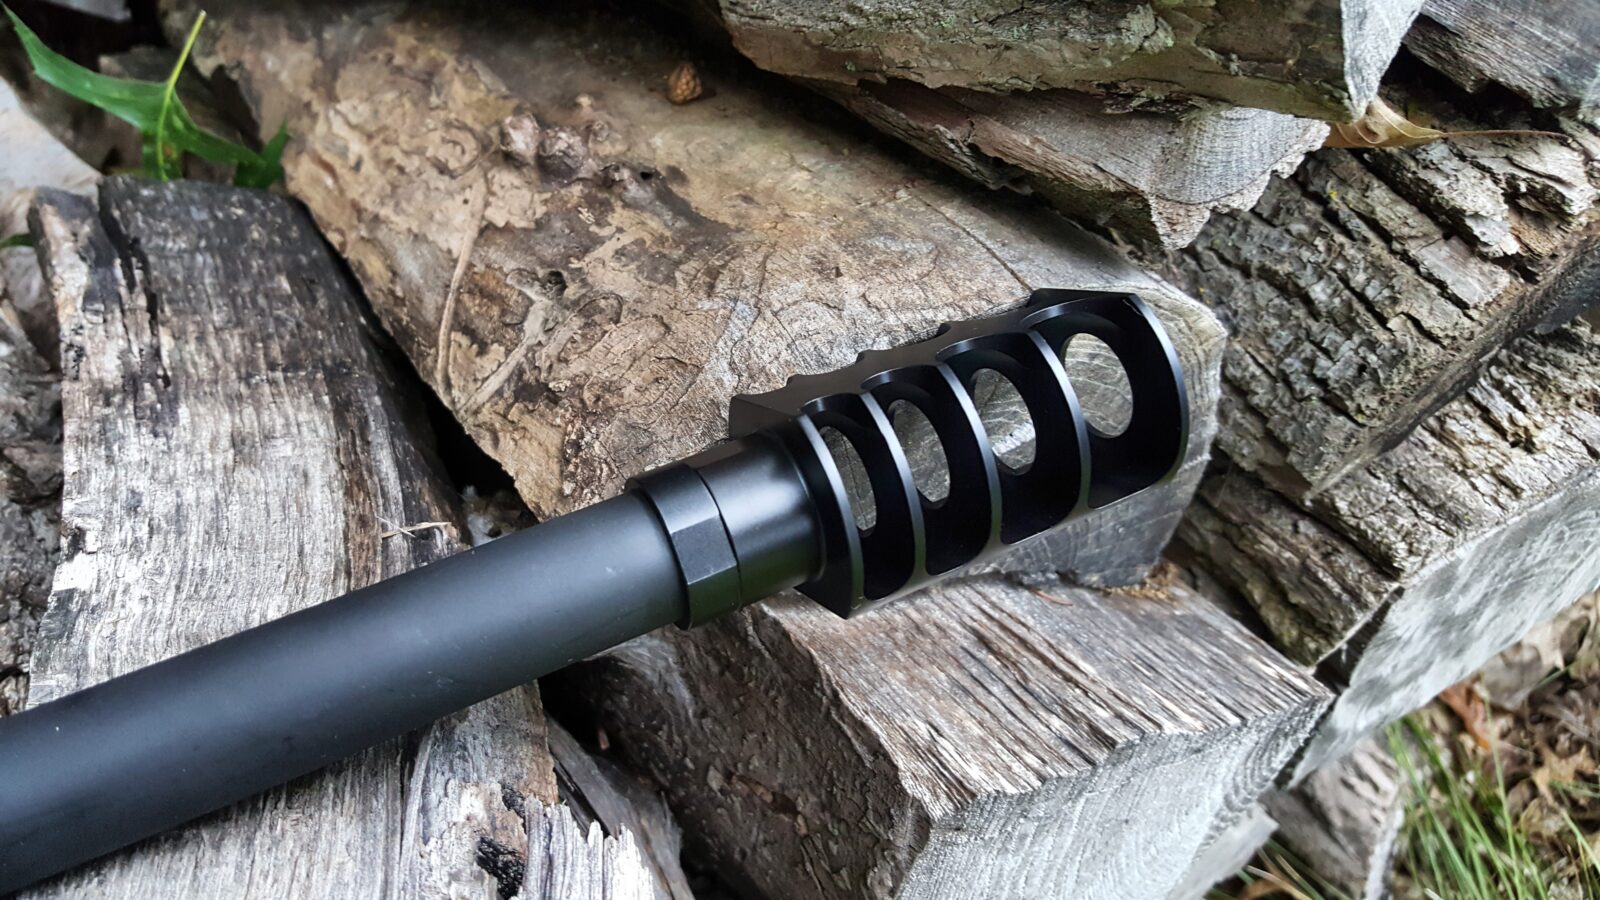
Installing the JMac RRD-4C 12 Brake
If you want to tame recoil, a good brake is essential. Justin McMillion and his company JMAC Customs make some great brakes so reaching out to him for a brake made perfect sense. He recommended their RRD-4C “12” brake.
The first thing I noticed was it’s size – it’s huge and badassed looking. Installation is a breeze. Unscrew the thread protector from the Lynx to expose its threads. Screw on the jam nut as far as you can and then thread on the brake as far as you can. Back it off enough that the brake is flat and the chambers are venting up as shown below. Then tighten the jam nut up against the back of the brake to lock it in place.
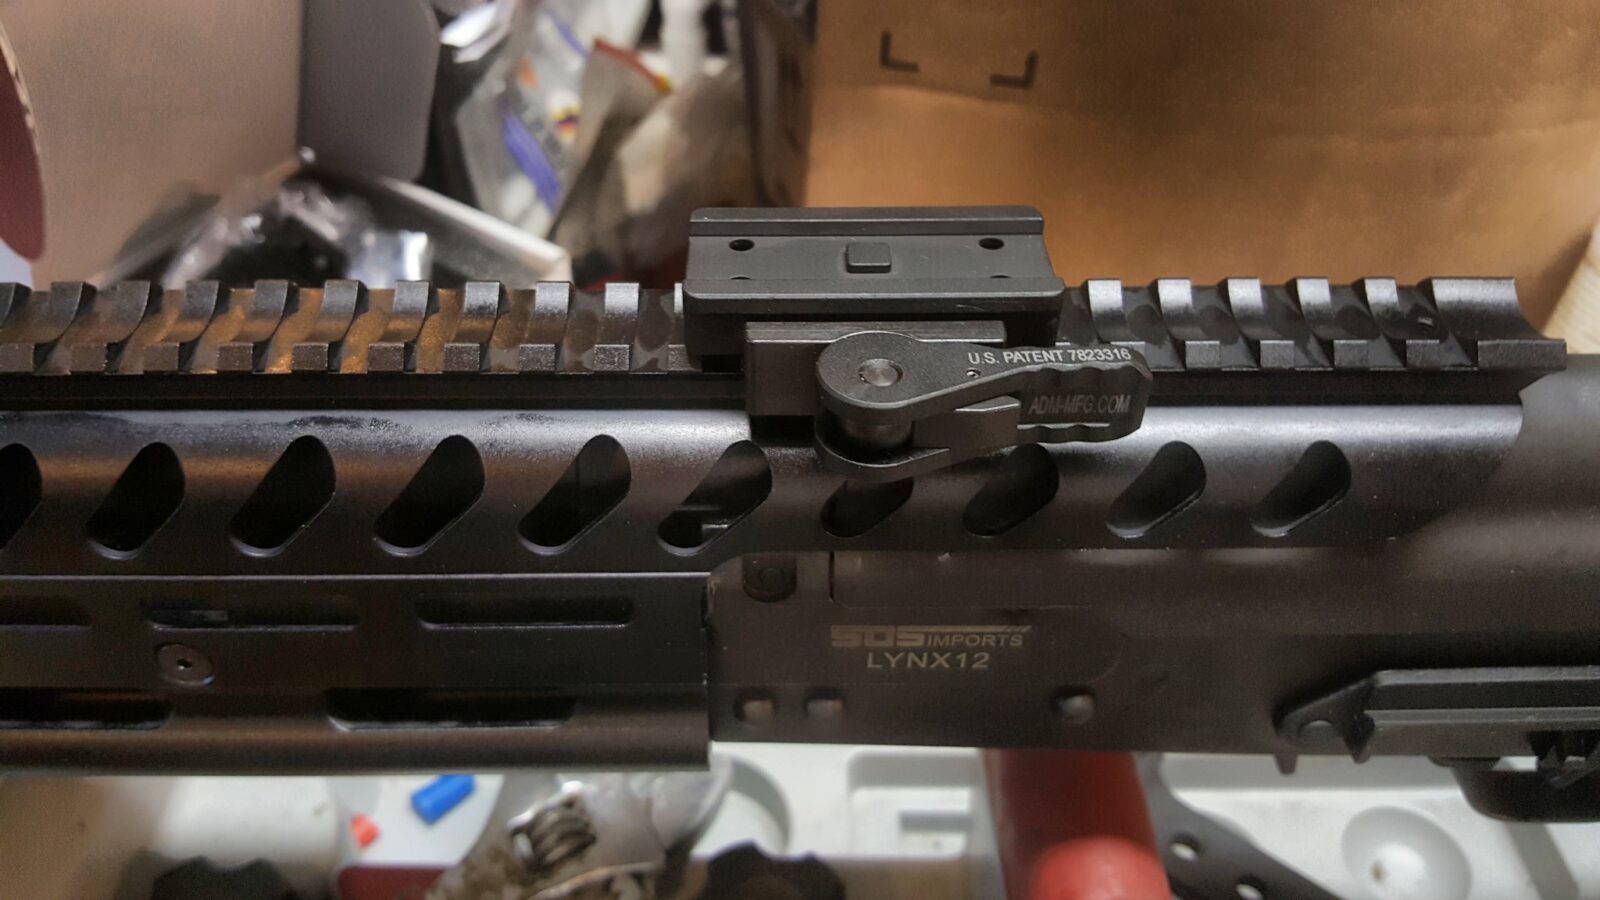
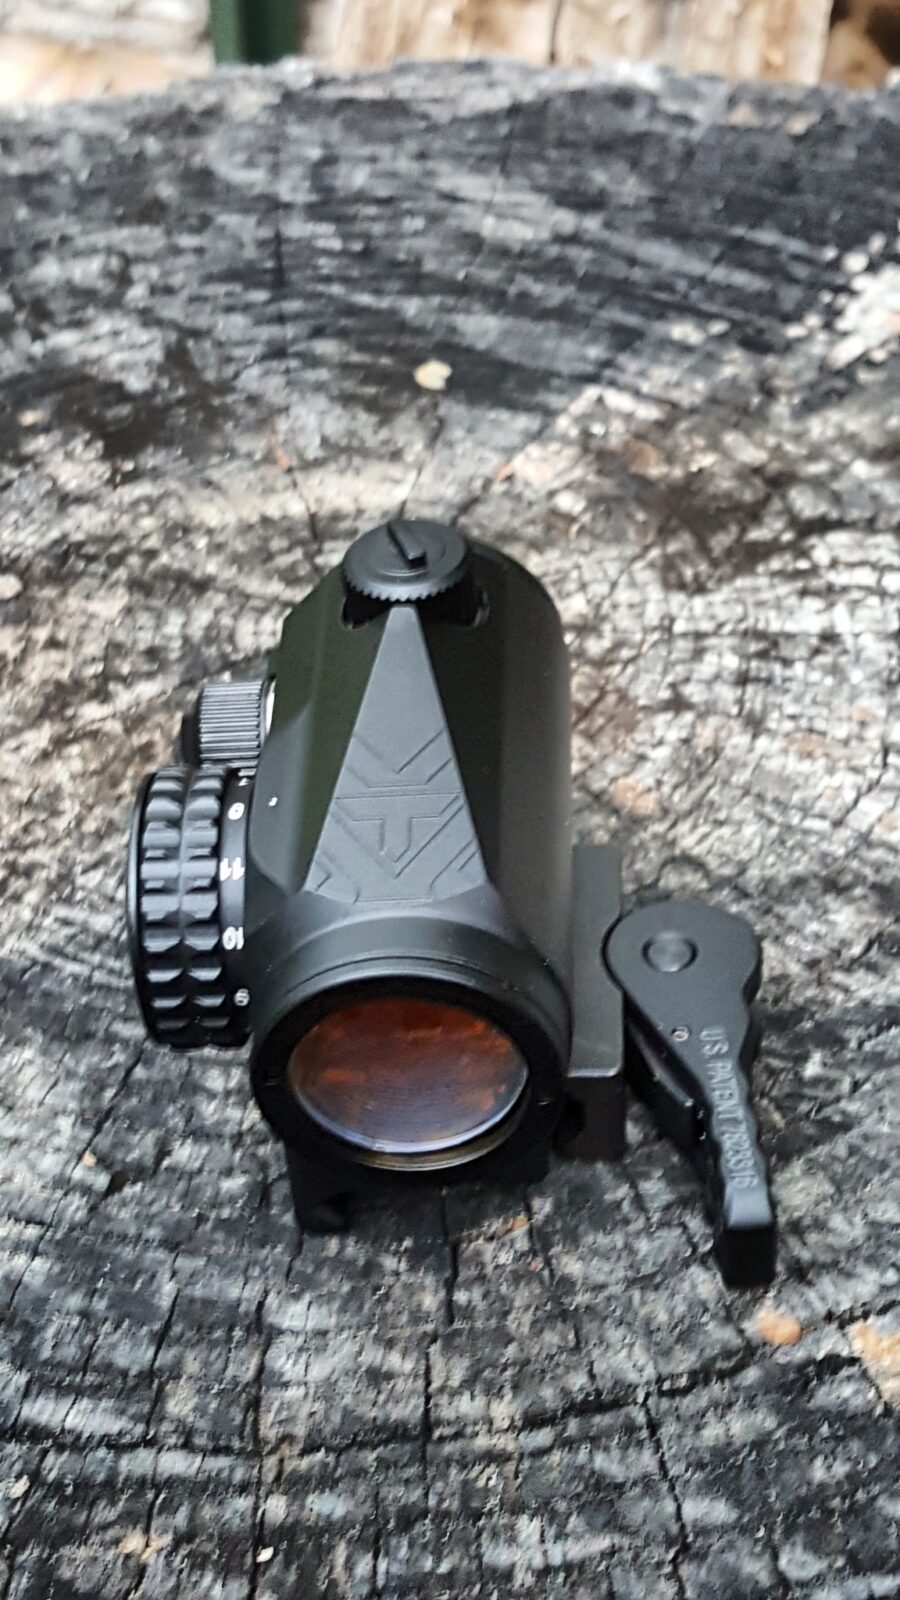
Installing the Crossfire Red Dot and American Defense Quick Release Lever
My go to red dot these days is the excellent Vortex Crossfire unit. It’s small and only has a 2 MOA dot. It comes configured for an AR but you can remove the tall base and use the supplied shorter one for a lower mount. Recently, I started using American Defense bases because they have a solid quick release lever so you can remove the red dot quickly. The base required is the AD-T1-L STD.
You just unscrew the four little screws on the bottom of the optic, apply Blue Loctite on the screws and attach it to the new base. Not hard at all! The results are totally worth it.

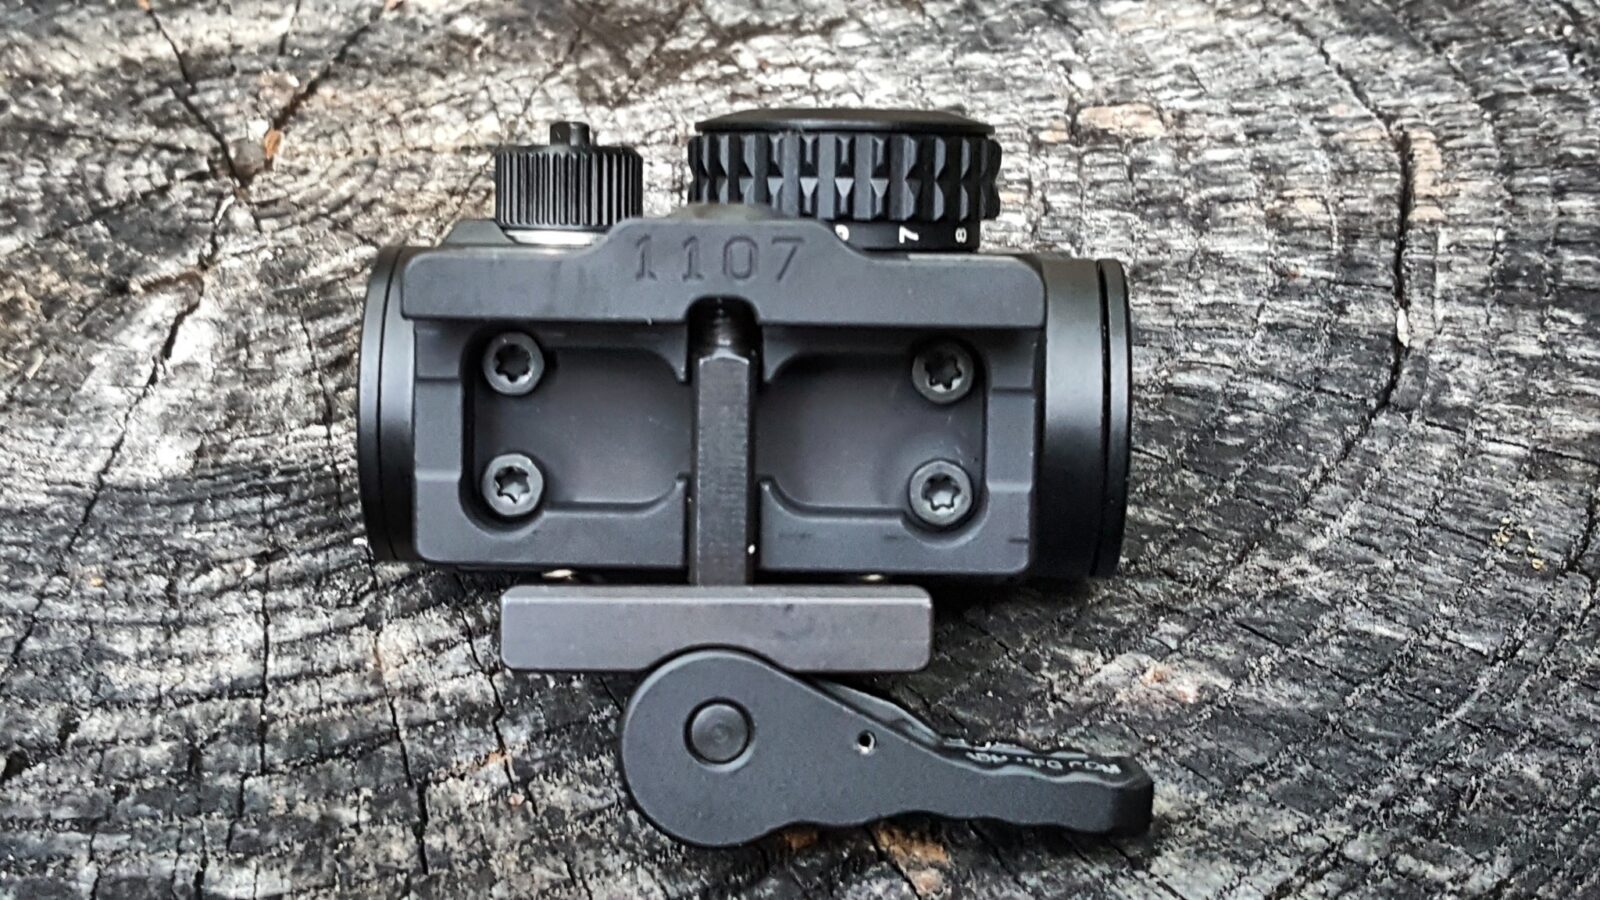
Caution about eBay: Watch out for cheap counterfeit products on eBay. I would recommend buying the optic and mount from a reputable dealer to make sure you are getting the real deal. The cheap knock offs just do not hold up.
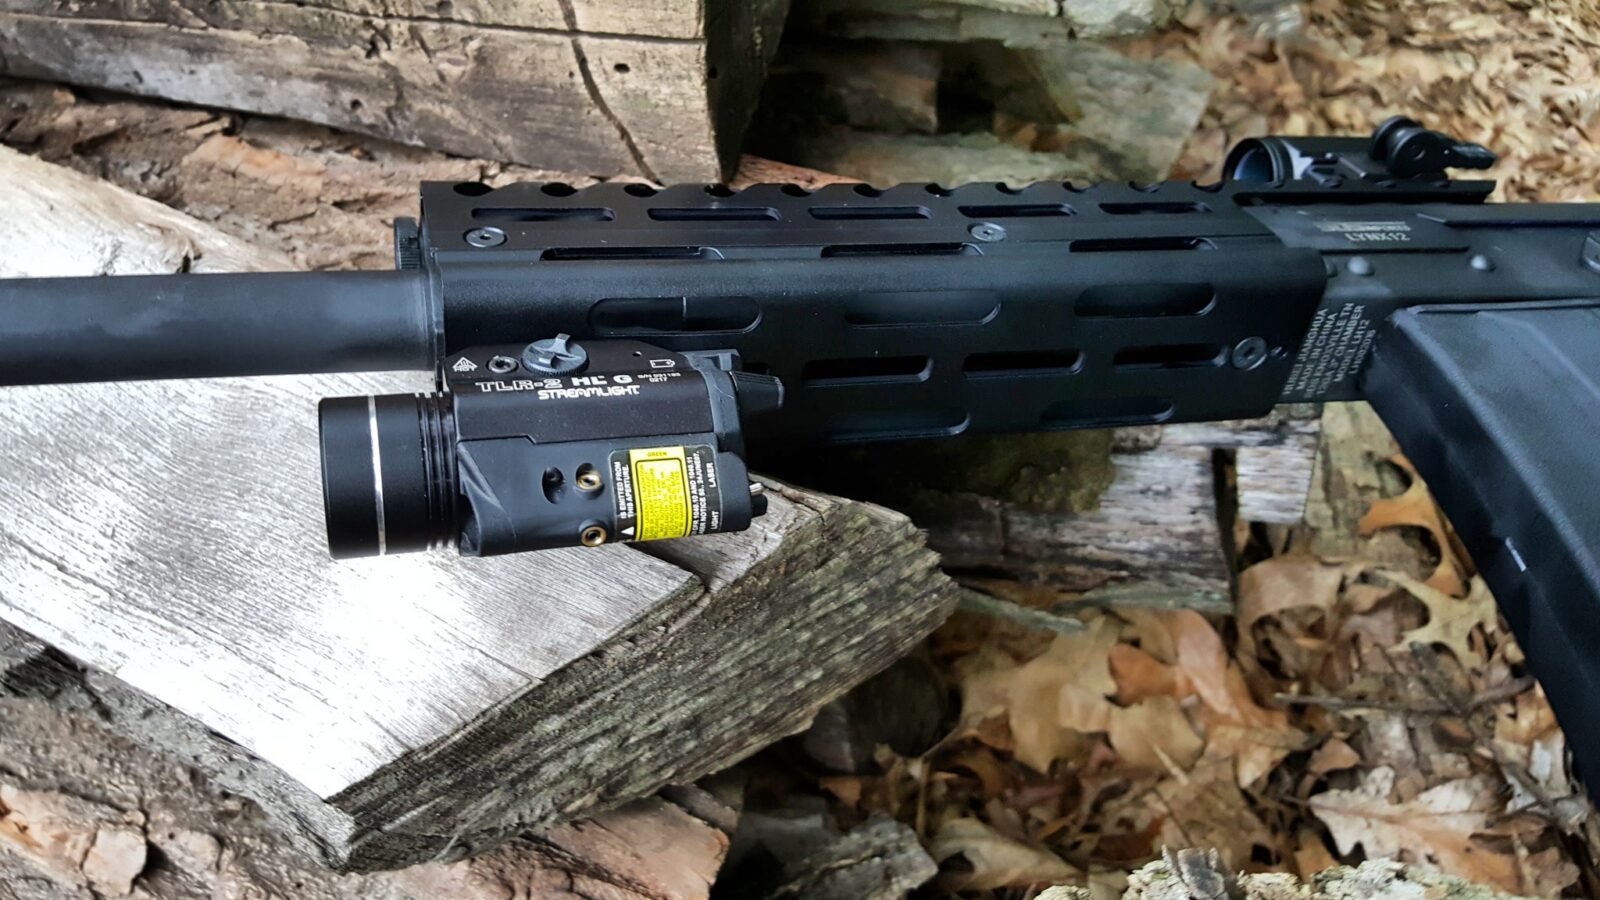
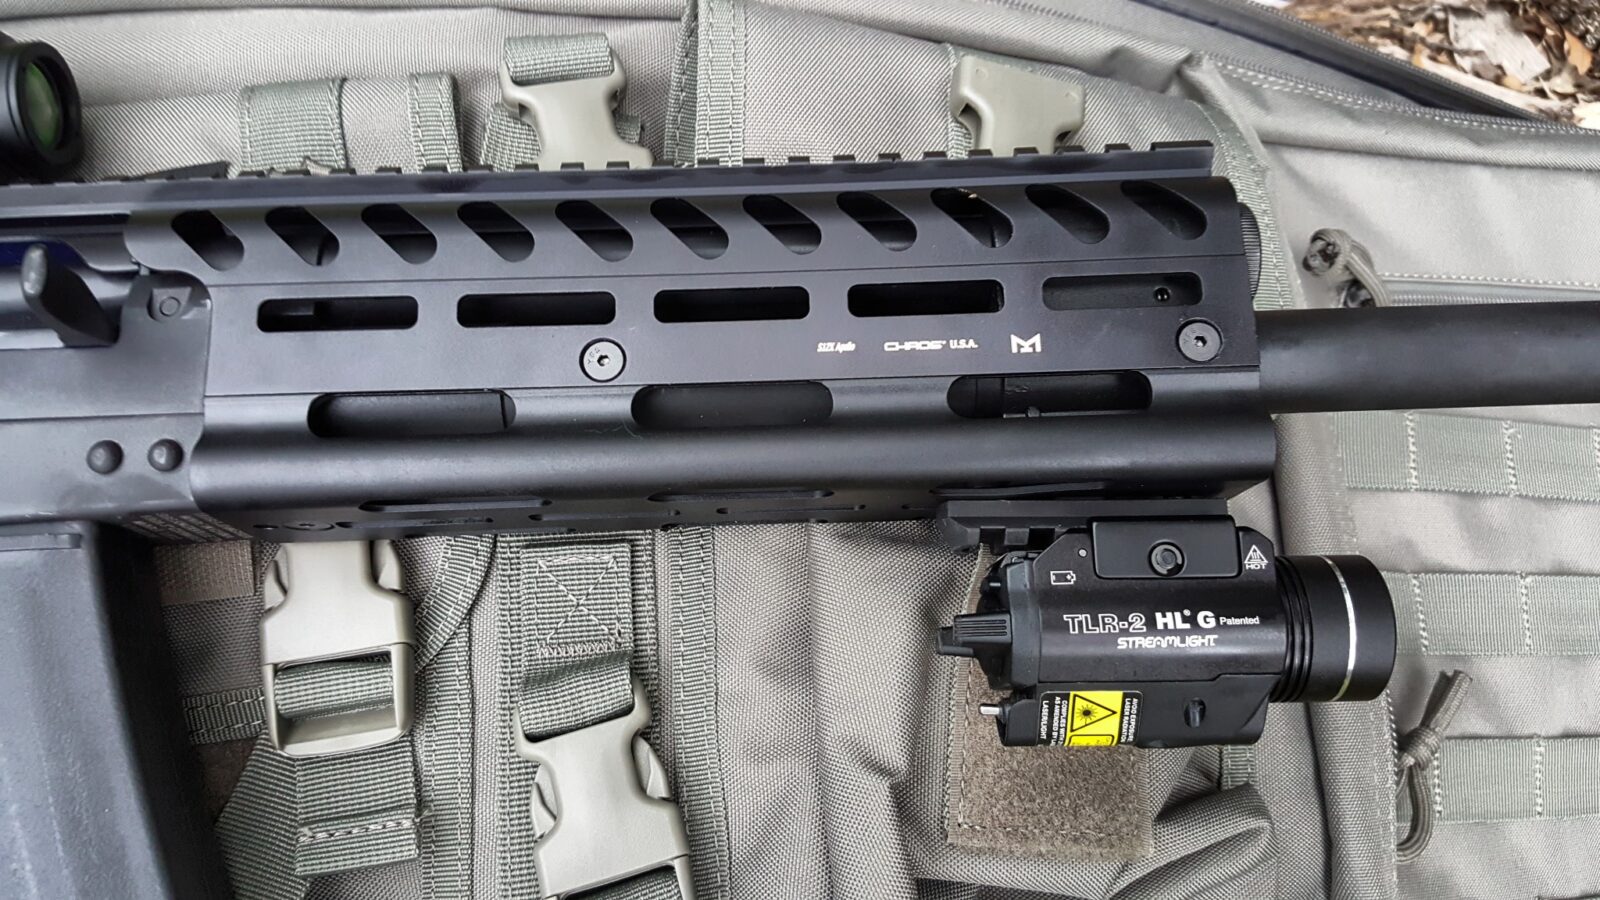
Streamlight TLR-2 HL G
I installed a small 5 slot Magpul M-Lok aluminum rail section on the bottom front of the handguard to hold a Streamlight TLR-2 HL G 800 lumen light and green laser. I have found they hold up remarkably well. In this age of cheap Chinese products, I would recommend buying a light that will work when you need it most.
To mount it, follow the directions with the light to install the key for the Picatinny rail. It comes with several and then it just screws onto the mount with the thumbscrew,
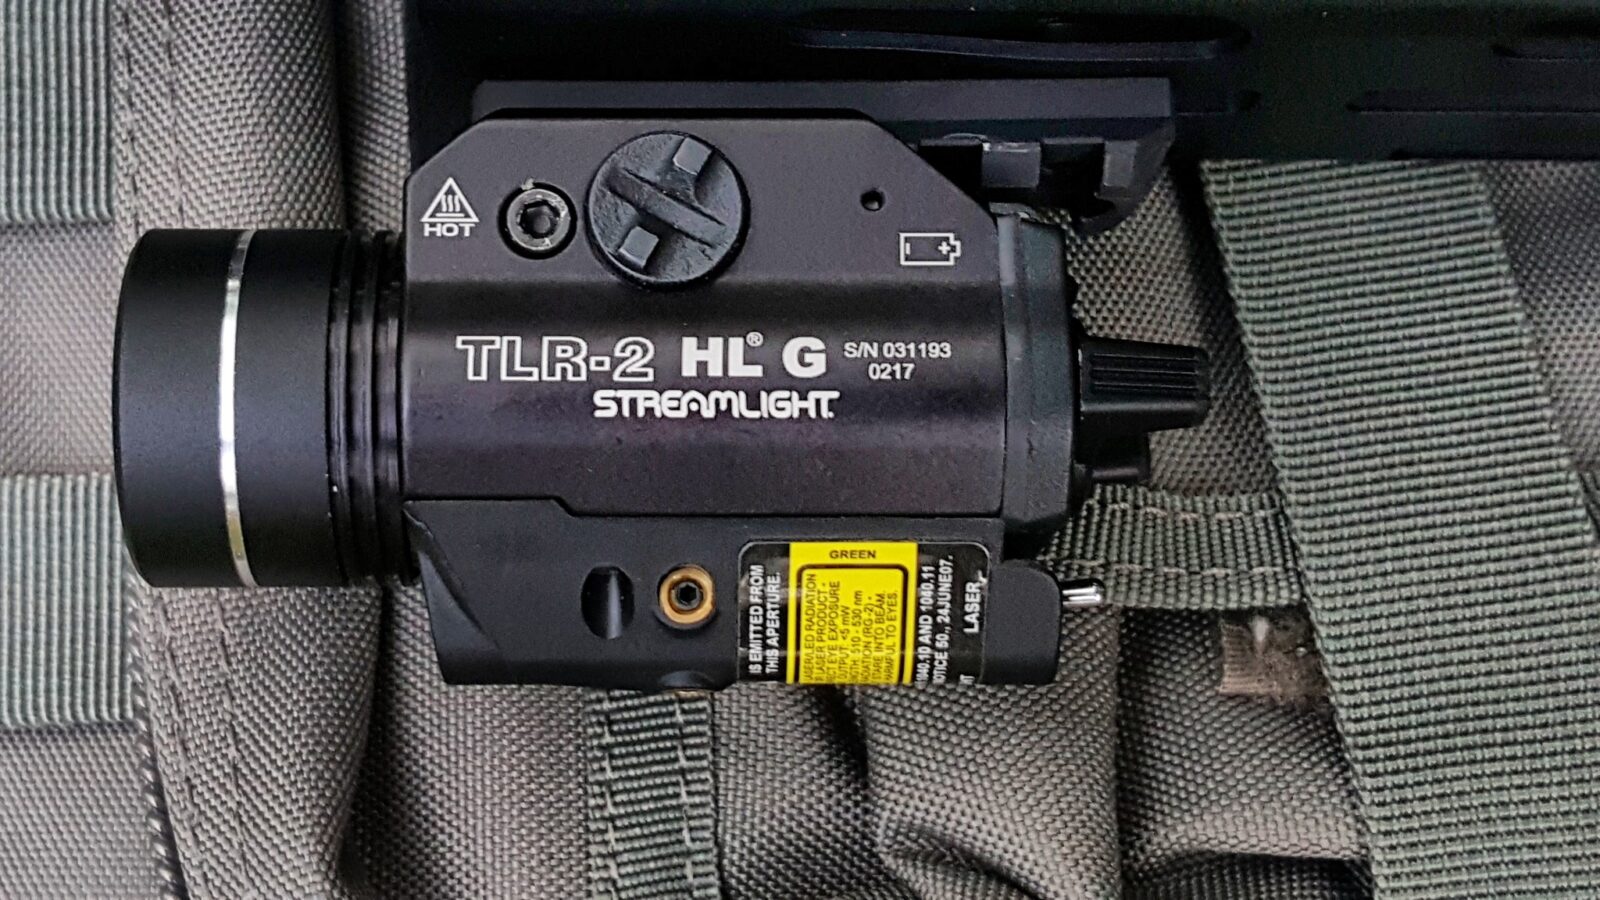
Caution about eBay: Watch out for cheap counterfeit products on eBay. I would recommend buying the Streamlight from a reputable dealer to make sure you are getting the real deal. The cheap knock offs just do not hold up.
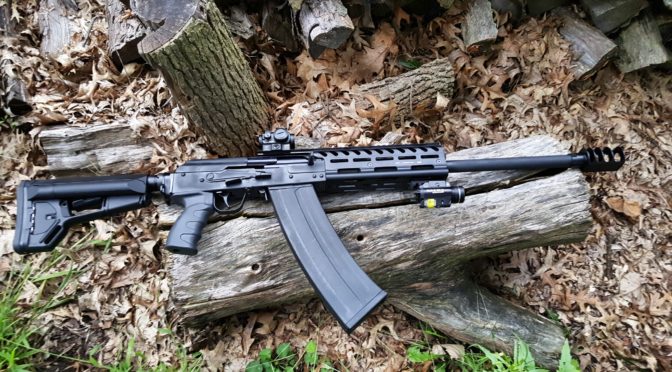
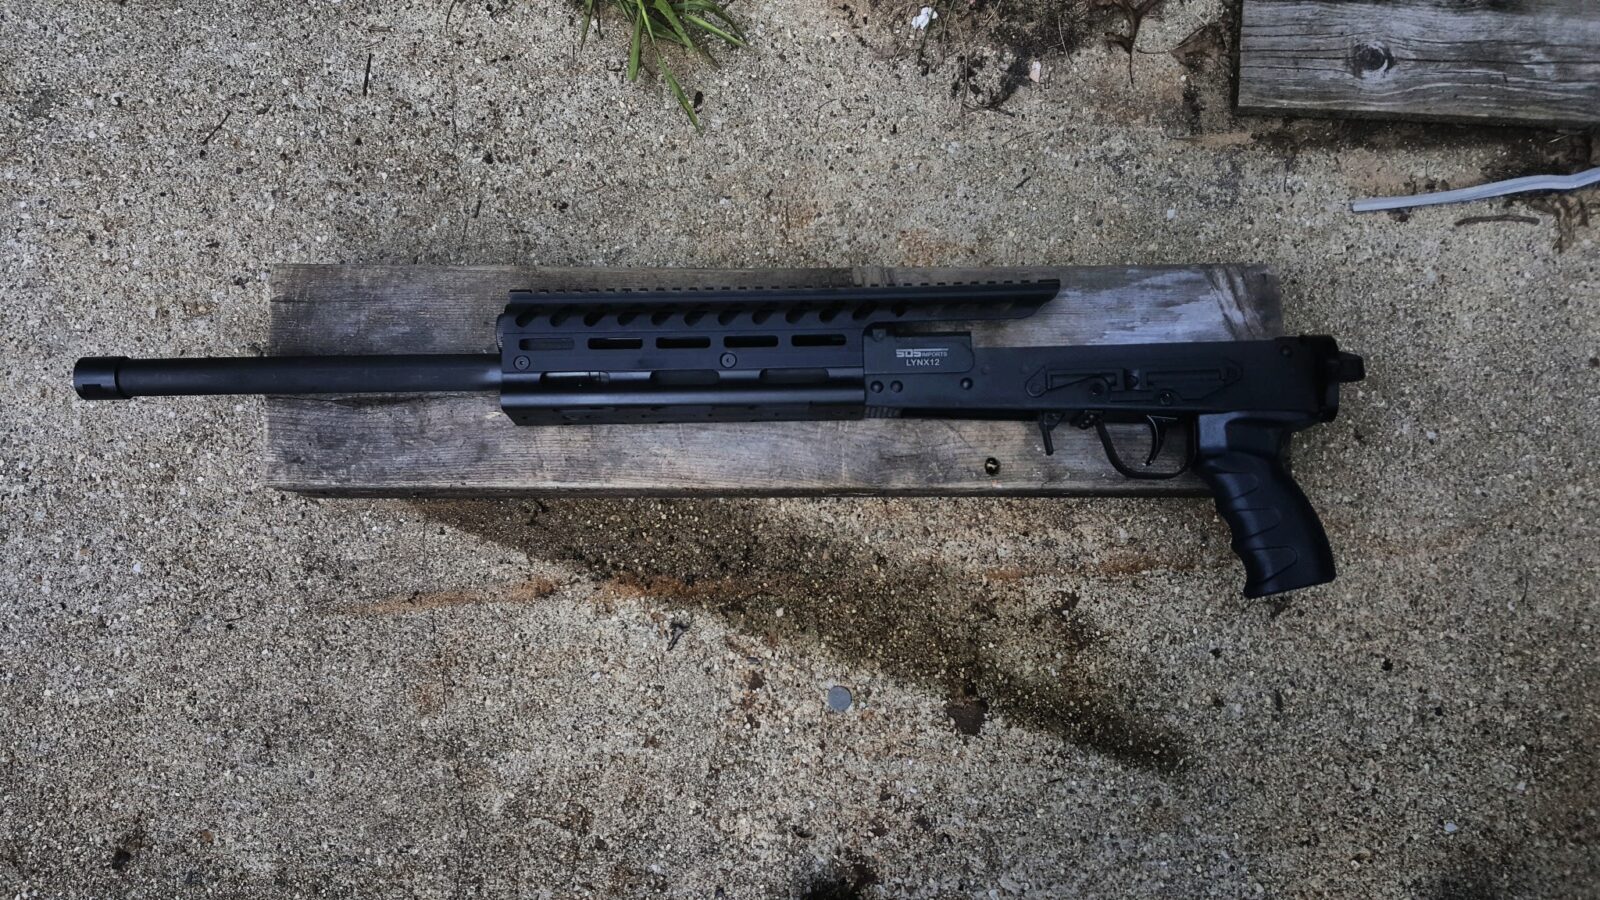
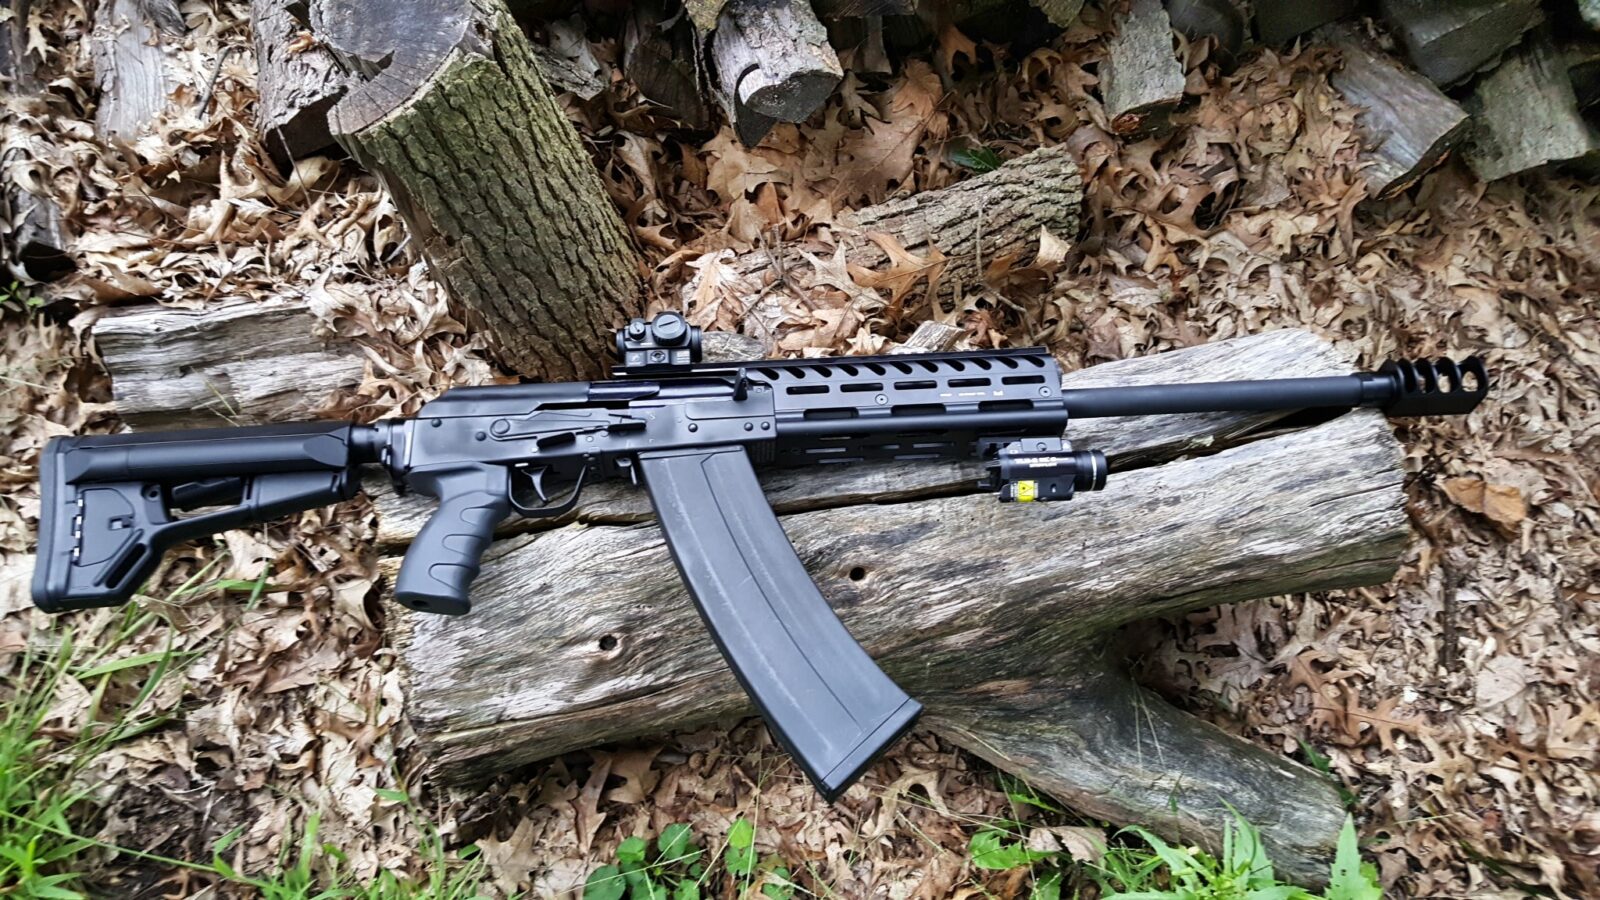
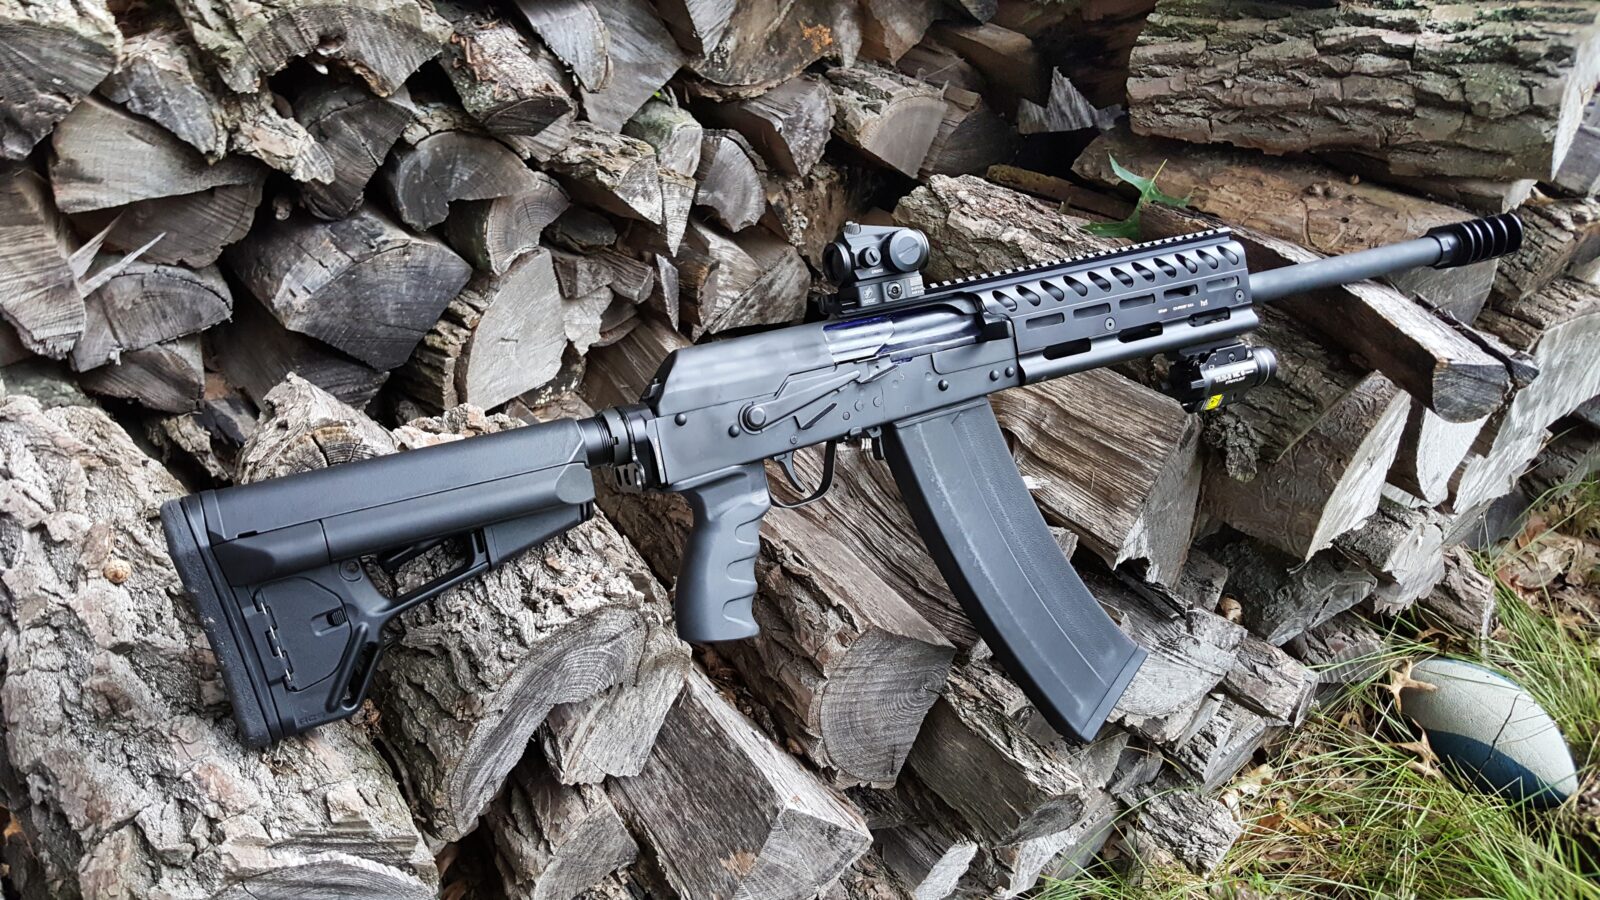
The End Result
I am very happy with how it turned out. The balance is great and the red dot is located just right – when I bring the shotgun up – the dot is right where I need it. I definitely need to take it to the range and like how it turned out. By the way, the magazine you see is the new SDS 10 round unit.


I hope you enjoyed these blog posts. There will be more to come 🙂
Note, I have to buy all of my parts – nothing here was paid for by sponsors, etc. I do make a small amount if you click on an ad and buy something but that is it. You’re getting my real opinion on stuff.
If you find this post useful, please share the link on Facebook, with your friends, etc. Your support is much appreciated and if you have any feedback, please email me at in**@*********ps.com. Please note that for links to other websites, we are only paid if there is an affiliate program such as Avantlink, Impact, Amazon and eBay and only if you purchase something. If you’d like to directly contribute towards our continued reporting, please visit our funding page.