In this step we will install the selector spring and detent along with the pistol grip. As you can imagine, I am a grip snob. I do not like the Mil-Spec grip much at all but do like the MagPul MOE and MIAD grip. For me, the lower-cost MOE grip is just fine – it feels good in my hand and is durable. It’s pretty much all I use on ARs other than target rifles where I prefer the Ergo grip with a palm shelf.

So, first off, I need to point out that in this step we install the spring and detent pin for the selector lever. Both the spring and pin are unique. In the next photo, the selector spring and detent are on the left. On the right is a detent pin and spring for the pivot and takedown pins. Be sure to use the heavier detent and spring on the left for the selector. Also, consider getting spares from Brownells because they are really easy to lose.

Step one: Turn the receiver upside down, put a dab of Tetra Gun grease (or whatever brand grease you like) in the receiver’s detent hole and then insert the detent pin point first. The grease helps hold the pin in as you move things around plus lubricates it:

Step two: I like to put a dab of grease in the spring hole in the pistol grip to keep the spring from falling out. This helps reduce my lost springs. It’s way too easy for your mind to wander and have the spring fall out.

To install the grip, I lay the receiver on its side and push the grip into place. This grip was so tight that I had to tap it into place with a rubber mallet. Go slow and make sure that the detent spring lines up properly with the pin. If you go nuts pushing/hitting it together you can kink the spring and ruin it.

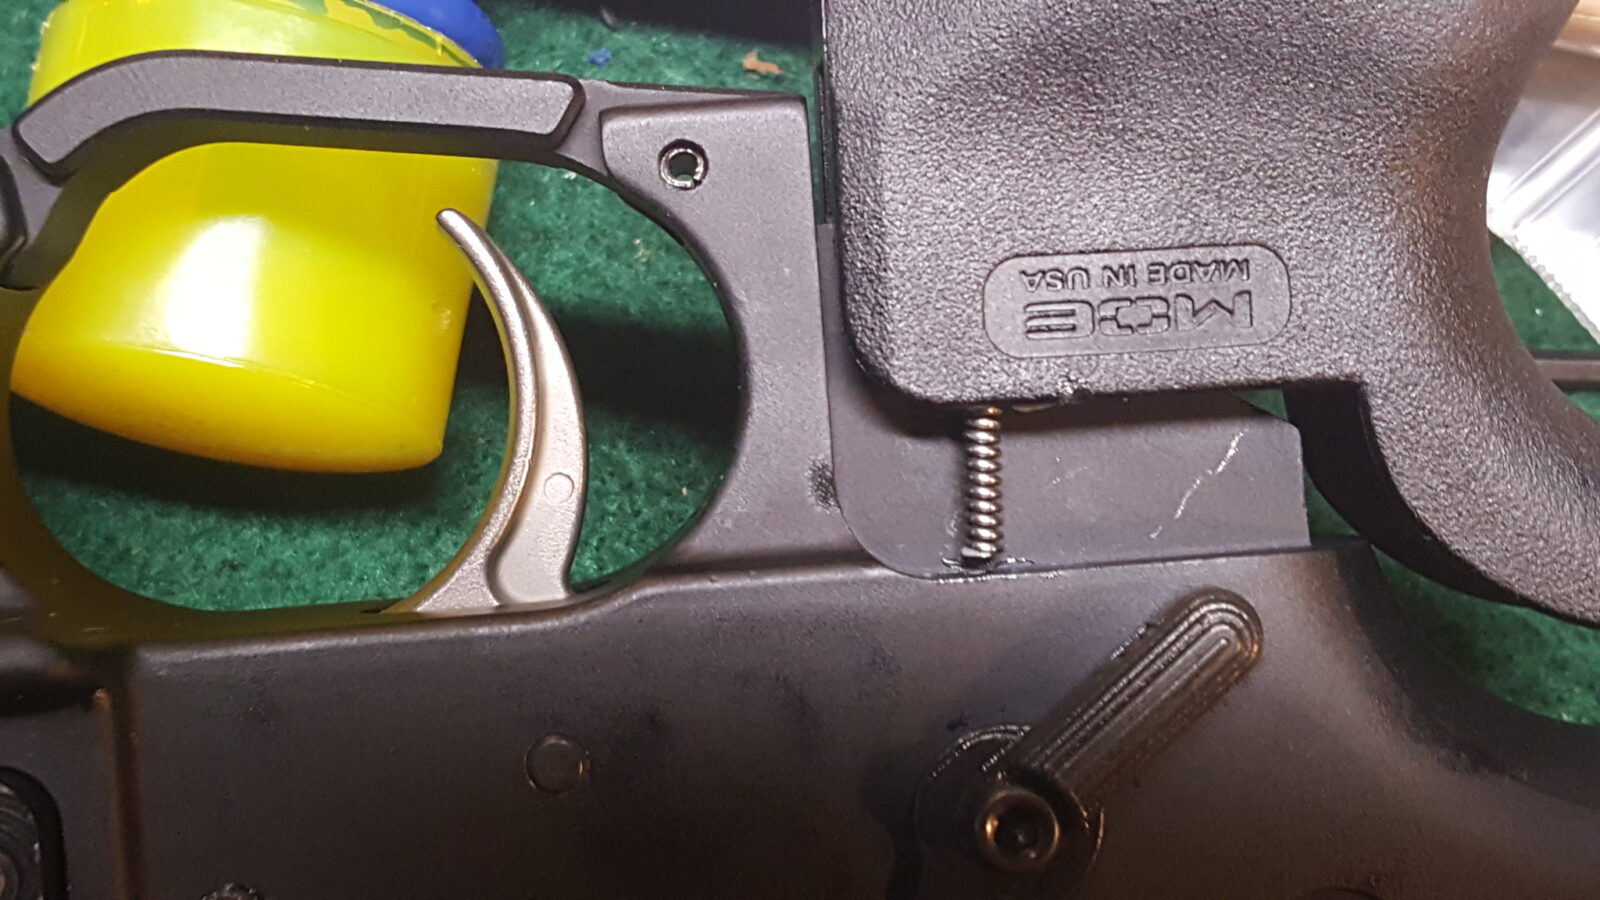

The Magpul grips come with a screw that can be installed via a slotted screwdriver or a hex key, which I prefer. Also note the yellow stuff on the screw – this is a pre-applied threadlocker so you do not need to add more. If you are installing a screw that does not have a lock washer or any threadlocker on it, you may want to apply a bit of medium strength Loc-Tite. Now, to get that screw down there, I angle everything back and slide the screw down the back of the grip just like a ramp and then I use my Allen wrench to tighten things down. Because I can’t get a good grip on the wrench due to my carpal tunnel, I use an adjustable wrench to give me just a bit more torque. Many of you may not need to do that. You are looking for firm – not Big Mongo torqued down tight. There are torque specs for everything but I do farmer ballpark tight on non-critical stuff.


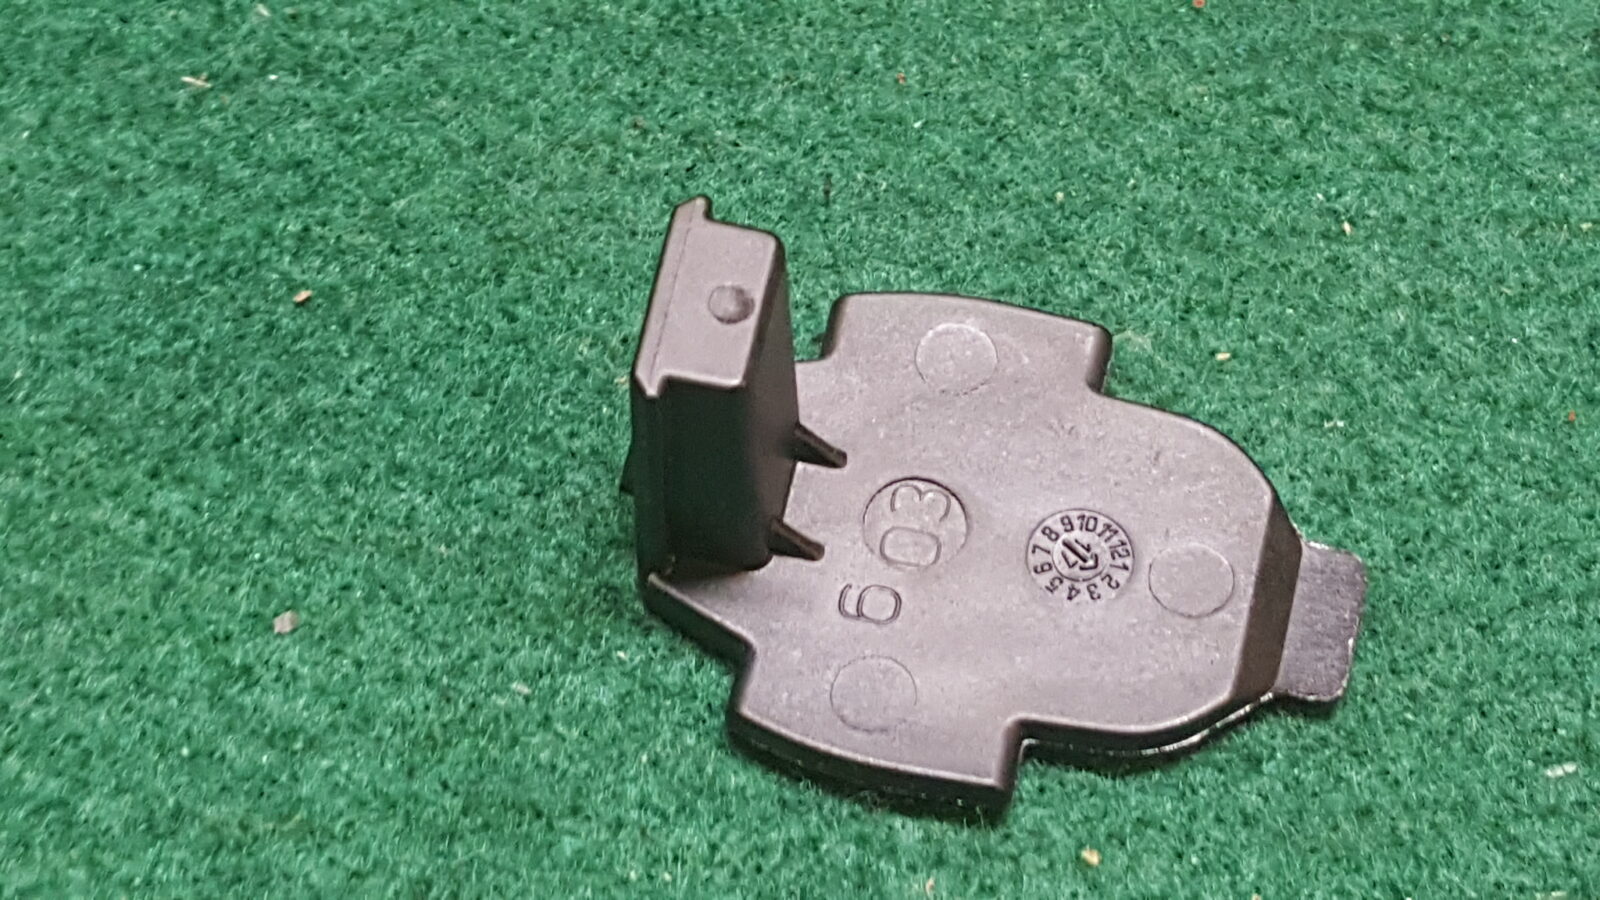
Once the screw is installed, the bottom end cap is snapped on place and you are done. Note, this cover can also be replaced with toolkits that slide up in the grip if you so desire. I’ve not done it yet but am considering it.

The next step will be to install the buffer tube.
If you find this post useful, please share the link on Facebook, with your friends, etc. Your support is much appreciated and if you have any feedback, please email me at in**@*********ps.com. Please note that for links to other websites, I may be paid via an affiliate program such as Avantlink, Impact, Amazon and eBay.