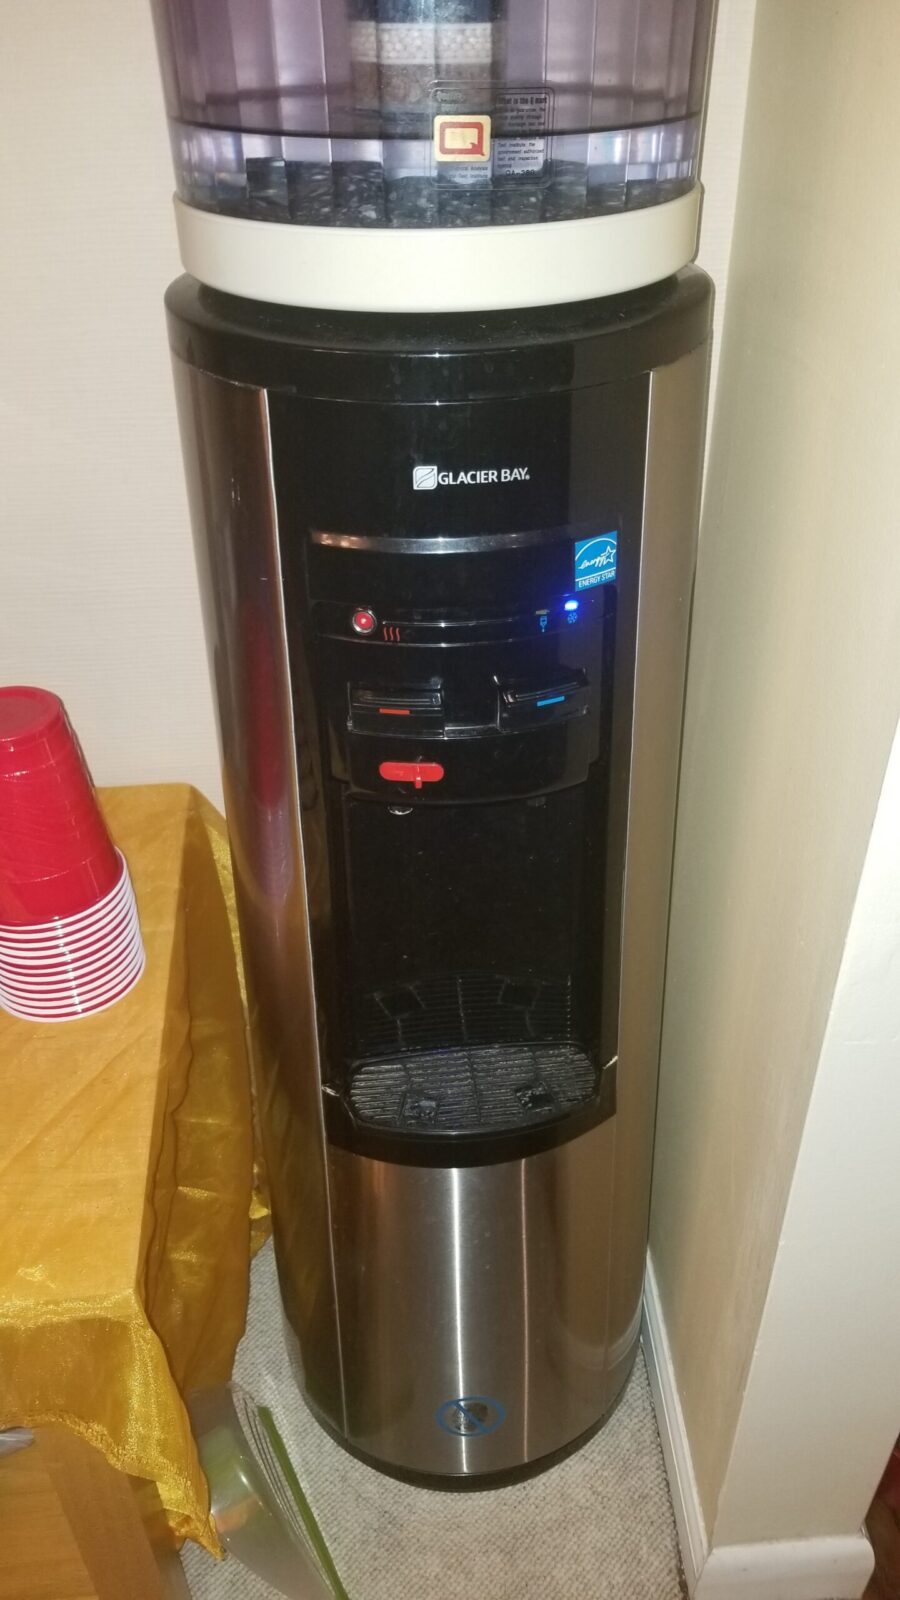
Years ago we invested in a water filter unit that sits on top of a regular water cooler. This lets us have clean good tasting cold water – at least it did until about a year ago. My wife was the first to notice that the water wasn’t getting as cold and finally it got to the point where it was only just a tad cool first thing in the morning. Because this thing was older, my first thought was that it was low on refrigerant because we’d had this happen before with old fridges.
Refrigeration systems are sealed but over time the seals age and slowly the refrigerant leaks out. At some point, there isn’t enough left to effectively cool whatever it is in questions – a fridge, freezer or a water cooler.
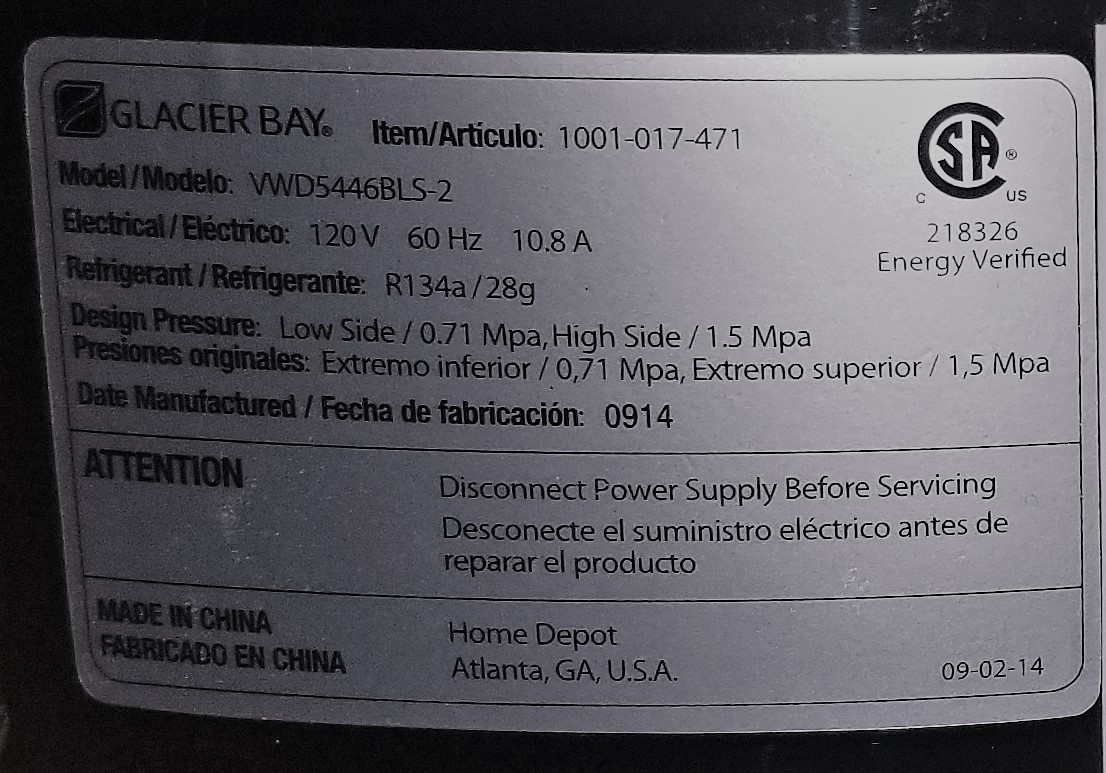
So, step one was to pull the cooler out and look at the manufacturer’s sticker on the back. Glacier Bay is a Home Depot house brand – no surprise there. The refrigerant used was R134A – definitely needed to know that, which was nice because I keep R134A around for use on cars. The sticker also told me the unit was made back in September of 2014 — yeah, this thing was just over six years old and we bought it new way back when.
Note: If you need R134A refrigerant, go to your local discount car parts store. Odds are you can get a can cheaper there than mail ordering one.
Now there’s one thing I have learned – do some research on things that need to be repaired before you make the wrong assumptions and really screw things up. Boy, I’m glad I did that in this case because these small refrigeration units work at way, way lower pressures than a car or truck.
Watch this great video
What helped me out the most was an amazing video that a fellow put together about how to recharge small fridges. It was exactly what I needed to know and I only made a few small adjustments to his recommendations:
What I did
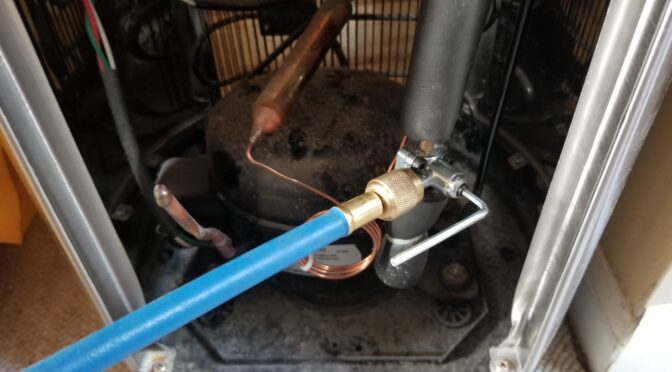
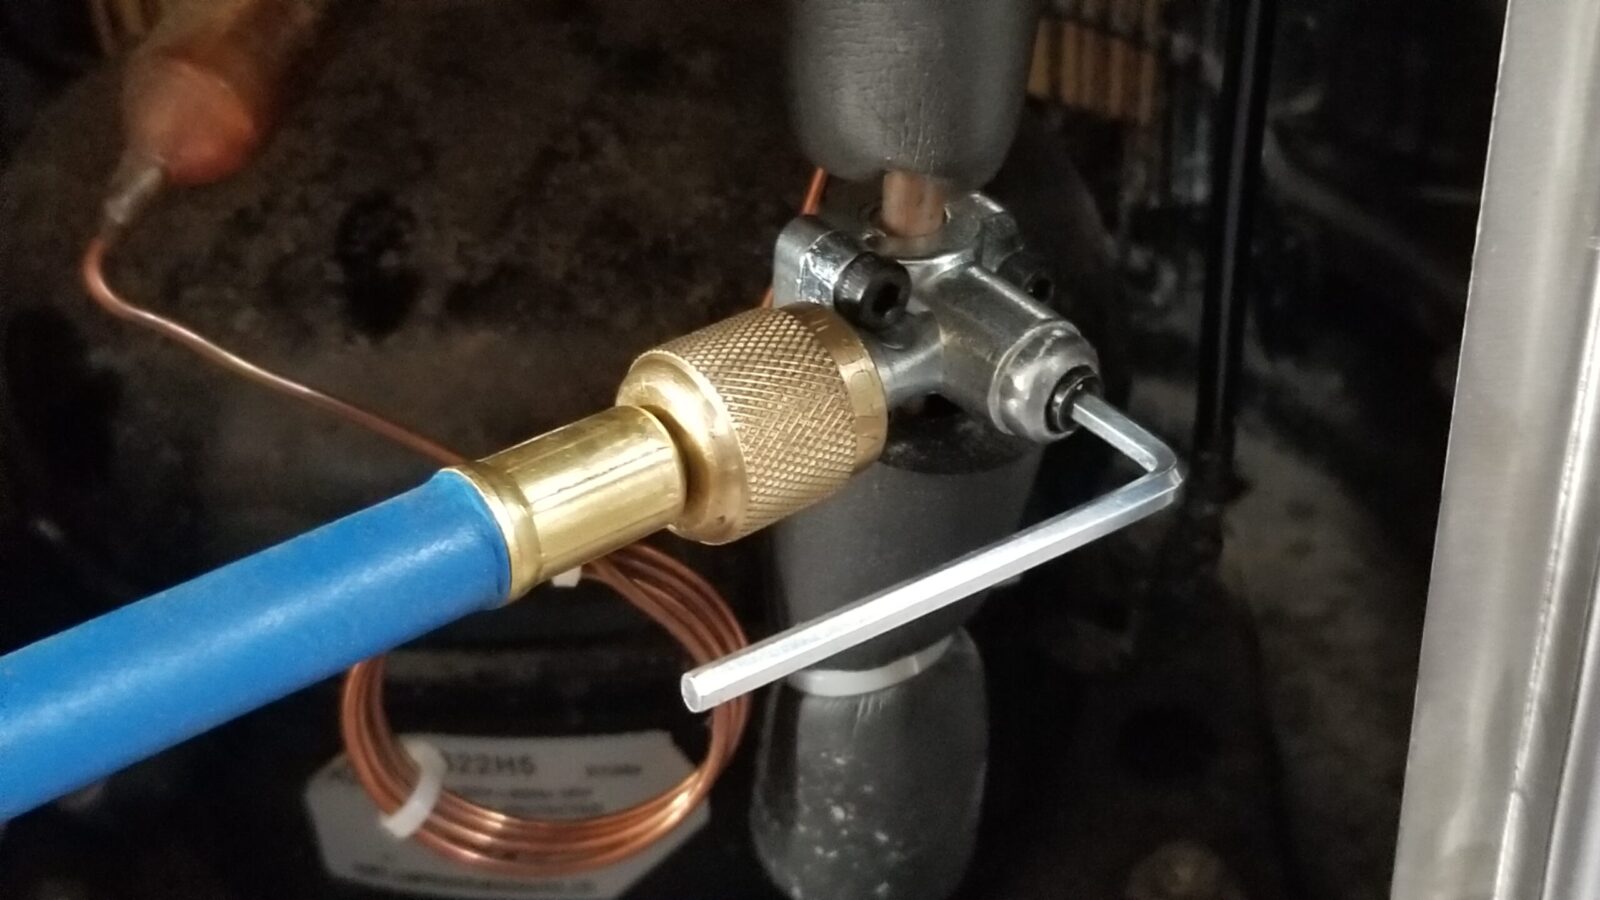
The first thing I had to figure out was how to get to the low pressure line to attach the bullet valve. While you may think to come at it from the back, which was my first thought, it will be a nightmare. It turns out that you remove the water tray by pulling it straight out and you are then looking at the one screw you need to remove to then pull off the front lower cover – voila – you are looking right at the lines.
I got my bullet valves off Amazon and you definitely need to back off the valve or it will pierce the line when you clamp it on. The gentleman mentions it in the video and I just want to reinforce you better make sure it is backed off.
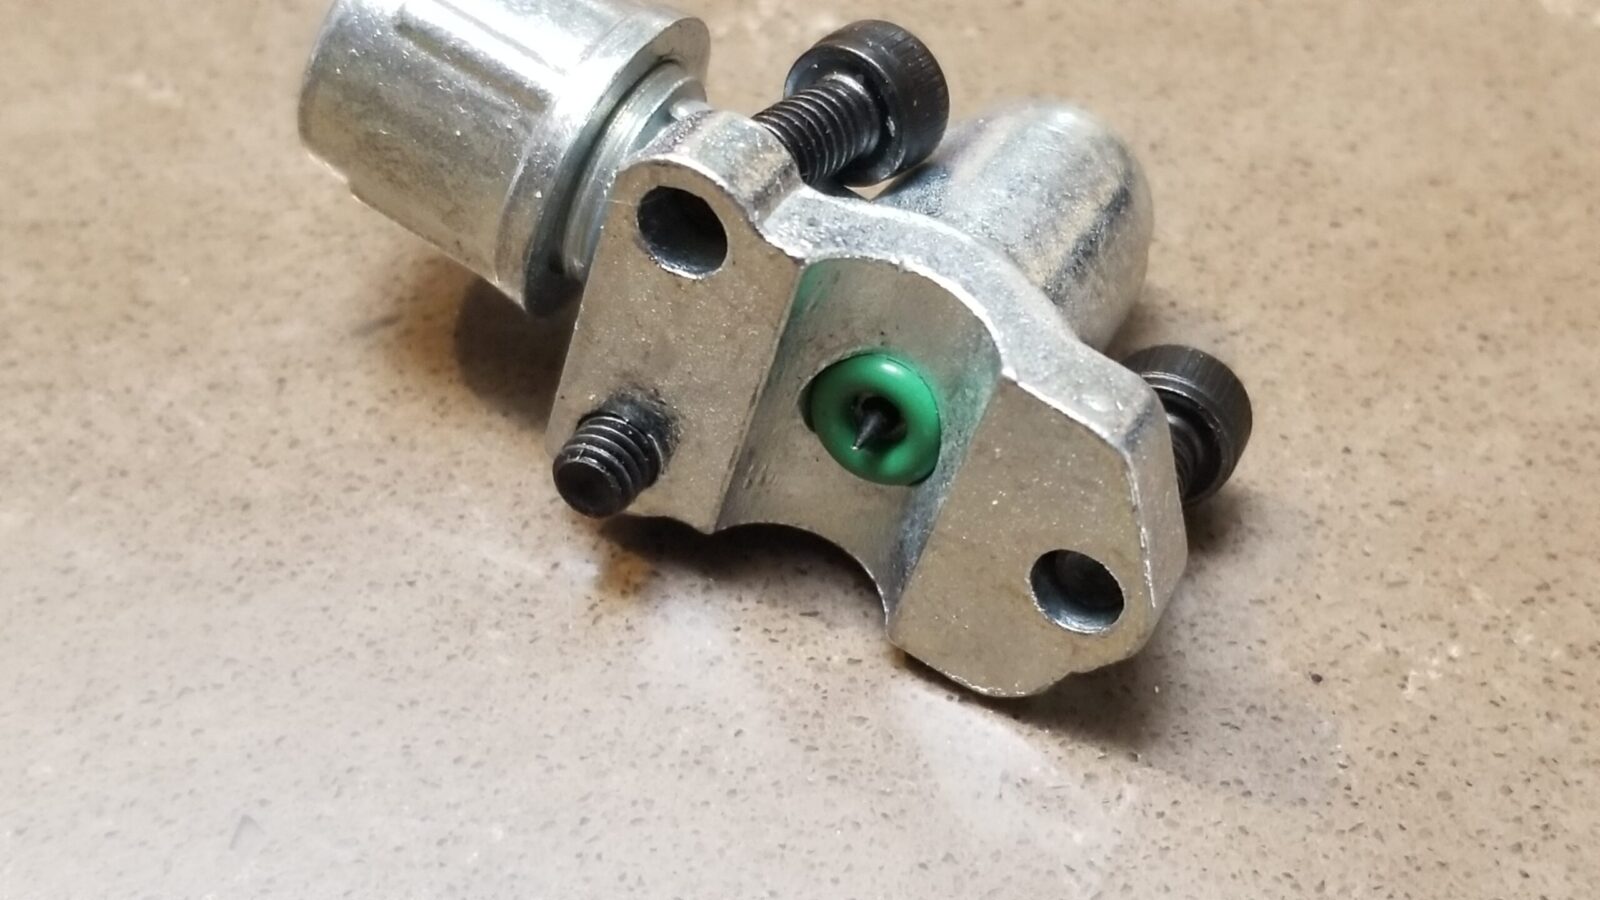
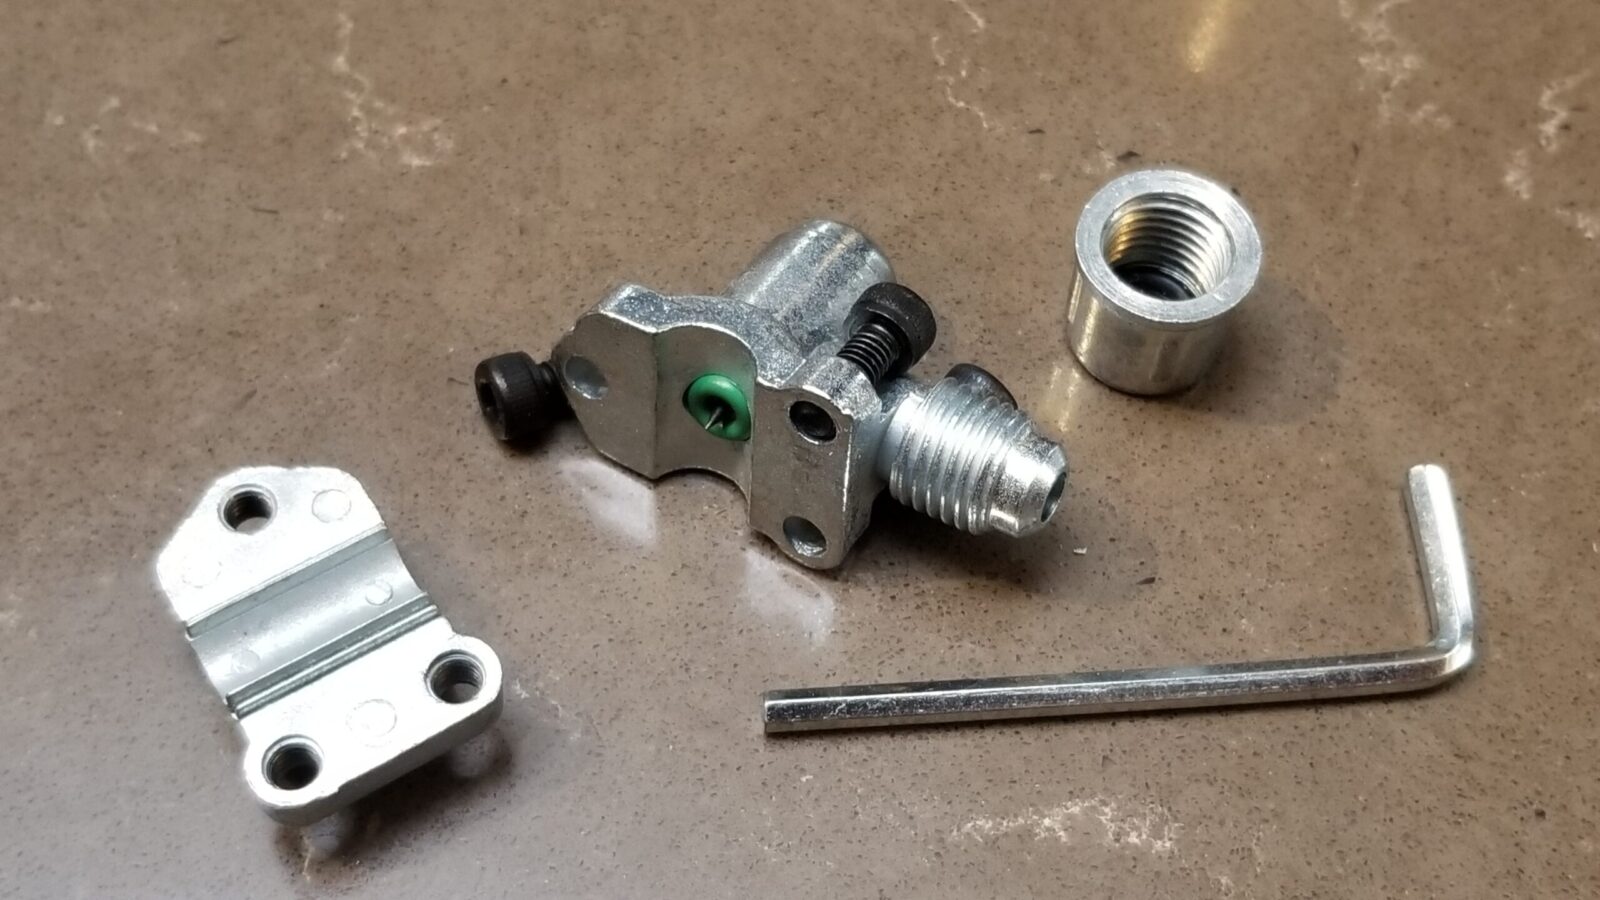
The line you need to attach the valve to has the insulation on it. I slid the insulation out the way, installed the valve assembly so it was just barely snug and then did the final positioning so I had easy access to the valve hex screw and could also attach the refrigerant line.
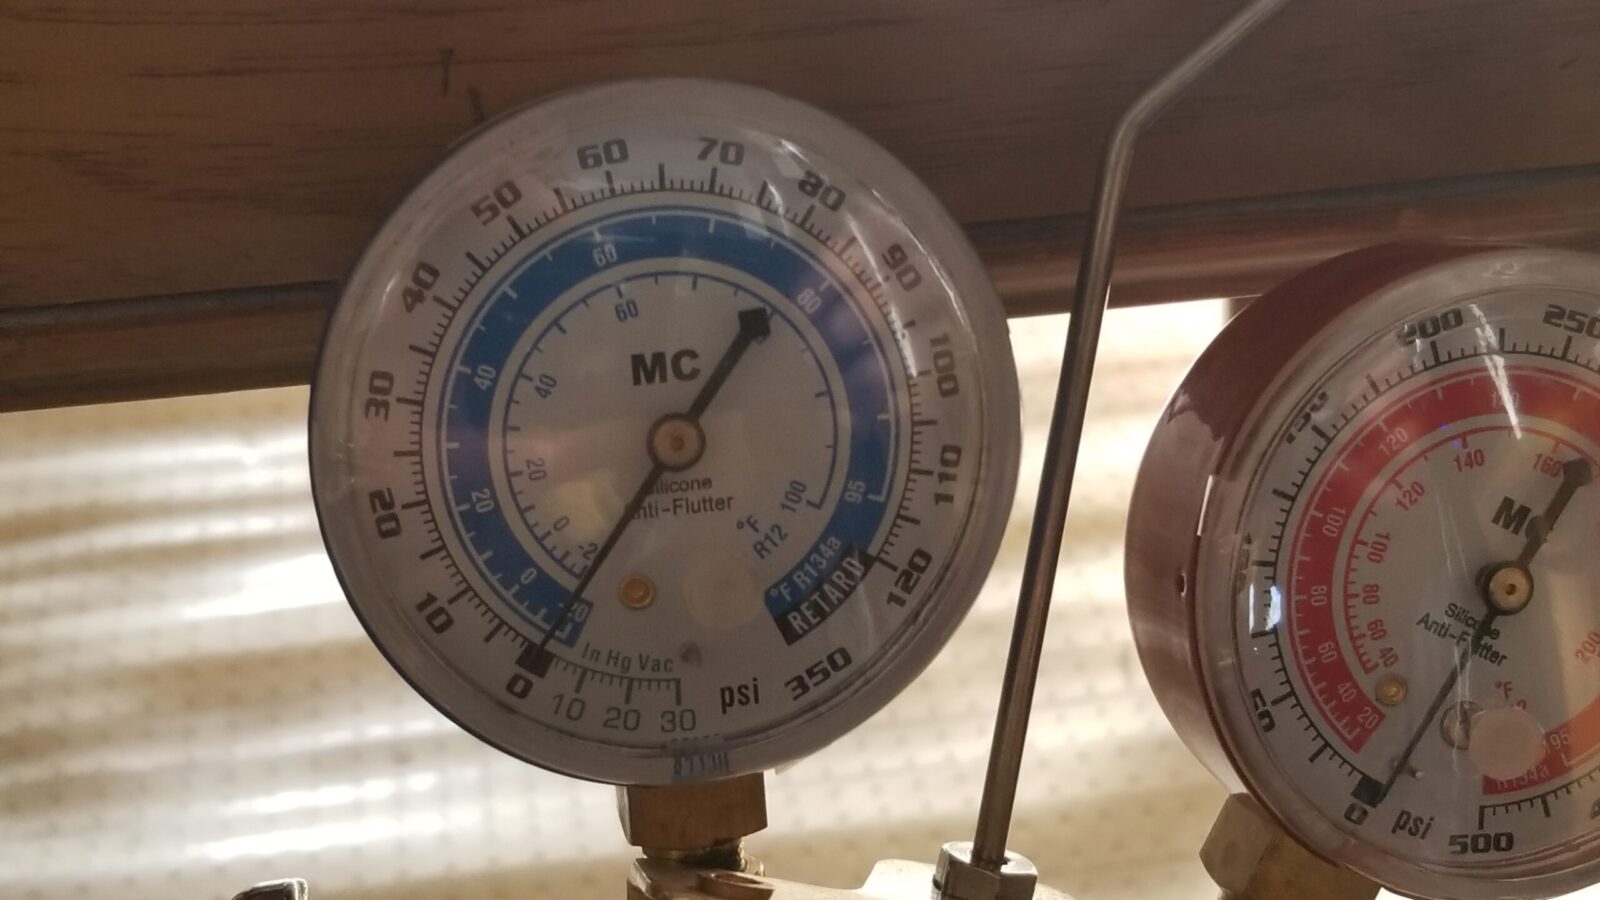
The compressor was drawing a vacuum and it appeared to be working and holding the vacuum so I did not use a vaccum pump to draw down the whole system. For me, this worked.
The fellow mentioned these things run at 1-3 PSI on the suction side so I opted to slowly fill it until it was at 2 PSI. Note, I did purge my manifold line before I opened the valve so as to get rid of any air first.
Now when I say slowly fill, I would add a bit with the cooler’s compressor running and then wait a few minutes to see what happened. I did this over and over for almost 30 minutes until the pressure gauge read 2 PSI. Don’t try to do it all in one step.

| If you don’t have air conditioning tools, there are tons of them for sale on Amazon. There are whole kits with everything you need to start – vacuum pump, manifold with gauges and more. Click here to see them. |
In conclusion
It’s been two weeks and the water cooler is still working just great. I have a spare bullet valve should I need it but other than those, since I already had the gauge set and the R134A, the repair didn’t cost me anything. Even if I had gone with complete repair kit, it would have been cheaper than having a repair person visit.
Note, I have to buy all of my parts – nothing here was paid for by sponsors, etc. I do make a small amount if you click on an ad and buy something but that is it. You’re getting my real opinion on stuff.
If you find this post useful, please share the link on Facebook, with your friends, etc. Your support is much appreciated and if you have any feedback, please email me at in**@*********ps.com. Please note that for links to other websites, we are only paid if there is an affiliate program such as Avantlink, Impact, Amazon and eBay and only if you purchase something. If you’d like to directly contribute towards our continued reporting, please visit our funding page.