Tag Archives: 16HP

How to change the transmission oil in your Simplicity Broadmor 16HP lawn tractor

If you ever notice that you are trying to push the foot pedal to back up your tractor and it is very slow, then you may have one or two things going on – your transmission could be low on oil or it could be really old and due for a change. How do I know this? Well, I just lived it.

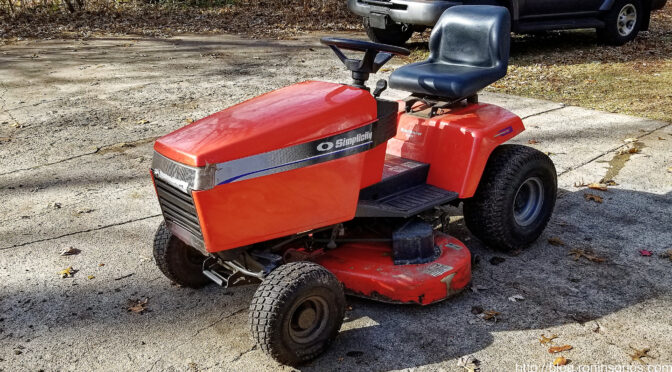
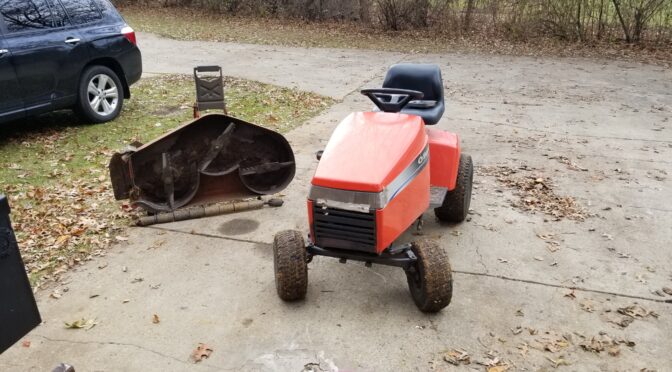
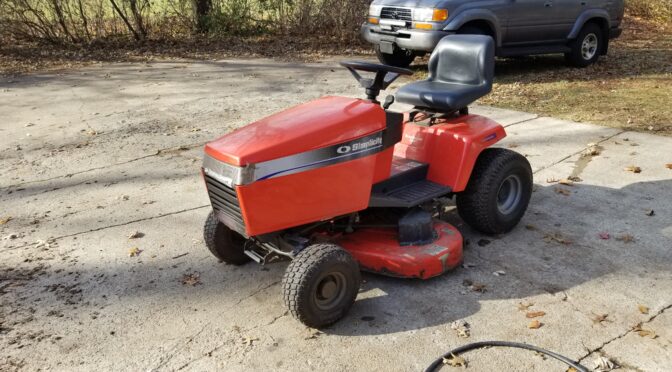
We have a 1998 Simplicity Broadmor tractor with a 42″ deck. It’s been backing up slower and slower for quite some time. When I bought the tractor new, I asked the dealer what I needed to do with the transmission – he said just make sure it has fluid but that’s it because it is sealed. He told me this in 1998 … and it’s now 2023. Yeah, I know now.

What is 10W-30 CD/SG?

Well, I was getting my tractor ready for the season and checked the plastic case and saw a dark shadow at the full mark. I took off the lid and couldn’t see any oil at all – anywhere inside. The cap said “TRANSMISSION OIL FILL 10W-30 CD/SG”? I had no idea what that meant so I called my master auto mechanic friend John up and he told me to put in a good real oil, not synthetic 10W-30.

The CD/SG was the API (American Petroleum Institute) service category. The “S” meant it was for automotive gasoline engines and the “G” code is the engine vintage. SG was introduced in 1989 but is not considered suitable for engines introduced after 1993. Regarding “CD”, the “C” is for automotive diesel engines. “D” means it should not be used in diesels made after 1994. In short, a modern car engine 10W-30 oil would work just fine. The simplicity owner’s manual also states this. It takes about 3.5 quarts.

The Reservoir

As to the dark mark on the plastic reservoir – I guess it is stained now due to age. You sure can’t see the fluid in the container unless you remove the cap. It had probably been low on transmission oil for a long time. I topped it off and it worked like new.

I was so happy about the speed in reverse that I called John. He paused and asked if I ever change my transmission oil. I told him that I hadn’t based on what the dealer told me way back when and he just chuckled “boy, you better drain that transmission or you’re going to have a problem”.

So, I listened to John. I looked up in the manual where the drain plug was at, removed it and out came pitch black oil. Have you ever felt guilty about what you did to a machine? I sure did. Wow.

According to the manual, Simplicity recommended that the oil be changed after the first 50 hours of run time and then every 250 hours after that. Folks, I kid you not, I was at 527.6 hours in the meter. Wow. I felt really bad about putting the tranny though that. I was also amazed that it was still working.

I’m going to show you some photos of what I did. One thing I want to point out to you is to make sure the area around the filler cap is clean. You do not want to get any dirt into the transmission oil tank. I cleaned mine with brake cleaner and then blew it off with compressed air just to be sure. I also used my compressed air to blow the work area clean to reduce the odds of dirt getting in the transmission oil tank. Just remember- getting dirt in a tranny can wreck it.
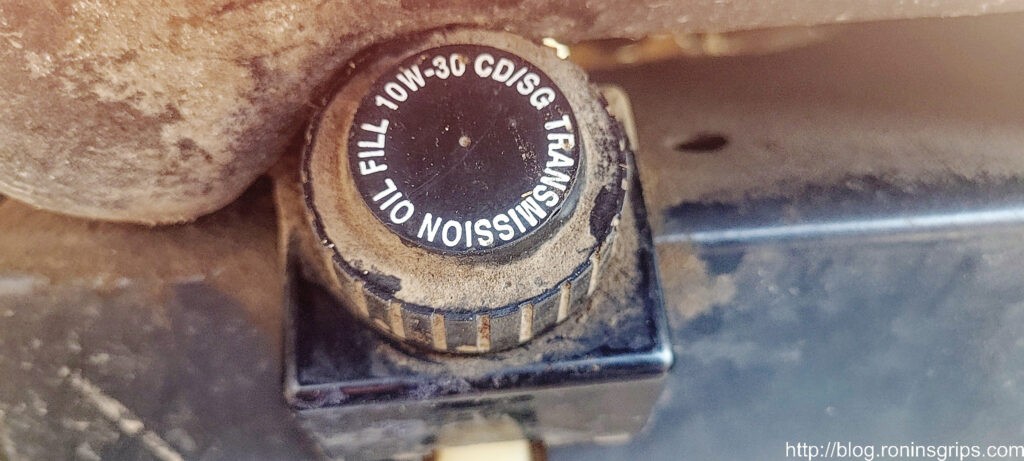
The fill cap was filthy with dust and is a tight fit against the fuel tank. I cleaned it off with brake cleaner, a rag and then blew the area off with compressed air.
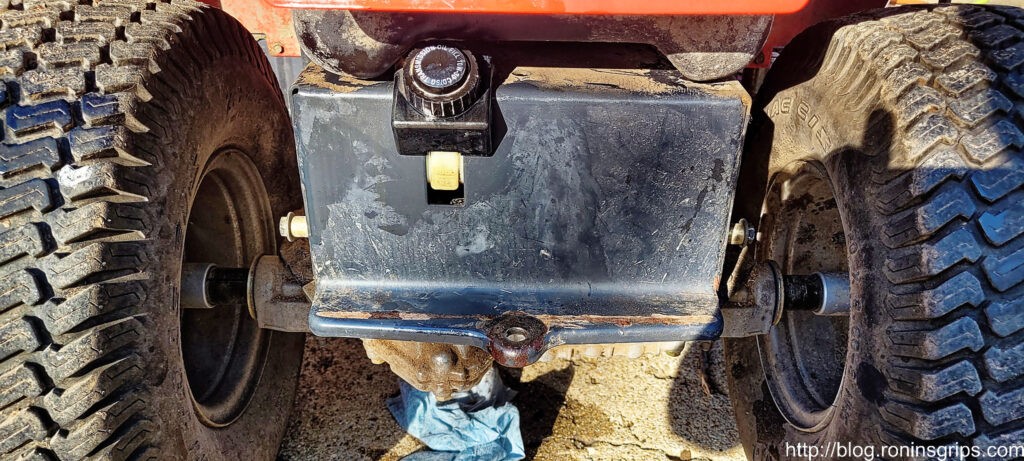
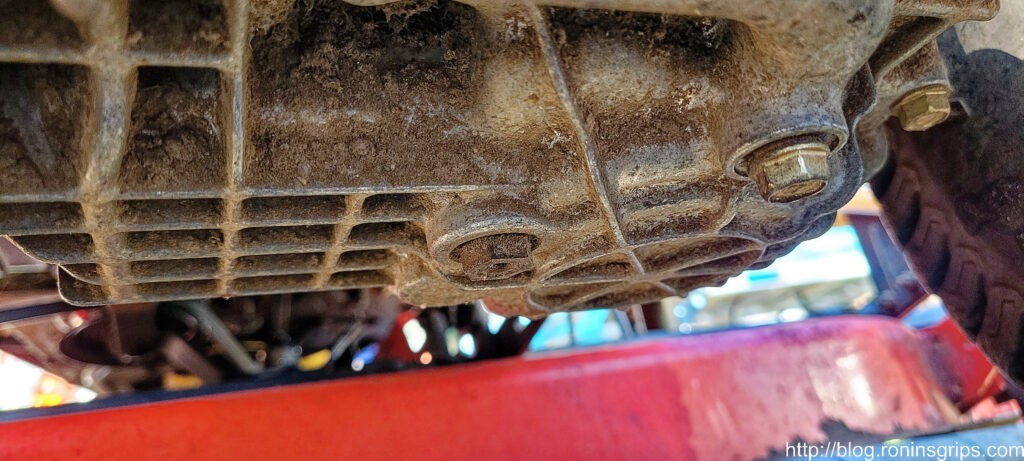
That centered hex head is the drain plug. It came free pretty easily. Clean and blow this off too – you don’t want dirt sticking to your drain plug when you go to re-install it.
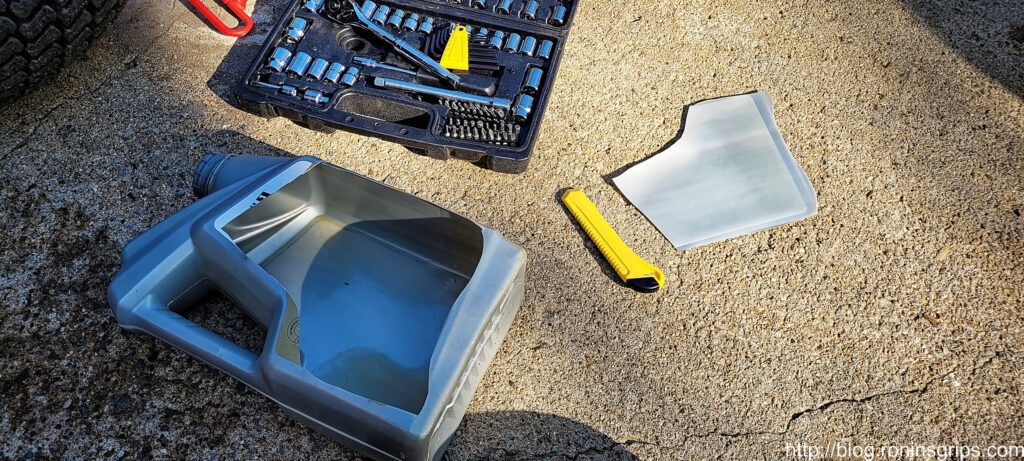
None of my car/truck drain pans would fit under the tractor’s transmission but I noticed a 5 quart oil container would so I took an empty one, cut out a section of the wall and used it. Note, a full transmission will have somewhere around 3.5 quarts of oil in it.
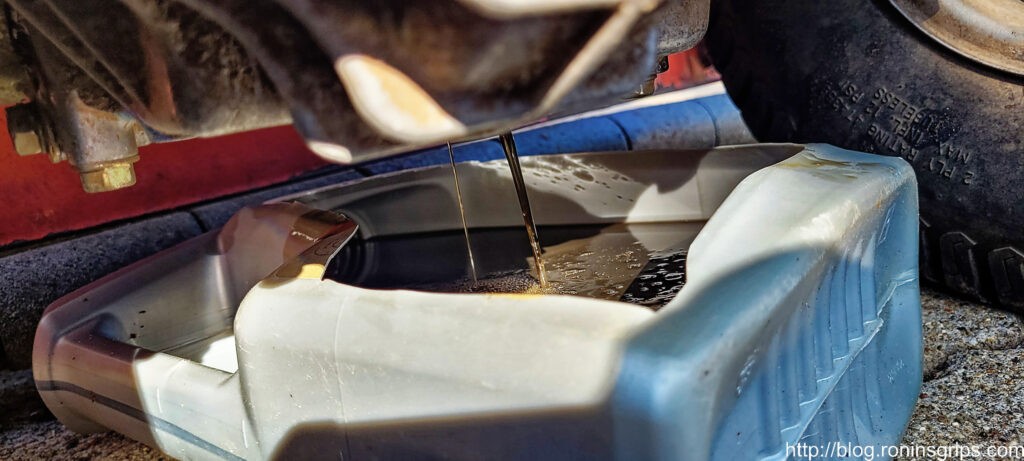
I removed the drain plug and out came black oil. I felt bad the minute I saw how black it was. I let it drain for 15-30 minutes then I put a clean shop towel in the mouth of the tank and blew shop air in to get out all of the oil I possibly could.
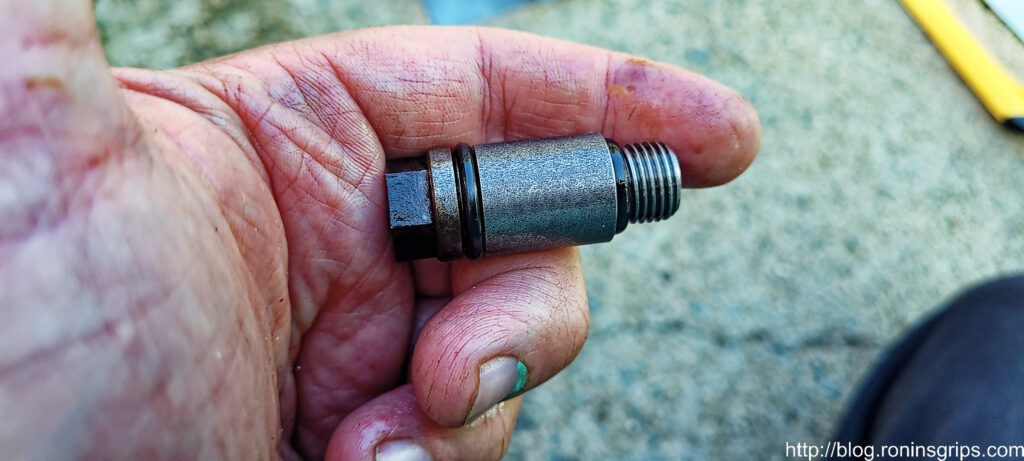
The transmission drain plug is an interesting looking creature. Note the length and two O-rings. I carefully cleaned it, made sure the O-rings looked okay and wrapped it in a clean towel for later installation. Don’t forget to put the drain plug back in before you start refilling the tranny with fresh oil.
The oil was black as night. Well, lesson learned – change the oil.
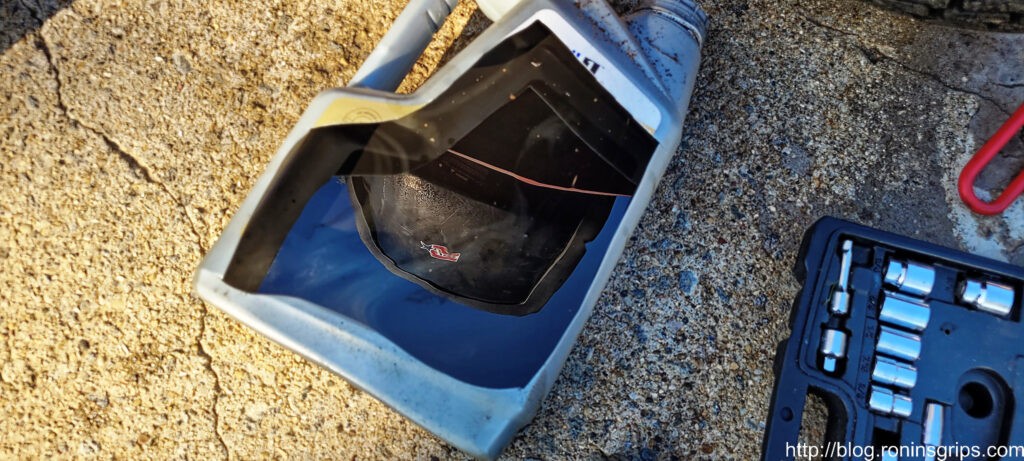
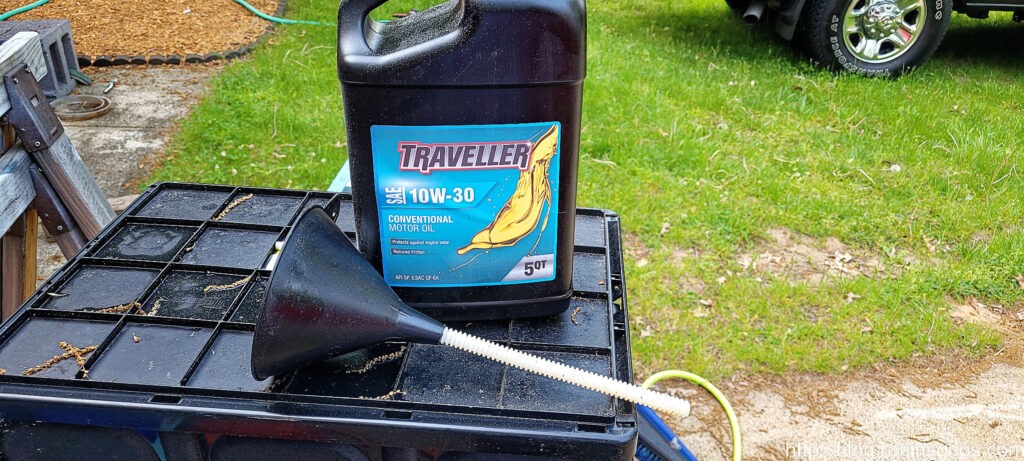
I went to my local Autozone and it seemed like all of the brand name engine oils they had were semi- or full-synthetics. John recommended I go with a good conventional oil so I went to Tractor Supply (TSC) and their house brand of oil was conventional, API certified and very affordable. Now, the one odd thing is trying to get oil into the filler mouth- it is a weird angle so I had to buy something and what I got I do not have anything good to say about. The funnel you see above is two pieces – unless you keep the white corrugated tube pulled down, oil goes everywhere. I trimmed about 6″ off the original tube so I could hold the funnel while keeping the tube pulled down with one hand and pour oil from the jug with the other. What a headache. I will buy a better gooseneck funnel next time – I had a metal one that I haven’t used in years and couldn’t find.
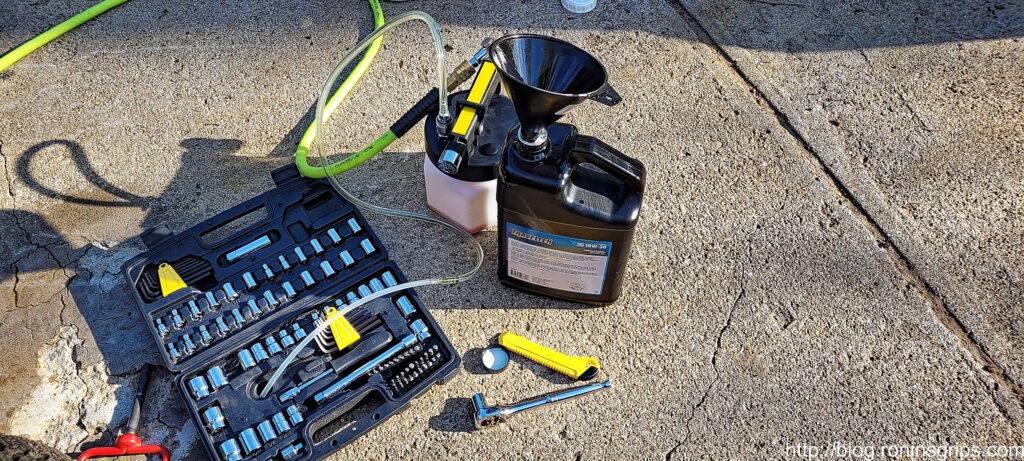
Thanks to that awful funnel plus the oxidized tank not longer showing the fluid level I couldn’t see what I was doing and overfilled the reservoir so I used my MityVac vacuum bleeder to remove fluid. Next time I will move the tractor some and let the oil go into the tranny before I bring it down to the final level.I started the tractor and the tranny made some noise for a few seconds – maybe 15-30 and then it was fine once oil got everywhere. In hindsight, I probably could have avoided that if I had followed the transmission purging procedure on page 34 of the manual and will do that next time. By the way, it dawned on me that it probably pulled more oil out of the tank as it filled the tranny and it did so I added just a bit more to bring the oil to the cold full mark.
Done – runs great!

Summary

My big lesson learned was that transmission oil does need to be changed. Luckily I found this out before damaged happened. The symptom that set this all in motion was a very slow/weak reverse gear.

]Also, with this vintage of tractor, that transmission fluid reservoir is not longer semi-transparent. What looks like the fluid level is not so you need to manually check and be sure to blow all of the debris away from the cap before you open it. I thought there was fluid but when I opened it, there was no oil in sight.

Last lesson – use good conventional 10W-30 engine oil for the fluid – it works just fine.

So, after I did this I mowed our 1.5 acre yard and it worked great – no scary sounds, reverse was solid and I would swear it went forward faster. It was totally worth the the half-hour to hour that it took. I spent more time trying to figure out what to do than actually doing it and I hope this post helps you skip some of that.


If you find this post useful, please share the link on Facebook, with your friends, etc. Your support is much appreciated and if you have any feedback, please email me at in**@ro*********.com. Please note that for links to other websites, I may be paid via an affiliate program such as Avantlink, Impact, Amazon and eBay.


Avoid Chinese Carbs on Your Kohler Command 16 Engine – Use a Kohler 12-853-93-S carb Instead

Back in 2020 my Simplicity Broadmor tractor with a Kohler Command 16 engine was running really bad and I suspected the carb was having issues so I bought two Chinese carbs off Amazon figuring one would work. They were different brands and about $19/each so I figured “why not?” Well, kind of wish I hadn’t so let me tell you what happened.

I replaced the carb but it really didn’t make a difference. I tried all kinds of stuff with no improvement and decided to use a small engine repair shop that shall go nameless. Turns out the ignition system had a known problems. The flawed Kohler Digital Spark Advanced Ignition (DSAI) was replaced with a Magneto Digital Ignition (MDI) model. Had I known about those issues and that the MDI part number was Kohler 12-707-01-S, I would have done it myself. But I didn’t, they did and they replaced the ignition.

So, let me recap – I had installed a Chinese carb and got it kind of working and the shop installed the MDI upgrade, got it running and called it even. On one hand it was running but it was rough, hard starting and often would backfire when either starting or stopping plus the power felt lower – it bogged down more when I got into tall grass. It got to the point that I had to do something but I wasn’t thrilled with the repair shop either.

Ok, so what did I do? I start reading up on the Command 16 engine in earnest – what I should have done the first time. The most likely culprit was the Chinese carb. The more I read about folks using Chinese carbs was that their quality was hit and miss. Guys who got them to work knew about how to tear down and rebuild a carb to fix what was overlooked by the factory. The guys who didn’t have that level of knowledge – like me – tended to run into problems. Hmmm…. yeah, I was definitely betting on the carb at that point.

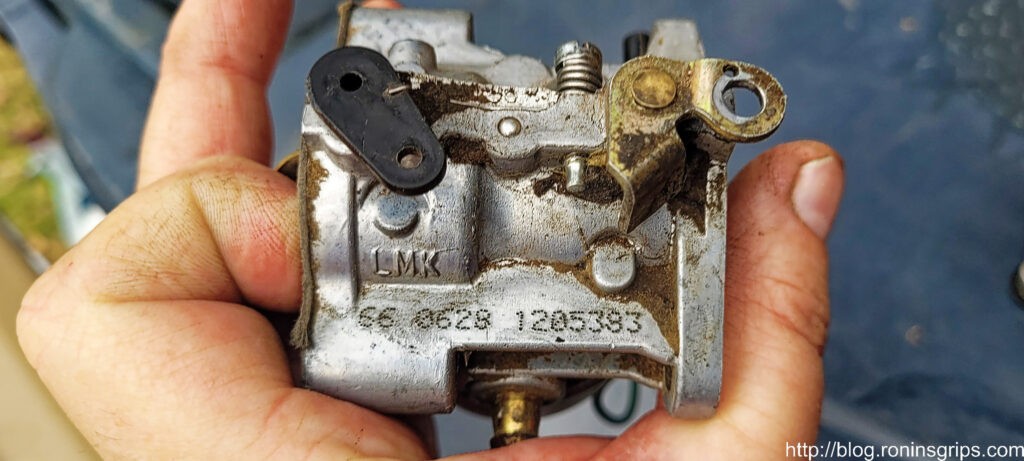
I still had the original carb but it had been sitting empty for over three years and I wasn’t sure how the seals would be so I started digging on what OEM Kohler carb I should buy. Turns out that my original 12-053-83 carb was superseded (replaced with a new model) by the 12-853-93-S carb so I did some digging and found it on Amazon for $201.89. Yeah, it was a fair amount of money but buying a new tractor is a fortune these days so I took the gamble.

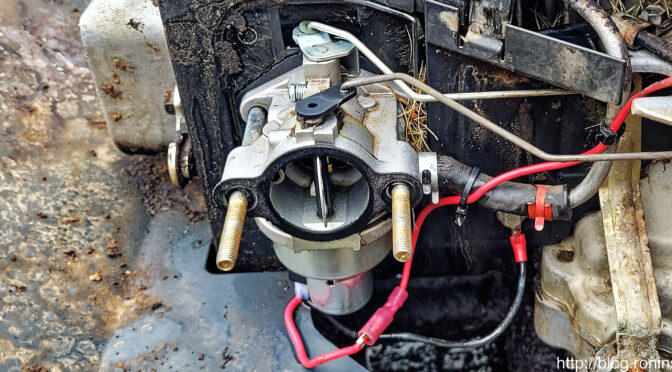
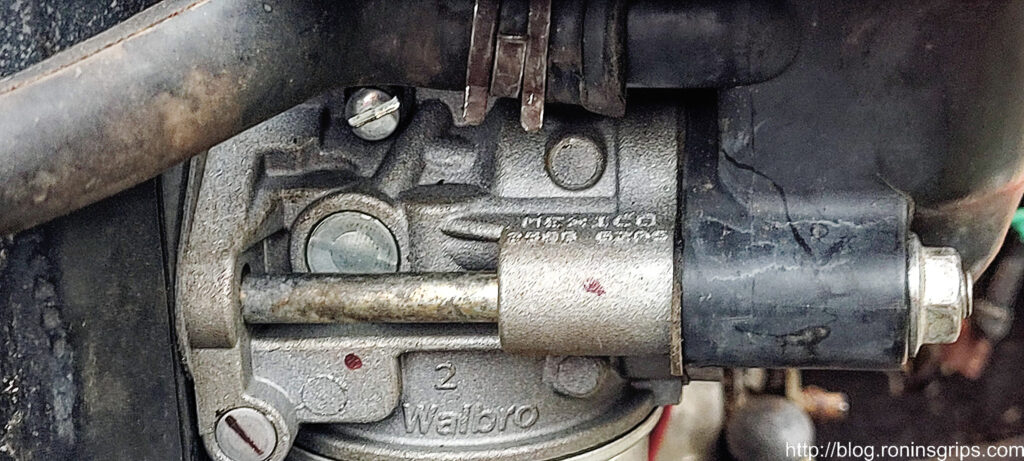
This was the original 12-053-83 carb the tractor’s Kohler Command 16 came with.

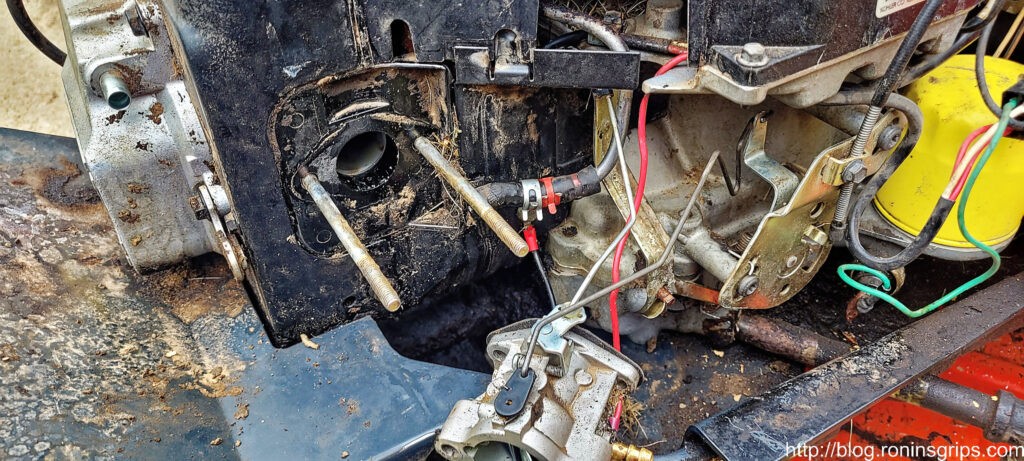
Replacing a carb on a Command 16 is very straight forward – remove the emissions hose, the two nuts that hold the air cleaner assembly in place, remove the fuel hose, the red electrical wire for the fuel solenoid and then you pull the carb off far enough so you can then move it around and remove the throttle and choke stiff wires. It took maybe 30 minutes – I was taking a photos too so that always slows things down.

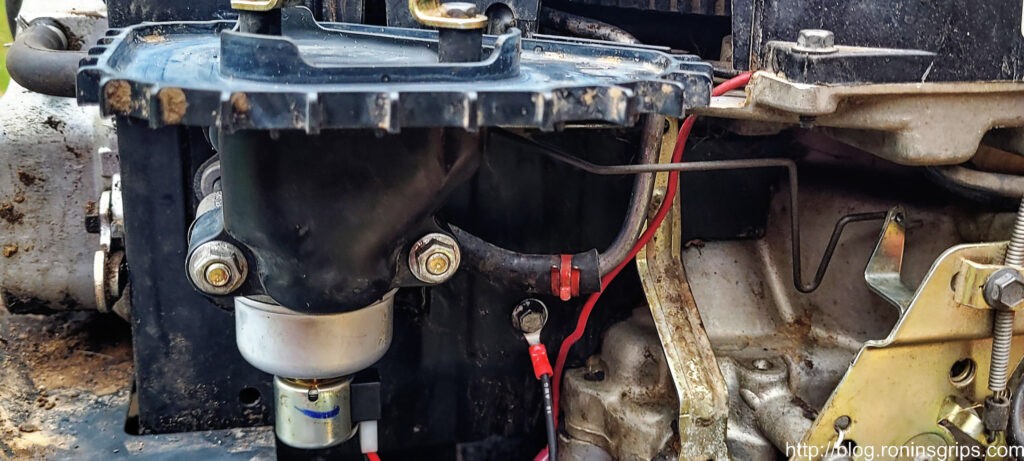
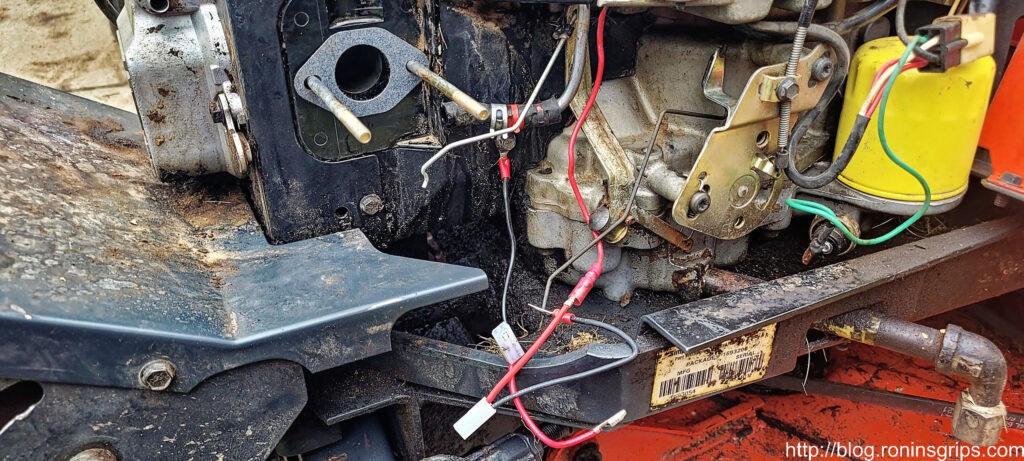
Those two nuts hold the air cleaner assembly against the carb and the carb to the block. Once you remove them and disconnect the emissions hose, the air cleaner assembly slides right off and you will want to clean it and set it to the side.
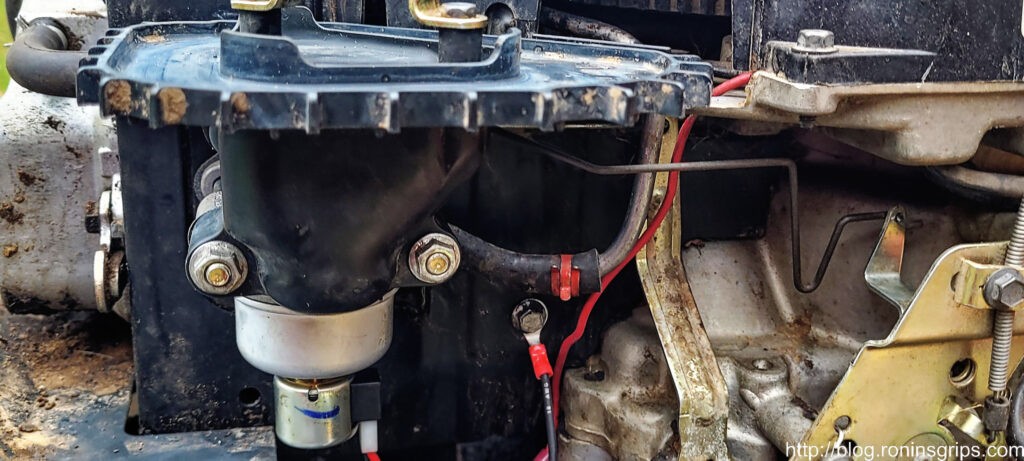
Remove the fuel line on the right and disconnect the red fuel solonoid wire. The linkages can’t be removed until the carb is off the studs. You do not want to bend those linkage wires.
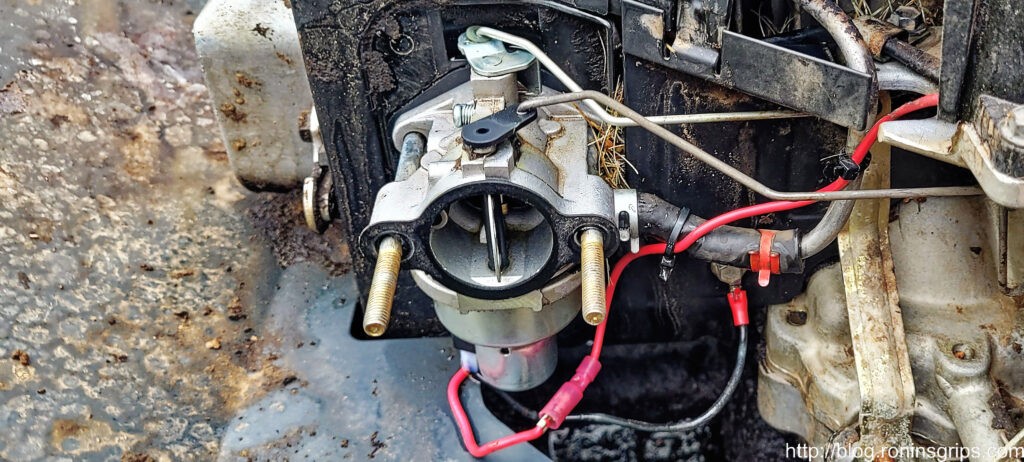
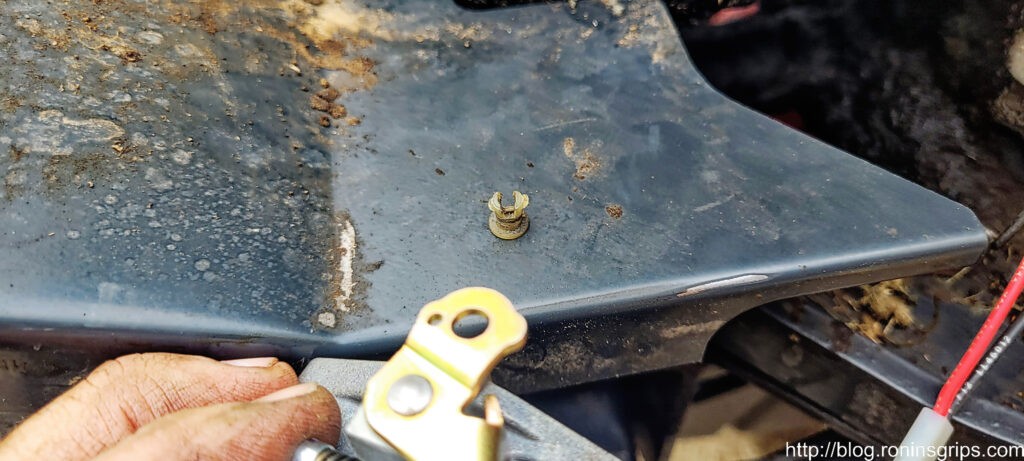
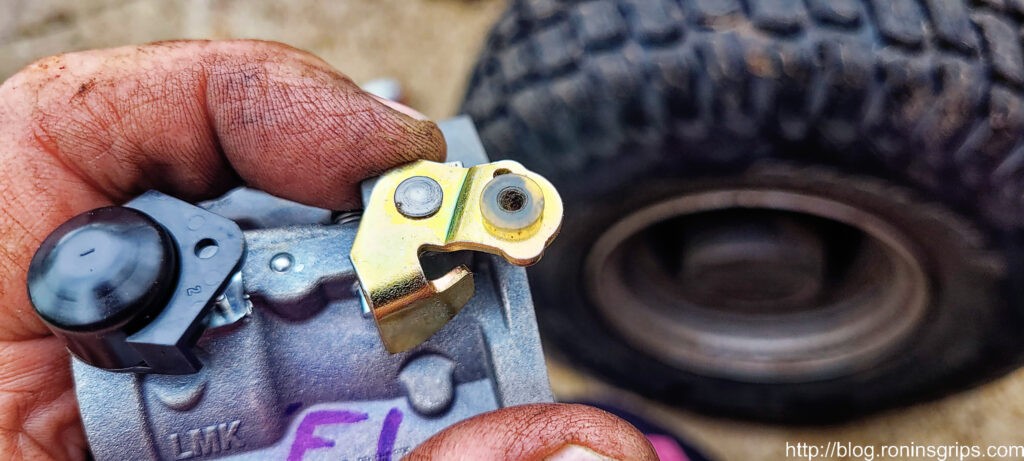
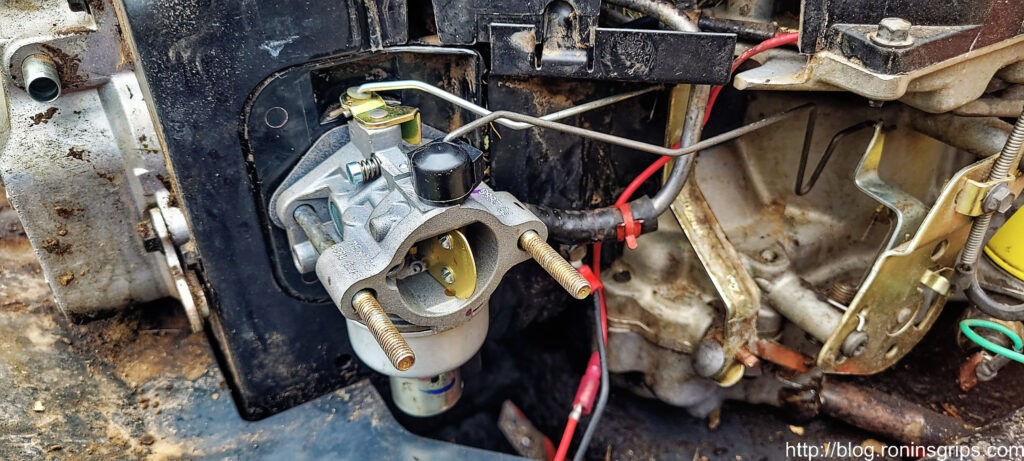
With the carb off the studs you now have enough freedom to move the carb and the linkages around until they come out of their respective holes. Take photos or a mental note of which linkage goes where and how they fit. Notice the little nylon bushing in the rear throttle linkage. That did not come with my new carb for some reason so I rescued it from the old carb and put it on the new one.
That little nylon bushing is what I am talking about – it’s upside down in this photo.
It will pushes into the throttle body linkage hole.
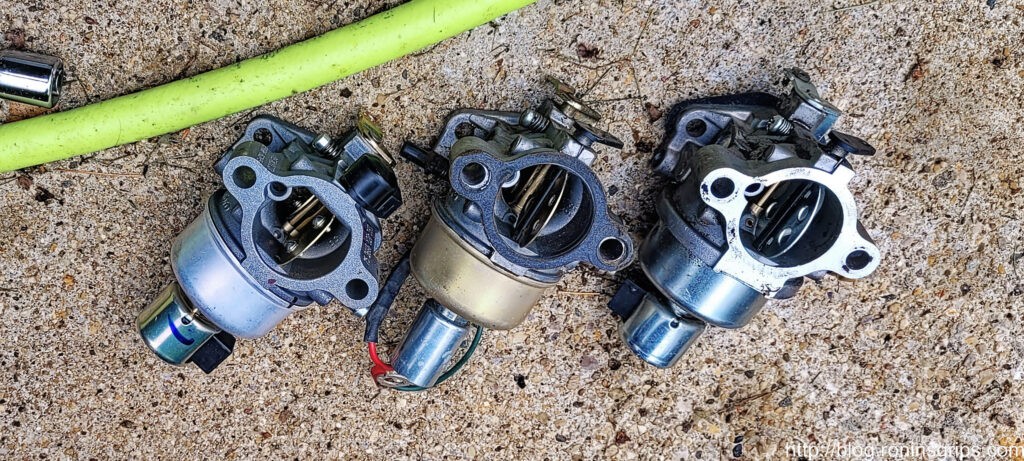
From left – New Kohler carb, middle is the Chinese carb and the right is the original Kohler carb.
Clean the area off carefully and put the new gasket that came in the kit on the studs. I am the process or replacing the old fuel solenoid wiring which is why you see two plug assemblies. Red to red and and the black ground wire goes under a screw on the block. I replaced them just to make sure the wiring was good and not wearing out from flexing over and over, oxidized, etc. A new one came with the carb kit so I did it.
So there is a step I couldn’t show because my hands were in use 🙂 Before you slide the new carb on the studs, attach the linkage wires/rods again. Once the carb is back on the studs, you will not be able to move things around enough to insert them. Attach the fuel line and the red fuel solenoid wire. If you turn on the ignition, you should definitely hear a “click” as the fuel solenoid opens. If not, check that the wires are seated, you have a good ground. There should be 12volts coming out of the red wire when you move the key to “on”. I had no problems.
Put the gasket on the carb, slide on the air cleaner, re-attach the emissions hose and tighten down the nuts. I brought them down a tad past snug but didn’t bother using a torque wrench. The studs are relatively small and in aluminum so don’t go crazy with tightening down the nuts.

I sprayed a bit of brake cleaner down the carb to give it some fuel and started it. I think I had to do it twice before there was enough gas in the carb for it to work but it ran great!! Wow – right out of the box. The one adjustment I made after I put on a new air cleaner was to the idle adjustment screw – shown in the top left of the photo. I lowered the throttle lever to where I wanted it to idle and then I screwed in the adjustment clockwise until I heard the RPM pick up. That acceleration told me the screw was engaging the throttle and opening it up more. When I then moved the lever down, the RPM would not go below that point. I then fine tuned it to the RPM that sounded good – yeah, I did it by ear.

Summary

The new Kohler carb ran like a champ. I wish I had just spent the money on it to begin with – yeah, it is expensive but worth it. I mowed our 1.5 acres the next day and what a difference it made! It hardly slowed down going through thick grass and I haven’t heard it run that good in years.

My recommendation to you is that unless you know small engine carbs and want to pull a cheap Chinese model apart and check it before you install it, spend the money on a Kohler as it is built right. By the way, I am not the only person who reports the Kohler carbs literally work right out of the box!

I hope this helps you out!


If you find this post useful, please share the link on Facebook, with your friends, etc. Your support is much appreciated and if you have any feedback, please email me at in**@ro*********.com. Please note that for links to other websites, I may be paid via an affiliate program such as Avantlink, Impact, Amazon and eBay.


Replacing the Drive Belt On A 1998 Simplicity Broadmor 16HP Tractor

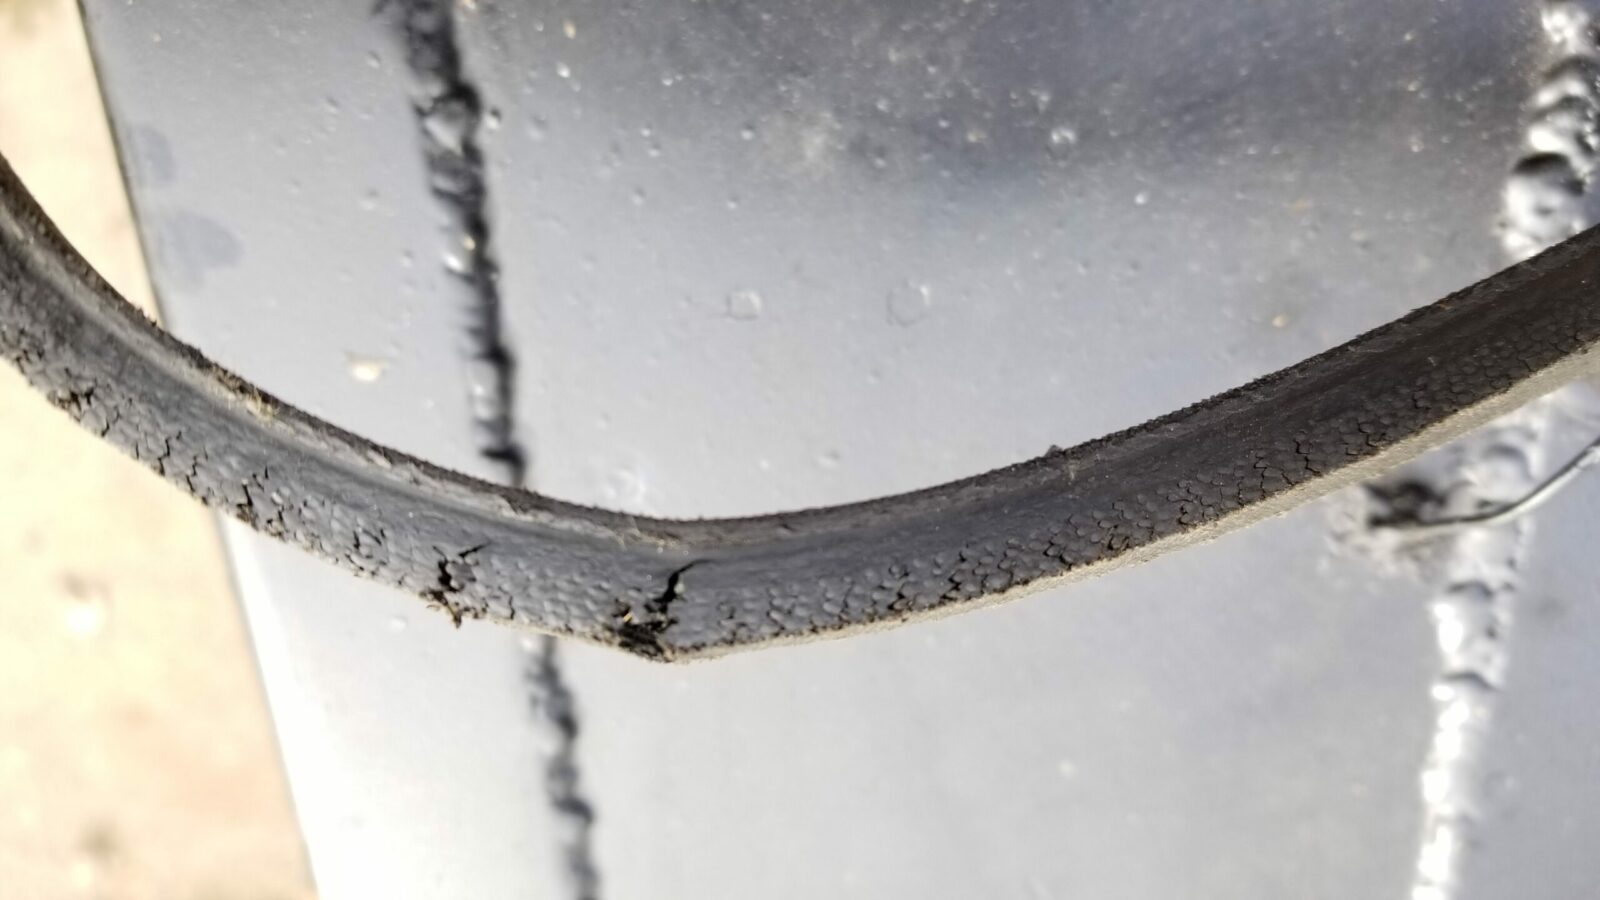
This fall we had a ton of leaves to mulch as usual. This means every week I mow our acre and a half for about two hours at a time. Long ago, I replaced the OEM Simplicity blades with Oregon Gator blades in the tractor’s 44″ mowing deck to help with this. At any rate, I pushed on the parking brake and all of a sudden heard a weird rattling sound so I turned the tractor off expecting to see a branch stuck underneath – no such luck. I started feeling and looking around and the drive belt felt loose and the idler assembly was as far as it could go. I looked closer and could see the cracks in the 21 year old original drive belt. Argh …. it needed a new drive belt and I really didn’t have the time but what are you going to do?

Finding the Belt

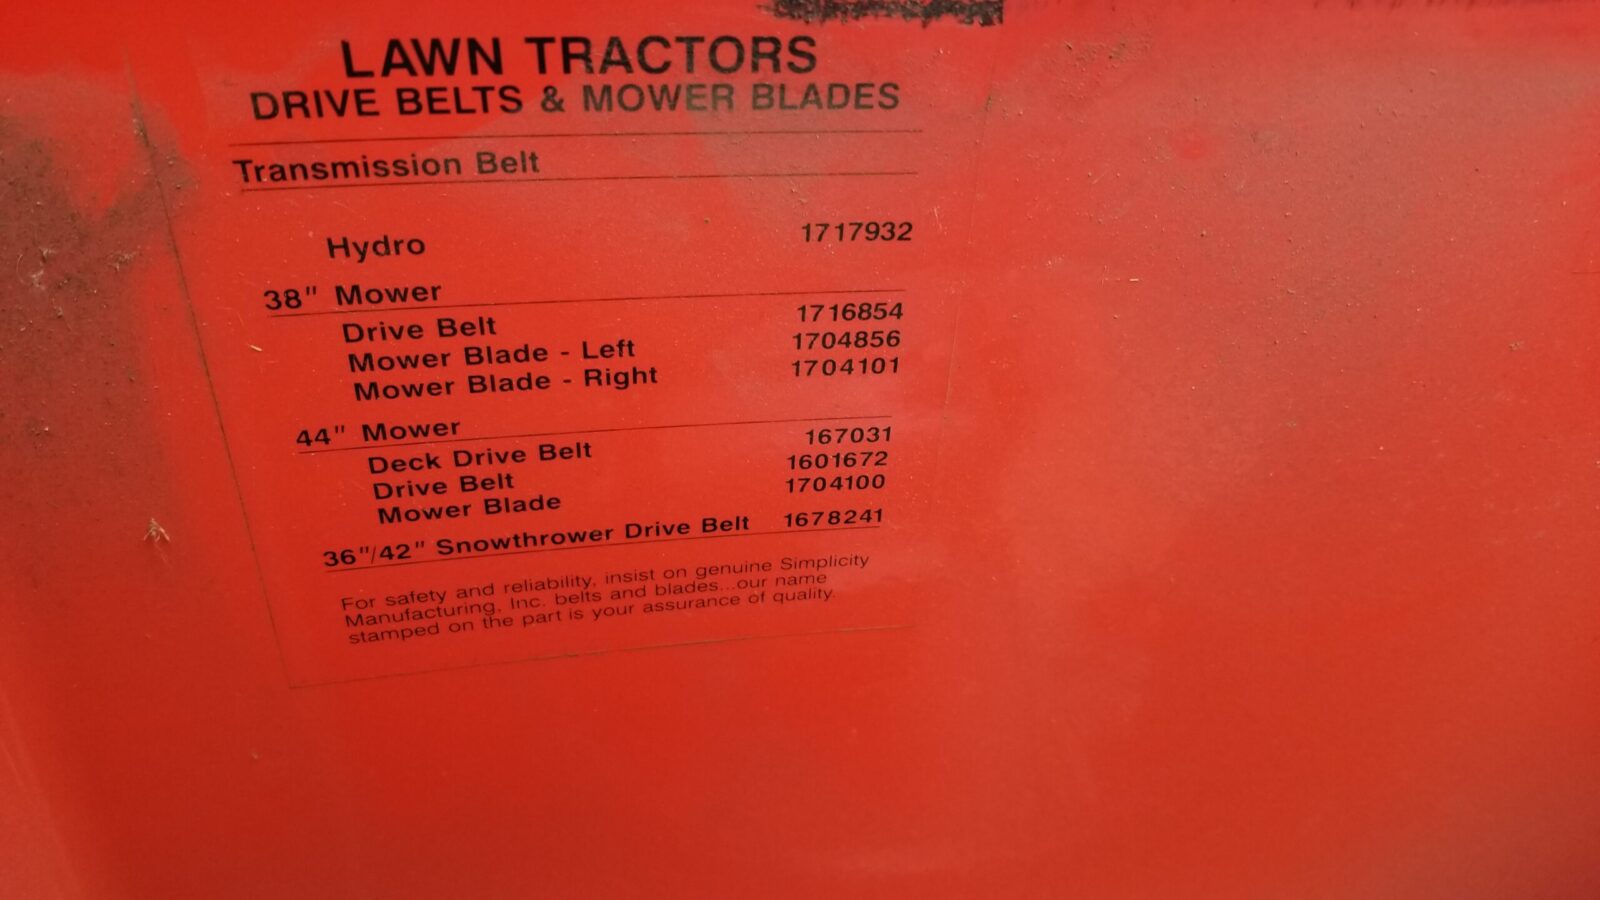
Simplicity did me a favor by having a decal under the hood that identified the drive belt part number along with a few other belts:

The top one is the drive belt – the 1717932 part number.

The correct drive belt part number for the tractor is the 1717932. If you look that part number up, it is an 84″ belt with a 4L profile. “4L” means that the top of the V=belt is a 1/2″ wide and from top to bottom, it is 5/16″ tall. The “L” means the belt is for light industrial or lawn & garden use.

Now, one could argue the original belt lasted 21 years so just get the same thing – either an original Simplicity part of a good 4L-84 belt. I tend to like safety margins and when something is a bear to do, I really just want to do it once and not worry about it again for a long time if ever. I have no idea how long the tractor will last – I’m replacing parts like the ignition switch and starter and even more recently torquing the motor mount screws back down. More concerning is that it smokes just a tad after it starts (wearing valve stem seals I bet) and has a slow oil drip (seals). At some point it will die on me but I do hope it is a long way down the road plus a friend pointed out I like tinkering and it gives me something to do – as if I ever have free time anways.

At any rate, let’s get back to the drive belt. All belts deteriorate over time. The question becomes how fast will they break down? There are many factors including the rubbers and fibers used plus the strain placed on the belt. 21 years was really a good run but I wanted to up my game and move to a 4LK belt – the “K” means that that Kevlar fiber is used vs. polyester or whatever.

Ordering The Belt

Once I knew the Simplicity part number, it was easy to do the searching and I found a Kevlar belt on Amazon that I ordered. Amazon’s delivery speed is astounding now – I have Prime, ordered in on 11/21 and received it on 11/22! I like Amazon because I can see the ratings and the delivery speed is fantastic.

I did take a bit of a gamble on the D&D PowerDrive belt – it had one good review and one complaint that it was the wrong size. D&D belts get mixed reviews but seem to be more positive than negative so we’ll see. I’ll post updates about how well it lasts because it definitely will be installed correctly.

If you are wondering why I didn’t get a Gates or a Dayton – I tried to go with an easy purchase experience. Hopefully it sorts out in the long run and time will tell.

How to Install the Belt

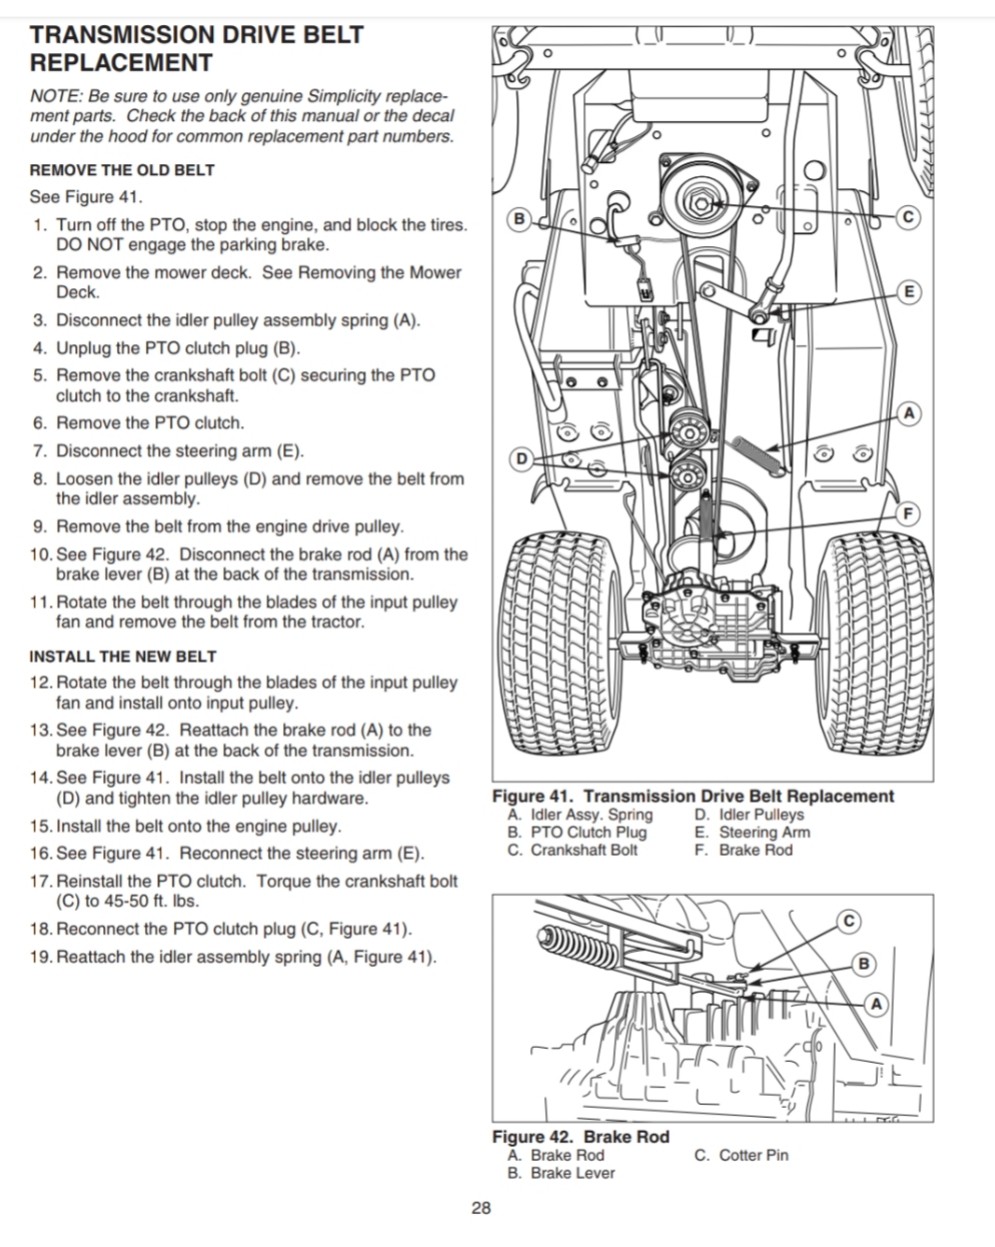
The installation went pretty well with two notable exceptions that I will cover shortly. I did some digging on the web and found a PDF of what to do that I then converted into a screenshot for you:

My two biggest headaches were unplugging the PTO clutch and then removing the damn cotter pin on the brake rod. For the PTO clutch electric fitting, slide a blade up under the locking tab and then keep working around the block with a small screw driver to try and loosen it up. I suspect that fitting hadn’t been disconnected since the factor and it did not want to come loose. Be careful to pull the fitting apart by focusing your efforts on the plug and the housing – if you pull on the wires, they may pull out. Eventually it did come apart and when I reassembled it, I applied silicone di-electric grease to both seal the connections and ease disassembly in the future.

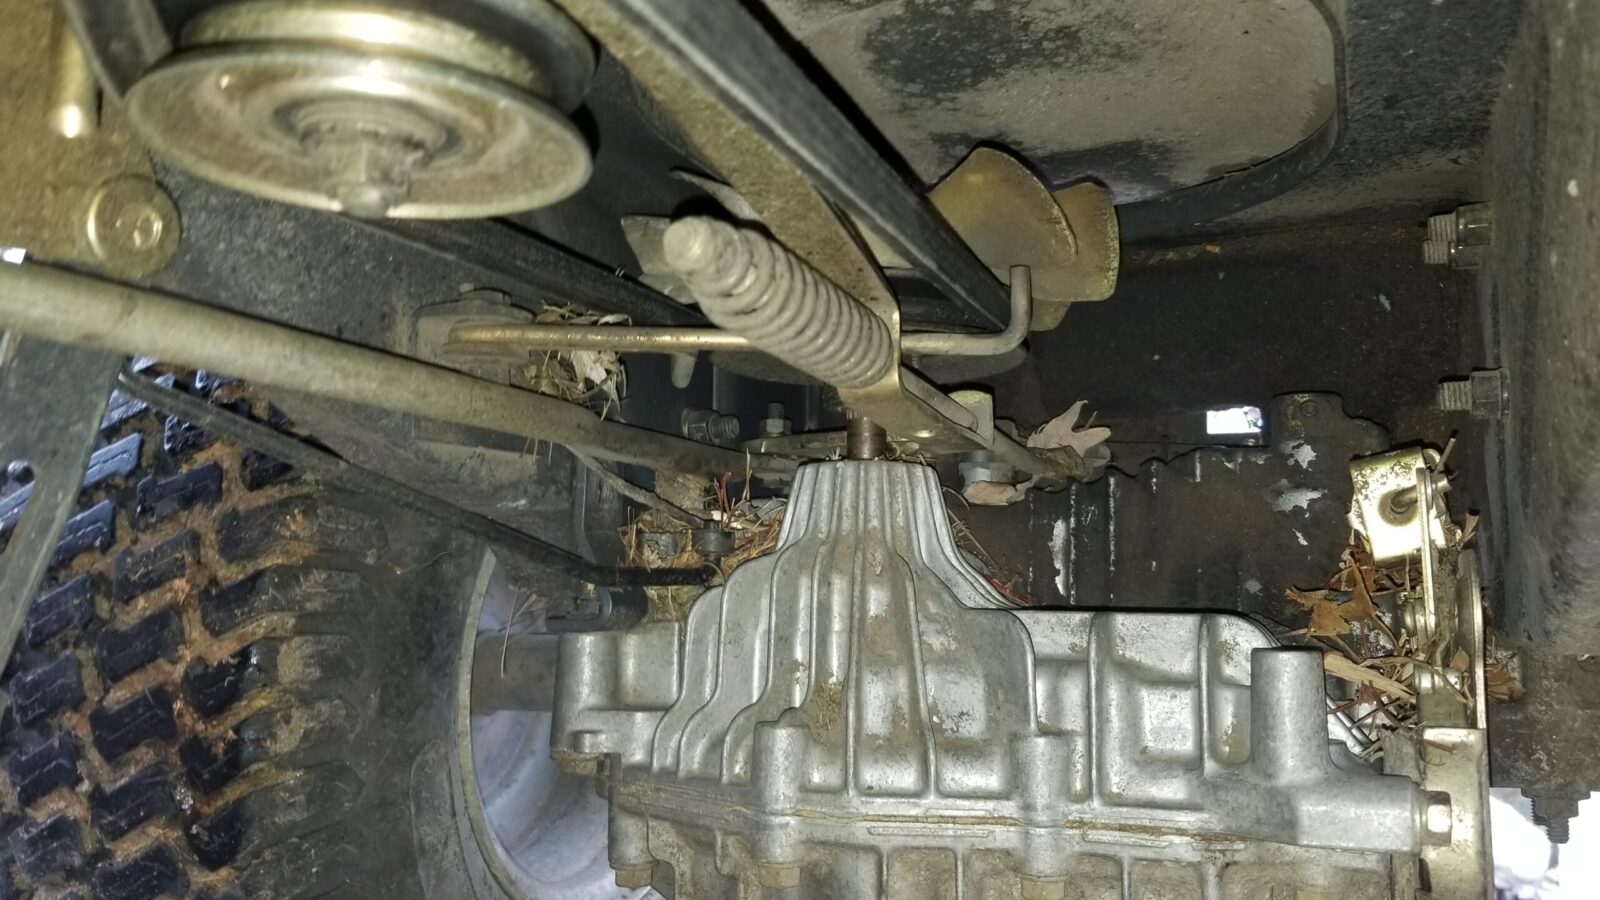
The hardest step was removing the cotter pin (C) that secures the brake rod (A) onto the brake lever (B) in Figure 42 above. It is an absolute pain in the ass to get to and I had to work blind because I could only get one hand back in there. How they made it a pain was that the closed end of the pin was facing towards the inner rear meaning I could not hook it and pull. What I did was to take and hook the flared ends and pulled them relatively straight. I then shoved one jaw of a pair of needlenose pliers into the eye of the pin. To remove the pin, I then rotated the pliers and wound/curled the pin around the jaws until it was out of the hole. Sheeesh. When I reassembled it later, I put the eye facing the front of the tractor so I can grab and pull it way easier. By the way, I did not use a Dremel to cut out the pin because the plastic reservoir for the transmission oil was too close for comfort.

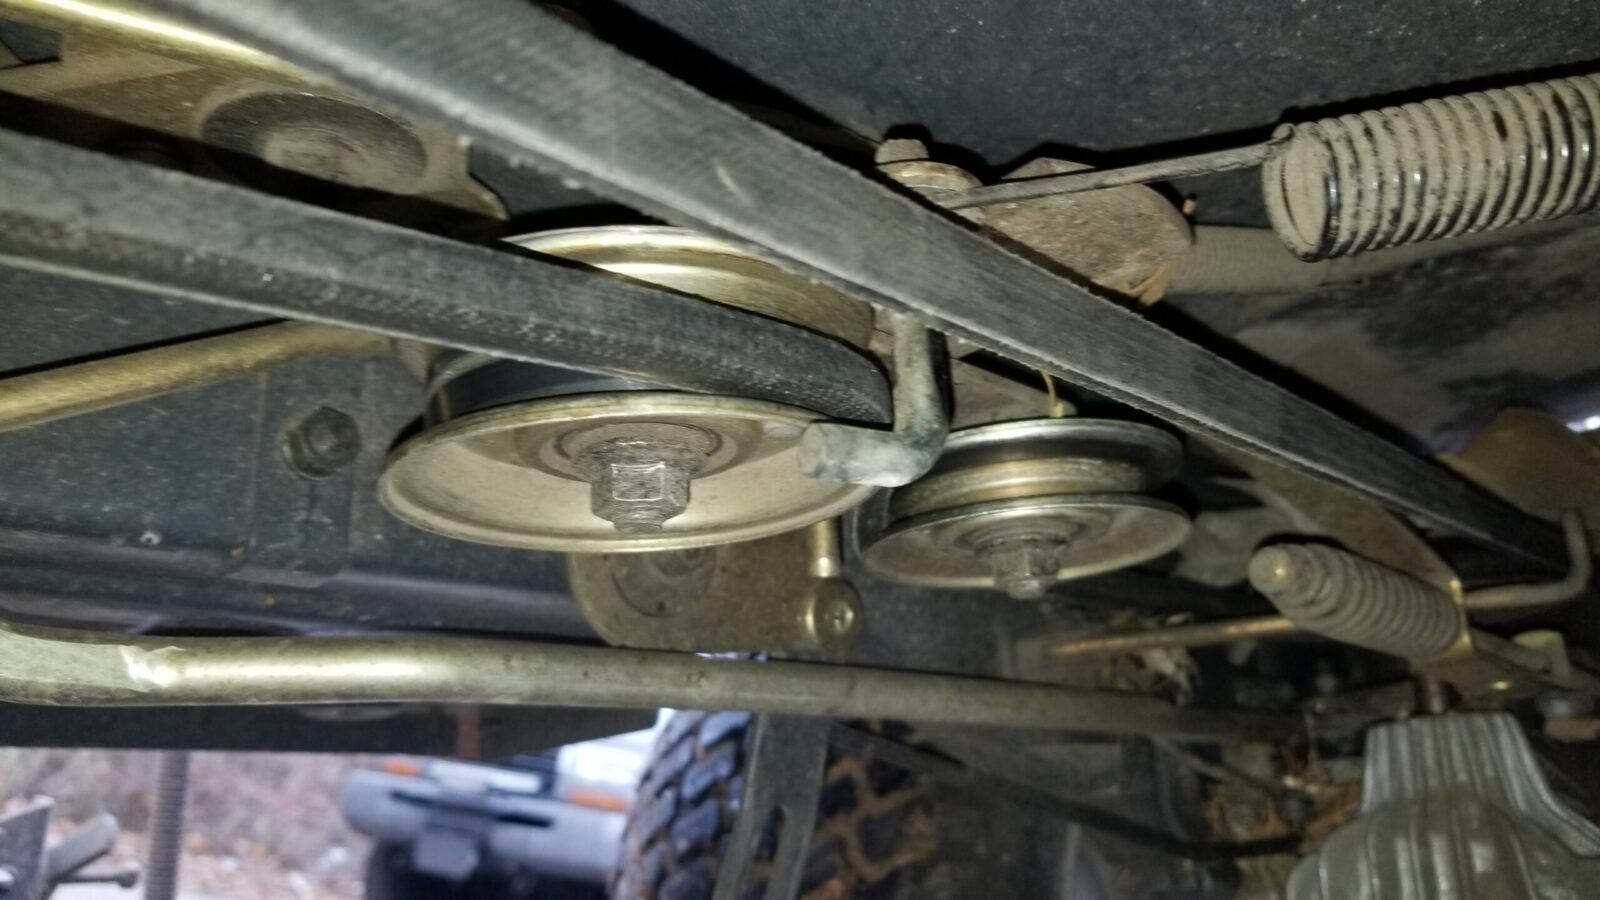
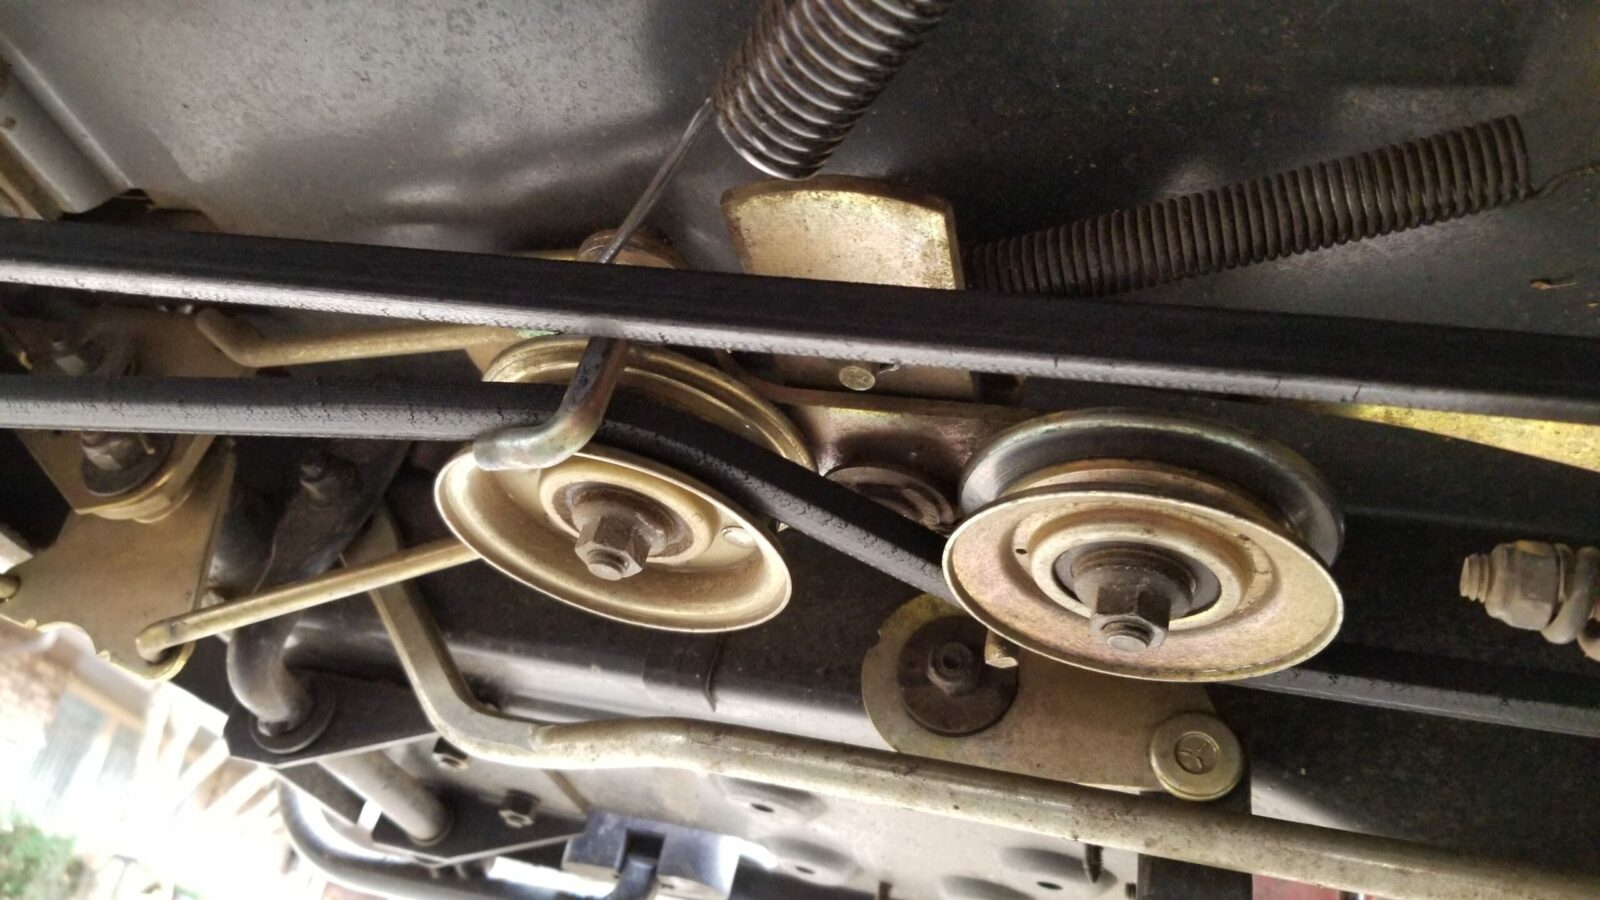
Before you remove the old belt, pay careful attention to the belt and how it passes around the brake assembly, through the idler assembly and around the arm. The illustration above is pretty good but the devil is in the details and the belt must not rub on anything when reassembled. My tip would be to take a ton of digital photos to refer to. In the old days you had to sketch stuff and the photos are way easier.

Here’s the original bet relative to the brake assembly.
Idler view one
Idler view 2
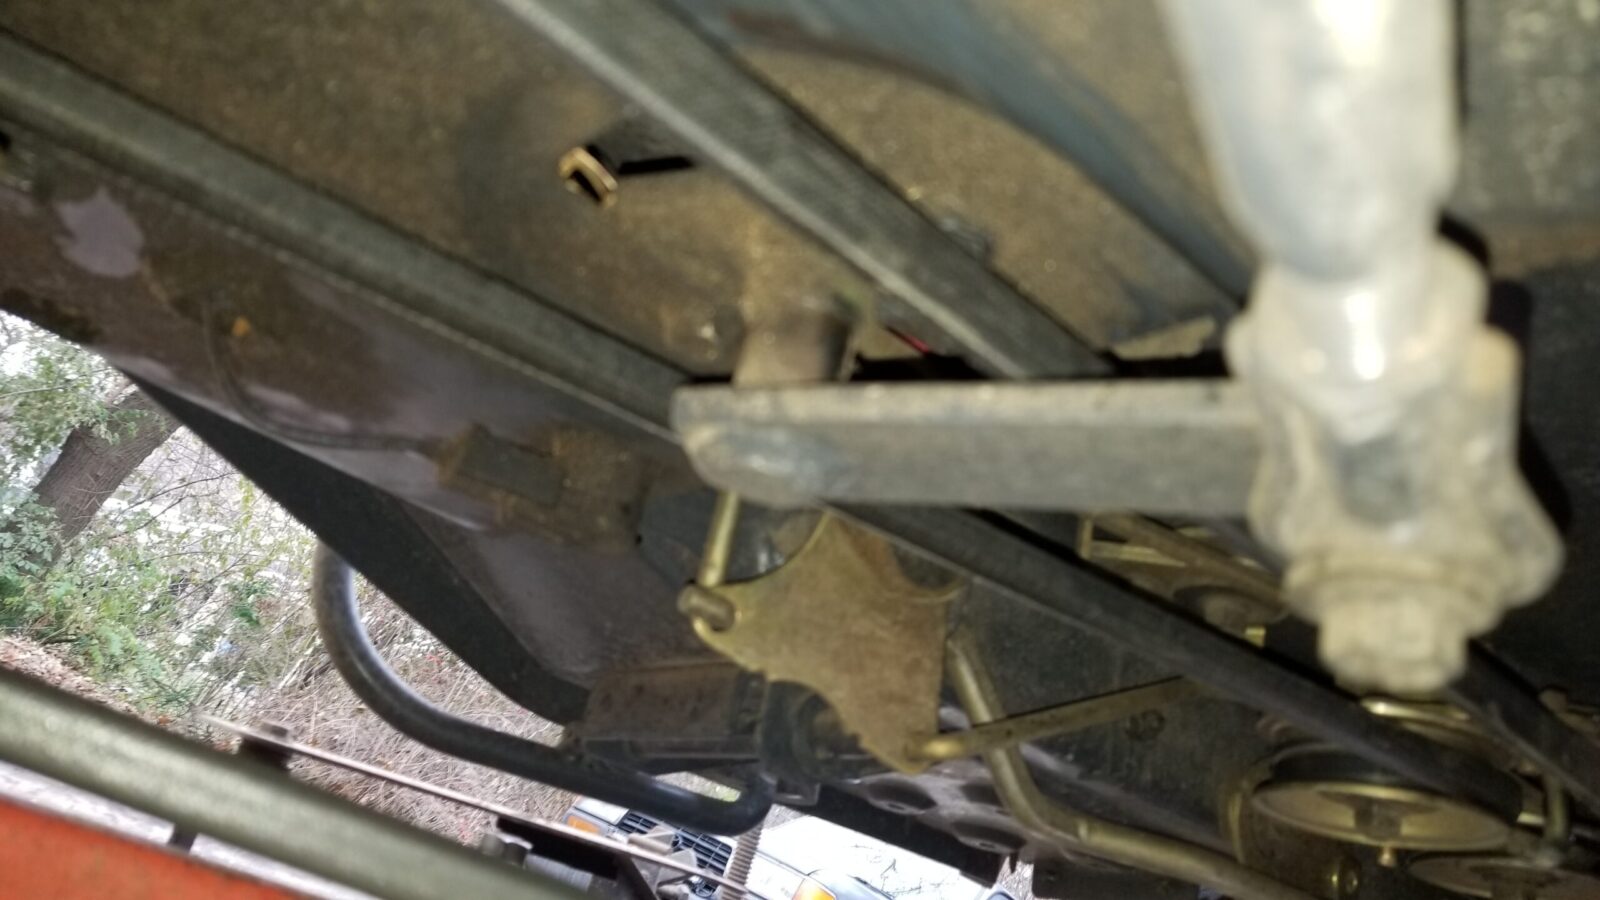
Clearing the steering arm
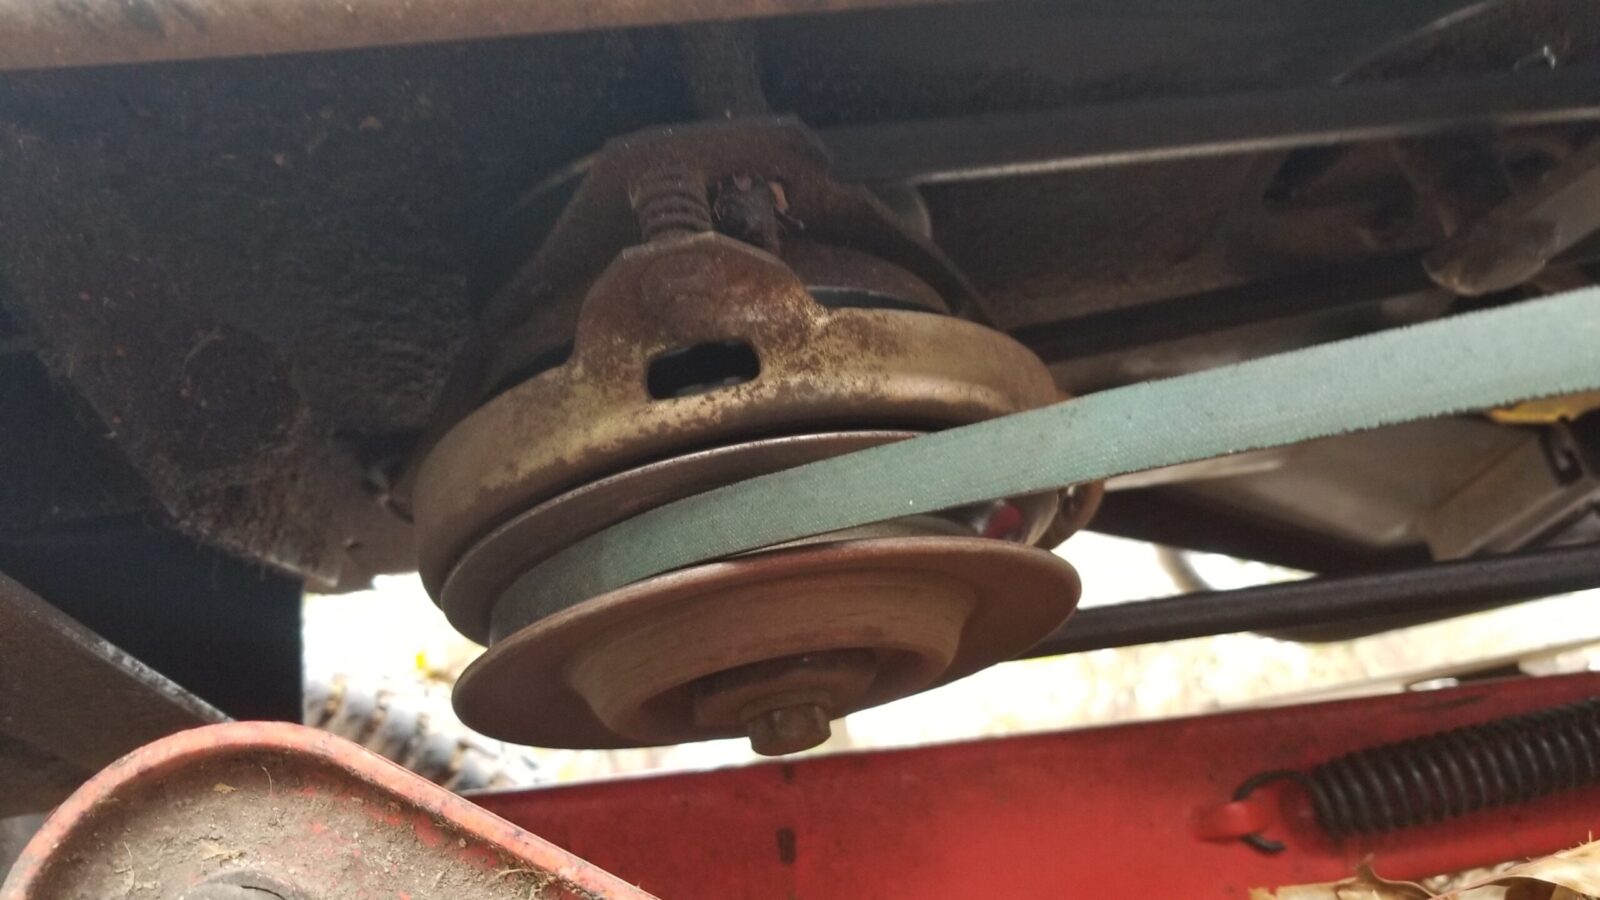
The electric PTO clutch
The original belt was in tough shape
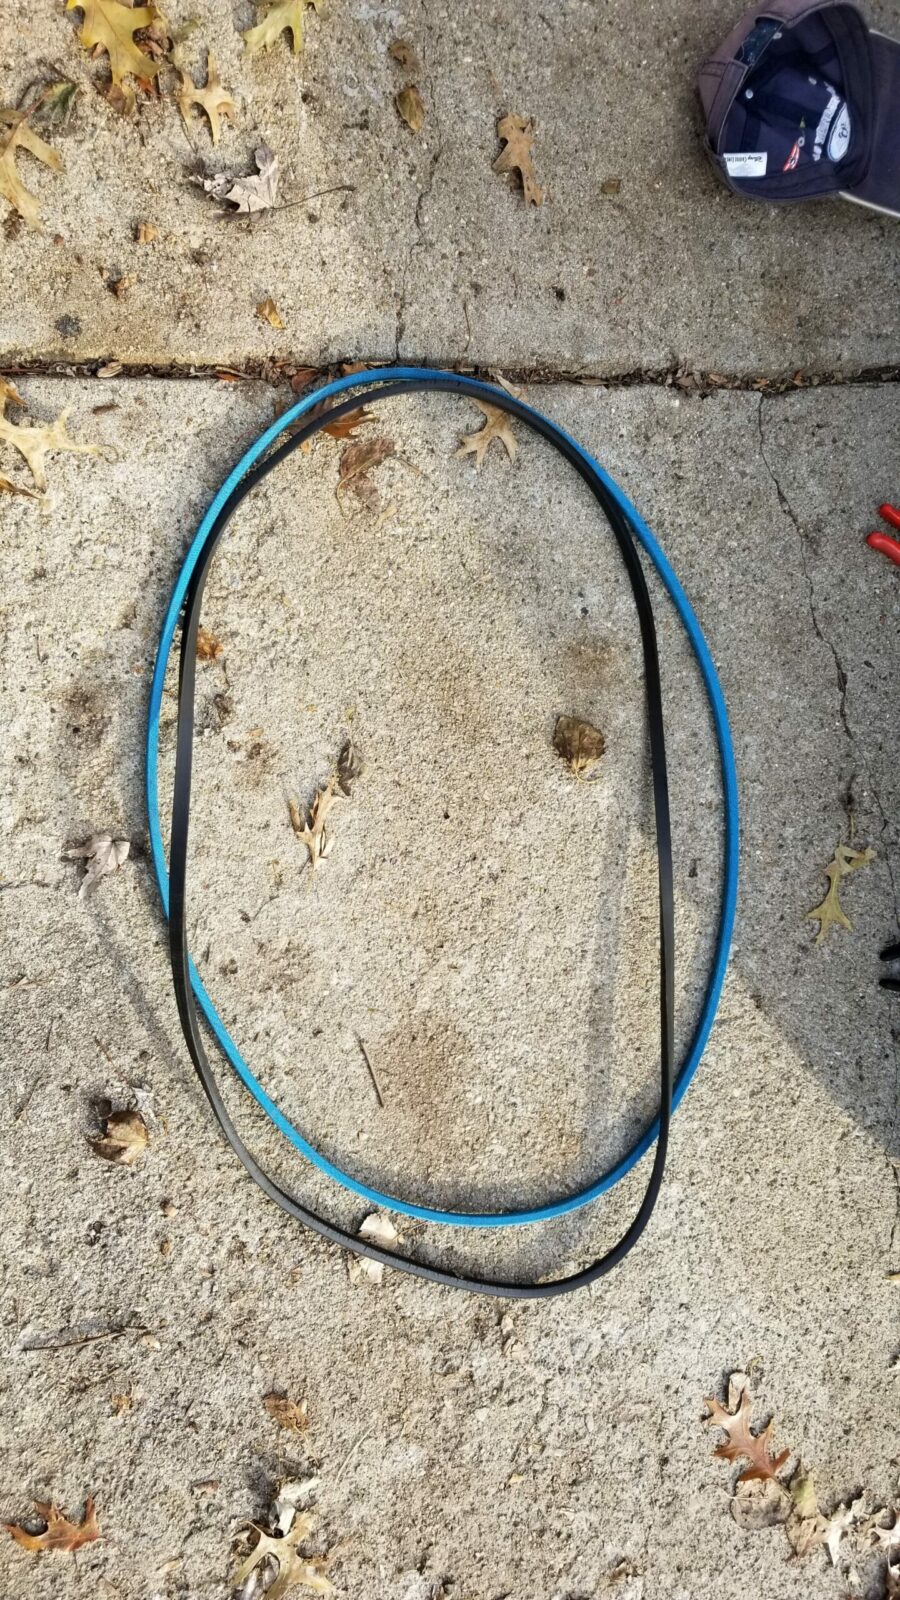
The new belt was just a tad bit shorter when I stretched them out side by side with my hands. I learned years ago to confirm the belt as best you can before you install it. I double checked the part number on the bag before I even began just to cut my risk. It sucks to have stuff apart or be in a real awkward position and then find out you have the wrong part.

In Conclusion

Kudos to Simplicity for a good illustration and guide. Re-assembly went smoothly and I then mowed/mulched leaves for two hours including some really thick areas so it passed the first trial by fire. Looking up under the tractor, the belt looks solid – no fraying or cracks. We’ll see how it holds up over time and I’ll report back but so far, so good. I hope this helps you out.

2/12/24 Update: The D&D belt is still working just fine! Click here to go to the Amazon product page for it.


If you find this post useful, please share the link on Facebook, with your friends, etc. Your support is much appreciated and if you have any feedback, please email me at in**@ro*********.com. Please note that for links to other websites, I may be paid via an affiliate program such as Avantlink, Impact, Amazon and eBay.


I thought My 1998 Simplicity 16HP Broadmor Tractor Had Bent A Crank – The Real Problem Was A Surprise!!

We bought our Simplicty 16HP Broadmor tractor back in 1998 mainly because my dad had a Simplicity that he kept running for almost 30 years. So here are in on 2019 and the tractor is starting to show its age plus the dealership is long gone so a lot of self-service and tinkering happens now.

I was mowing leaves a few weeks back on out acre and a half property when I had to turn the tractor off to pick up branches and move stuff around. I went to start it up and immediately heard thud, thud , thud, thud … so I turned the tractor off. Oh crap … the last time I heard a sound like this a car had bent a rod. I immediately checked the oil and it was almost empty.

Now I was really pissed off at myself. I knew it was burning oil but why had I let it get so low? I thought it had a low oil level protection device to stop it running … Needless to say,I was mad and I knew the fault was all mine. It was the worst possible time also – we simply could not afford to replace the tractor.

So, I filled the oil and figured I would run it until it failed. I had to get the leaves done and that’s just what I did. I ran it for another hour and put the tractor away while feeling like an idiot the whole time.

A week later we had a ton more leaves on the ground so I went to get the tractor out of the shed fully expecting it not to start. Much to my surprise, it did start and I made it half way through the yard when I had to turn it off to eat lunch with my wife.

When I went back out I started it up and it was really clanging away and the tractor was really vibrating but the engine sounded good. I turned the engine off and thought about it. I assumed it was a rod because of the low oil but what if that was not the problem?

The exhaust was tight and not rusted out. The oil level was good. So I started it with the top open and put my hand on the engine to feel for vibrations and the thudding stopped …. Holy Crap???? I took my hand off and it started thudding. Put it on and it stopped. I turned the ignition off and found that I could move the engine on the frame!!

I looked under the frame and one motor mount screw was in the hole but loose. Another was cocked in the hole ready to fall out and the other two werre missing. As luck would have it, I found one screw in the yard. Looking at it jogged my memory of a screw I found a few weeks earlier and couldn’t figure out where it came from. To this day I am not sure if I threw the screw out or tossed it somewhere in my shop – I thinkI threw it out.

So, after almost 21 years, the motor mount screws came loose. It never occured to me to check them. Now, here’s what I want to share with you – the screws are M8 diameter x 1.25 pitch x 30mm long. You can find them at hardware stores, etc. The original bolts also have a washer and lockwasher. I bought the replacement and was good to go.

Say hello to Mr. replacement bolt, washer and lock washer. After torquing things down, the tractor was running smooth again. Duh.

The torque spec is 40 foot pounds and if you want to never deal with them again, put a bit of blue loctite on the screws. Note, I would highly recommend that if the engine is hot, let the engine cool down before torquing on aluminum. I’ve watched threads strip on hot aluminum way too many times and have learned to be patient although a floor fan pointing at the engine will help it cool down a lot faster.

When I started the tractor again after replacing the bolt and torquing down all the bolts it was a huge relief to see and hear the tractor operating normally. I figured it was a good story to share.

Moral of the story – don’t assume and check before you jump to a conclusion. I did make a big assumption based on the sound and freaked myself out before I started the process of elimination that I should have started with. I hope this helps you out.


If you find this post useful, please share the link on Facebook, with your friends, etc. Your support is much appreciated and if you have any feedback, please email me at in**@ro*********.com. Please note that for links to other websites, I may be paid via an affiliate program such as Avantlink, Impact, Amazon and eBay.