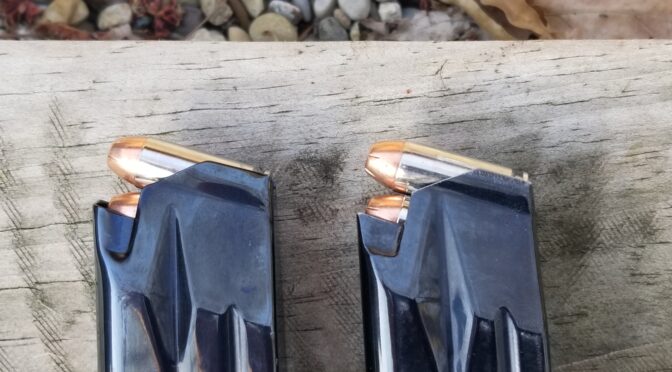
In most magazine fed weapons, the angle at which the cartridge feeds into the chamber is critical to reliable functioning. This is certainly the case 1911-style pistols. I wrote up a blog post outlining what I did to modify Mec-Gar Para P16 10mm/.40 magazines over for use in the Rock Island HC-series (High Cap series) pistols such as my 10mm 52009 (click here if you want to read it). I got a few emails from guys asking if I could explain what needs to be done to adjust the cartridge angle.
Okay, so what is controlling the feed angle is in part the shape of the lips, the gap between them and the shape of the follower. Let’s take a look at an ACT-MAG that works for both .40 and 10mm:
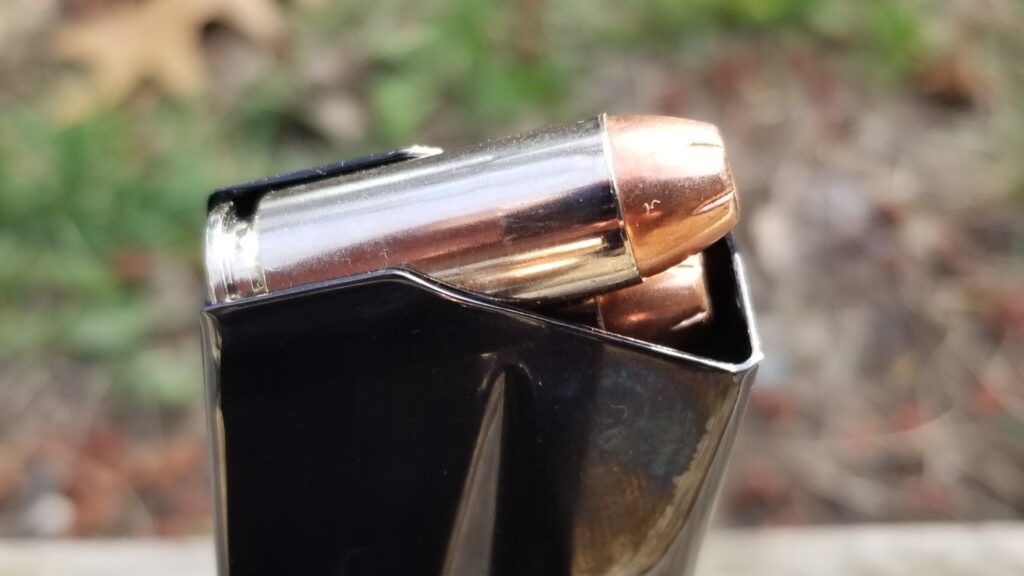
There are a whole bunch of reasons why you need to adjust the angle as a consumer. Slight variations in how the pistol or magazine were made, wear over time, etc.
What you can do is to bend the feed lips open or closed in the front to adjust the angle. This works because the cartridge is round and the gap affects how far up that part of the cartridge will rise up.
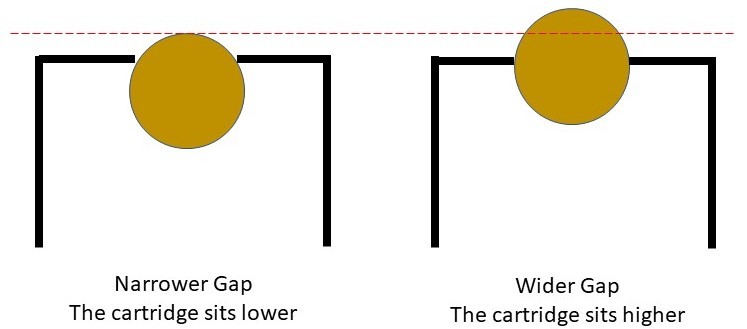
In general, the back of the lips are relatively fixed because of the extra material around them. Now they can get bent out of shape for one reason or another and I would recommend you compare the front and back feed lip caps of a questionable magazine to a good magazine.
Safety Comment – Use Dummy Cartridges / Snap Caps
I said this in the first post and it is so important that I want to reinforce the message – I knew I was going to need to do a ton of cycling of rounds. Using live ammo is risky because you have the very real risk of a negligent discharge. To avoid this, order yourself in a bunch of dummy cartridges. There are sellers on eBay that will sell you 10+ at time. Order yourself in 10-20 rounds. You are going to smash the crap out of them due to the heavy recoil spring a 10mm uses. I trashed at least 10-15 of them. Most were due to the bullet being smashed back into the case, one dented the case pretty bad and one deformed the case right at the mouth.
I can’t even guess how many cycles I did – especially starting out. I’m going to hazard a guess and say I averaged about three cycles per dummy before something failed on the dummy as I worked out the kinks and I would load three rounds per magazine to do the testing.
I can’t stress it enough – get dummies to tune your magazines.
Actually Adjusting The Lips
The goal is for the bullet to point straight into the chamber so that when the slide goes forward, the cartridge is stripped from the magazine and is fed straight into the chamber. We can move the front of the cartridge up and down by changing the gap between the lips.
In general, the gap at the back of the lips tend to be slightly smaller than the front. What happens is the cartridge gets pinched/stopped at the back while the relatively wider front portion allows the cartridge to be pushed farther upwards per the figure above.
| Do not rush! If you take your time this goes pretty smooth. Do a little bit of adjustment and test over and over. It gets easier the more you do it. |
If you need to close the lips, you can slightly crush them in a soft-jawed vise, use rubber/plastic tipped/non-marring pliers or light taps with a non-marring hammer. Just do a little and test over and over. In general, I use either the vise or pliers depending on how my hands feel as I prefer the control vs. tapping with a hammer. Everyone has their preferences and I know guys who can rock with a hammer. It’s up to you.
I get it in the ballpark and then I fine tune by spreading the front lips open a bit with malleable chain pliers – these are made for being the links of chain that some hanging light fixtures have. Any plier that opens when you squeeze it, such as external snap ring pliers, can work.
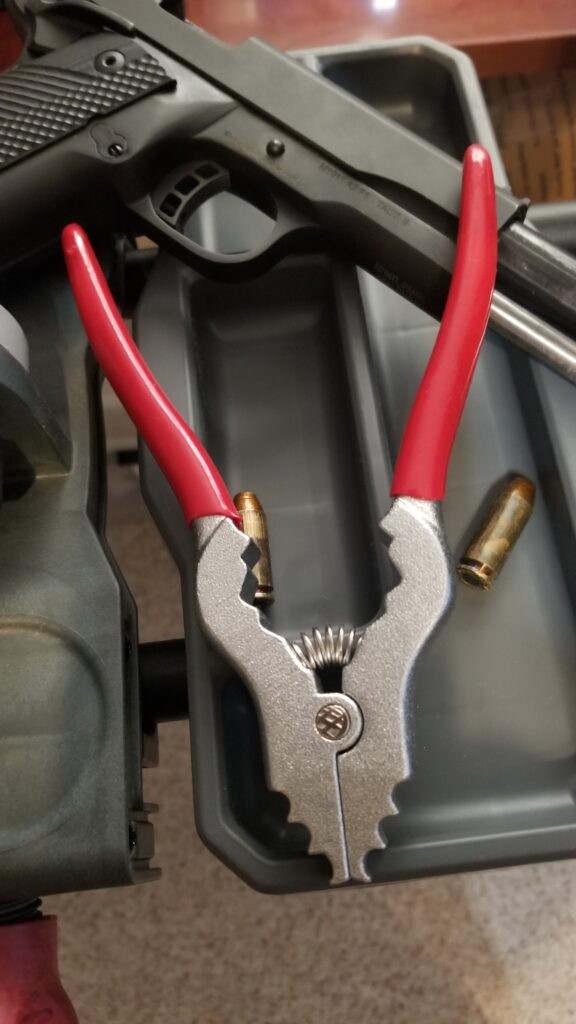
What I do is to put the pliers inside the front edge and open just a tad. I don’t try to do it all at once – it doesn’t take much to open them up a slight bit. So do that and then test with dummy rounds (snap caps) over and over. You will trash a lot of dummy rounds doing this so keep spares around. I absolutely do not recommend doing this with live ammo – it’s an accident waiting to happen.
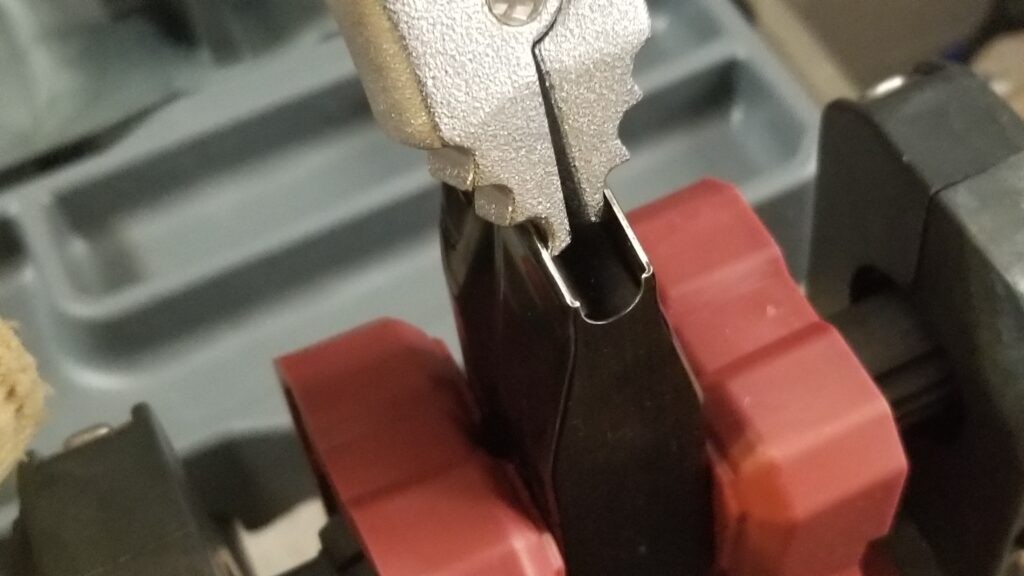
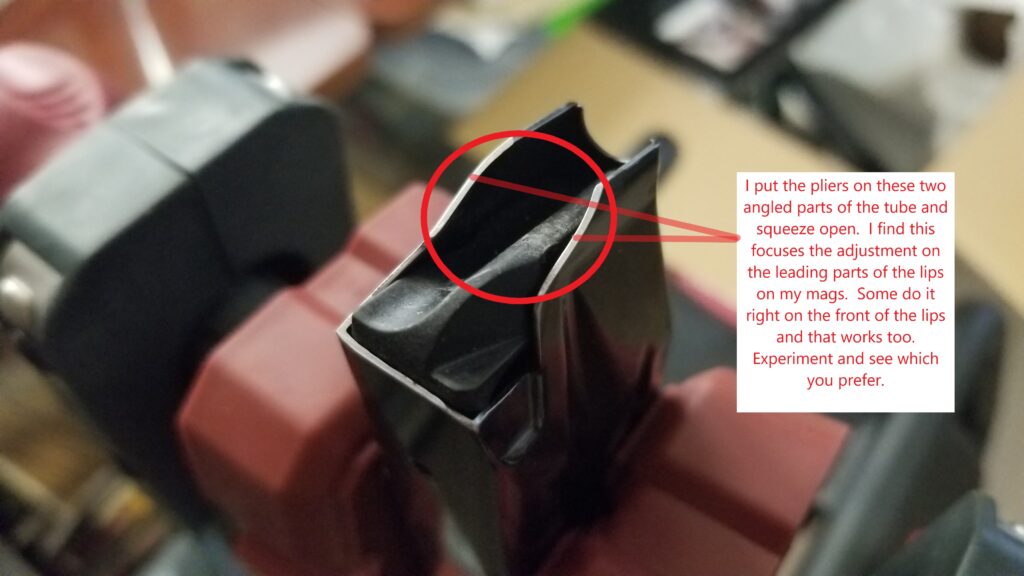
You really need to experiment with every mag and fine tune them. I don’t have a set of measures that works perfectly every time. Instead, just remember to aim the bullet at the chamber and tune from there.
Last comment – always take your pistol to the range and make sure a magazine is reliable before you count on it. I like to number my mags to I can keep tabs on ones that are having problems and need adjustment.
Conclusion
This is what I do and it works for me. I know other guys have other approaches so do some searching and decide what works best for you. I hope this helps you out.
Note, I have to buy all of my parts – nothing here was paid for by sponsors, etc. I do make a small amount if you click on an ad and buy something but that is it. You’re getting my real opinion on stuff.
If you find this post useful, please share the link on Facebook, with your friends, etc. Your support is much appreciated and if you have any feedback, please email me at in**@*********ps.com. Please note that for links to other websites, we are only paid if there is an affiliate program such as Avantlink, Impact, Amazon and eBay and only if you purchase something. If you’d like to directly contribute towards our continued reporting, please visit our funding page.
