The hammer assembly includes the pin, spring and hammer itself. In the next photo, the hammer group is to the right. This is an enhanced trigger group from Palmetto State Armory (PSA) that I really like and recommend for people wanting a decent low-cost trigger for a basic build.
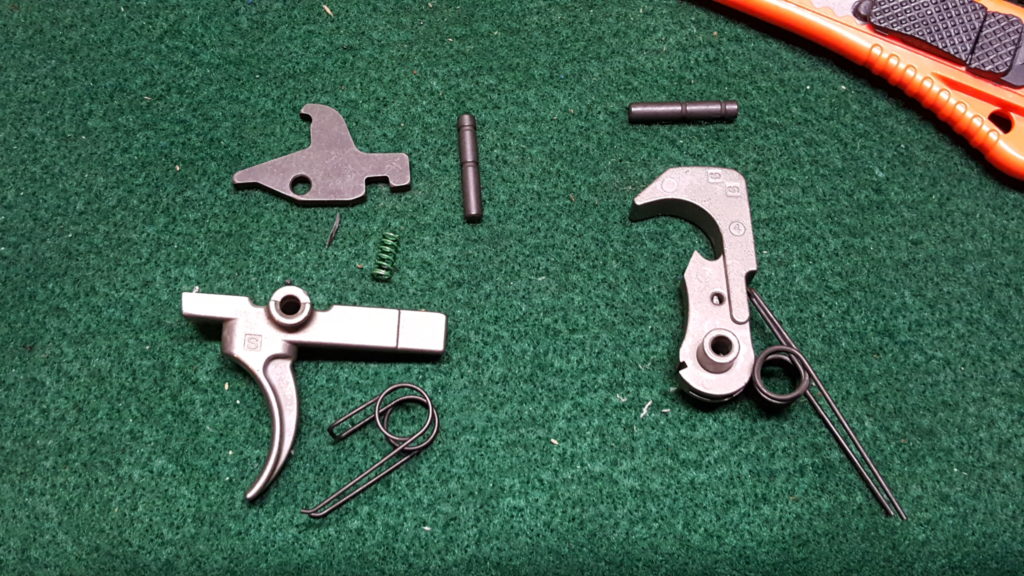
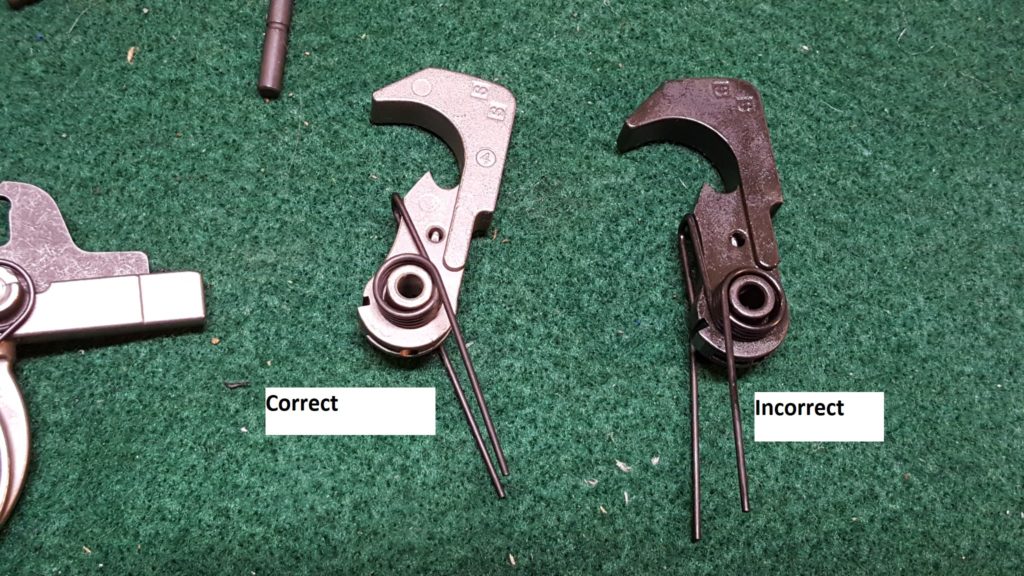
It’s straight forward to install with one important detail to get right – put the spring on so the loop is to the back and top of the hammer and the legs wind down clockwise off the hammer. Installing the spring the wrong way can have weird not always predictable results. I’ve had rifles that fired fine and others that doubled. Be sure to install the spring the correct way:
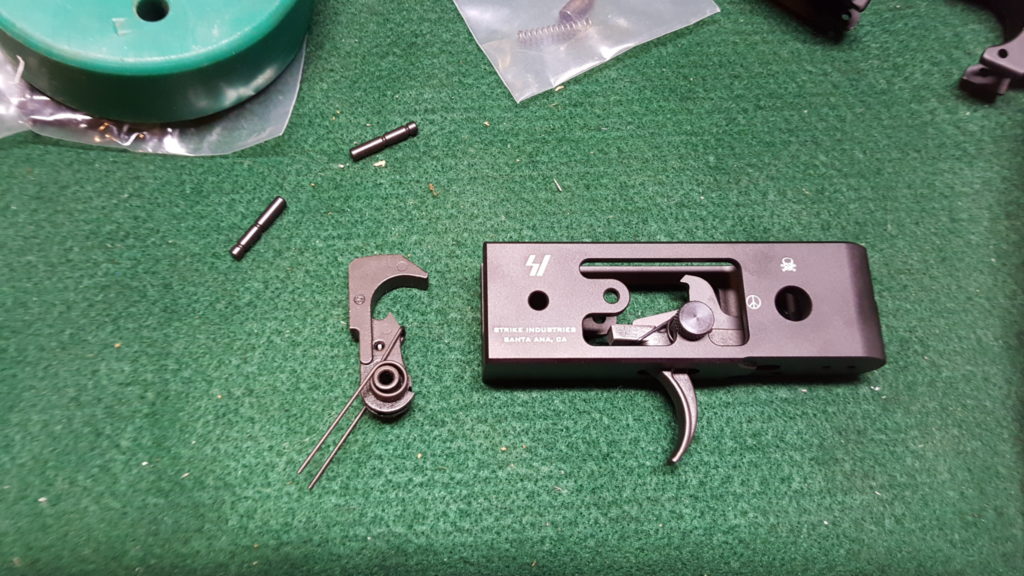
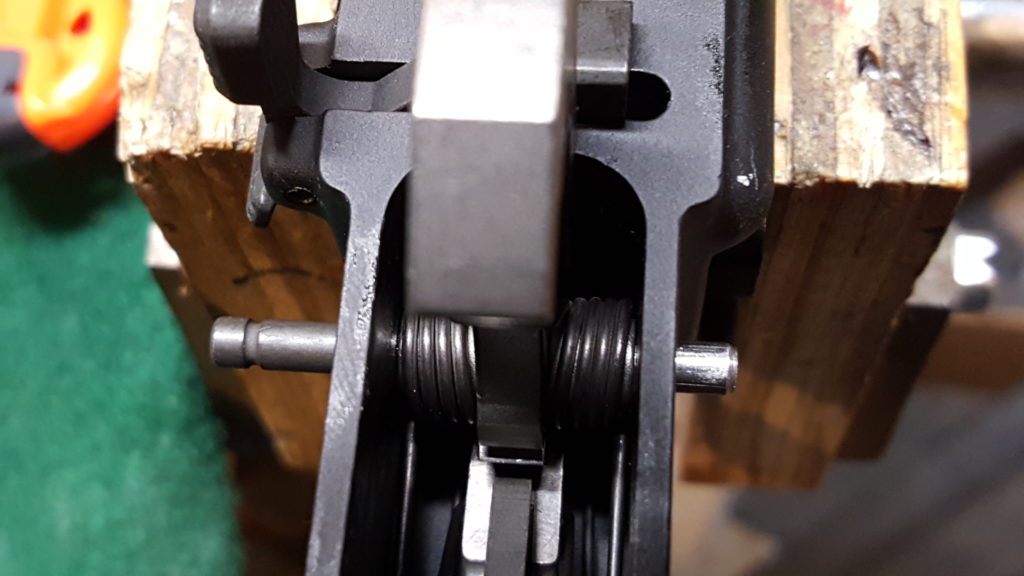
Now this next photo is of a fire control group installed in my Strike Industries jig that is great for tuning. It’s not the PSA enhanced trigger but I wanted you to see the way the hammer spring’s legs must sit in the trigger pin’s groove. This is very important as it locks the pin in place. You may need a pair of needlenose pliers to adjust the leg to make sure it does rest in that groove. By the way, the part the strikes the firing pin is the straight flat face so when you install the hammer, the face is forward as you see in the next photo.
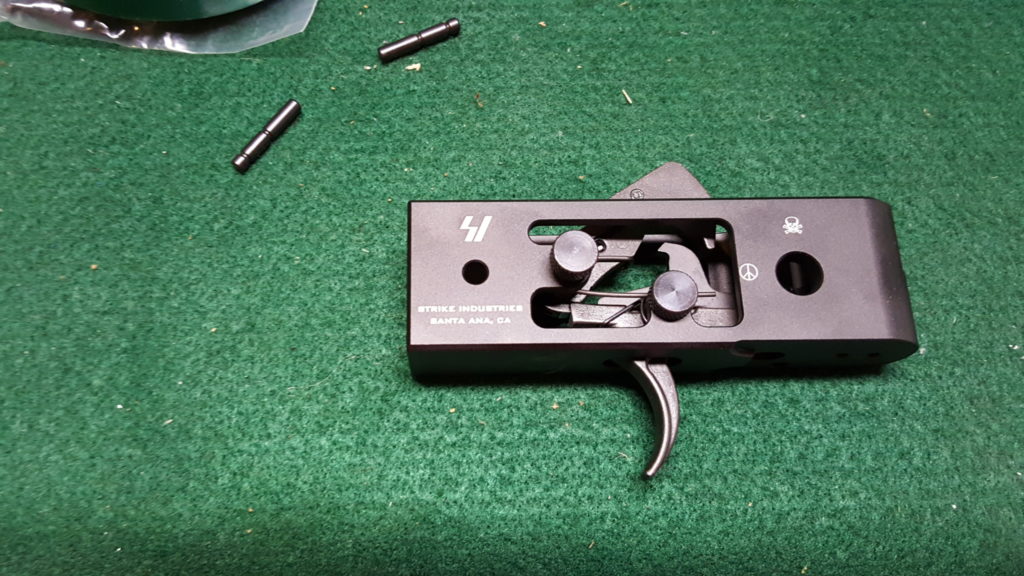
To help line things up, I either use a punch or a little slave in. The hammer spring is pretty strong and something to help you line it up while you install the cross pin will seriously lower your stress level. Here, I am using my slave pin and you can see the actual hammer pin coming in from the left. As a reminder, the trigger and hammer use the same pins.
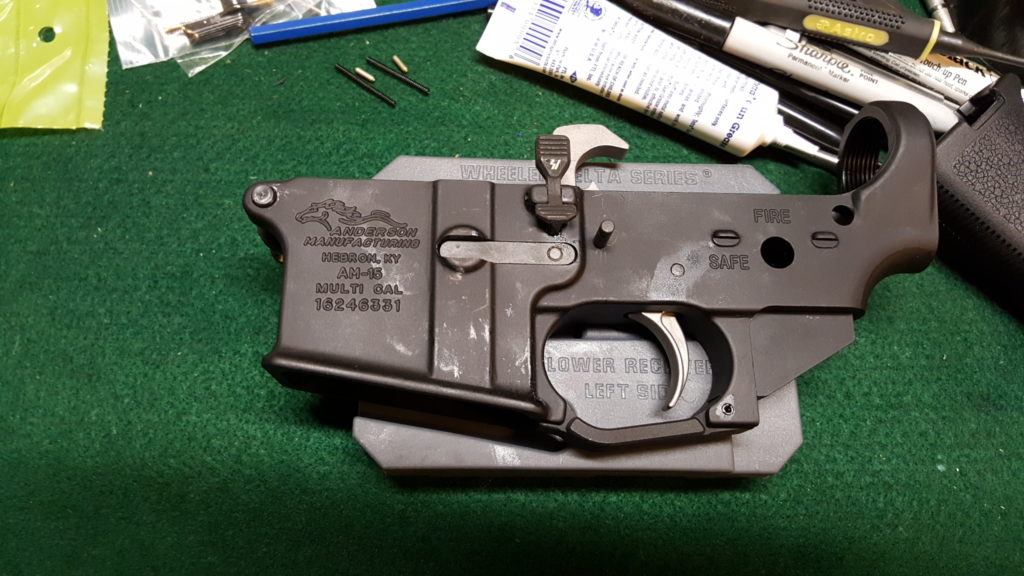
Next, you need to function test the fire control group. DO NOT LET THE HAMMER COME FORWARD AND SLAM THE MAG WELL!! You need to use your thumb or something to ease the trigger up. A steel hammer hitting an aluminum receiver’s magazine well is not a good combination. Pull the hammer back and the trigger should catch it. Next, pull the trigger while holding the hammer and the trigger should release the hammer letting it come forward.
Done! On to the selector assembly.
If you find this post useful, please share the link on Facebook, with your friends, etc. Your support is much appreciated and if you have any feedback, please email me at in**@*********ps.com. Please note that for links to other websites, we are only paid if there is an affiliate program such as Avantlink, Impact, Amazon and eBay and only if you purchase something. If you’d like to directly contribute towards our continued reporting, please visit our funding page.
AR Parts Sources
There are a lot of reputable AR parts vendors online but beware of eBay and bargain basement dealers that sell airsoft parts and tell you they will stand up to firearm use – they will not. At any rate, here are my top sources of AR parts:
