In my last post, I mentioned my disappointment that the Kinetic Research Group (KRG) Bravo chassis that Aero Precision sells with some of their Solus bolt rifle offerings is not truly bipod ready. In my opinion, Aero should either have discosed that the stock isn’t bipod ready and/or given an option during the purchase of the Solus to buy one of the models of spigots that KRG offers. Okay, that’s water under the bridge. I want to make this post about adding a spigot to a Bravo.
First off, sincere kudos to KRG for a really nicely done modular and extensible chassis that looks like a stock. It’s very well designed and executed. The Bravo has tons of ways you can configure it. Some are included such as the adjustable cheek piece, length of pull and one rail segment. Others you need to purchase such as forward mounts for night vision devices, ARCA Swiss mounting accessories and far more. One of the accessories you can buy are various spigots.
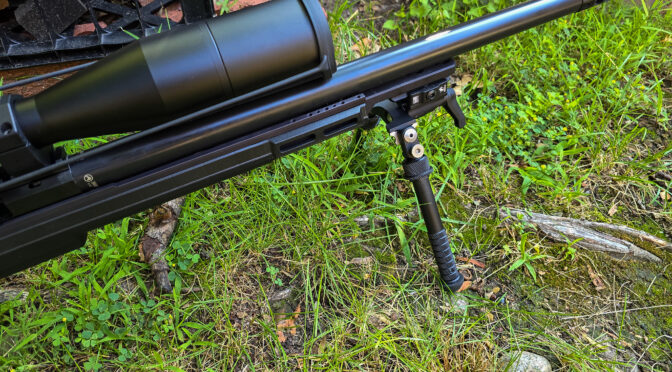
It’s time for me to explain what I am talking about – a spigot is an attachment point that extends forward past the front end of the stock where a bipod, and sometimes other accessories, can be attached.
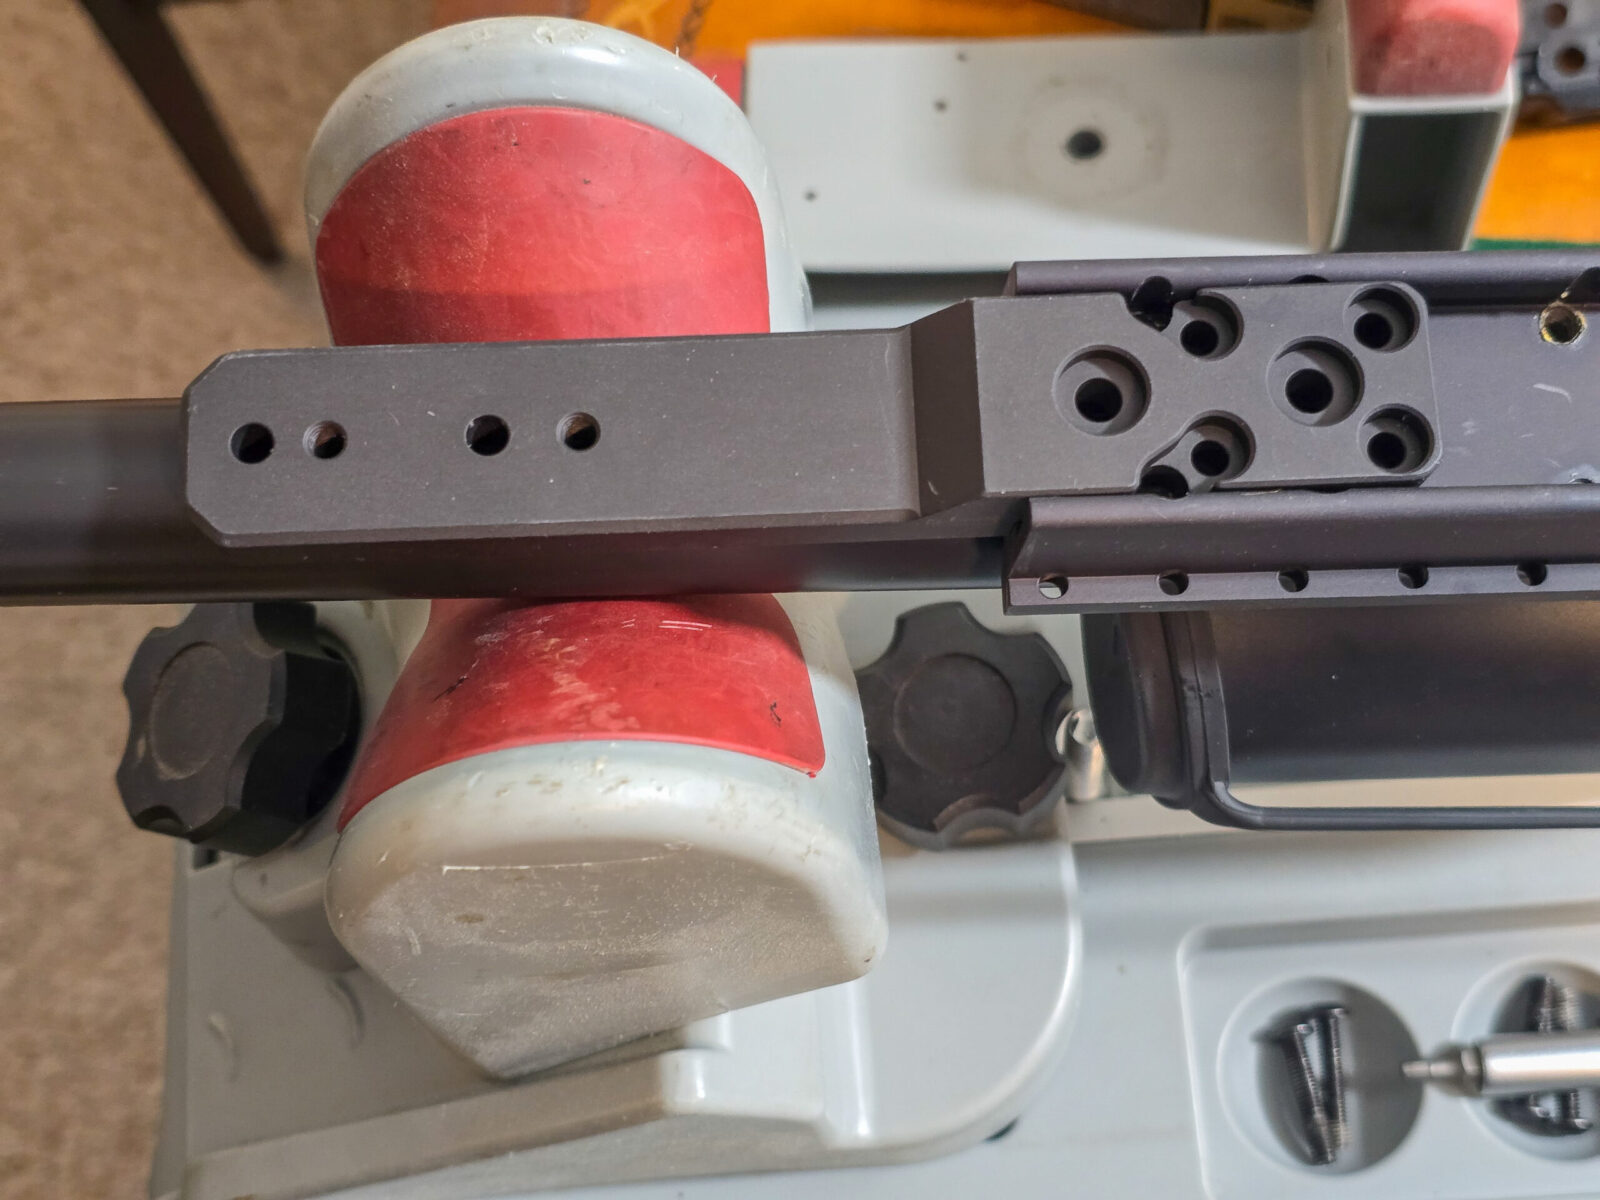
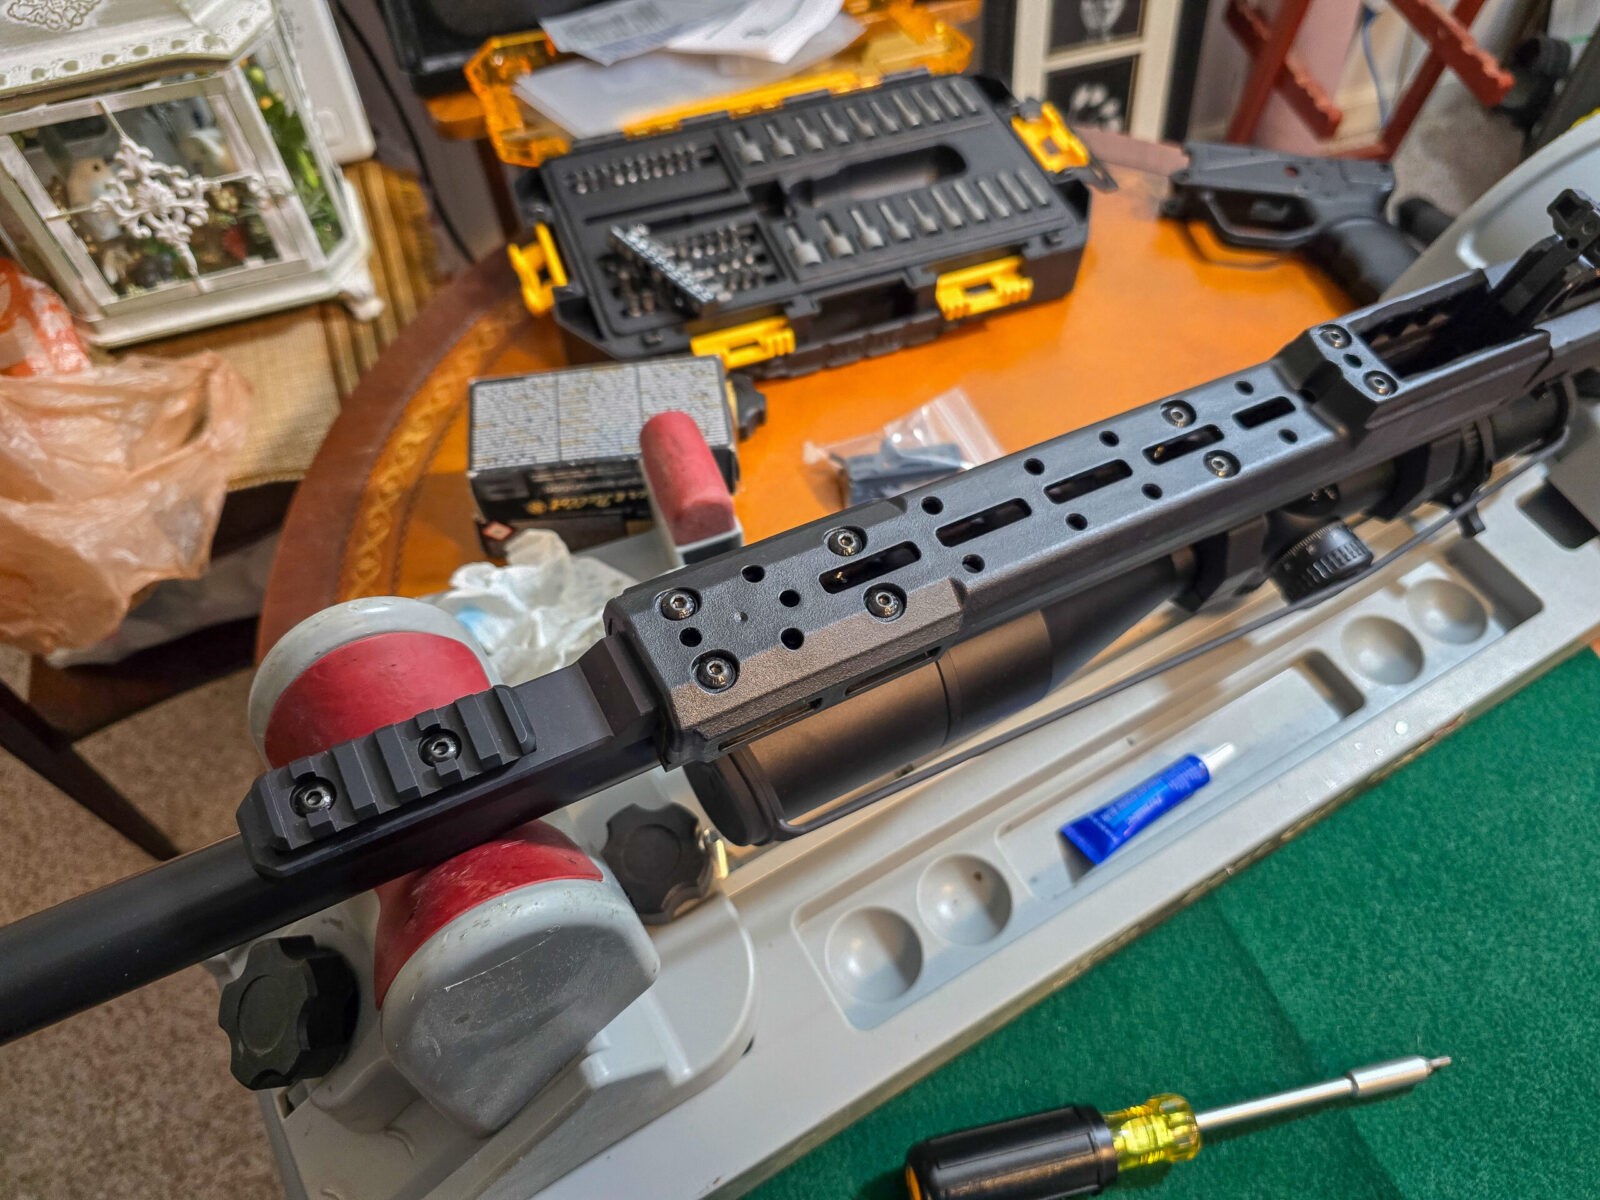
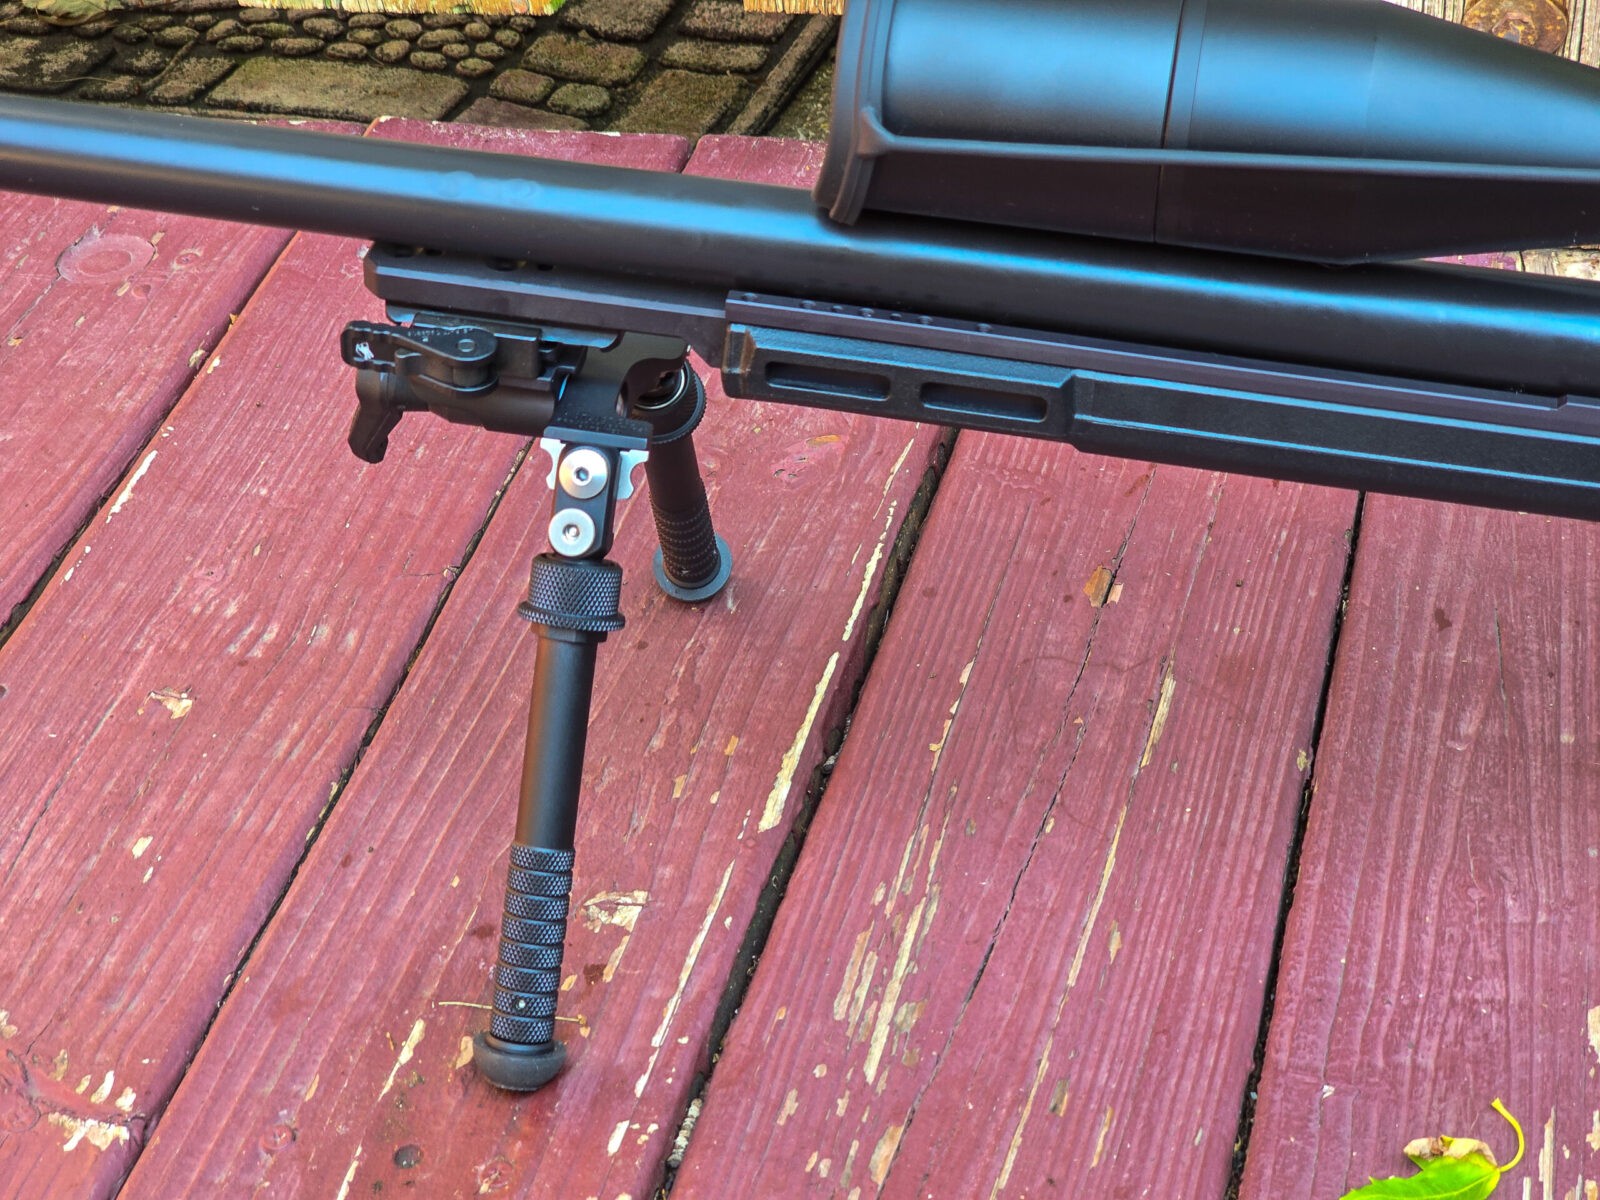
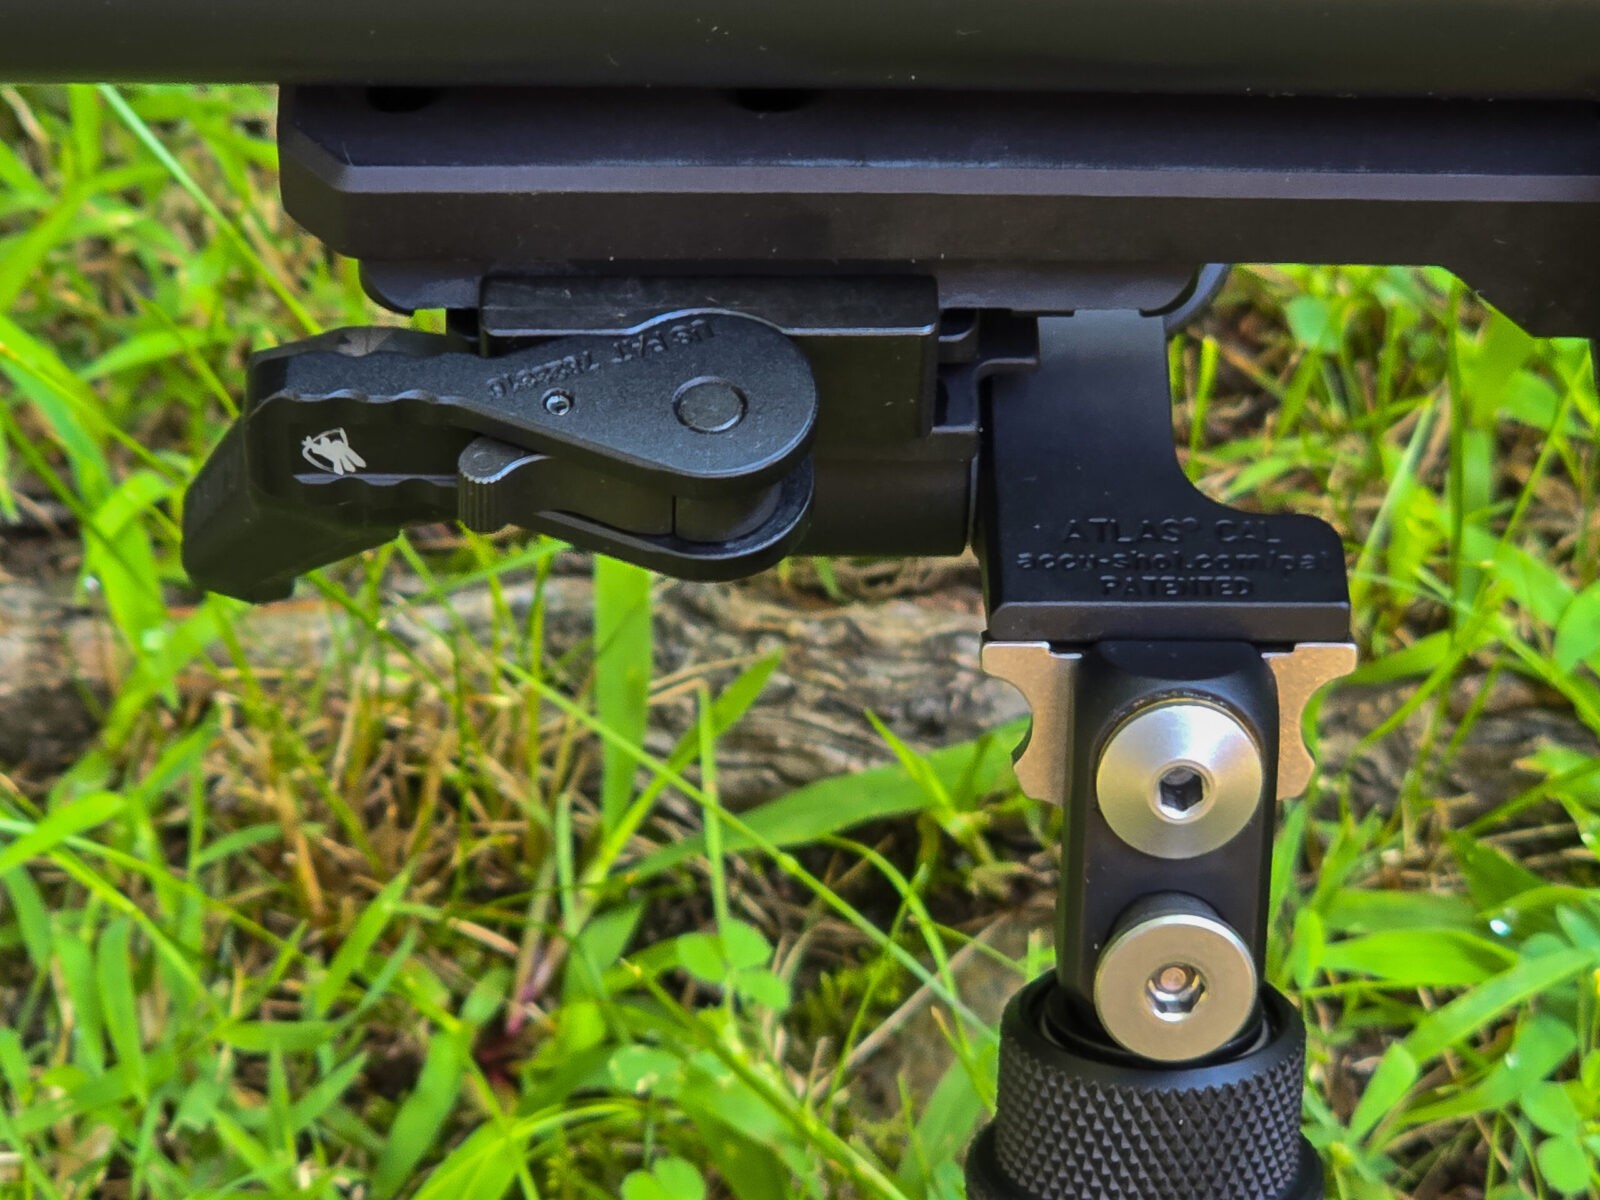
In the case of the Bravo, a spigot will connect to the aluminum chassis and both move the bipod mounting point forward and provide an extremely secure mount directly to the chassis.
Nostalgia Time
The first time I encountered a spigot was with Versa-Pod bipods. It’s been so long, I can’t recall if I found out about Versa-Pods and then bought an Accuracy International Chassis System (AICS) for my Remington 700 XCR LR or it was the other way arround.
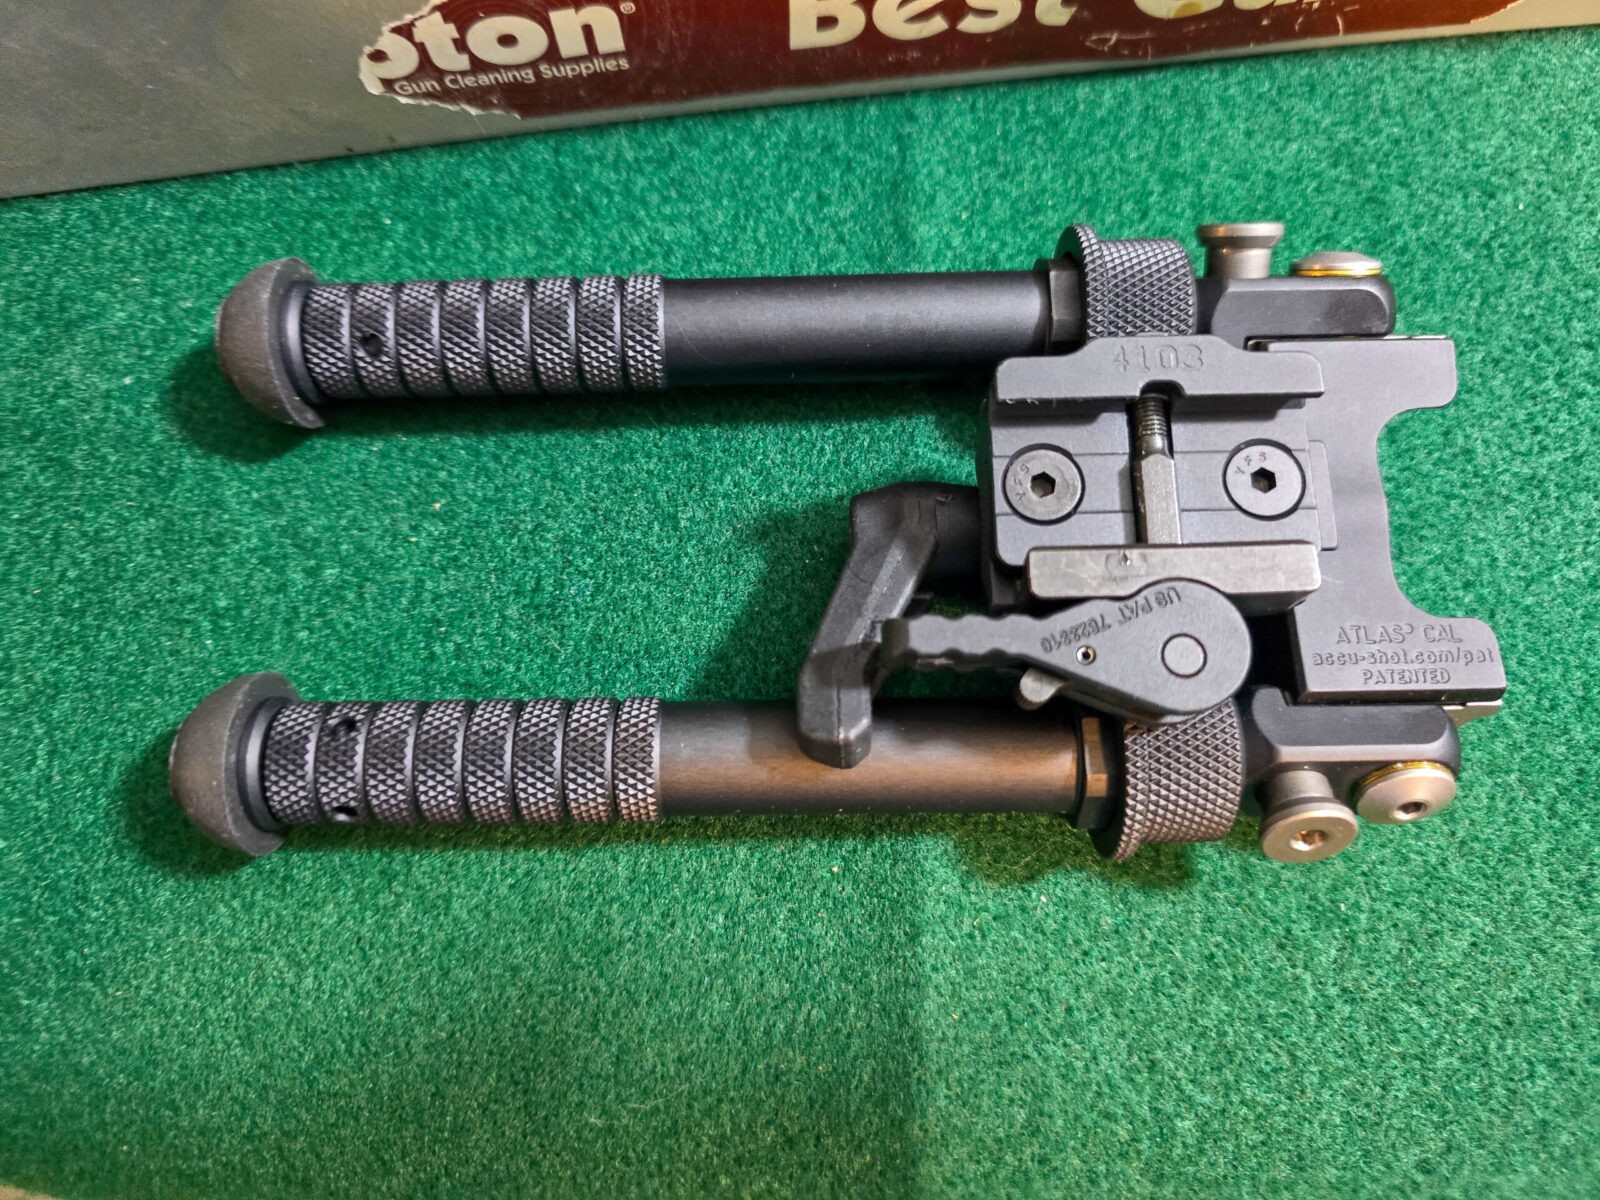
I don’t really recall when but at some point I moved away from the Versa-Pods mainly because I didn’t like the rotation around the spigot unless you really cranked down the locking knob. These days, my go-to bipods are Atlas models.
Back to KRG Spigots
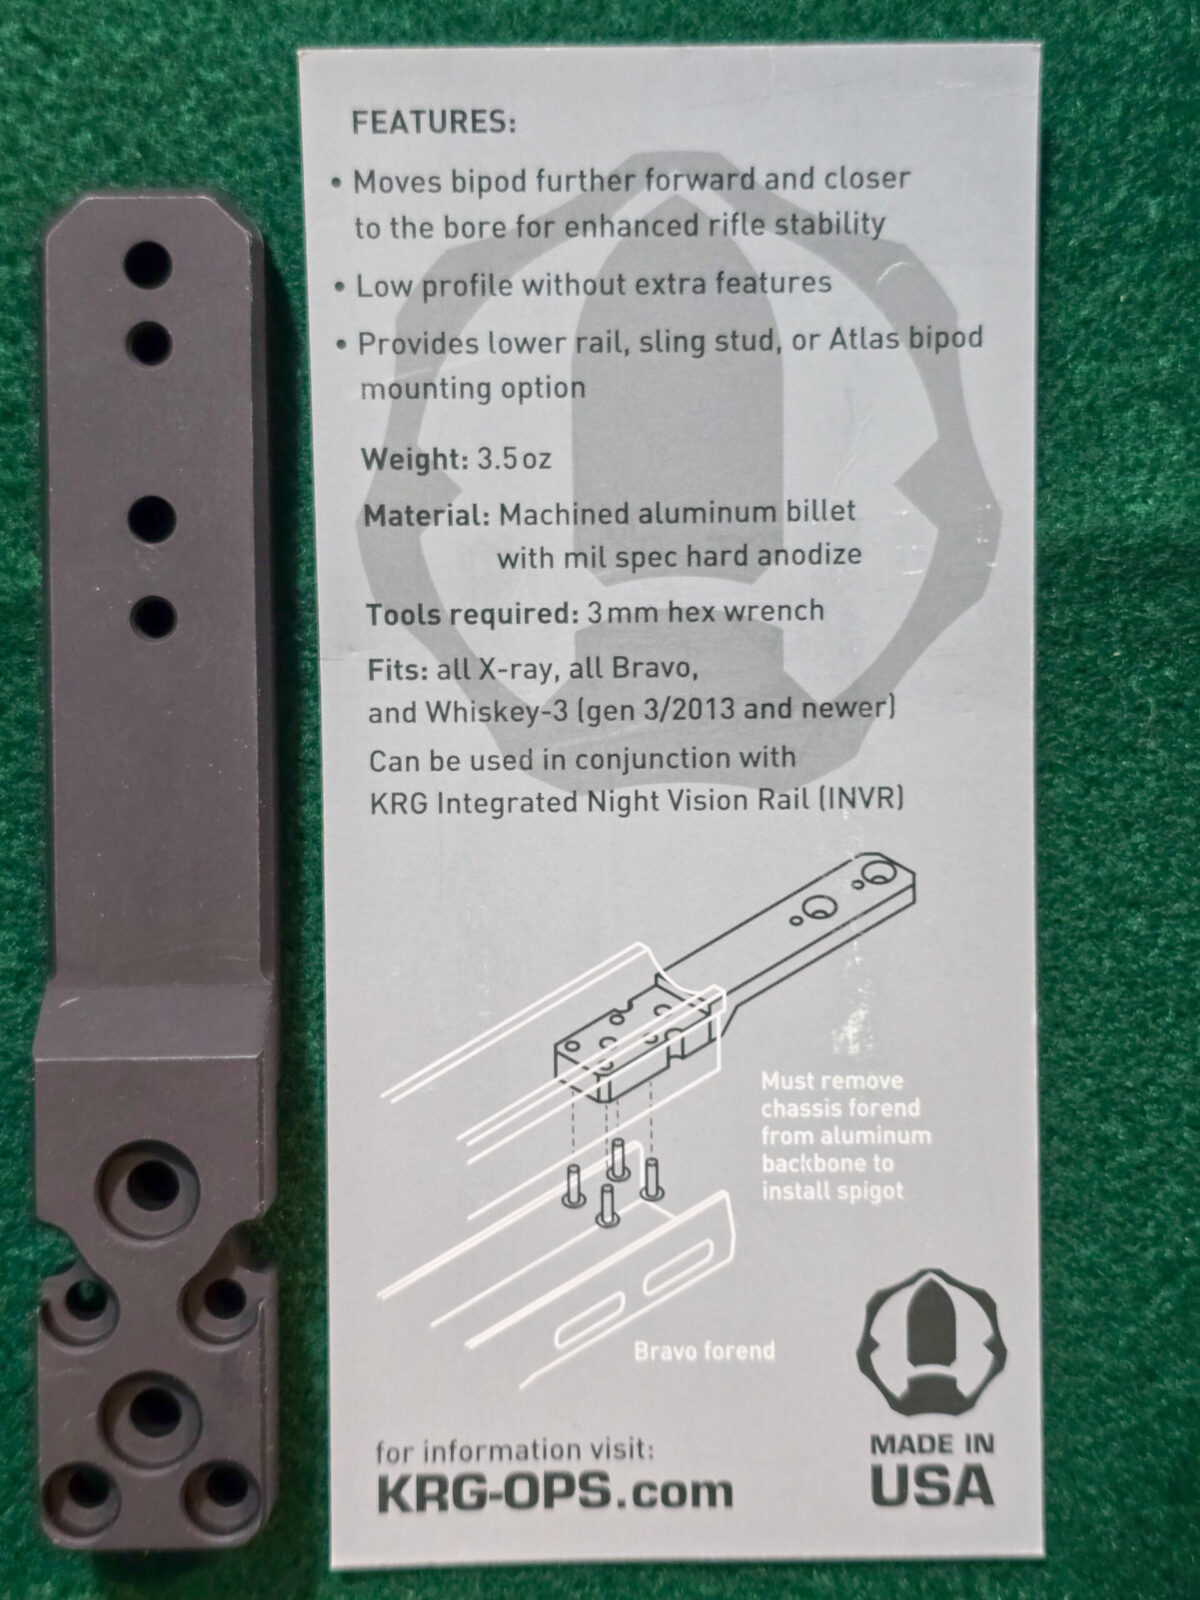
KRG literally has a whole page of different spigots. There really are three factors that distinguish them – whether it is an ARCA pattern, how far forward you want the mounting point and what all you want to attach.
I’ll be honest – I actually had to call KRG to figure out what I needed. The customer service person I talked to was great and patiently explained the pros and cons of each based on what I needed:
- I did not need to connect an ARCA device, such as a tripod. Since I did not need ARCA this also ruled out their really long spigot.
- I only needed a bipod mount. Their normal spigot provides all kinds of attachments for rails, QD studs, night vision, etc.
Ok, no ARCA and just a bipod. That pointed me to the Minimalist spigot. The Minimalist moves the mount closer to the bore – which means you can get lower all things being equal. It also moves the attachment about five inches forward.
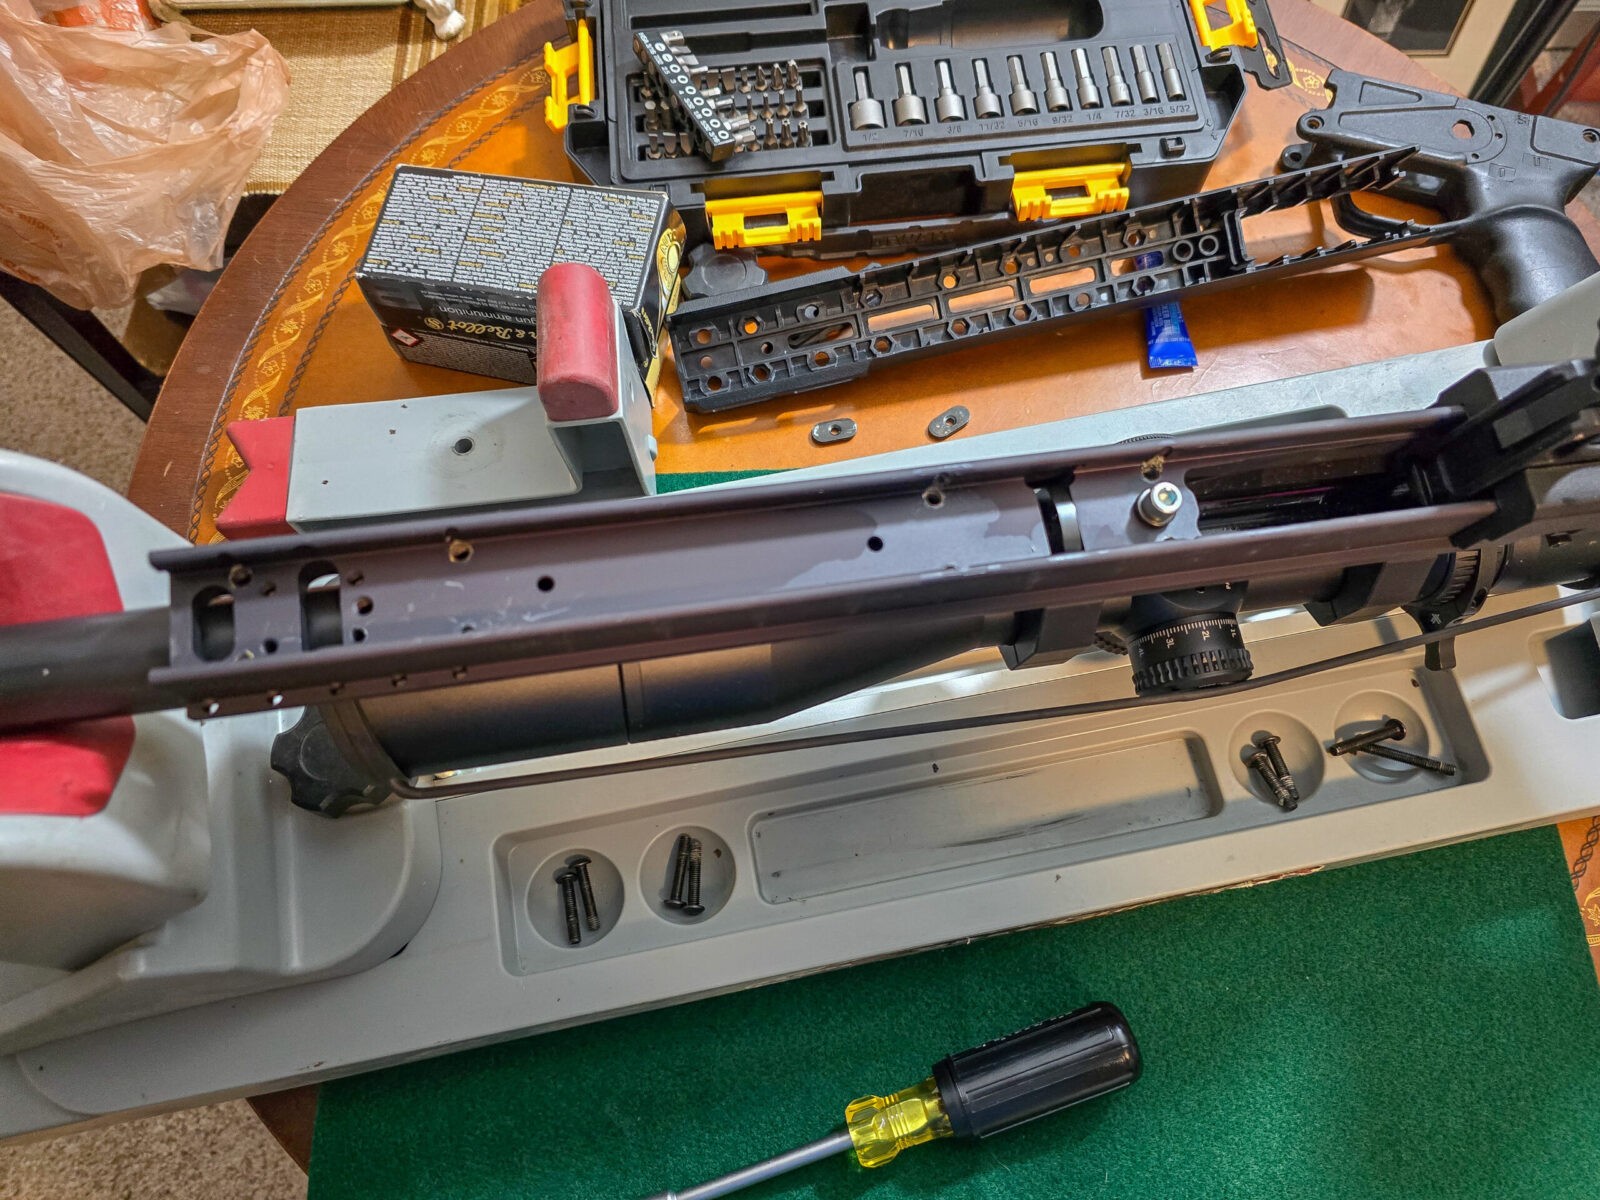
One thing with the Minimalist – it does not come with a rail section. You can either use the polymer one that came with your stock or buy an aluminum section from them. There rails sit flat as they not have the typical M-Lok boss on the back. This also means you can’t use a common M-Lok rail.
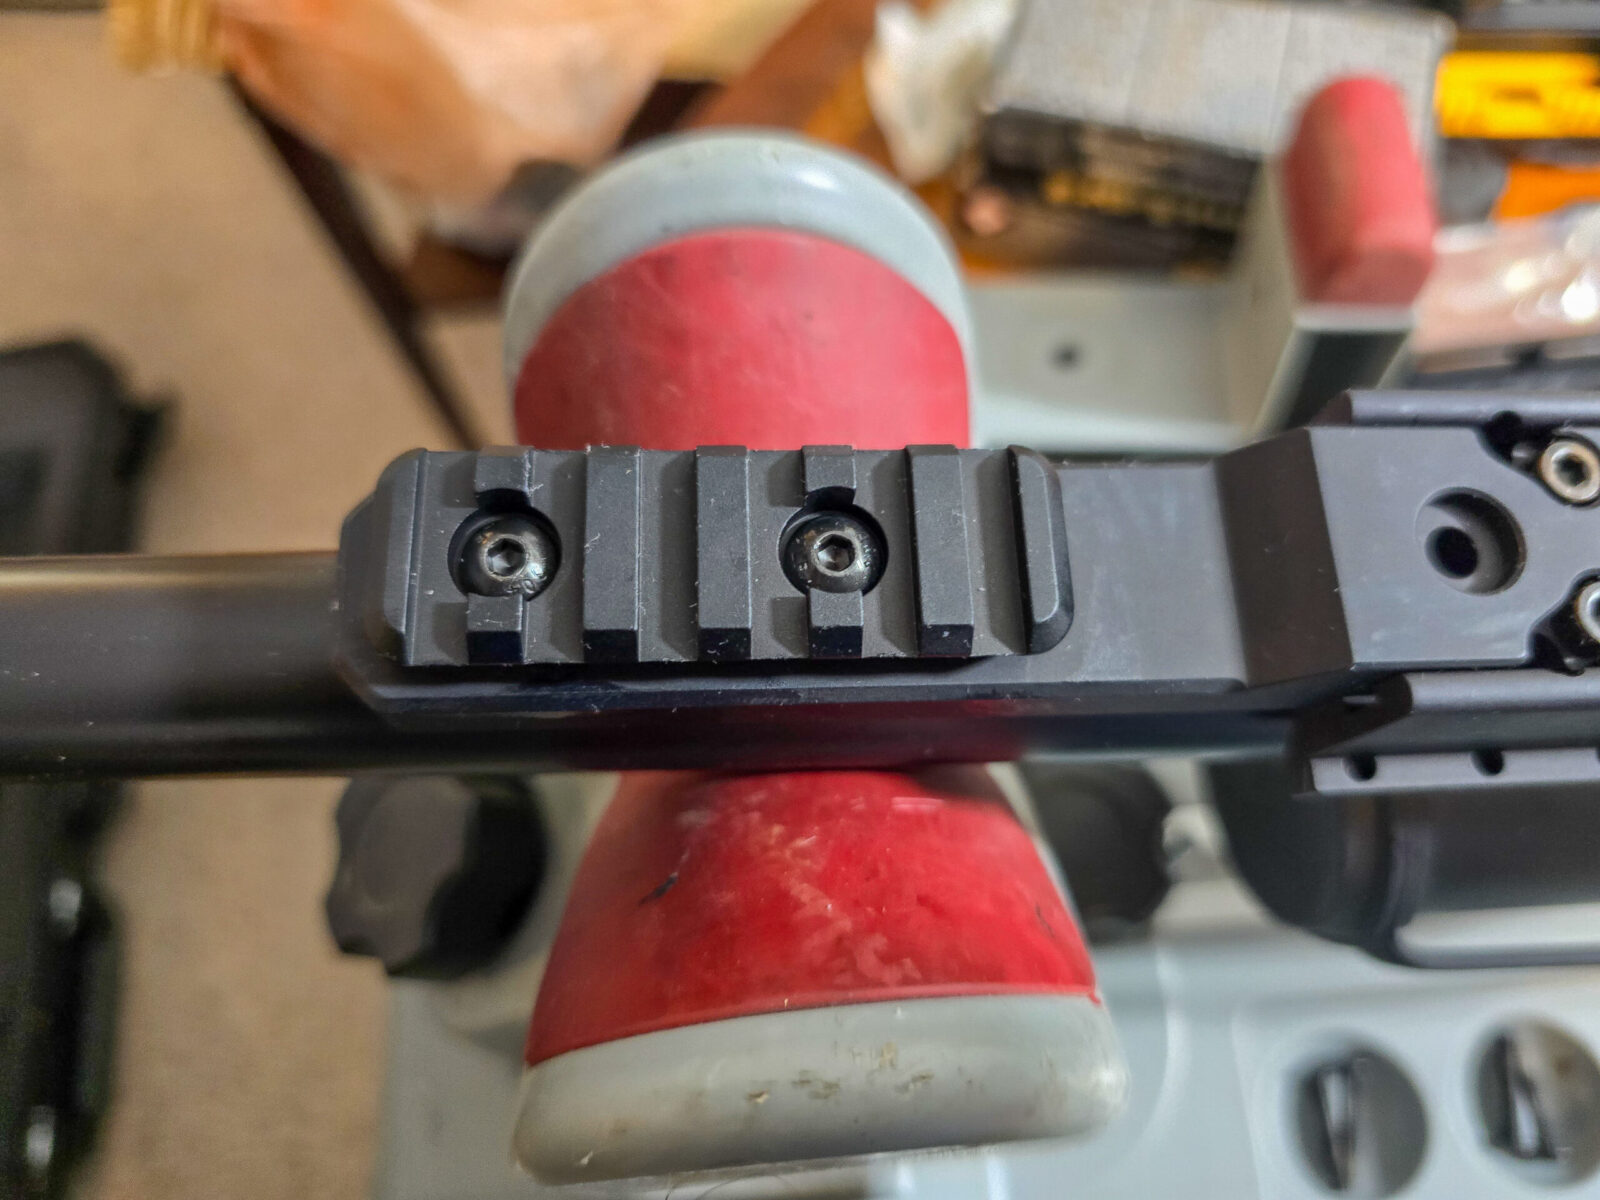
Your other option is to bolt an Atlas bipod or a Harris bipod they sell directly to the spigot. I like using a rail because I can pair it with an American Defense Manufacturing (ADM) quick release lever and have the ability to quickly take the bipod off if I don’t need it. For example, if I am shooting from a bench rest.
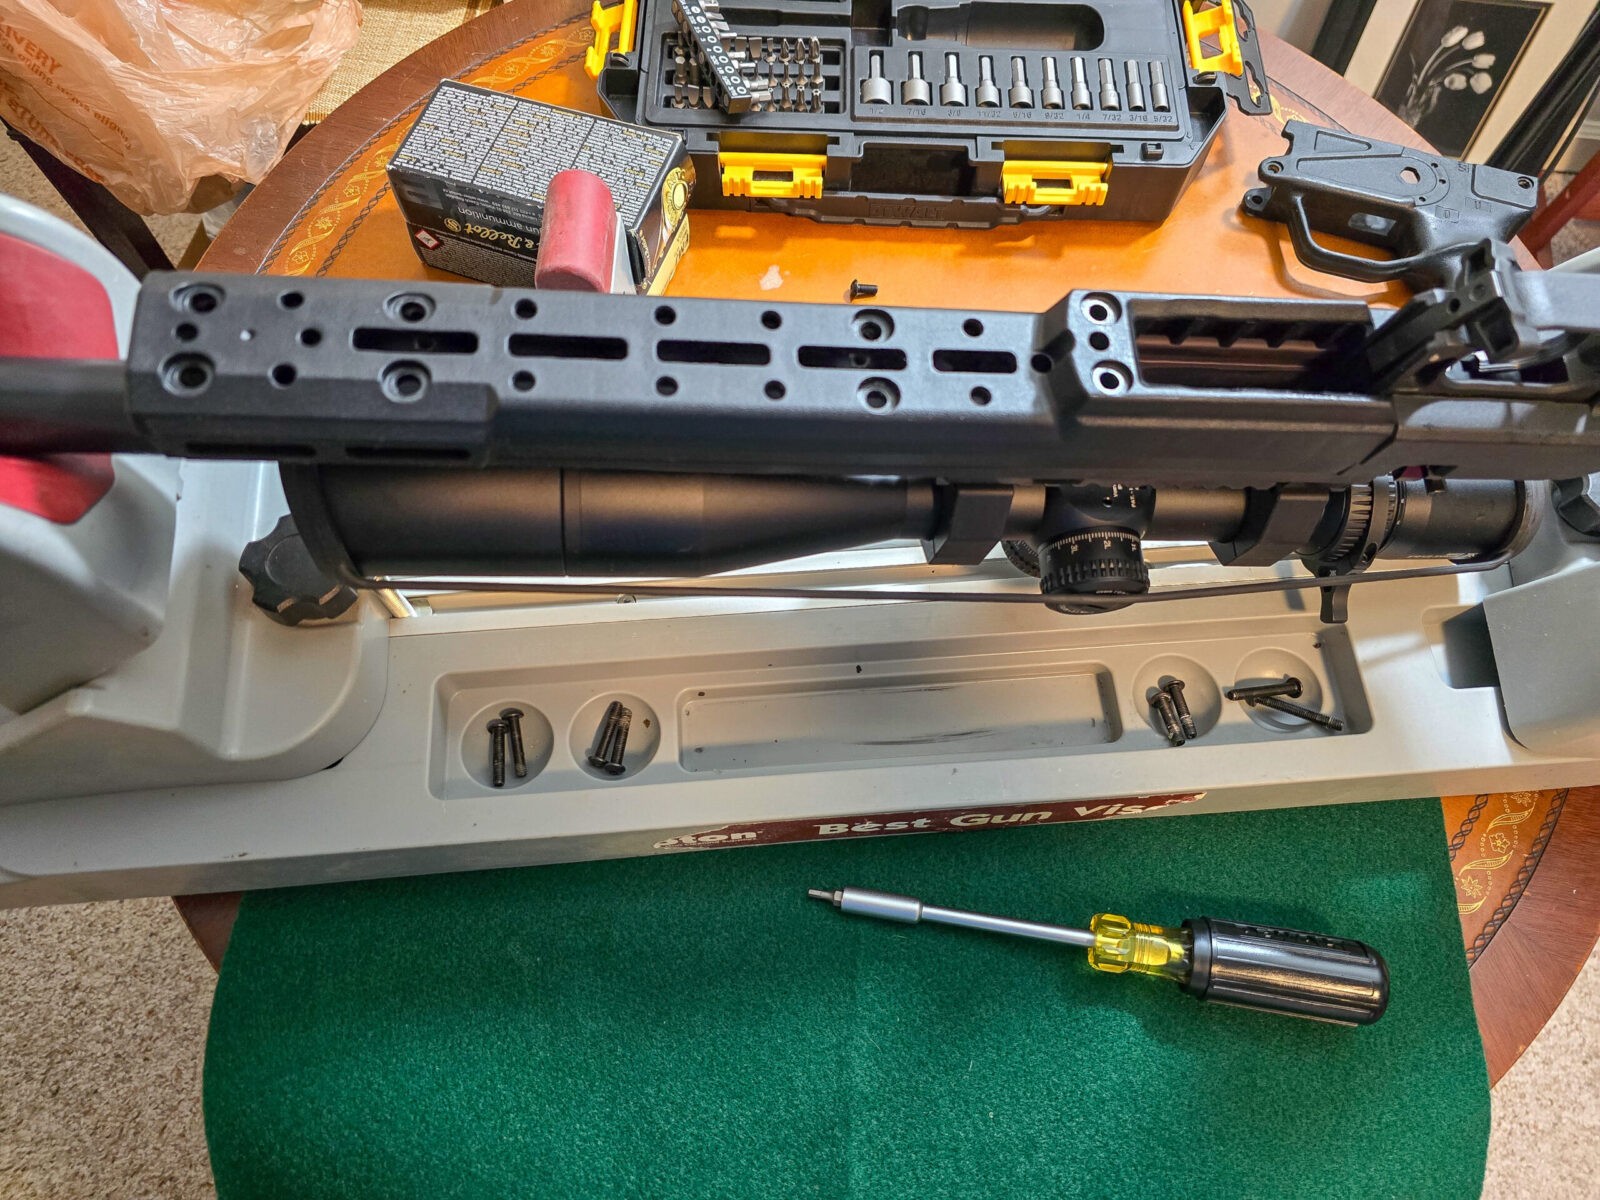
How to install the Minimalist spigot
If you can turn a screwdriver, you can install the spigot has there are just a few steps:
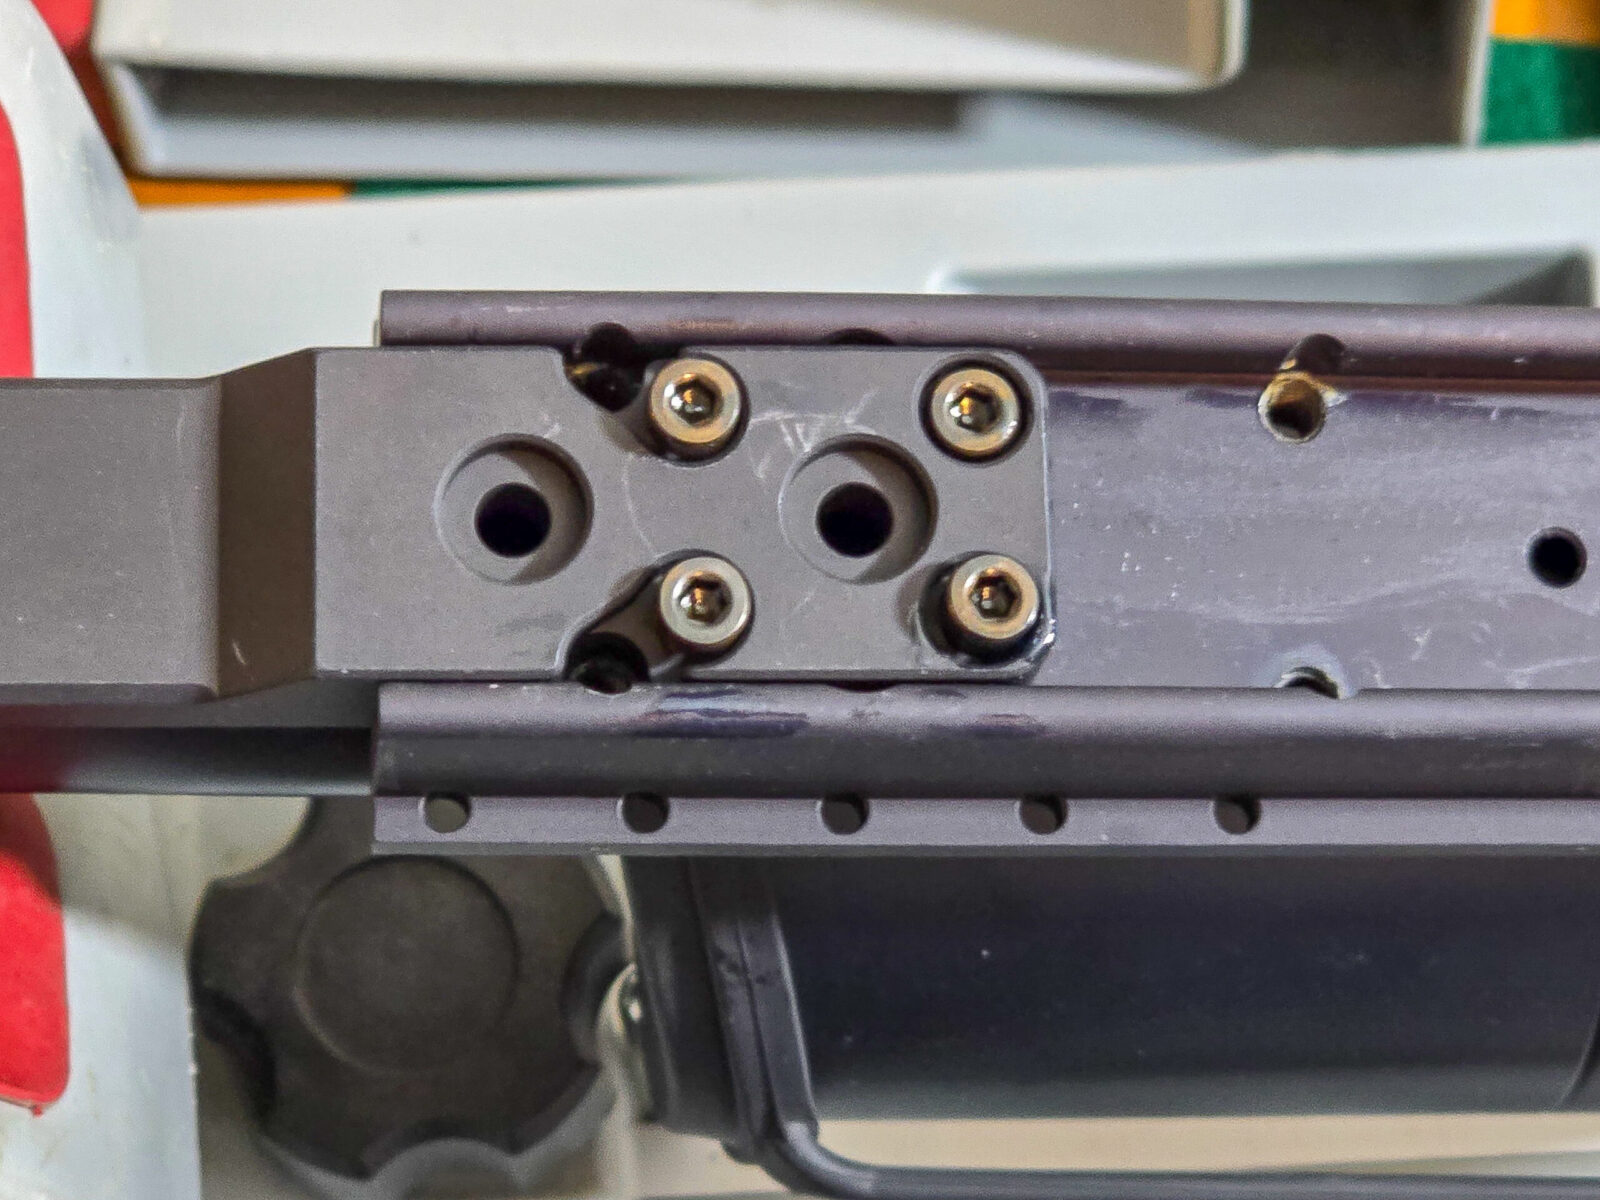
- Remove the bottom chassis cover by removing eight bolts
- Screw the spigot into place – use blue/medium thread locker on the bolts
- Apple blue/medium strength threadlocker to each bolt and screw the rail segment onto the spigot – assuming you go that route
- Apply blue/medium strenth thread locker to each bolt and screw the bottom cover back on
It’s nice when something literally is that easy.

Summary
Okay, I was starting to like the Bravo chasis more and more. The Minimalist spigot is absolutely worth it. You can then either mount your bipod directly or via a Picatinny rail section like I did.
Dear Aero – hint, hint – I would have paid for the spigot in a heartbeat had I known how solid it is and what a stable platform it can enable.
To anyone reading this who has a Bravo chasis – adding a spigot is very much worth it. I’m honestly glad I did.
I hope this helps you out.
Note, I have to buy all of my parts – nothing here was paid for by sponsors, etc. I do make a small amount if you click on an ad and buy something but that is it. You’re getting my real opinion on stuff.
If you find this post useful, please share the link on Facebook, with your friends, etc. Your support is much appreciated and if you have any feedback, please email me at in**@*********ps.com. Please note that for links to other websites, we are only paid if there is an affiliate program such as Avantlink, Impact, Amazon and eBay and only if you purchase something. If you’d like to directly contribute towards our continued reporting, please visit our funding page.