Tag Archives: M92

Scott Igert’s Custom Yugo M92 PAP with Dark Russian Plum Furniture

Scott Igert owns Modern Antique Firearms in Benton Harbor, MI, and is the force behind the Michigan Gun Exchange website.  He replaced the furniture on the below Yugo M92 PAP:

10409049_796182993773403_5320883308574152484_n

The grip is our ARM9 (which is my favorite grip by the way and use it on my own rifles) and he used a Yugo M92 Ferrule Cut furniture set for the handguards.  Both are in our Dark Russian Plum color with a blasted finish for good looks and a sure grip.  I also like the contrast between the black ferrule and the color of the handguards – I think that is a nice accent.

ARM 9 Page: http://shop.roninsgrips.com/Custom-Bulgarian-ARM-9-Grip-Converted-For-All-AKs-w-Screw-BulgyARM9WithScrew.htm

Yugo Ferrule Cut Page: http://shop.roninsgrips.com/Yugoslavian-M85-M92-Ferrule-Cut-Handguard-Sets-M85M92HandguardsFerruleCut.htm


If you find this post useful, please share the link on Facebook, with your friends, etc. Your support is much appreciated and if you have any feedback, please email me at in**@ro*********.com. Please note that for links to other websites, I may be paid via an affiliate program such as Avantlink, Impact, Amazon and eBay.


What is a Ferrule on Yugo and AK Rifles?

A ferrule is a metal end cap found on some wood grips and handguards to protect the end grain of the wood from being hammered and splitting open.  They were used on different country’s weapons and are usually not interchangeable between countries.  For example, Bulgarian and Yugo ferrules are different.

Near and dear to me are the metal ferrules on Yugoslav / Zastava wood lower handguards.  The following photo shows a M92 lower and the black metal cap is the ferrule.  This ferrule does not fit everything Yugo – just the M70, M85/92, and M77.  The M72 and M76 are unique sizes.

DSC_0312

You have three options when you need a ferrule:  1) Find a used one and this is real hard – try posting in the Marketplace of http://www.akfiles.com and see if they have one.  2) Buy a replica ferrule from us or 3) Simply pry the old ferrule off, put it on the new handguard and the squeeze the tabs shut again with a pair of pliers.

DSC_0322
DSC_0323

Note if you are putting it on one of our plastic handguards either just set it on it with the ears closed or glue it in place.  Absolutely do not try to squeeze the ears shut — the little metal divots will not dig into our plastic and you risk snapping the handguard tabs.  Again, either slide it on or glue it in place with something like rubber glue or Goop that you can later remove if you want.  Epoxy works too but it is pretty permanent.

For example, I just slid the ferrule on the M70 bulged handguard in the next photo.

We manufacture ferrules that fit the Yugo/Zastava M70, M77, M85 and M92 lower handguards. Note, they are specific to those models and will not fit other nationalities or models.

Click here to visit our store with the ferrules for sale.


If you find this post useful, please share the link on Facebook, with your friends, etc. Your support is much appreciated and if you have any feedback, please email me at in**@ro*********.com. Please note that for links to other websites, I may be paid via an affiliate program such as Avantlink, Impact, Amazon and eBay.


What the M92 Looks Like After All the Mods

This shows what the M92 looks like today.  I haven’t had time to go to the range yet but the “feel” is fantastic in terms of weight, balance and length. CNC Warrior nailed the folding arm brace.  Wow – how cool it is!

Here is a list of the modifications made:

  1. CNC Warrior Folding Arm Brace
  2. CNC Warrior 4 Piece Brake
  3. CNC Warrior Detent Pin
  4. CNC Warrior Picatinny Rail Scope Mount
  5. Ronin’s Grips M92 Ferrule Cut Handguard Set
  6. Ronin’s Grips Bulgy ARM-9 Pistol Grip
  7. Ronin’s Grips M92 Dust Cover Quick Takedown Pin
  8. Vortex Sparc Red Dot with the Low Mount

DSC_0326 DSC_0331 DSC_0332 DSC_0333 DSC_0334 DSC_0337 DSC_0339 DSC_0341 DSC_0432


If you find this post useful, please share the link on Facebook, with your friends, etc. Your support is much appreciated and if you have any feedback, please email me at in**@ro*********.com. Please note that for links to other websites, I may be paid via an affiliate program such as Avantlink, Impact, Amazon and eBay.


Removing the M92 PAP Muzzle Cap and Installing the Detent Pin

The M92 PAP pistol is brought in neutered with a muzzle cap and no detent spring.  With some careful Dremel work, some cold blue solution and a bit of patience, it is really easy to restore the pistol back to it’s original threaded muzzle state

SAFETY STEP – MAKE SURE THE WEAPON IS UNLOADED.  NEVER ASSUME THAT IT IS – VERIFY IT IS UNLOADED BEFORE YOU BEGIN WORK.

1.  Look at the muzzle of the PAP
M92 and you will see a big spot weld that is holding the muzzle cover on.  Thankfully it is both small and superficial so it can be cut through.

DSC_0005 DSC_0008

2.  Now the first step is to secure the pistol so it can’t move around.  I used a wood jawed woodworking vice but you can use whatever you have handy.  If you use a regular vise, be sure to put something over the jaws to protect your M92 from getting all scratched up.

DSC_0274

3.  I use my Dremel tool all the time.  These days I am using one of their cordless jobs with two Lithium batteries and I like the EZ Lock bits that make replacing cutting wheels and other tasks a breeze.  Be sure to practice with your Dremel before doing this.  Please don’t go buy a Dremel and try and do this fresh out of the box.  The secret is to make light cuts and not rush.  Let the weight of the tool do the work and carefully guide it and keep it in position.

DSC_0061 DSC_0150

4.  Now, I came in from the front and at a slight angle to protect the front sight & gas block combo.  The cap will twist off clock-wise as it is reverse threaded.  Cut a bit and test, cut a bit and test over and over.  If you have a strap wrench or a pipe wrench, that can help with the removal.  Again, remember that this is reverse threaded just like other AKs.  It will loosen by turning clockwise.

DSC_0067  DSC_0066DSC_0069

5.  Hidden under that large ugly cap is the big 26 x 1.5mm LH (reverse threaded) muzzle just waiting to have your favorite brake or fake can installed but it would be real cool to get the detent pin working again – wouldn’t it?

DSC_0073 DSC_0074

5.  Use a small sanding drum and smooth the block where the weld was and then use the cold bluing solution you like to color the steel while it is fresh and oil free.  I like Brownell’s Oxpho Blue and apply it with a Q-Tip per their instructions.

DSC_0084 DSC_0089 DSC_0090 DSC_0094

6.  CNC Warrior sells a very small kit with the detent pin, spring and cross pin.  The PAP has all the holes there already.  You literally slide in the pin and spring, turn it the right way and then drive in the cross pin, which is a small roll pin.

DSC_0102 DSC_0105

7.  I really like the Bulgarian 4 piece Krink brakes and CNC Warrior has great version they have made for the M92.  I pretty much knew I had to go with this brake!  It does a great job reducing muzzle flash and is real high quality.  Now that the detent pin was installed, I just threaded it on until it was where I wanted it and the detent pin engaged fully.

DSC_0119 DSC_0120 DSC_0123DSC_0121 DSC_0191

So that’s all it took!  I hope this helps you with your project.

Stay tuned for more blog posts about the M92.


If you find this post useful, please share the link on Facebook, with your friends, etc. Your support is much appreciated and if you have any feedback, please email me at in**@ro*********.com. Please note that for links to other websites, I may be paid via an affiliate program such as Avantlink, Impact, Amazon and eBay.


Tools That Can Help You Do the M92 Upgrades

In doing this M92, I wanted to use tools that many guys already have or can get without spending a fortune.  I could have used my mill or drill press but I wanted you to see that some simple hand tools are all you need.  The follow are what I used and certainly you can use other tools that work for you.

Dremel Tool with cutoff wheel, abrasive wheel and sanding drum
If you do much gun work, you’ll find a rotary tool to be a huge time saver when used properly.  I have an ancient corded Dremel tool made for Sears plus an 18volt cordless that I use all the time.  You will need some thin cut off wheels for metal, a small abrasive wheel (if you want or do it all with the sanding drum) and a sanding drum.  Because I use my Dremel a lot, I buy the discounted multibit packs when I find them.

DSC_0061

Here are the tools at Amazon:

Dremel 8220-1/28 12-Volt Max Cordless Rotary Tool


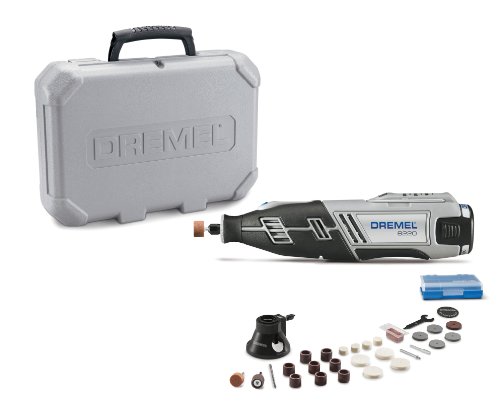
One thing I would recommend against is buying cheap no-name import bits – they often fall apart or dull real fast.  For the last few years, I have been buying Dremel brand bits off Amazon.  Everything you’ll need is in the below accessory pack:


Dremel 710-05 160 Piece Accessory Kit

The one thing I will say here is to practice before you try to actually work on your new pistol.  I can’t stress this enough – please practice first!! A Dremel can scoot around and chew things up if your hands aren’t supported and you don’t know the “feel” of how to cut things.  So please be sure to do some testing and practice before you go near your pistol.  I’ve been using a Dremel for almost 30 years (literally) and I still get surprised from time to time but I know what to do to minimize bad things from resulting due to my experience.

Hand Drill
You just need a plain jane hand drill.  It could be corded or cordless.  Slower is better to avoid heat build up.  You will need to drill a 3/8″ hole for the arm brace and a #21 hole for the picatinny rail screws.  All the work I did was done with my Ryobi 1/2″ 18volt hand drill that I bought from Home Depot and have gotten a ton of use from over the years.

Tap Handle
If you do not have one already, go get a tap handle from your local hardware store.  You will need it to get a good square grip on the #10 tap if you install the CNC Warrior picatinny rail.  Some guys try to go cheap and use a small wrench but the problem is that you will have a very hard time starting the threading squarely.  Spend a few bucks and get a tap handle.
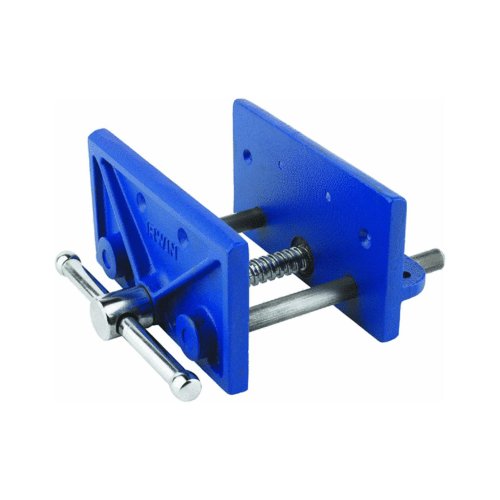
Irwin 12001 T-Handle 1/4-Inch Capacity Tap Wrench

Good Vise
It really pays to have a good vise.  There are so many options out there but make sure it is secure and that if it has steel jaws, that they are padded with leather, wood, plastic or something else that is relatively soft to protect the finish.  It could be a tool vise or even one of the rifle cleaning and maintenance vises such as Tipton’s.  Just make sure that whatever you use is firmly holding the rifle and can’t slide as you drill.   You could drill it into your work bench or use some clamps on the corners.

Tipton Best Gun Vise

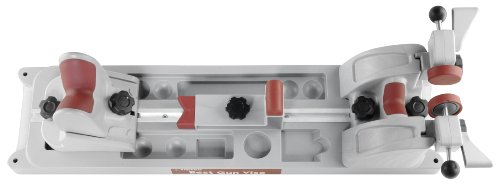
I specifically used one of my woodworking vises that is permanently attached to my work bench for this project.  It is like the following and you must add wood to make the actual jaws hence the screw holes in the side plates of the vise:
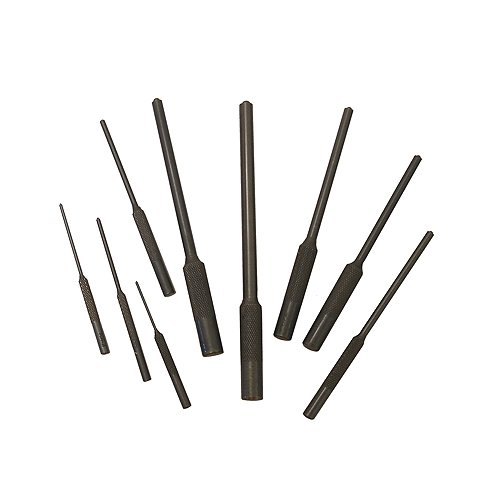
IRWIN 226361 6-1/2-Inch Woodworkers Vise

Roll Pin Punches
You could use any punch set but I like pin punches as they have a dimple in the face that goes into the roll spring to help center and drive it.  Note, I have watched guys skip using a punch and just tap in the roll pin with a small hammer directly.  The roll pin punches help but are not mandatory.

Grip 9 pc Roll Pin Punch Set

Hammer

I’ll skip the photo 🙂  You just need something to tap the pin punch with.
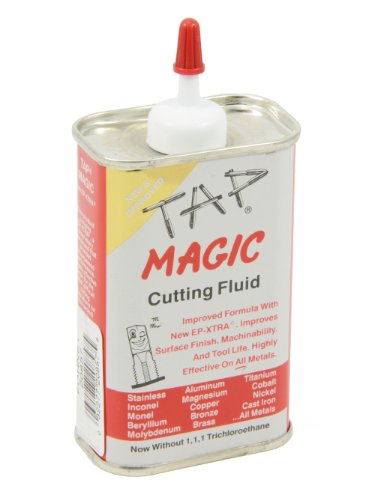
Cutting Oil

In a pinch you can use regular oil but I like to use Tap Magic for lubricating drill buts and also taps.  This helps them run cooler and last longer

Forney 20857 Cutting Fluid, Industrial Pro Tap Magic, 4-Ounces


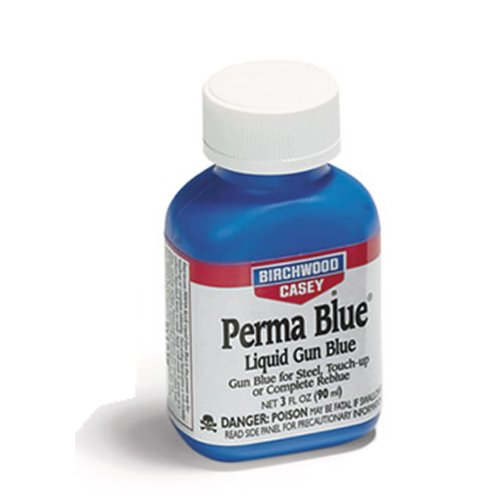
Cold Blue Solution and QTips

My favorite cold blue is Oxpho Blue liquid from Brownell’s.  There are a lot of other brands out there and guys have told me they like the cold blue solution from Birchwood Casey as well.

Birchwood Casey PSP Gun Blue (3 Ounce)


Deburring tool or Sandpaper

The last tool I would recommend is a deburring tool.  It is very handy for clearing drilled holes of burs.  I used it after I drilled the rear of the receiver for example.

SHAVIV 151-29249 Bonus Pack Deburring Tool Kit for Extra Close Work  with Mango IIB Handle (11 Pieces)

The next posts will be about doing the actual work – I promise 🙂

CNC Warrior Brake and Replacement Detent Pin for the Zastava M92 PAP

To be imported, the M92 has a muzzle nut, or muzzle cap, installed over the threads with a single big weld.  It’s obvious where the weld is and guess what?  It can be easily removed and if you look close that will also then clear the detent spring hole as well.

DSC_0048 DSC_0049

There are a few brake options out there for the M92.  Bear in mind that like many Yugo rifles, the designers made the size and thread of the M92’s muzzle unique.  It is left-hand 26mm wide with a 1.5mm pitch thread – definitely an oddball.   At any rate, CNC Warrior makes a four piece Bulgarian style brake that really cuts down on muzzle flash that I have been drooling over for a while plus they make a number of other brakes, adapters and fake cans that can fit that thread.

The following are more detailed photos for you.  By pulling the small locking wire down, the end cap can be unscrewed and the brake disassembled into its four parts – the body, cap, cone and spring.

DSC_0037

DSC_0038

DSC_0039

DSC_0040

DSC_0041

DSC_0042

DSC_0043

They also sell a detent pin kit so you can have the original method to retain the brake as well and it can be installed in literally less than five minutes because the PAP comes with all the holes drilled:

DSC_0033

Click here for our post that shows how to install them.


If you find this post useful, please share the link on Facebook, with your friends, etc. Your support is much appreciated and if you have any feedback, please email me at in**@ro*********.com. Please note that for links to other websites, I may be paid via an affiliate program such as Avantlink, Impact, Amazon and eBay.


CNC Warrior’s M92 PAP Picatinny Rail Mount is Excellent!

A M92 is screaming for an optic of some type.  My preference is a red dot and I run a Primary Arms M4 clone on my first rifle and will use a Vortex Sparc on this new rifle.

As some of you may know, I have a Stormwerkz rail on my first M92 that I custom built and it has served me well.  The only draw back with the design is that you install the button head screws from inside the dustcover.  Because of this, you will notice the bolt carrier does hit screws.  I have shot a ton of ammo – well over a thousand rounds – from this rifle and the bolt carrier shows no harm but you do see the scuffed screws.

When I heard that CNC Warrior had a mount, I had to take a closer look and sure enough, they had a different approach.  Their screws go through the rail and screw into the thick steel portion of the dust cover that runs to the hinge.

I talked to Denny, the owner of CNC Warrior, about my plans and he recently switched over to a four hole model that will give a person more options when installing the rail to work around the very hard spot welds — basically you just need two screws so with four holes, you pick the two you like that enable you to miss the welds.

If you look closely at the next photo, you will notice small circular indents in the steel – those are the spot welds that are harder than the surrounding steel and can be an absolute bear to drill through.  Thus, with CNC Warrior’s new four hole rail, you can slide it back and forth until you get two holes that clear these welds.
DSC_0030

Please note that Denny sent me one of each – the old two hole rail and the new four hole rail – so I could show you folks the difference and he did not have time to have it finished so it is bare metal in the photos.  I used Molyresin to finish it flat black but that is not something you will need to worry about.  Going forward, when you order his mount you’ll get the four hole rail section already finished black.

DSC_0027 DSC_0028 DSC_0029

Included with the picatinny rail is their installation kit and instructions that makes installing it a breeze.  In a future blog post I’ll show you just how easy installation is and how you can do it with a hand drill and some cutting oil.

The rail is on their website at:  http://www.cncwarrior.com/ProductDetails.asp?ProductCode=26454


If you find this post useful, please share the link on Facebook, with your friends, etc. Your support is much appreciated and if you have any feedback, please email me at in**@ro*********.com. Please note that for links to other websites, I may be paid via an affiliate program such as Avantlink, Impact, Amazon and eBay.


CNC Warrior Folding Arm Brace for Zastava M92 PAP

One of the parts I knew I wanted was the folding arm brace from CNC Warrior.  This essentially gives you additional support to either fire the pistol with one hand or to even shoulder the weapon comfortably if so desired.

Now the ATF has reviewed and approved the arm brace as not being a shoulder stock.  Each arm brace that CNC Warrior ships includes a copy of the ATF letter that says it is not a stock and that attaching it will not make a pistol a SBR.

This stock is a joint design effort between Chris Bonesteel, of Bonesteel Arms and CNC Warrior and is very nicely made.  It has a very strong hinge mechanism and is a breeze to install.

When I took the assembly out of the box I immediately noticed how well made it was.  I recalled a talk I had several years back with Chris where he worried about some folders being weak and this design reflects that both he and Denny at CNC Warrior wanted to make a strong one.  The attention to detail and fitment are very apparent.  Hands down, this is my favorite set up that I have seen for the M92.

The following are photos of the brace for people who like to see details:

DSC_0013

DSC_0014

DSC_0015

DSC_0016

DSC_0017

DSC_0018

DSC_0019

The following photos shows how nice brace marries up to the back of the receiver plus the quick release sling hole but it has not been attached yet.

DSC_0021

DSC_0025

It comes with the mounting screw you will need and easy to follow instructions:

DSC_0035

I highly recommend you buy their installation kit.  It comes with the drill bit and mounting jig to make this a breeze:

DSC_0036

In a later blog post, I’ll show you just how easy the installation was. I kid you not, if you have a hand drill and their installation kit, you can do this!!


Note, I have to buy all of my parts – nothing here was paid for by sponsors, etc. I do make a small amount if you click on an ad and buy something but that is it. You’re getting my real opinion on stuff.

If you find this post useful, please share the link on Facebook, with your friends, etc. Your support is much appreciated and if you have any feedback, please email me at in**@ro*********.com. Please note that for links to other websites, I may be paid via an affiliate program such as Avantlink, Impact, Amazon and eBay.